Capture stunning abstract photography using paint and Photoshop
Fancy some abstract photography to hang on your walls? This project using paint, water and Photoshop is just the ticket
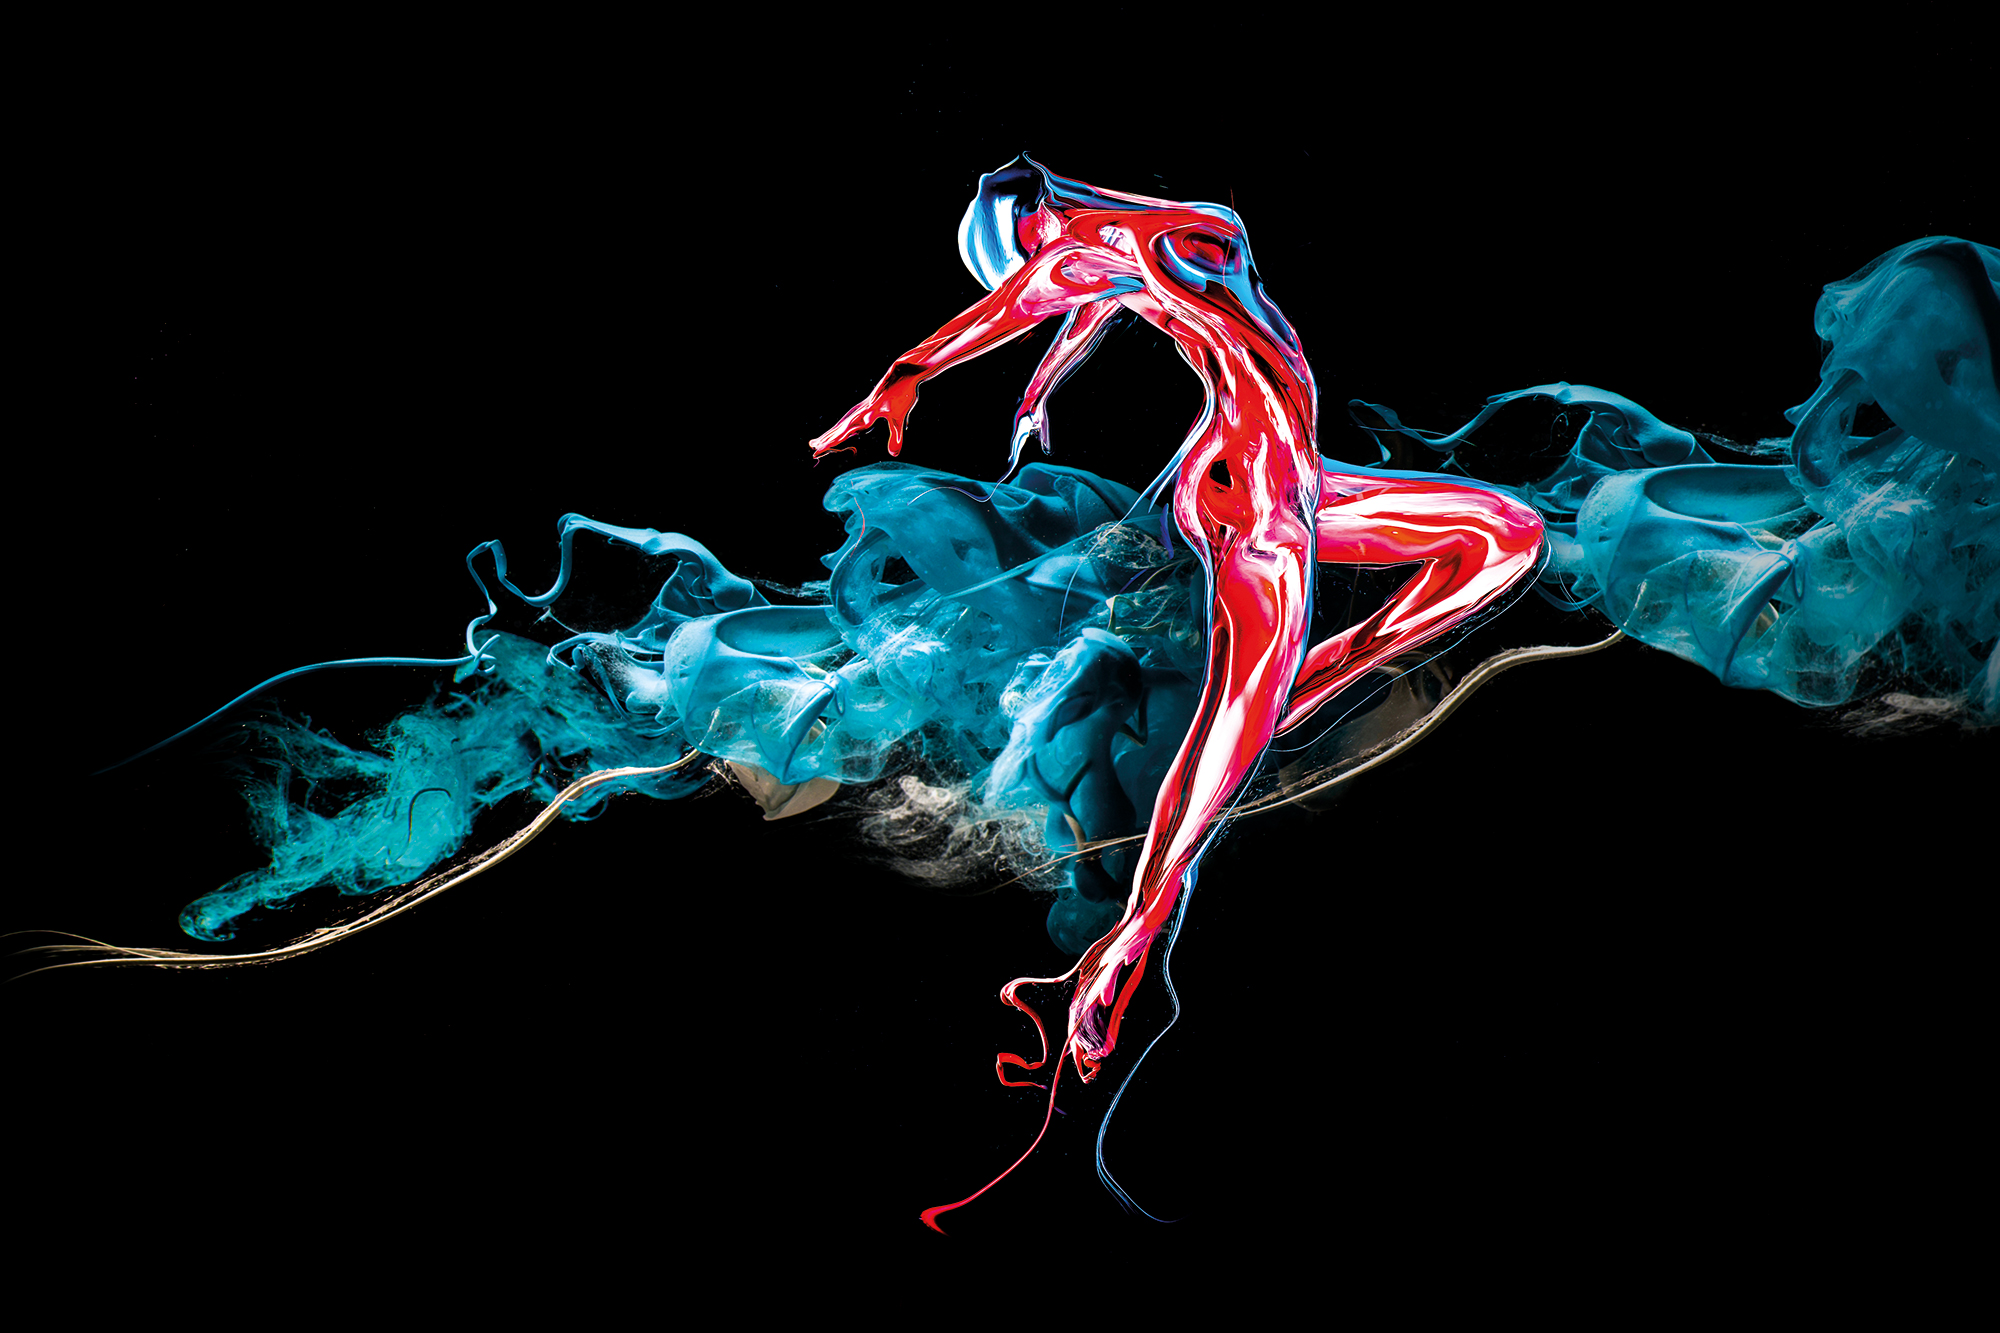
Creating a piece of abstract photography doesn't mean it all has to be done in-camera. Photoshop is a fantastic tool to take your abstract art to the next level. For this project, we’ll look at how to craft a colorful dancer image from a series of photos of paint. This involves a combination of shooting skills and Photoshop techniques.
First, we’ll get set up to shoot vibrant photos of paint by capturing the colors as they travel through water. Once done, we’ll progress into Photoshop where we’ll warp the photos into the shape of our springing dancer. As such, this is effectively two skills in one. So if you’re mainly interested in capturing beautiful paint abstracts, then you can follow along with the first part, and if you’d rather work on the Photoshop skills, you can skip the shooting part and use the supplied images to craft your own painterly figures.
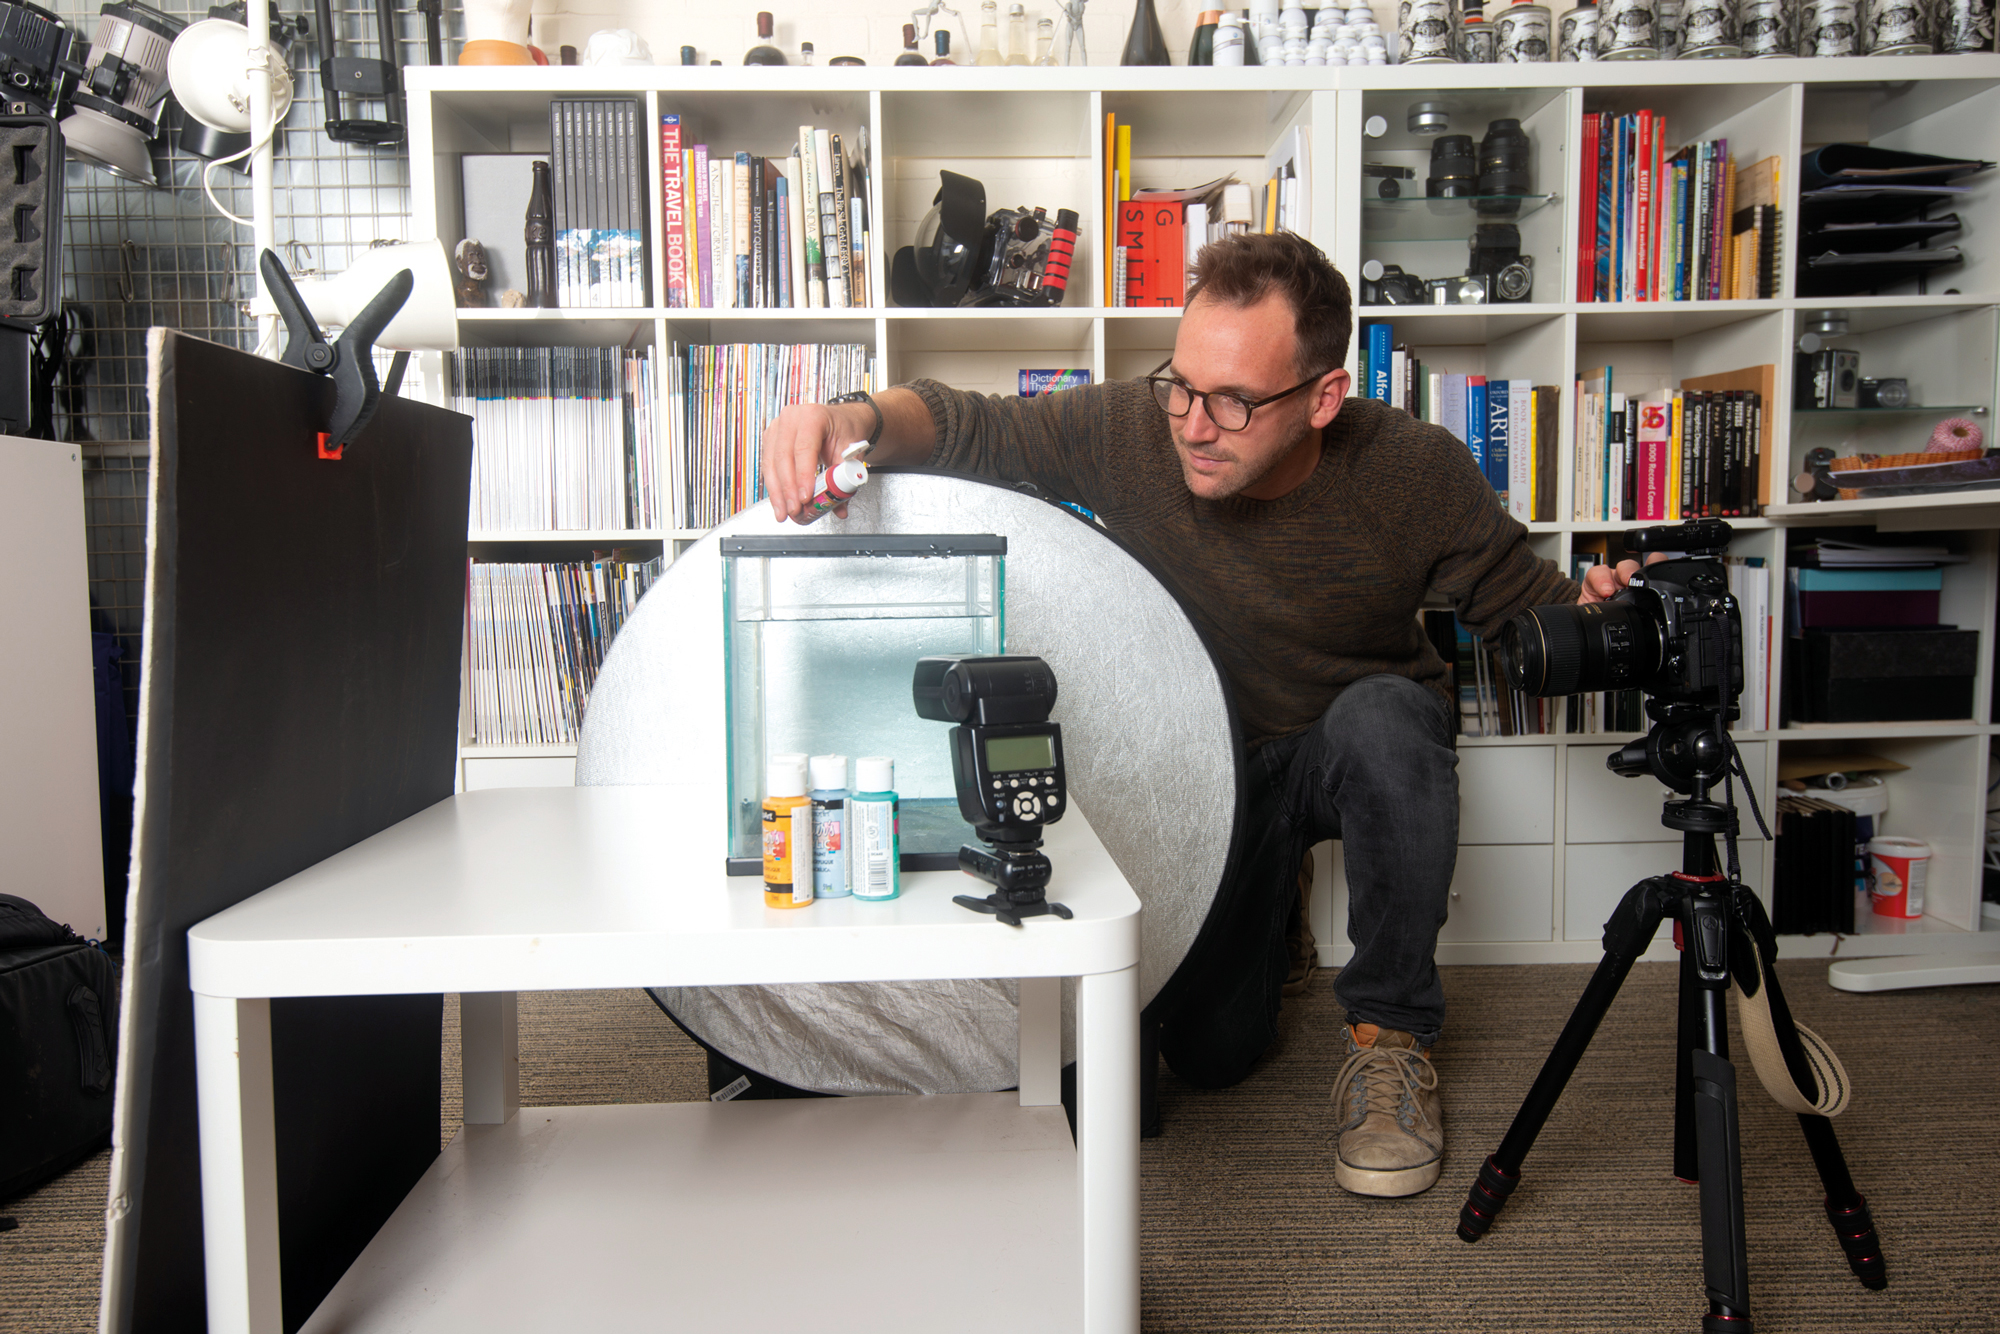
For the shoot, we need a clear container full of water. A fish tank is ideal, but any clear plastic or glass container will do. As for the lighting, you can use natural light at a push, but you’ll get better results with an off-camera flash – any budget Speedlight will do. The flash helps to bring out the colors in the paints and freezes the action as the paint travels through the tank of water. We’ll also look at how to get set up with your off-camera flash and how to expose for the shot. We’ll then move on to the Photoshop part of the technique. It might seem complicated, but it’s actually much easier than it looks…
Shooting abstract photography with paint
Fish tank
A small fish tank like this is ideal, but any plastic or glass container will work. Ensure the glass is as clean as possible before you start filling the tank with water. You’ll need to refresh the water after every few shots, so this is best done near to a sink.
Speedlight
An off-camera flash is the best way to capture the paints, as it gives your images a clarity that is hard to achieve with natural light alone. Position the flash to one side of the tank, angled slightly away from the backdrop so that it doesn’t spill onto it.
The best camera deals, reviews, product advice, and unmissable photography news, direct to your inbox!
Reflector
By positioning a reflector opposite the flash on the other side of the tank, we can bounce the flash light into the shadows to even out the lighting. As such, it’s a simple and cheap means of creating a second light source for your subject.
Black background
A plain piece of card can be used to make a black backdrop. This helps to make the paints stand out, and also makes it easier to combine several images of the paint later on. It means we can simply blend them using the Lighten blend mode in Photoshop, which effectively cancels out the black backdrop.
Wireless flash trigger
A wireless trigger lets you fire your off-camera flash. If you don’t happen to have one, you could set your Speedlight to optical remote mode then use your camera’s pop up flash to trigger it instead. Or, alternatively, you can use a flash that is wirelessly compatible with your camera.
Camera settings
As a starting point for your exposure, set your camera to Manual mode with aperture at f/8, ISO100 and shutter speed 1/200 second. Set the flash to manual at 1/2 power and take a test shot. If it’s too bright then adjust the flash power down until it looks just right.
Shooting paint abstracts
Choose your paints
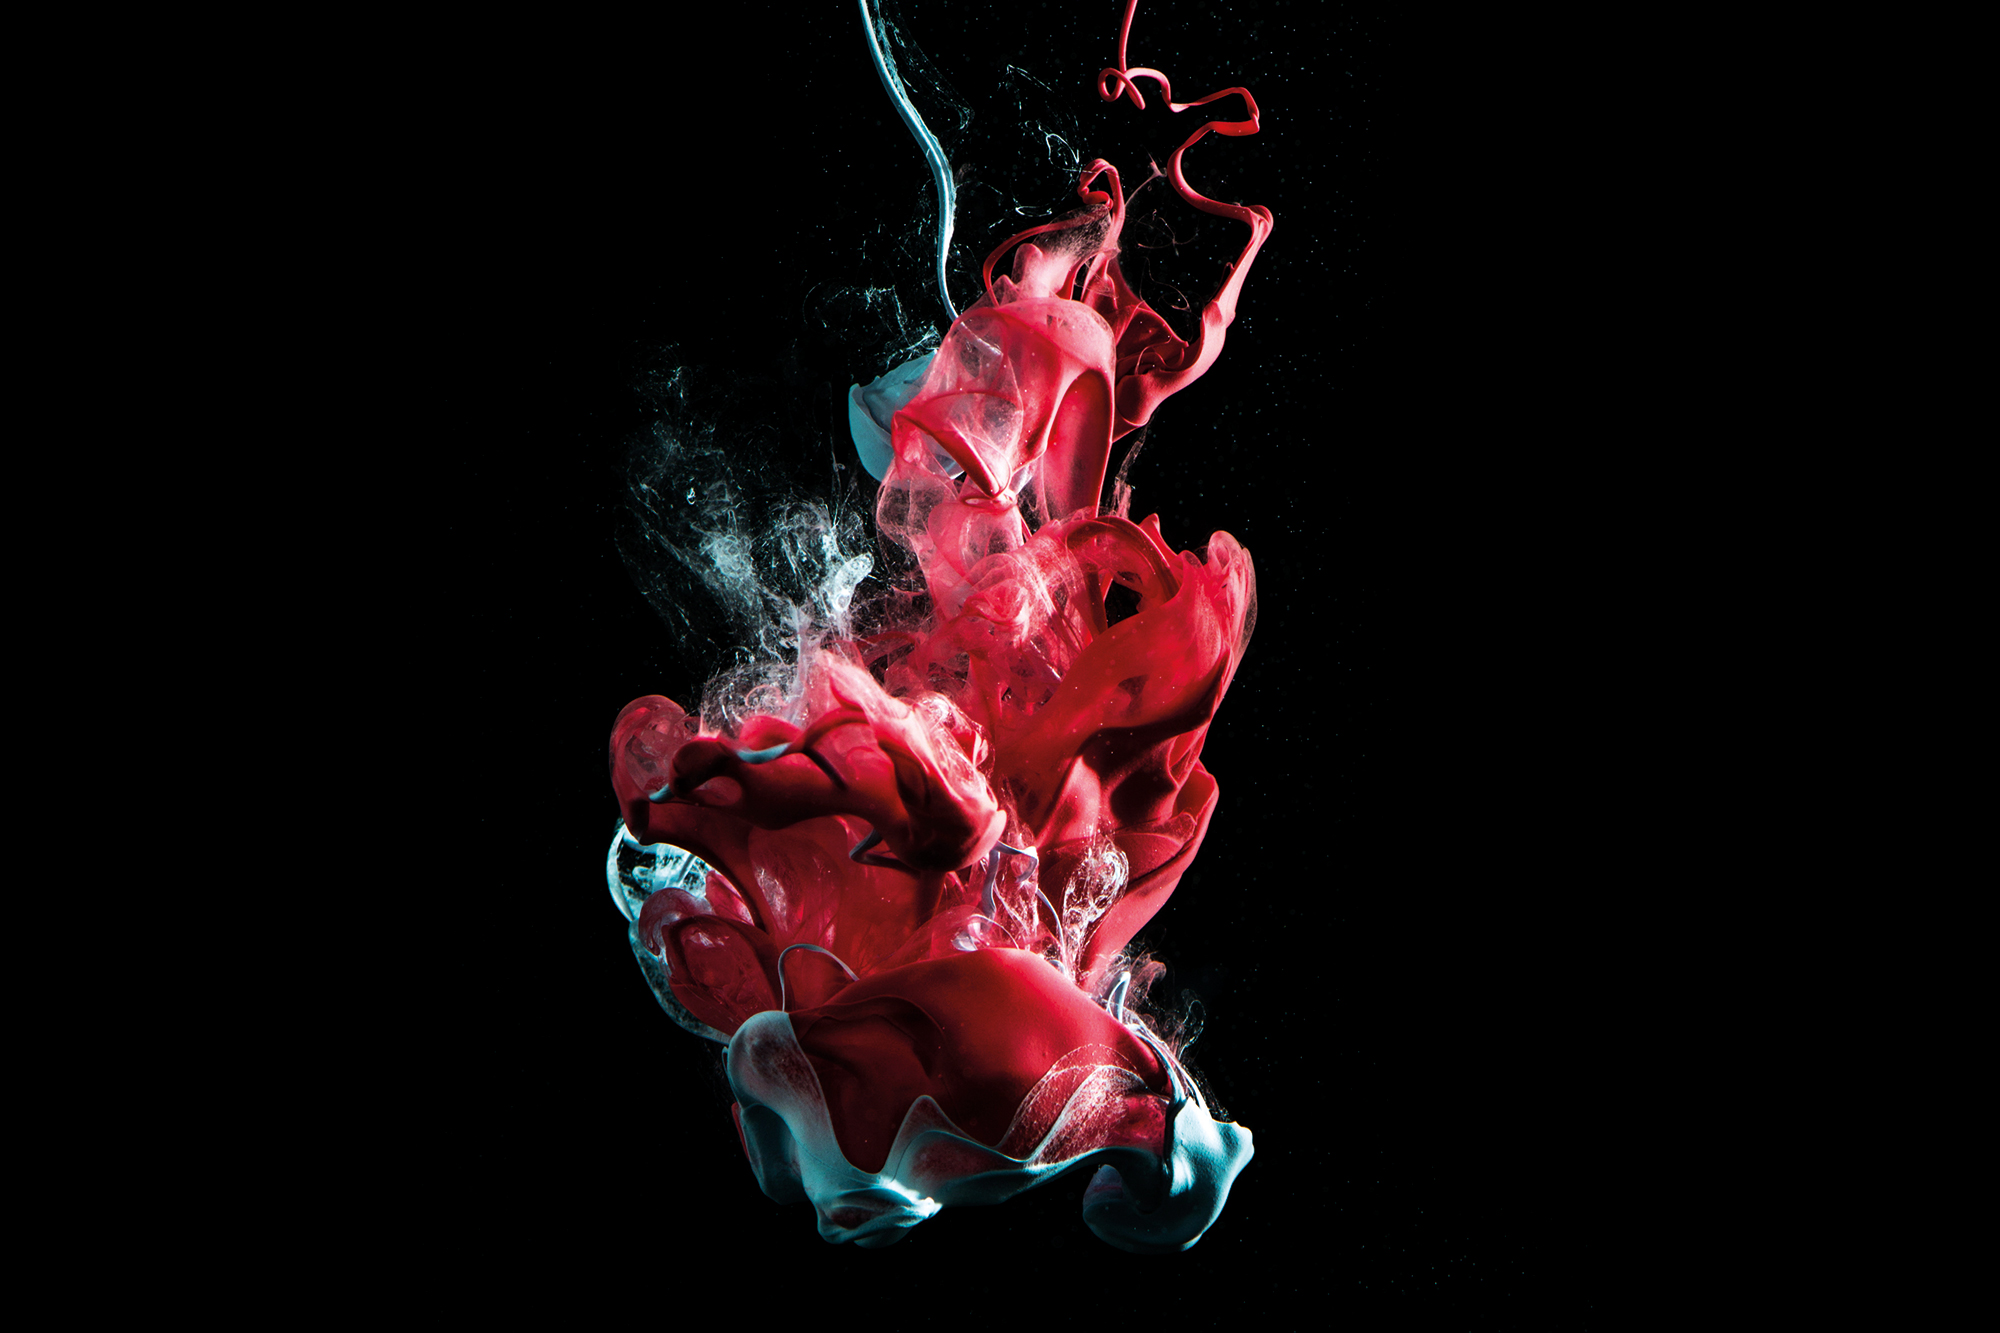
Acrylic paints will work best for this as they don’t mix with water, so they’ll stay clumped together when you drop them in the water. If the paints are too thick then try mixing them with a dash of white spirit to thin them out. Experiment with the height at which you pour them into the water.
The drop spot
Before you start dropping paints into your water you’ll need to pre-focus on the spot where they’ll be. Hold an object like a spoon in the centre of the water, focus on it and then switch your lens to manual focus in order to lock it in place. Drop the paints in the same spot.
Mix your colors
Try pouring more than one color into the water at once, as the best photos will be those where the paints intertwine with one another. Use contrasting colors with bold shades. If need be you can always change the colors in Photoshop using the Hue/Saturation command (Cmd/Ctrl+U).
Use Photoshop to craft your painterly dancer
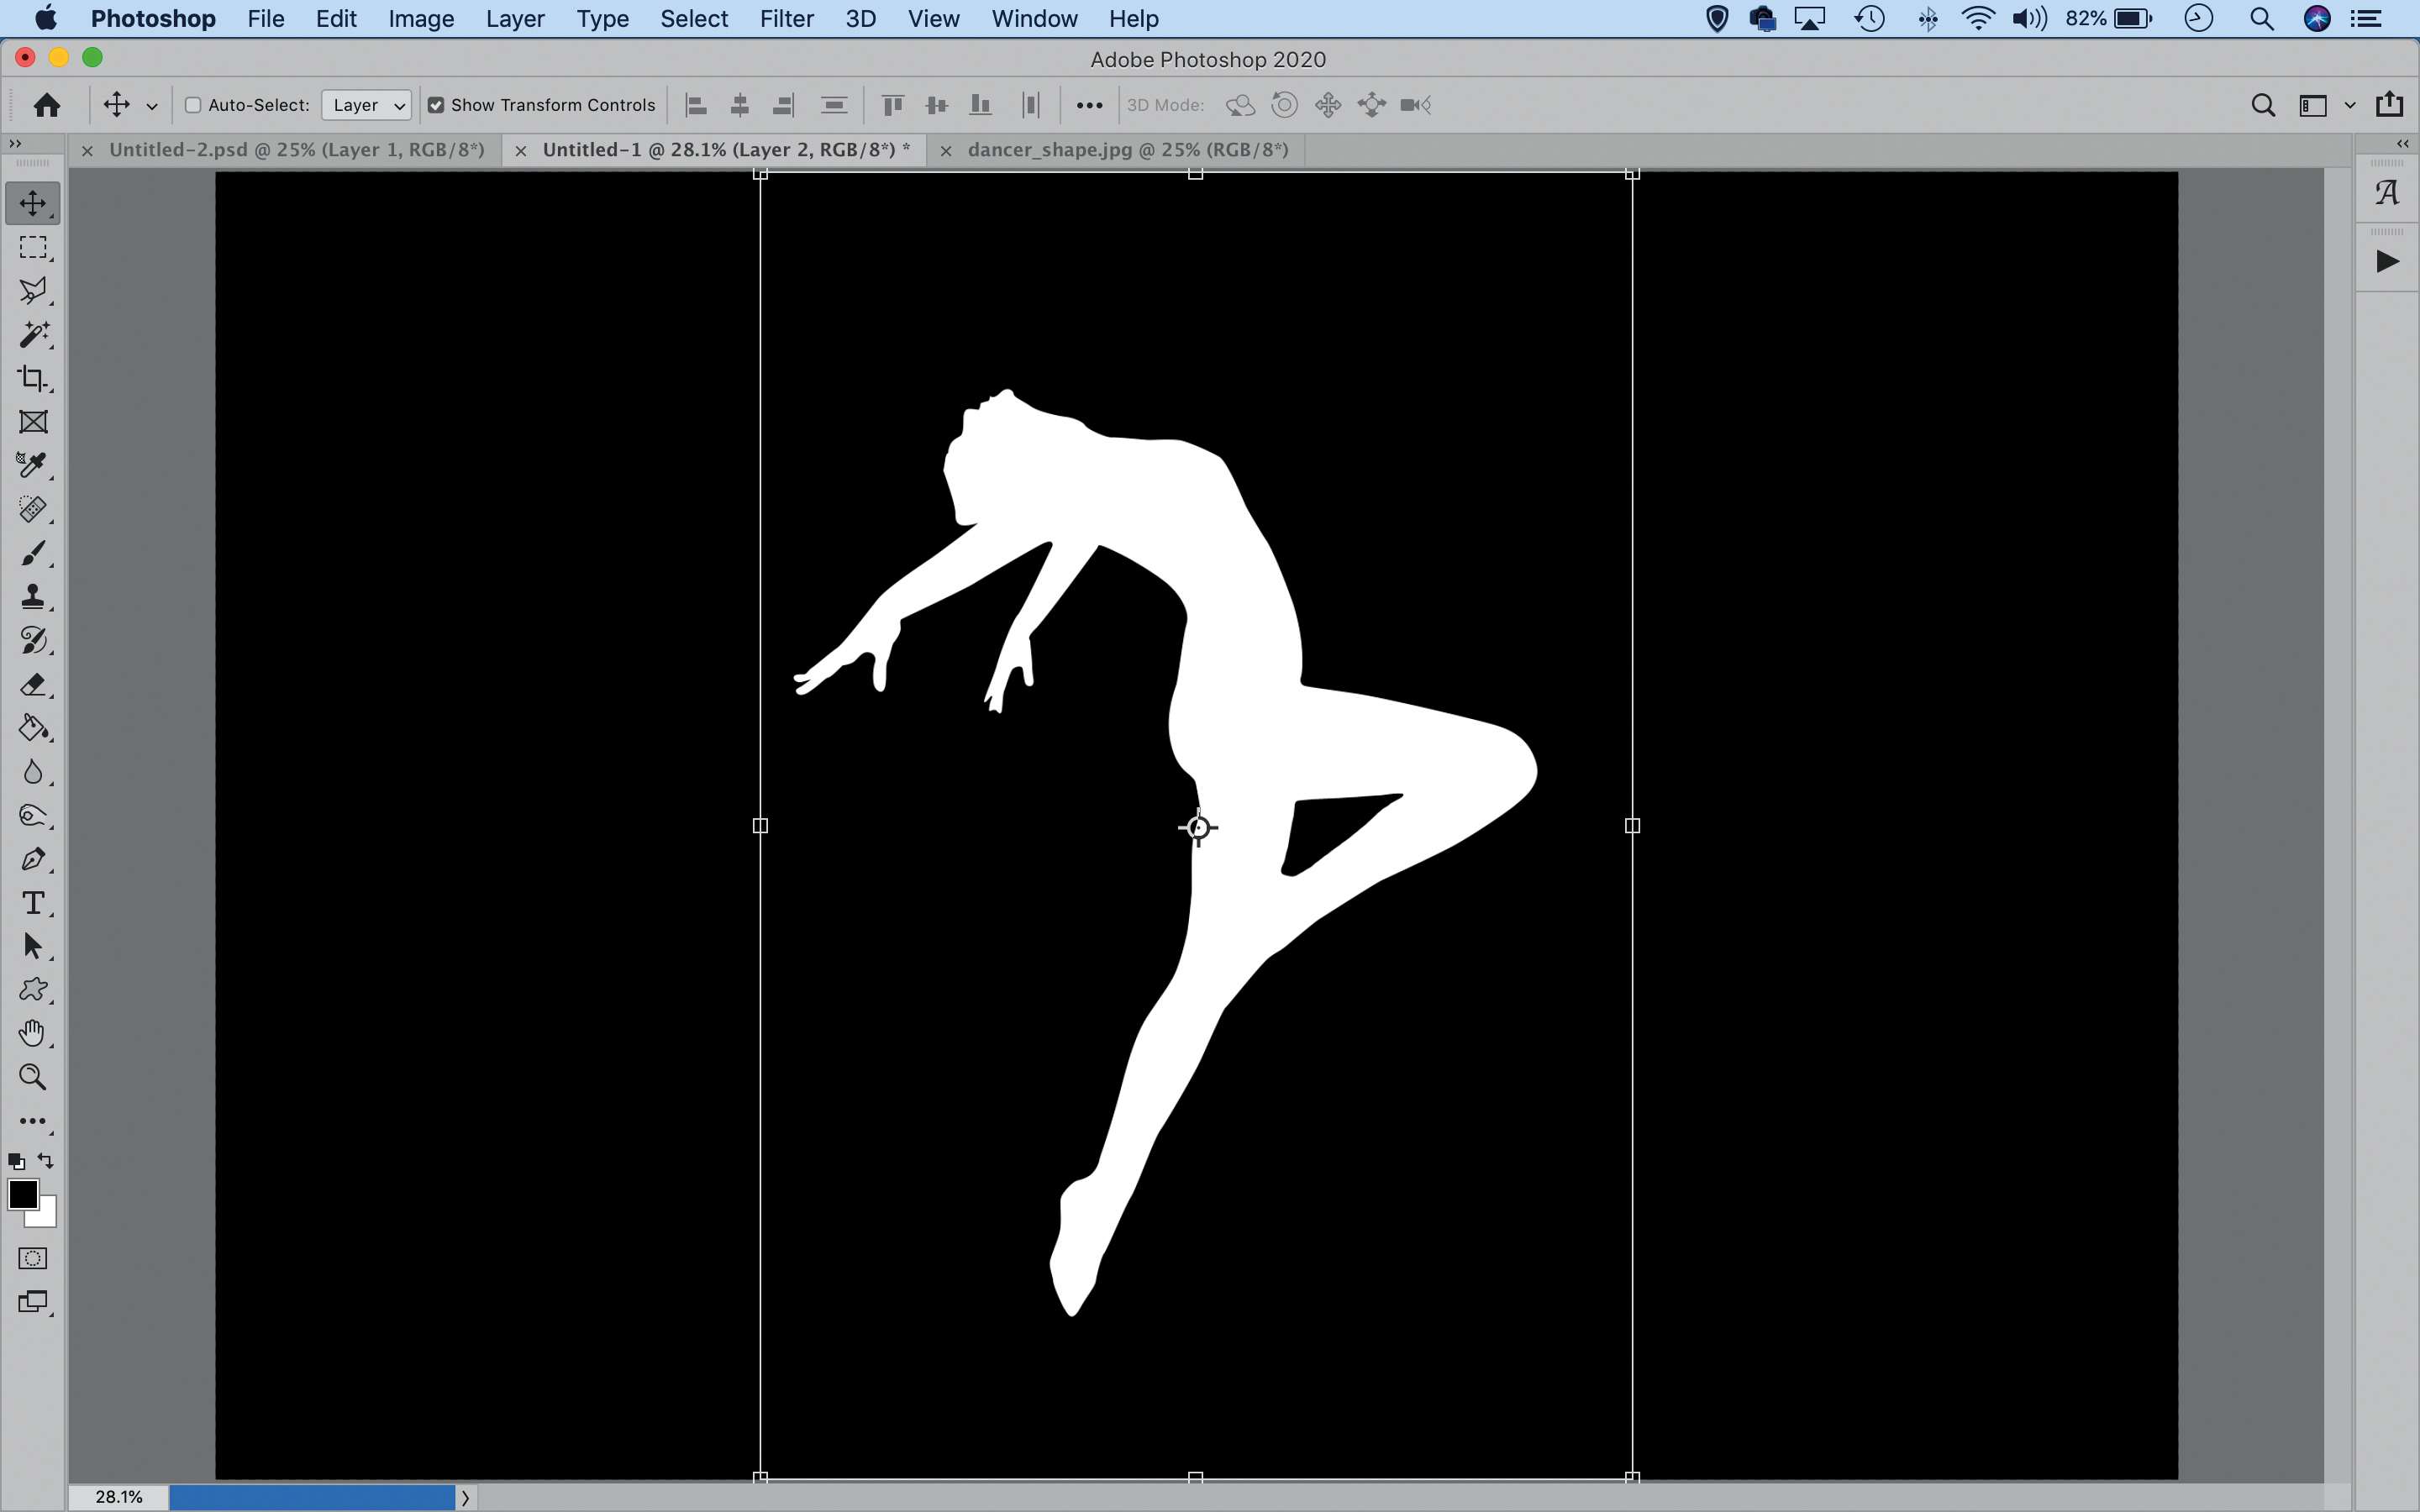
Drop in a shape
Open Photoshop, go to File>New, set Background Contents: Black and hit OK. Next, drag and drop the shape that you want to use. Here we used an outline of a dancer, but you can find many other shapes and figures online. Resize the image with Cmd/Ctrl+T, then hit 2 to set the layer to 20% opacity.
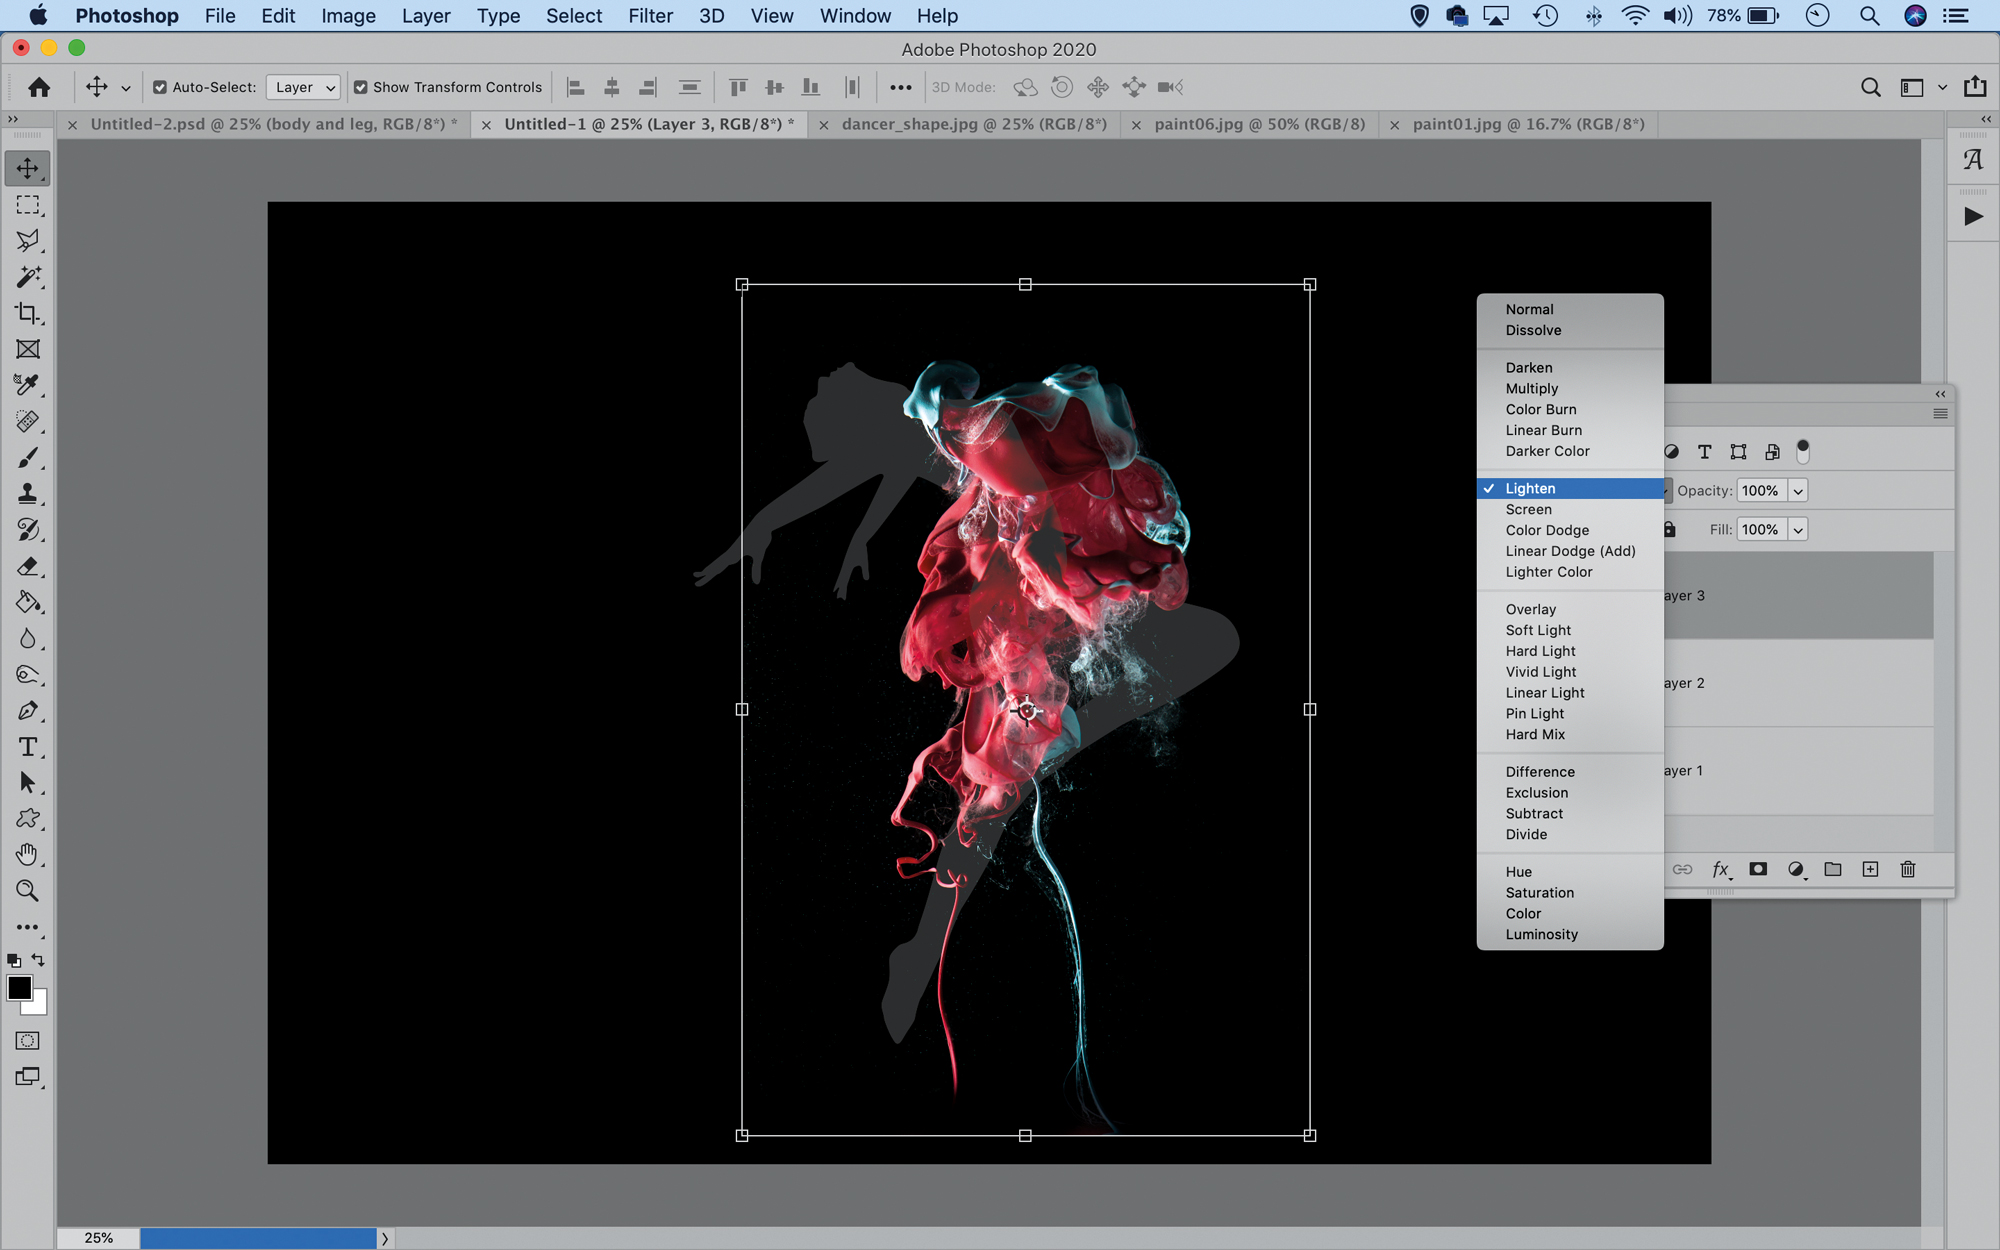
Copy in the paint
Copy in a paint photo and position it roughly over the figure. In the Layers panel, set the blend mode to Lighten. Next, go to Filter> Liquify. Check ‘Show Backdrop’ in the settings on the right. Choose Use: dancer shape and set Mode: In Front, then adjust the opacity slider to suit.
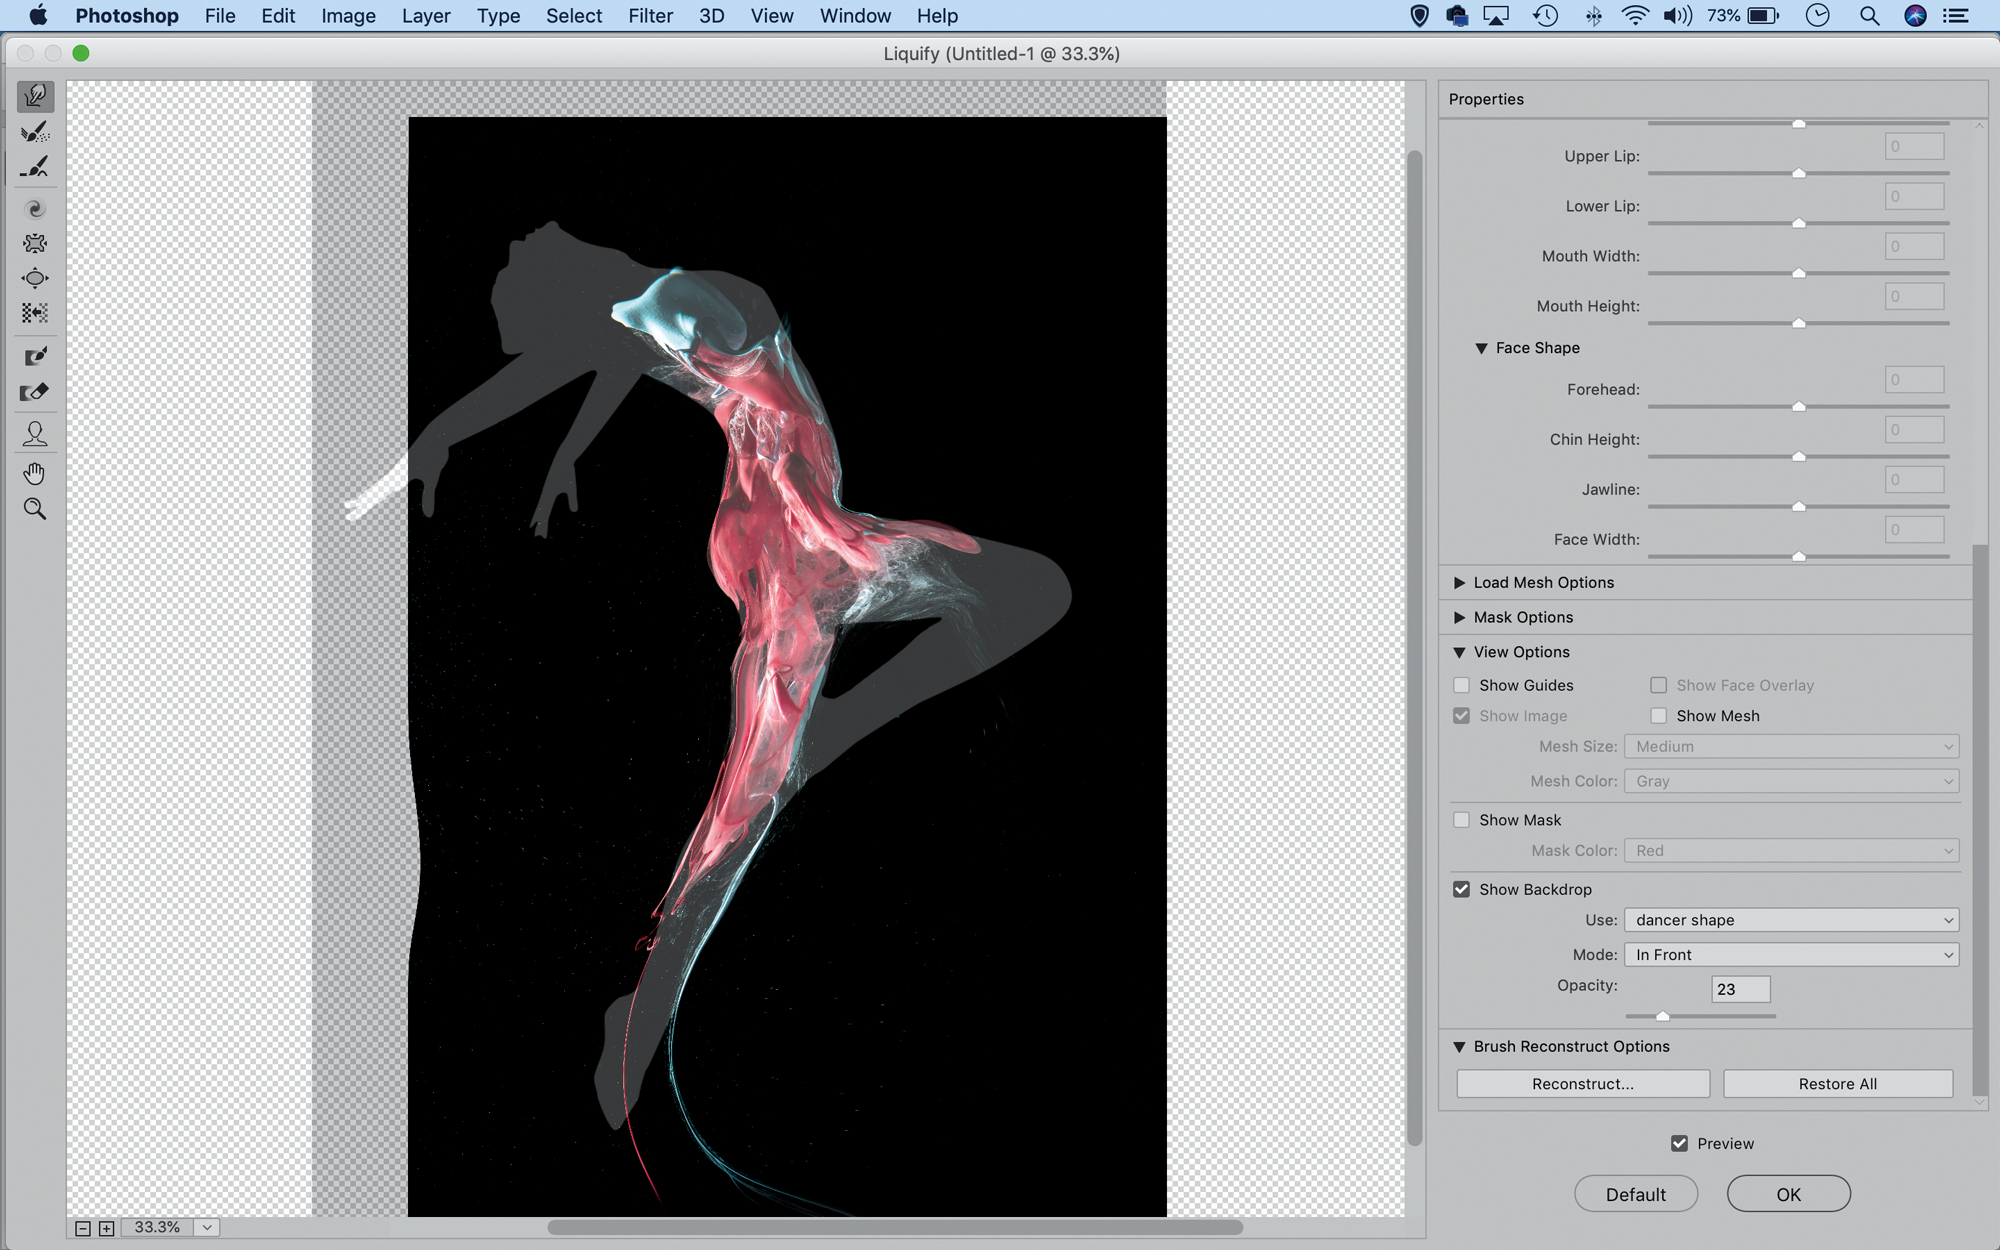
Warp the paint
Grab the Forward Warp tool from the toolbar and use the ] and [ keys to resize the brush tip. Drag over the image to push the paint around so that it follows the body of the dancer. Shape it to cover a part of the body using short, sharp pushes with the tool. Hit OK when you’re happy.
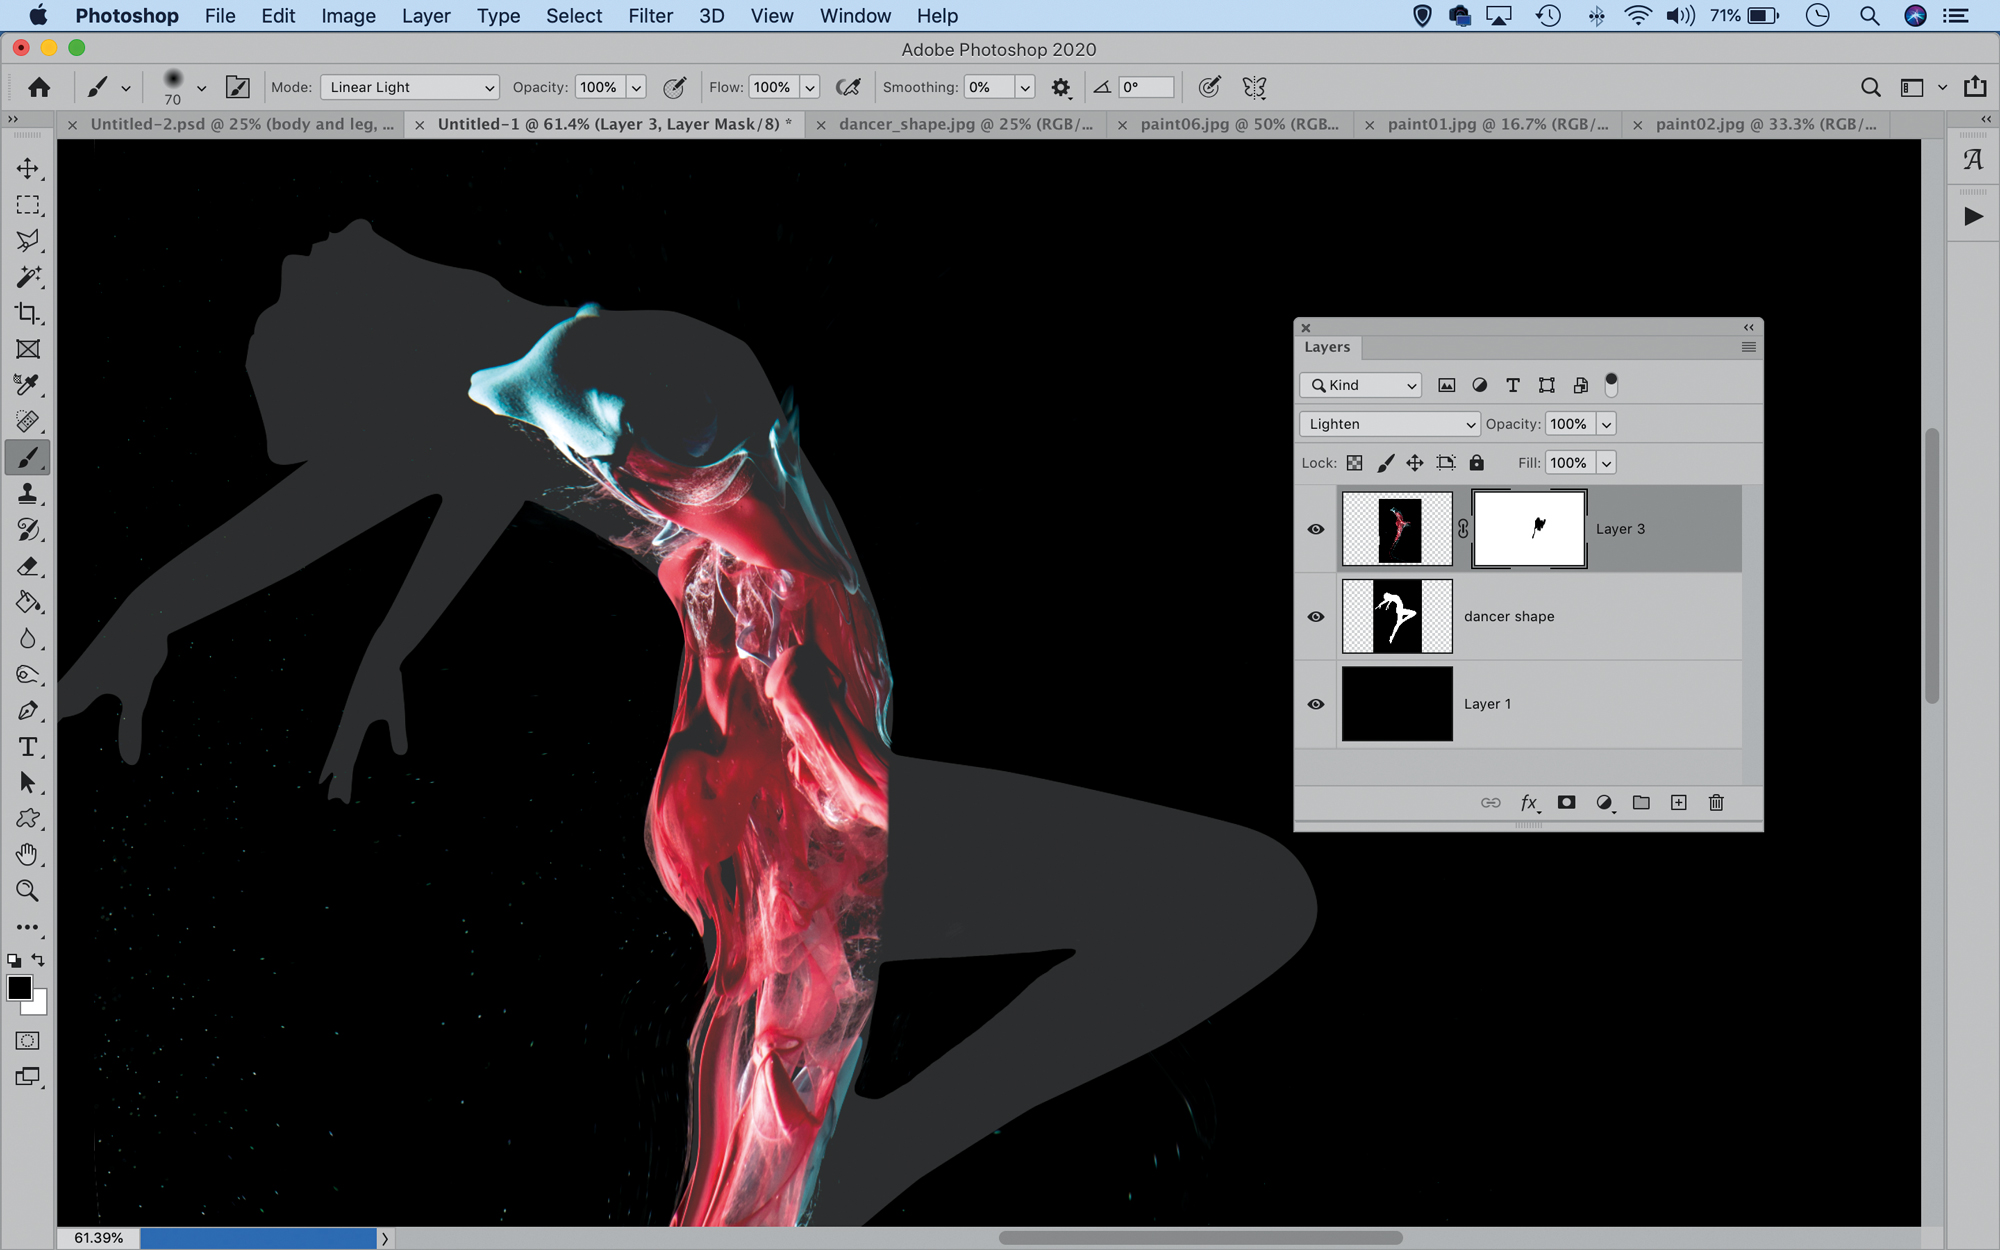
Paint a mask
Go to the Layers panel and click the Add Mask icon, then grab the Brush tool and hit D then X to set the color to black. Paint to hide any parts of the paint that you don’t want to include. Next, drag and drop another paint image in, and position it roughly as before.
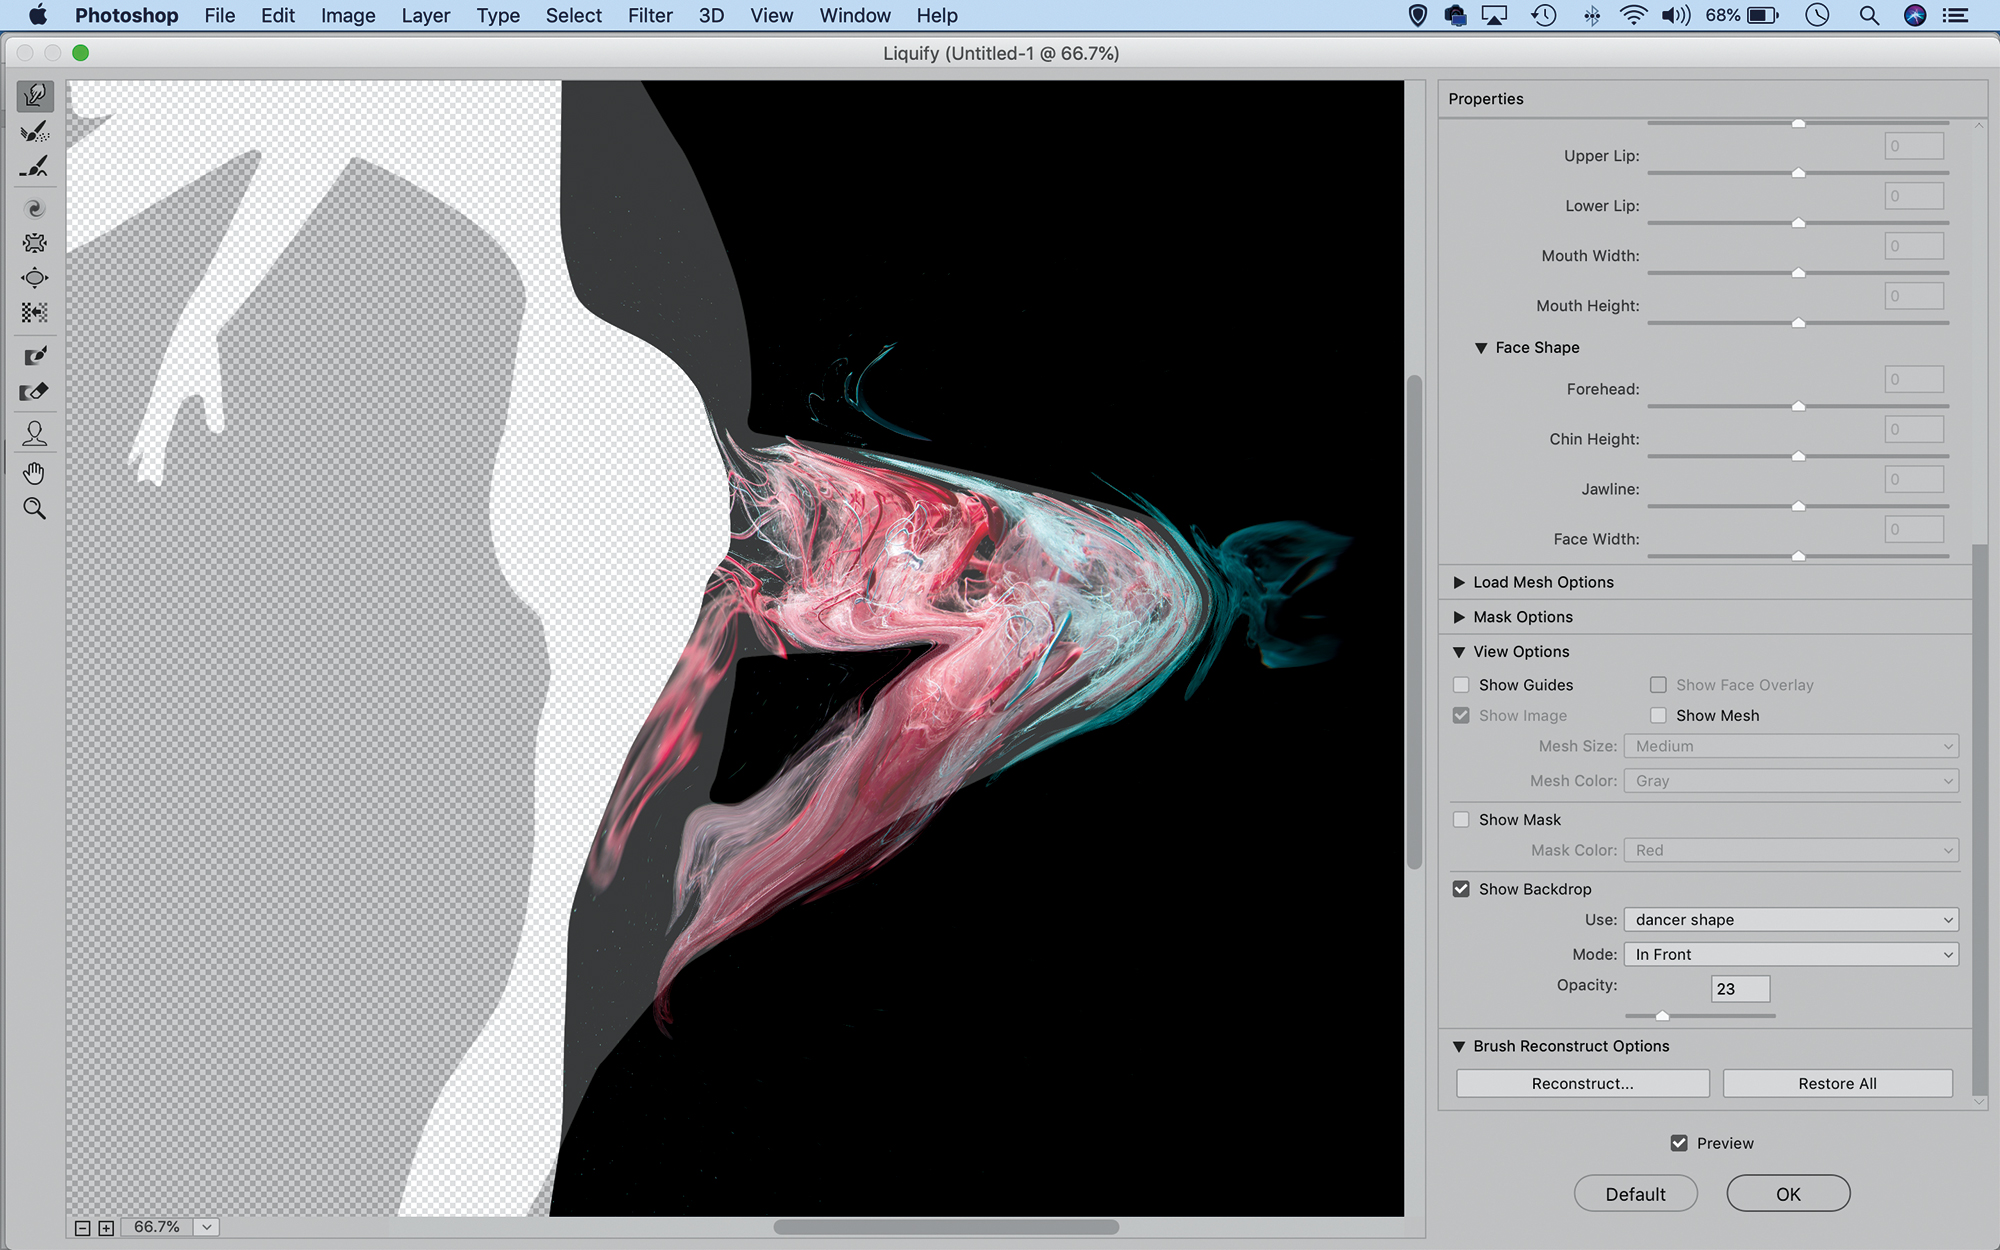
More paint images
Change the blend mode of the newly added paint layer to Lighten, then, again, go to Filter>Liquify. Once more, set the Show Backdrop settings so you can see the dancer shape, then use the Forward Warp tool to reshape the paint to match up with another part of the figure, the other leg in this instance here.
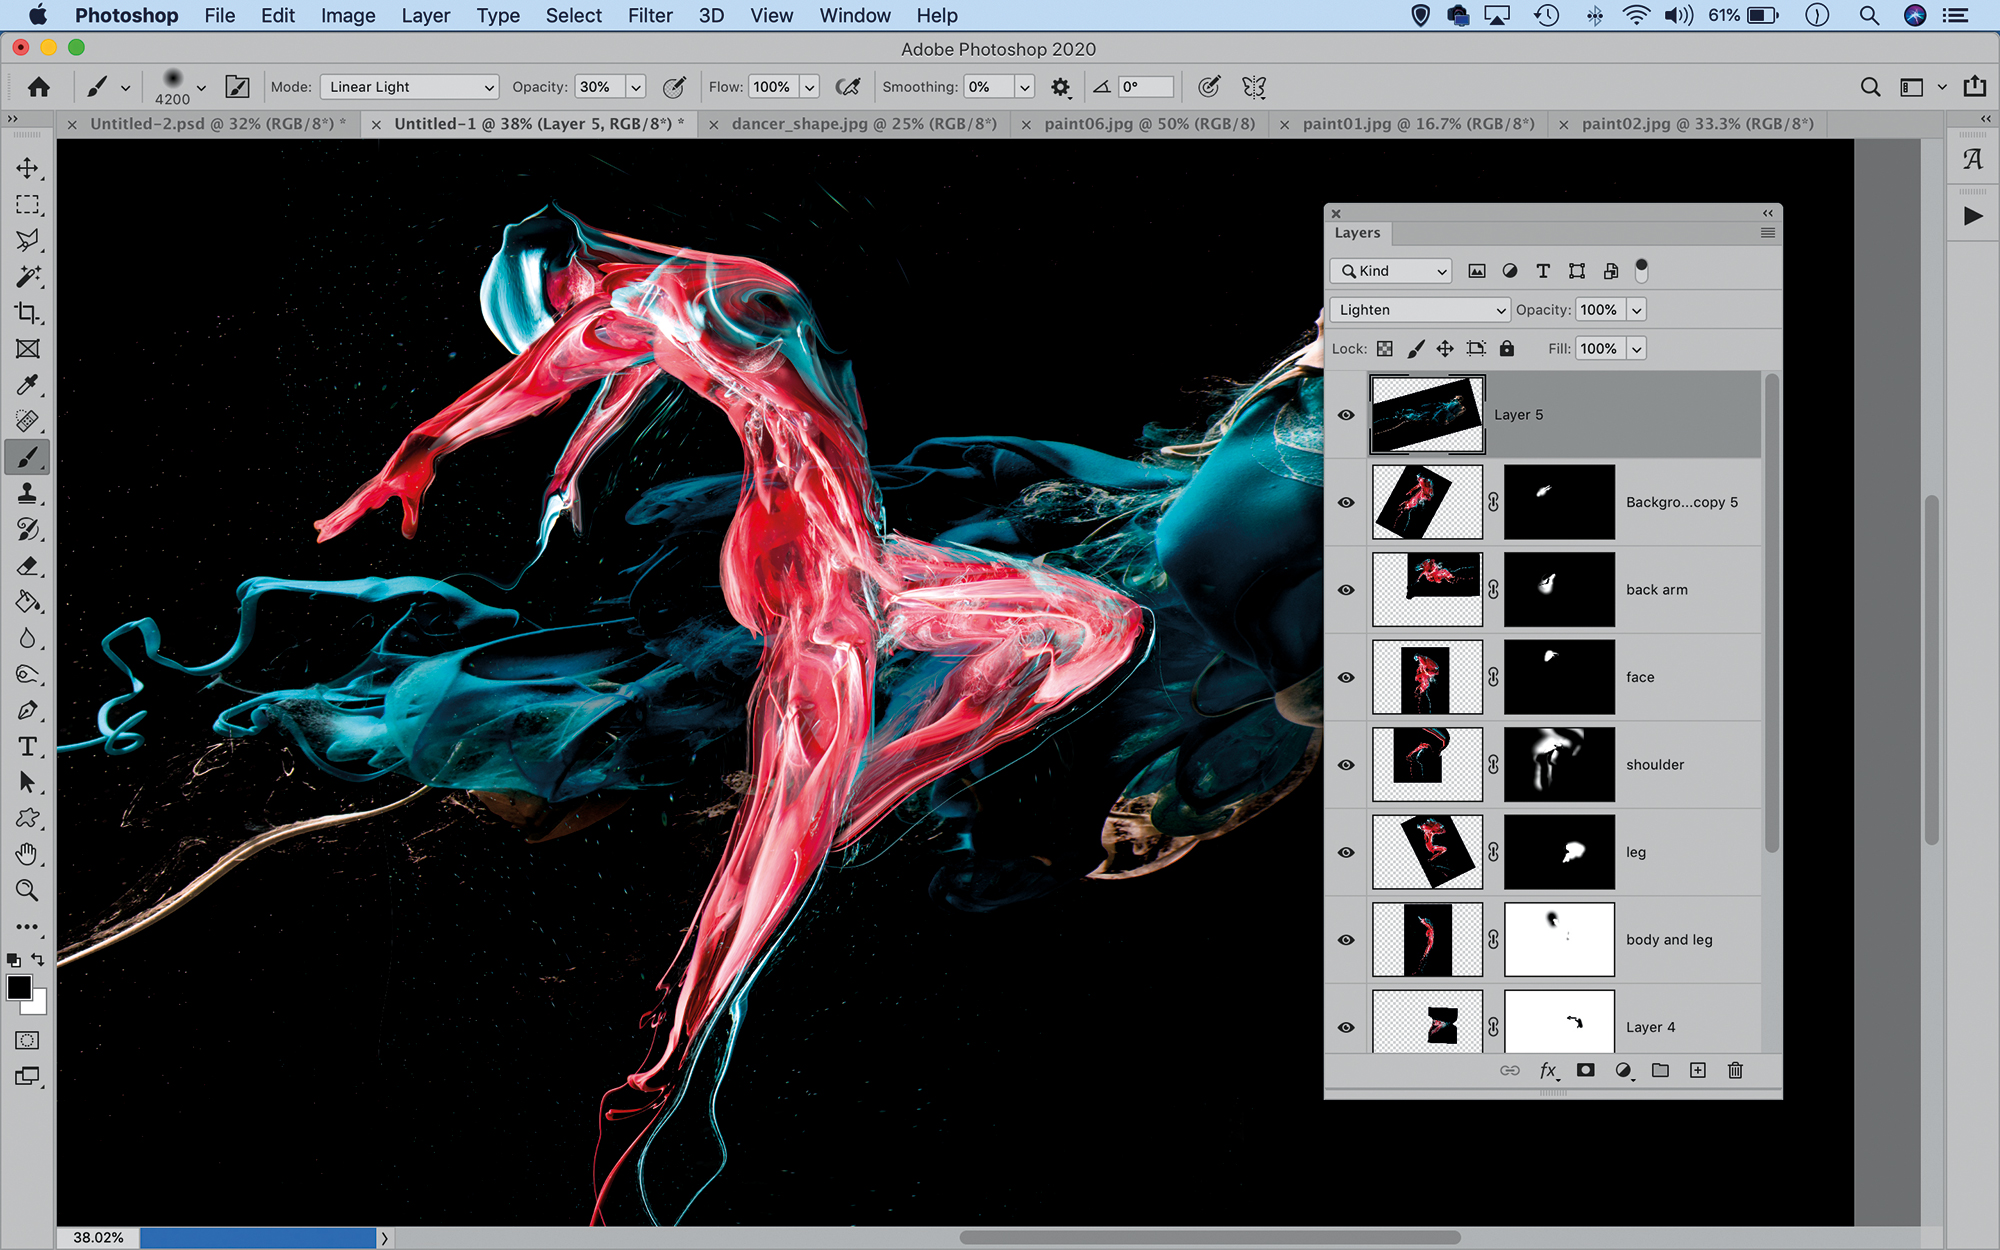
Build it up
Continue to build up the effect. Once done, hide the dancer shape layer and add a paint image as a backdrop – drop it in and change the blend mode to Lighten. Press Cmd/Ctrl+U and adjust the Hue to give it a different color if you like, then add a mask to hide any areas that you need to.
Read more
Best Nikon camera
Best Canon camera
Best tripod
Best DSLR
Best mirrorless camera
The lead technique writer on Digital Camera Magazine, PhotoPlus: The Canon Magazine and N-Photo: The Nikon Magazine, James is a fantastic general practice photographer with an enviable array of skills across every genre of photography.
Whether it's flash photography techniques like stroboscopic portraits, astrophotography projects like photographing the Northern Lights, or turning sound into art by making paint dance on a set of speakers, James' tutorials and projects are as creative as they are enjoyable.
He's also a wizard at the dark arts of Photoshop, Lightroom and Affinity Photo, and is capable of some genuine black magic in the digital darkroom, making him one of the leading authorities on photo editing software and techniques.


