Digital Camera World Verdict
If you’re an iMovie user who wants to expand their video editing abilities then upgrading to Final Cut Pro is a no-brainer. Its workspace is similar enough to iMovie for you to get up and running quickly and you can enjoy discovering its more sophisticated suite of post-production tools as you summon and explore the various sub-menus and panels. However, if you already subscribe to the Adobe Creative Cloud then Premiere Pro can perform most of the functions things that Final Cut Pro can (though you own Final Cut Pro outright whereas you have to subscribe to Premiere Pro annually.)
Pros
- +
No repeat subscription required
- +
iMovie users can adapt thanks to its similar interface
- +
Handles Apple ProRes footage from iPhone Pro models
- +
Change focus on iPhone Cinematic mode clips
- +
Supports third-party LUTs and plug-ins
- +
Optimised for M2 Pro, M2 Max and M1 Ultra chips
Cons
- -
Mac Only
- -
Keying tools not as versatile as Premiere Pro’s
Why you can trust Digital Camera World
Apple provides every Mac owner with a free desktop and iOS version of iMovie, an entry-level non-linear (NLE) video editing app. iMovie lets you trim clips to share the best bits and swap their order in a timeline (hence the term non-linear) to tell a story. You can then spruce up the sound levels using basic EQ presets and sprinkle on some titles and captions for a polished product.
Final Cut Pro is Apple’s answer to the needs of professional video editors who need a wider range of high-end post-production tools to take even more control over their video assets. If you’re an iMovie user who’s wondering whether you need to invest in a professional NLE then read on to find out what extras Final Cut Pro has to offer.
One other thing to mention - Final Cut Pro is my editing app of choice. I’ve used it over the last few years to edit clips, grade colors and tones, and fine-tune the sound on a range of professional productions.
Final Cut Pro X Key Features
Final Cut Pro has all the key features you’d expect from a professional non-linear video app. As well as the usual tools to split, trim, and re-order clips you have a selection of color grading tools to choose from.
• macOS 12.6 or later
• 4GB of RAM (8GB recommended for 4K editing, 3D titles, and 360° video editing)
• Metal-capable graphics card
• 1GB of VRAM recommended for 4K editing, 3D titles, and 360° video editing
•5.5GB of available disk space
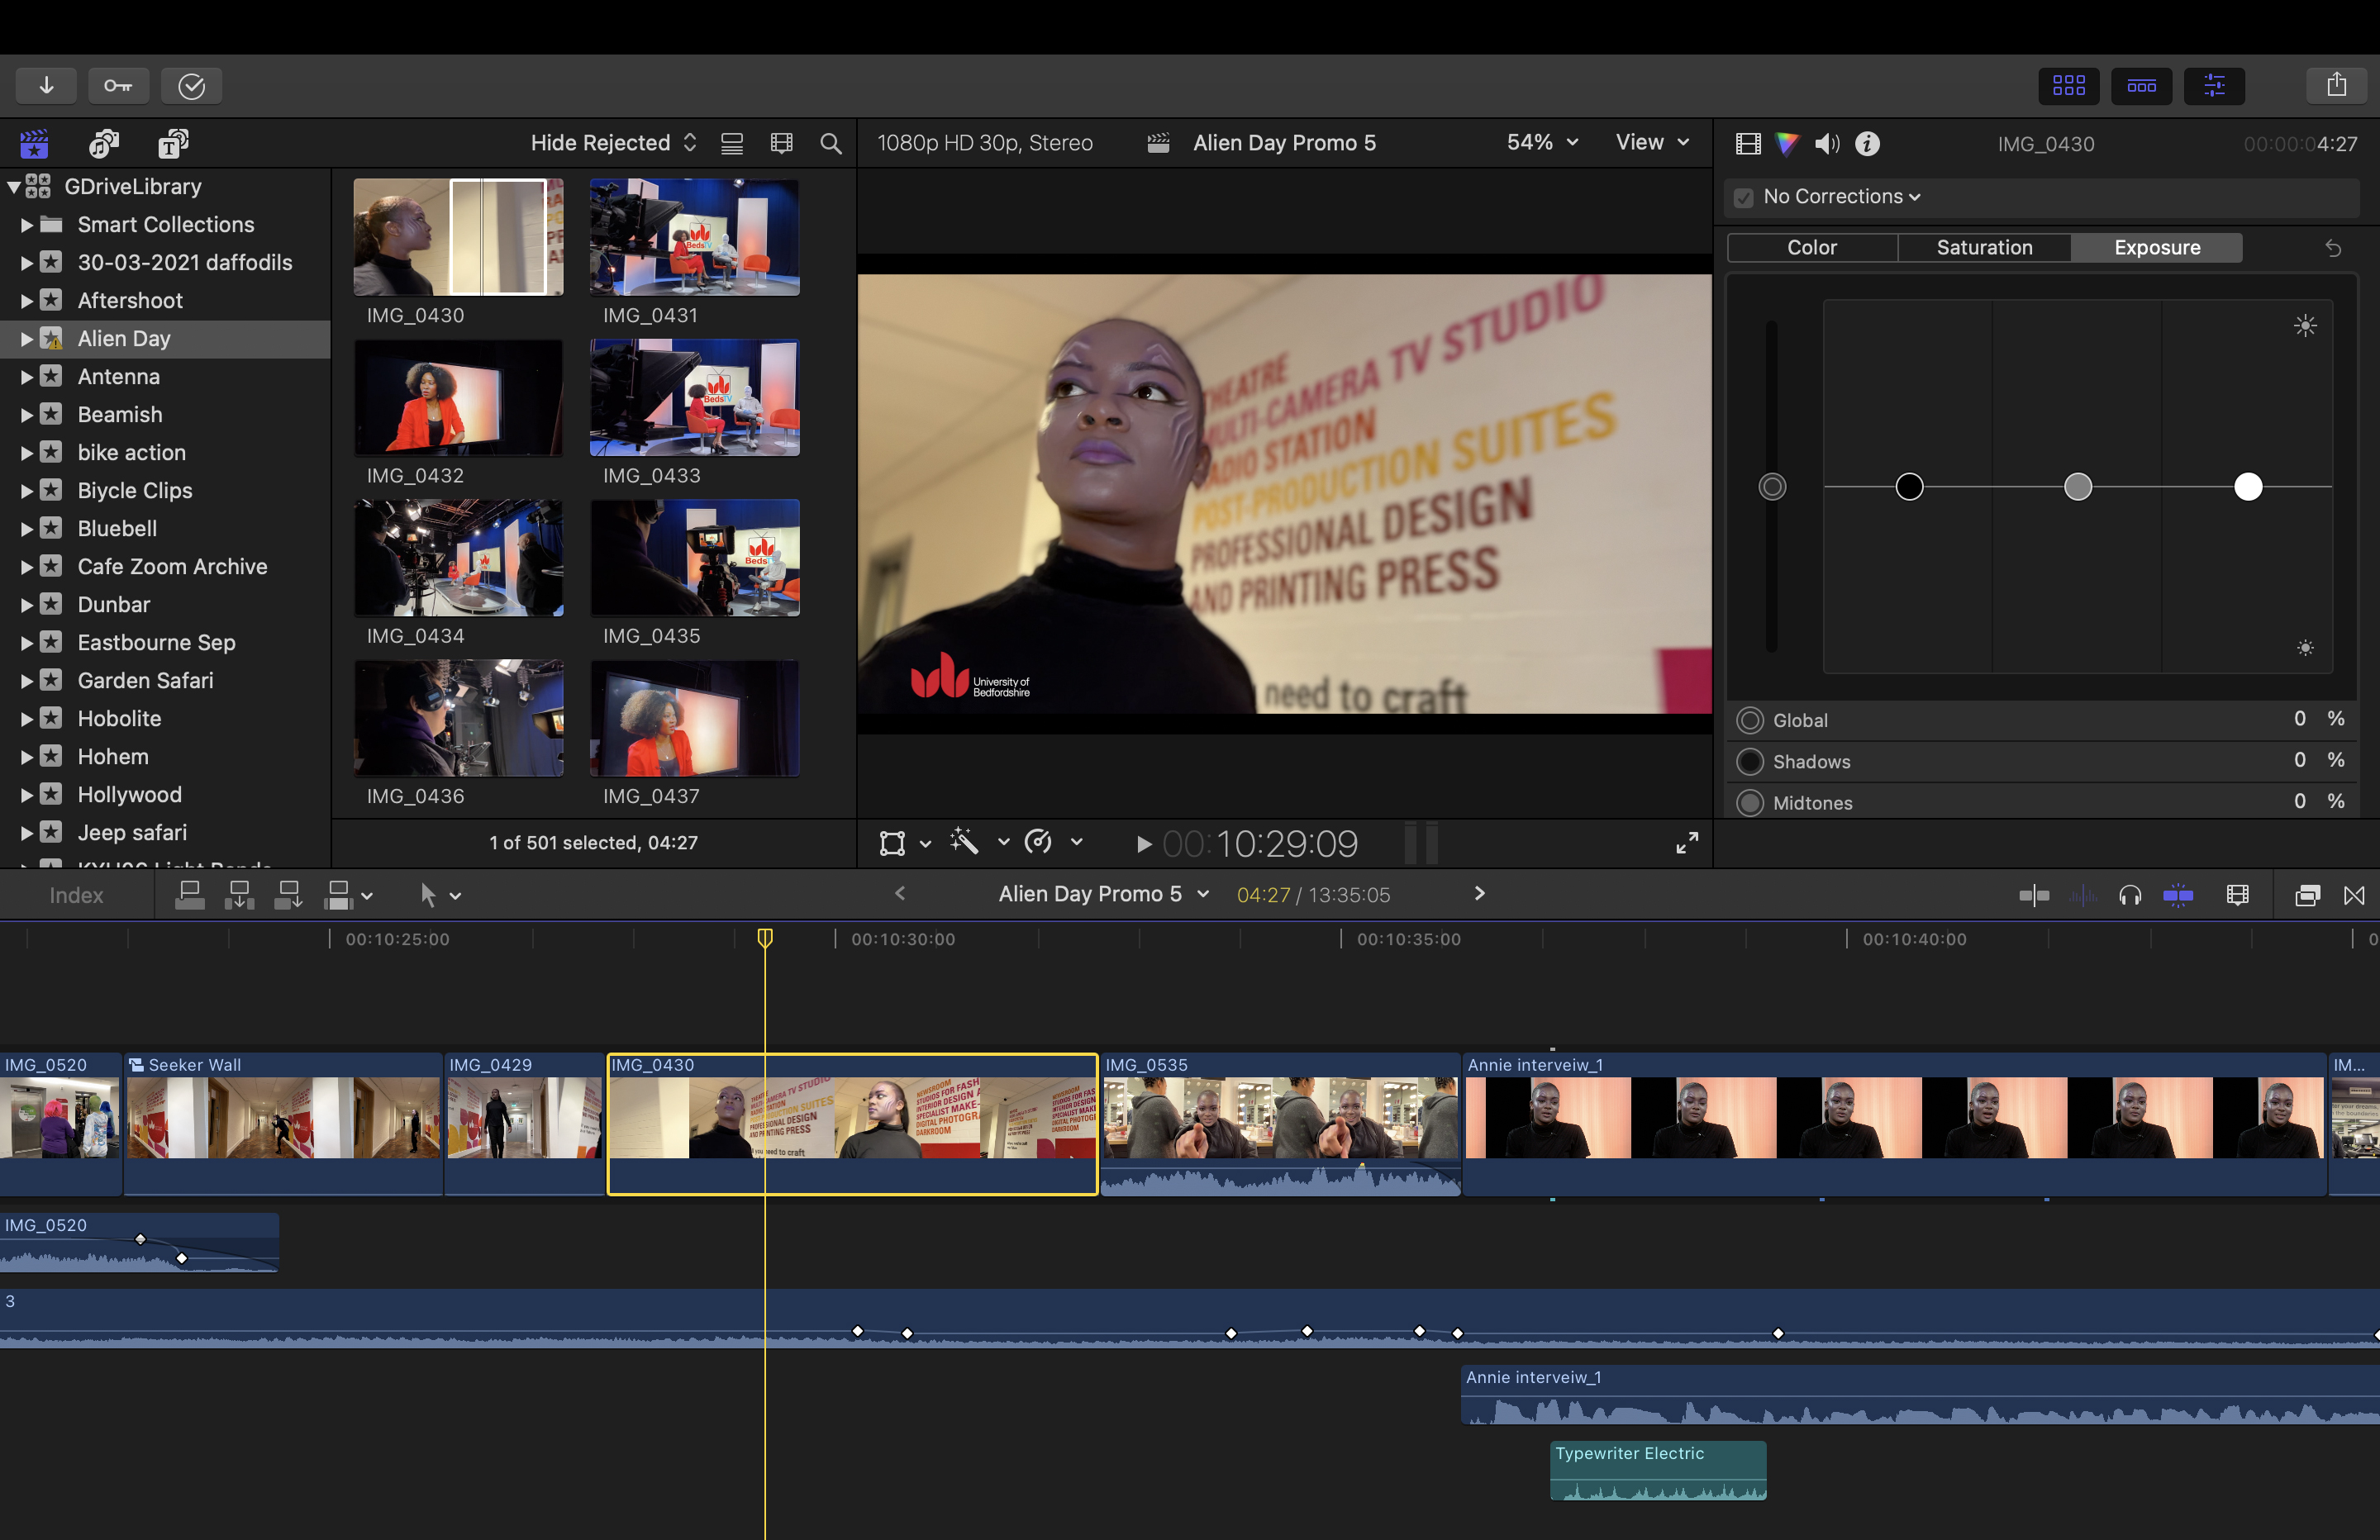
In its earlier days, Final Cut Pro was lacking in the grading department, with a basic Color Board that enabled you to make simple adjustments to the exposure, color, and saturation of shadows, mid-tones, and highlights.
The current version boasts a wider range of grading tools such as Color Wheels that enable you to adjust hues, saturation, and lightness of various tones in a more intuitive way (much like the Color grading wheels in Lightroom and Adobe Camera Raw.)
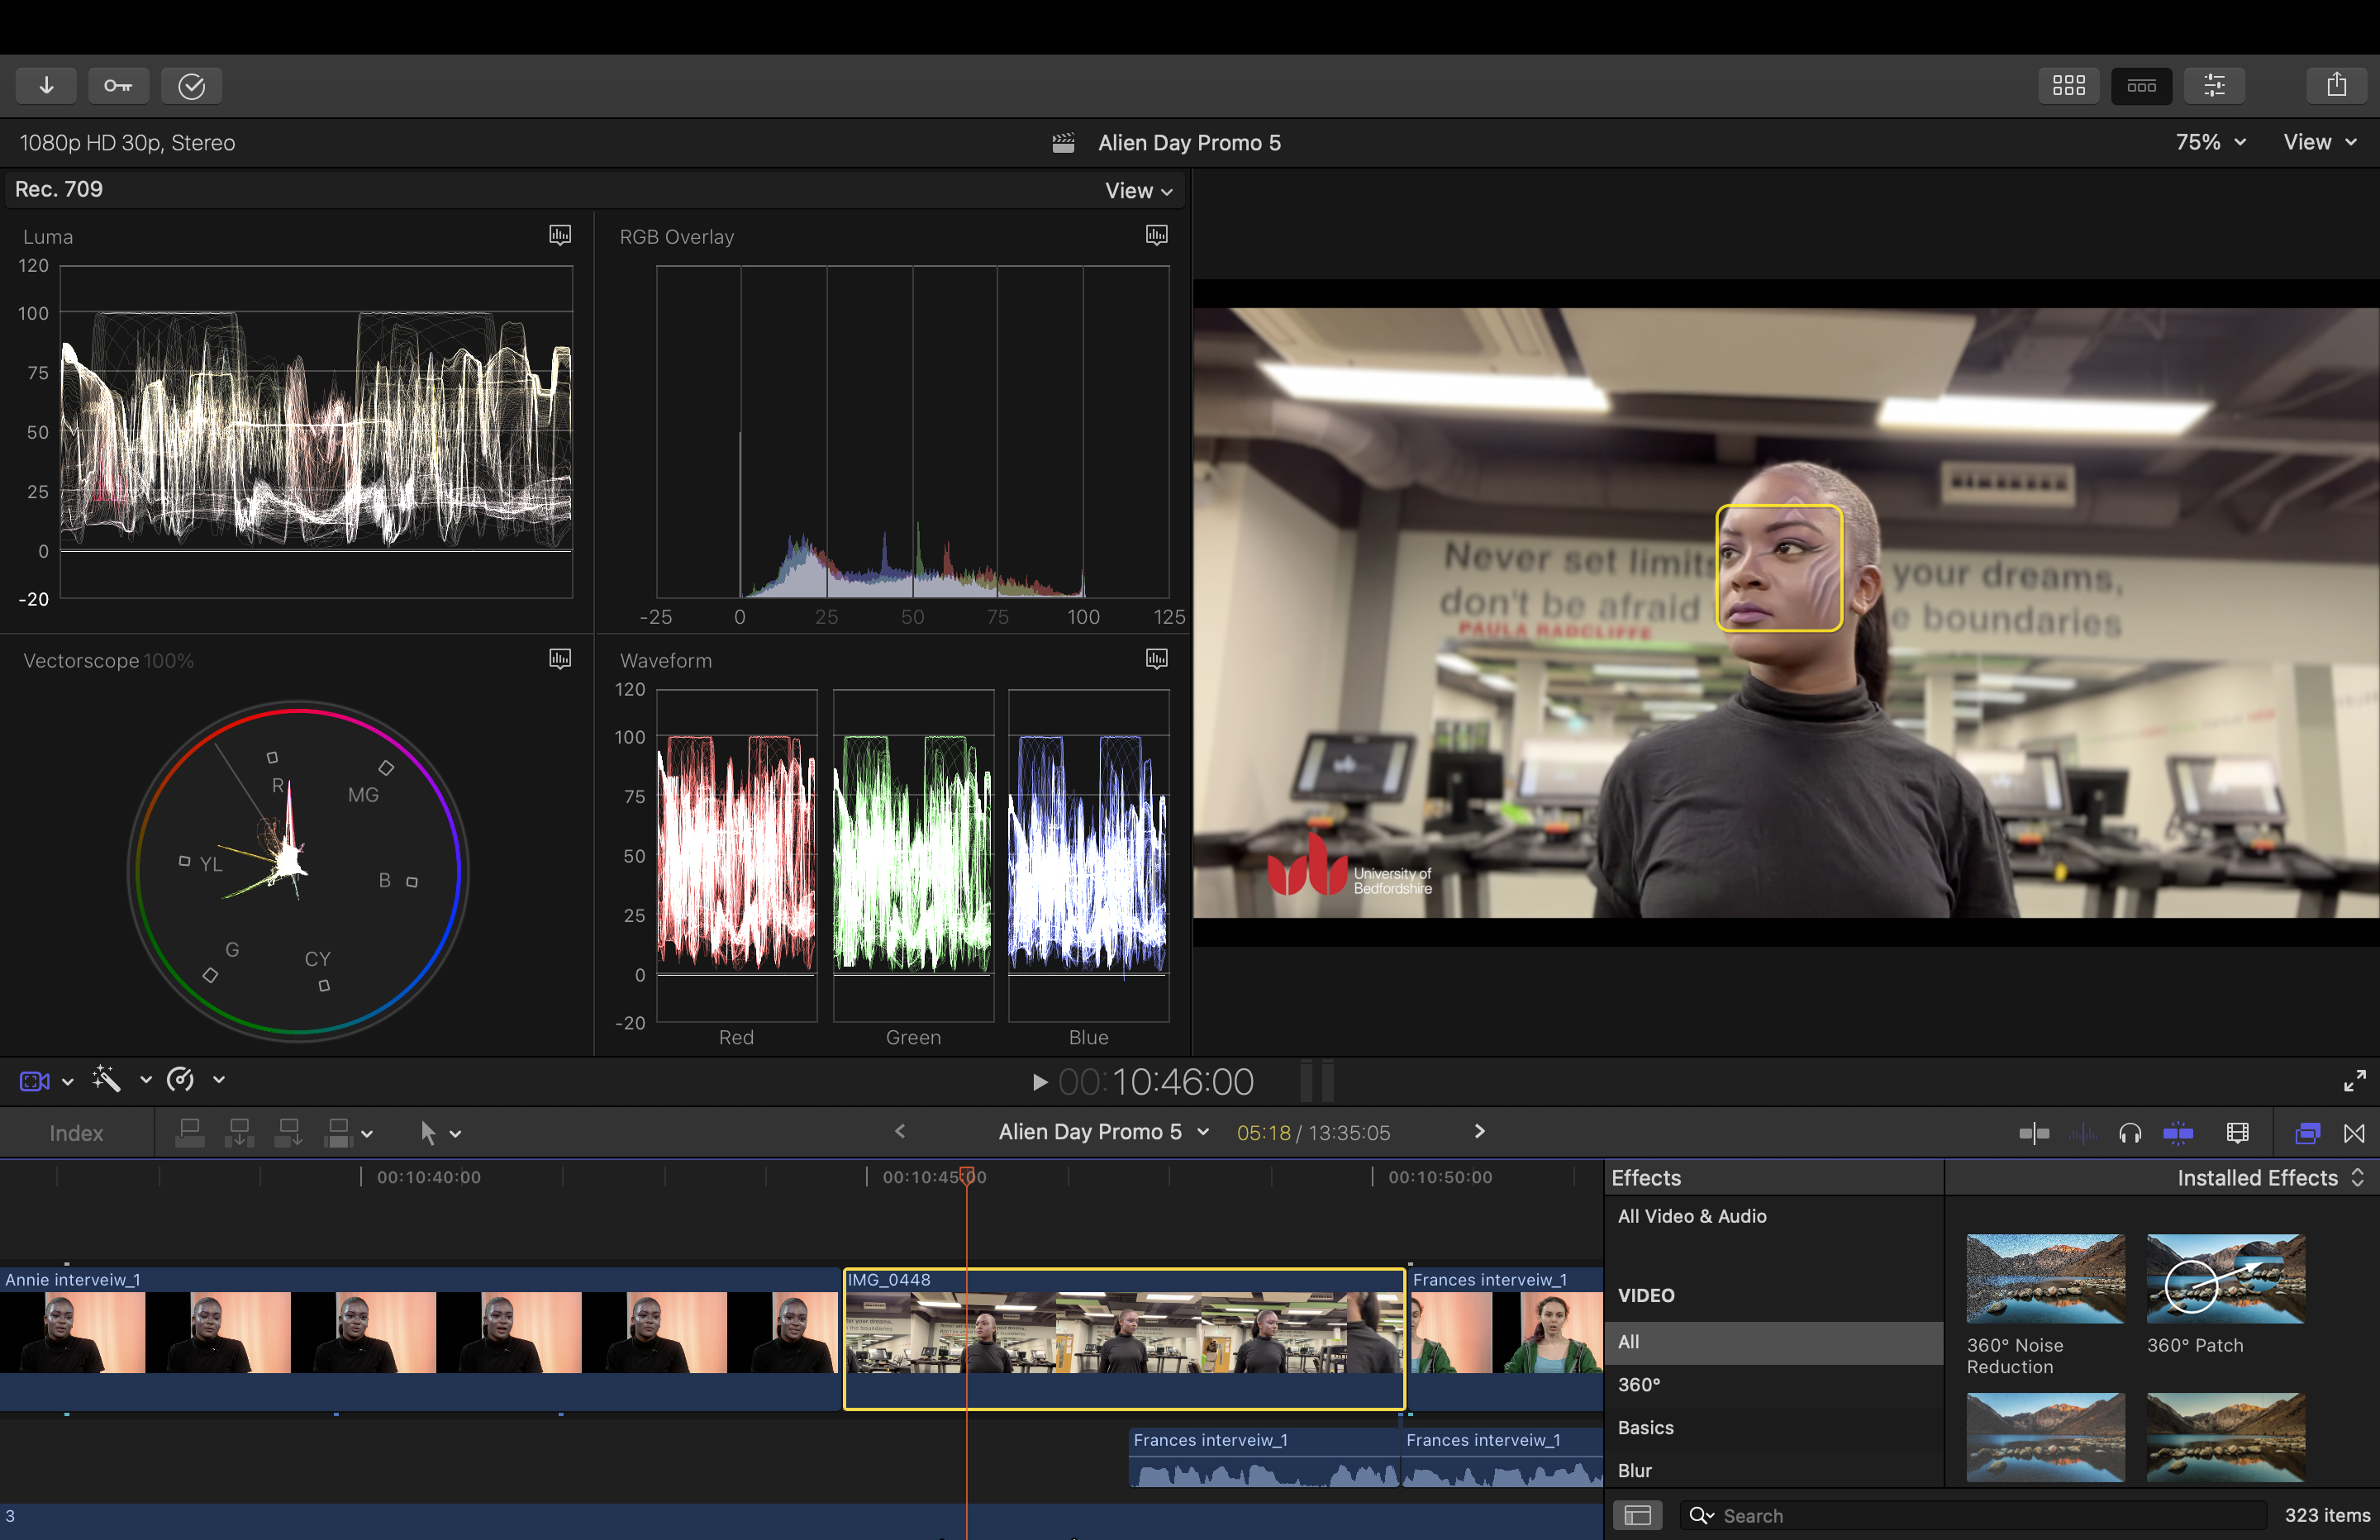
You can also use Color Curves to sample a specific color (such as a blue sky) and then drag points on a curve to change its hue to cyan and darken its luminance to make clouds stand out more. You can also summon a range of Scopes (such as a Histogram) to get a more technical analysis of the spread of a clip’s tones (or you can use a Vectorscope to help you grade tint-free caucasian skin tones).
The best camera deals, reviews, product advice, and unmissable photography news, direct to your inbox!
Final Cut Pro lagged behind Premiere Pro for a long time when it came to motion tracking, but now Apple’s app can recognize and auto-track an object or face so you can attach a caption or effect to the moving subject.
You can also add subtitles to a dedicated caption track and export the subtitles as an .srt file that you can attach to your edited show on YouTube. YouTube can of course generate subtitles automatically but it’s far from accurate, especially with people’s names.
Another key feature that I use a lot is Multicam. I can shoot a scene using multiple cameras to cover a range of angles and shot sizes. Final Cut Pro then uses the audio in the clips to combine them into a synced Multicam clip. I can then play the Multicam clip in the timeline and tap a key when I want to cut from one camera angle to another in the main viewer - as if I was vision-mixing live! This is a very fast and easy way to sync and edit multiple clips!
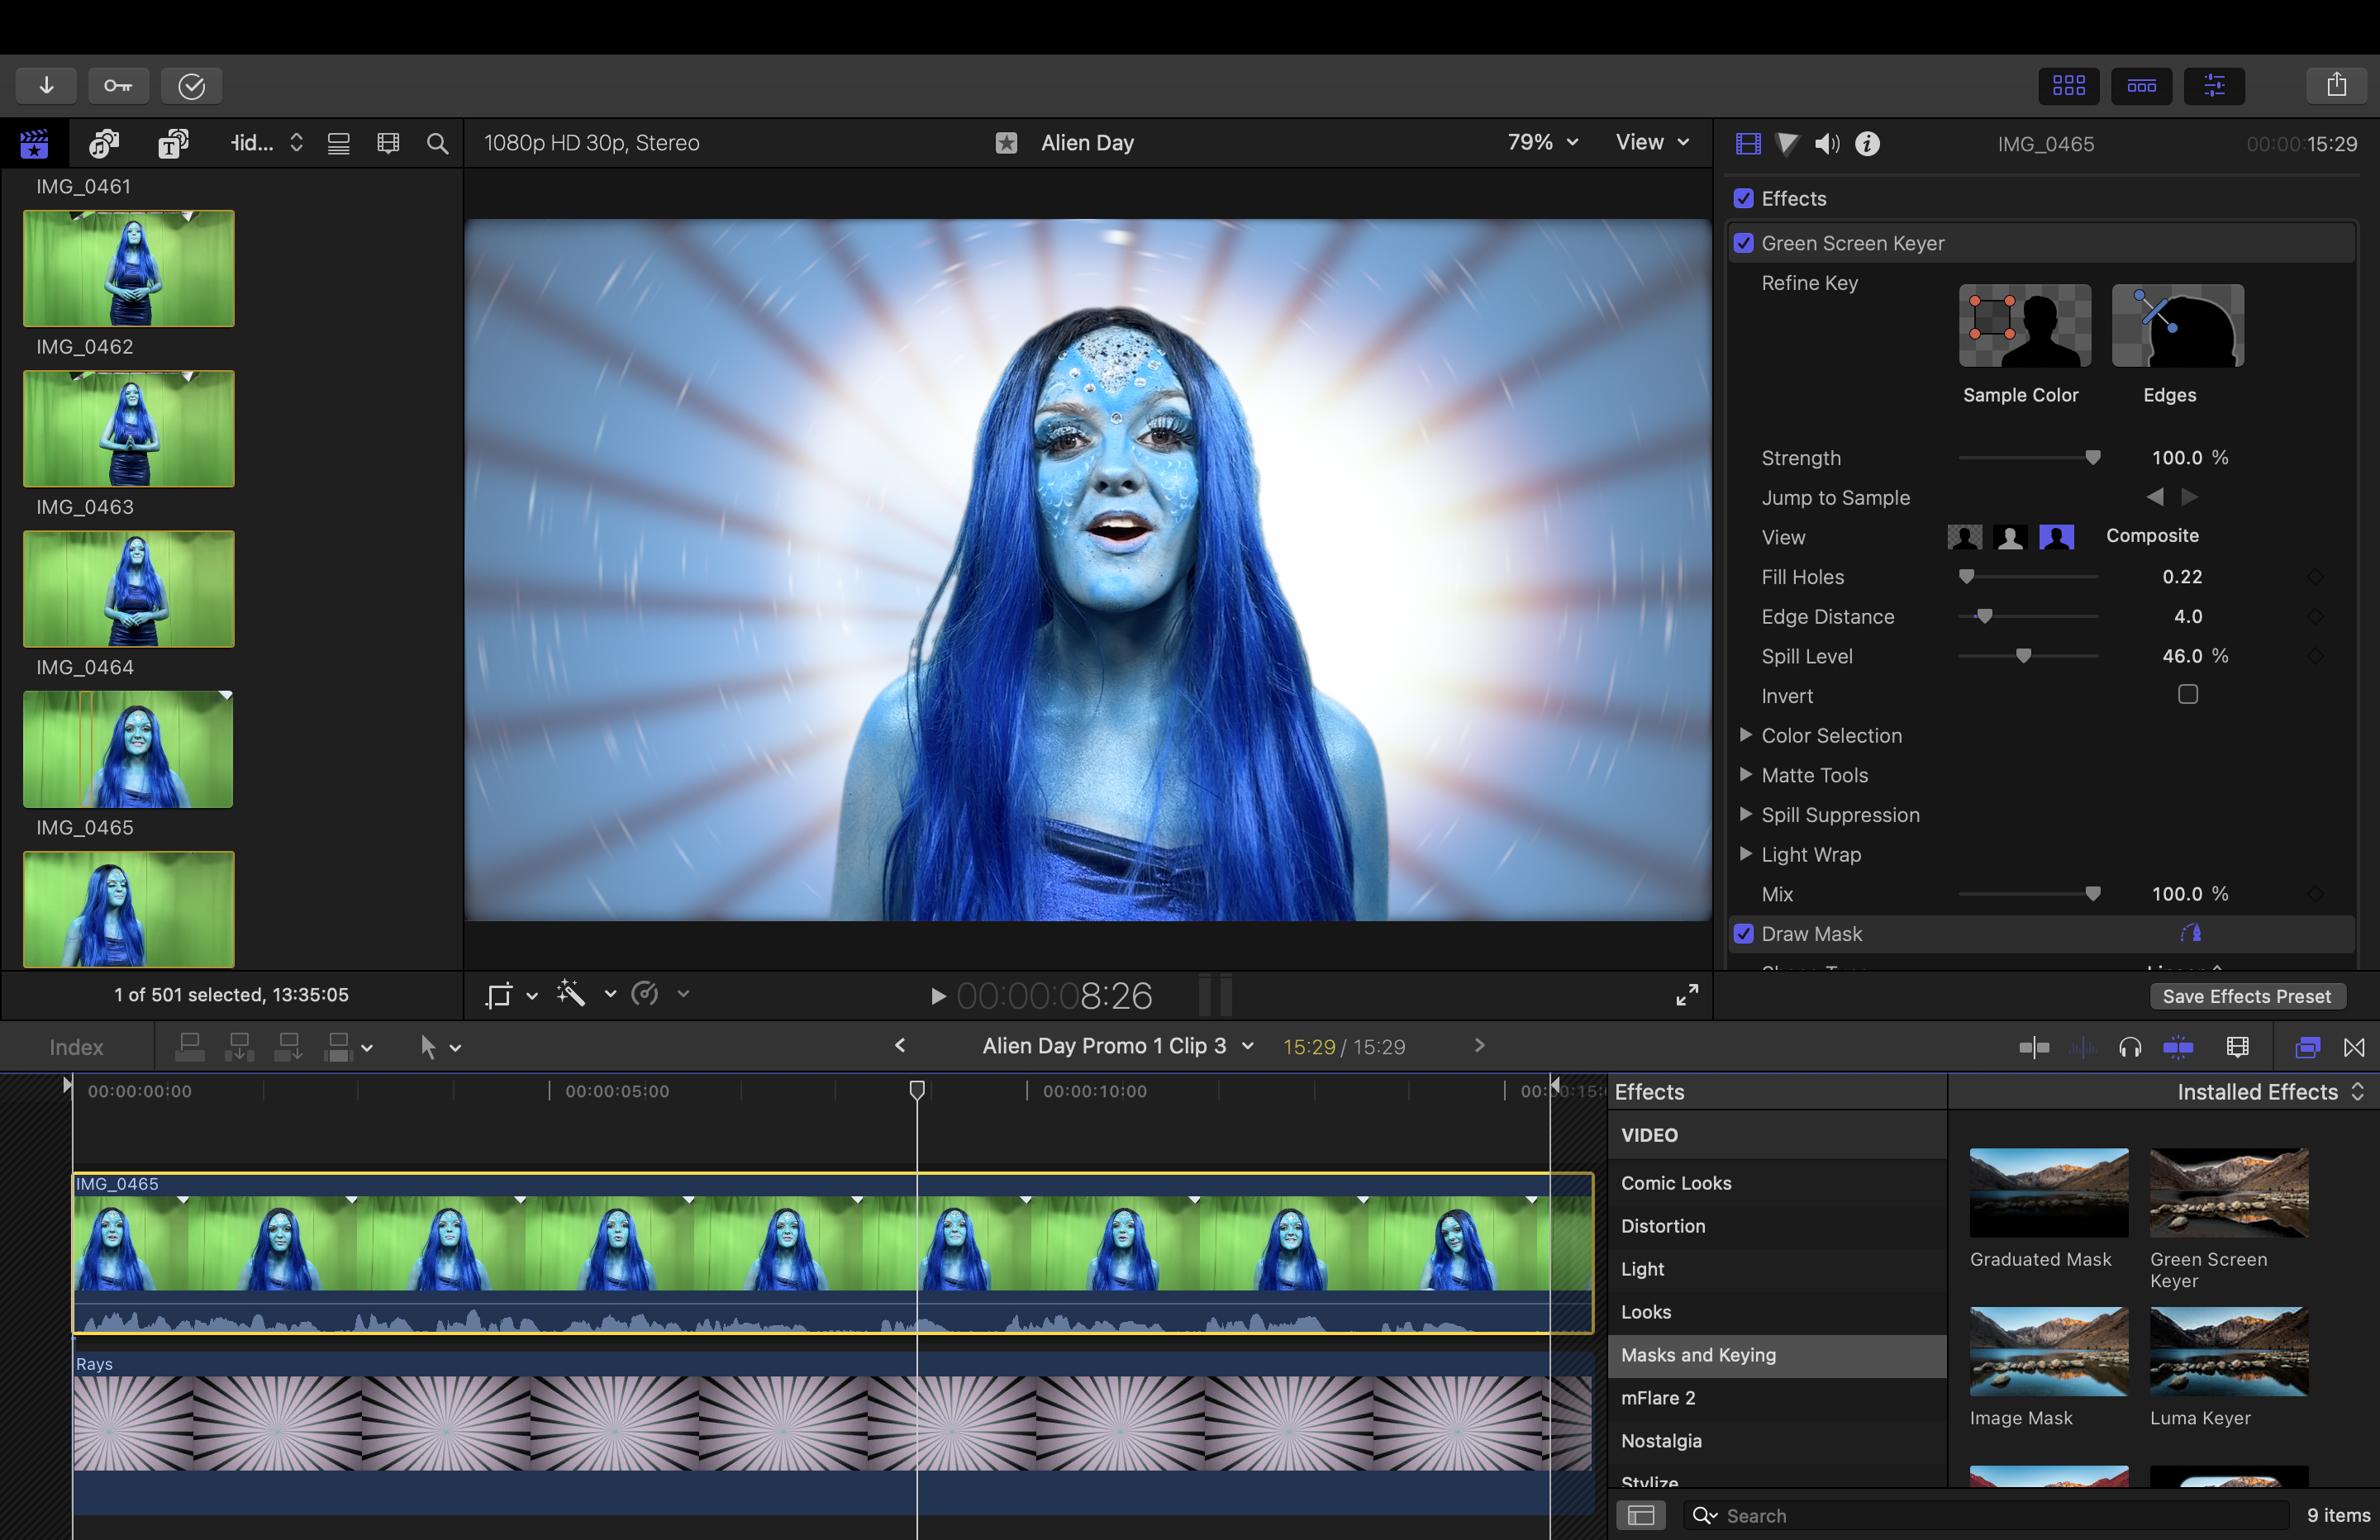
If you need to replace a green background with a clip on another layer then Final Cut Pro has a decent Green Screen tool to help you fill holes in a subject and adjust problems such as green spill. It also has a garbage matte that you can use to extend the transparency of a layer if you don’t have enough green backdrop behind your main subject.
You can then turn these multiple layers into a compound clip and then drag and drop an effect onto the compound clip to alter all of its contents at once. For example, once compositing a person into a new background I flatten the layers together then add some camera shake to unify all of the compound clip’s elements.
Final Cut Pro X Interface
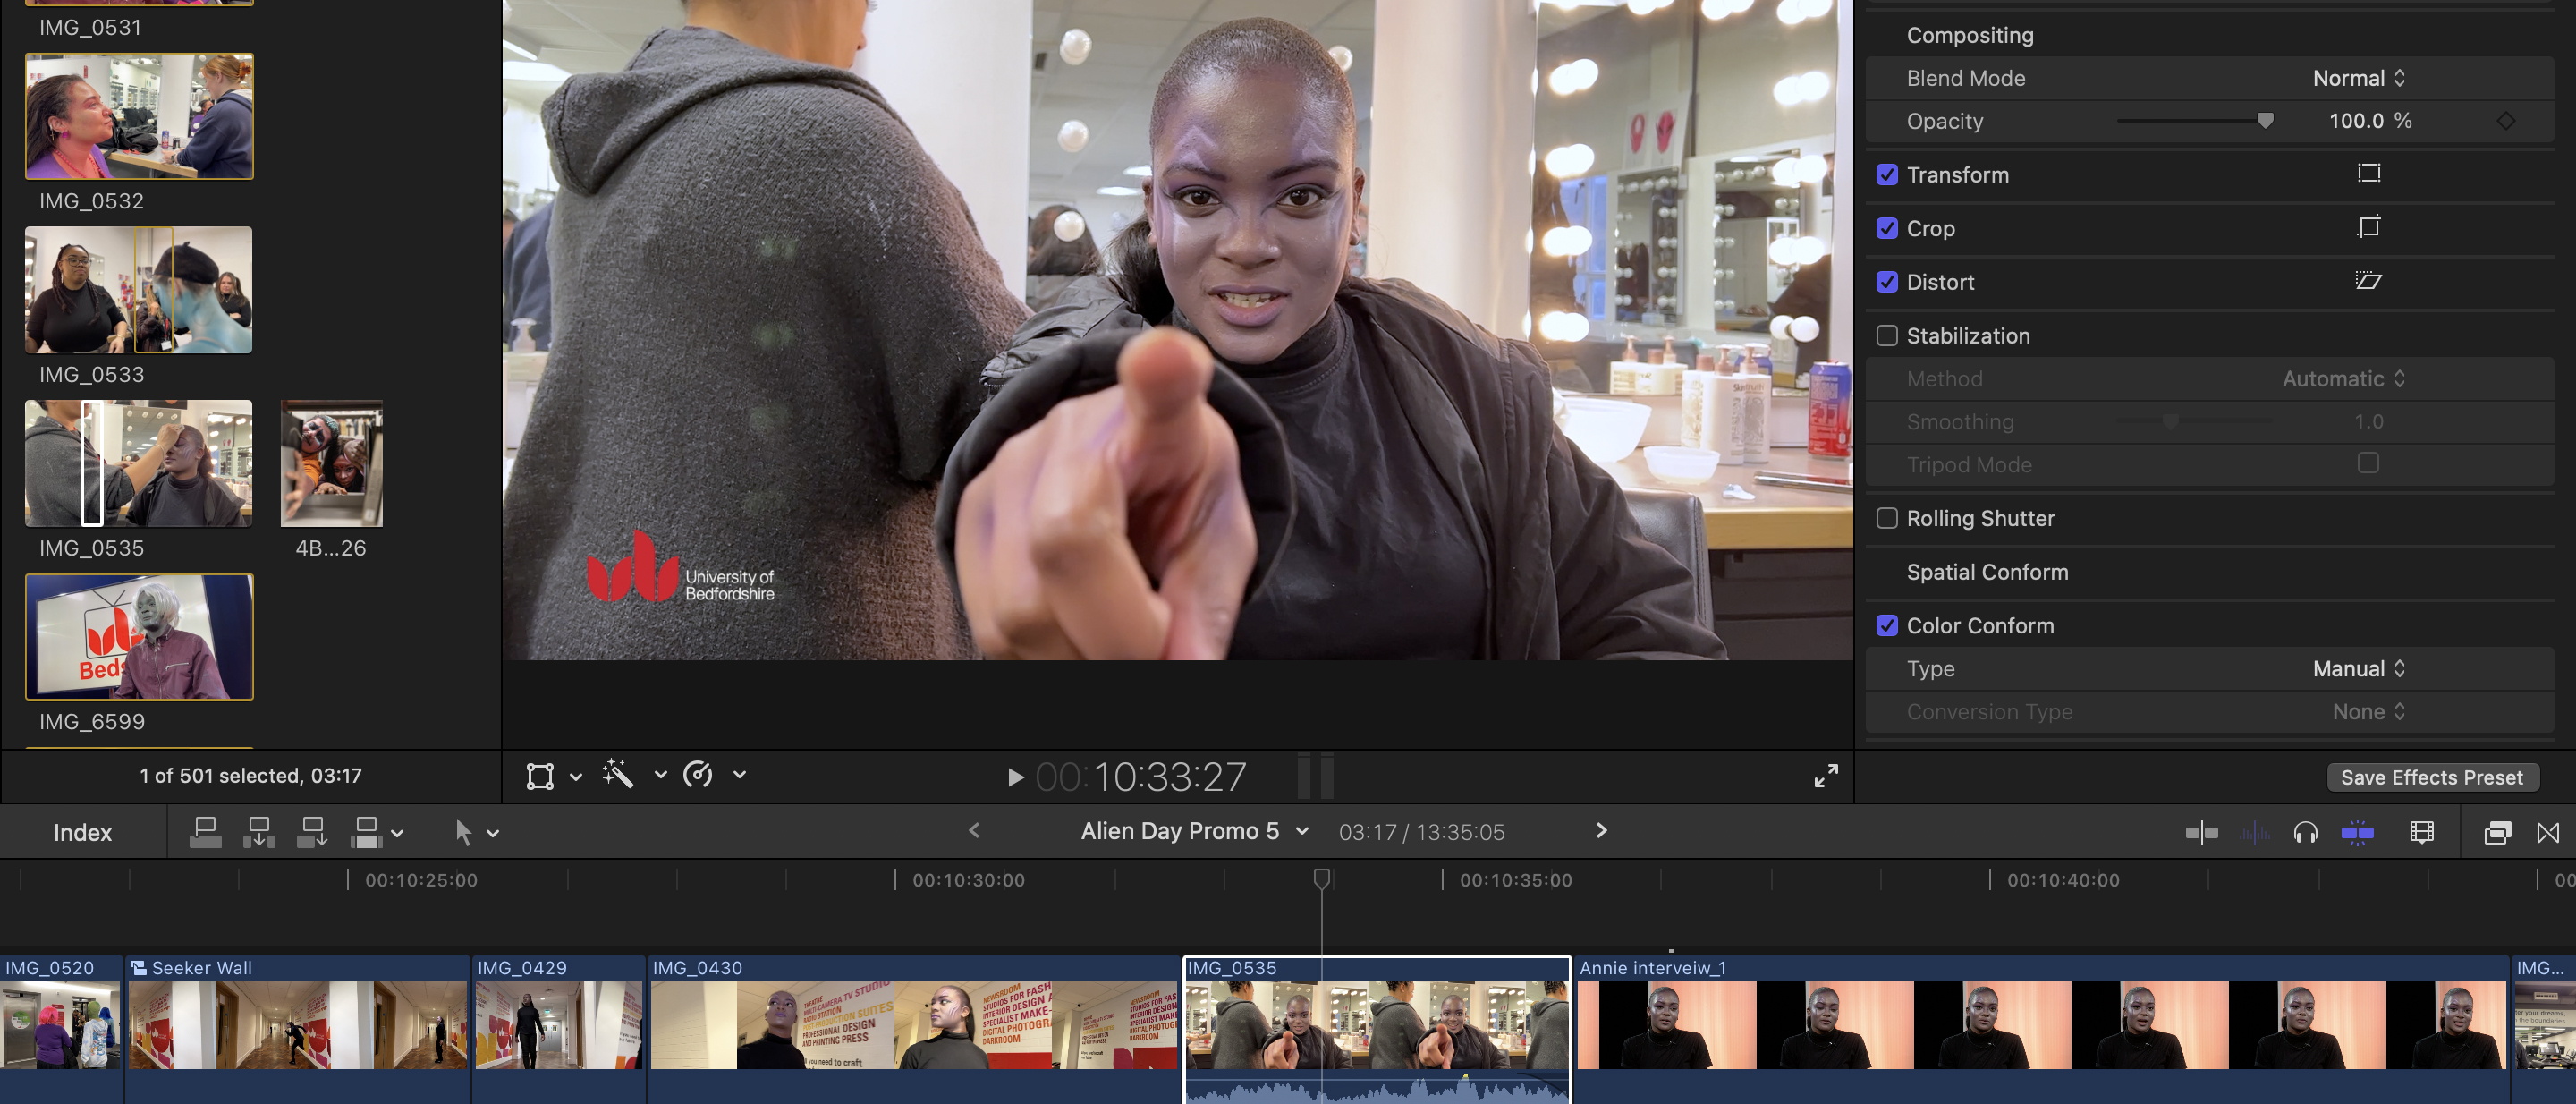
If you compare iMovie and Final Cut Pro side by side then the black and grey workspaces look very similar, with imported assets stored on the left, a timeline at the bottom, and a program monitor (viewer) at the top right. If you’ve used any NLE before then you’ll quickly be able to import clips, pop them in the timeline and intuitively drag trim handles to tweak their duration.
Once you add effects to a clip in the timeline you can adjust their proprieties in the Video Inspector. For example, you can use the Inspector to change the control points of a mask, adjust color, or tweak the many properties on the Green Screen Keyer.
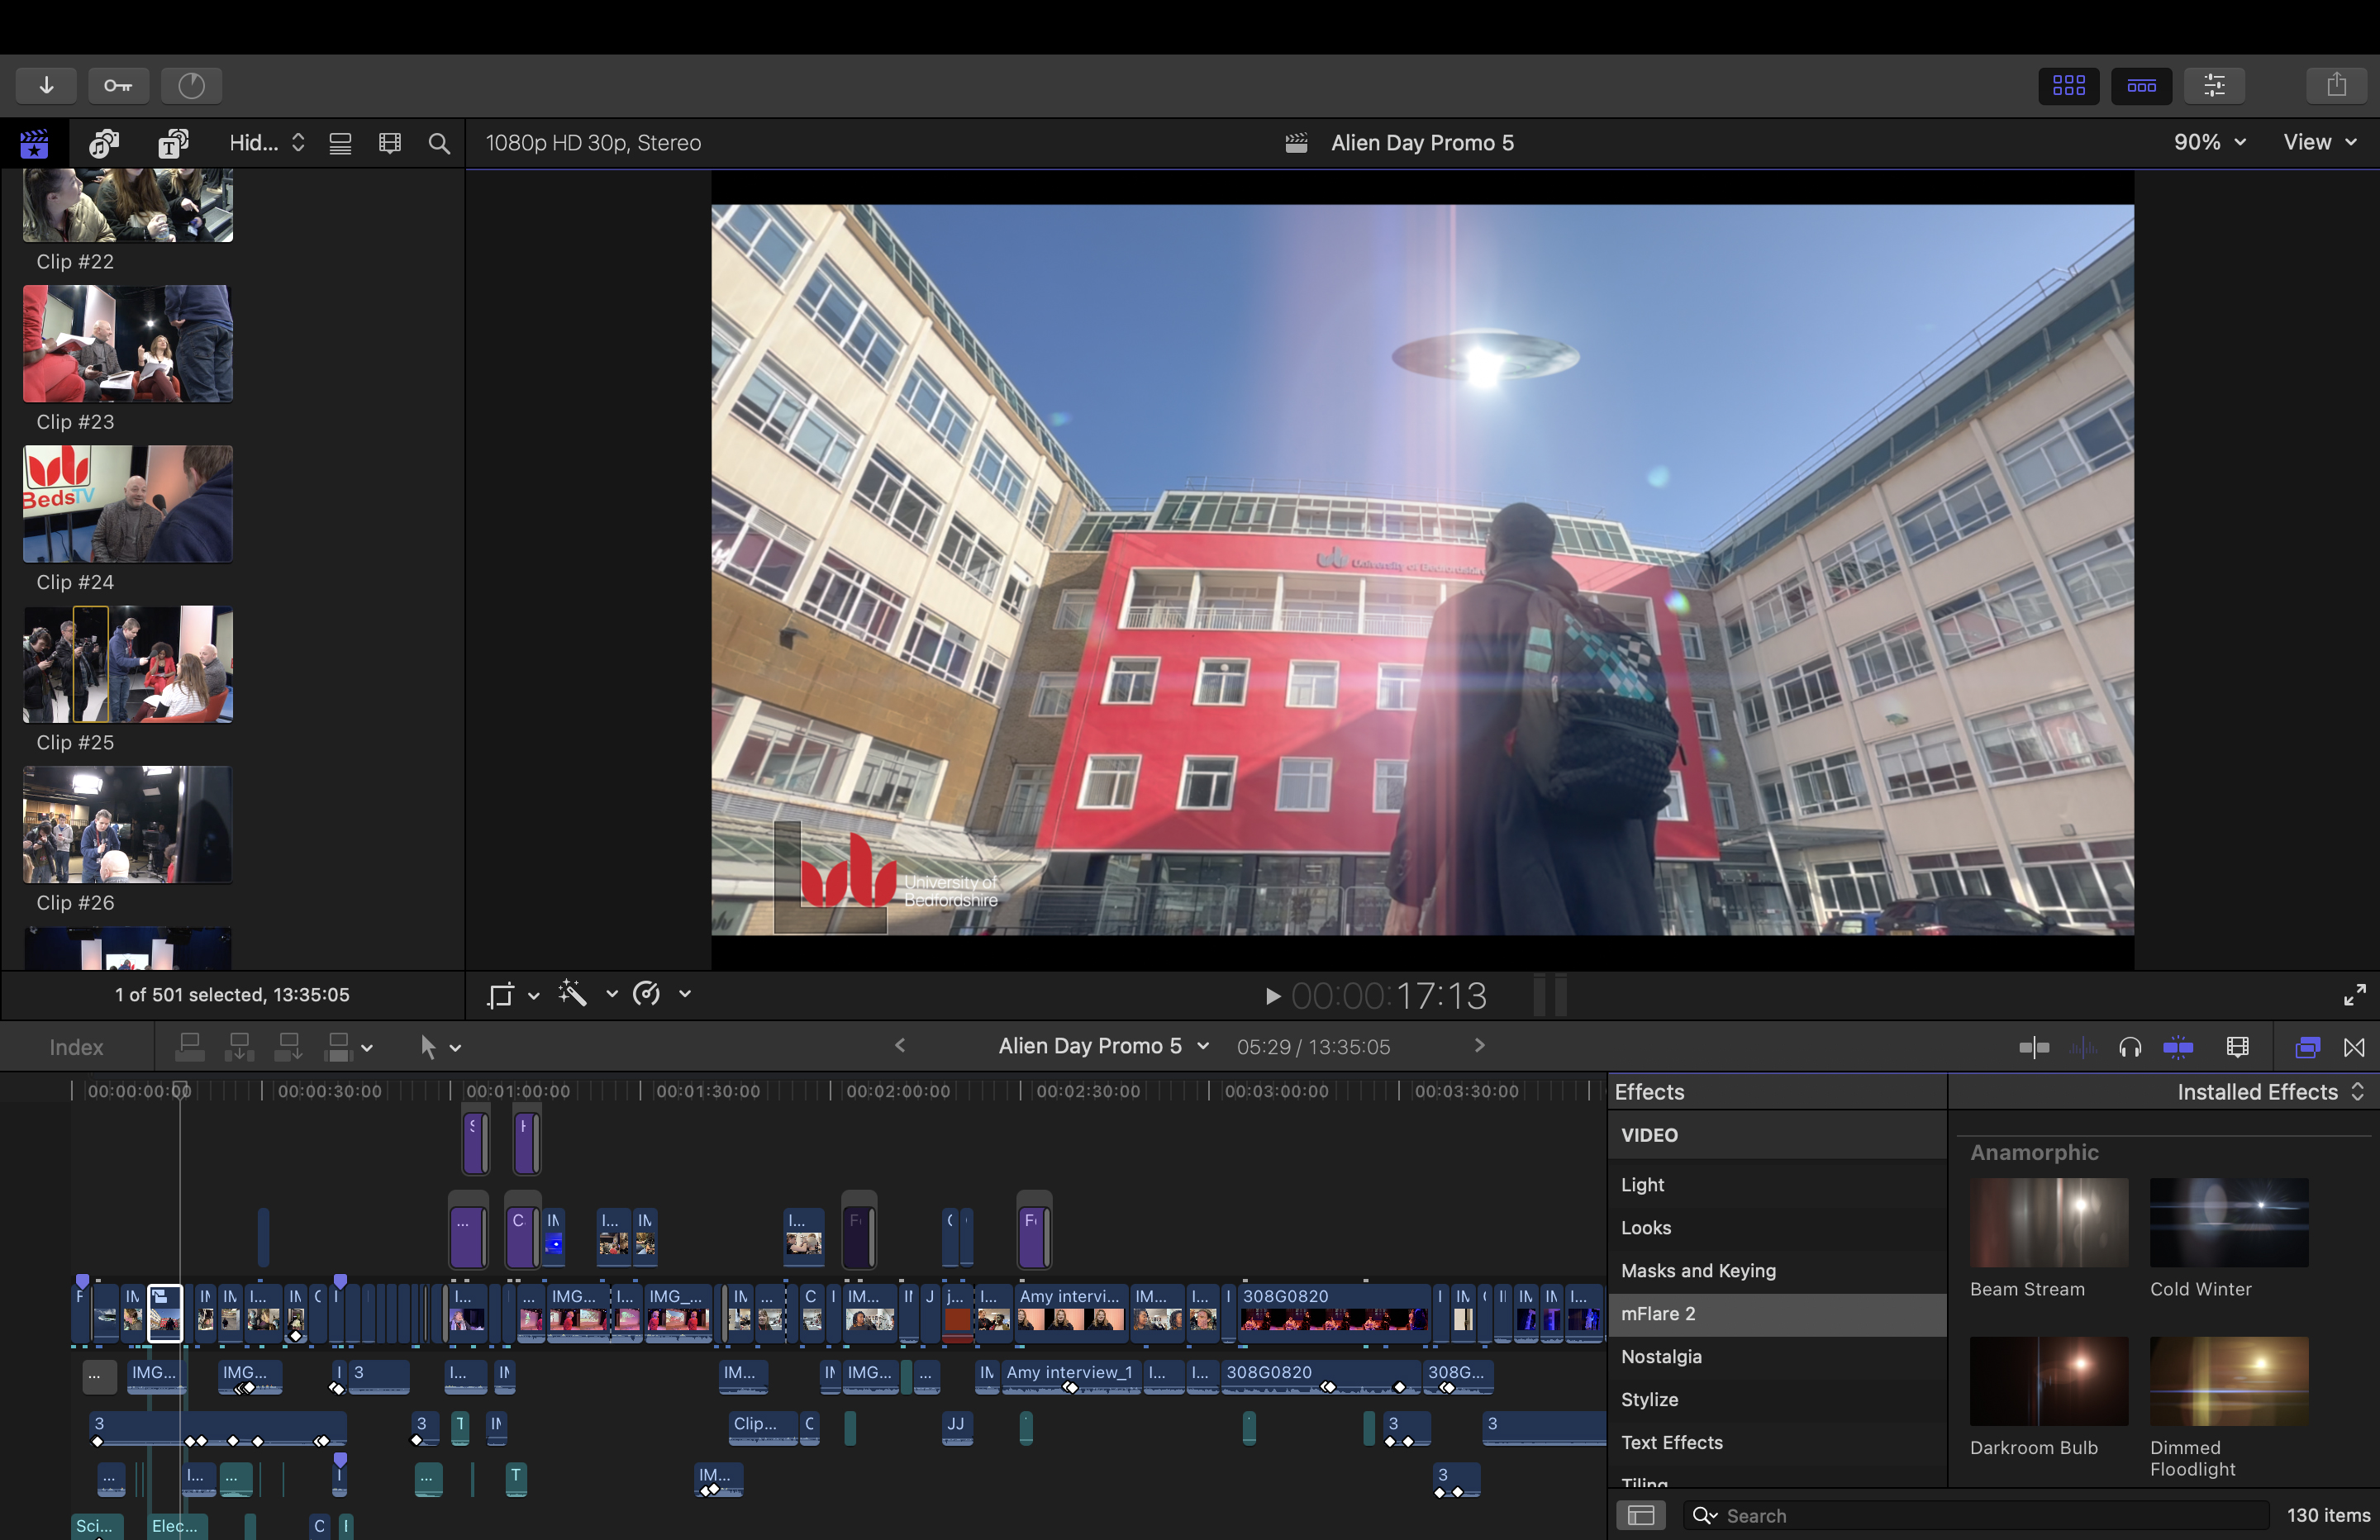
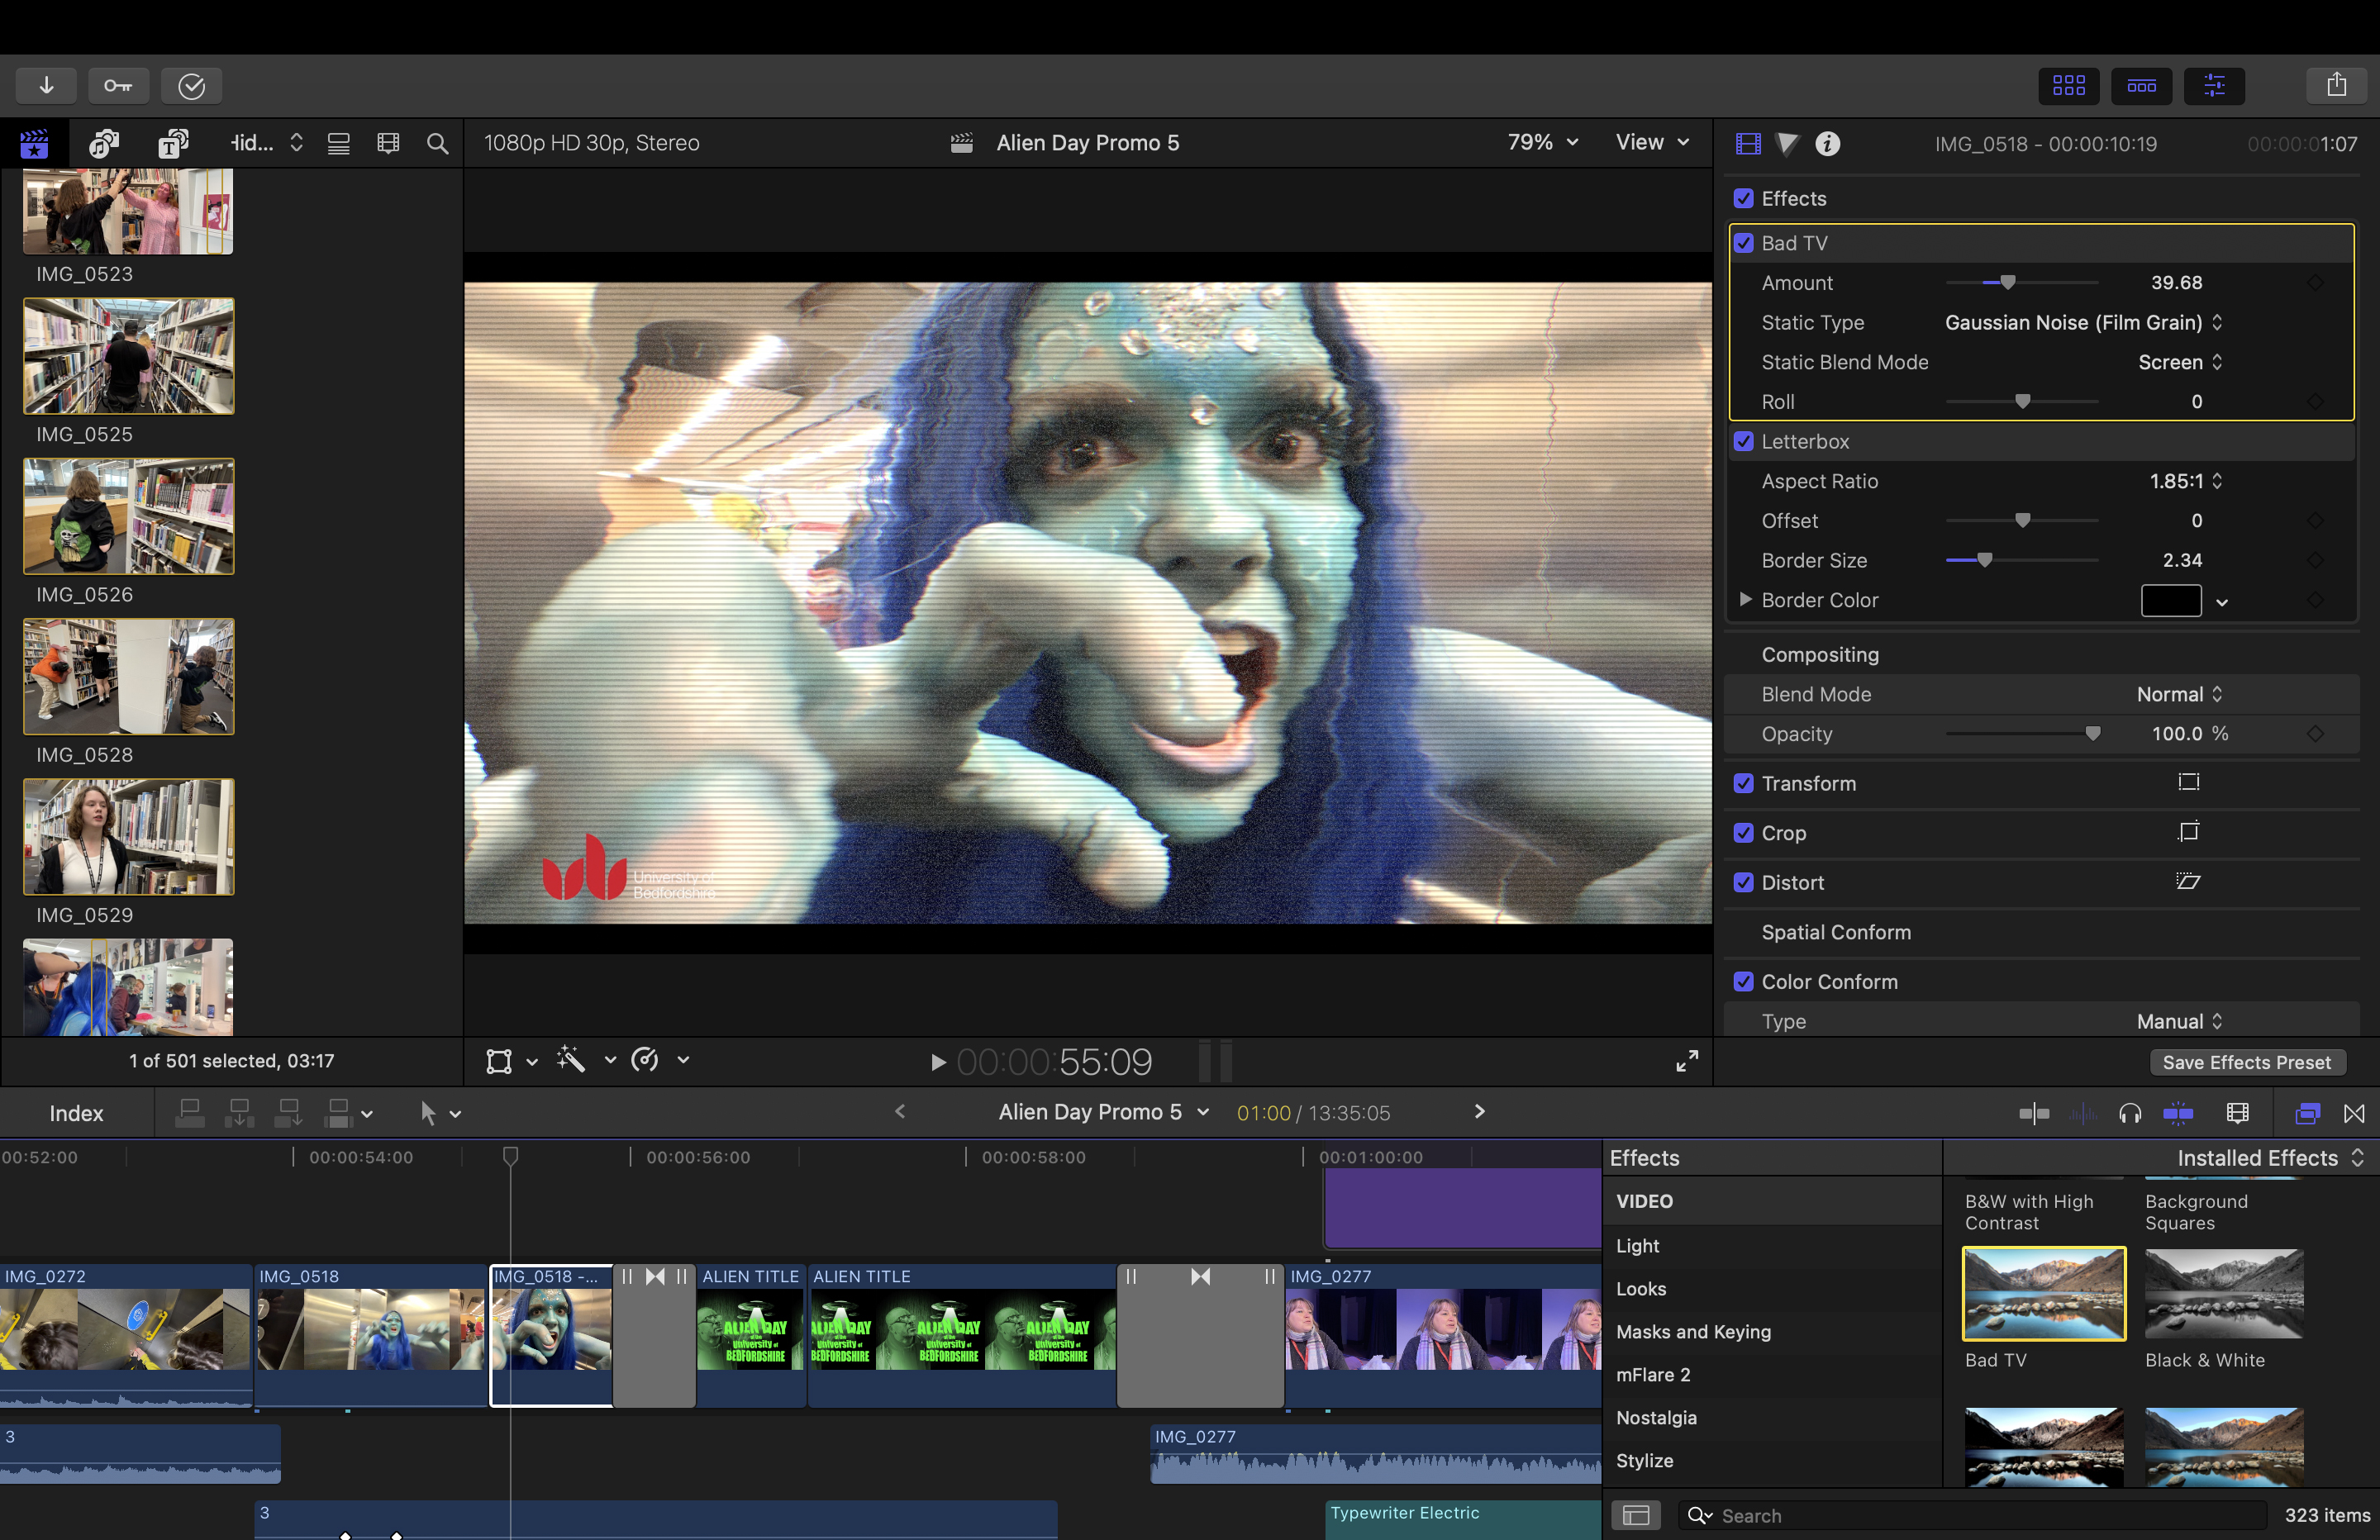
Final Cut has preset workspaces to help you find appropriate tools and panels. For example, if you choose the Color & Effects workspace then you’re presented with the Inspector and the Effects panel with its drag-and-drop thumbnails. Final Cut Pro ships with a wide range of effects that can distort and stylize a clip’s colors and tones.
You can also import third-party plug-ins from suppliers such as MotionVFX to extend Final Cut Pro’s effect repertoire. For example, I enjoy adding sci-fi-style lens flares to footage using MotionVFX’s awesome MFlare2 plug-in. You can even get the lens flares to track an object on screen. Final Cut Pro has plenty of tools to master but it’s great to know that you can expand its toolset if required.
Final Cut Pro X Results
I used to edit in Final Cut Pro on a 2017 iMac but that was beginning to show its age and my footage in Final Cut Pro could skip frames. I currently run Final Cut Pro on a 15-inch Apple MacBook Air. I store the Final Cut Pro library on a highly portable external 2TB LaCie Rugged SSD Pro drive so that I don’t fill up my Mac with video files. Final Cut Pro is optimized to run on my Mac’s M2 chip and it happily plays 4K footage from the LaCie stored library without a stutter.
Final Cut Pro also enables you to work with ApplePro Res footage so you have plenty of information to reveal detail throughout a wide tonal range and grade your colours to perfection.
It will also handle video files from a wide range of cameras such as ARRI, Sony, Panasonic, and Canon including formats such as ARRI Log C, Canon Log 2/Cinema Gamut, Panasonic V-Log, Sony S-Log2/S-Gamut, and Sony S-Log3/S-Gamut3.Cine.
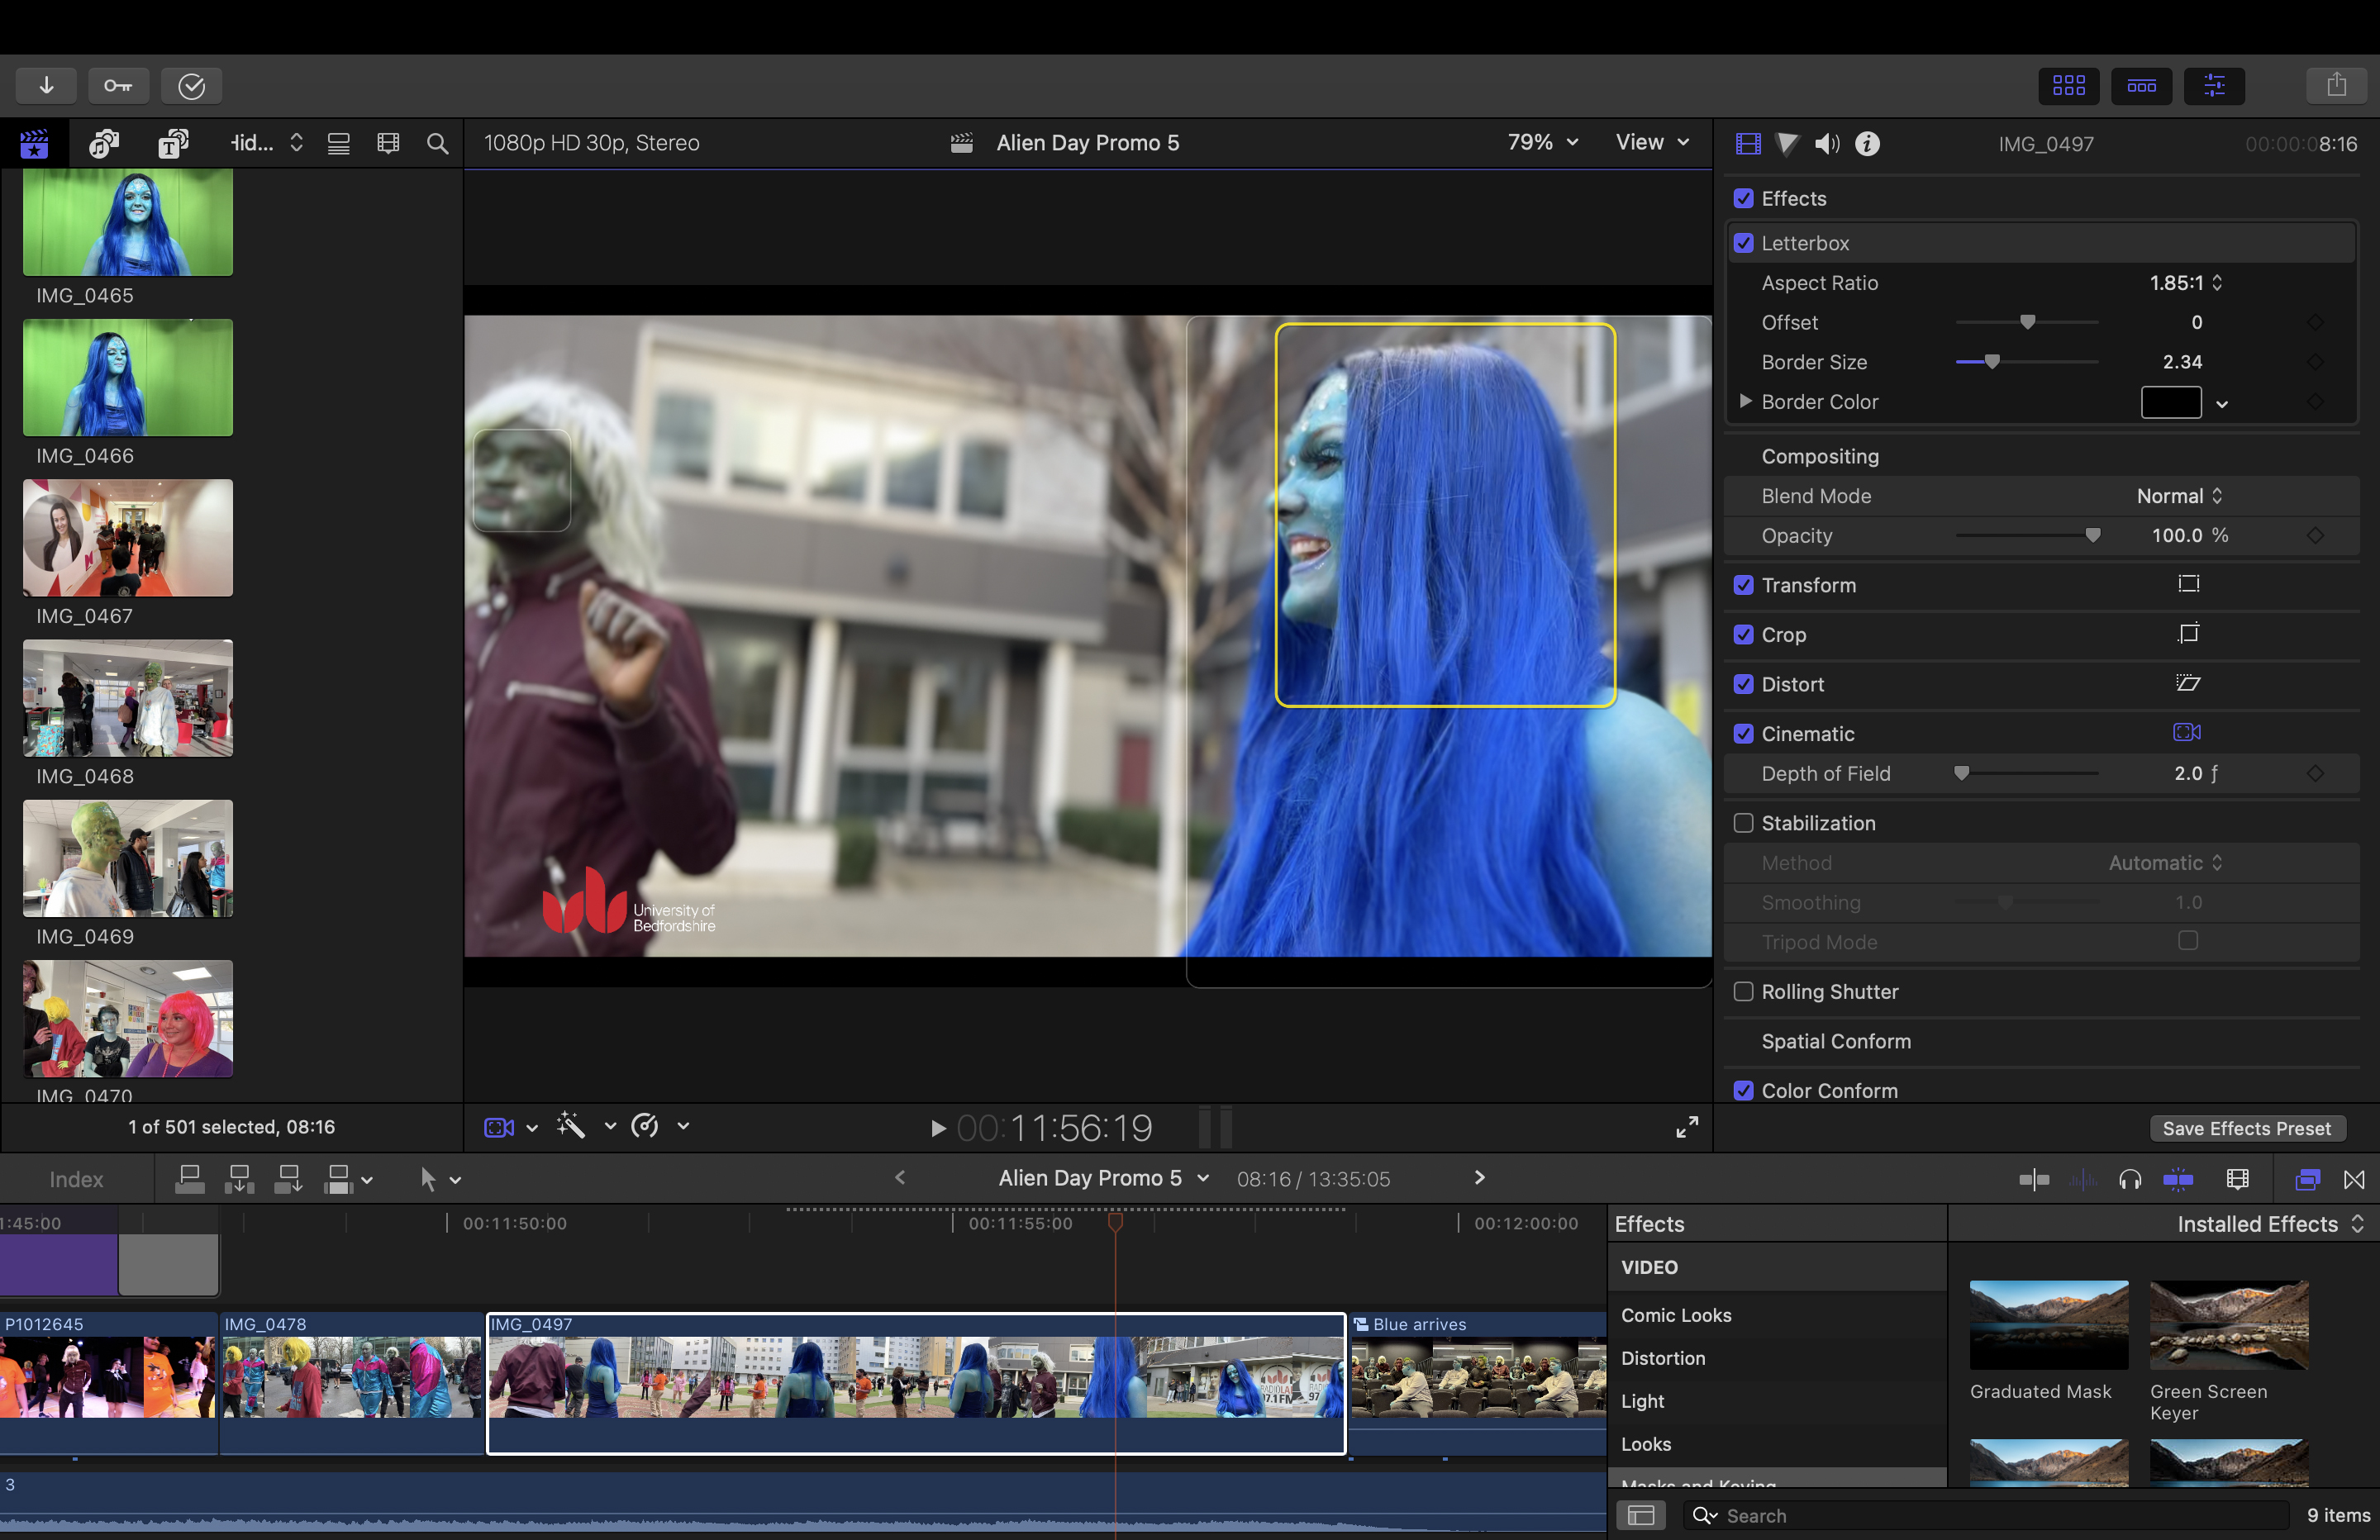
If you shoot in Cinematic mode using the iPhone’s Camera app then you can add a blurred background to a subject. Final Cut Pro enables you to adjust the strength of the blur in post! You can even change the focus point during a Cinematic mode sequence and pull focus from a foreground to background person (or vice-versa). This is a huge attraction if you use an iPhone as your primary asset generator (which I do).
Final Cut Pro X Verdict
As a professional Final Cut Pro editor I could be accused of bias, but I’ve used Final Cut Pro for years because it enables me to deliver slickly-edited videos to happy clients. I’ve used Premiere Pro too (and teach it to university students) but as a dyed-in-the-wool Apple user, Final Cut Pro is a better fit for me. If you’re an iMovie user then there is a time-consuming learning curve to climb to master the many extra tools in Final Cut Pro but the climb is worth it to enjoy the view at the top! If you’re a video editing novice then start with iMovie, or check out Movavi Video Editor Plus with its generous (and larger) collection of filters and effects.
George has been freelancing as a photo fixing and creative tutorial writer since 2002, working for award winning titles such as Digital Camera, PhotoPlus, N-Photo and Practical Photoshop. He's expert in communicating the ins and outs of Photoshop and Lightroom, as well as producing video production tutorials on Final Cut Pro and iMovie for magazines such as iCreate and Mac Format. He also produces regular and exclusive Photoshop CC tutorials for his YouTube channel.
