How to build a photo booth
Liven up the party with a selfie station!
The best camera deals, reviews, product advice, and unmissable photography news, direct to your inbox!
You are now subscribed
Your newsletter sign-up was successful
Set up a photo booth with your DSLR and a Speedlite
Time needed: One hour
Skill level: Intermediate
Kit needed: Tripod • Flashgun • Cable or wireless release • Photoshop • Lightroom
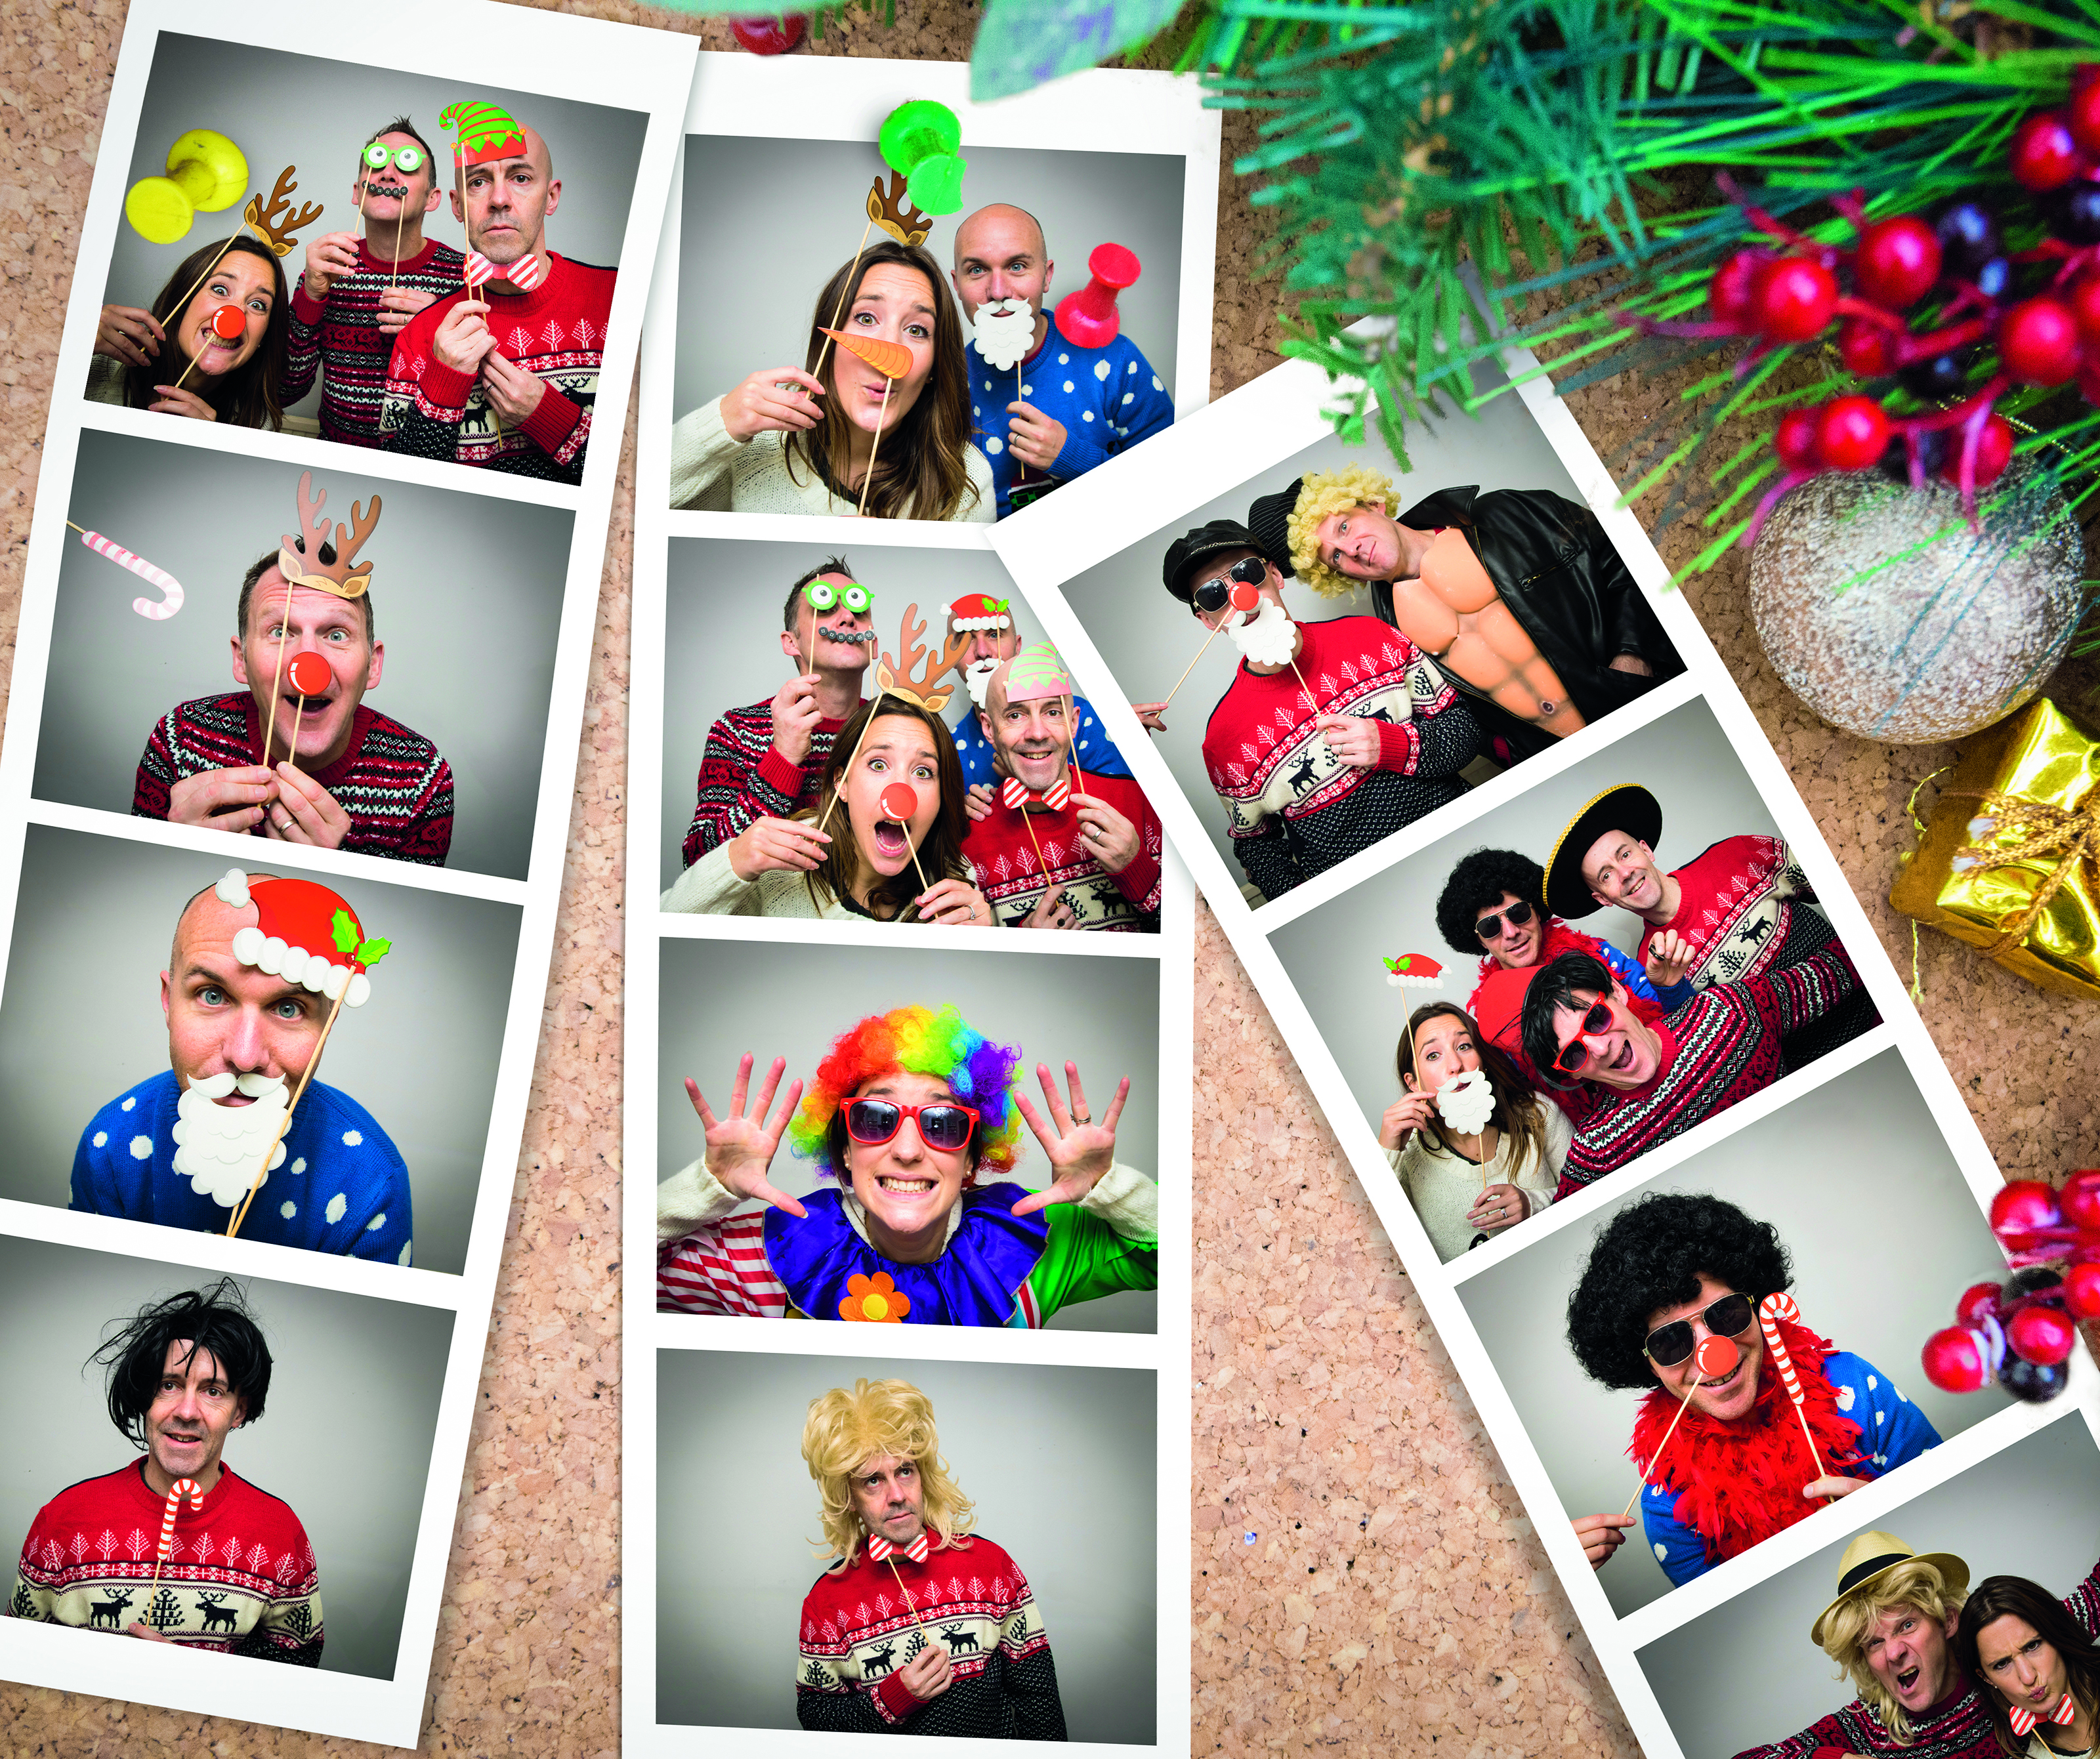
This festive season, why not spice up your parties by setting up a simple photo booth? Armed with a bag of costumes, some home-brewed ale and a few questionable wigs, the PhotoPlus team did just that, descending on operations editor Adam’s house for an afternoon of selfie madness.
Anyone can set up a photo booth, but if you want to get the best quality photos then it’s worth going the extra mile by calling upon a few simple camera and lighting skills. Over the next few pages we’ll explain how it’s done, from the gear you need, to the best way to light your guests.
It’s the lighting that can really elevate your photo booth beyond the ordinary. Sound lighting will make your guests look great, and that means they’ll keep coming back for more. At big events and fancy balls you’ll often see a full studio lighting set up for this kind of thing. But a more modest approach can still give great results. Here a single Speedlite – bounced off the ceiling and wall behind the camera – provides a bank of even, flattering illumination.
Article continues belowAnother way you can impress your guests is by setting up a rolling slideshow, so they can see their antics displayed on a screen moments after they’ve been taken. Then, once the party is over, you can go through the set of images, edit out any nudity, and put together a festive collage of your favourite shots. We’ll explain how over the page…
STEP BY STEP: Build your own photo booth
The gear, camera settings and flash controls for great portraits of your party guests
01 PICK YOUR SPOT
First we need a space to shoot – ideally pick a spot that’s out of the way of the rest of the party. Look for a plain backdrop – a clear wall is ideal, but if not hang up a board or sheet.
The best camera deals, reviews, product advice, and unmissable photography news, direct to your inbox!
02 ANGLE YOUR FLASH
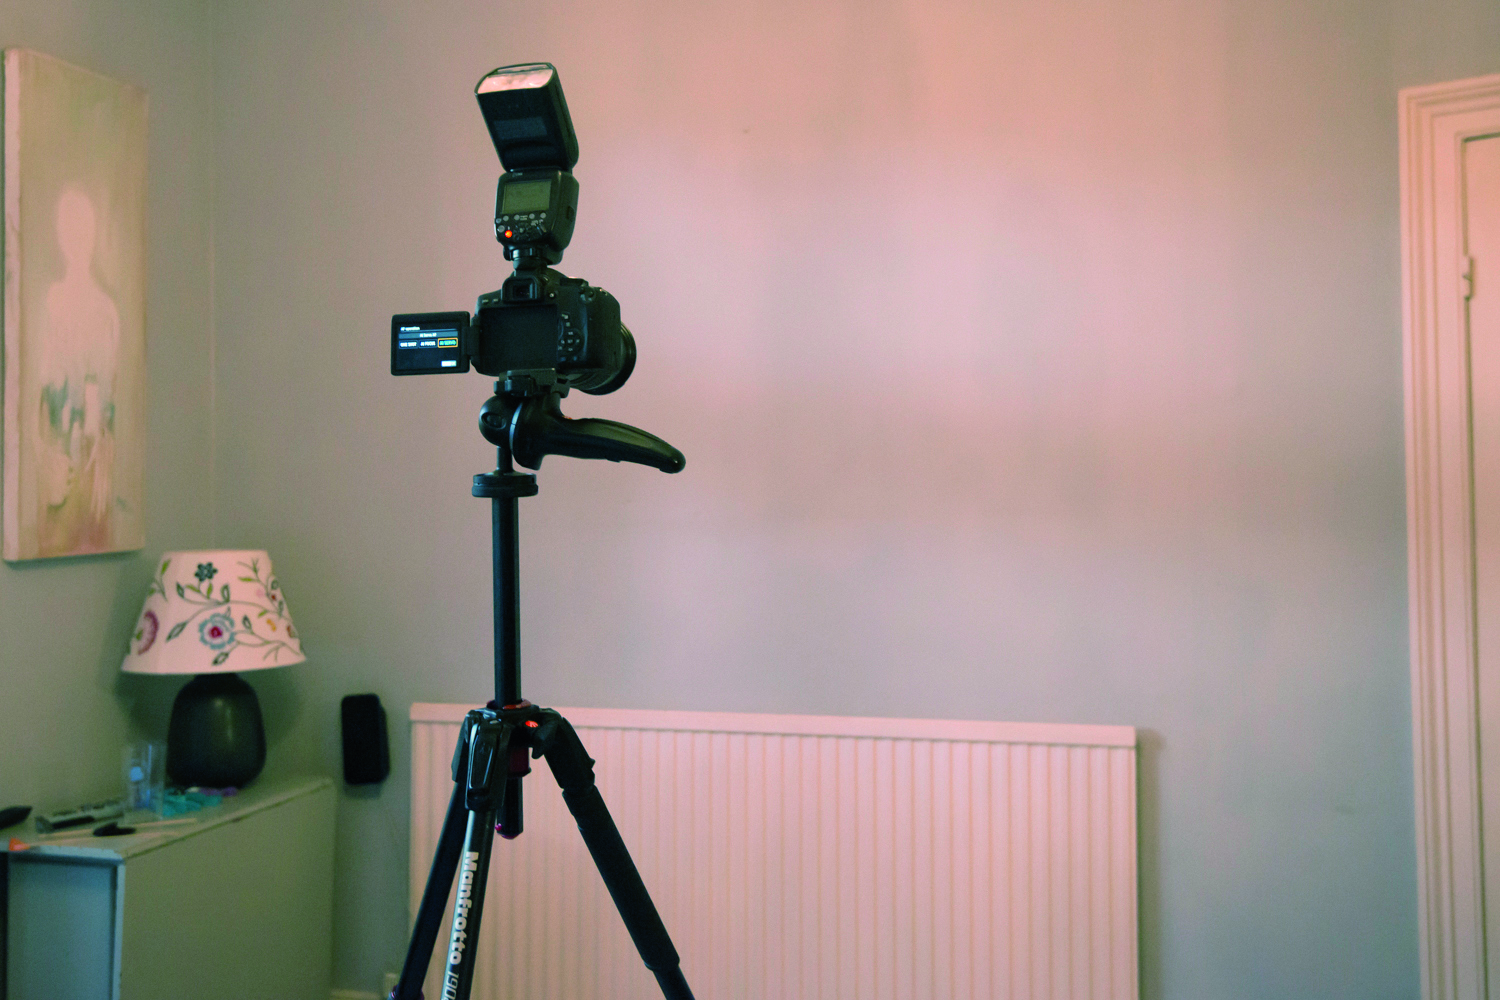
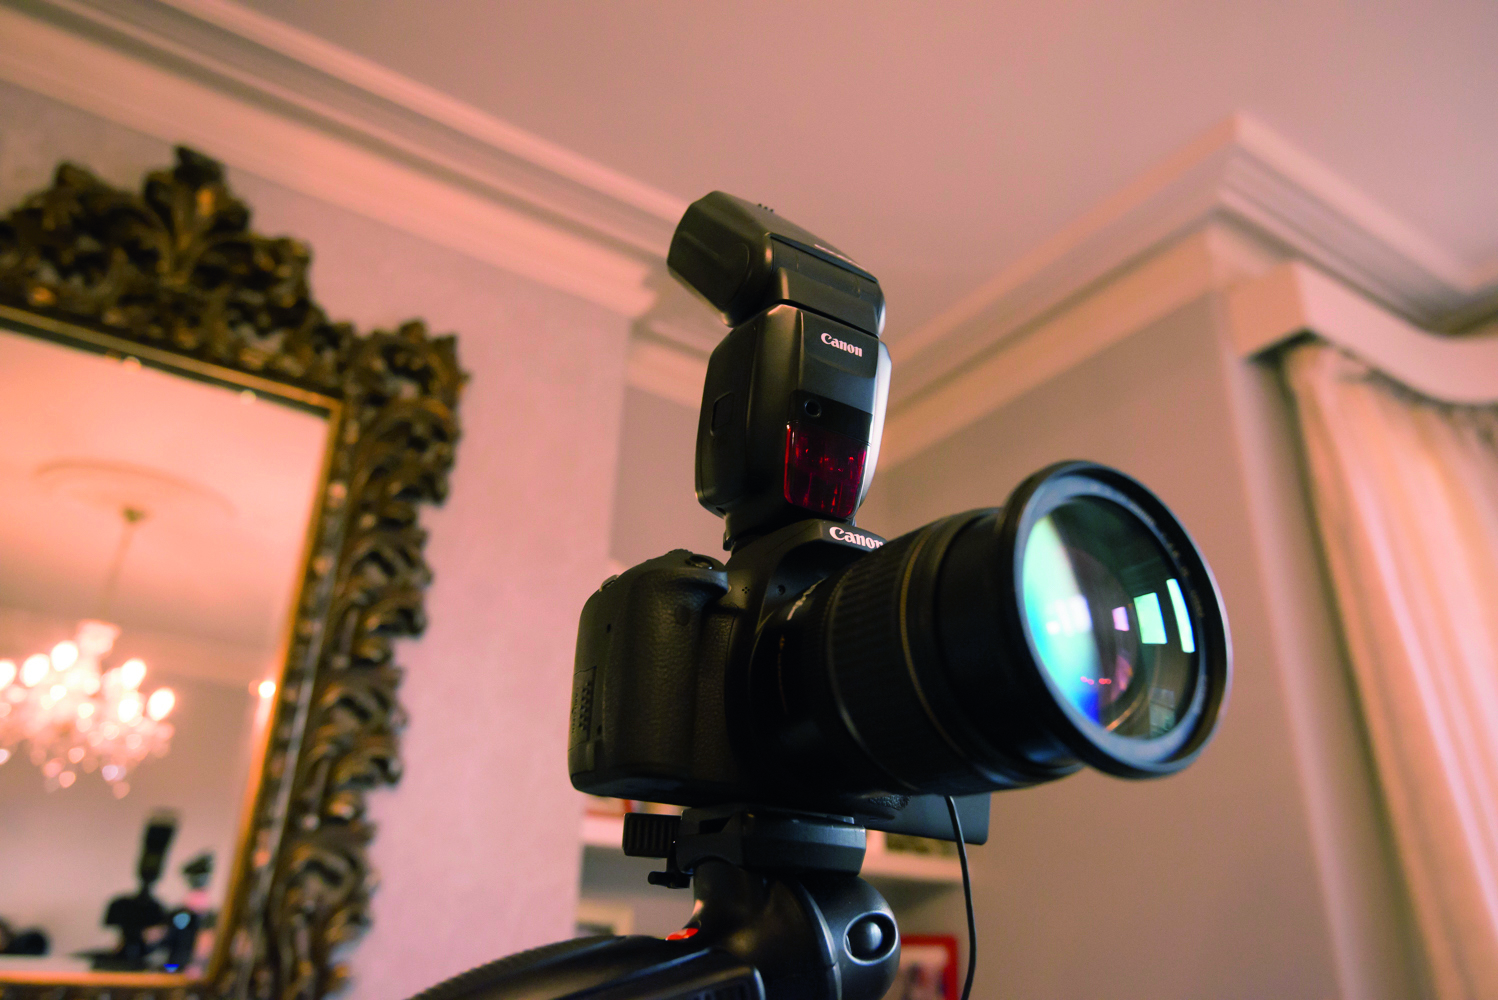
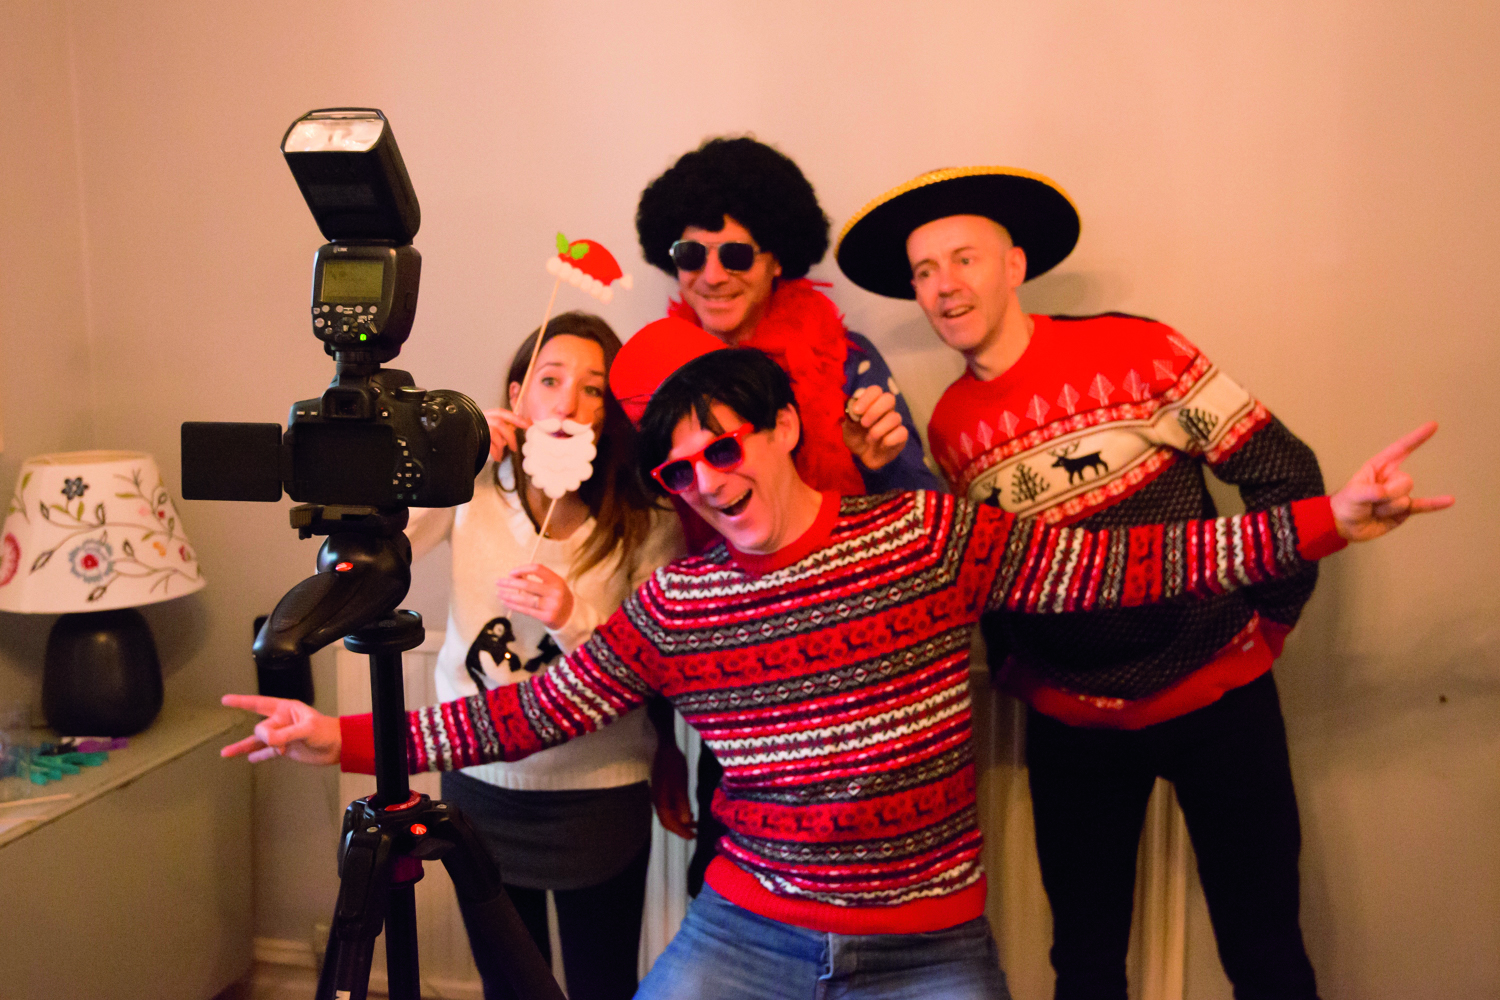
Set the camera up on a tripod and attach a Speedlite. Angle the head up and behind the camera to bounce light off walls and ceiling to produce softer, more even light than if the flash was fired directly at the guests.
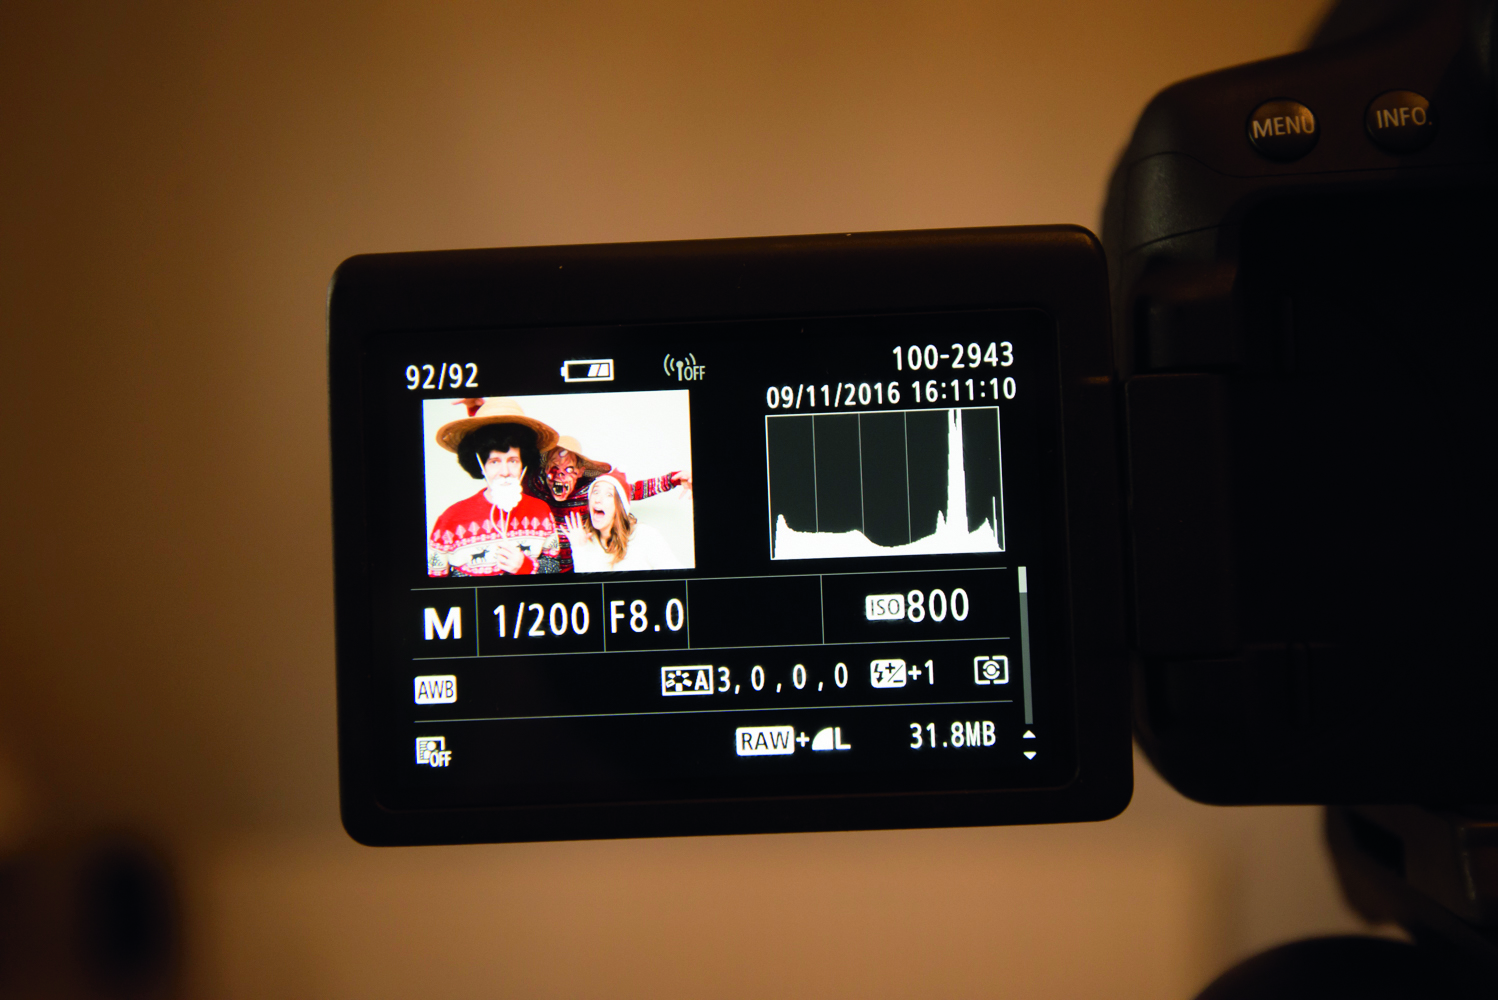
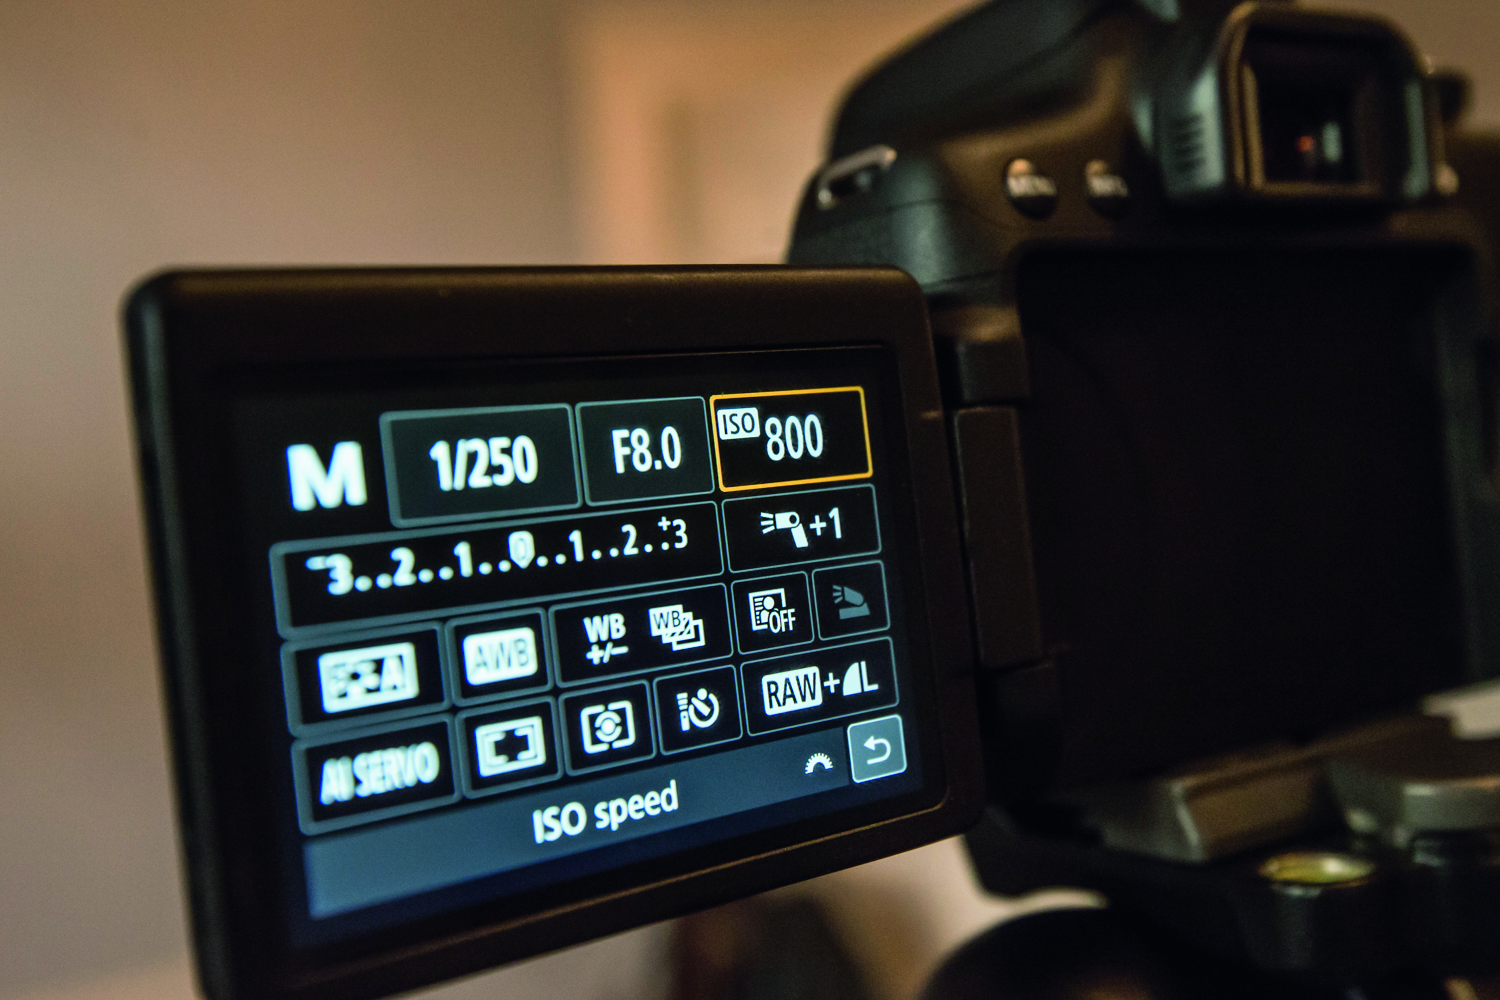
You might have noticed that our camera settings show an ISO of 800. But why use such a high ISO (and consequently result in images with increased noise) when our flash is capable of an output that would allow ISO100? It’s a practical decision. We want the flash to be able to recycle quickly and we don’t want to spend the party changing batteries. By using a higher ISO than normal we can constrain the flash to a ISO800 is acceptable as we’re not going to be making huge prints here.
03 SET YOUR EXPOSURE
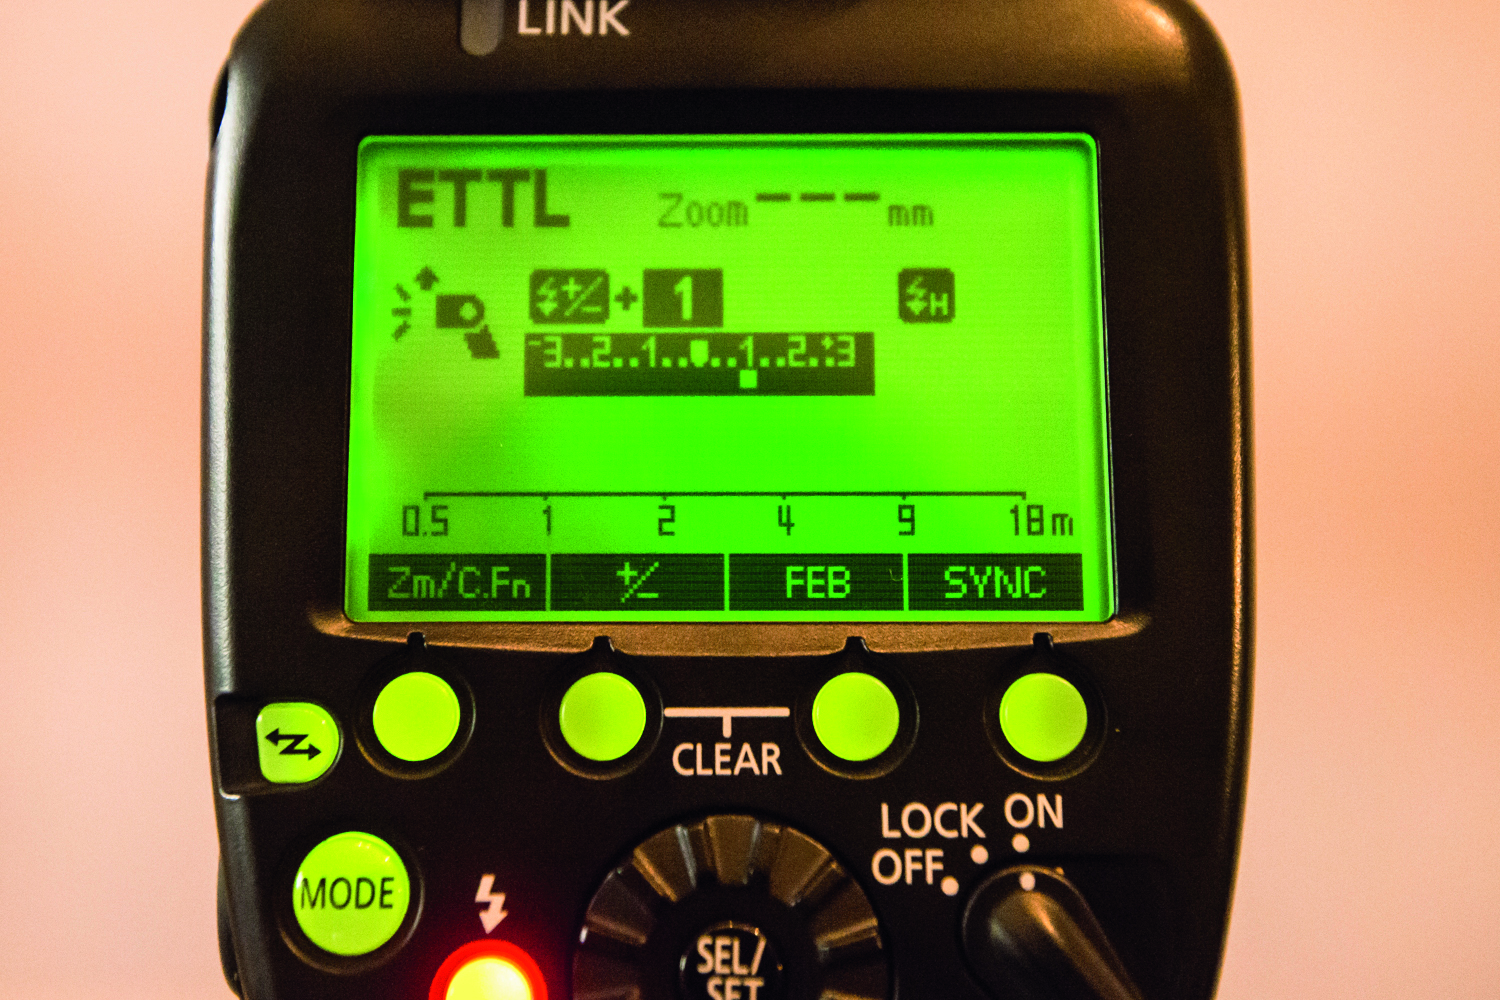
Put the flash in E-TTL mode then set your DSLR to Manual exposure mode with the shutter speed at 1/200 sec, aperture at f/8 and ISO800; this way the flash output will adapt to the exposure settings.
04 PUMP UP THE POWER
At this point take a couple of test shots to perfect your settings. Bouncing flash like this can weaken the output and lead to underexposure, in which case use flash exposure compensation to increase the output.
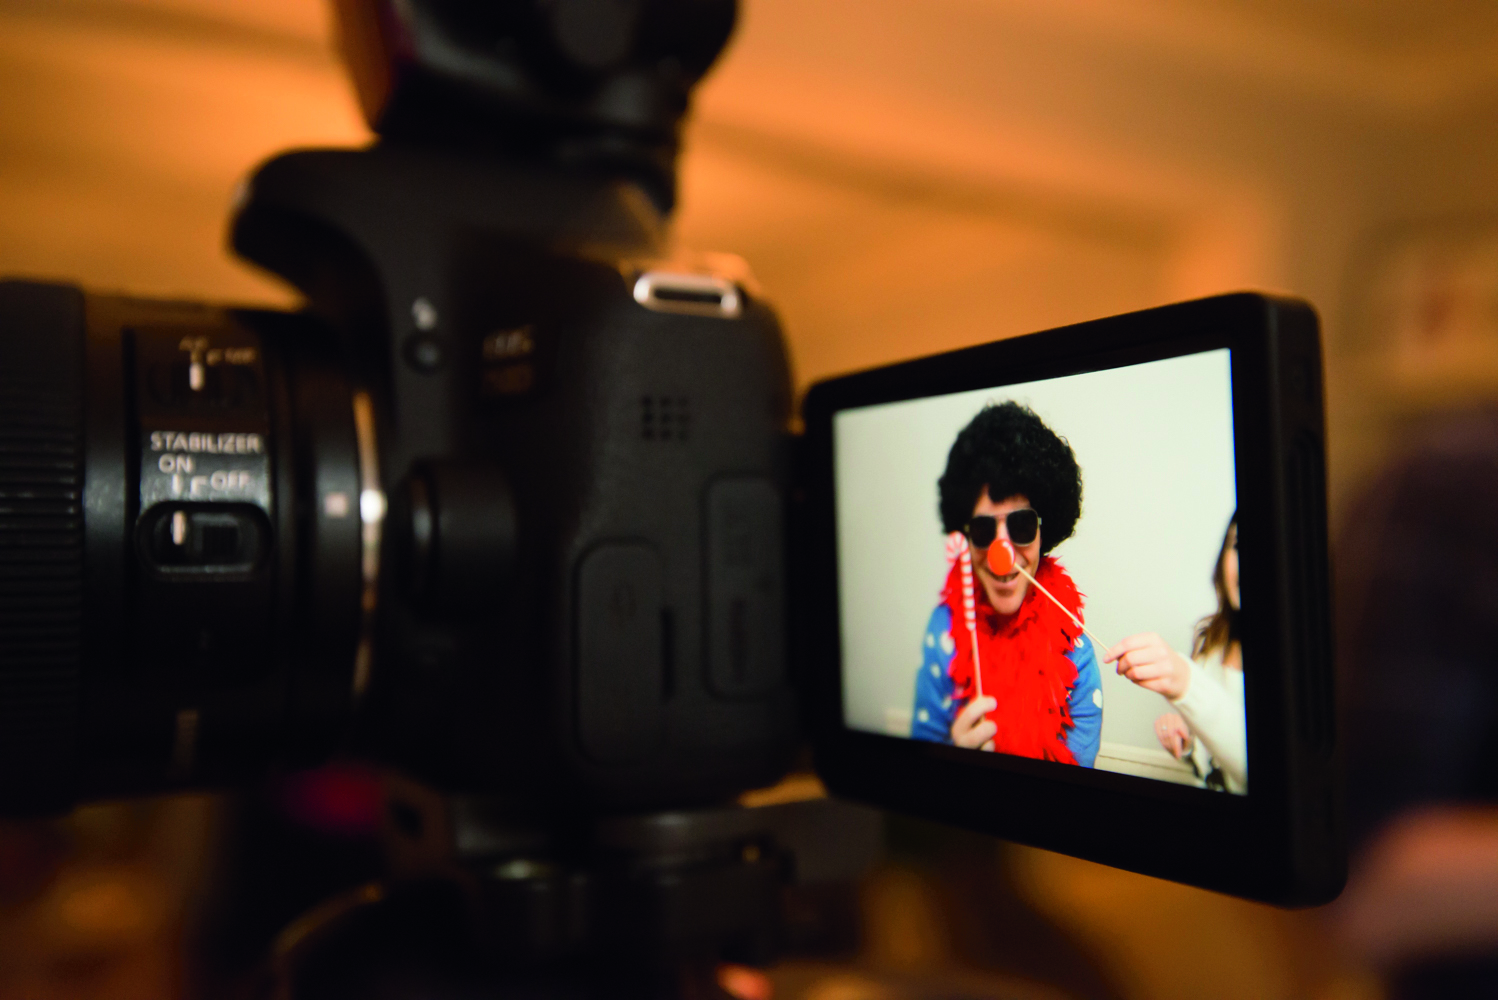
It’ll make it easier for the guests if they can see themselves while shooting, so it helps if your camera has a flip-out screen. If not, you could perhaps hook your DSLR up to a tablet or TV and display the Live View feed. When your camera is in Manual mode, Live View uses ‘exposure simulation’ to show how the scene will look. But it only meters the ambient light and doesn’t account for the Speedlite, so the feed might be very dark. Consider disabling exposure simulation for a clearer picture, if your DSLR has this option.
05 USE A RELEASE
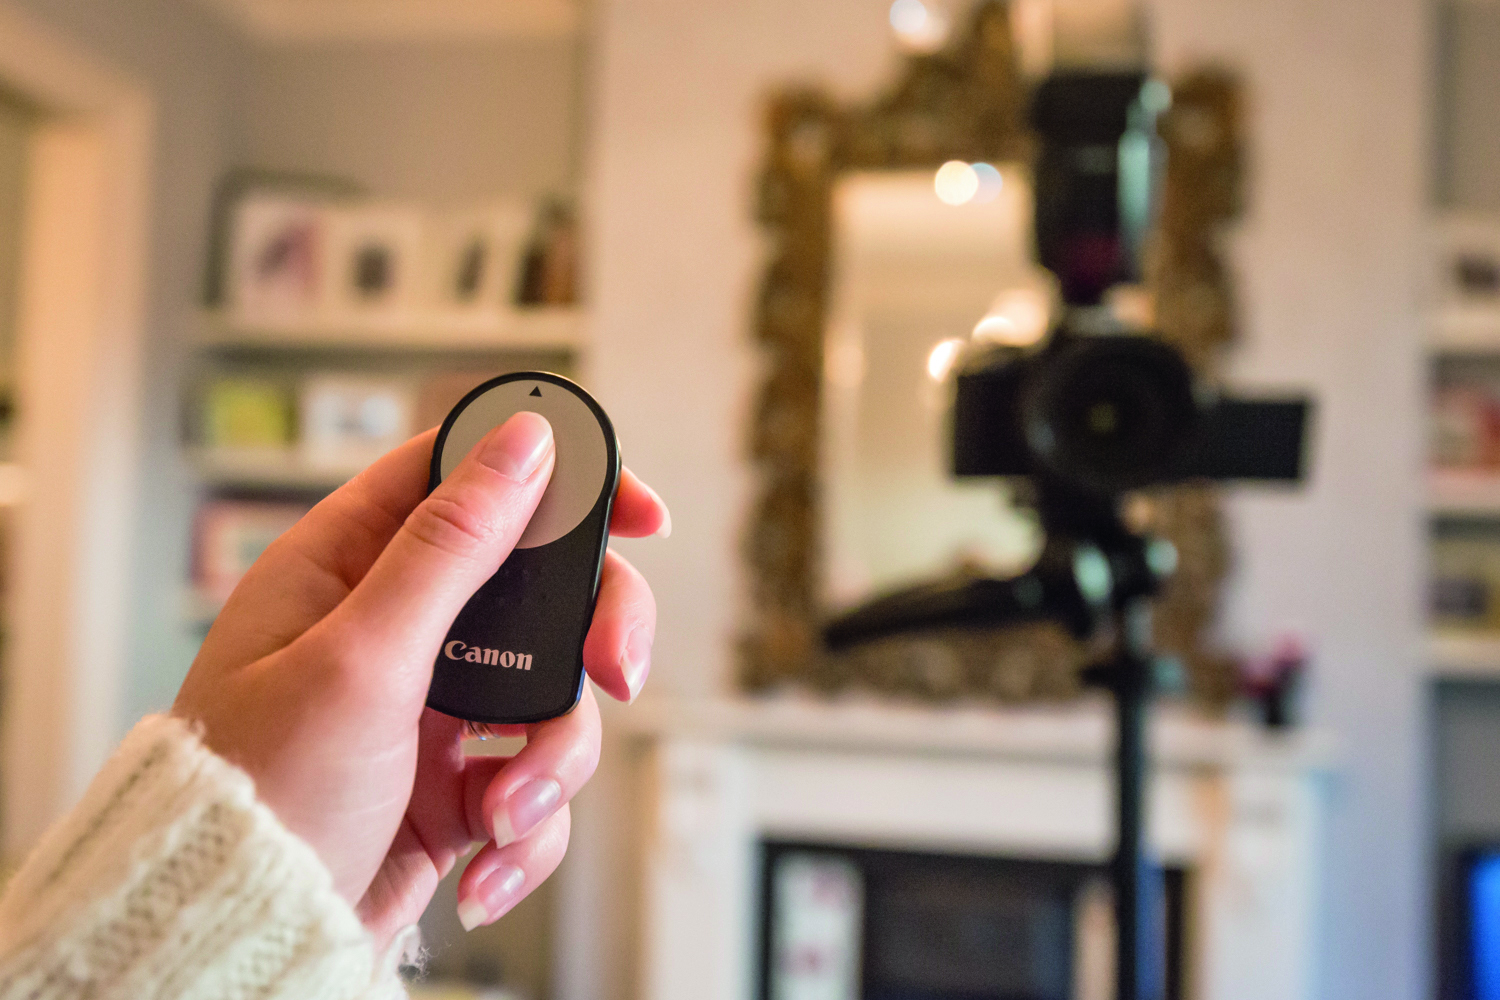
A wireless or cable release stops the camera getting nudged and makes it easier for your guests. Some remote controls use an infrared signal that will trigger a variety of DSLRs.
06 PARTY ON
Now with everything set up, sit back and let the fun begin! If you like, you could make the area more booth-like by screening it off from the rest of the party. Why not add festive decorations and signs too?
TOP TIPS: Photo booth advice
The right props and camera settings can make all the difference
01 GET DRESSED UP
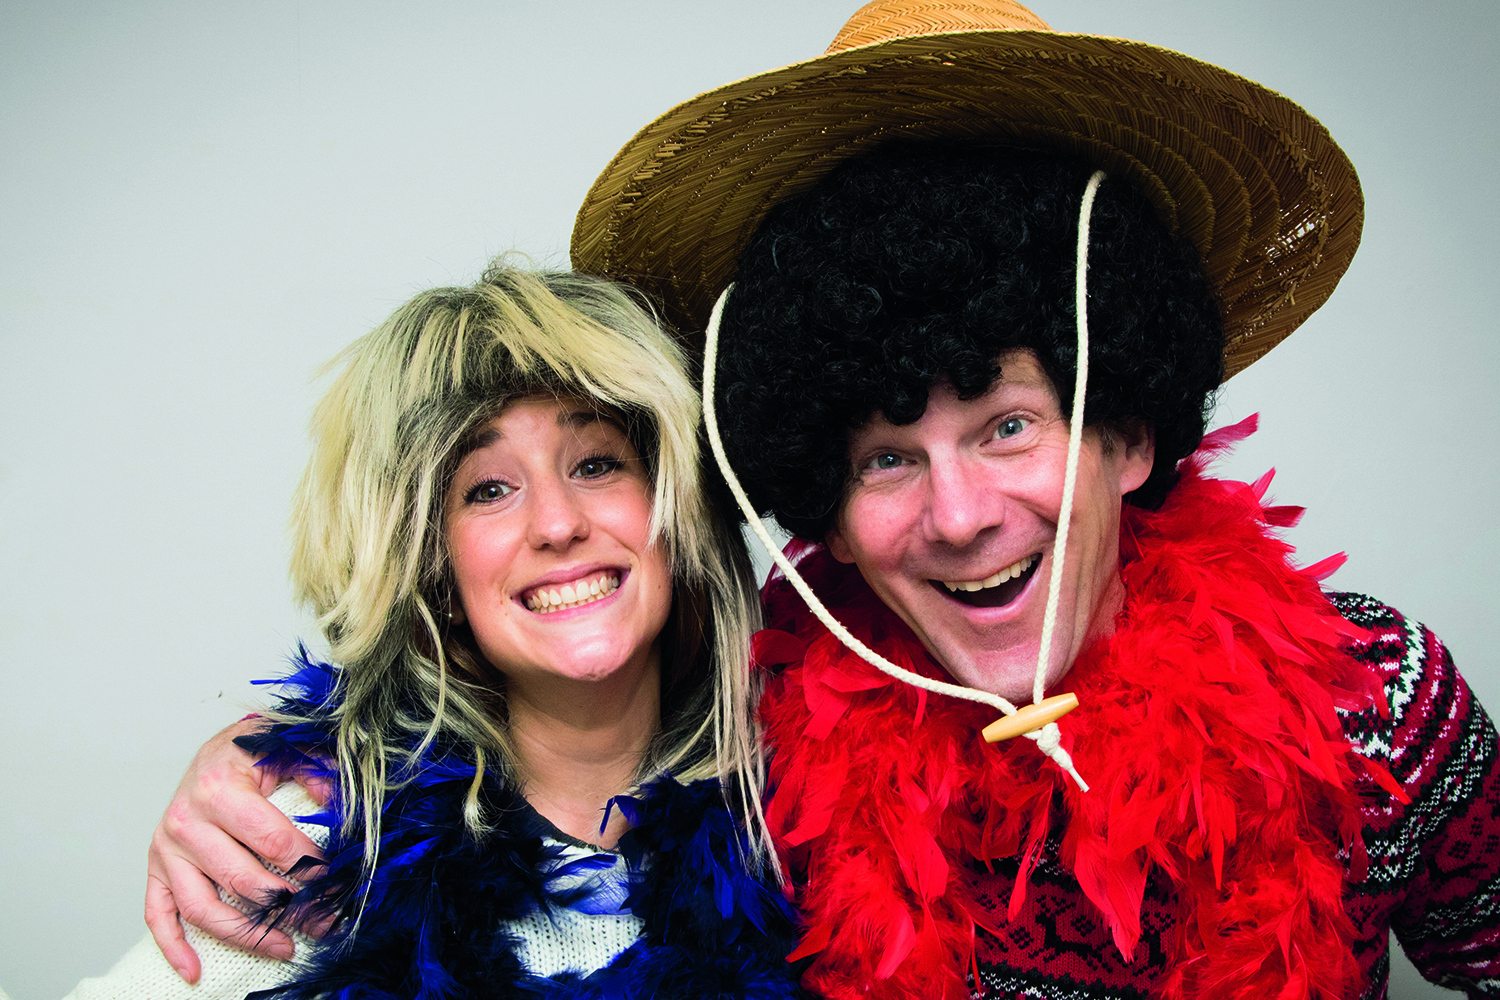
A good selection of costumes can bring a shoot like this to life, as well as add a little extra colour to your photos. Alternatively, why not add a chalk board for guests to write messages on?
02 USE A PHOTO BOOTH KIT
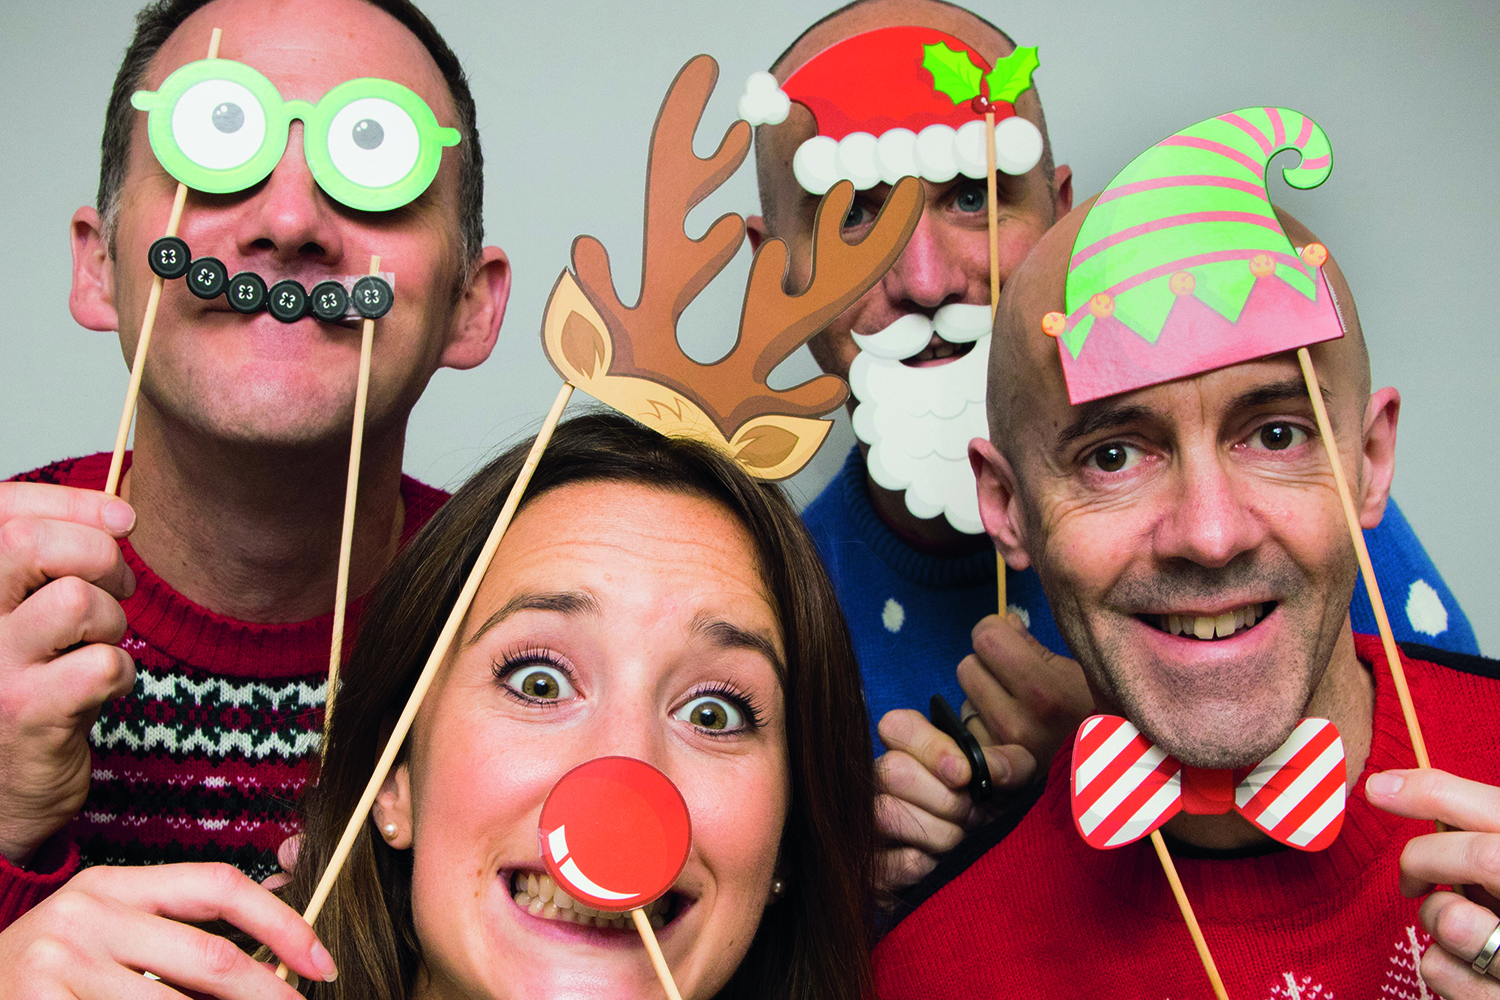
A simple photo booth set with cards attached to sticks is a fun, inexpensive option. Kits like this can be bought online. They usually come packed flat, so you have to stick the cards to the sticks. We were rather surprised at how good they looked in the photos.
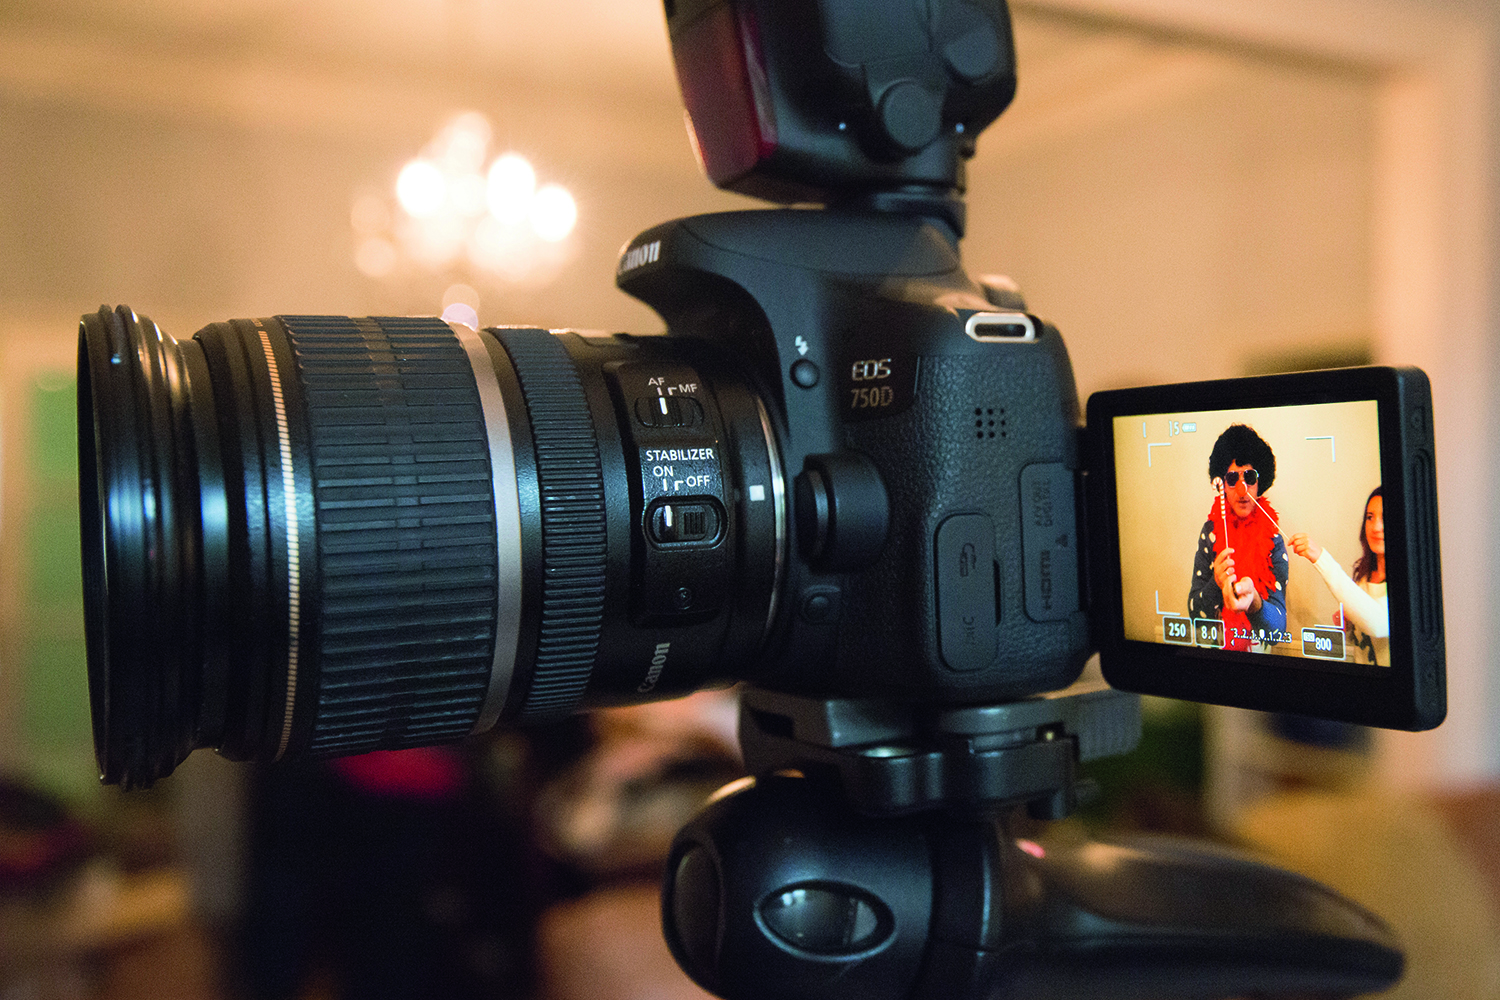
03 LENSES AND FRAMING
A fairly wide focal length is best for this kind of shoot – our Tamron 17-55 zoom here was set to 21mm (on a crop-sensor 750D). Frame a little loosely as your guests may not always manage to get into the perfect position – you can always crop in tighter later on.
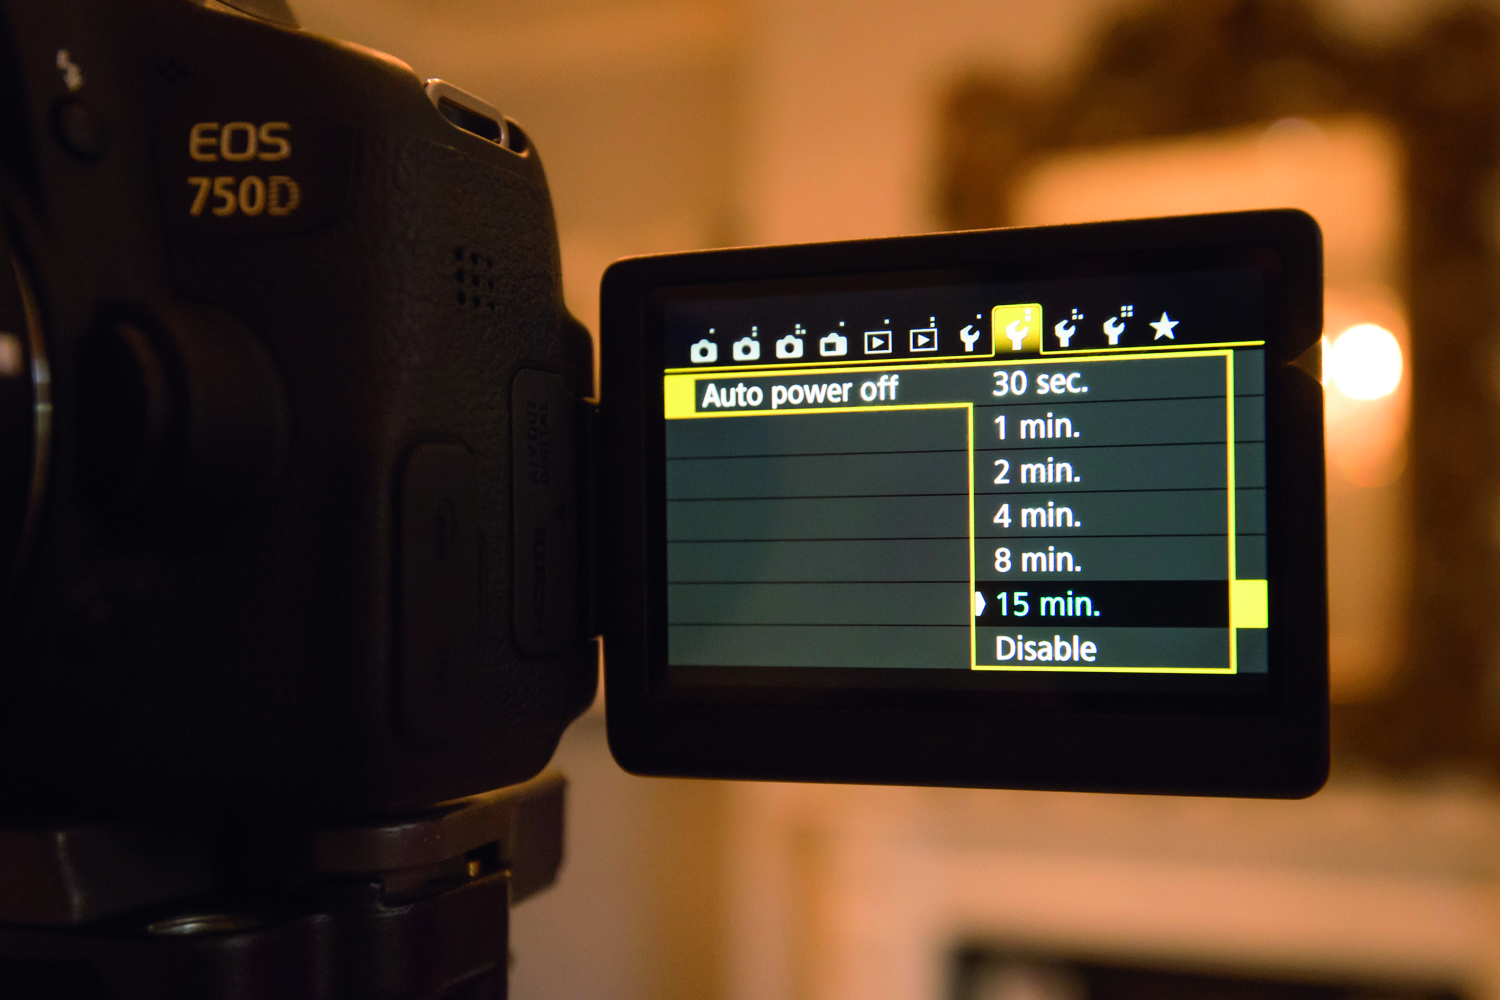
04 EXTEND AUTO POWER-OFF
We don’t want the camera to turn itself off so go into the menu and delay the auto power-off to 15 minutes. You might also want to change the image review time to 4 secs so that your guests have enough time to check out the image once it’s been shot.
STEP BY STEP: ENABLE FACE TRACKING
Modern DSLRs feature face-detection for automatic focusing wherever your guests appear in the frame
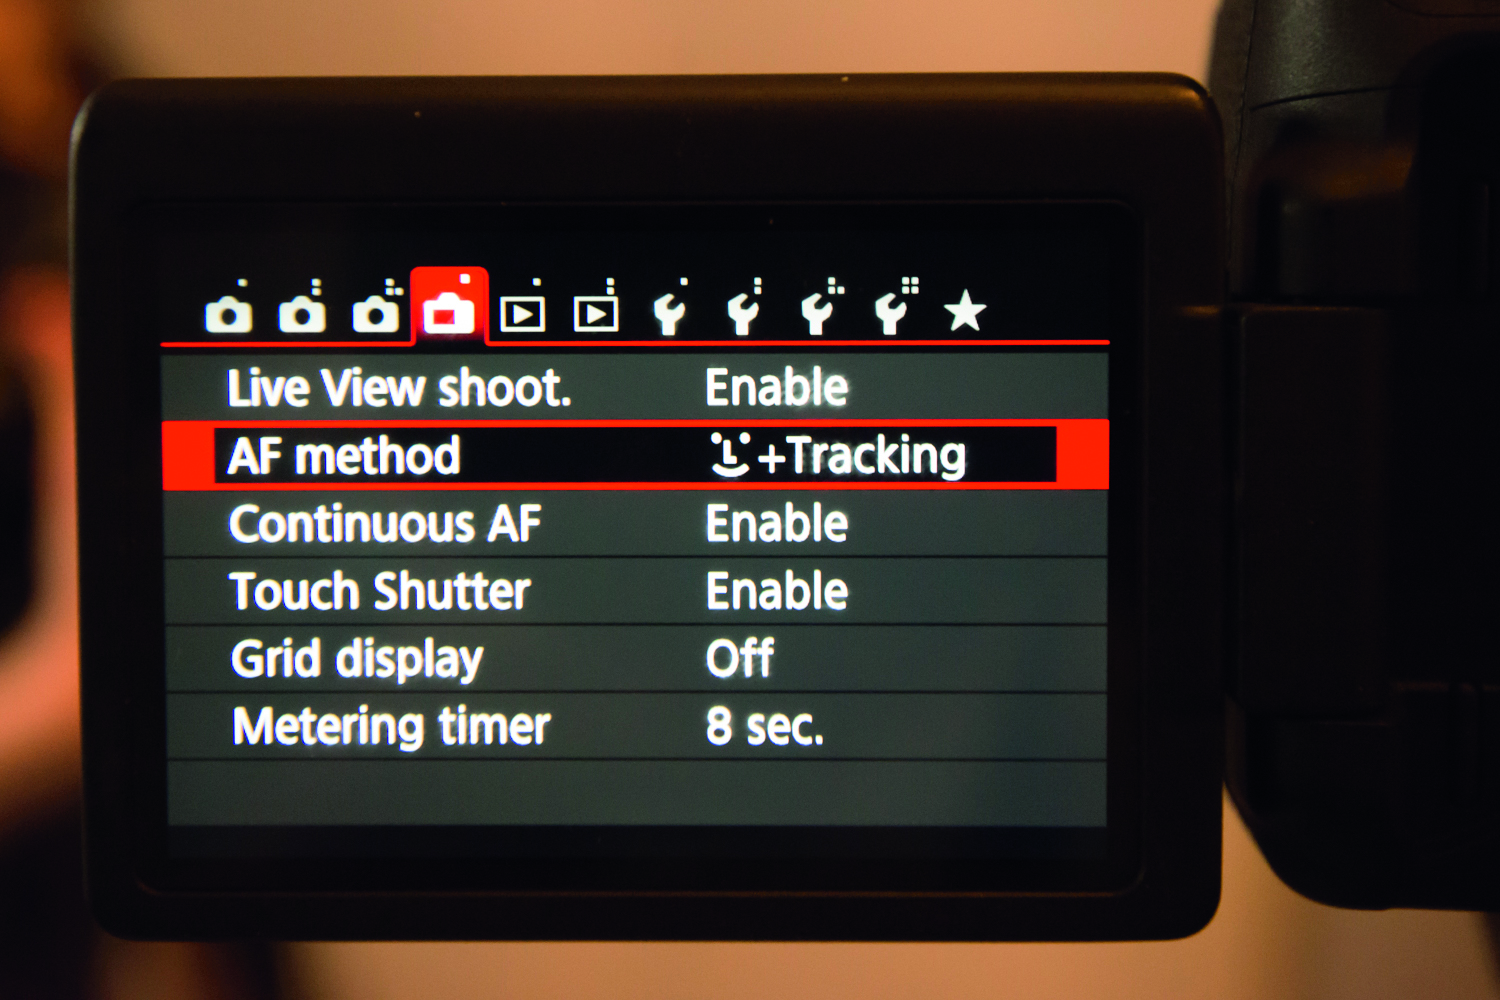
Many newer D-SLR's have a hugely useful feature that makes Live View focusing all too easy. We simply set the AF mode to AI Servo, so the focus is continuous, and then we enabled face tracking in the autofocus menu.
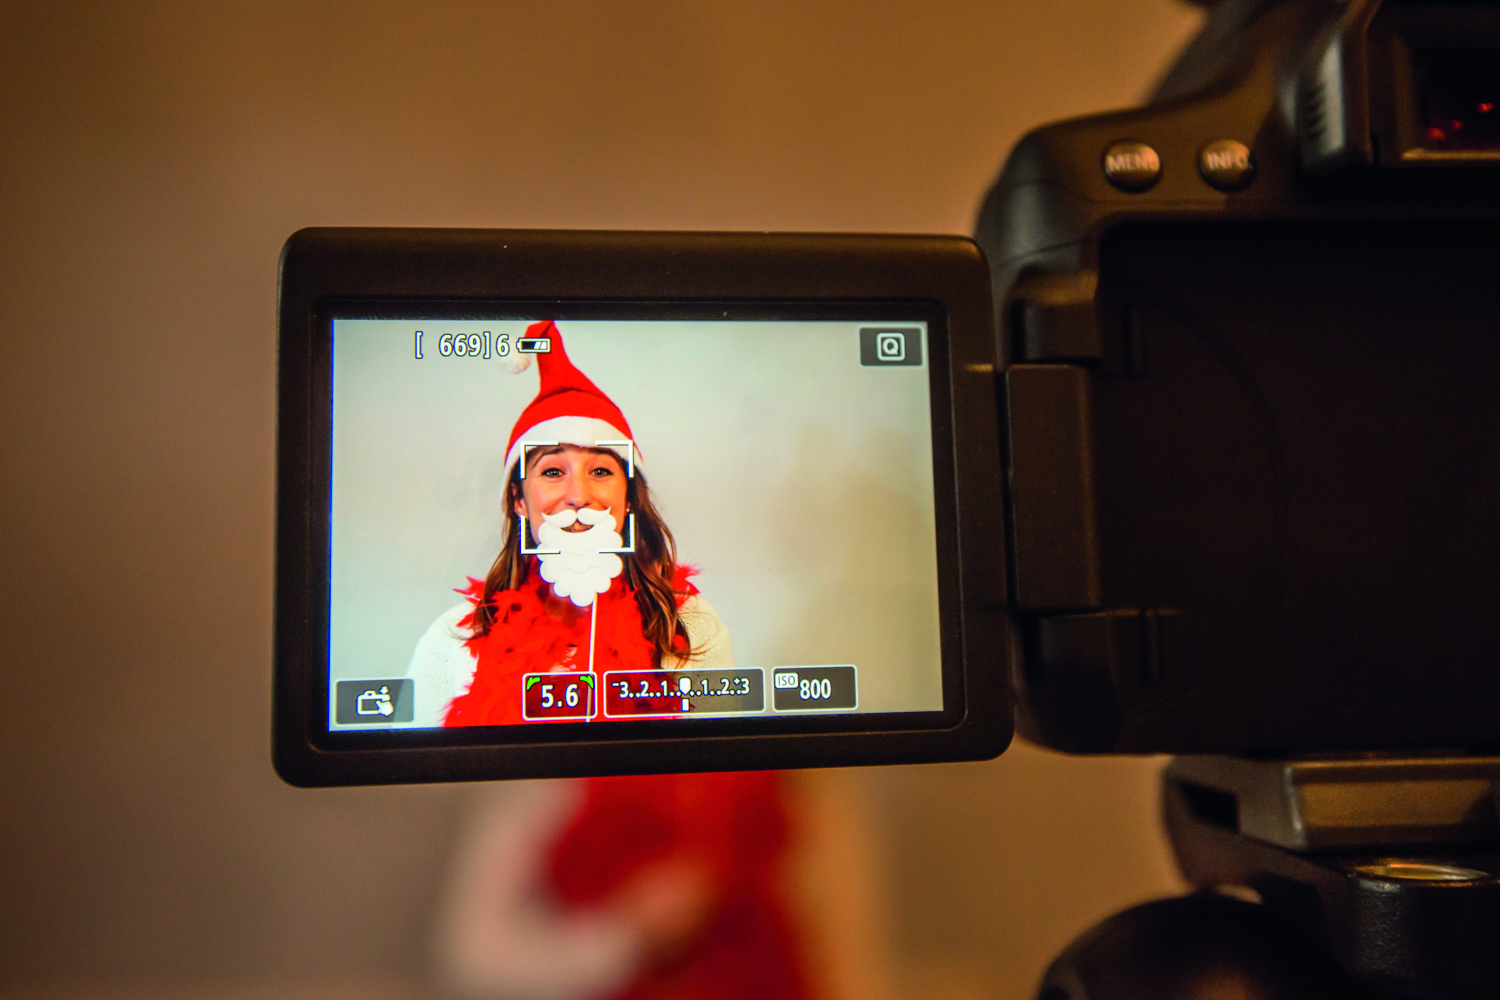
The focus will detect faces and snap onto them, whether they are close up or further away. If your camera doesn’t have face detection try FlexiZone tracking. Alternatively, make a mark on the floor for guests to stand on and prefocus on it.
STEP BY STEP: Set up a slideshow
With EOS Utility and Lightroom, display a rolling slideshow that includes new photos as soon as they’re taken
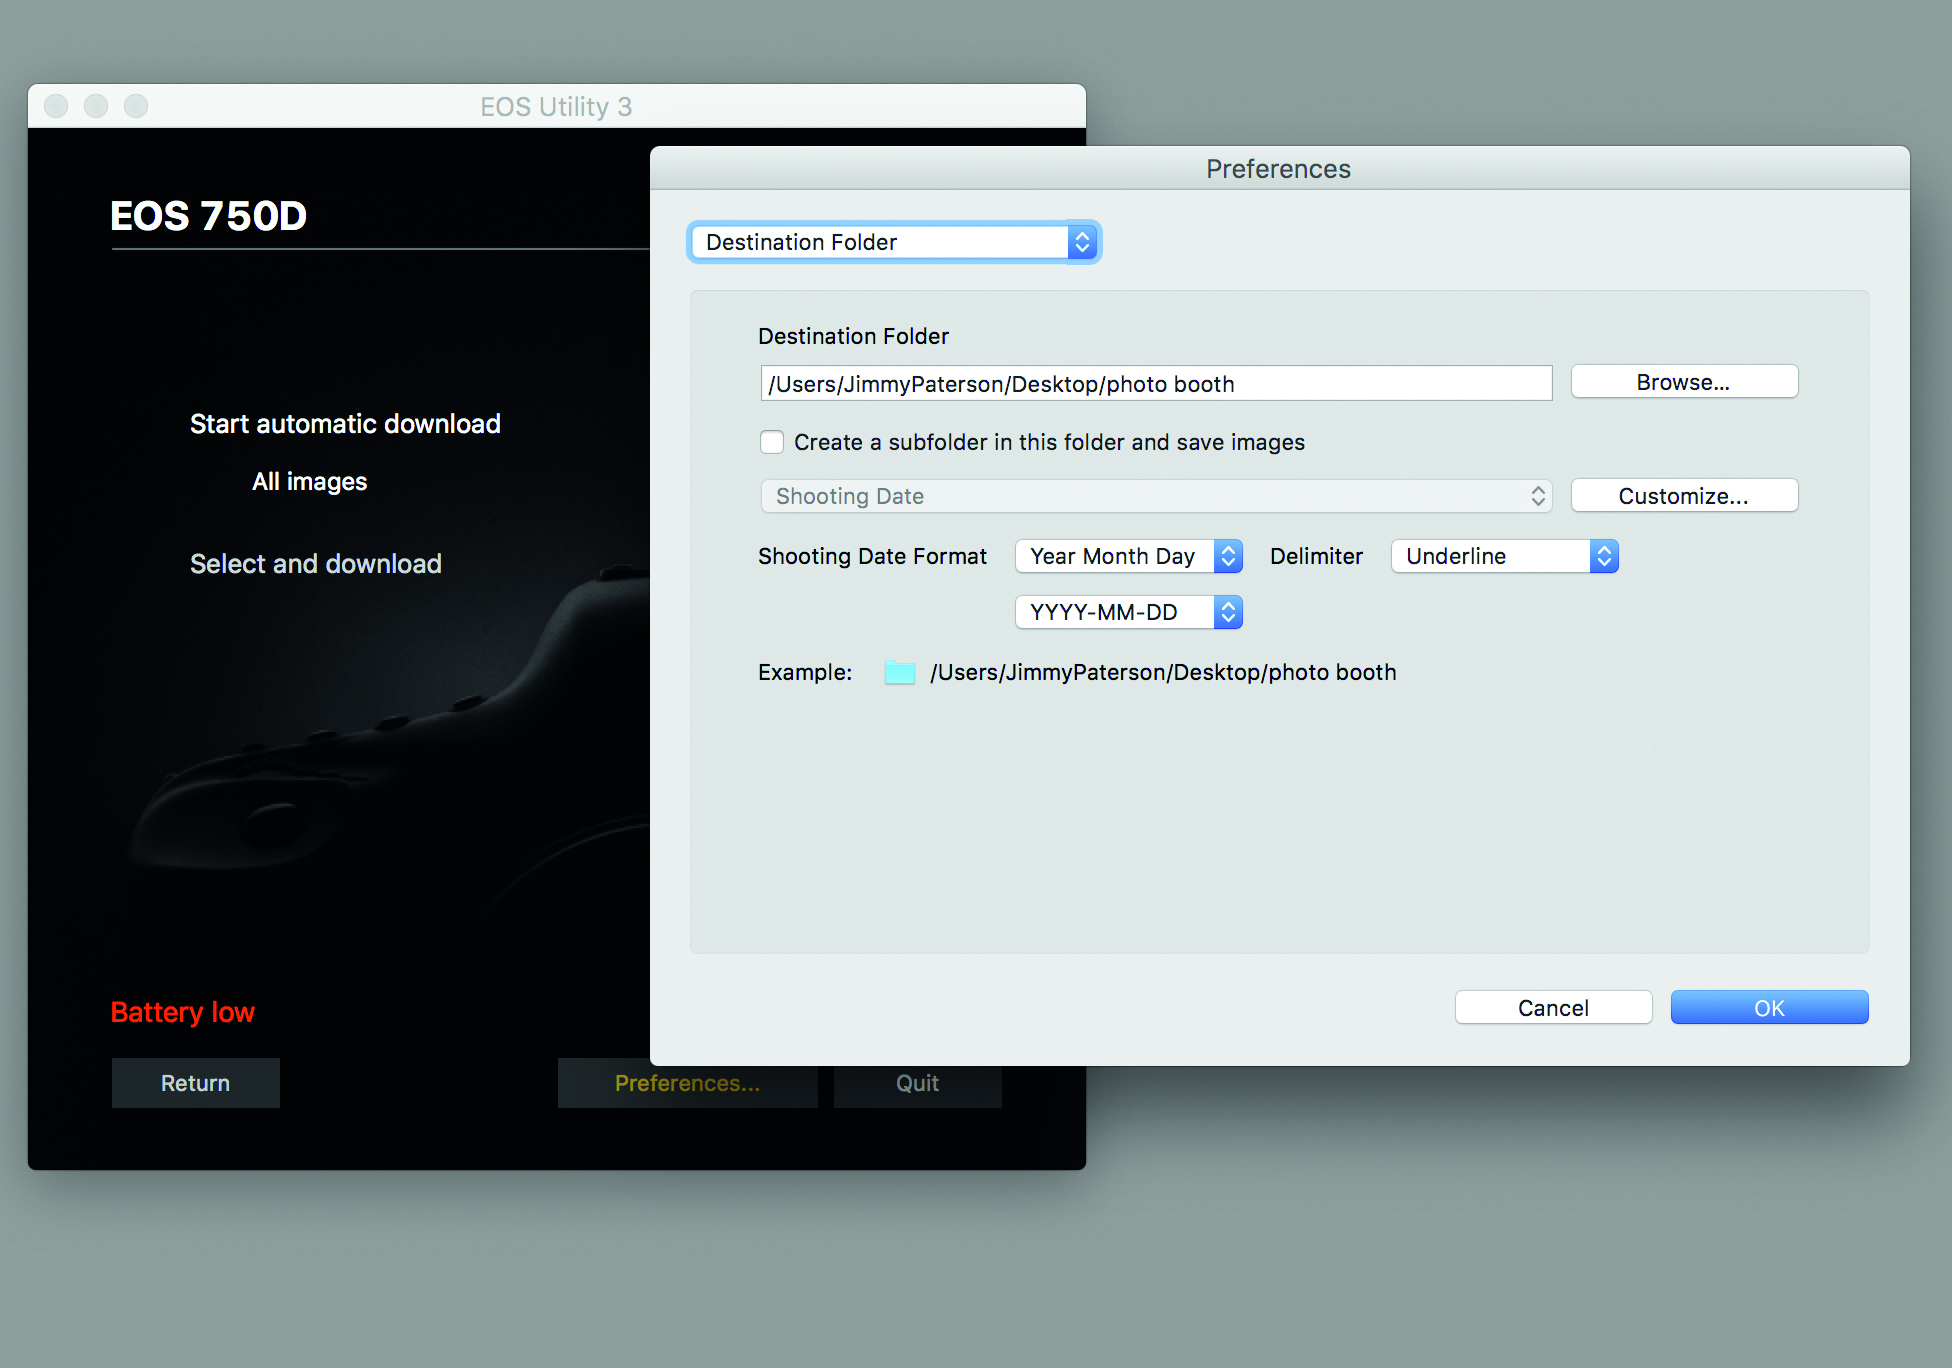
01 TRANSFER THE PHOTOS
We need to transfer the images to a laptop as soon as they’re shot, either via a USB cable or using Wi-Fi, if your camera has it. Once connected, open the transfer utility and download images to the destination folder on your computer.

02 AUTO IMPORT INTO LIGHTROOM
Open Lightroom, go to File>Auto-Import and direct it to the same destination folder. Then photos will automatically appear in Lightroom as they’re taken. If you like you can also choose to apply a preset on import, such as a black and white effect or a colour boost.
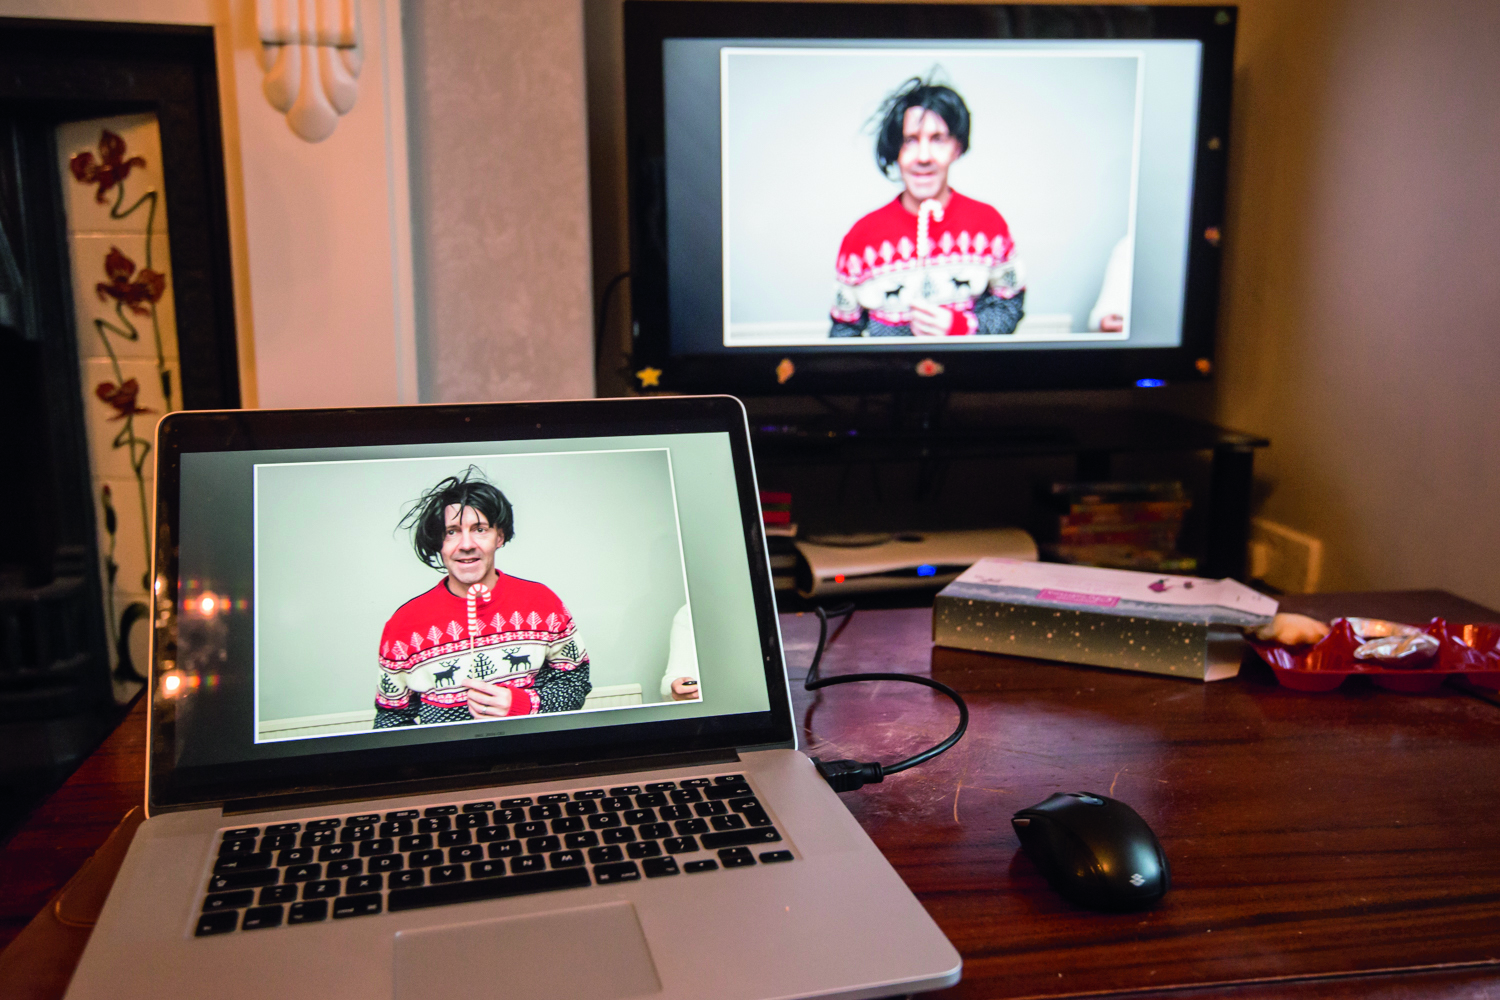
03 START A SLIDESHOW
Go to Lightroom’s Slideshow module and hit play. As more photos get taken in the booth they’re added to the loop – so everyone gets to see their photos moments after they’ve been shot. Once done, why not attach your laptop to a TV for a better view?
STEP BY STEP: Make a Christmas composite
Create photo strips and combine them with a background image using simple Photoshop skills
After the party you’re bound to have lots of fun portraits. The question is, what to do with them next? Why not try combining them into a montage, like the image on the previous page? We’ve supplied a few different backgrounds amongst the project files for you to try out, or you could, of course, shoot your own. Selecting and laying out your images in this way is not only a great way to display them, it also touches upon key Photoshop skills like selections, layer styles, filters and masks. You’ll find a full walkthrough on the accompanying video.
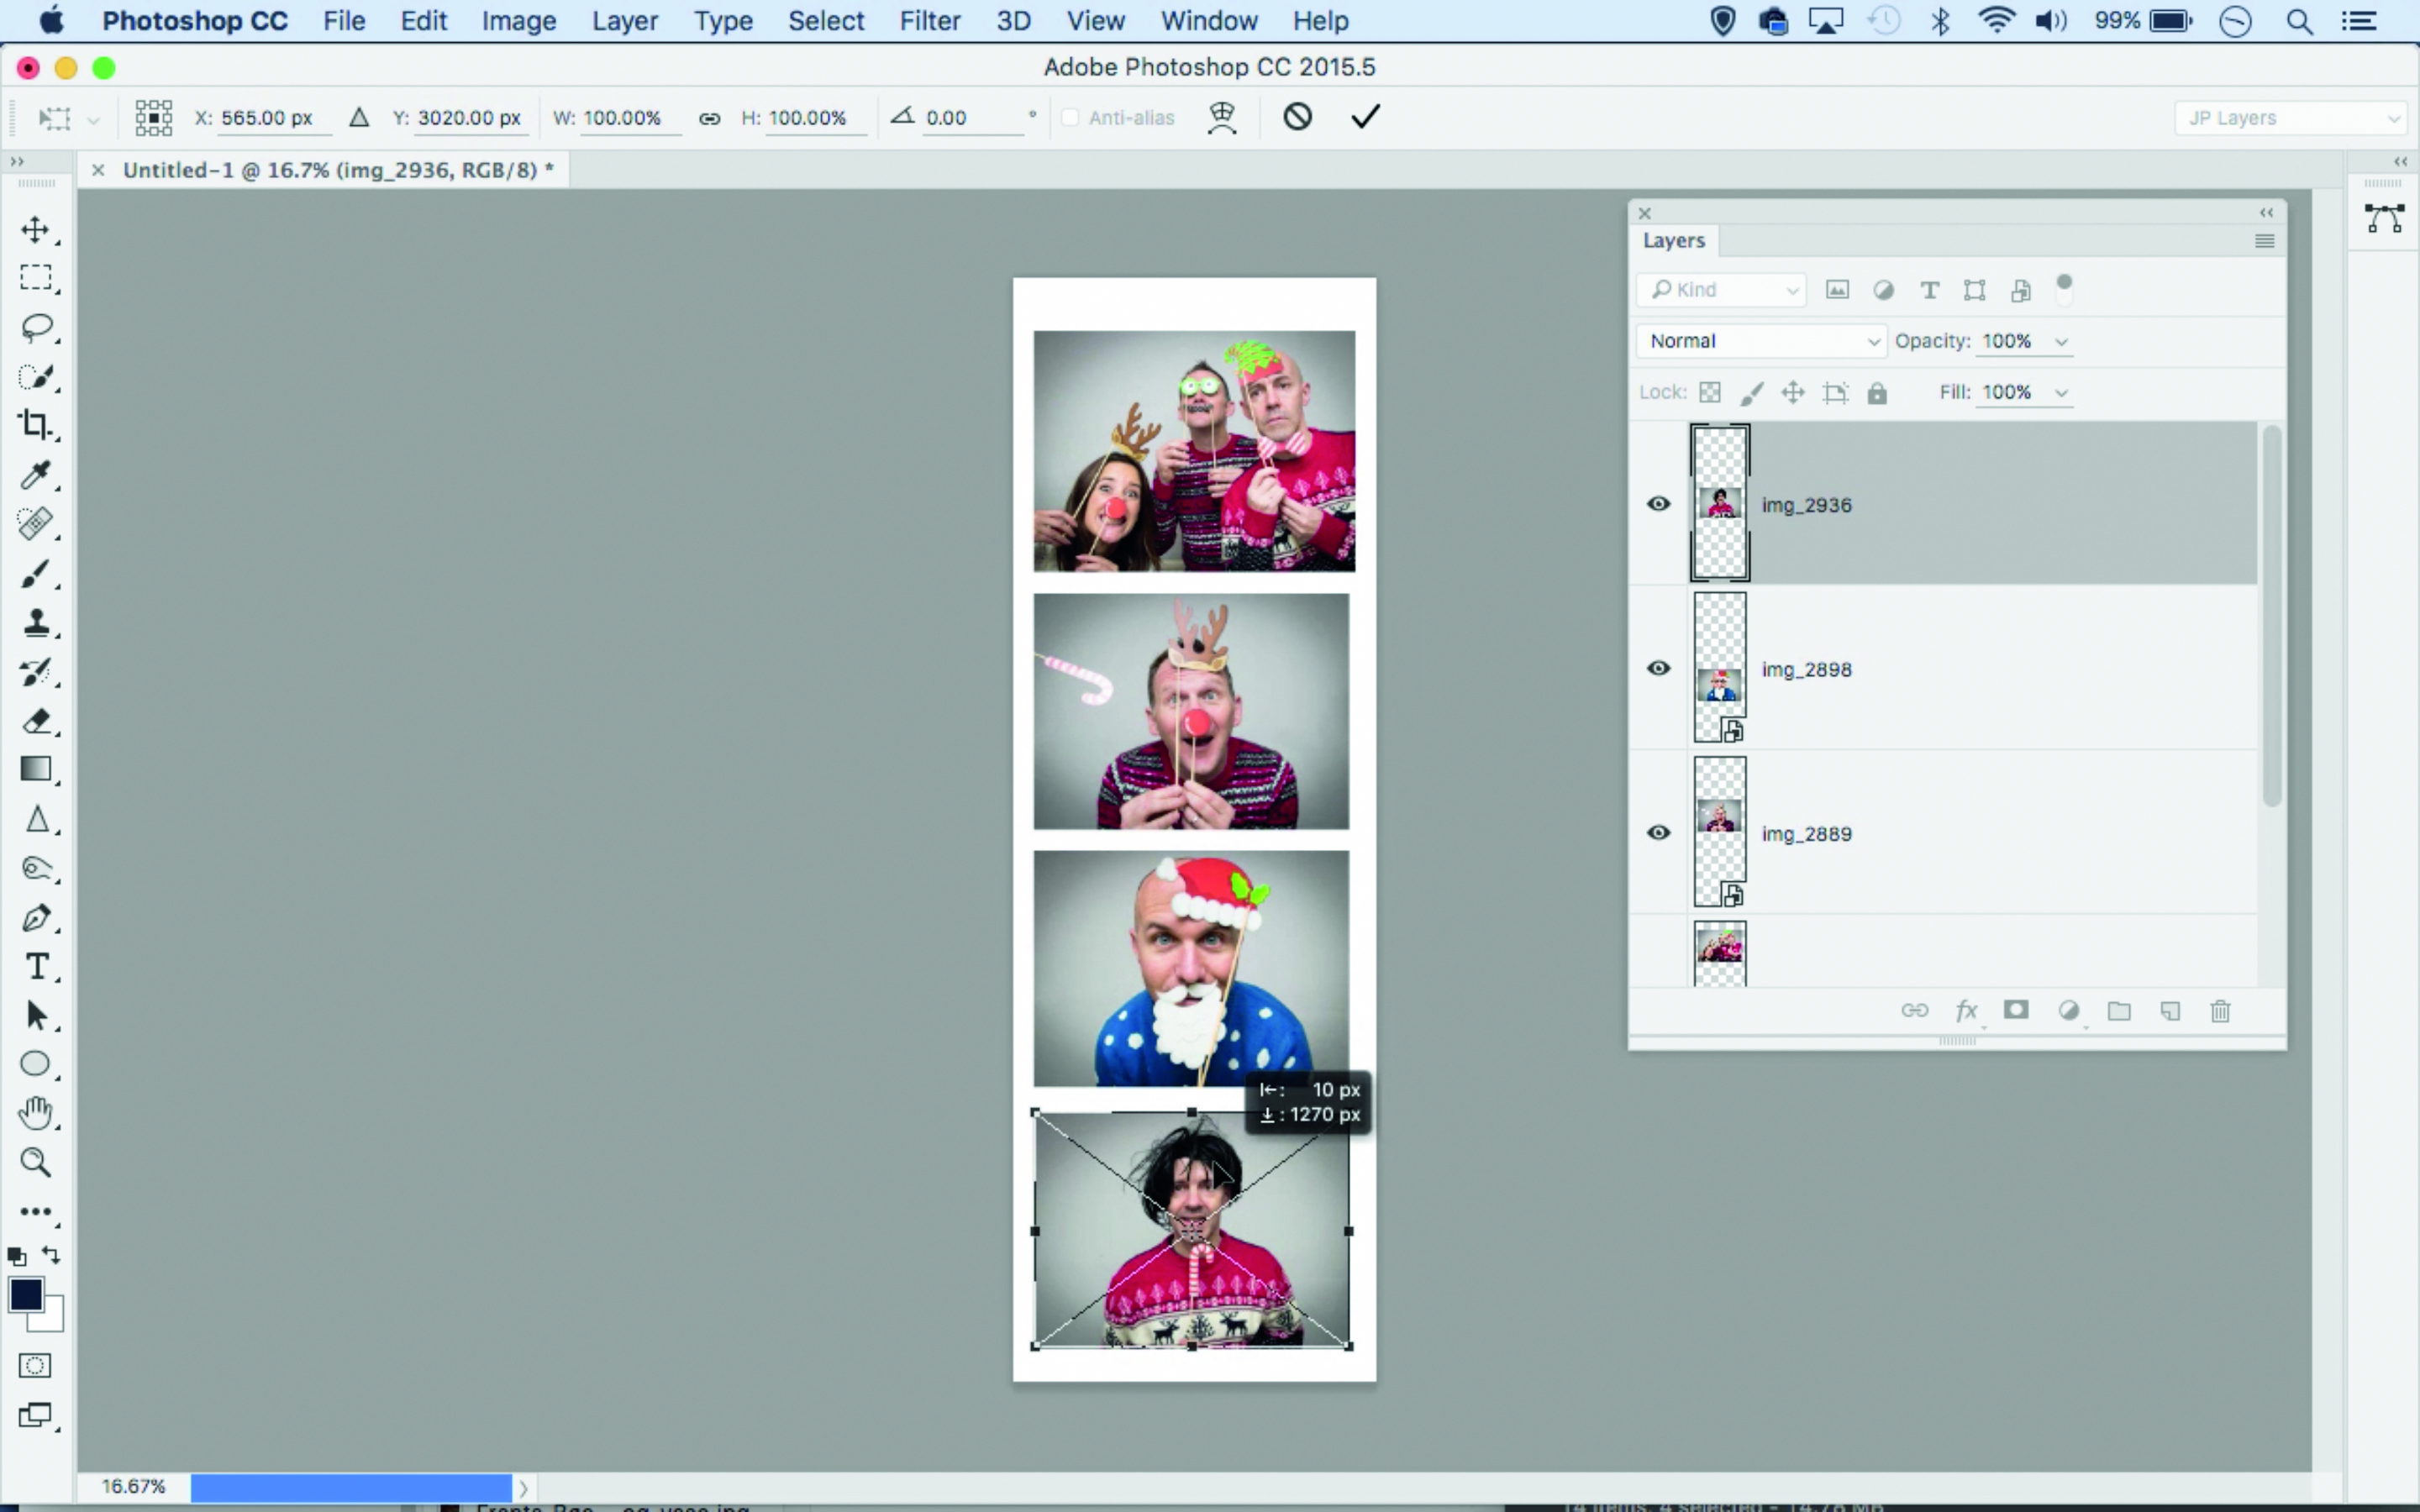
MAKE A STRIP
Go to File>New to make a document sized 1150x3500px. Drag four images into it. Position them in a line. Go to Layer>Flatten.
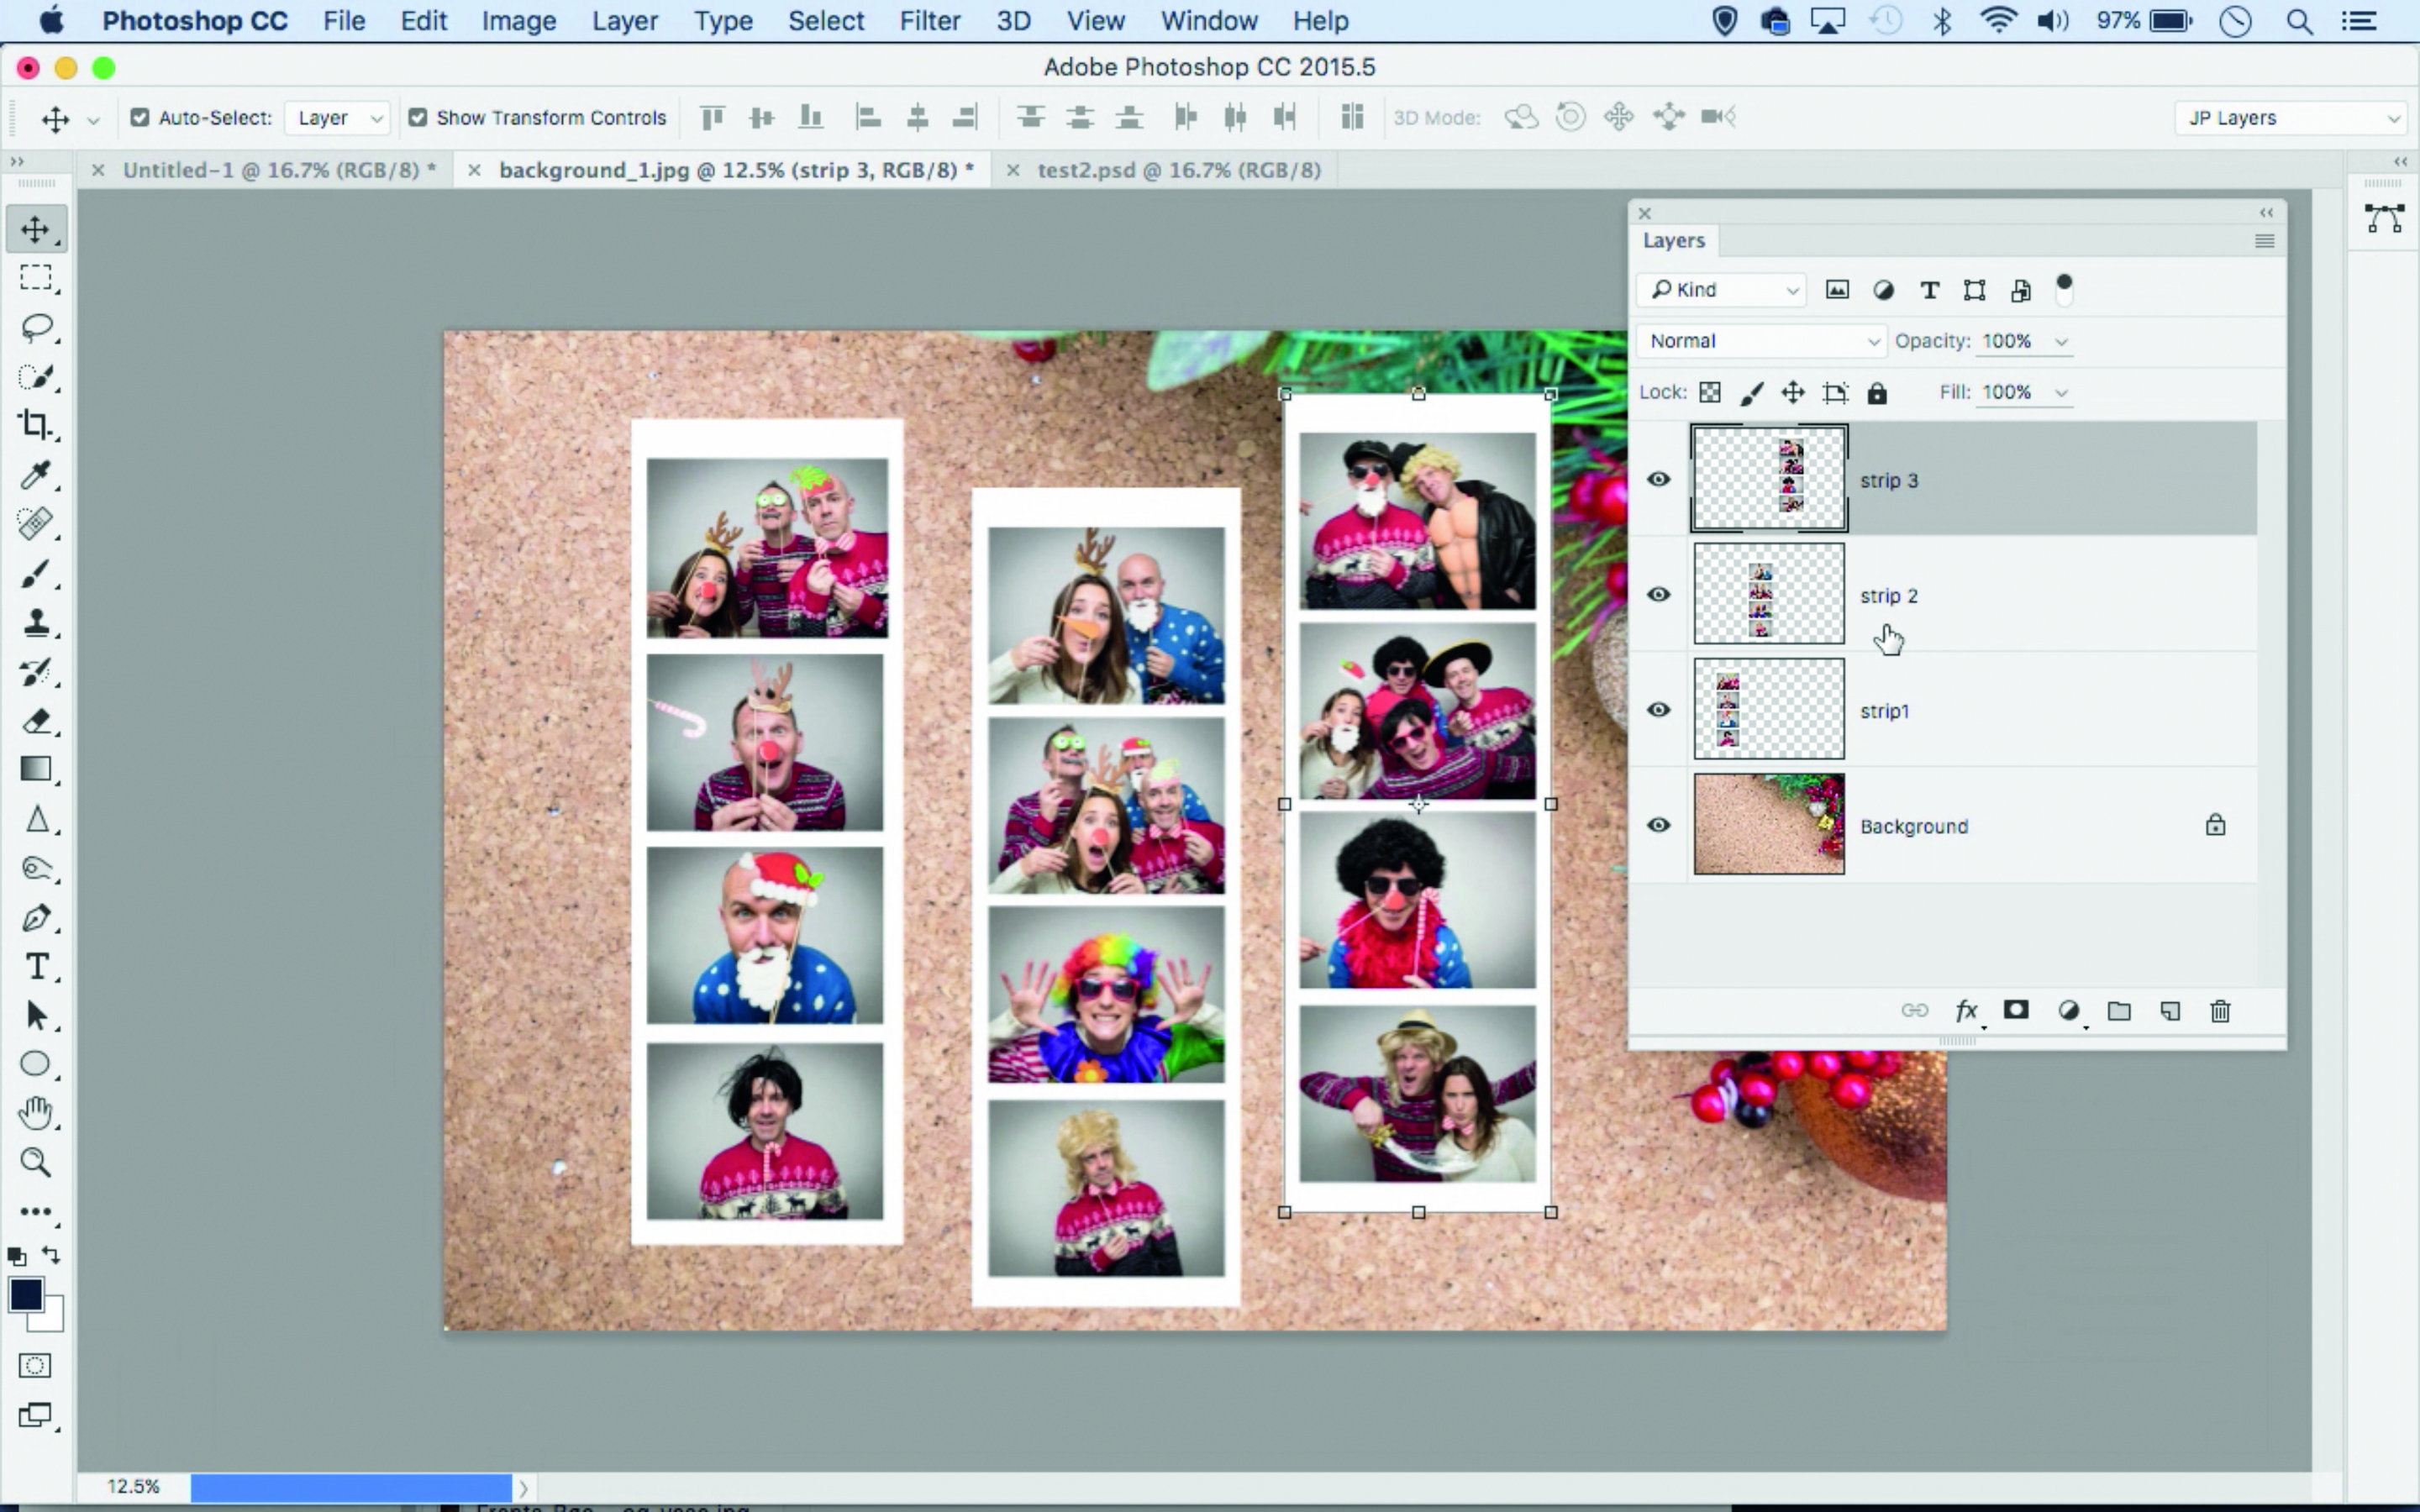
DROP THE BACKGROUND
Repeat Step 1 to make more strips. Open up a background (we’ve supplied a few) and drag the strips in with the Move tool.
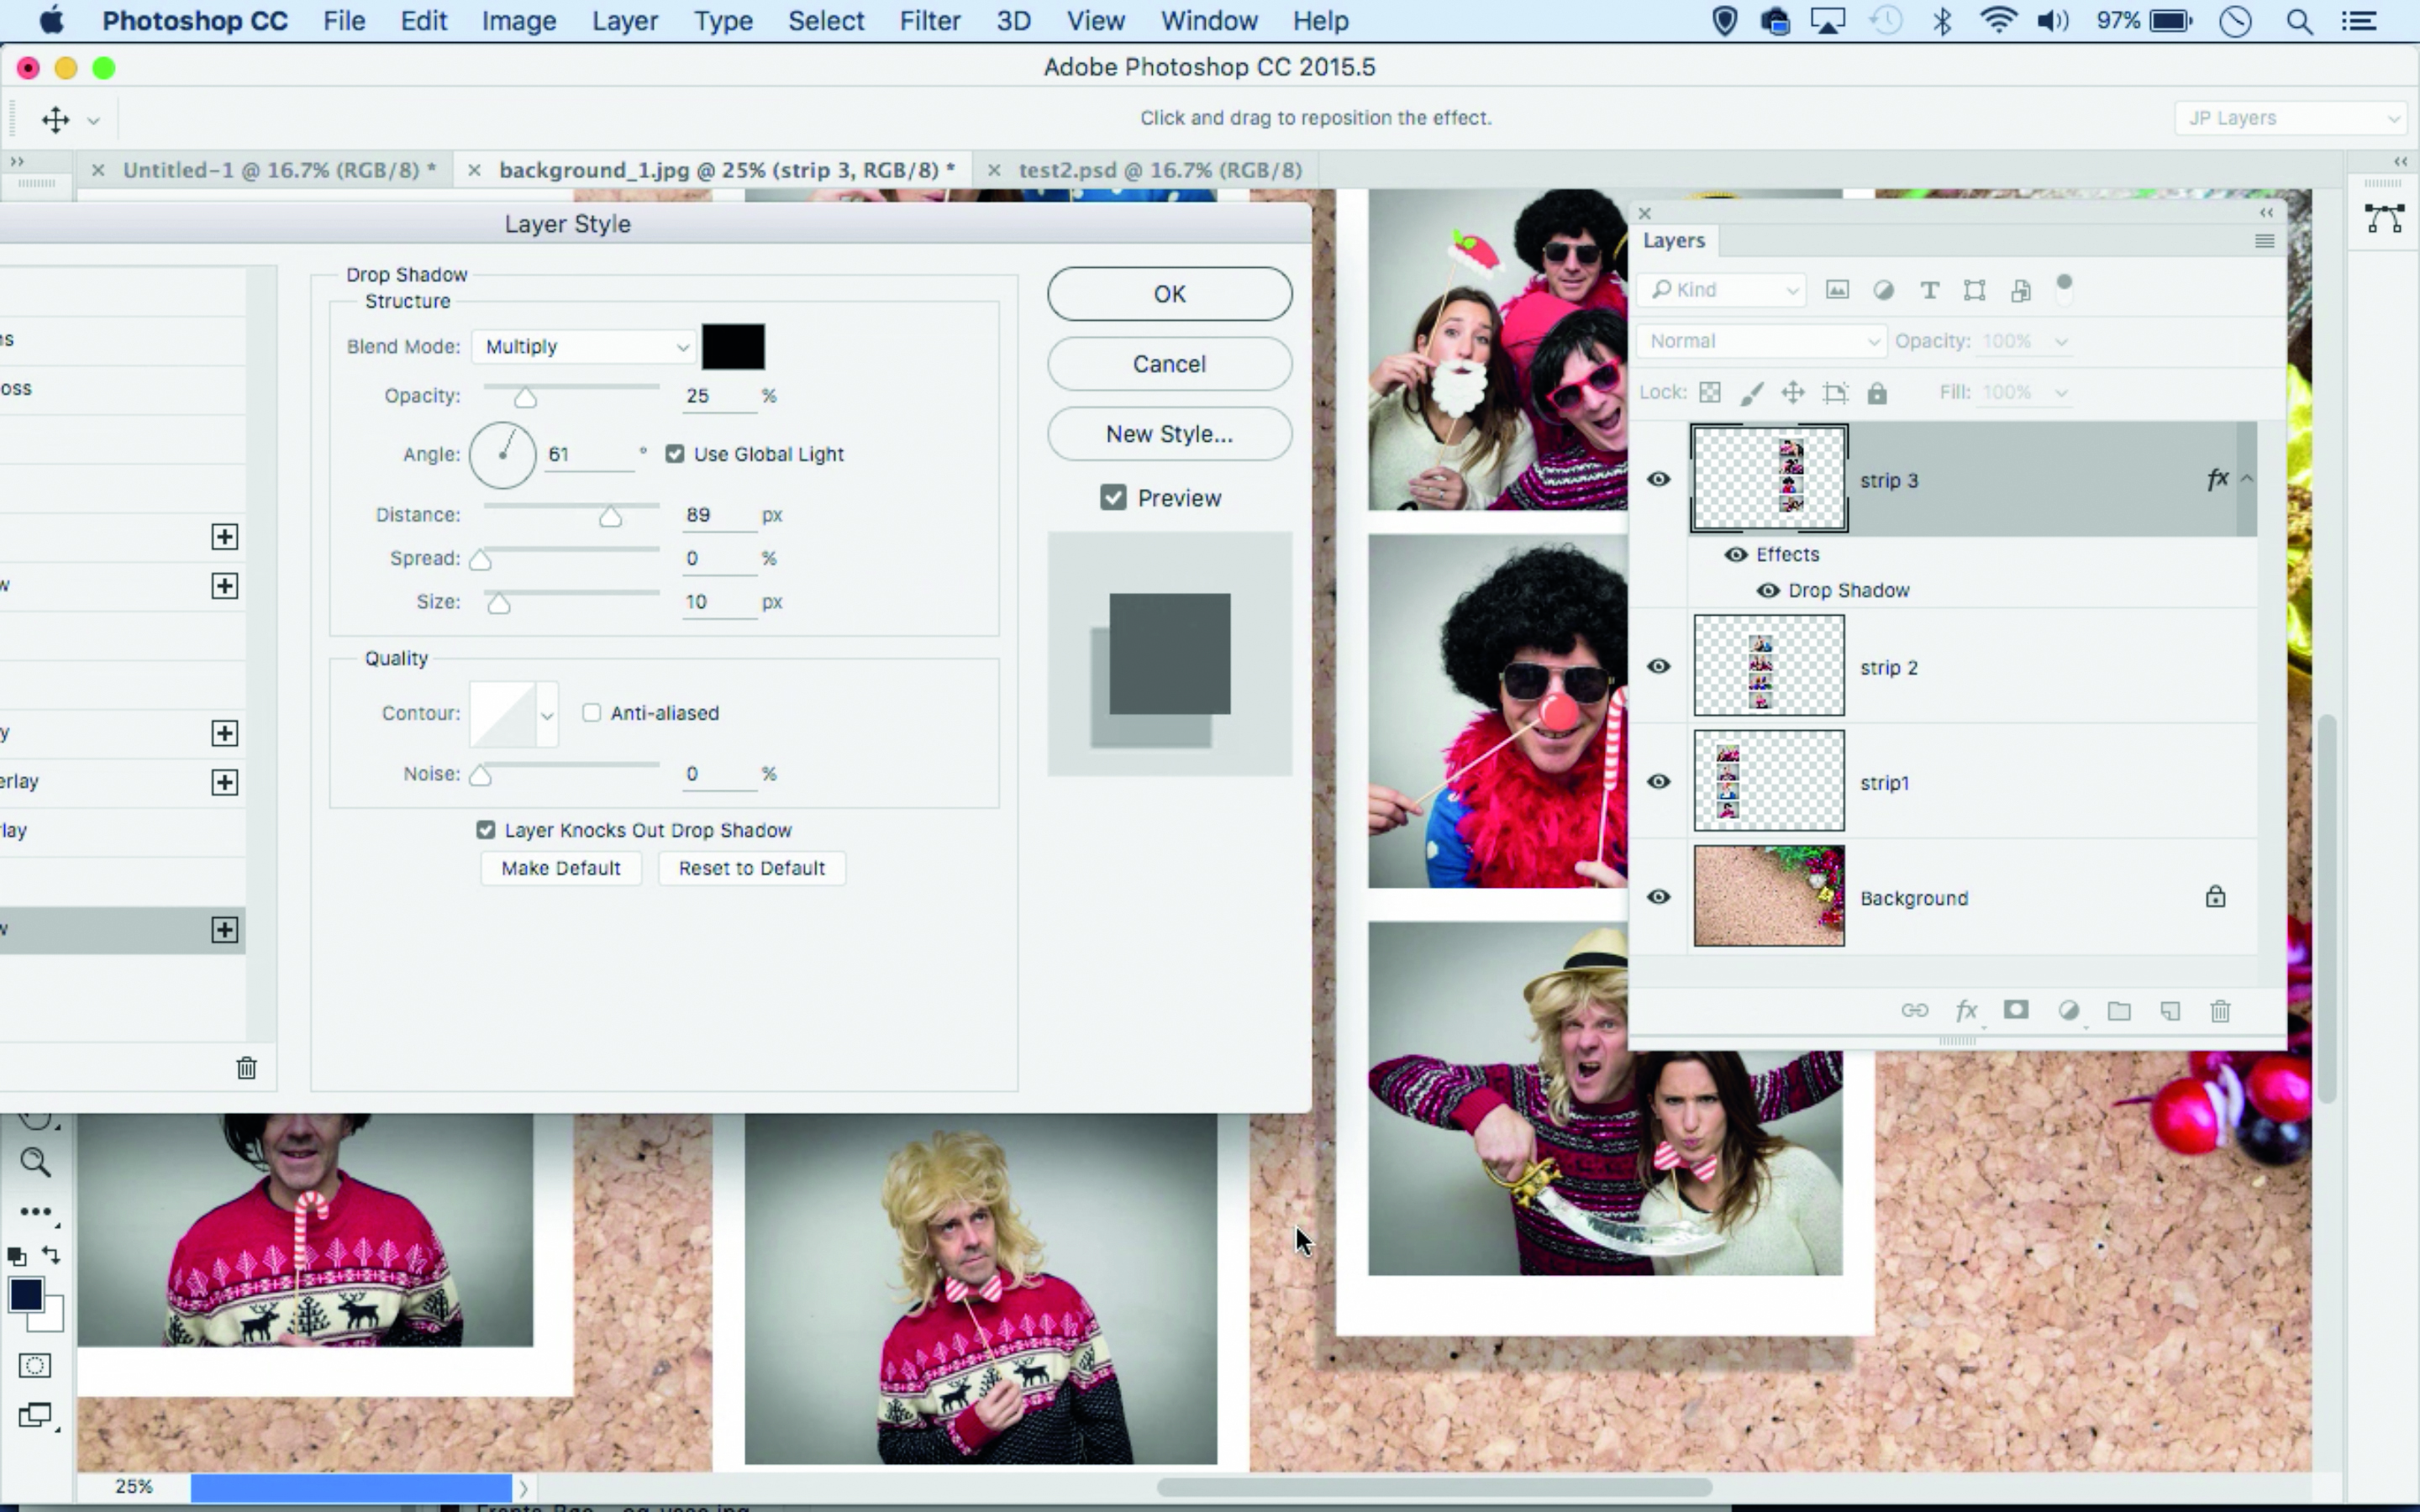
ADD A SHADOW
Go to the Layers panel. Double-click a layer to open Layer Styles. Add a Drop Shadow. Alt-drag to copy the shadow to other layers.
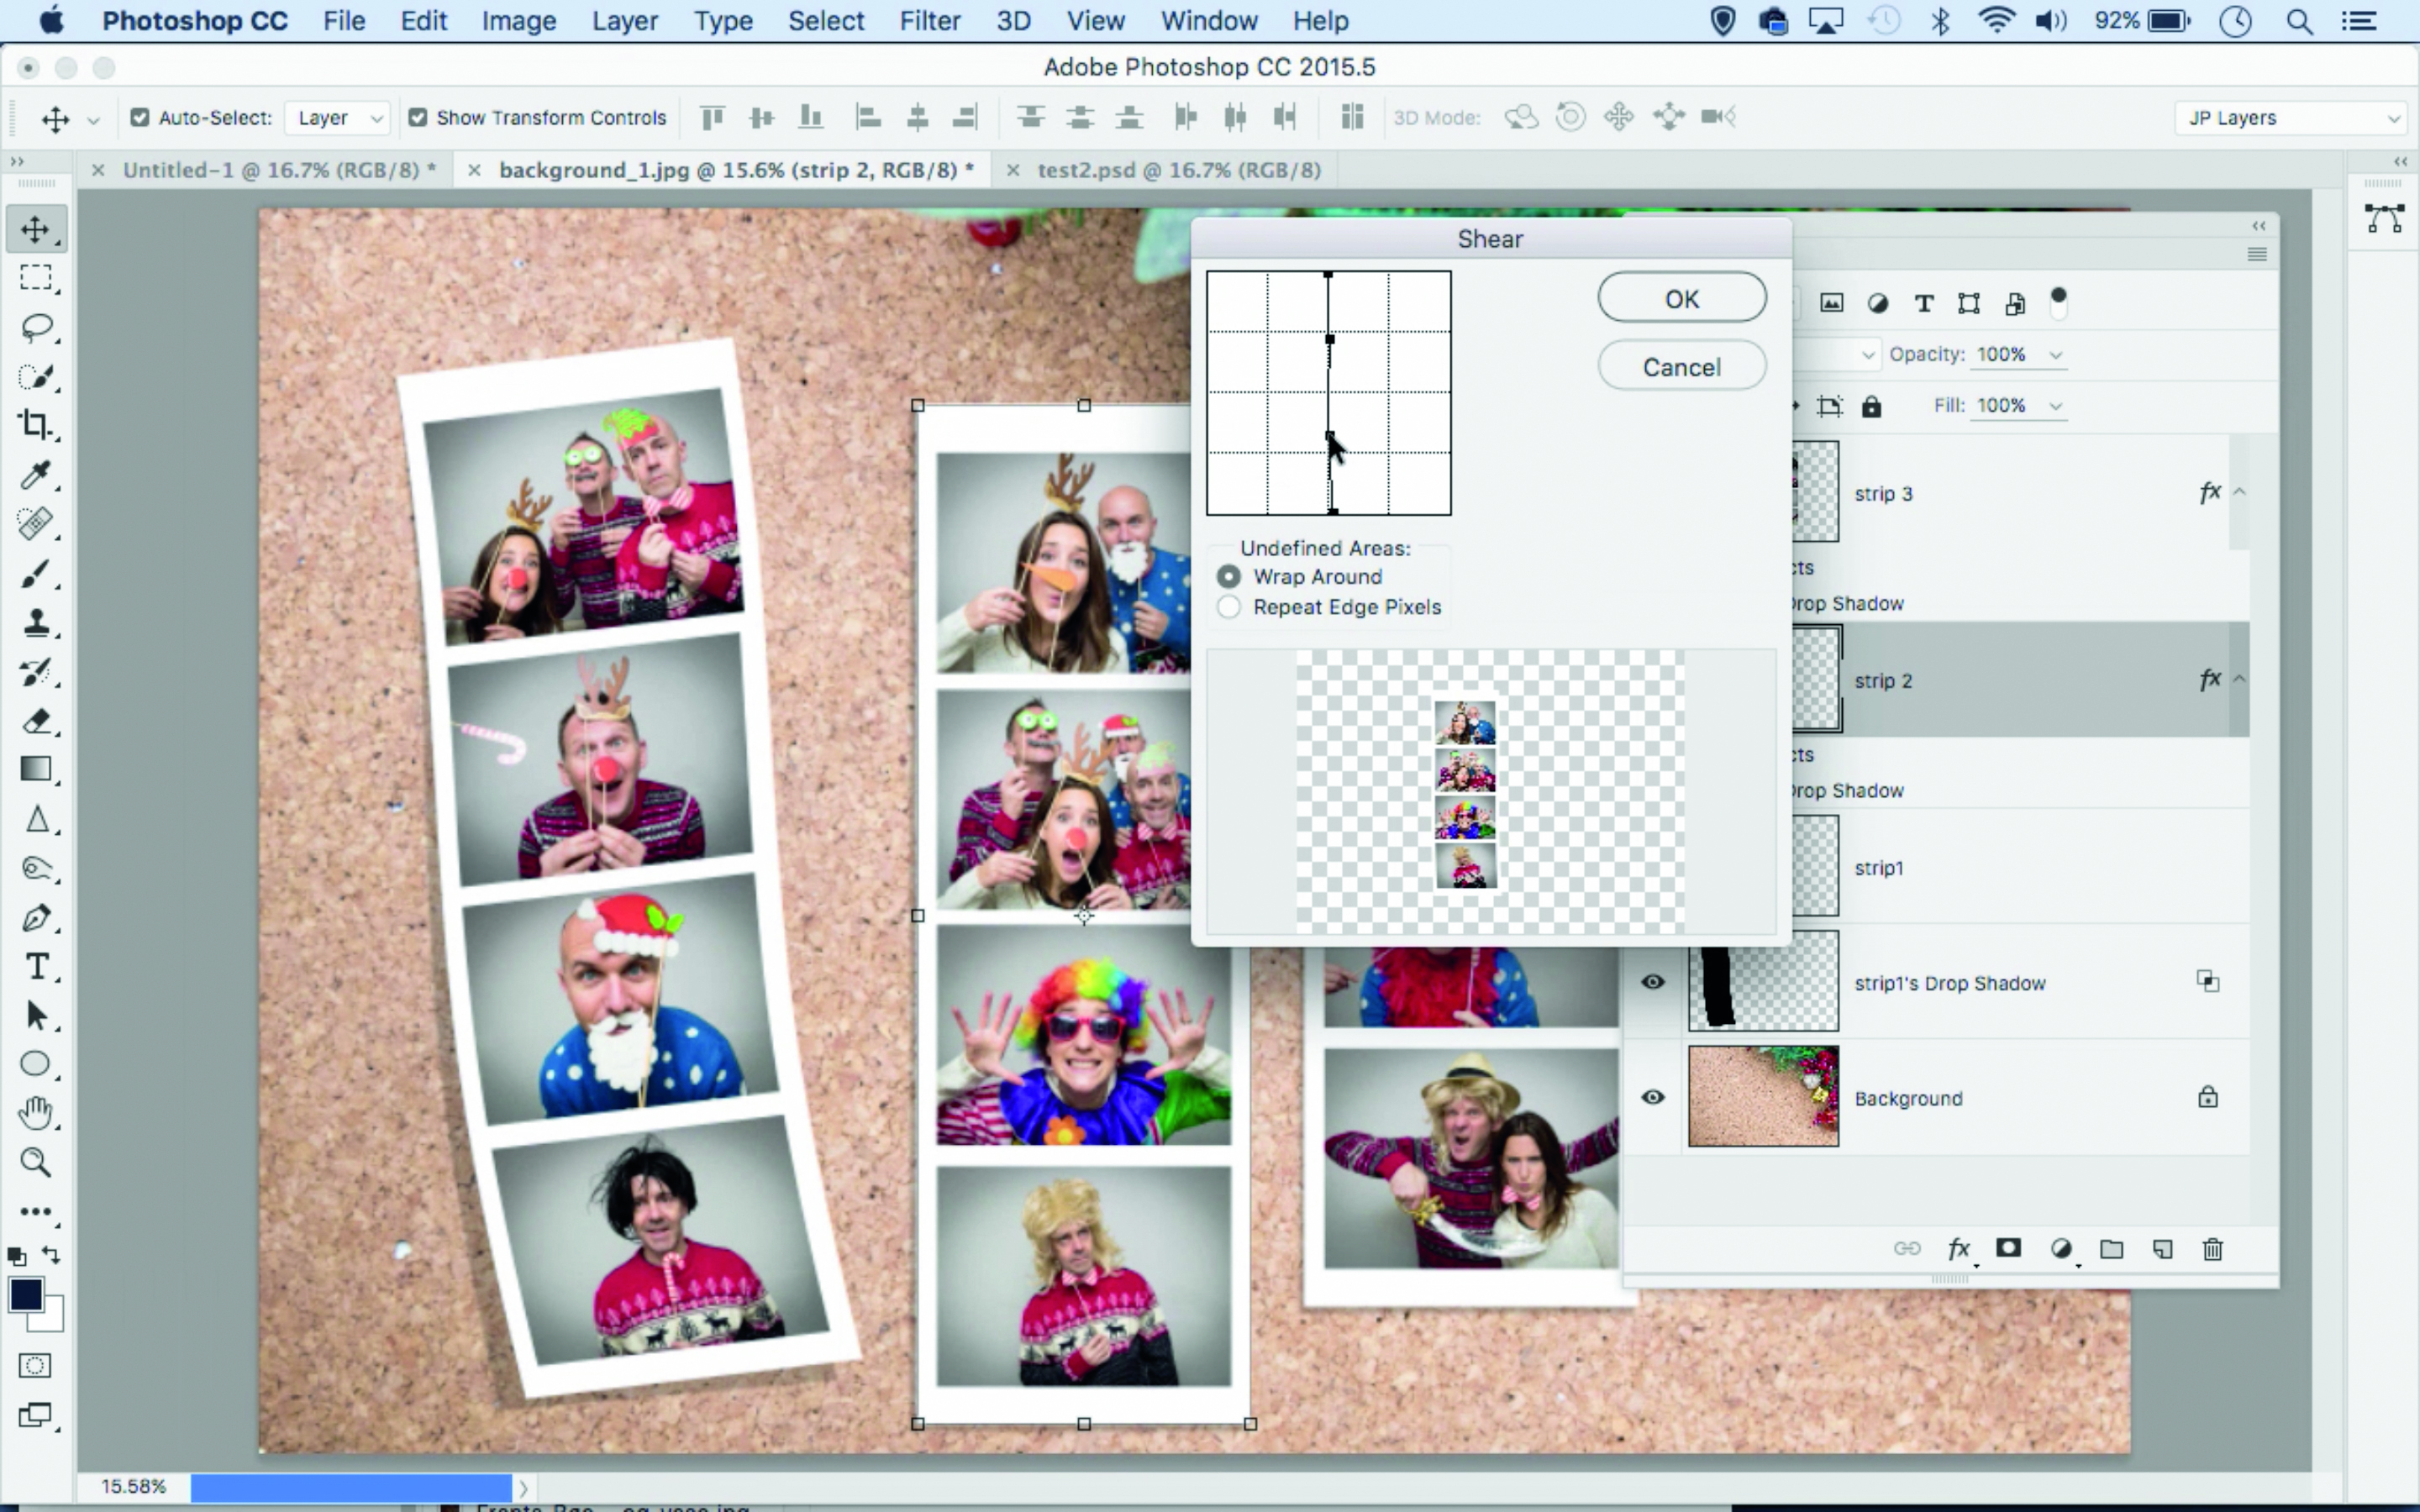
BEND THE STRIP
Go to Filter>Distort>Shear to bend the strip. Next right-click ‘Drop shadow’ and ‘Create Layer’, then rotate the shadow slightly.
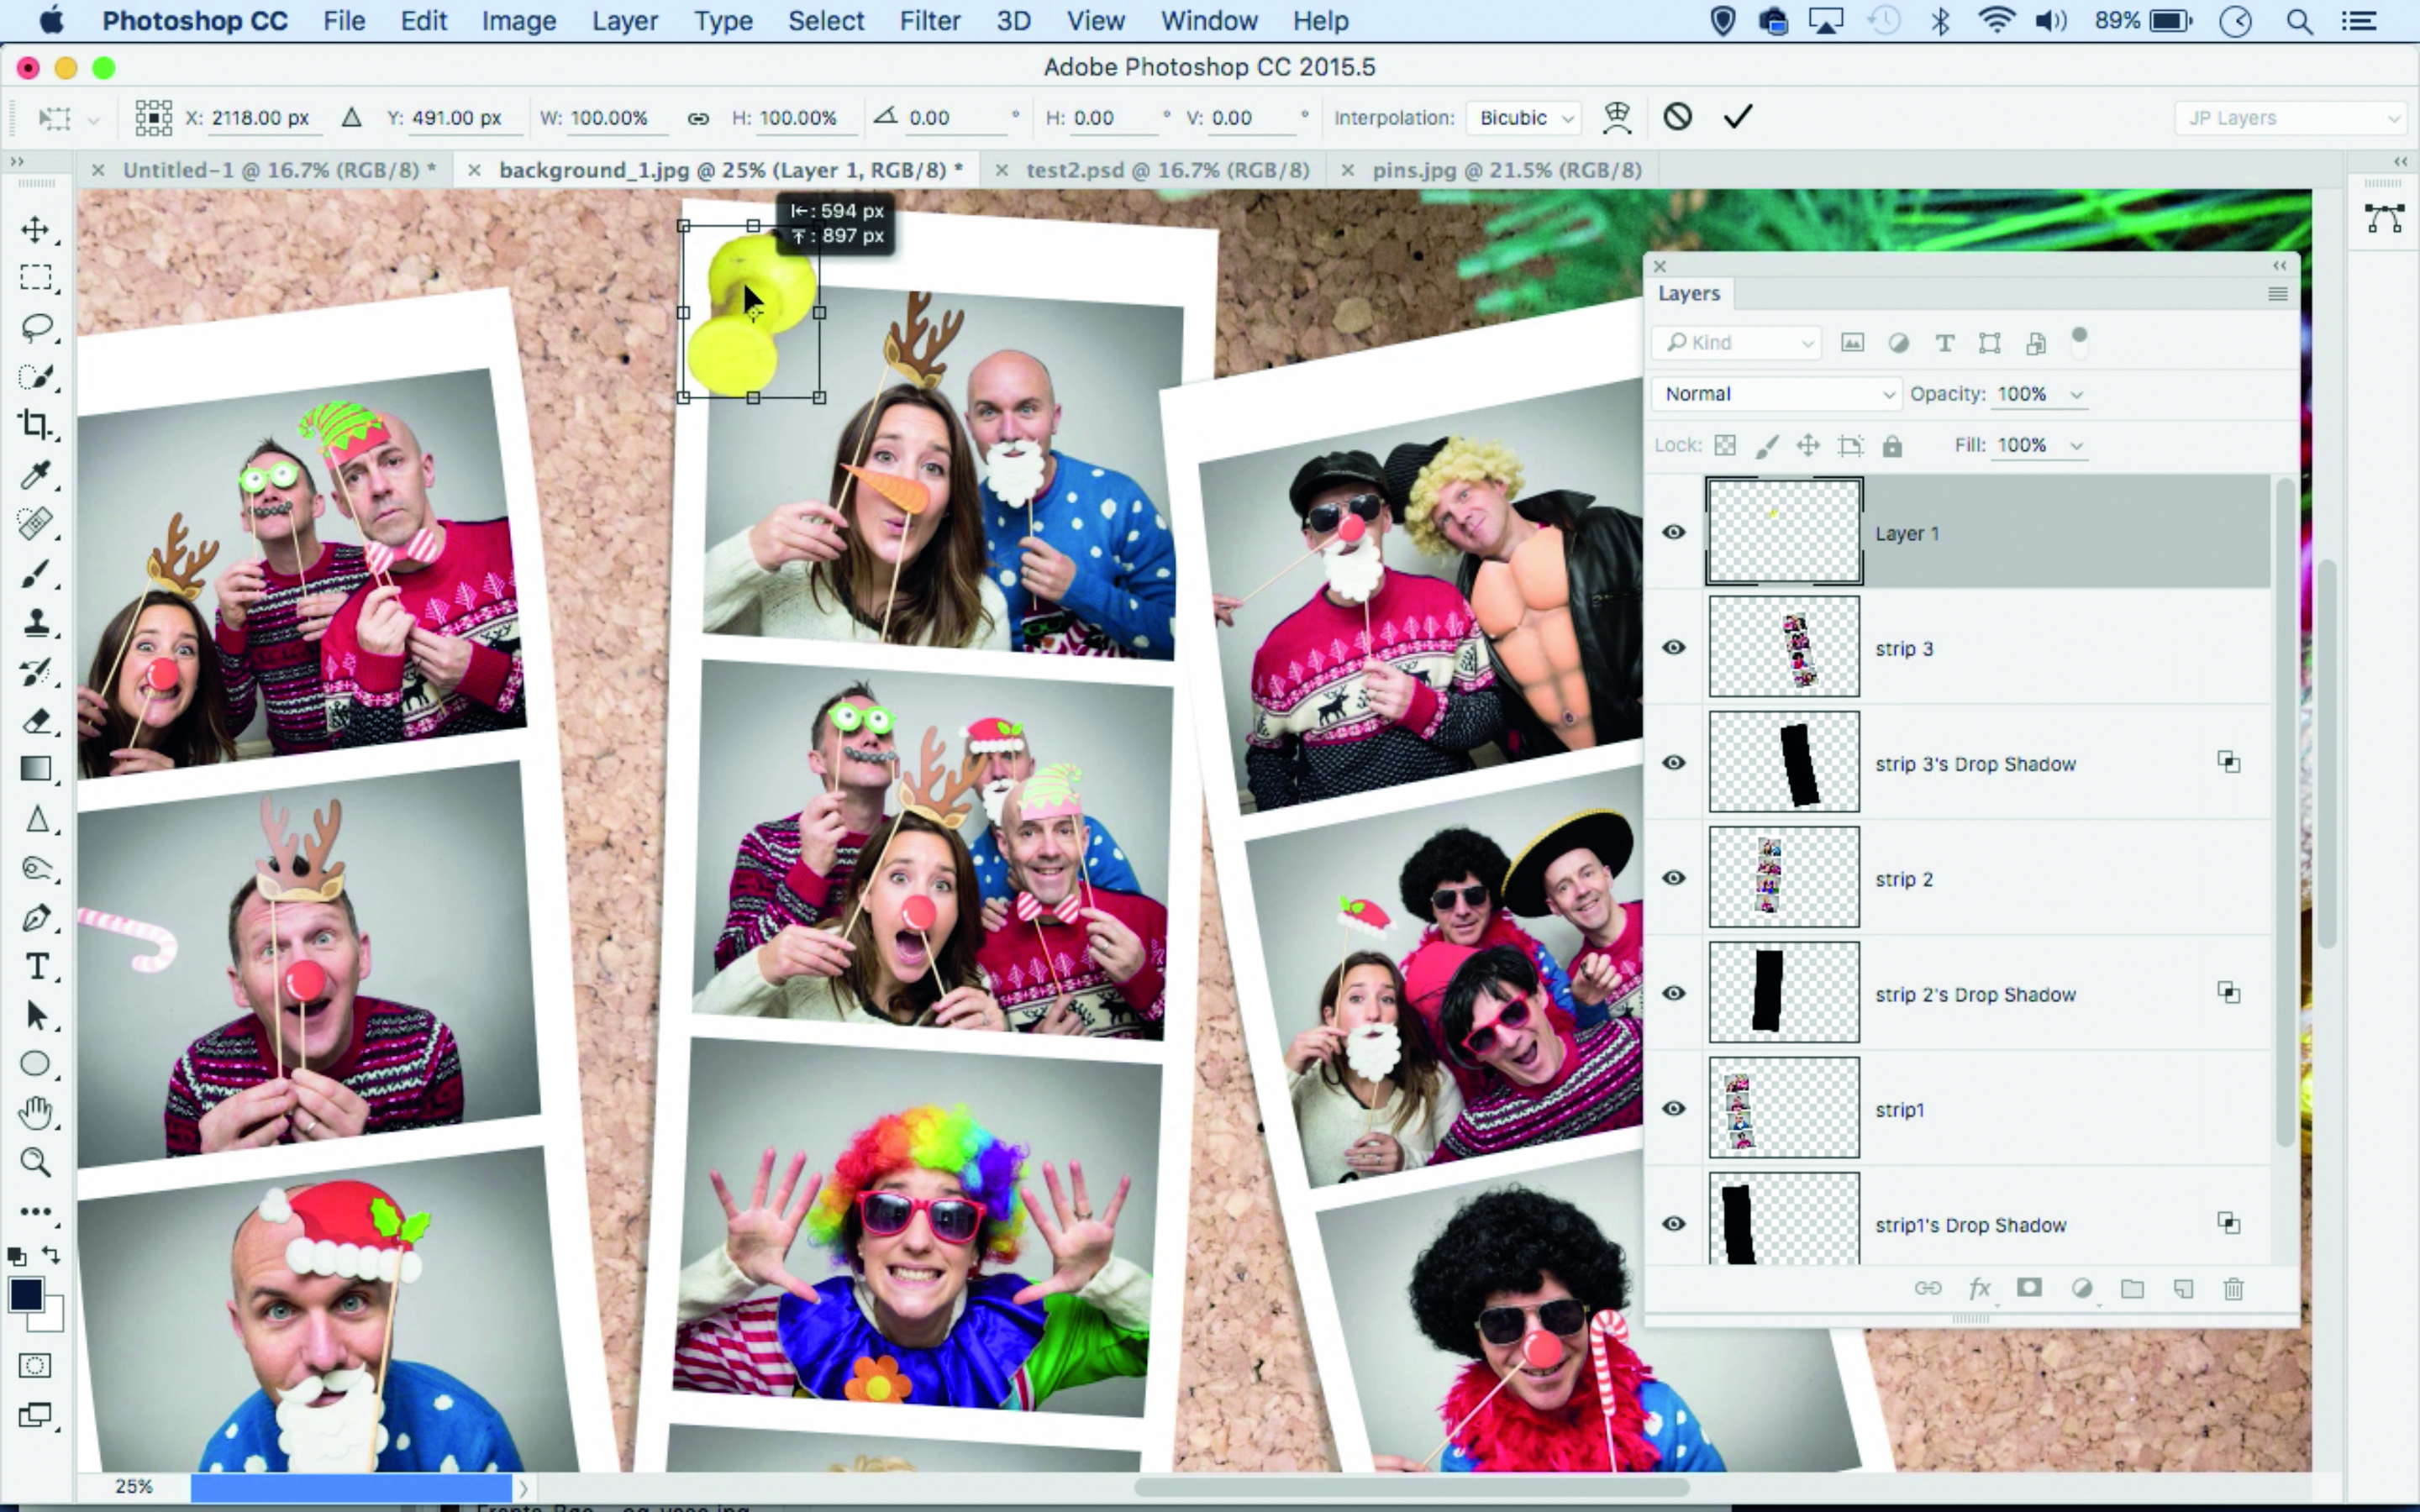
ADD A PIN
Open pins.jpg and grab the Quick Selection tool. Select the pin then copy with Ctrl+C, go to the main image and paste with Ctrl+V.
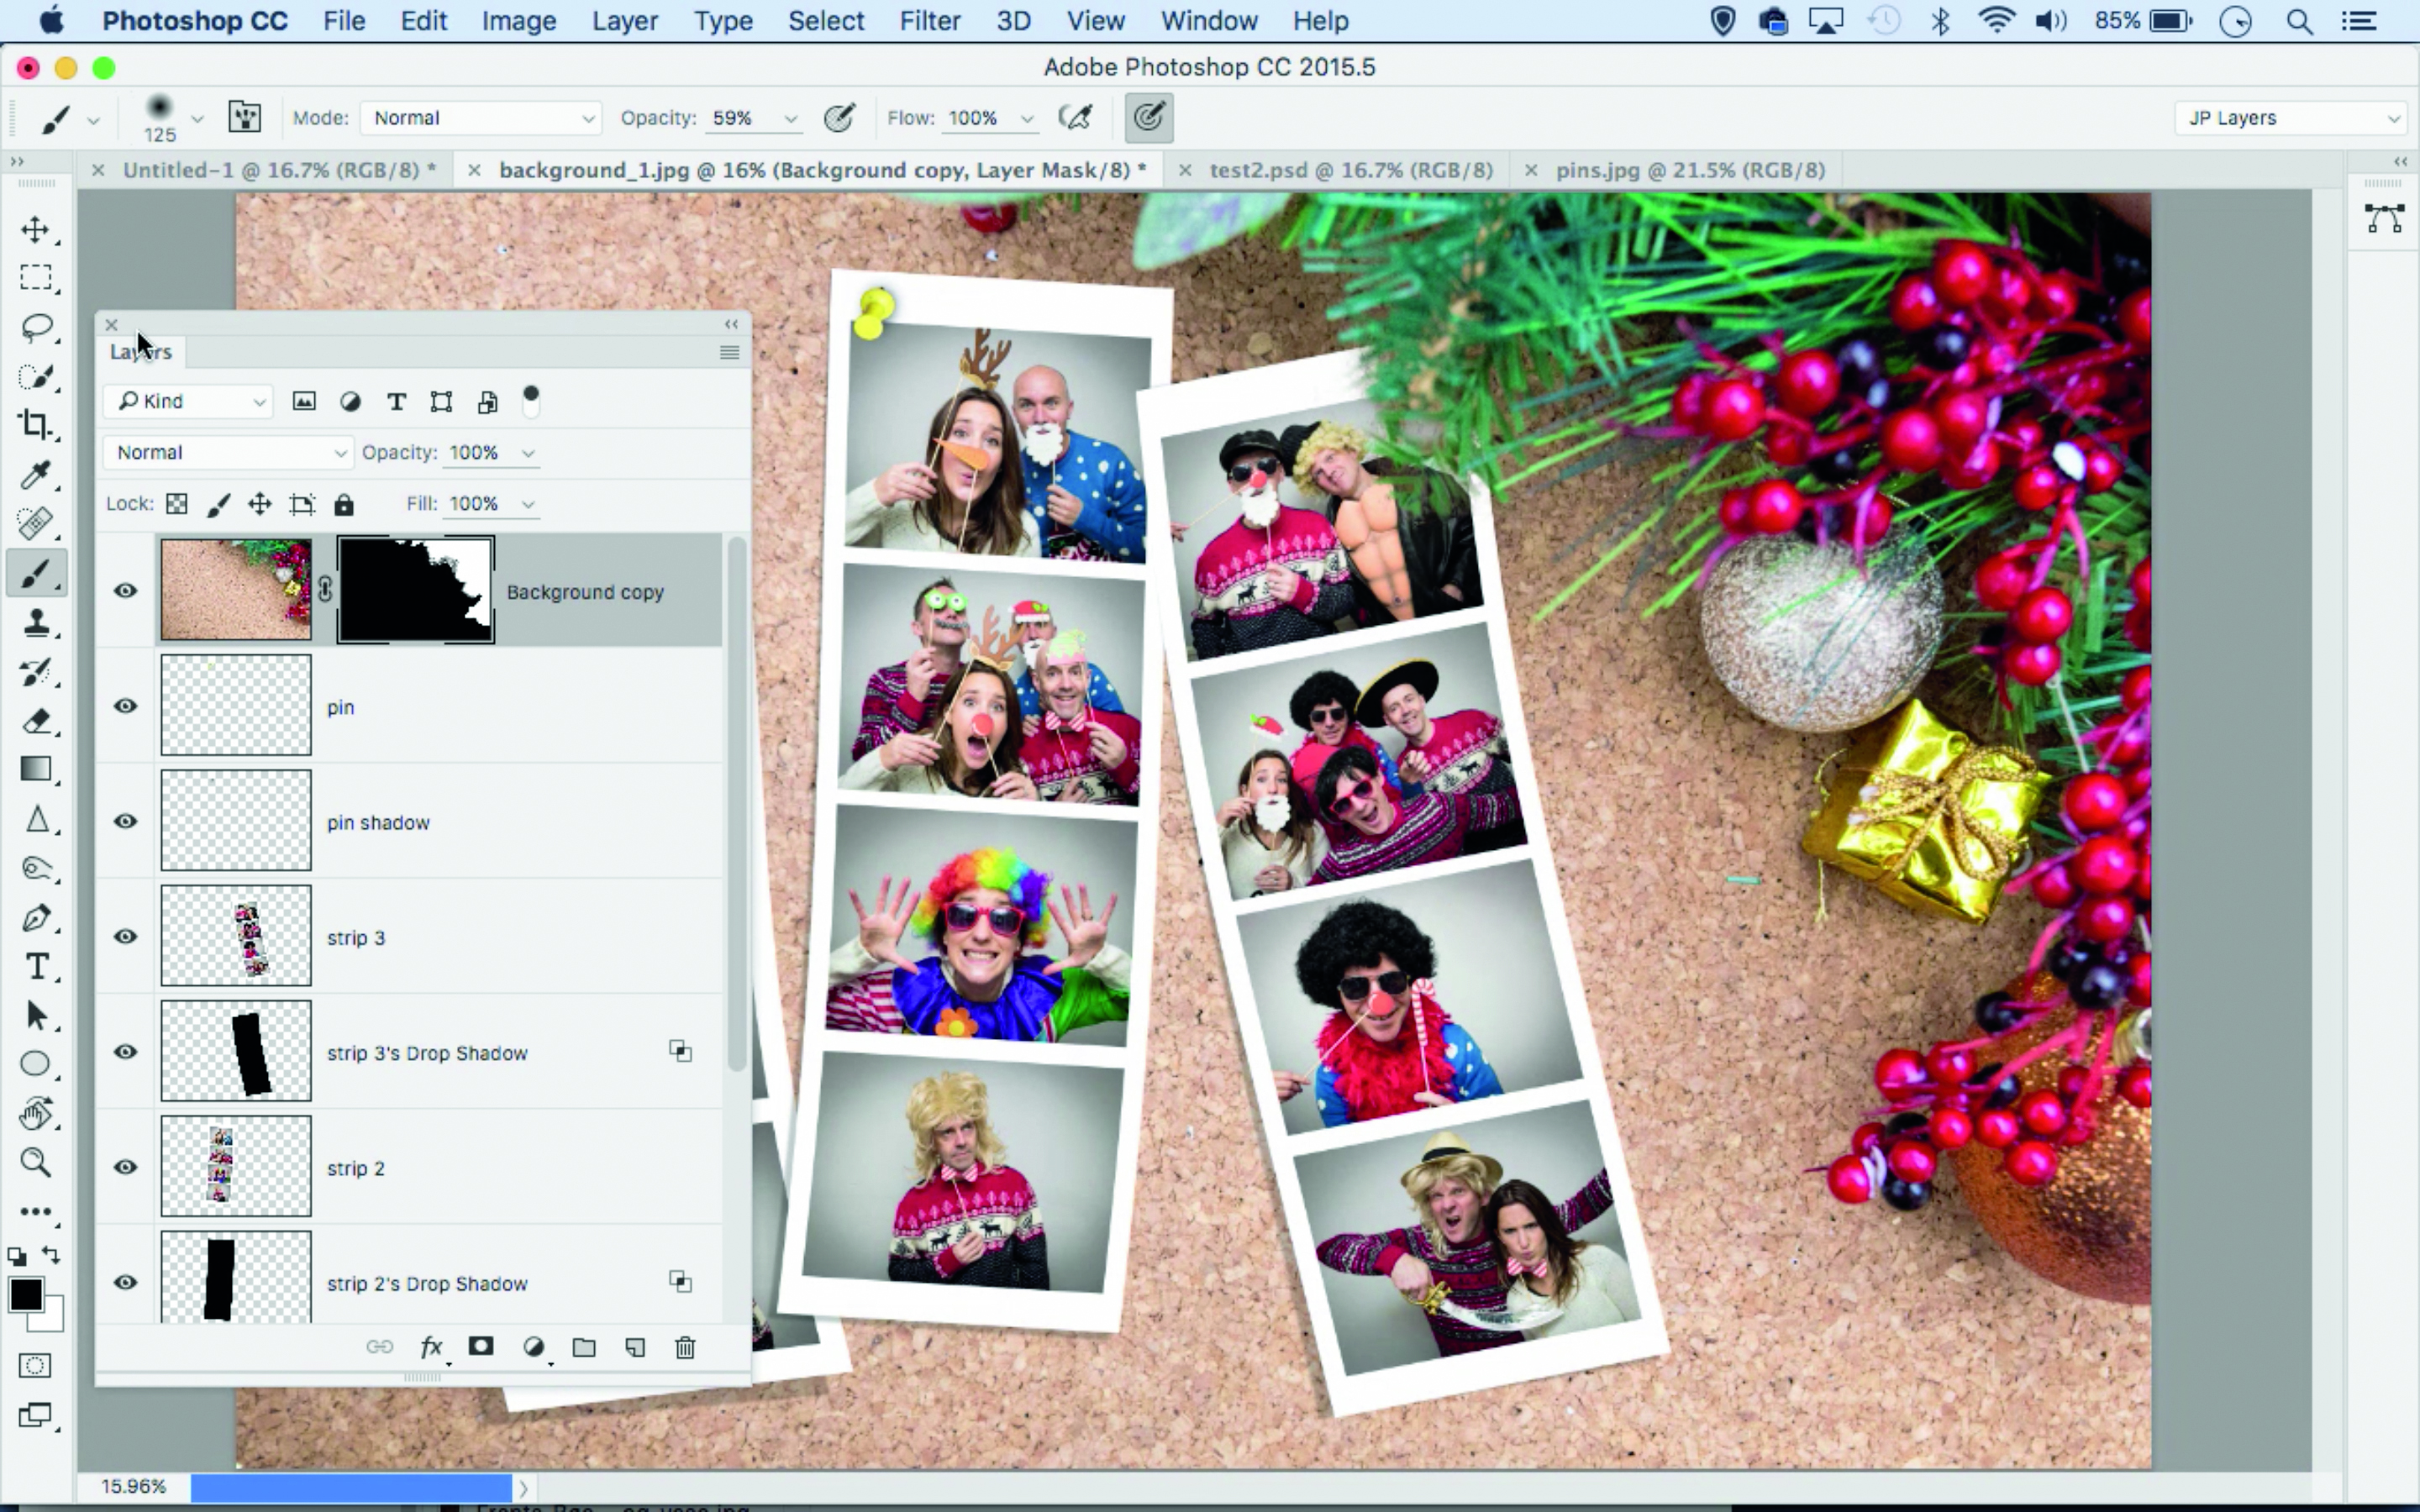
MASK AN OVERLAP
If areas of background need to be above the strip, duplicate the ‘Background’ layer, drag to the top, then select and mask the details.
The lead technique writer on Digital Camera Magazine, PhotoPlus: The Canon Magazine and N-Photo: The Nikon Magazine, James is a fantastic general practice photographer with an enviable array of skills across every genre of photography.
Whether it's flash photography techniques like stroboscopic portraits, astrophotography projects like photographing the Northern Lights, or turning sound into art by making paint dance on a set of speakers, James' tutorials and projects are as creative as they are enjoyable.
He's also a wizard at the dark arts of Photoshop, Lightroom and Affinity Photo, and is capable of some genuine black magic in the digital darkroom, making him one of the leading authorities on photo editing software and techniques.

