How to use Lightroom HDR Merge
Combine several exposures into a single, highly detailed image
- Download the start files here
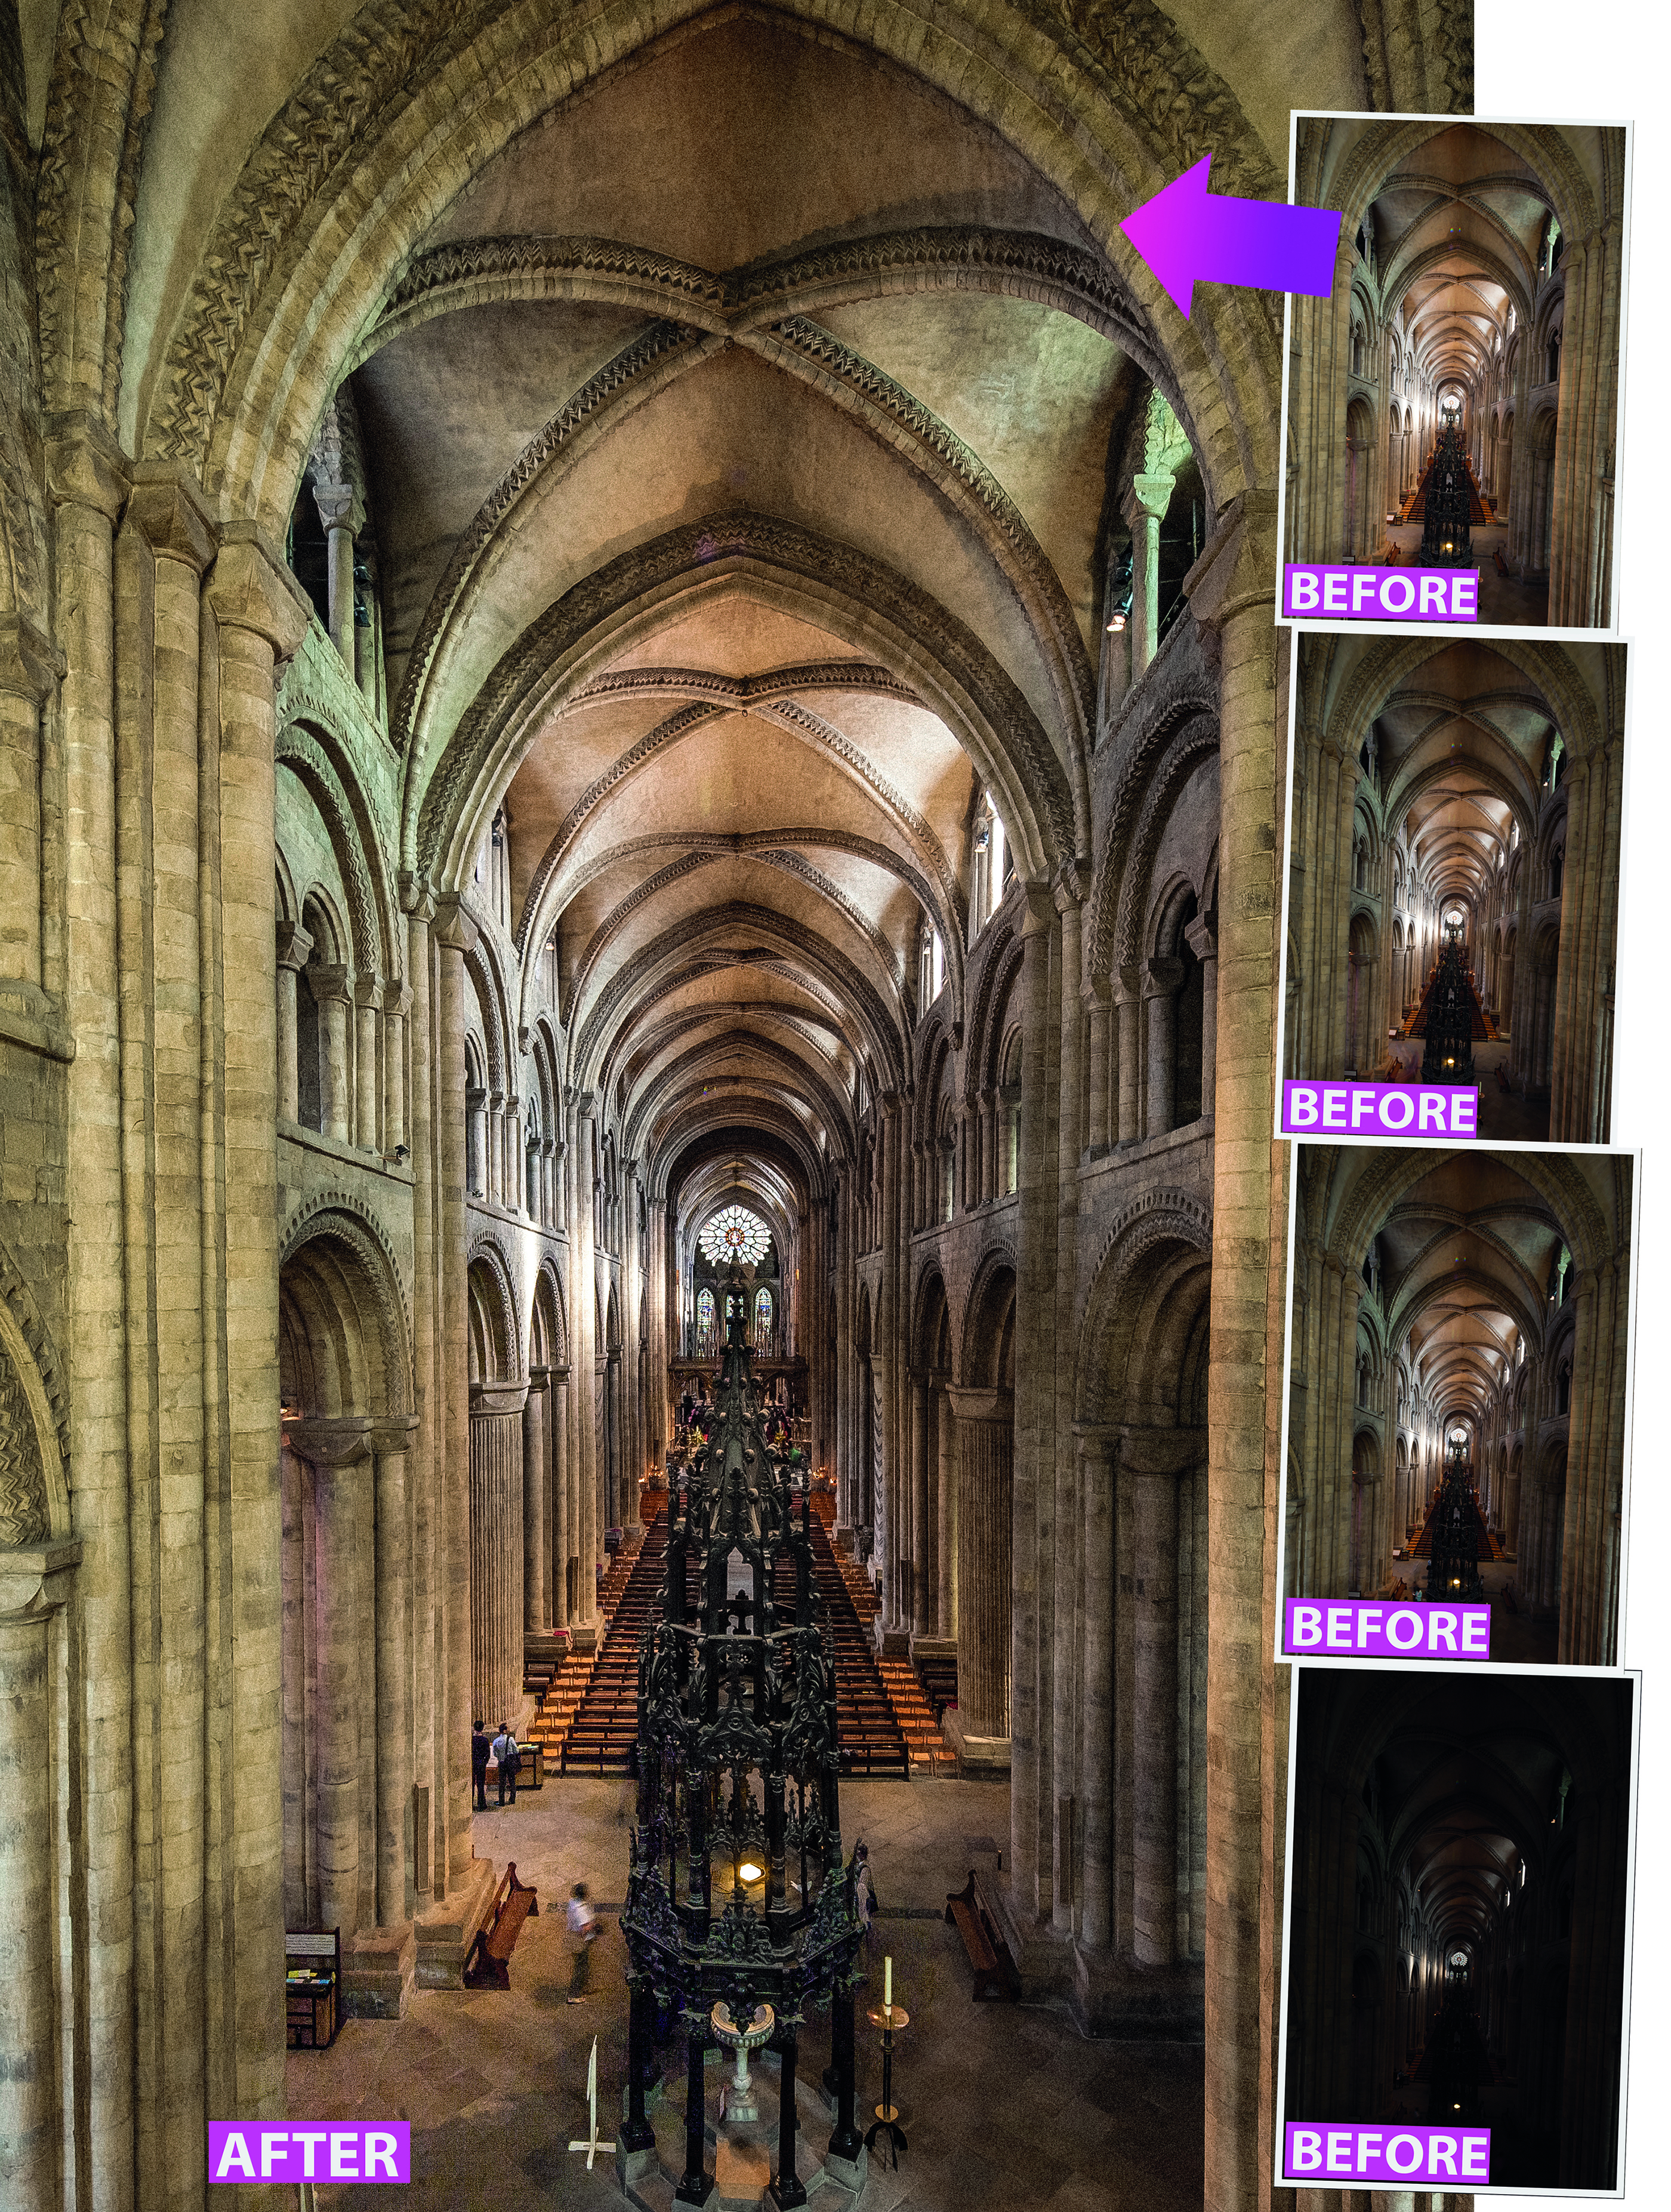
Lightroom’s HDR Merge tool combines several exposures into one, creating a high dynamic range image that has detail in the brightest highlights and darkest shadows (which makes it particularly useful for high-contrast interiors and landscapes).
Best of all, it then creates a merged DNG Raw file that is packed with tonal information. Understandably, the Lightroom feature isn’t as in-depth as dedicated HDR software, such as Photomatix Pro or Nik’s HDR Efex Pro – or even Photoshop’s own Merge to HDR command.
But Lightroom’s approach is slightly different. It creates a detail-rich Raw file without the over-processed look that puts many photographers off HDR. So it’s more HDR as a utility than as a style, and we think it’s all the better for it.
While limited, the options in the HDR Merge command are very effective. There’s an Auto Align feature, so as long as camera movement isn’t too severe, you can get away with merging handheld sequences. There’s also a Deghost control to fix movement within the frame.
And once you've got your merged image, you can apply regular Lightroom adjustments and presets as normal (see our list of free Lightroom presets).
Step-by-step guide: Reveal every detail
Three into one will go – for a detail-rich image that removes ‘ghosts’ from the scene
Use your camera’s Auto Exposure Bracketing (AEB) feature to easily create the separate exposures for your HDR image
1. Start HDR Merge
The best camera deals, reviews, product advice, and unmissable photography news, direct to your inbox!
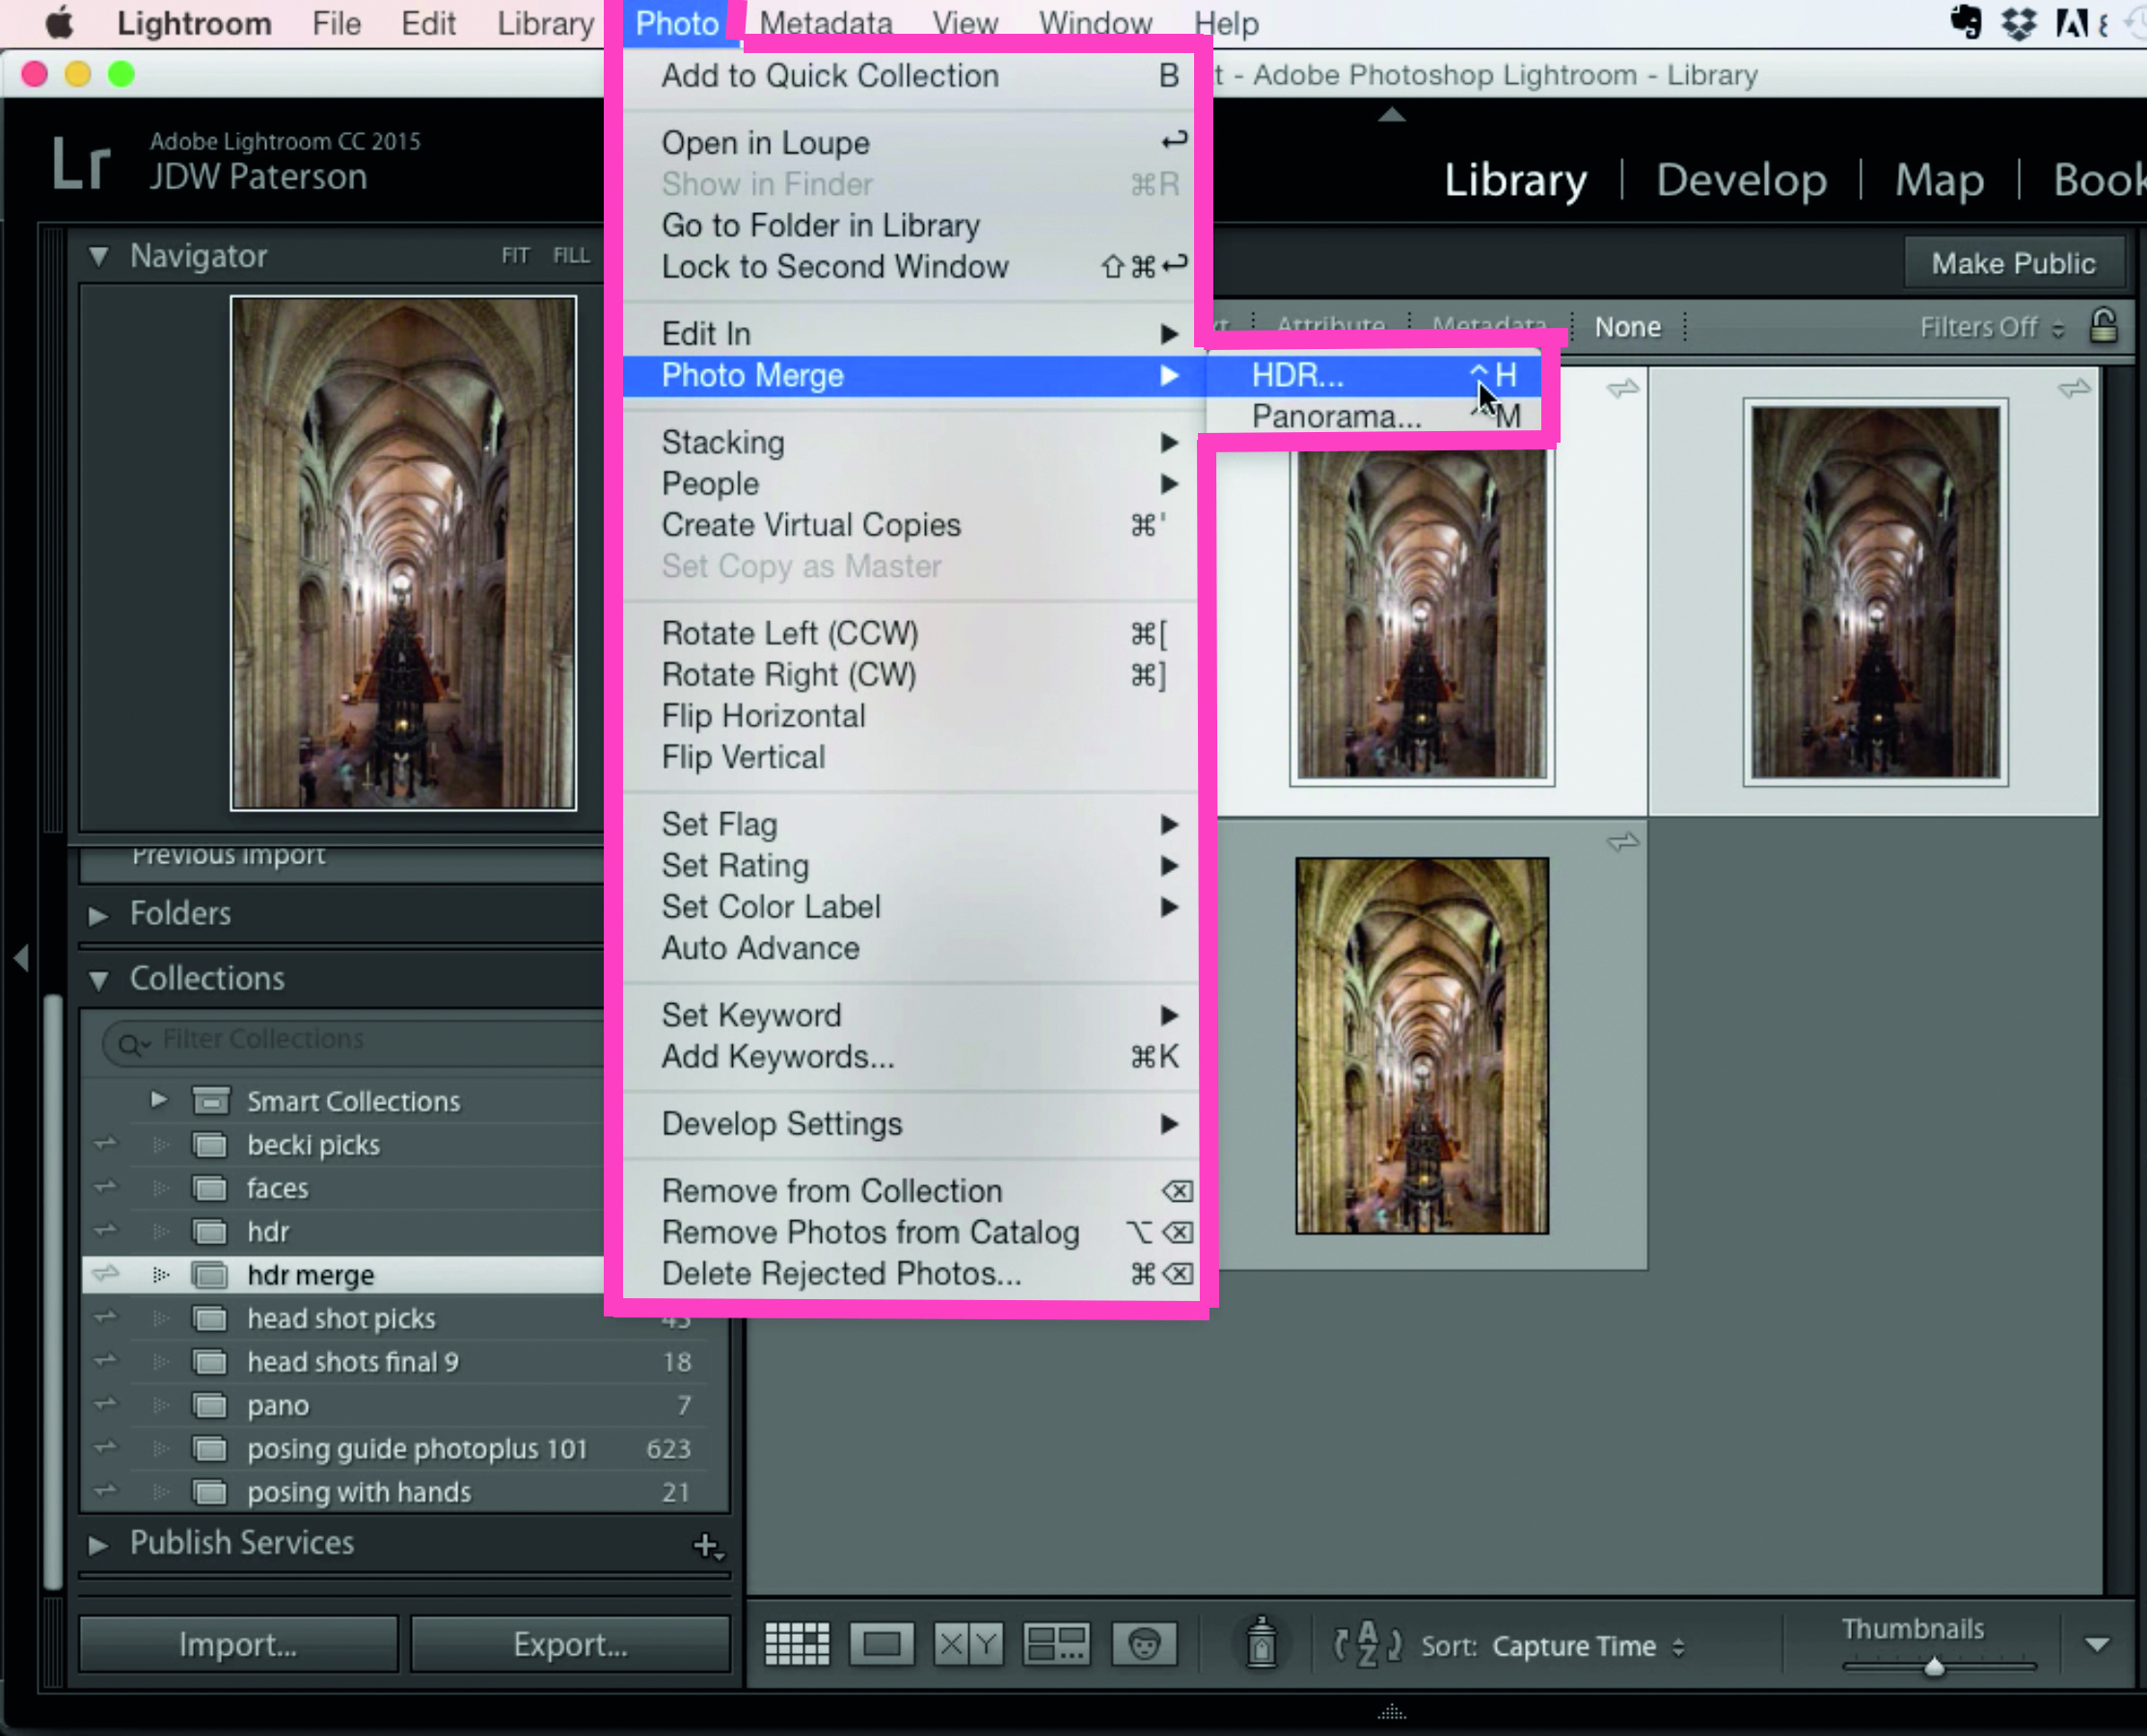
Take a set of Raw images with different exposures. Import them into Lightroom and Shift-click to select them all. To begin the HDR command, go to Photo>Photo Merge>HDR, or right-click the images and choose Photomerge, or simply press Ctrl+H.
2. Improve the tones
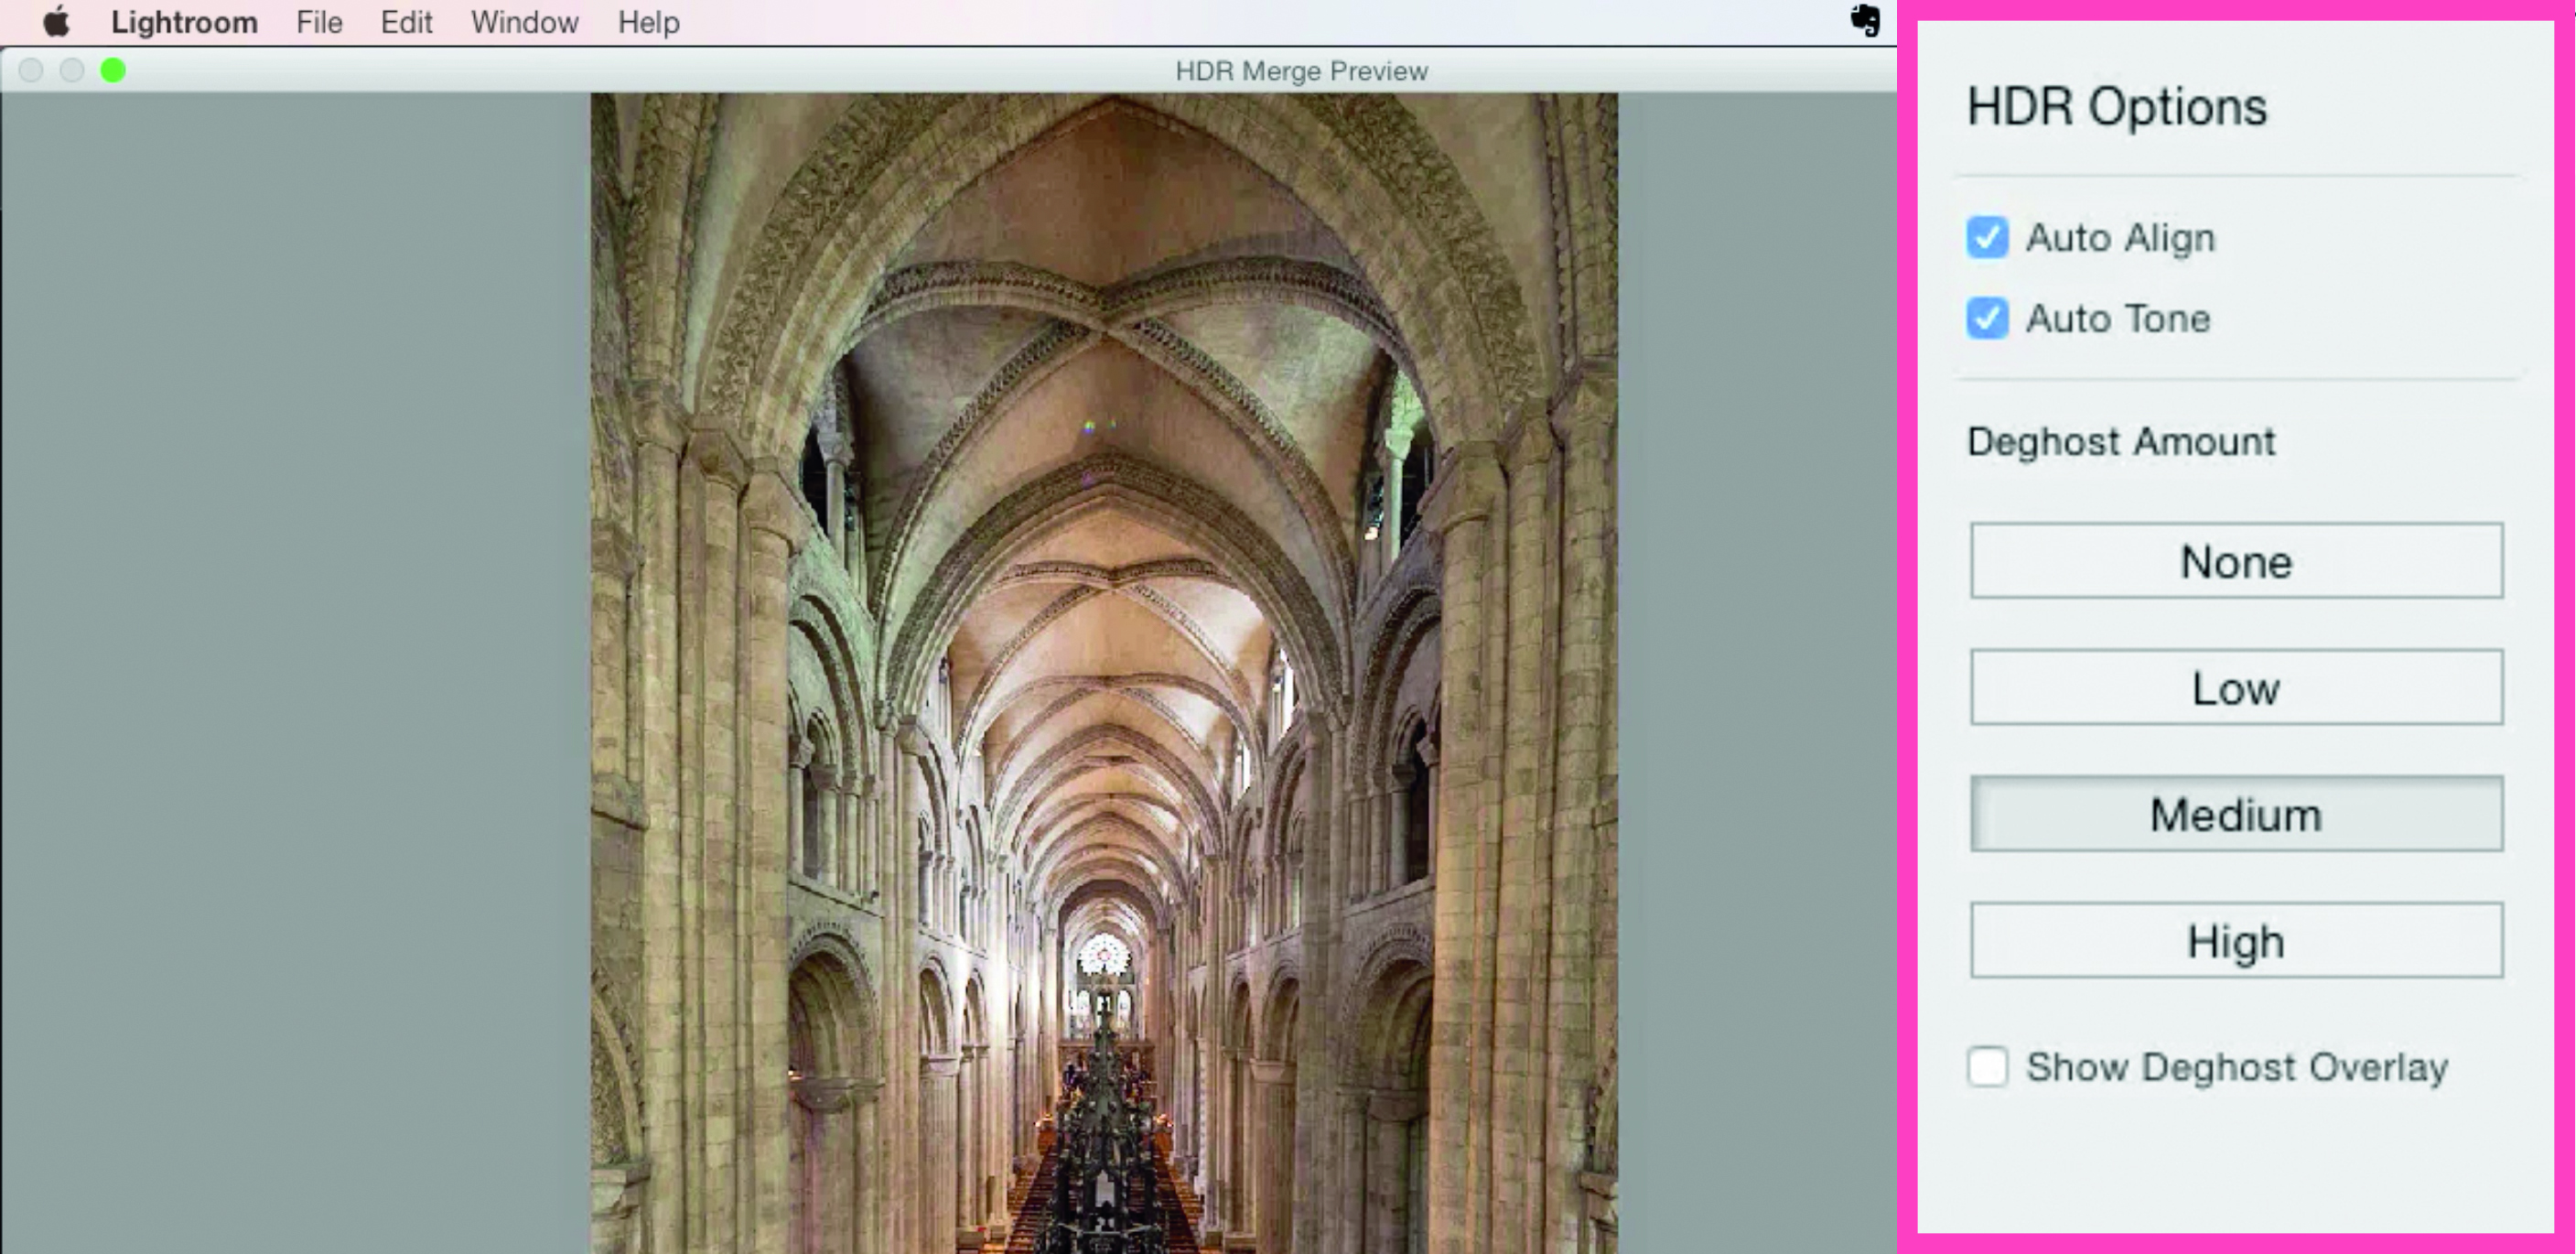
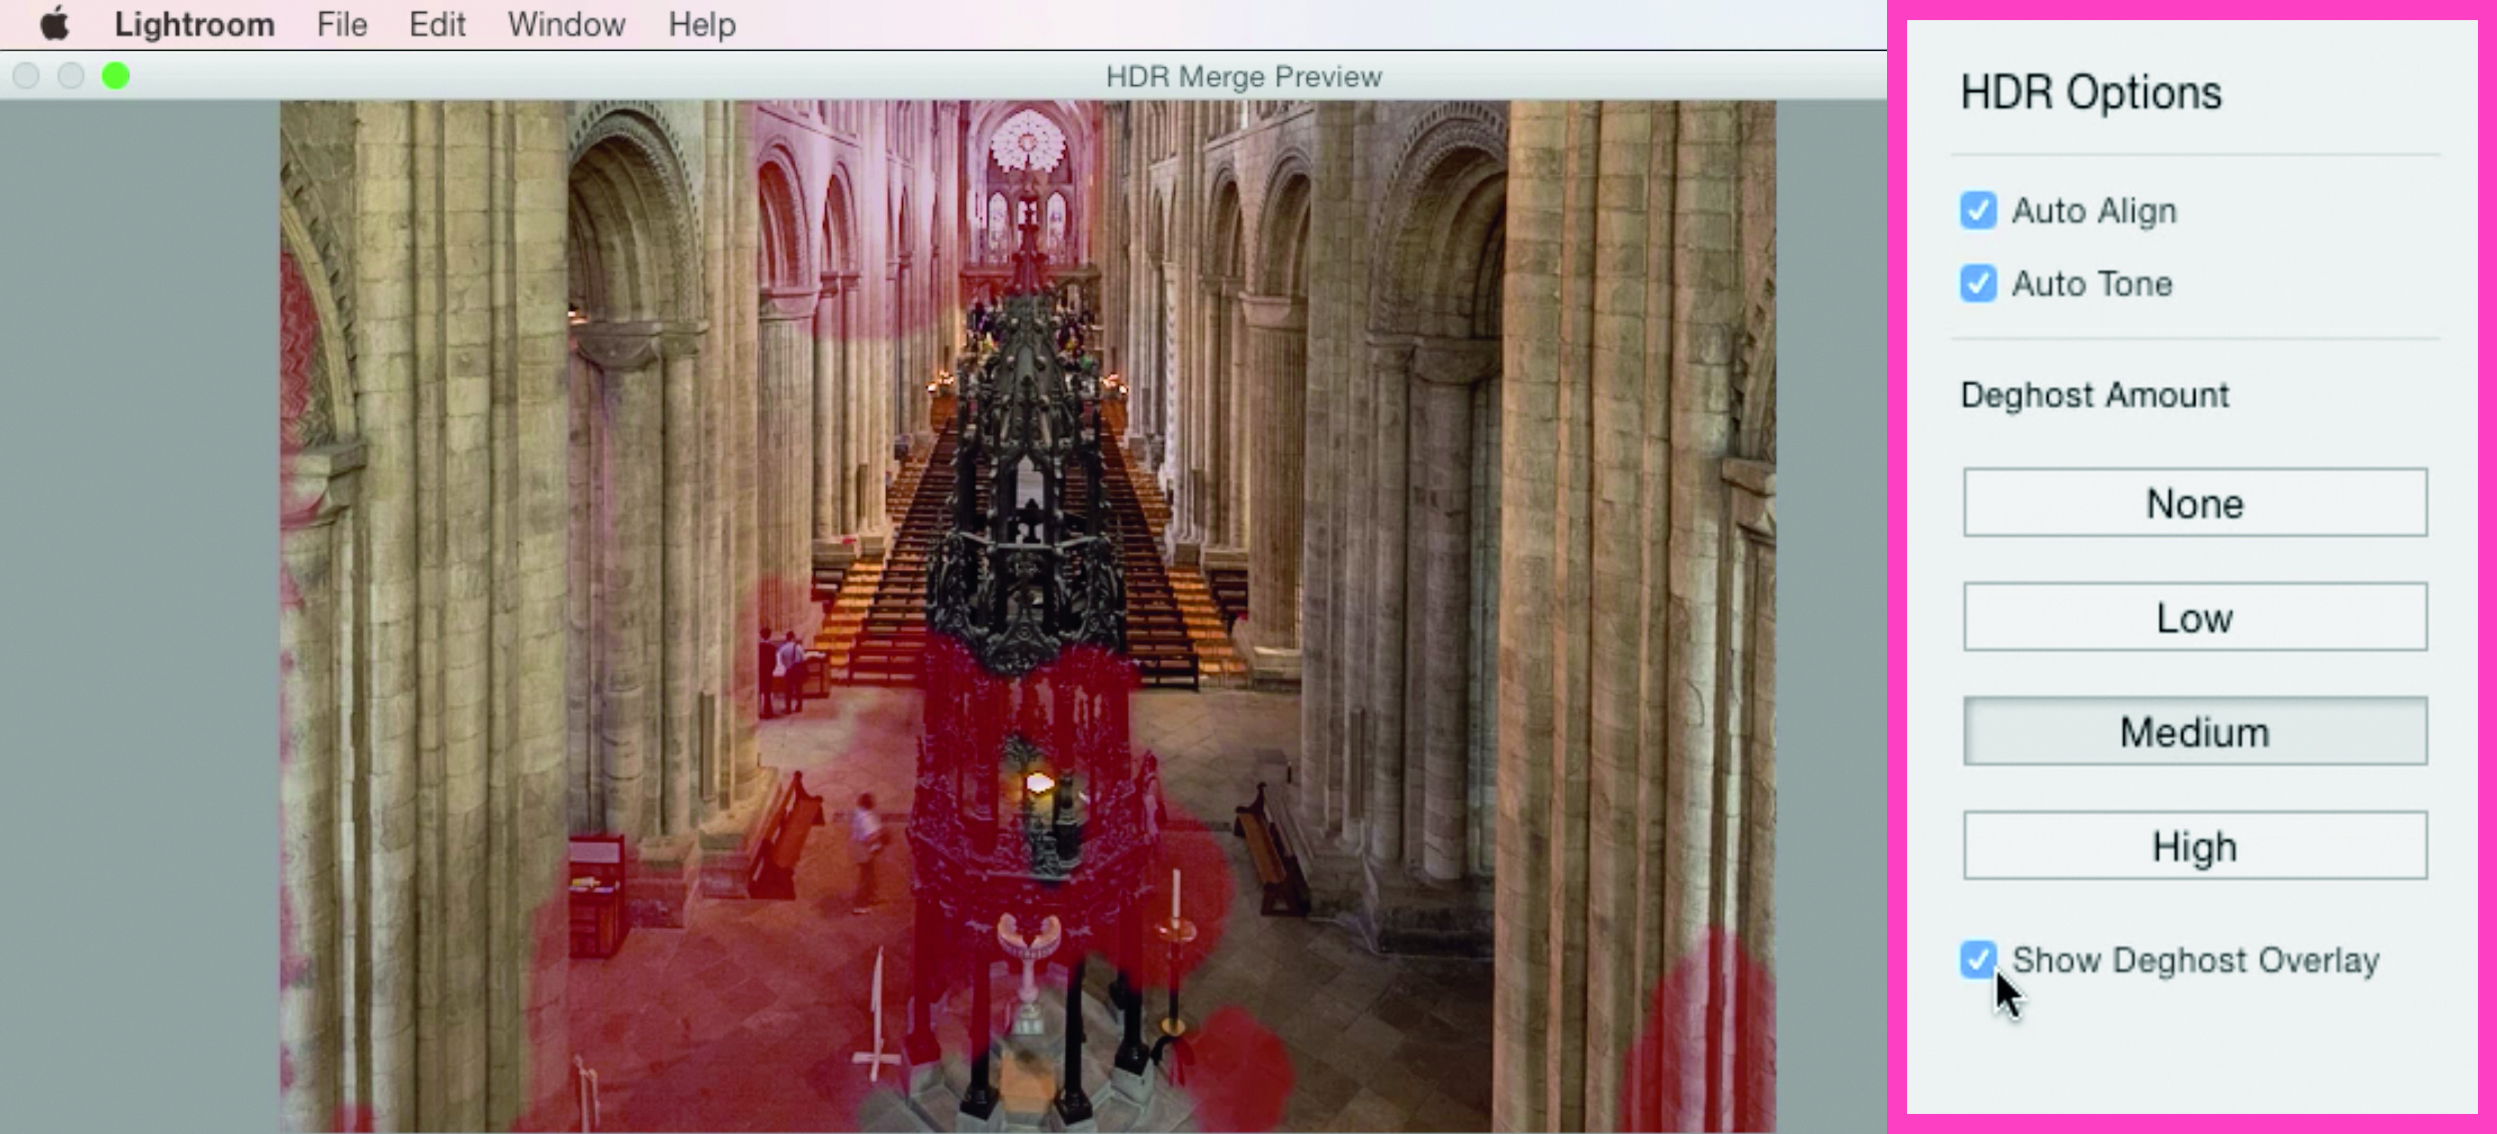
The Auto Align box helps if the alignment between frames is slightly off. The Auto Tone box brings out detail in shadows and highlights. It’s non-destructive, so once you merge the images, you can change the settings with the Develop module’s Basic panel.
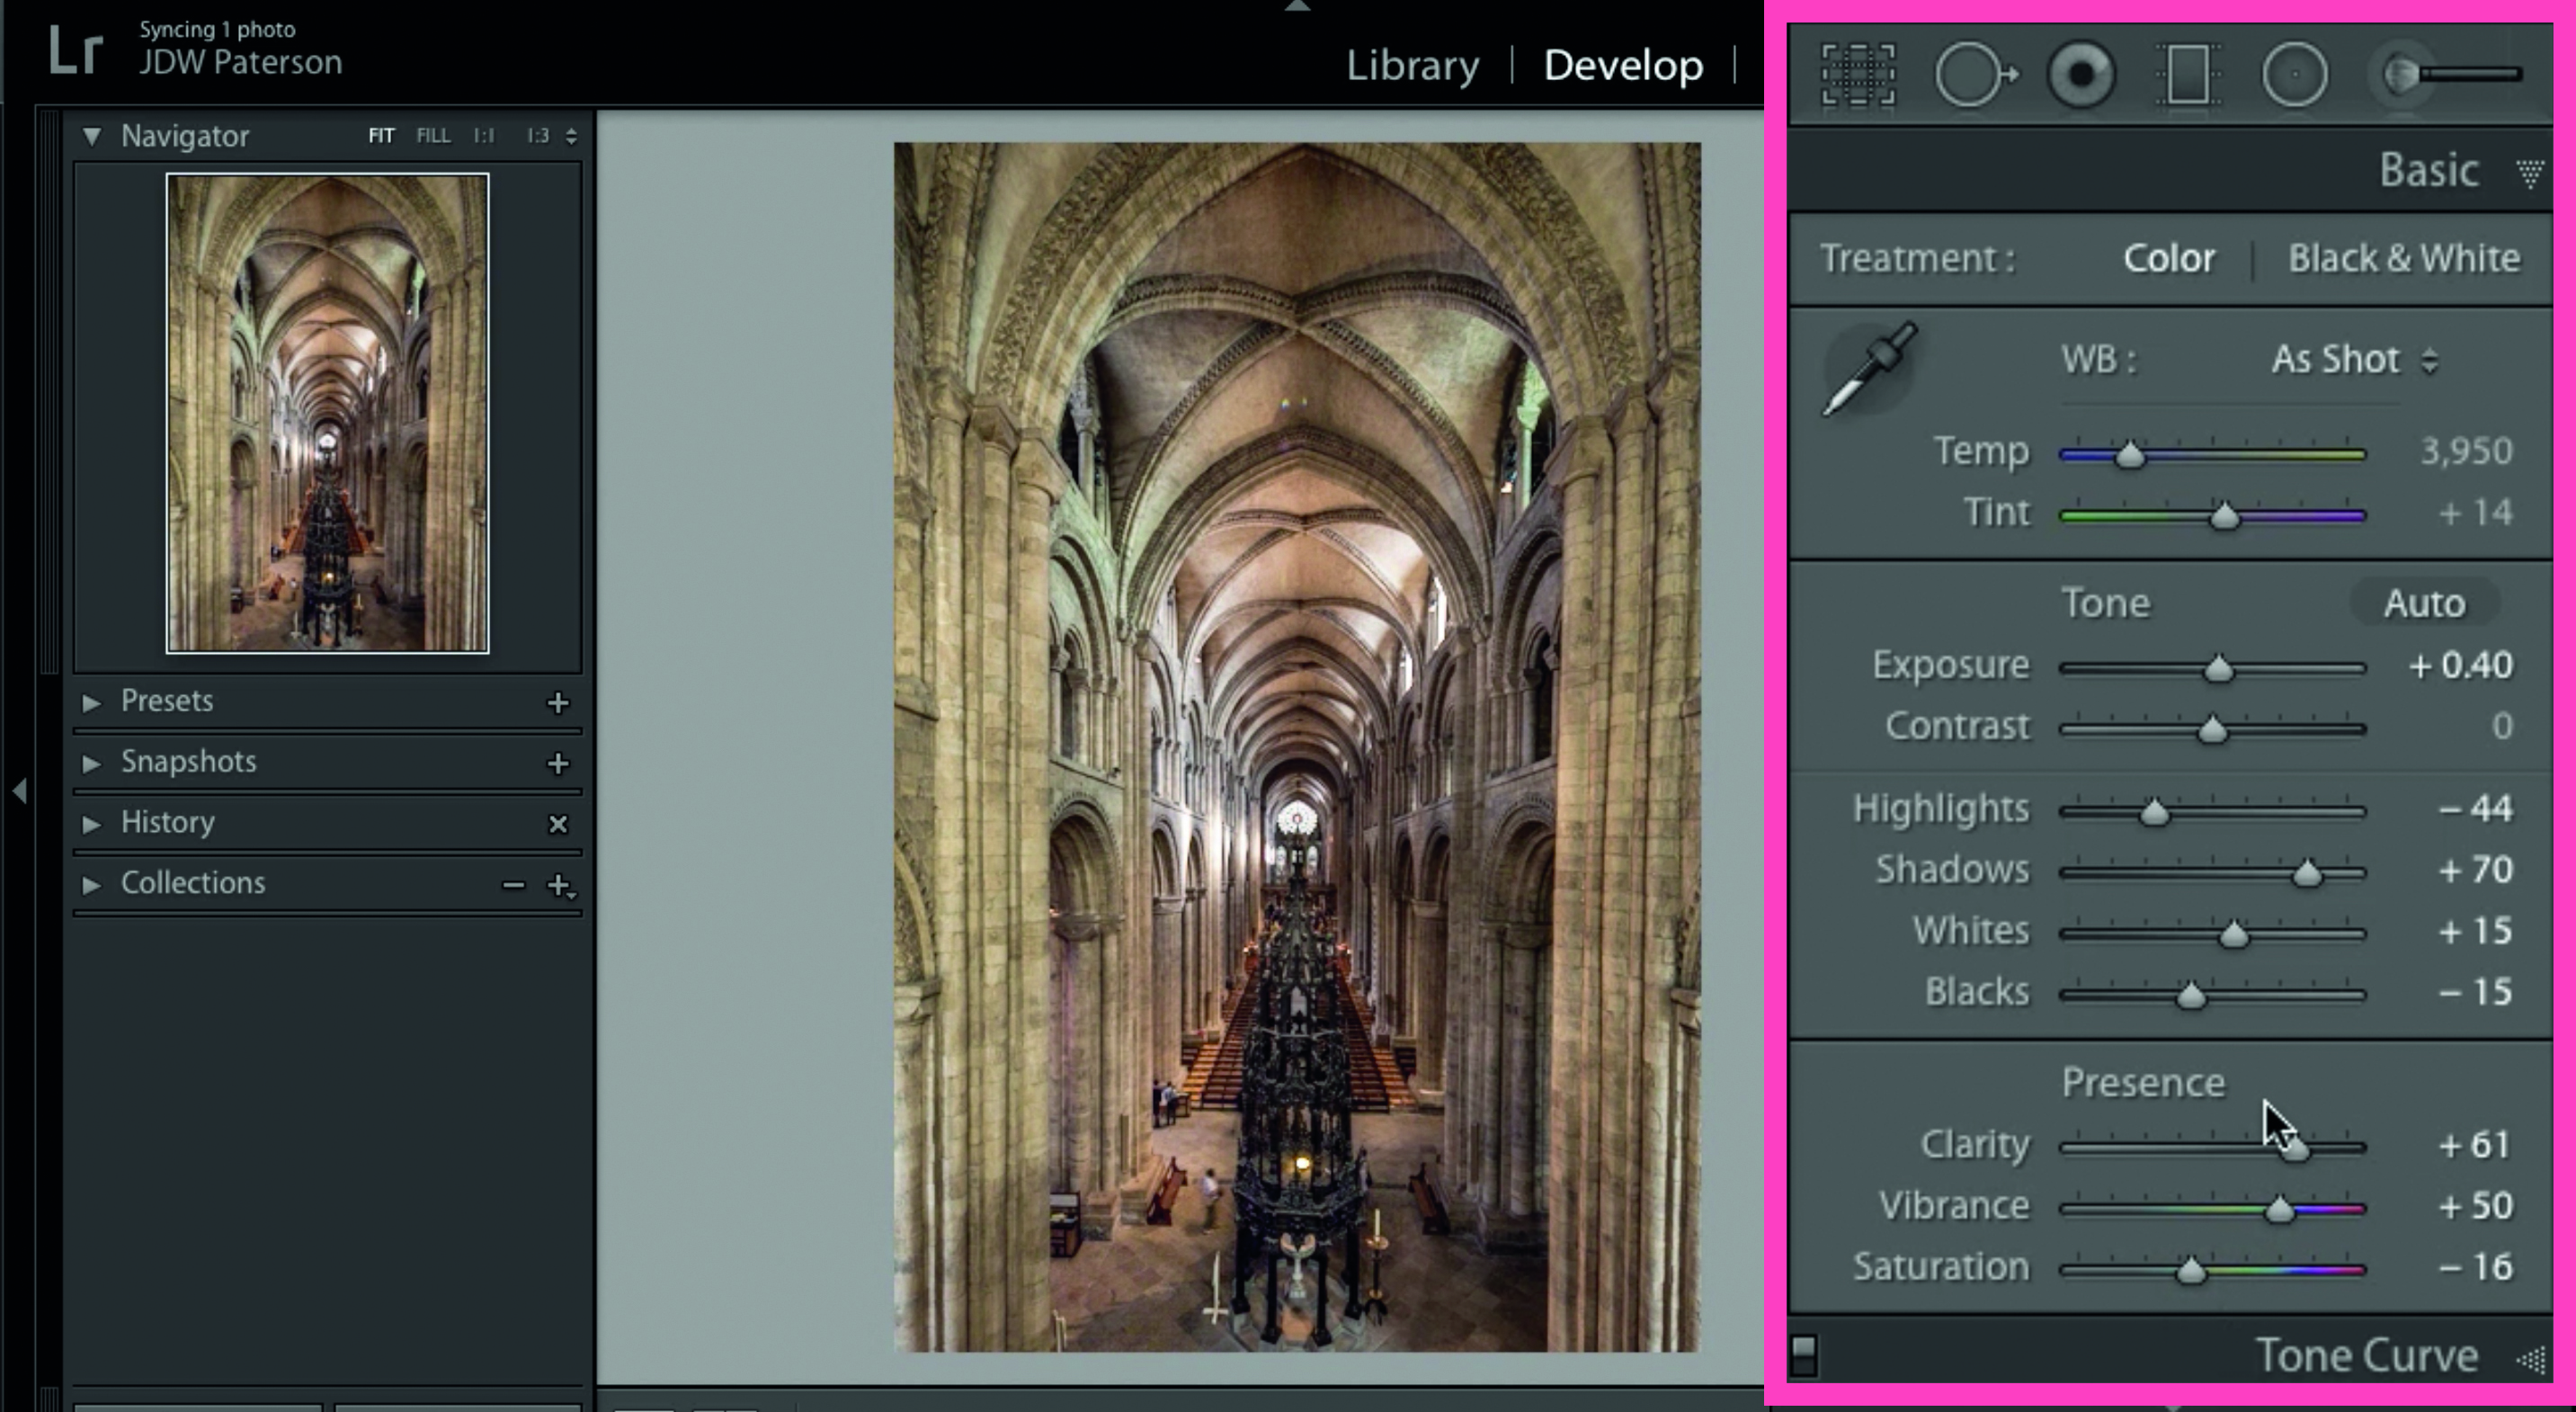
Because the resultant HDR image remains a Raw file, you can continue to use all the tools and sliders in Lightroom’s Develop module. However, you’ll notice that the range of the Exposure slider is increased: rather than -4 to +4 you can set it between -10 and +10, reflecting the increased dynamic range of the HDR image.

3. Fix ghosting movement
Deghost helps correct movement by taking the problematic area from a single frame rather than by merging several. Along with four deghosting strengths (we used Medium), there’s a ‘Show deghost overlay’ option to see the areas being corrected.
4. Merge and enhance
Click Merge and Lightroom creates a new Raw DNG file with the suffix HDR in your Library. There’s more tonal information than in a normal photo, so take the image into the Develop module and use the tonal tools and the Adjustment Brush to improve it.
Read more: How to use Adobe Lightroom Mobile
The lead technique writer on Digital Camera Magazine, PhotoPlus: The Canon Magazine and N-Photo: The Nikon Magazine, James is a fantastic general practice photographer with an enviable array of skills across every genre of photography.
Whether it's flash photography techniques like stroboscopic portraits, astrophotography projects like photographing the Northern Lights, or turning sound into art by making paint dance on a set of speakers, James' tutorials and projects are as creative as they are enjoyable.
He's also a wizard at the dark arts of Photoshop, Lightroom and Affinity Photo, and is capable of some genuine black magic in the digital darkroom, making him one of the leading authorities on photo editing software and techniques.

