In the spotlight: tips for using a snoot in photography
Create theatrical lighting with your hotshoe flash, as we shot you how to use a snoot in photography to control the light
Watch the video: how to use a snoot in photography
A flashgun is always a handy tool to have in your camera bag, but it can often be like using a sledgehammer to crack a nut. For this reason, you almost always need extra add-on accessories to turn the flash into a useful creative effect.
The flash accessory with the most unusual name has to be the snoot. This is just a long tube or funnel that attaches to your flashgun, converting it from a floodlight into a spotlight, picking out a small area of the scene.
A snoot is very handy when you are photographing a portraits against a wall. Even though most add-on strobes have a zoom head that enables you to narrow the spread of light, the flashgun will still light up the majority of the frame.
A snoot restricts the spread to a narrow beam, so that some areas of the frame are not lit at all by the flash. It is an effect that is not just useful for portraits; it can also be used for still-life arrangements, where you only want one thing on your tabletop to be highlighted.
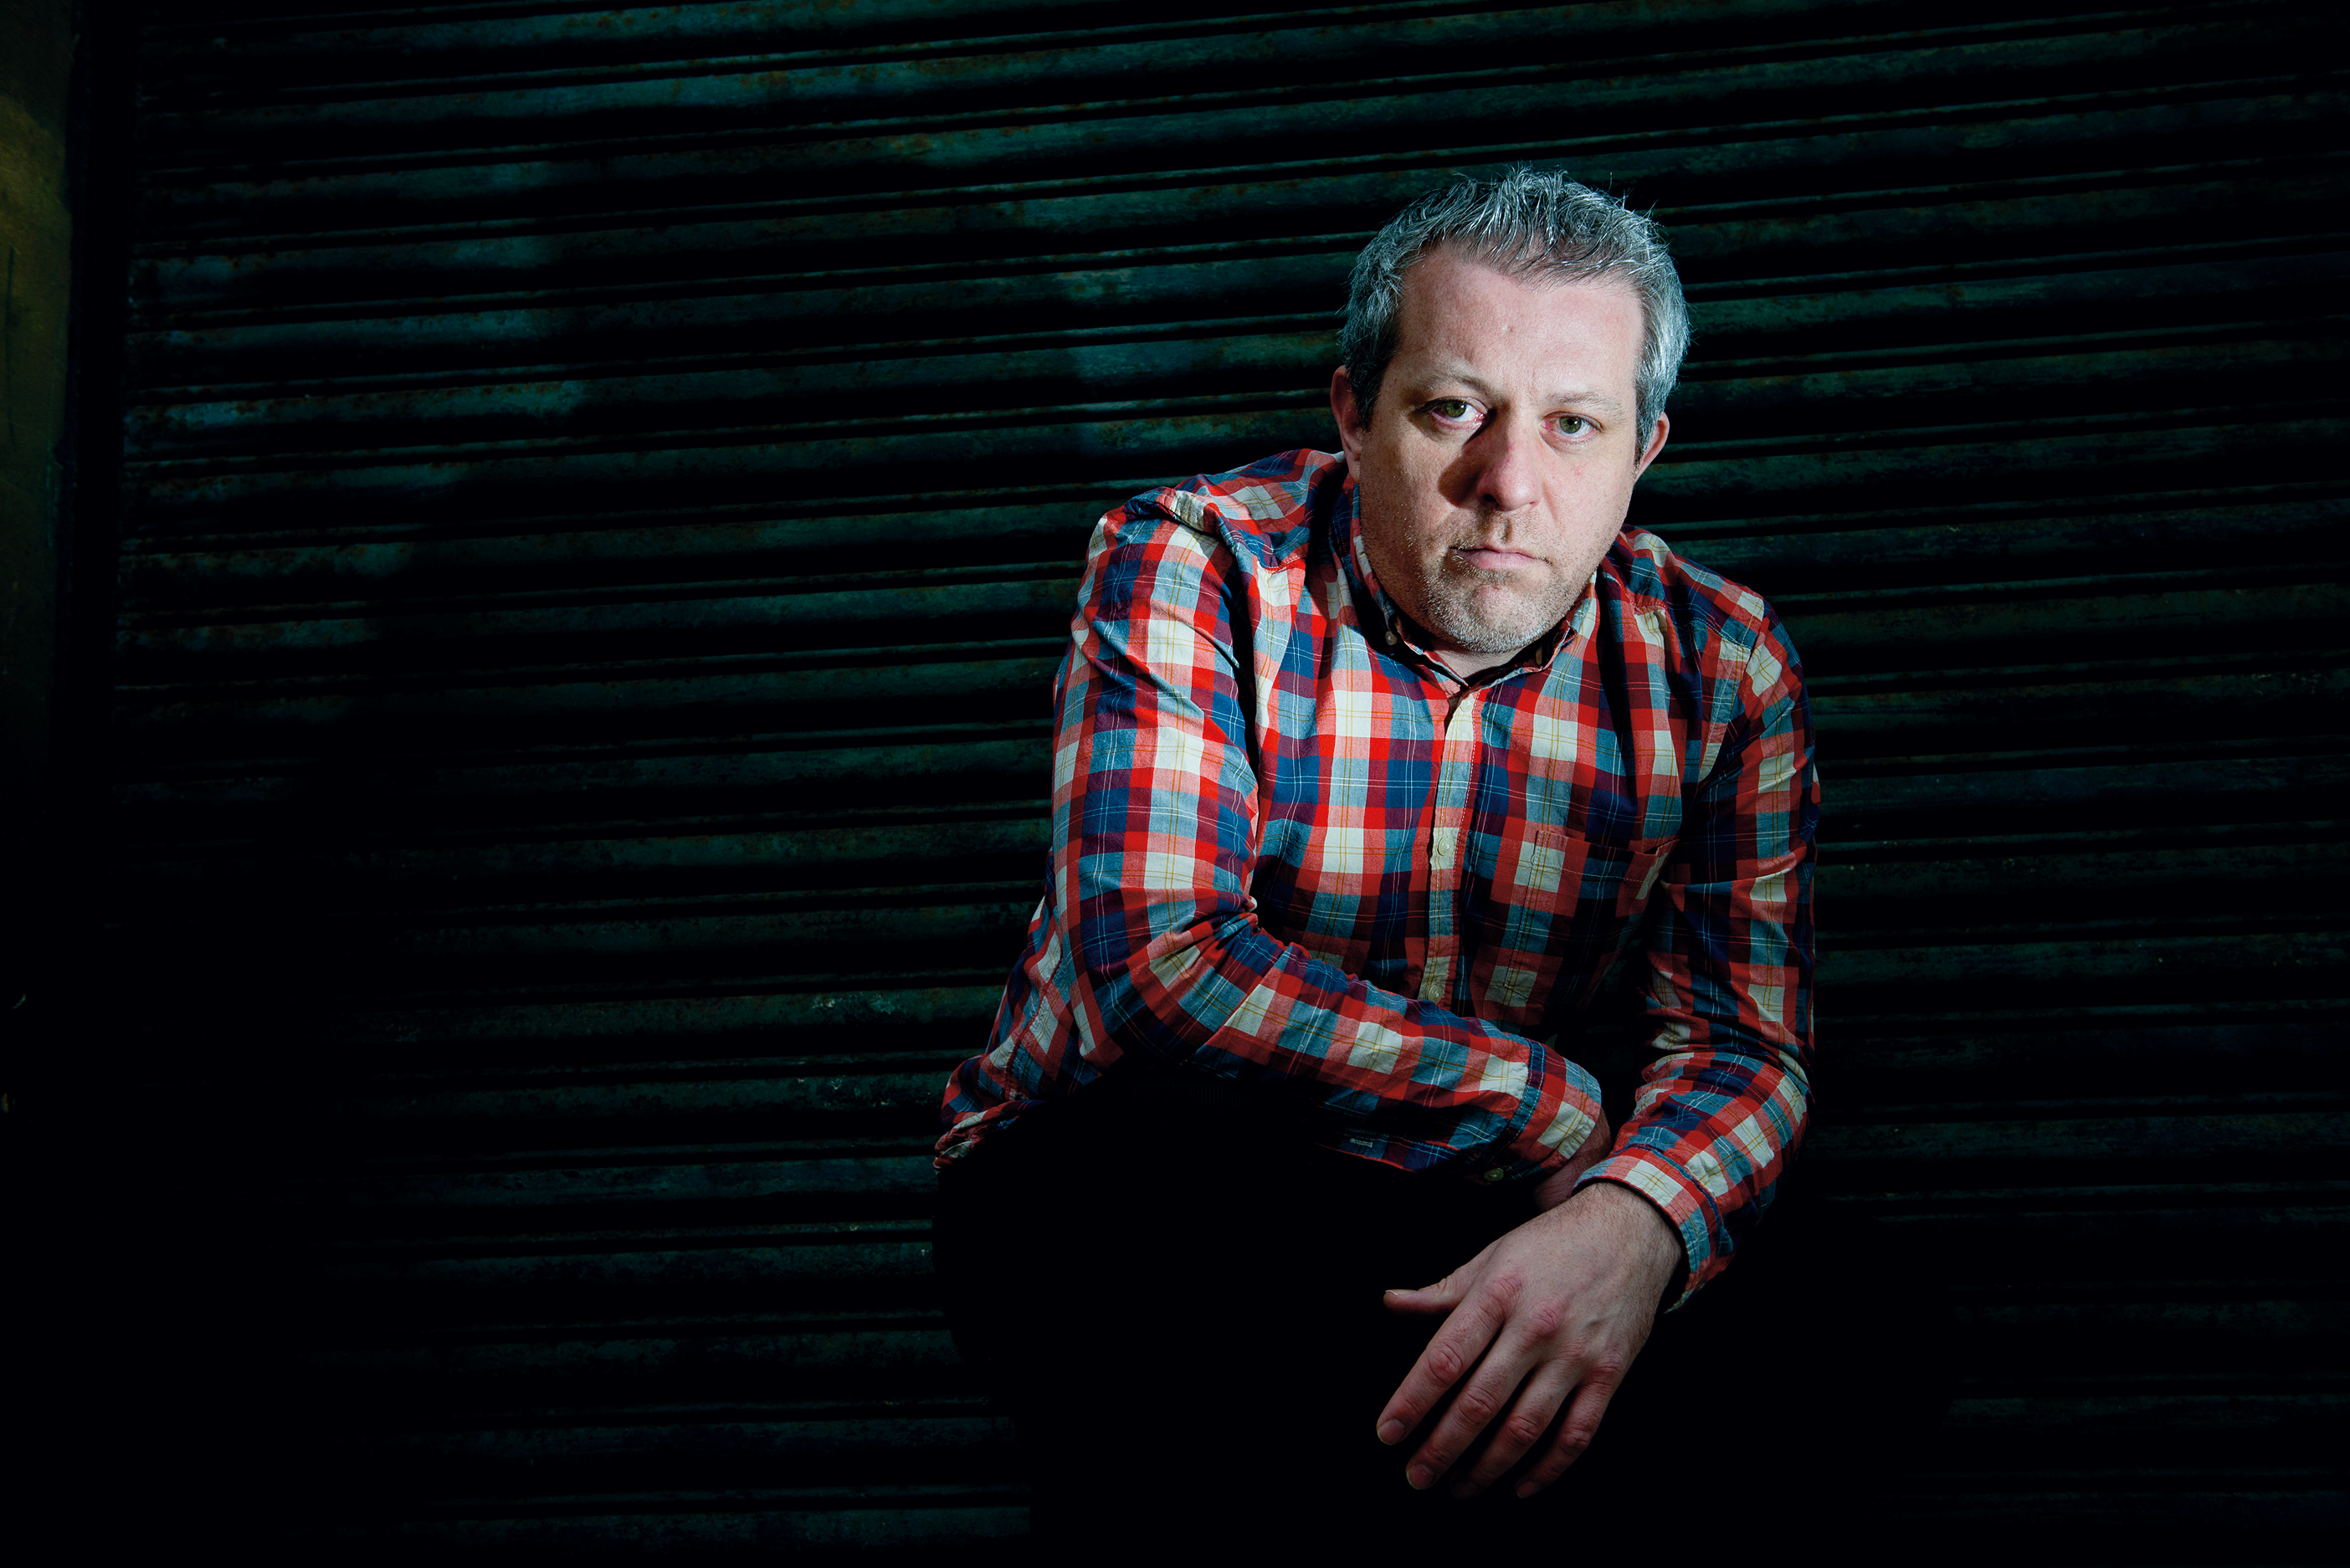
A snoot is of most use in circumstances where the background is very close behind the subject. If the background is much further away then the wide coverage of the flash tube is not an issue, as the light power falls off so sharply with distance.
With a portrait, if the wall or backdrop is just behind the subject, the background becomes as well lit as the person. The result is a cold, analytical shot that lacks any atmosphere. Use a snoot and just the person’s face is lit, creating a much more theatrical effect.
The best camera deals, reviews, product advice, and unmissable photography news, direct to your inbox!
Commercially made snoots are available to fit most add-on flashguns (see our guide to the best flash diffusers, softboxes and modifiers to see kits that come with snoots), but there is no need to spend money on one to get this cool effect, as you can make your own light funnel very easily. Whether you buy one or make one, there are some things to watch out for to get successful results with a minimum of fuss…

01 Backs against the wall
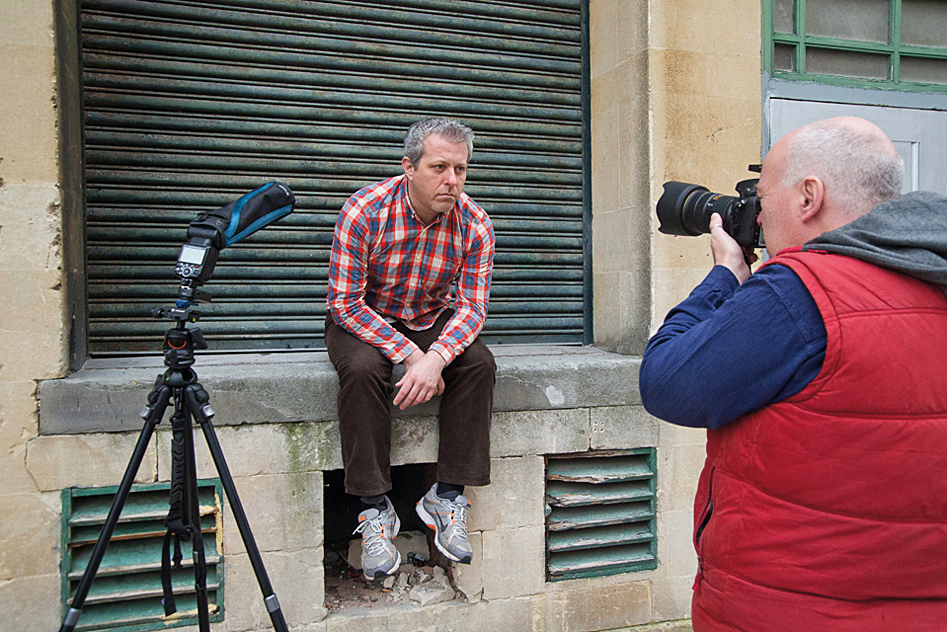
A snoot is particularly useful when there is little option but for the subject to stand or sit near the backdrop you are using. It is the best option if you don’t want the whole background to be as well lit as the person. The theatrical lighting effect is very well suited to male portraiture.
02 Base exposure
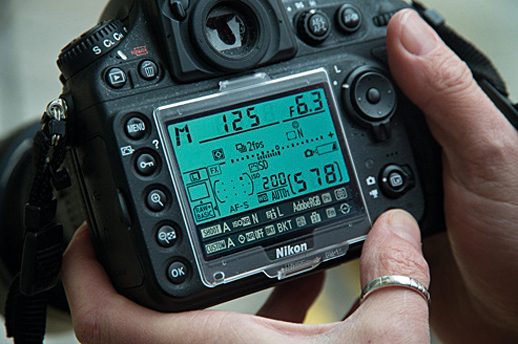
With off-camera flash it is wise to use manual exposure mode, particularly when lighting just a small part of the frame. Settings of 1/125 sec at f/6.3 and ISO200 are a good starting point. Take a test shot of the backdrop without flash to see that the shot looks dark enough.
03 That’s a wrap!
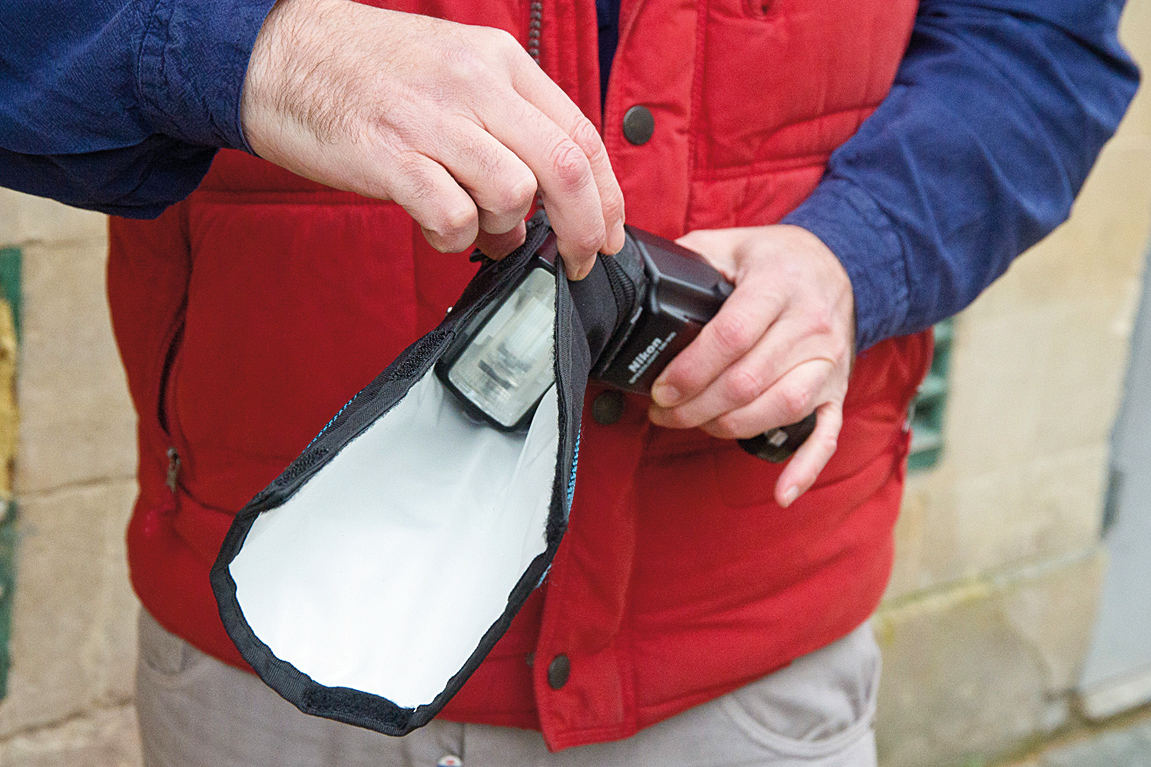
We used a Large Rogue FlashBender, which wraps around a flashgun with an elastic strap and velcro, as our snoot. You also need a trigger for the off-camera flash, and something or someone to hold the flash in the right position.
04 Pull the trigger
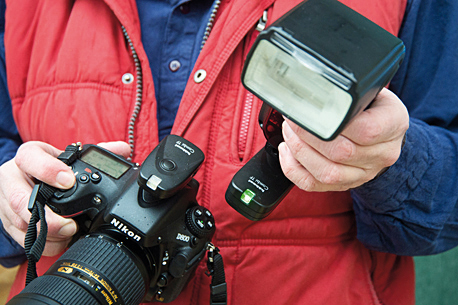
You can use a snoot with the flash mounted on the hotshoe, but you get more dramatic results if the flash is used off-camera to create a side-lit effect. The best solution is to use a two-part radio trigger. Low-cost options are available on eBay, and top pro options include the Pocket Wizard range. We used a mid-priced option from hähnel.
05 Power control
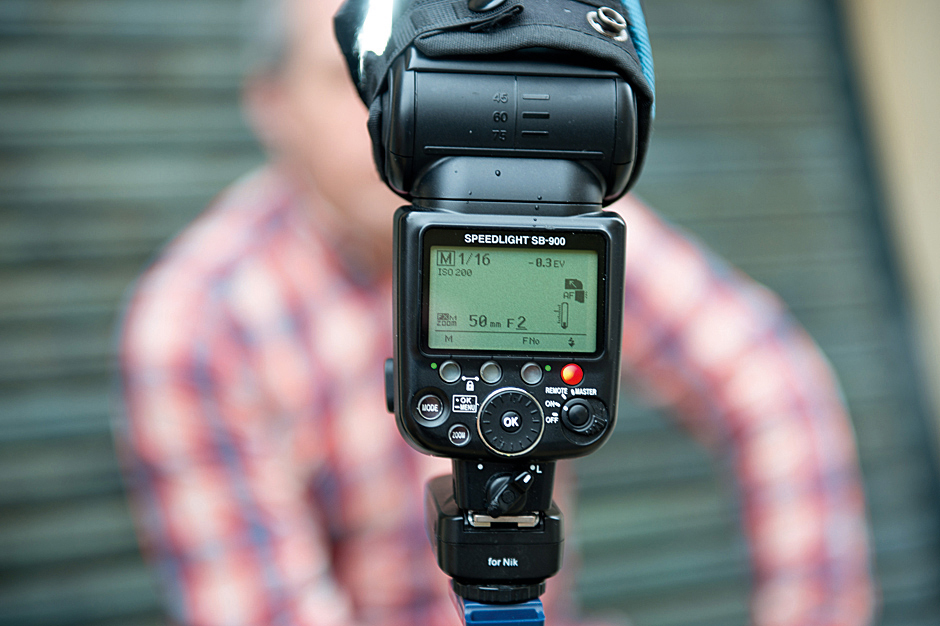
The exposure for the subject is simply controlled by altering the power output of the flashgun. Use the flash in manual mode and start off with a setting of 1/8 or 1/16 power. Take a test shot and if the subject is too bright, reduce the power – if they're too dark, increase it!

Top tips: A snoot for every budget
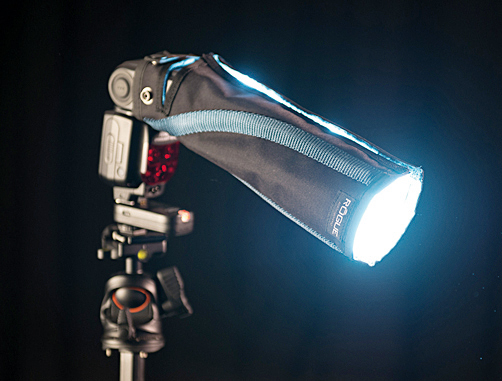
01 Rogue FlashBender
Reinforced nylon portable solution available in two sizes, held on with velcro strap. Also works as a bounce card.
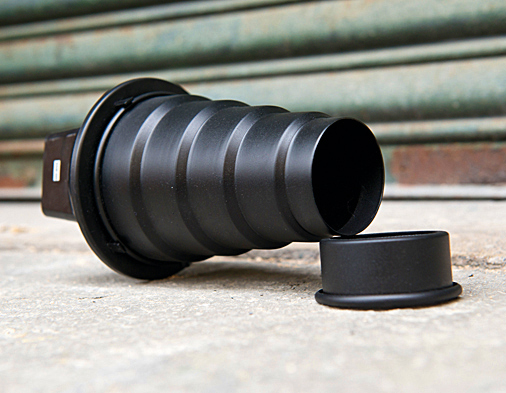
02 Interfit Strobie
Metal snoot with add-on grid, just one part of a bargain kit of Strobie flash portrait accessories from Interfit.
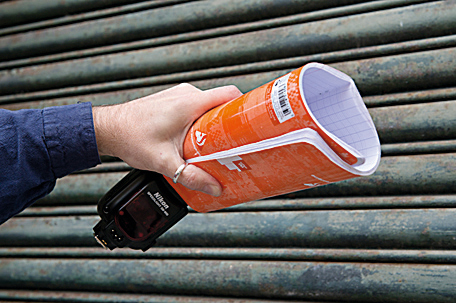
03 Use paper or card
On location, fashion your own impromptu snoot from a rolled up magazine, notebook or newspaper, or a piece of card.
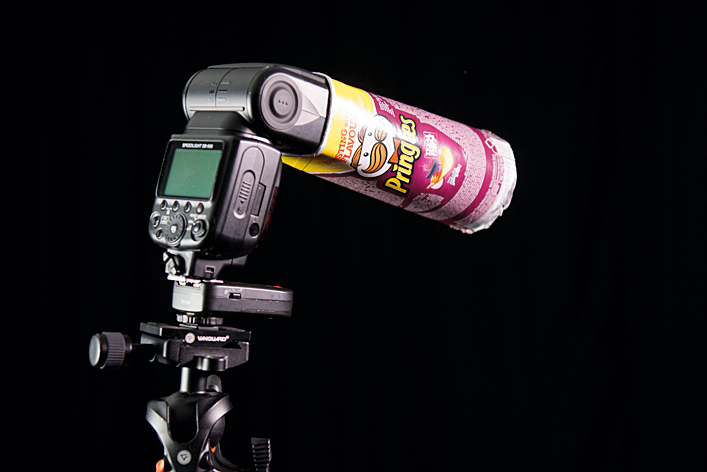
04 Use a Pringles tube
This potato chips can was just the right size to make a snugly-fitting snoot for our Nikon SB-900 flashgun. You need to cut the end off!
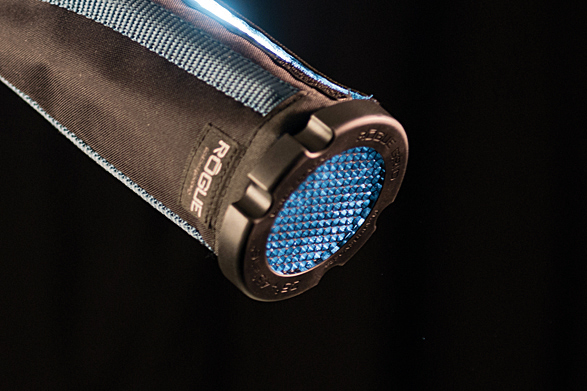
05 Honeycomb grid
A grid or honeycomb narrows the spread of flash light further, and can be used with a snoot. A set from Rogue is a cost effective option.

More videos:
Photography tips and techniques videos
The best flash diffusers, softboxes and modifiers for your speedlight
Gobo lighting: tips for dramatic portraits and film noir photography
Studio portrait lighting: essential tips and setups explained
The best flashgun in 2019
The 50 best camera accessories
Chris George has worked on Digital Camera World since its launch in 2017. He has been writing about photography, mobile phones, video making and technology for over 30 years – and has edited numerous magazines including PhotoPlus, N-Photo, Digital Camera, Video Camera, and Professional Photography.
His first serious camera was the iconic Olympus OM10, with which he won the title of Young Photographer of the Year - long before the advent of autofocus and memory cards. Today he uses a Sony A7 IV, alongside his old Nikon D800 and his iPhone 15 Pro Max.
He is the author of a number of books including The Book of Digital Photography, which has been translated into a dozen different languages.
In addition to his expertise in photography and videomaking, he has written about technology for countless publications and websites including The Sunday Times Magazine, The Daily Telegraph, What Cellphone, T3 and Techradar.
