Photo ideas: Levitation photography secrets
Combine camera skills and Photoshop techniques for dramatic levitation photography images
The best camera deals, reviews, product advice, and unmissable photography news, direct to your inbox!
You are now subscribed
Your newsletter sign-up was successful
Watch video: Photo ideas – Levitation photography secrets
Photography projects at home
• More home photography ideas
Useful home photography kit
• Best tripods
• Best lighting kits
• Best reflectors
• Best macro lenses
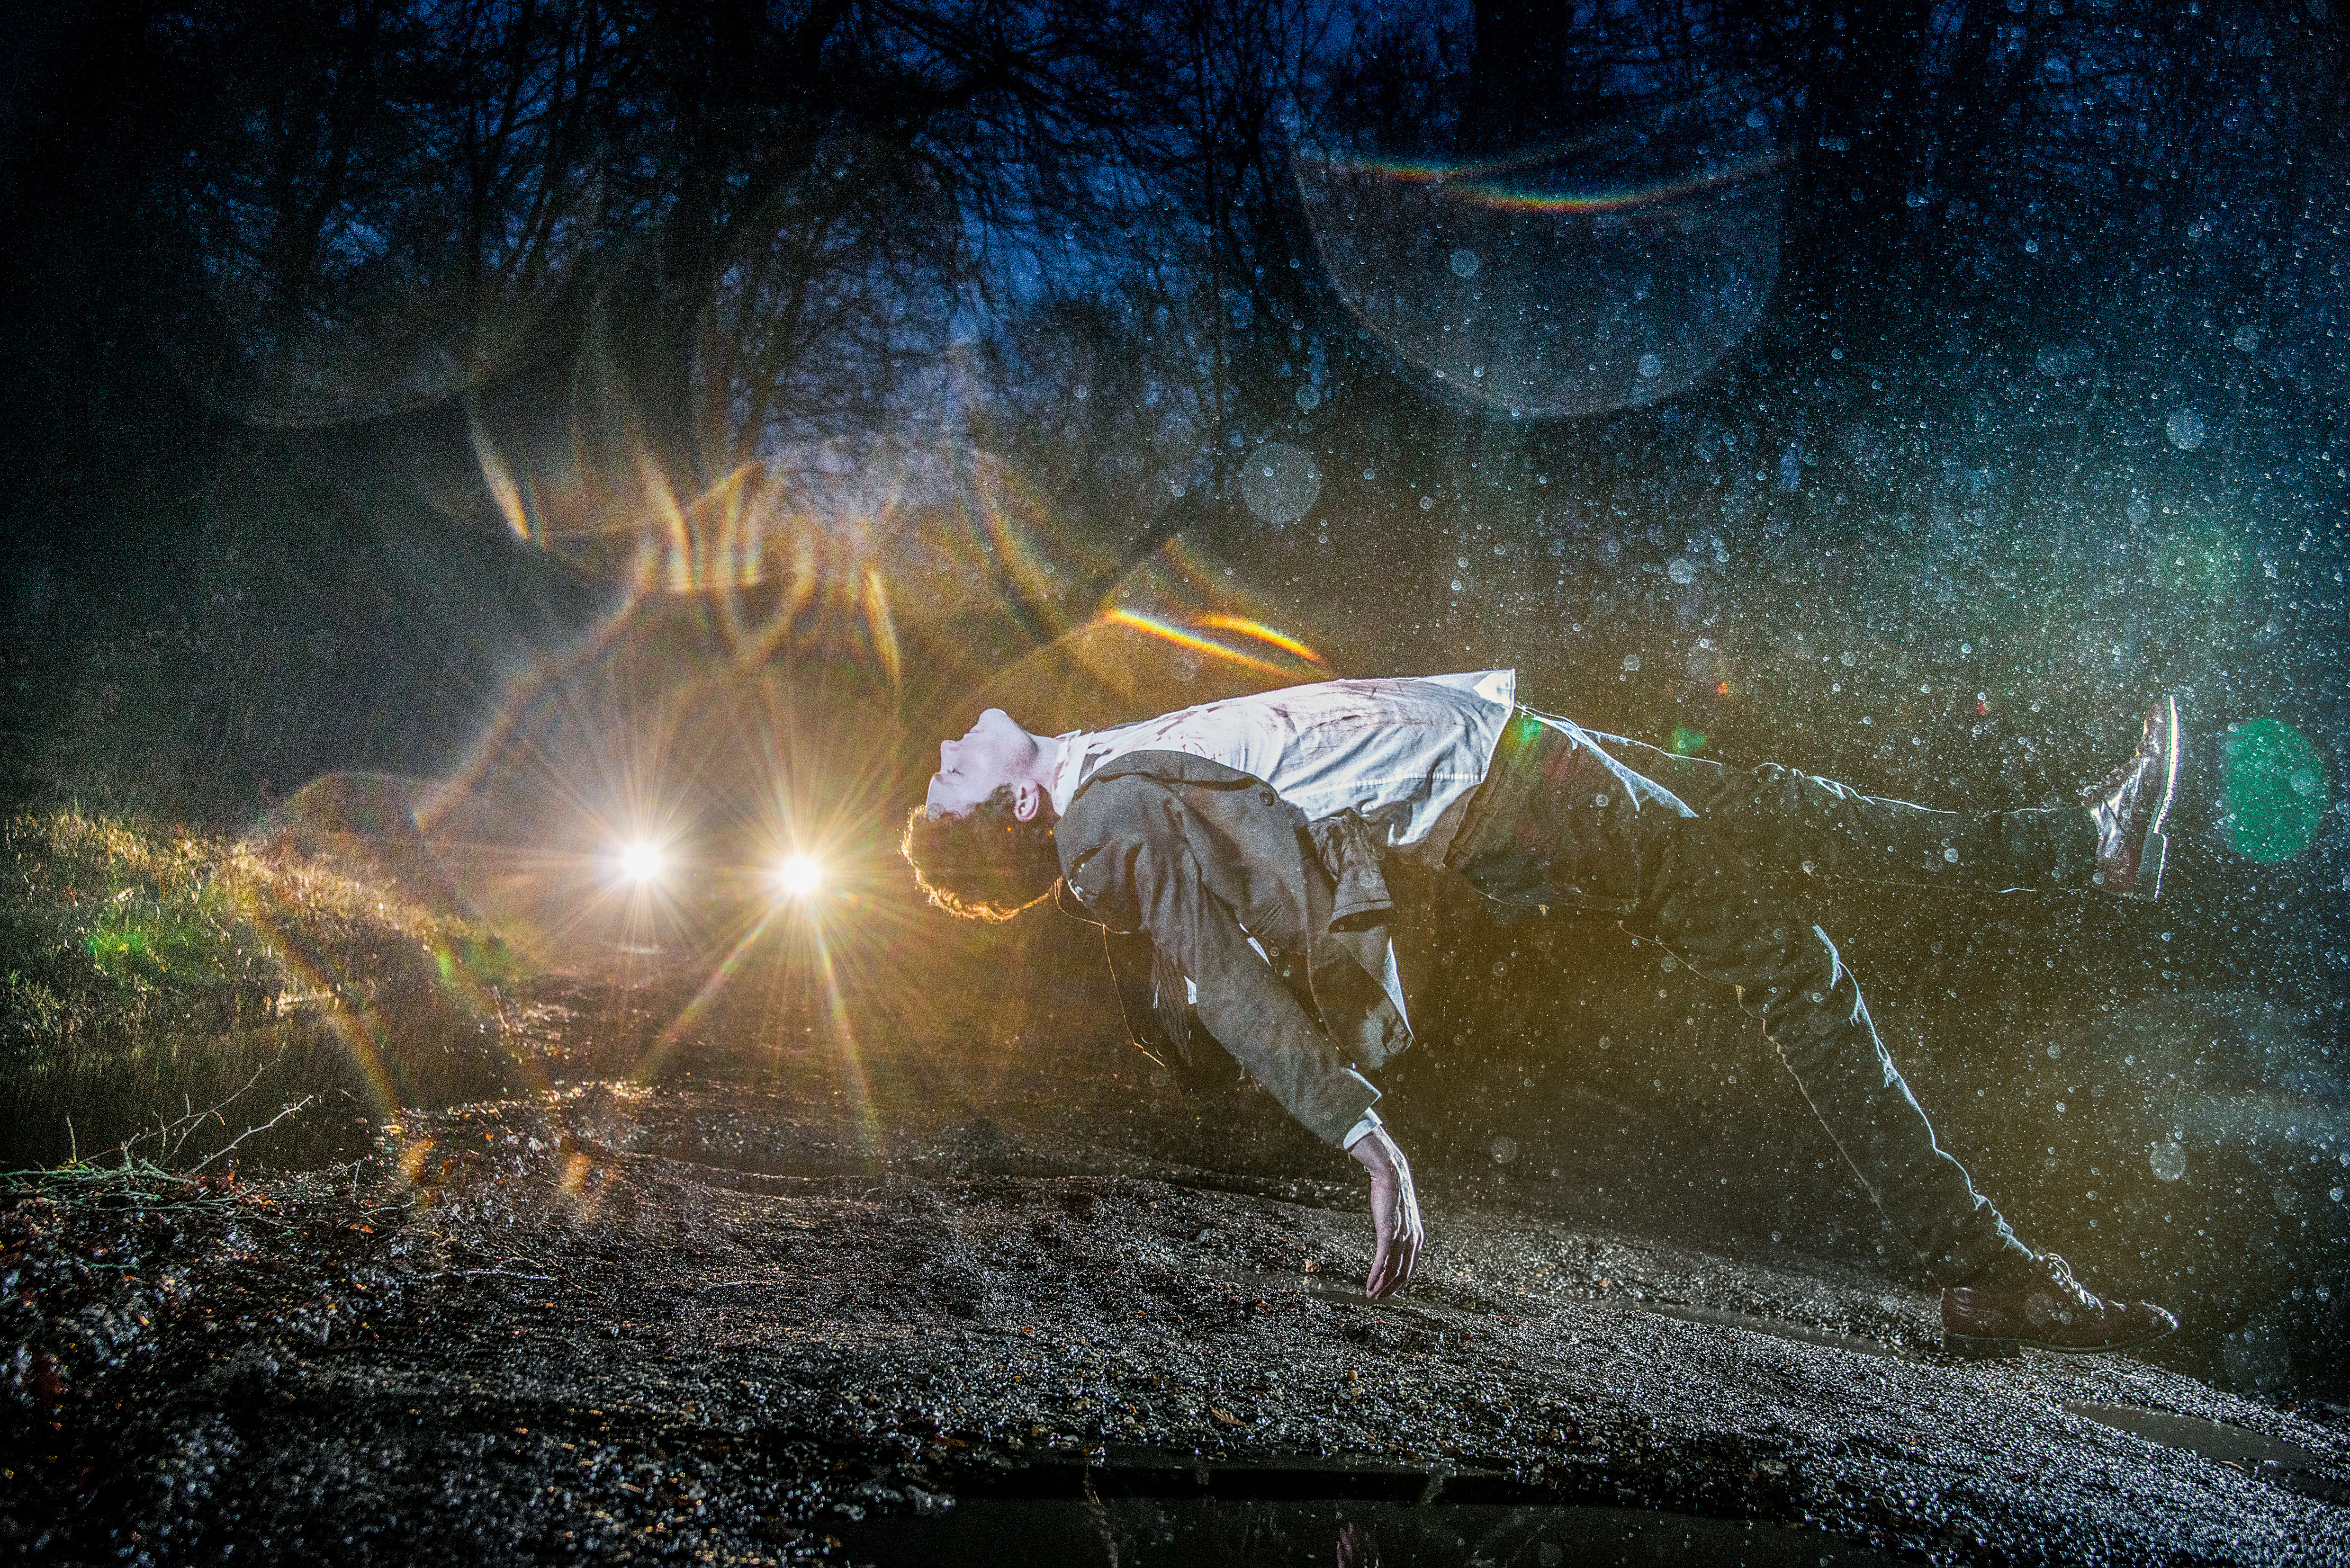
This is one of those photo tricks that makes viewers think, ‘How did they do that?’ The answer is surprisingly simple and, like all the best Photoshop techniques, the real skill begins in-camera.
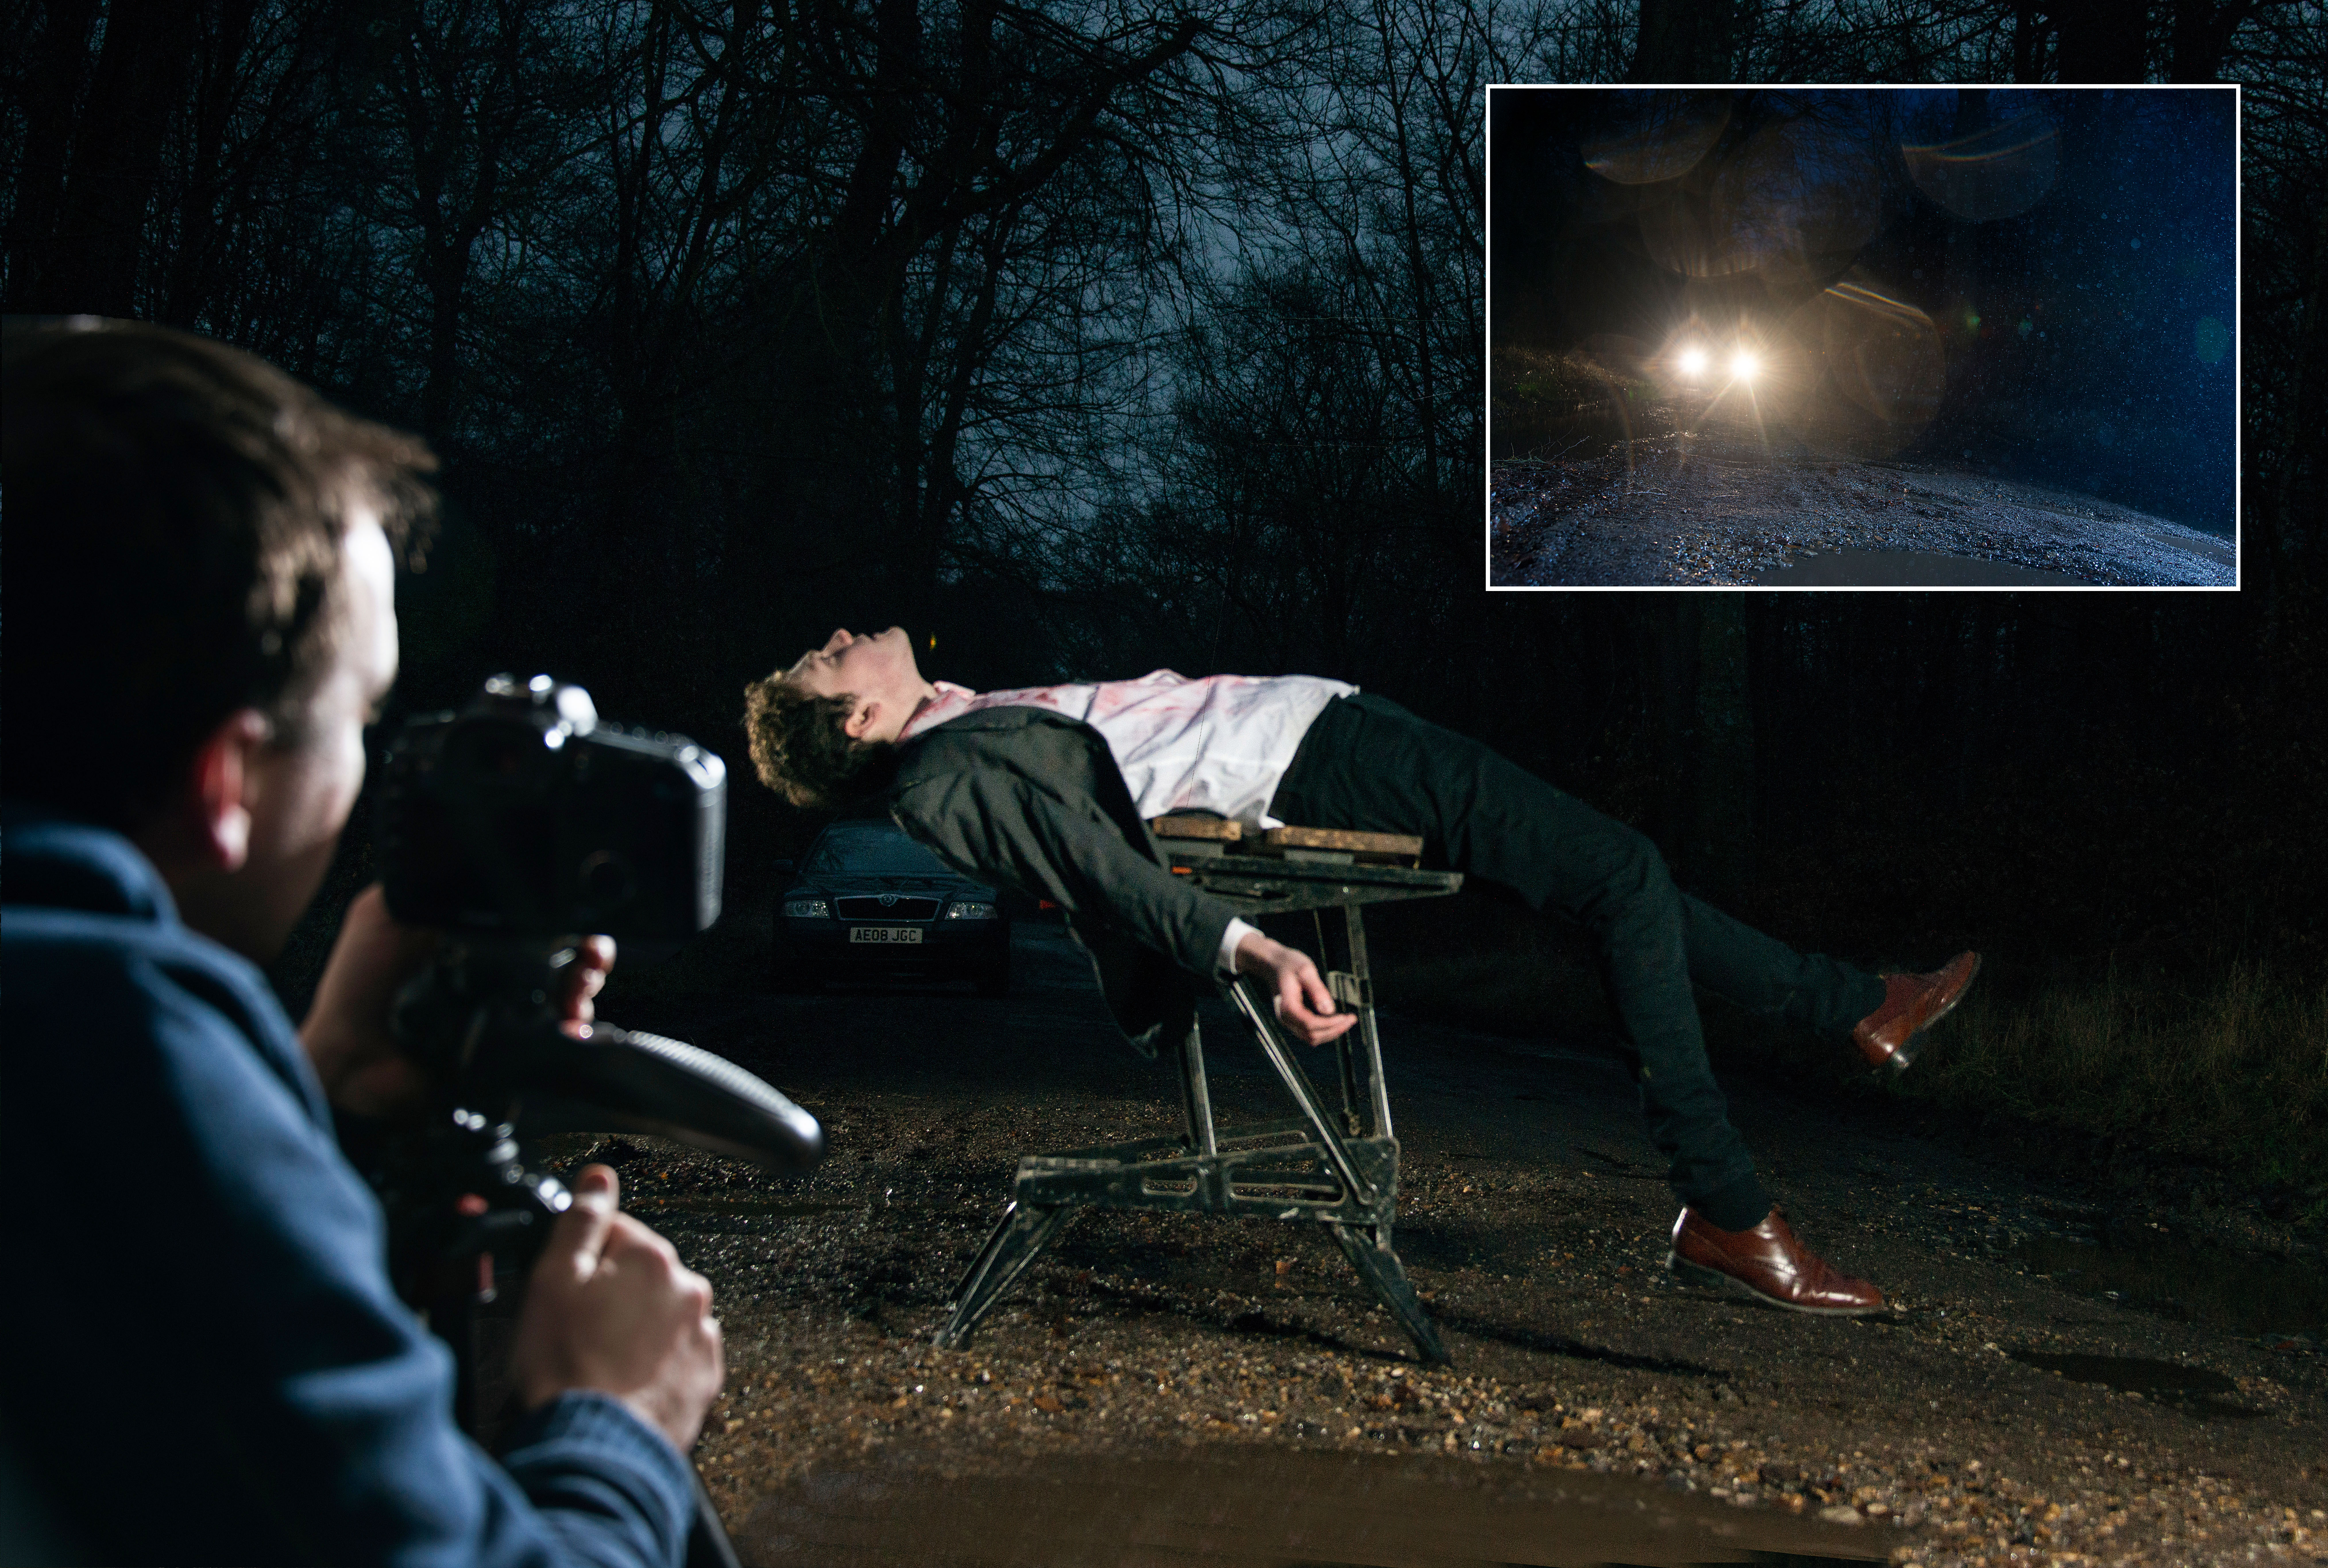
To create a seemingly levitating figure we capture two different versions of the scene – one with the person perched on a stable support, and the other of the empty scene. Both versions need to be perfectly aligned.
So the actual camera technique is easy, we just use a tripod and take two shots – one of our subject, another without them or their perch. Then we simply piece it together in Photoshop, which – even for a complete novice – is a relatively straightforward job.
The real skill is in crafting atmosphere around the effect. That’s how we draw the viewer in. A visual trick is fun, but a story is even more appealing. There are lots of ways to do this – atmospheric lighting, deliberate mise en scène, creative composition, purposeful posing, use of props… these can all enhance the effect.
Even the weather can be useful – heavy rainfall here created beautiful backlit raindrops and watery lens flare, which all add to the mood. Let's see how it's done!
Levitation photography: setting the scene
01 Sturdy tripod
The shots we need for this effect need to be in perfect alignment, so use a tripod throughout. Get down low to emphasize the gap between subject and ground.
• Best tripods
The best camera deals, reviews, product advice, and unmissable photography news, direct to your inbox!
02 Stable support
Our subject should be perched atop a support in a floaty pose. We used a foldable workbench, but a stool, stepladder or chair could work just as well.
03 Back Lighting
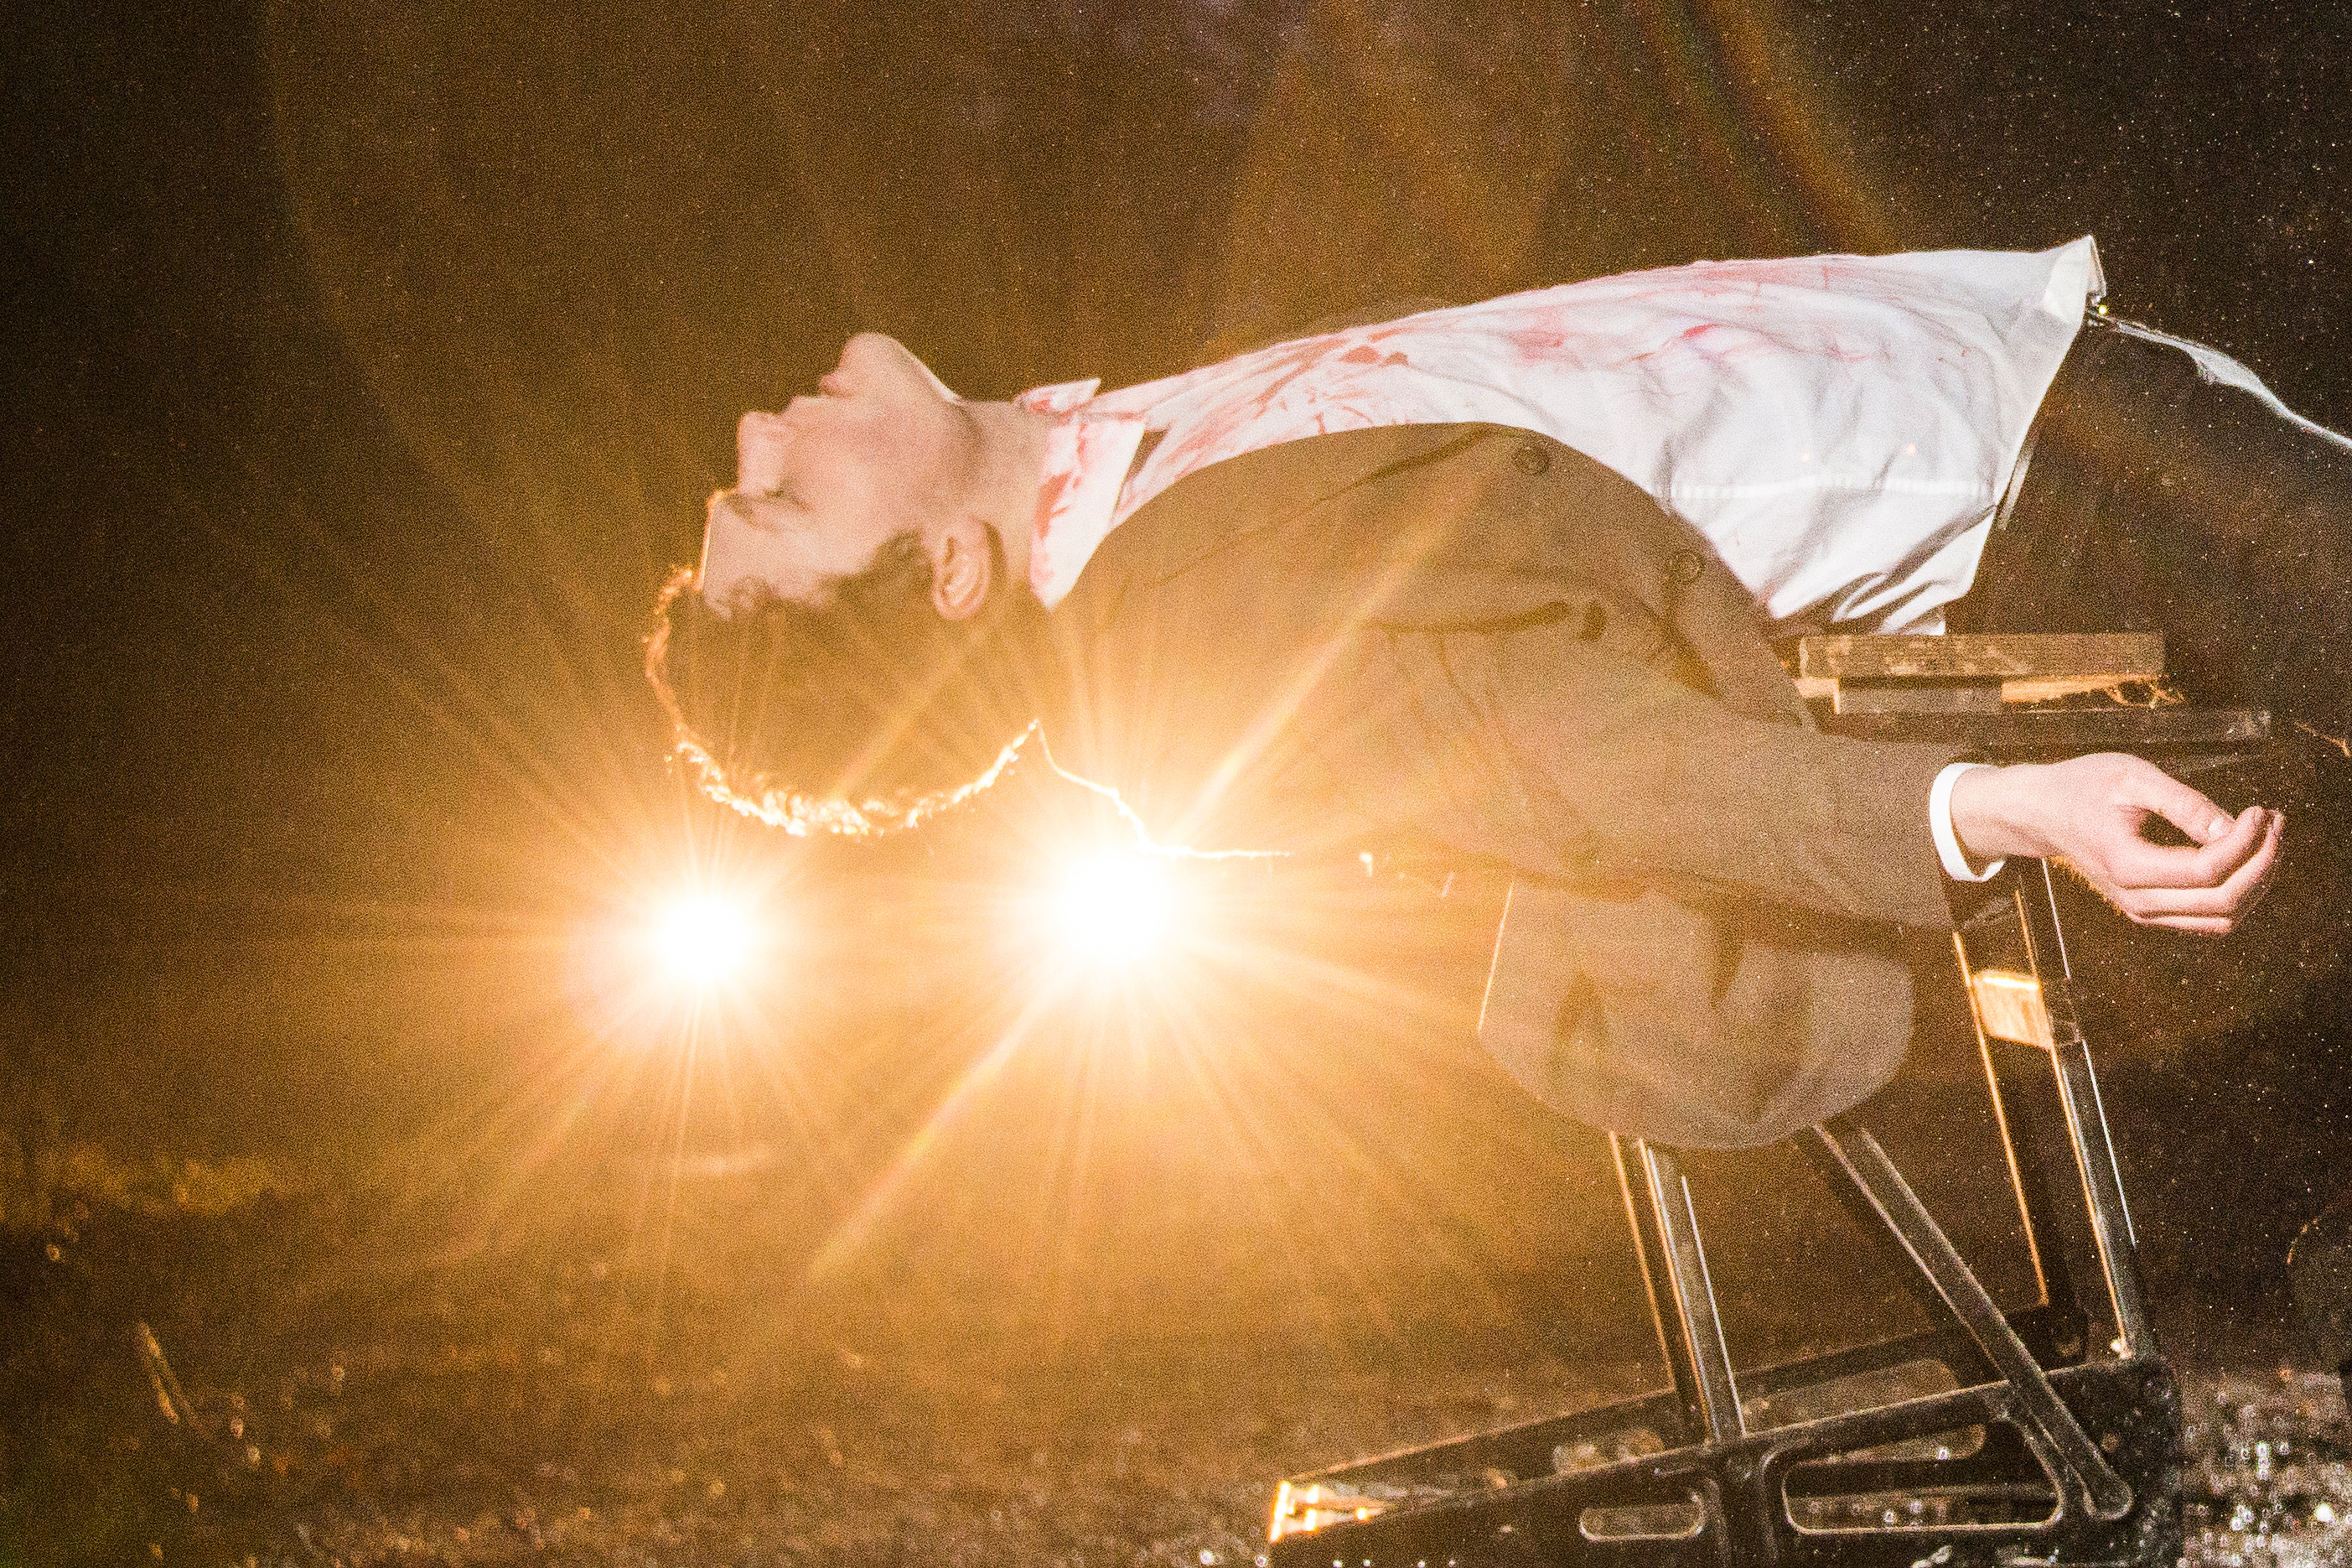
Moody lighting and the night setting boost atmosphere. As well as the headlights, we used two speed lights; one behind to the right, and another to the left.
• Best flashguns
04 Empty space
We also need a shot of the empty scene, sans subject or support. The exposure and focus point should stay consistent over both frames.
05 Keep it standard or go wide
You want to shoot somewhere between a wide and standard (50mm) focal length, depending on your scene. A nifty fifty or 24mm lens would work well if you're using primes, but a 24-70mm zoom will give you the most flexibility.
Top tips: Sell the effect
01 Perfect the posing
There’s a danger that the effect can look as if we’ve just copied and pasted our subject in. To get around this, have them interact with the scene in interesting ways. Here the car lights help to place our model, as the flare wraps around him in a way that would be hard to fake.
02 Arrange the clothes
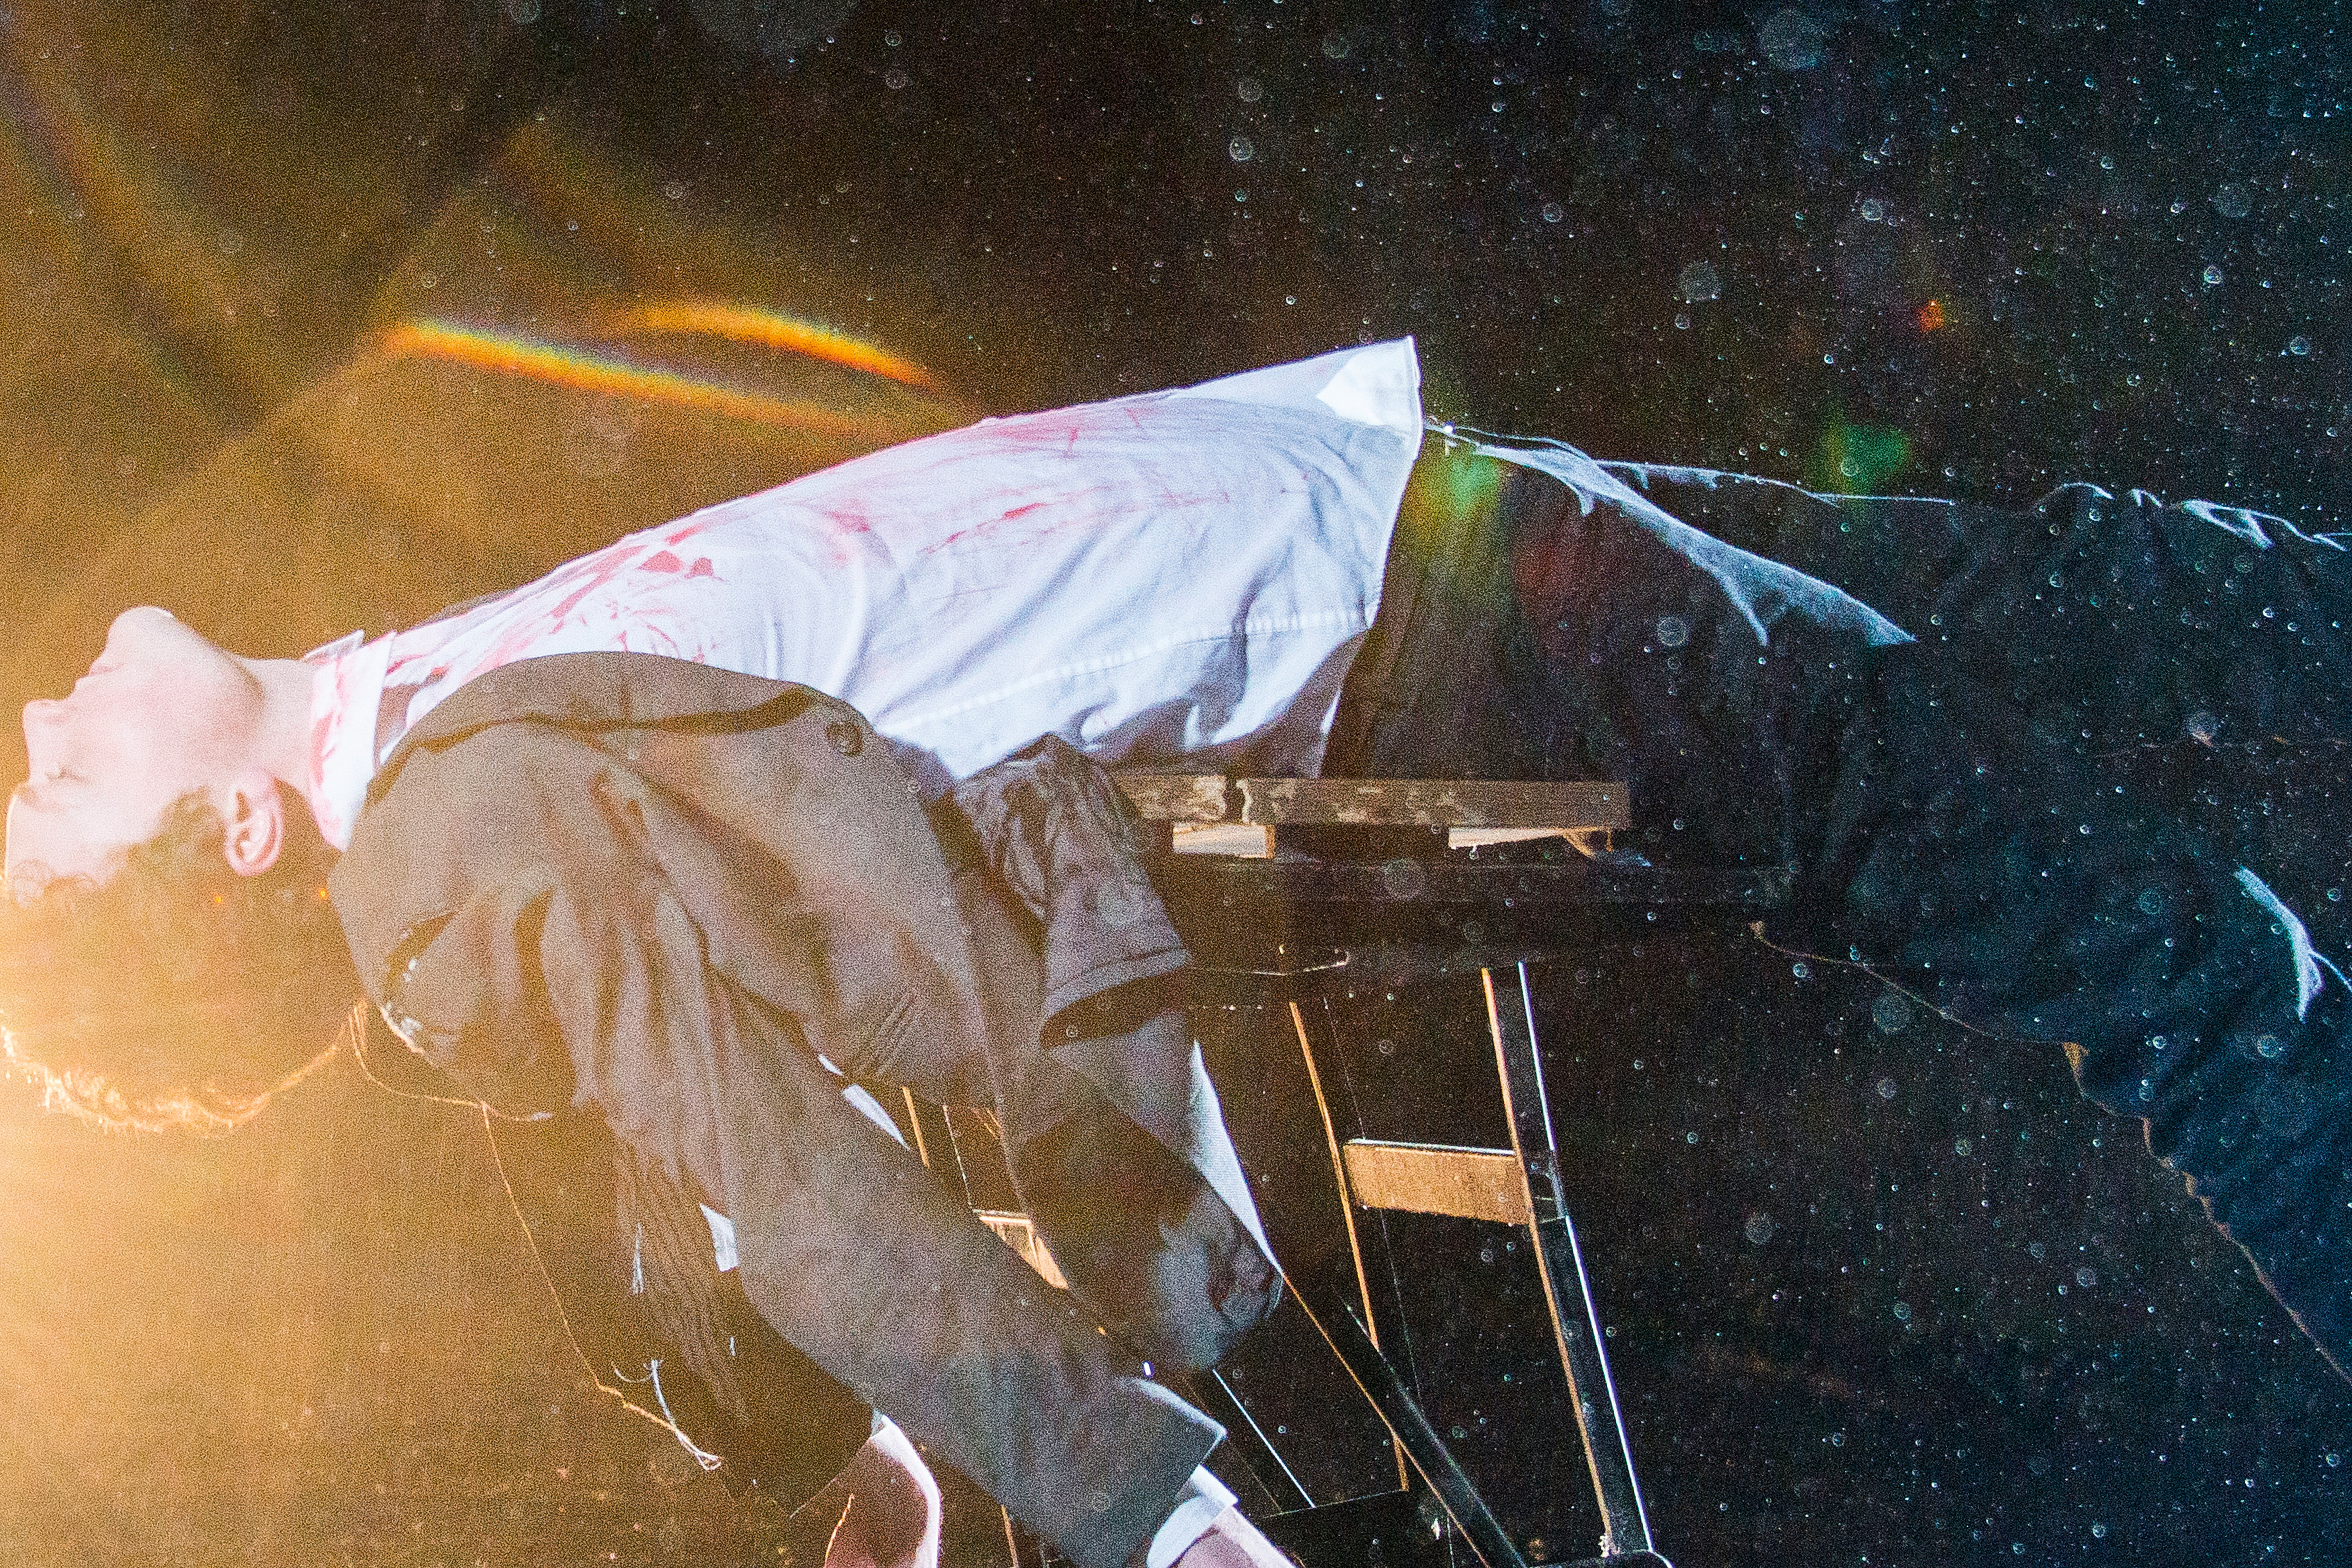
Clothes can make or break the effect. The main crunch point is where the body meets the support; try to make the clothes here look as floaty as possible, and drape loose clothing over the edges of the support to hide it. You could also use threads to lift parts of the clothes.
Post production: Hover craft
01 Copy over the layer
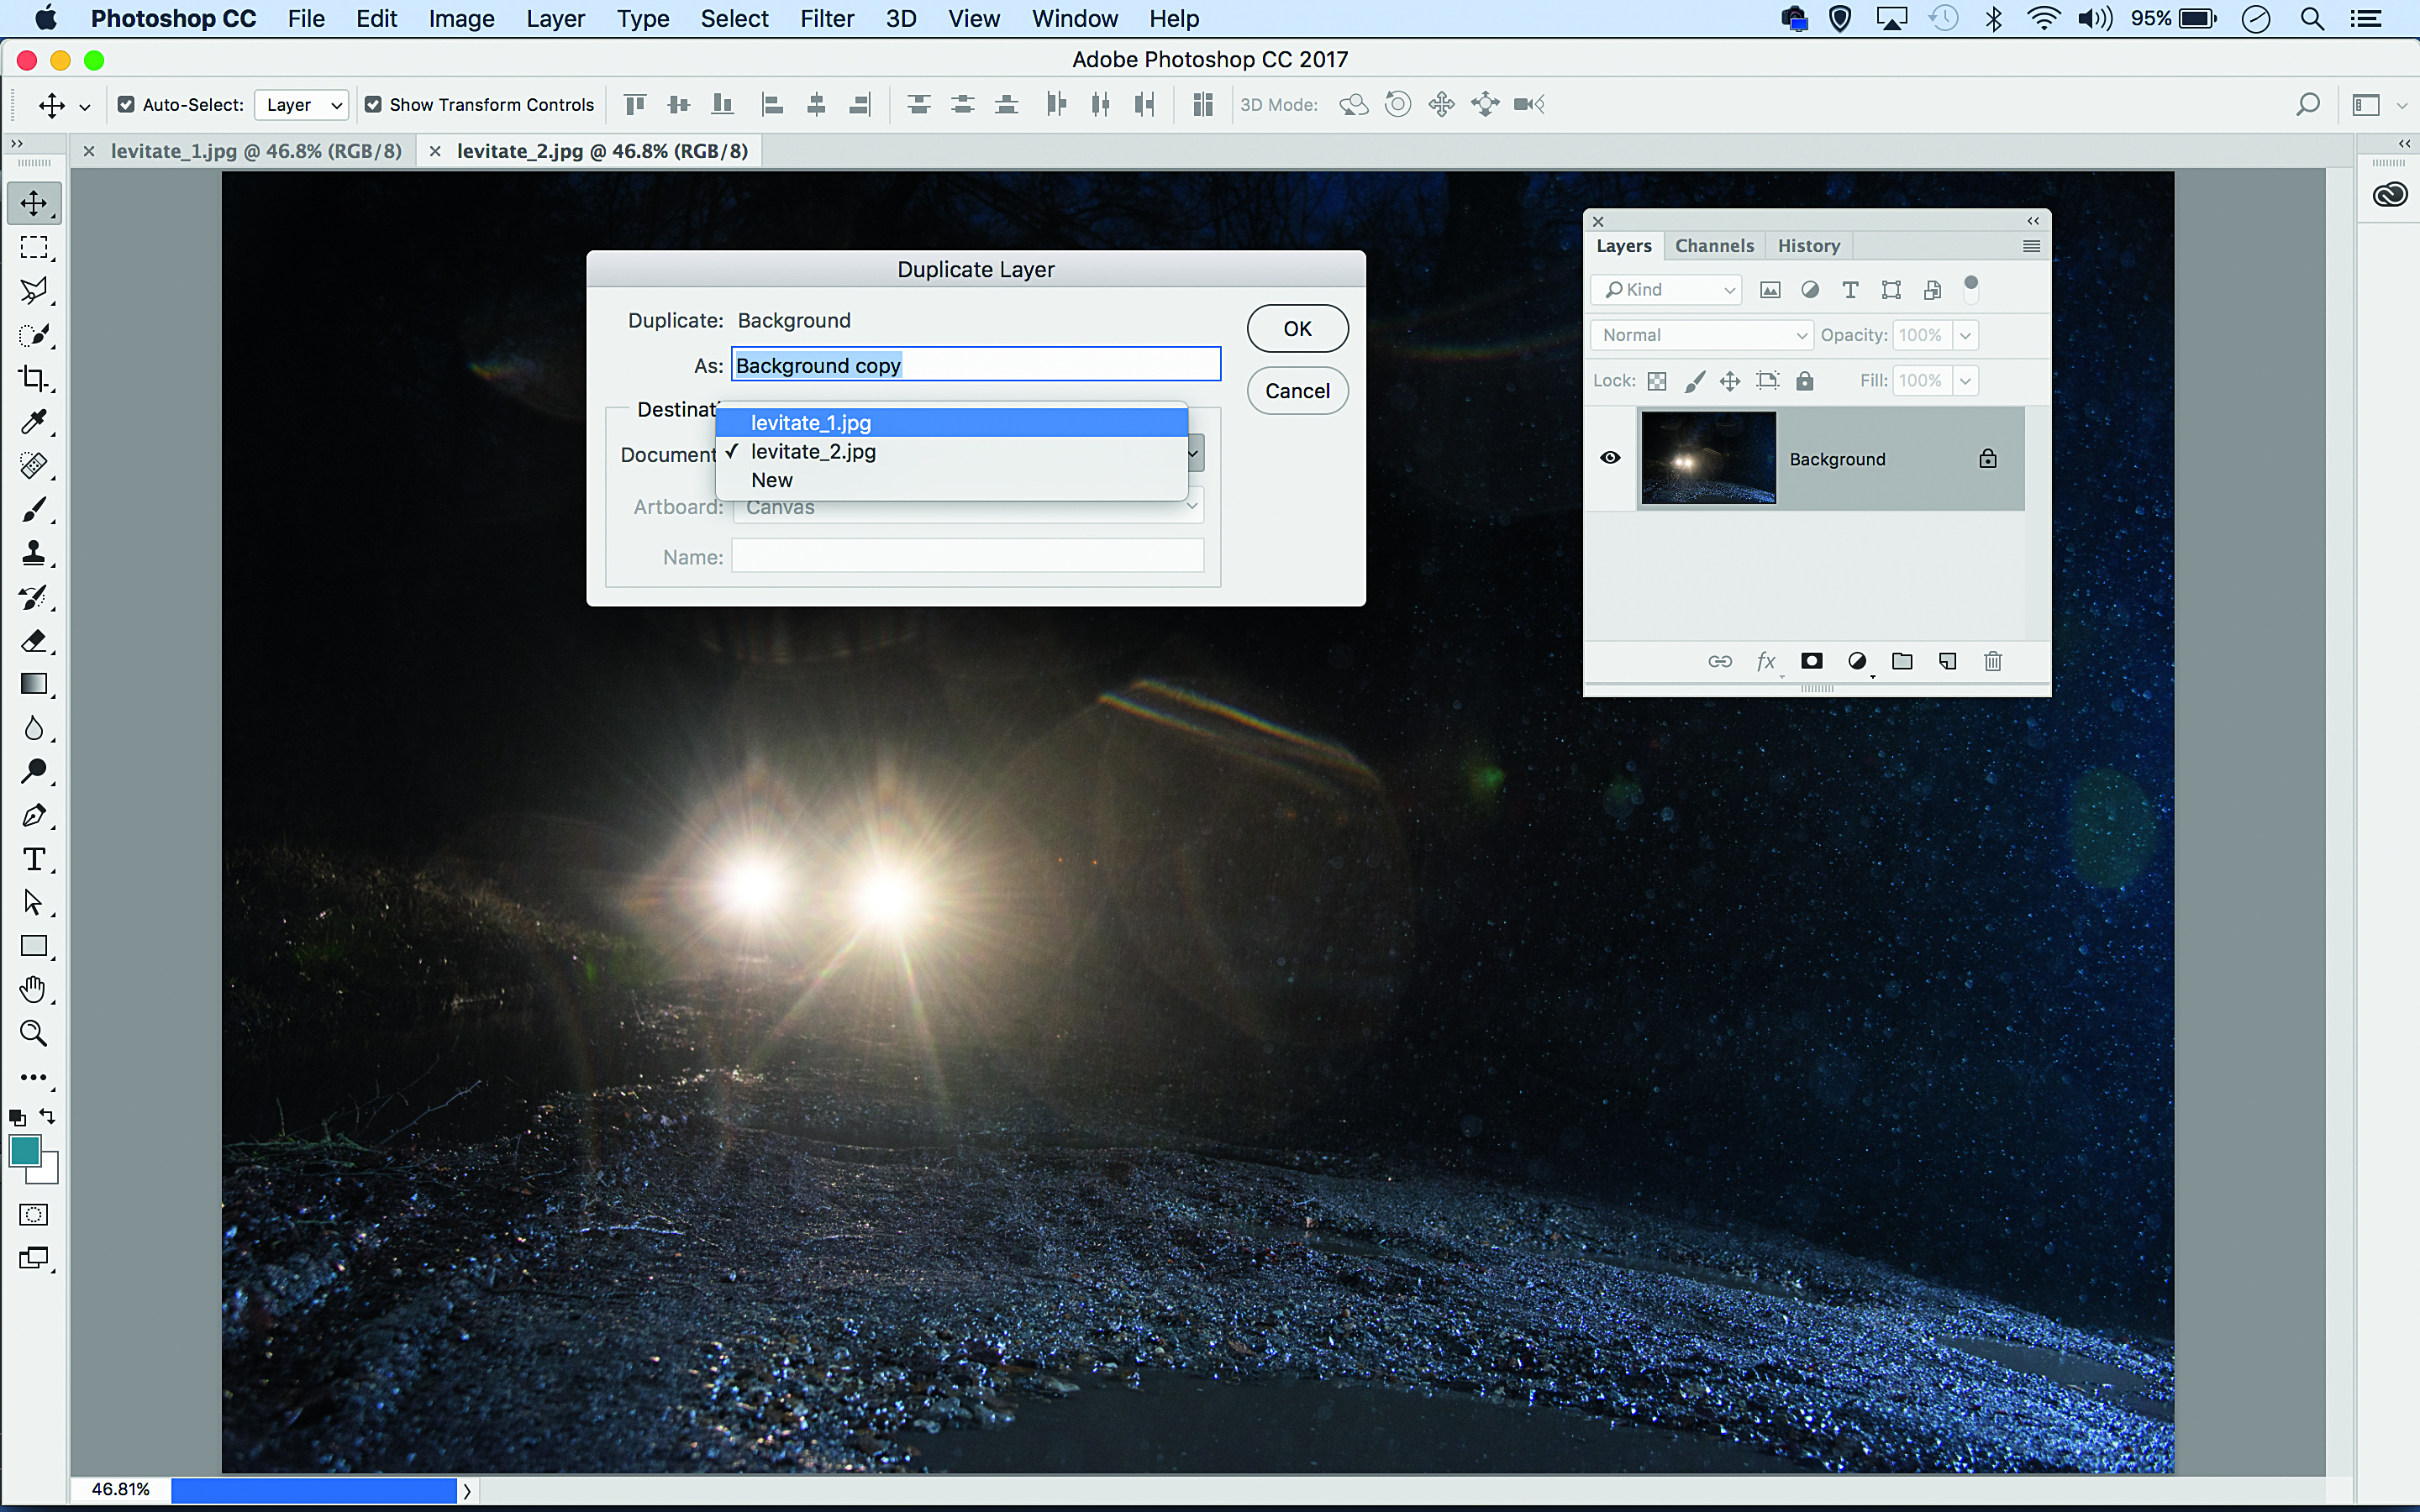
Open the images of the subject and the empty scene in Photoshop. Go to the empty image, then go to the Layers panel (Window > Layers). Right-click the ‘Background’ layer and choose Duplicate Layer. In the Destination Settings choose the other image, hit OK.
02 Add a full mask
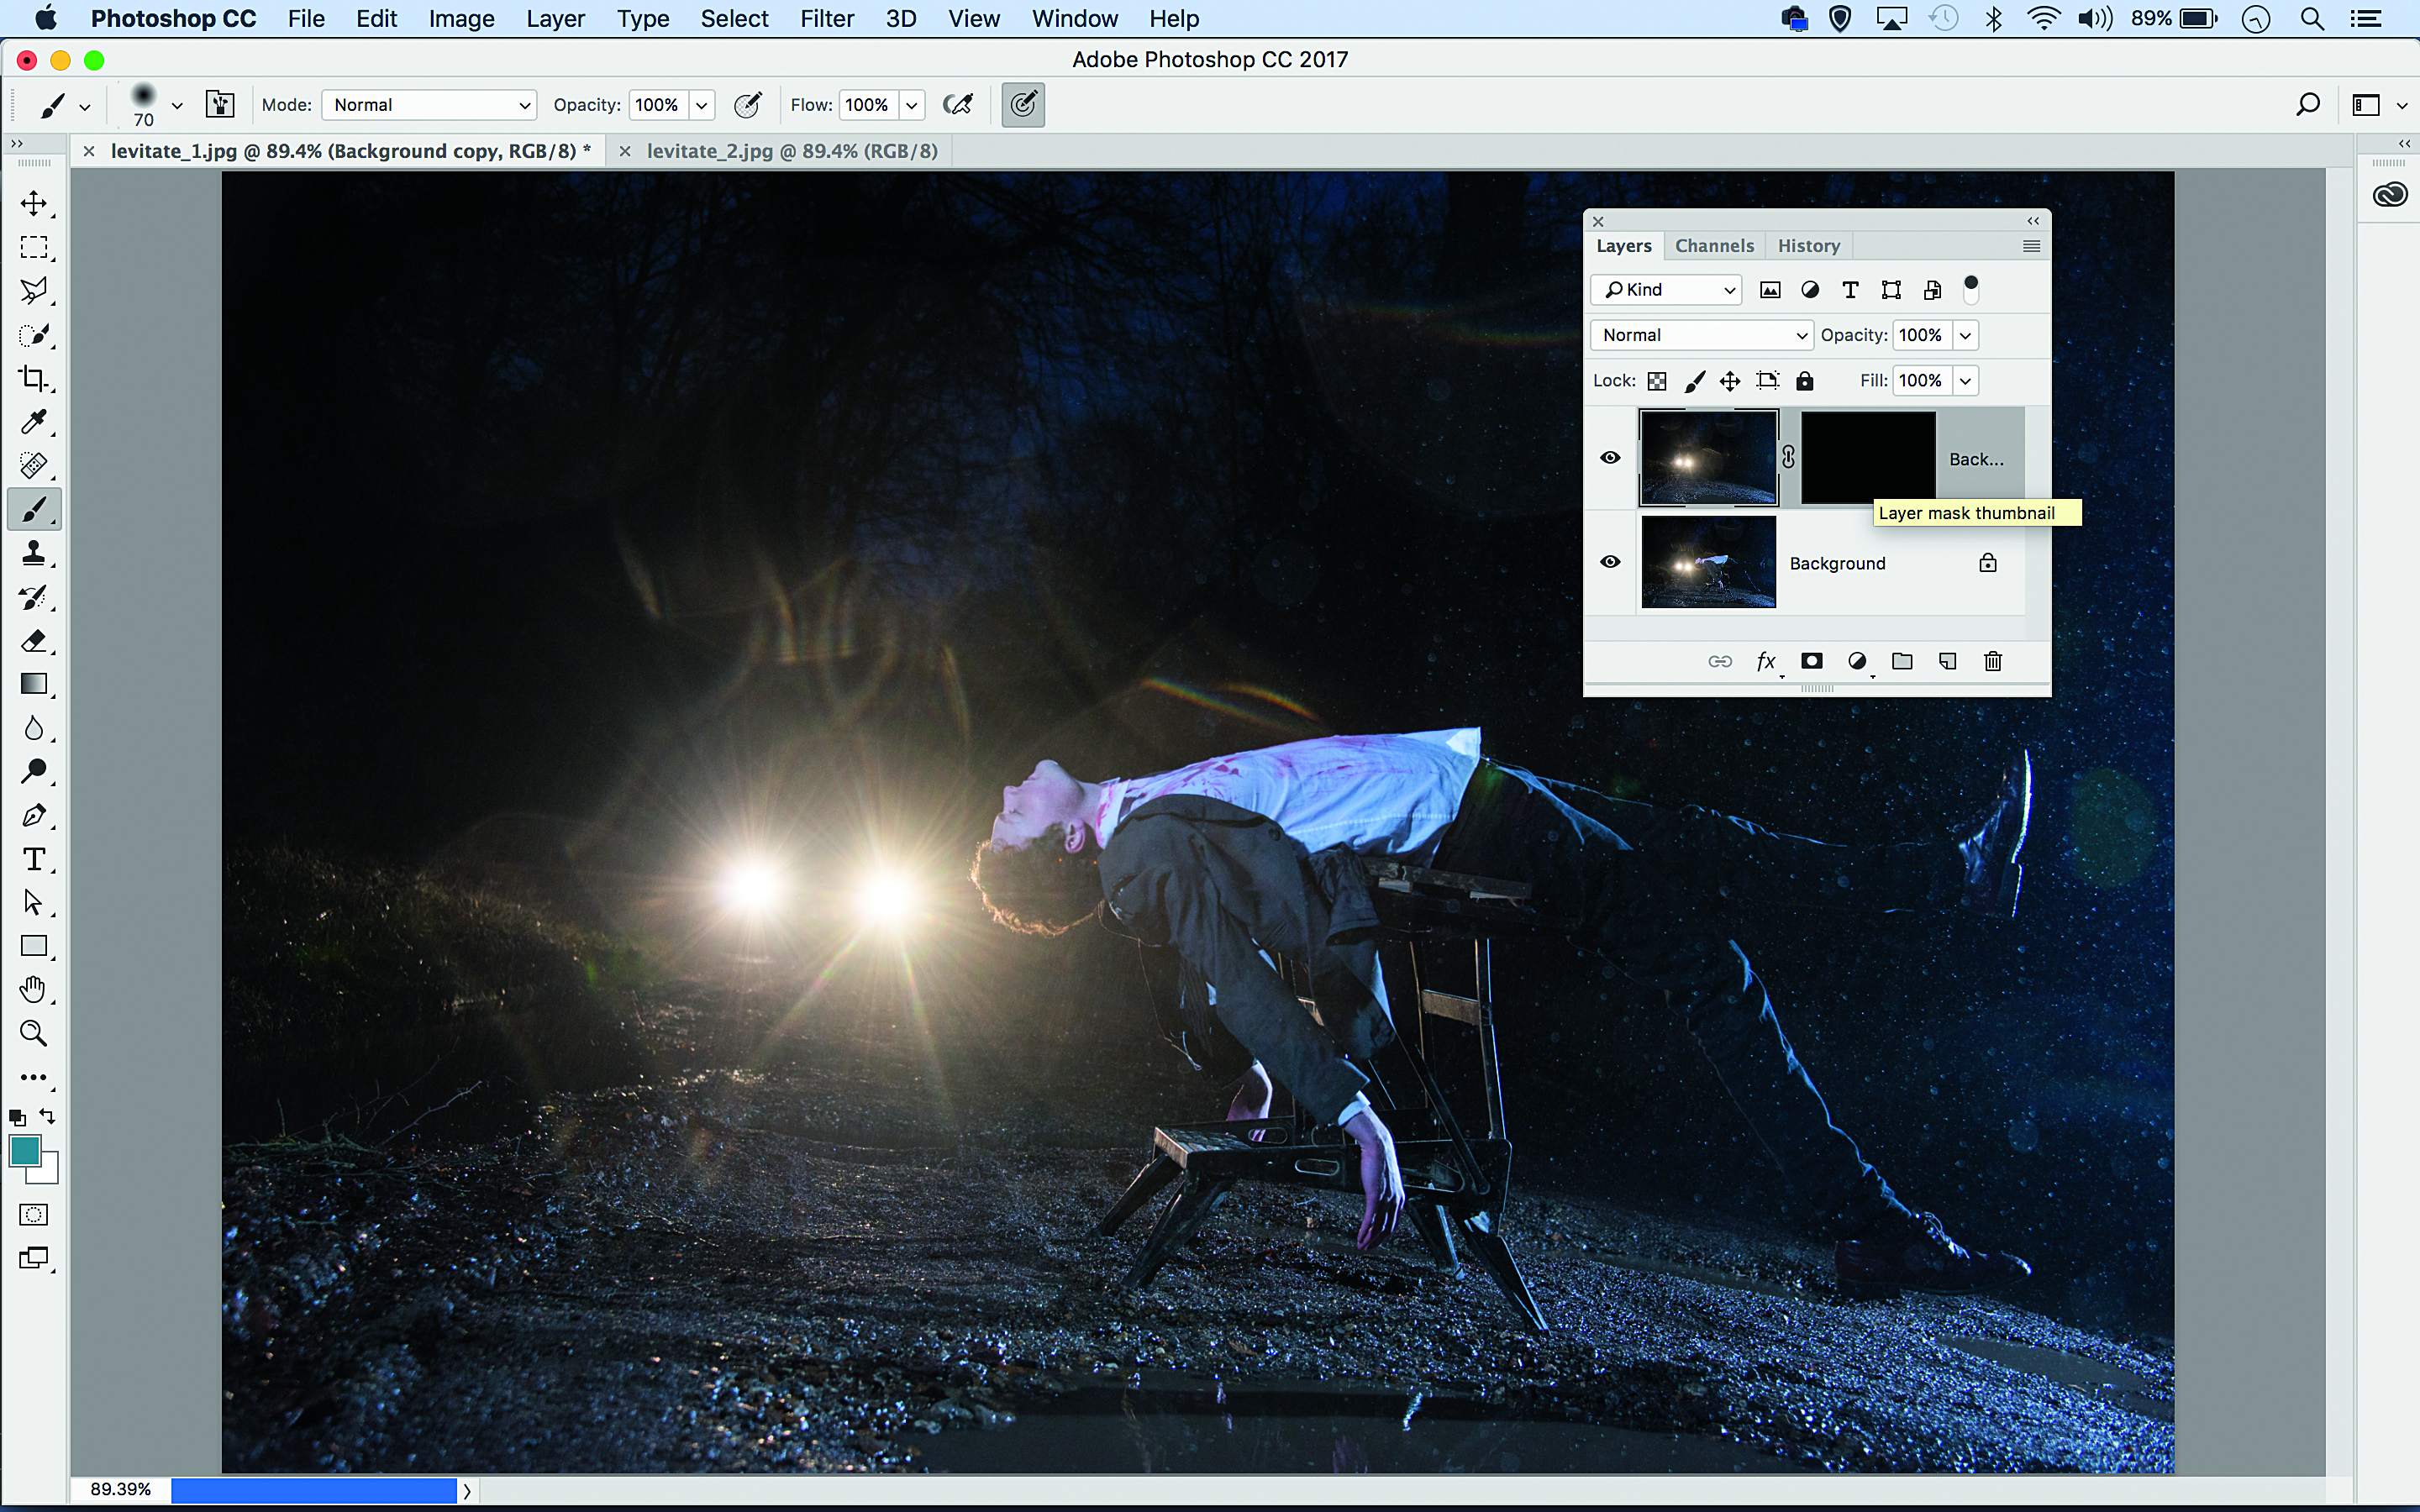
Go to the other image, you’ll now have two layers in the Layers panel. With the upper layer highlighted, hold Alt and click the rectangular Add Layer Mask icon at the bottom of the Layers panel. This will add a full black layer mask that completely hides the layer.
03 Brush over the bench
We can now paint with white to reveal the background, thereby hiding the bench. Grab the Brush tool from the Tools panel (hit B). Press D to set your color to white. Right-click and decrease the brush hardness to 0, then paint over the bench to reveal parts of the empty scene.
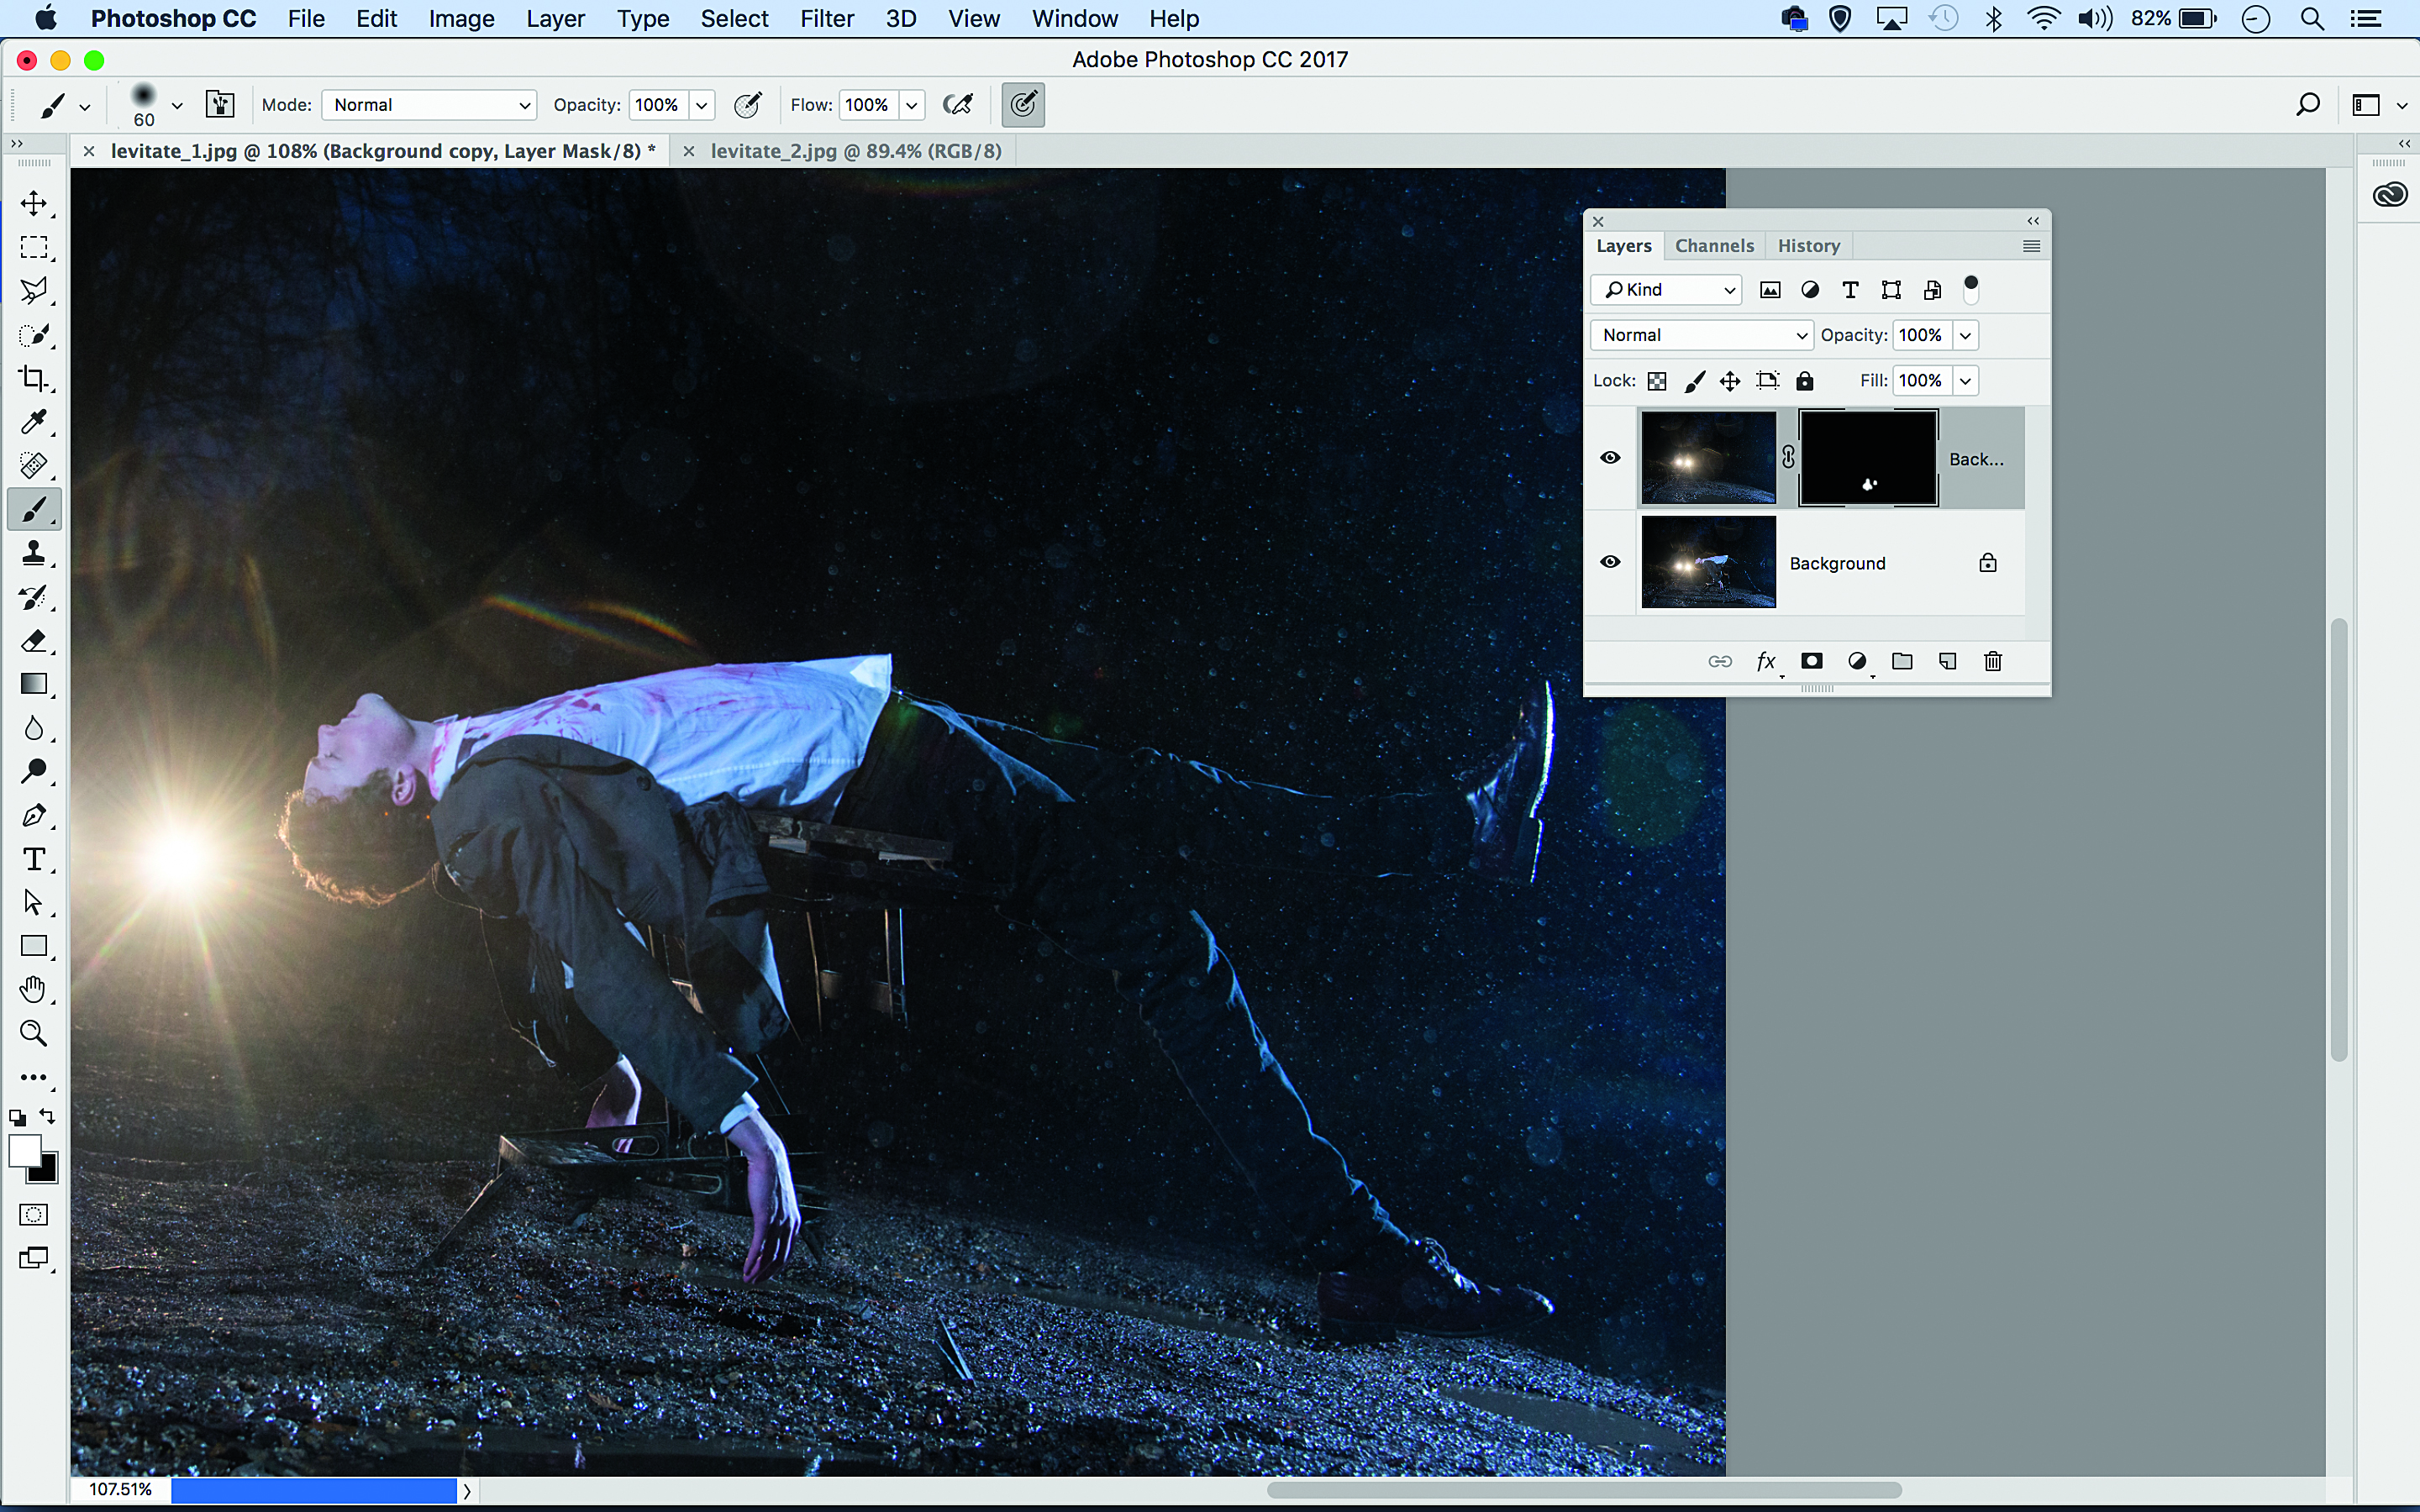
04 Perfect the mask
Zoom in close and continue perfecting your layer mask. If you reveal too much of the empty scene, simply hit X to switch to black and paint to hide it again. Use the ] and [ keys to resize your brush tip, and Shift-click between two points to paint a line between them.
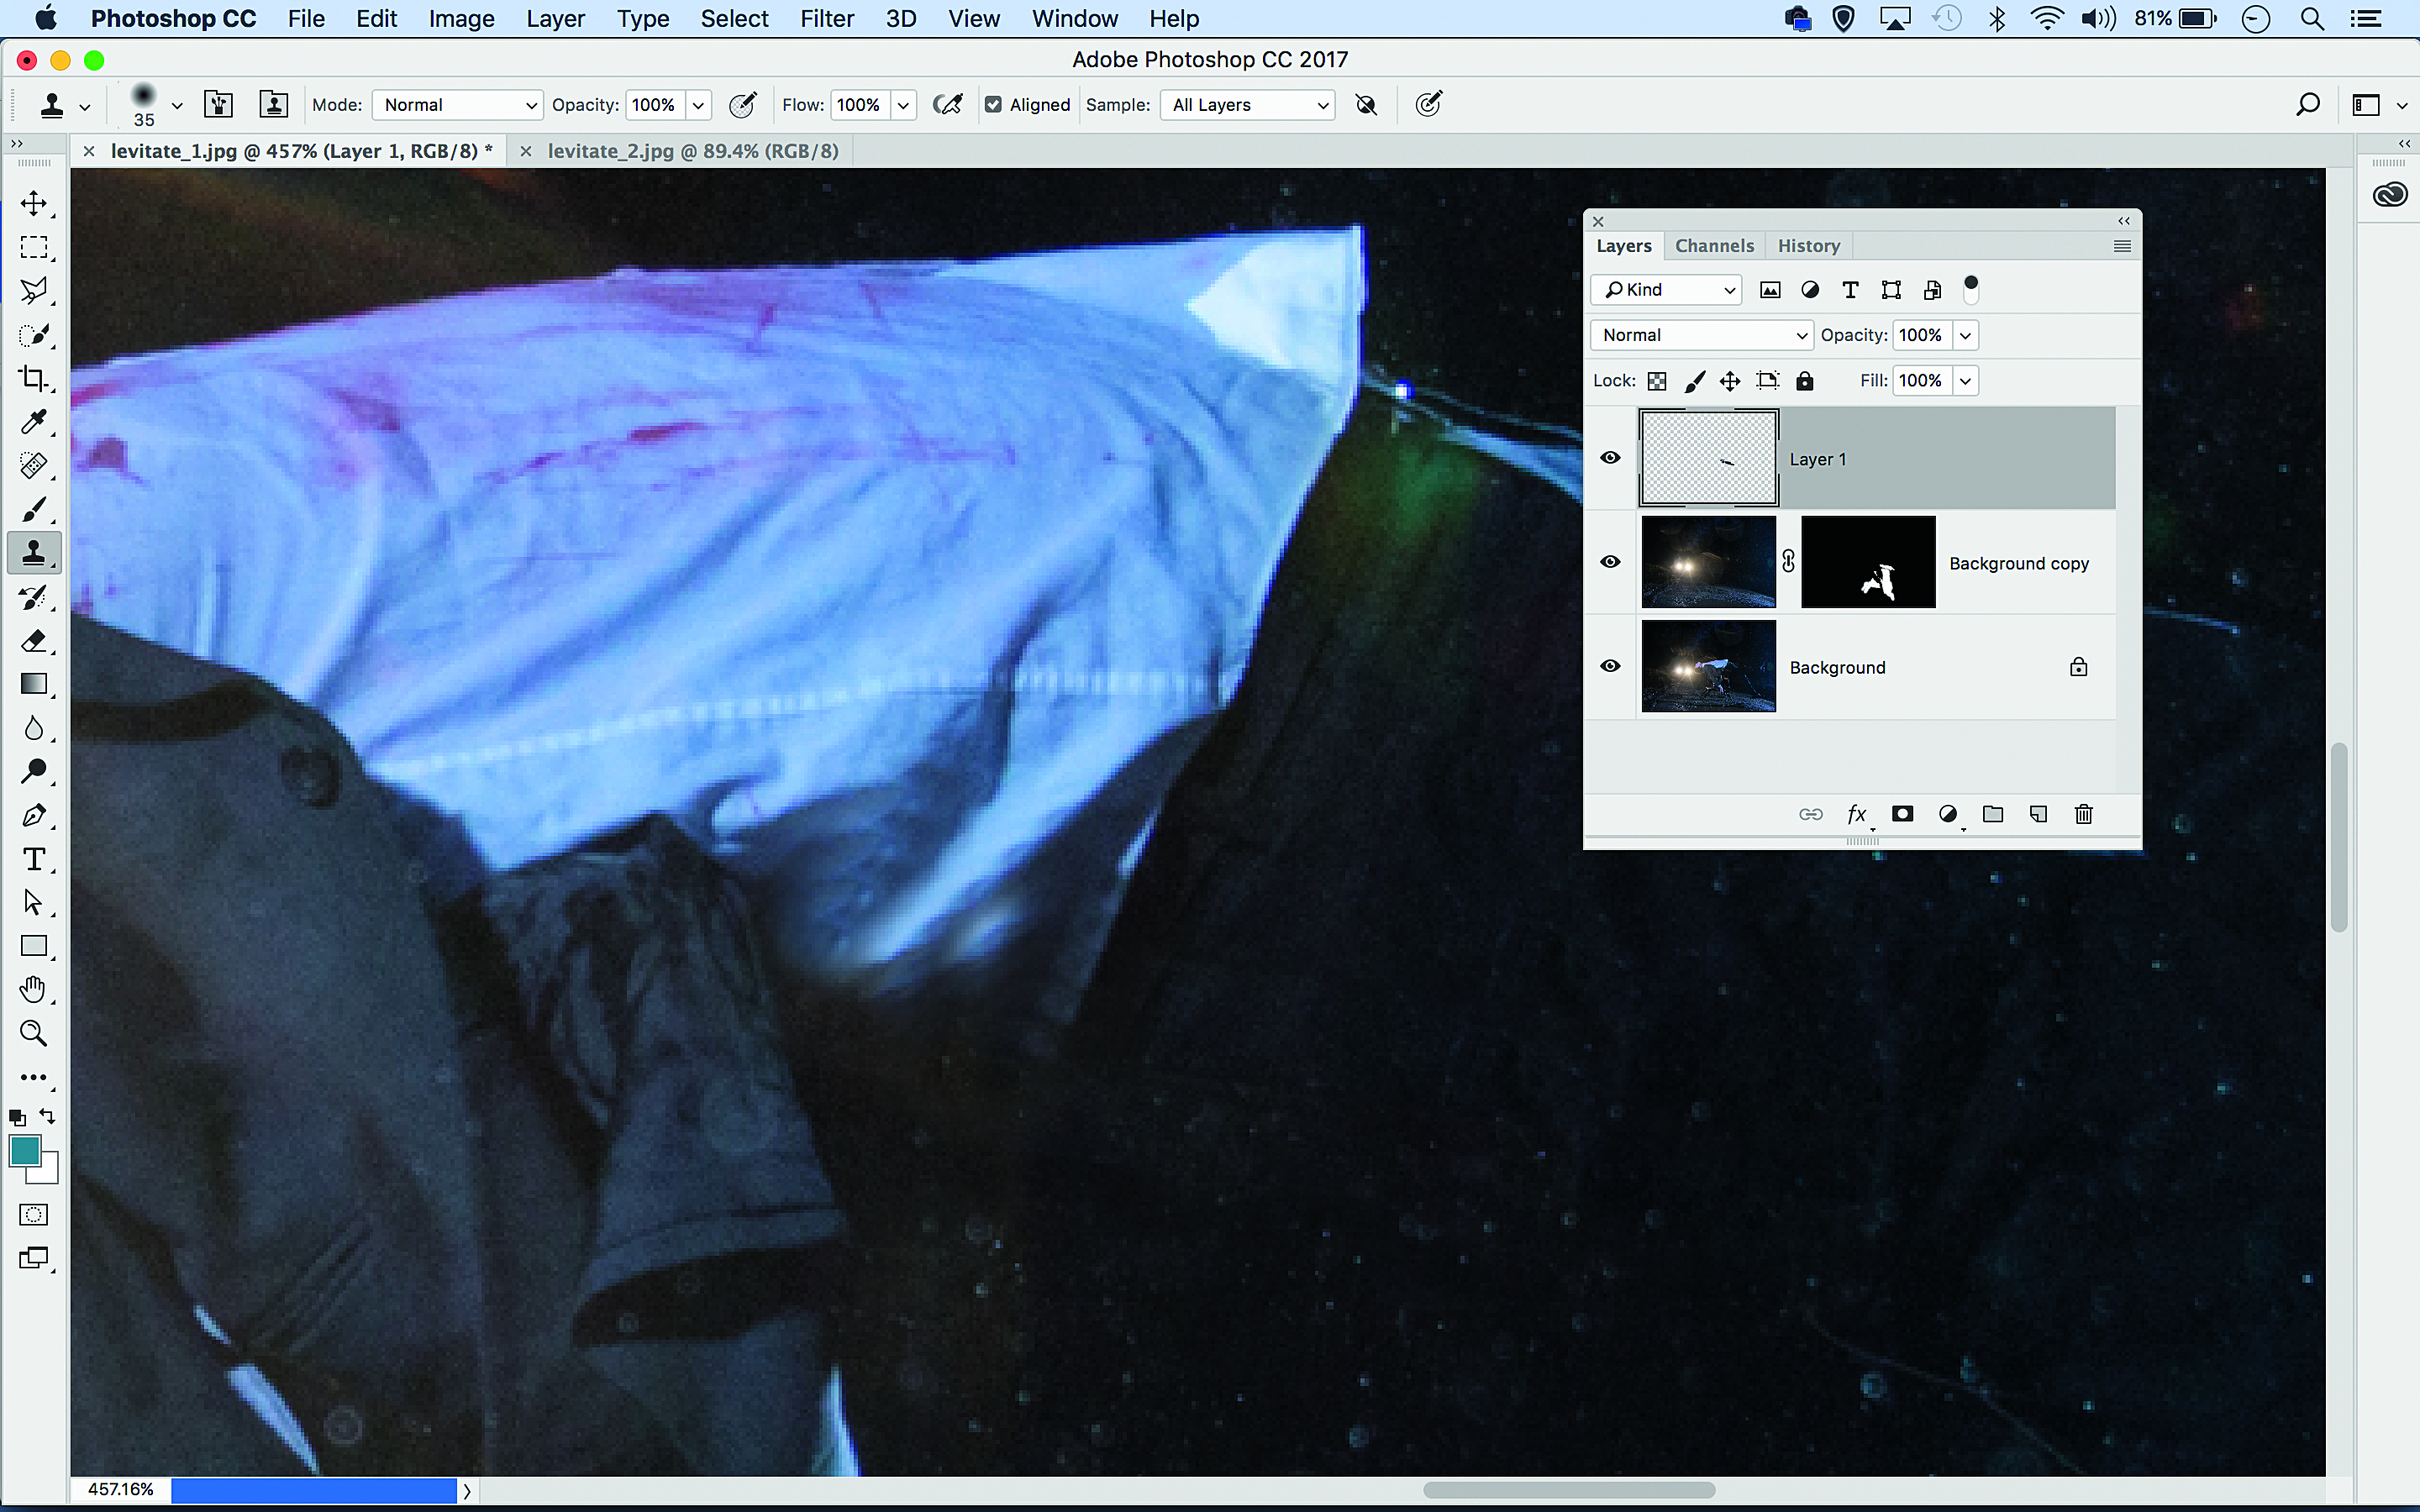
05 Tidy the clothes
Click the New Layer icon in the Layers panel. Grab the Clone tool from the Tools panel and set it to Sample All Layers. Zoom in to where the clothes meet the bench. Alt-click to sample clothes and clone over messy areas, hiding the join and adding extra detail where necessary.
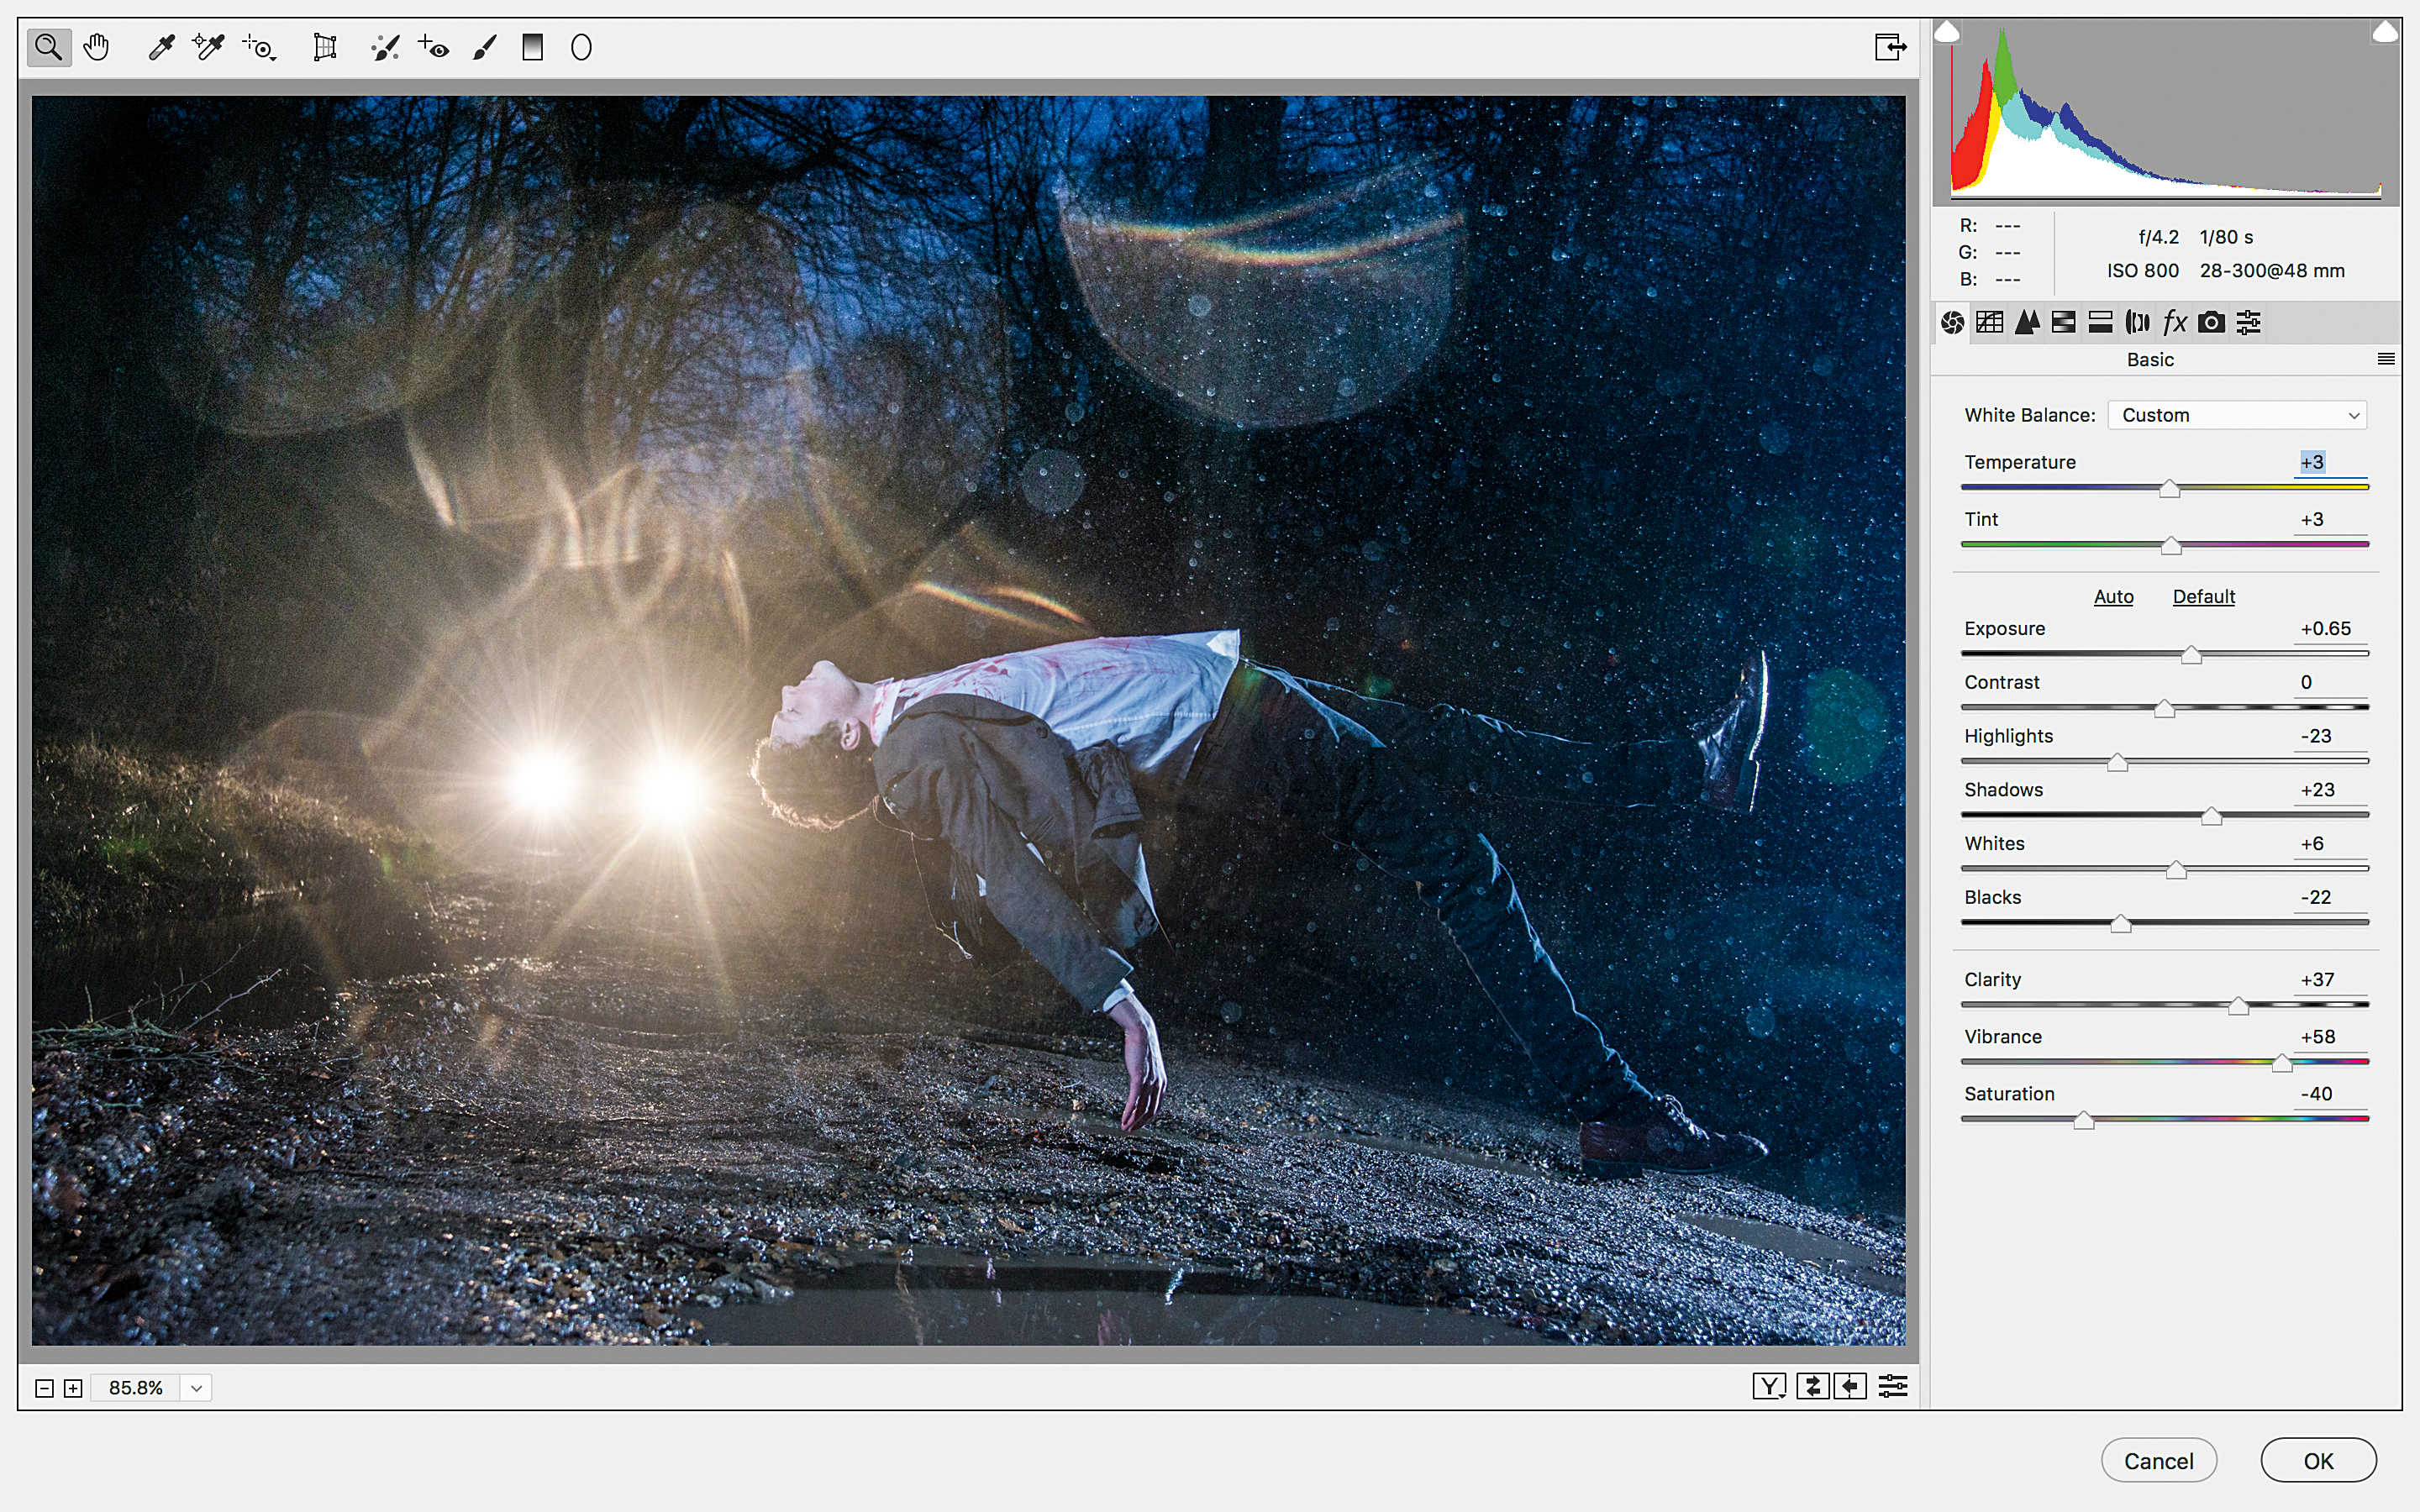
06 Enhance the tones
Finally, make any tonal changes you think necessary. We like to use the Camera Raw filter for this. Hit Cmd / Ctrl + Shift + Alt + E to merge a layer, then go to Filter > Camera Raw Filter. Use the Basic tonal controls to add contrast, tweak colors and boost clarity. Hit OK.
N-Photo: The Nikon Magazine is a monthly publication that's entirely dedicated to Nikon users. For the best news, reviews, projects and more, subscribe to N-Photo today!
Read more:
The best flashgun: the best strobe units for Canon cameras, Nikon and more
The best standard zoom lenses
The best 50mm lens: Which 'standard prime' is the right one for you?
The lead technique writer on Digital Camera Magazine, PhotoPlus: The Canon Magazine and N-Photo: The Nikon Magazine, James is a fantastic general practice photographer with an enviable array of skills across every genre of photography.
Whether it's flash photography techniques like stroboscopic portraits, astrophotography projects like photographing the Northern Lights, or turning sound into art by making paint dance on a set of speakers, James' tutorials and projects are as creative as they are enjoyable.
He's also a wizard at the dark arts of Photoshop, Lightroom and Affinity Photo, and is capable of some genuine black magic in the digital darkroom, making him one of the leading authorities on photo editing software and techniques.
