The best camera deals, reviews, product advice, and unmissable photography news, direct to your inbox!
You are now subscribed
Your newsletter sign-up was successful
Watch video: Selective color in Photoshop Elements
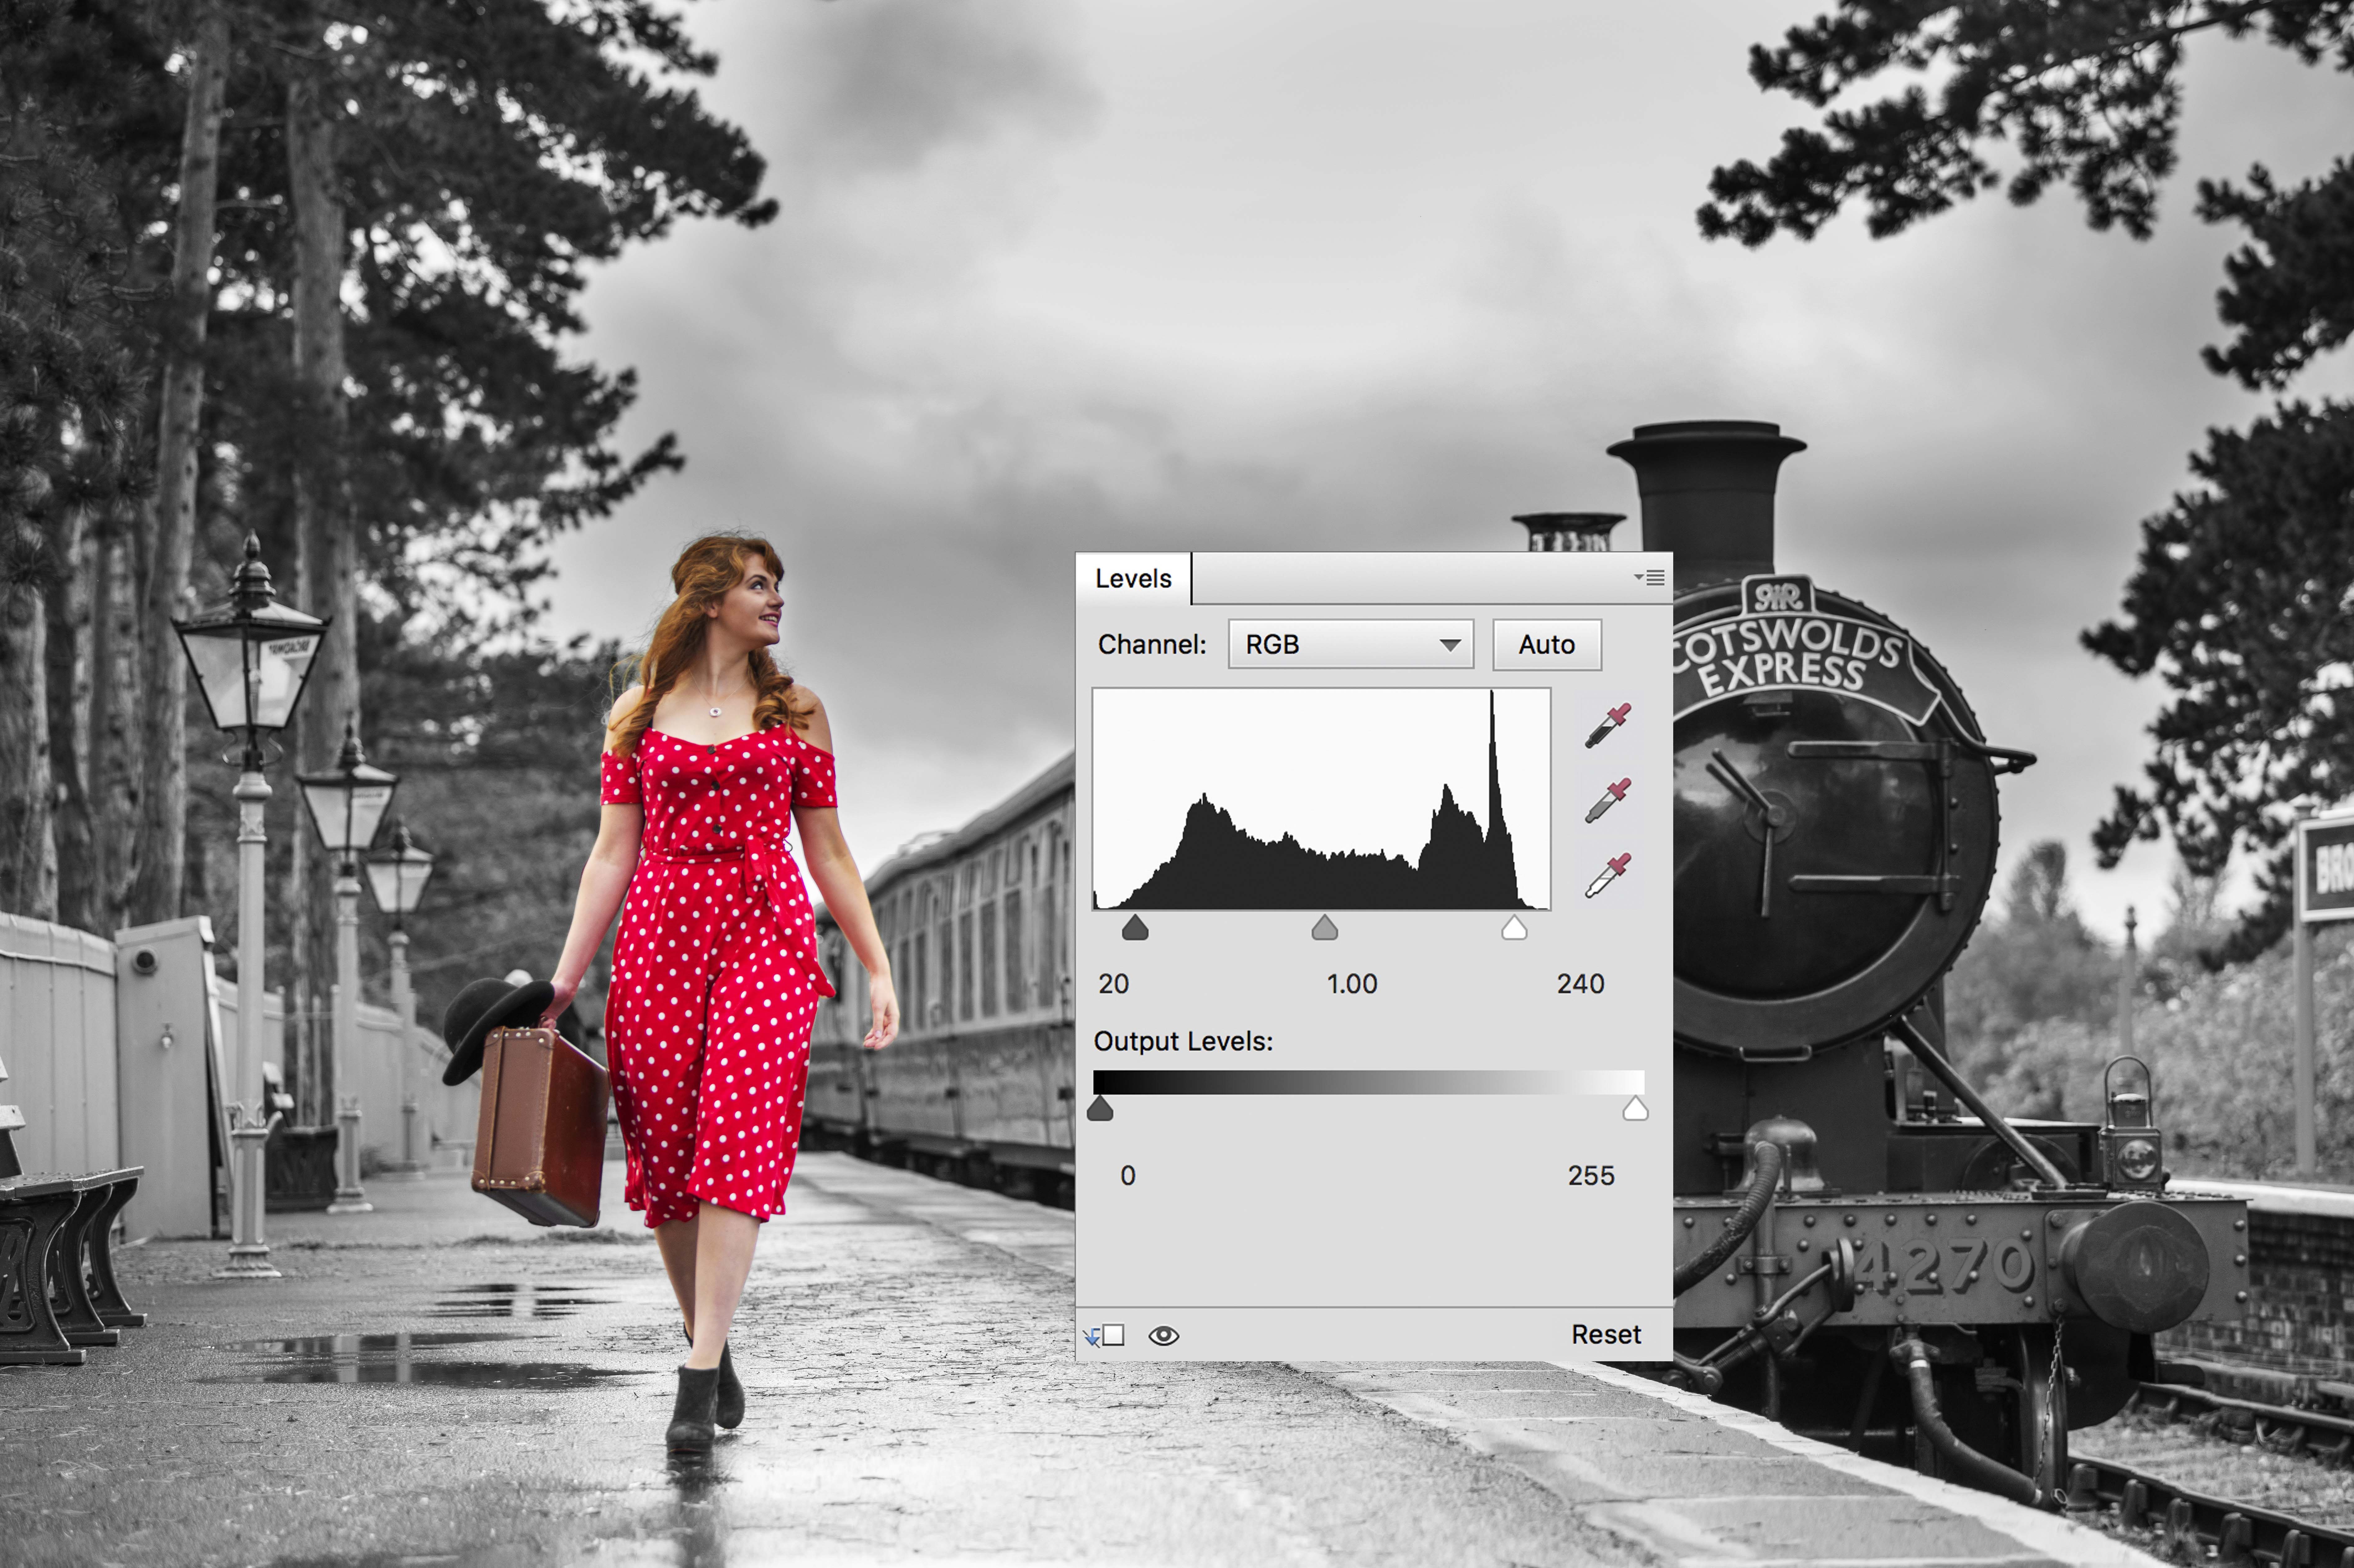
Here’s a fun technique that leaves the viewer in no doubt of where to look in your picture. It’s called selective coloring (also known as 'color pop'), because you’re editing the shot to remove color in specific areas of your image. In our shot, for example, we only wanted the model and her vibrant dress to stand out, so left her full of color.
You’ll discover how to make full use of layers, one of the most useful features that Photoshop has to offer, enabling you to stack different images or adjustments separately. If you’re new to Photoshop, or have never experimented with layers this, is a really easy technique to get to grips with, and will show you how they work – you can do it in either Photoshop CC or Photoshop Elements 2020.
Along the way you’ll learn how to use layer masks, which enabled you to hide part of a layer. In the example here we’ll use a hue/saturation layer to remove all the color from the image, then paint onto the layer mask to hide the desaturating effect precisely over the model. Using layers is a completely non-destructive way of working, as it doesn’t affect the original image – you can reverse the effect on any of your layers and revert to the original.
01 Desaturate your image
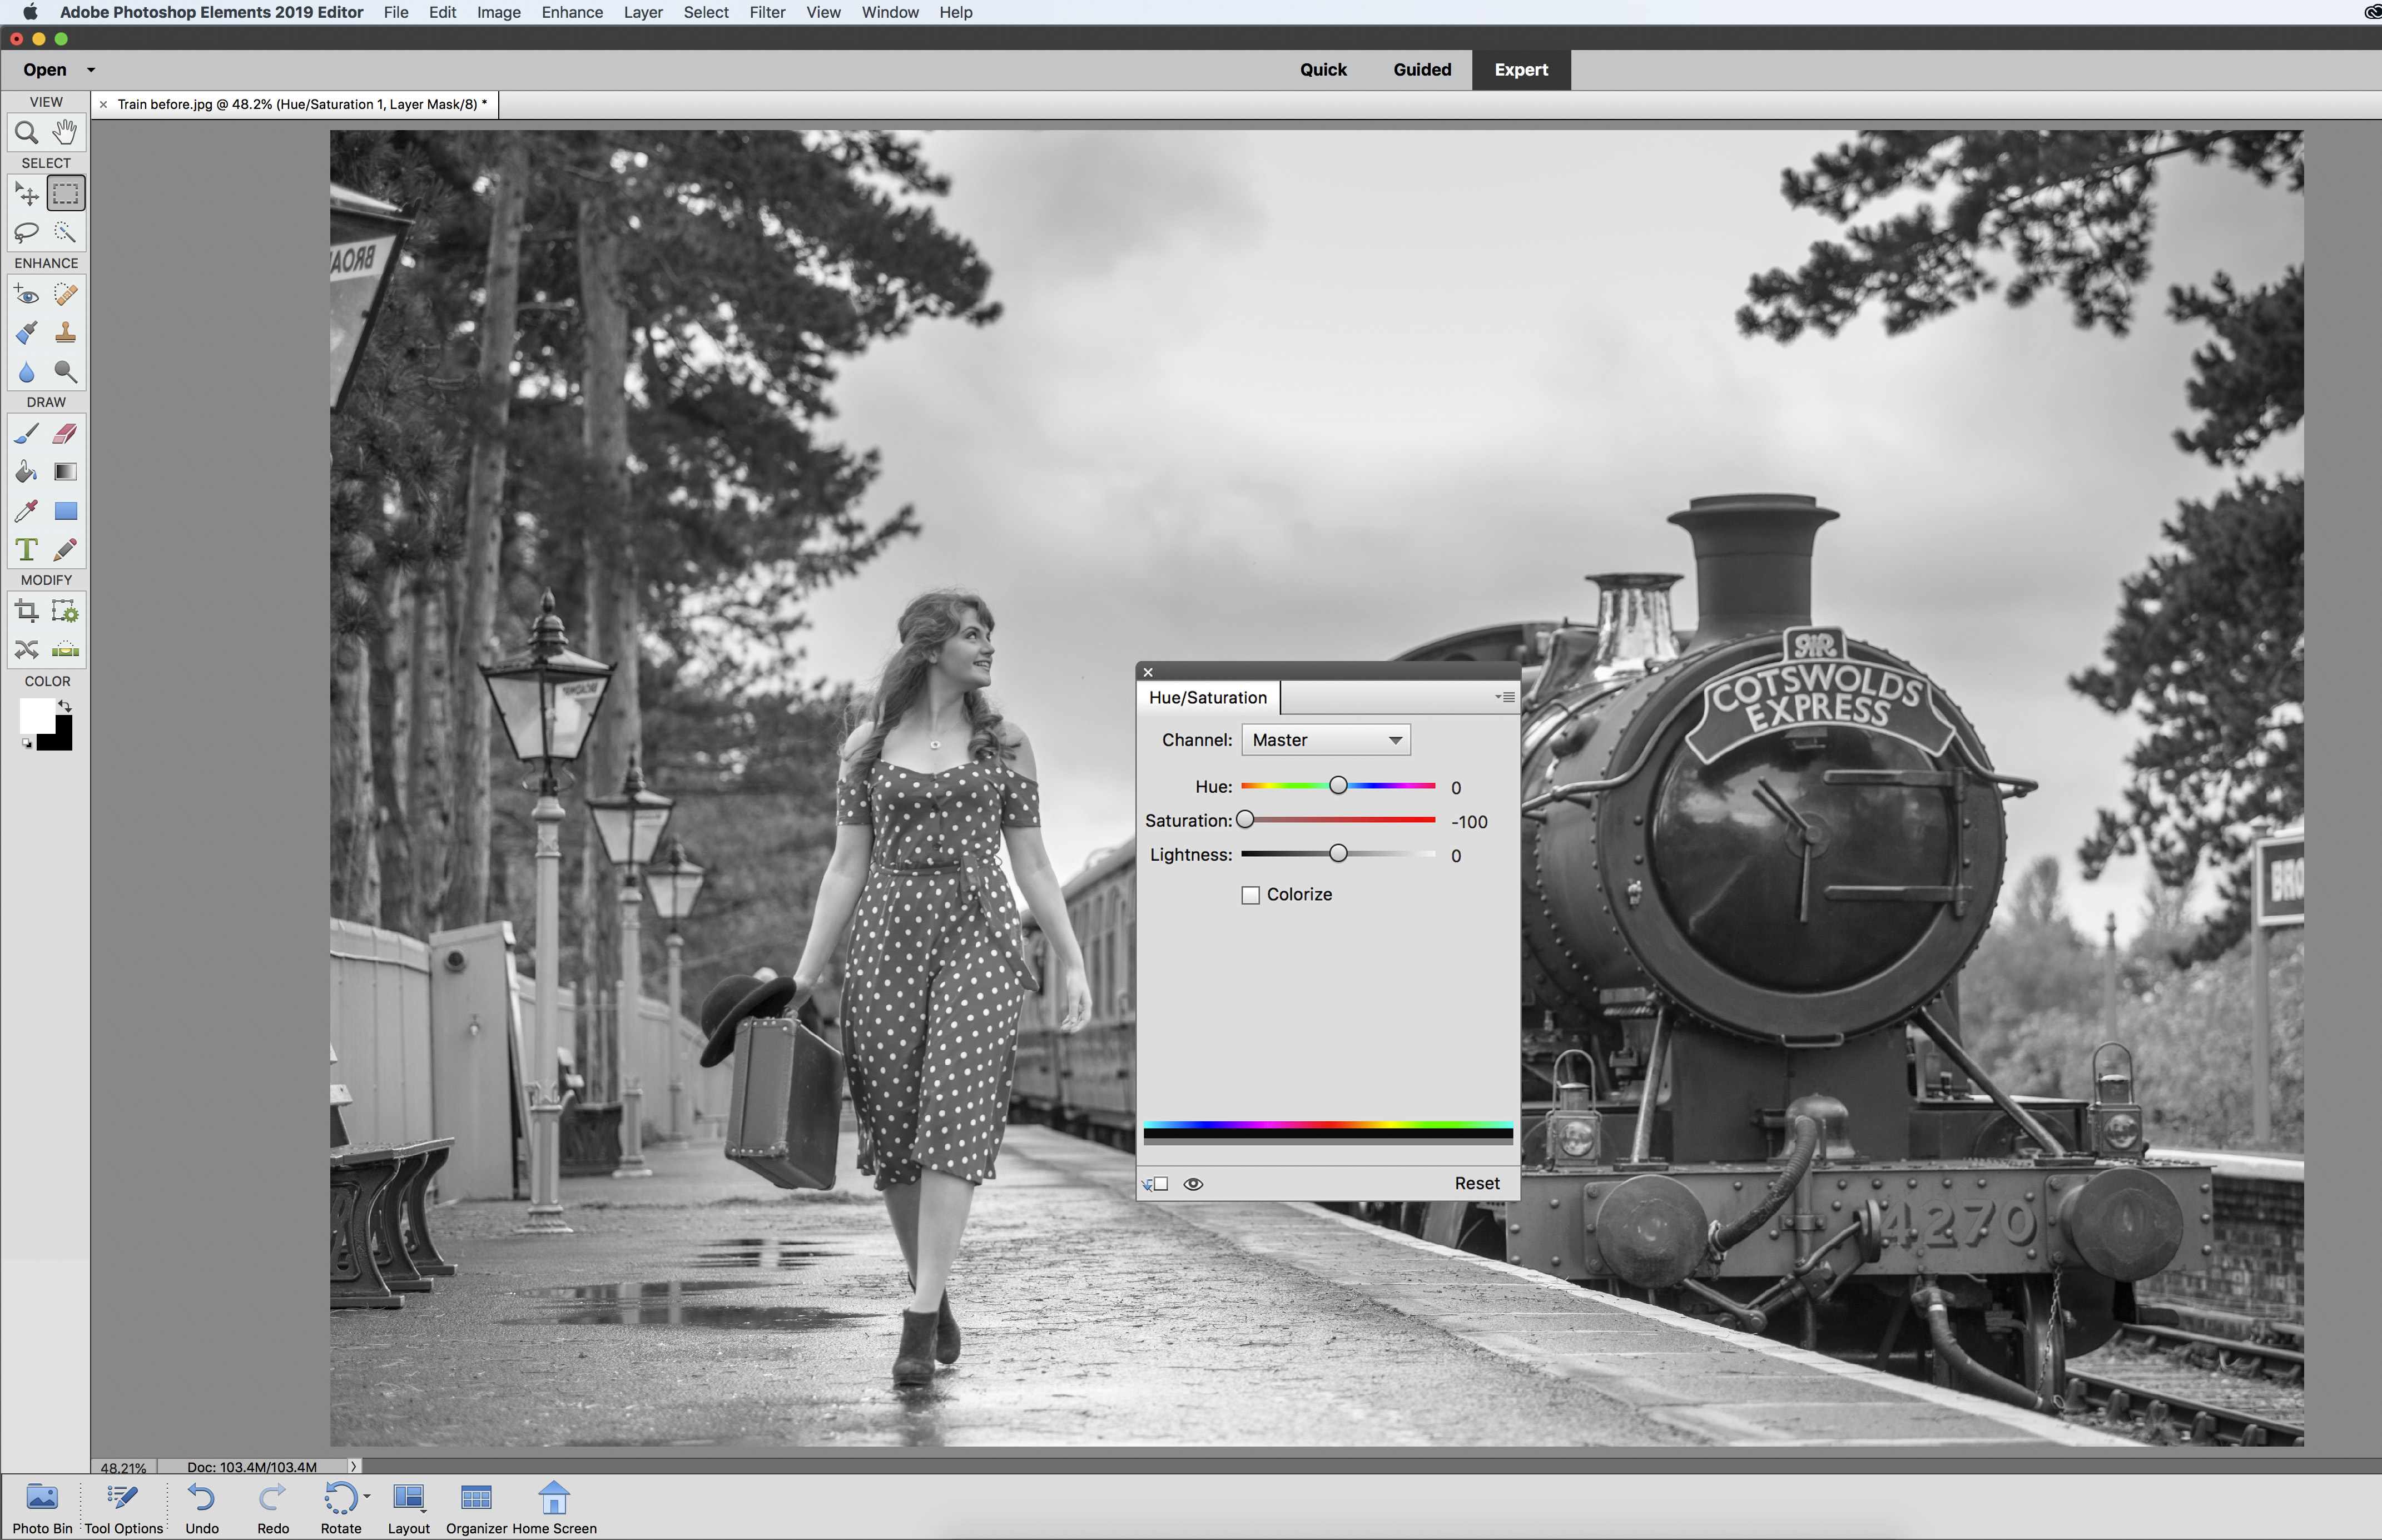
Open your image into Photoshop Elements and head over to the Layers panel (Window>Layers). Now click on the Create new adjustment layer icon and choose Hue/Saturation. In the panel that appears, set the Saturation slider to -100 to drain all the color.
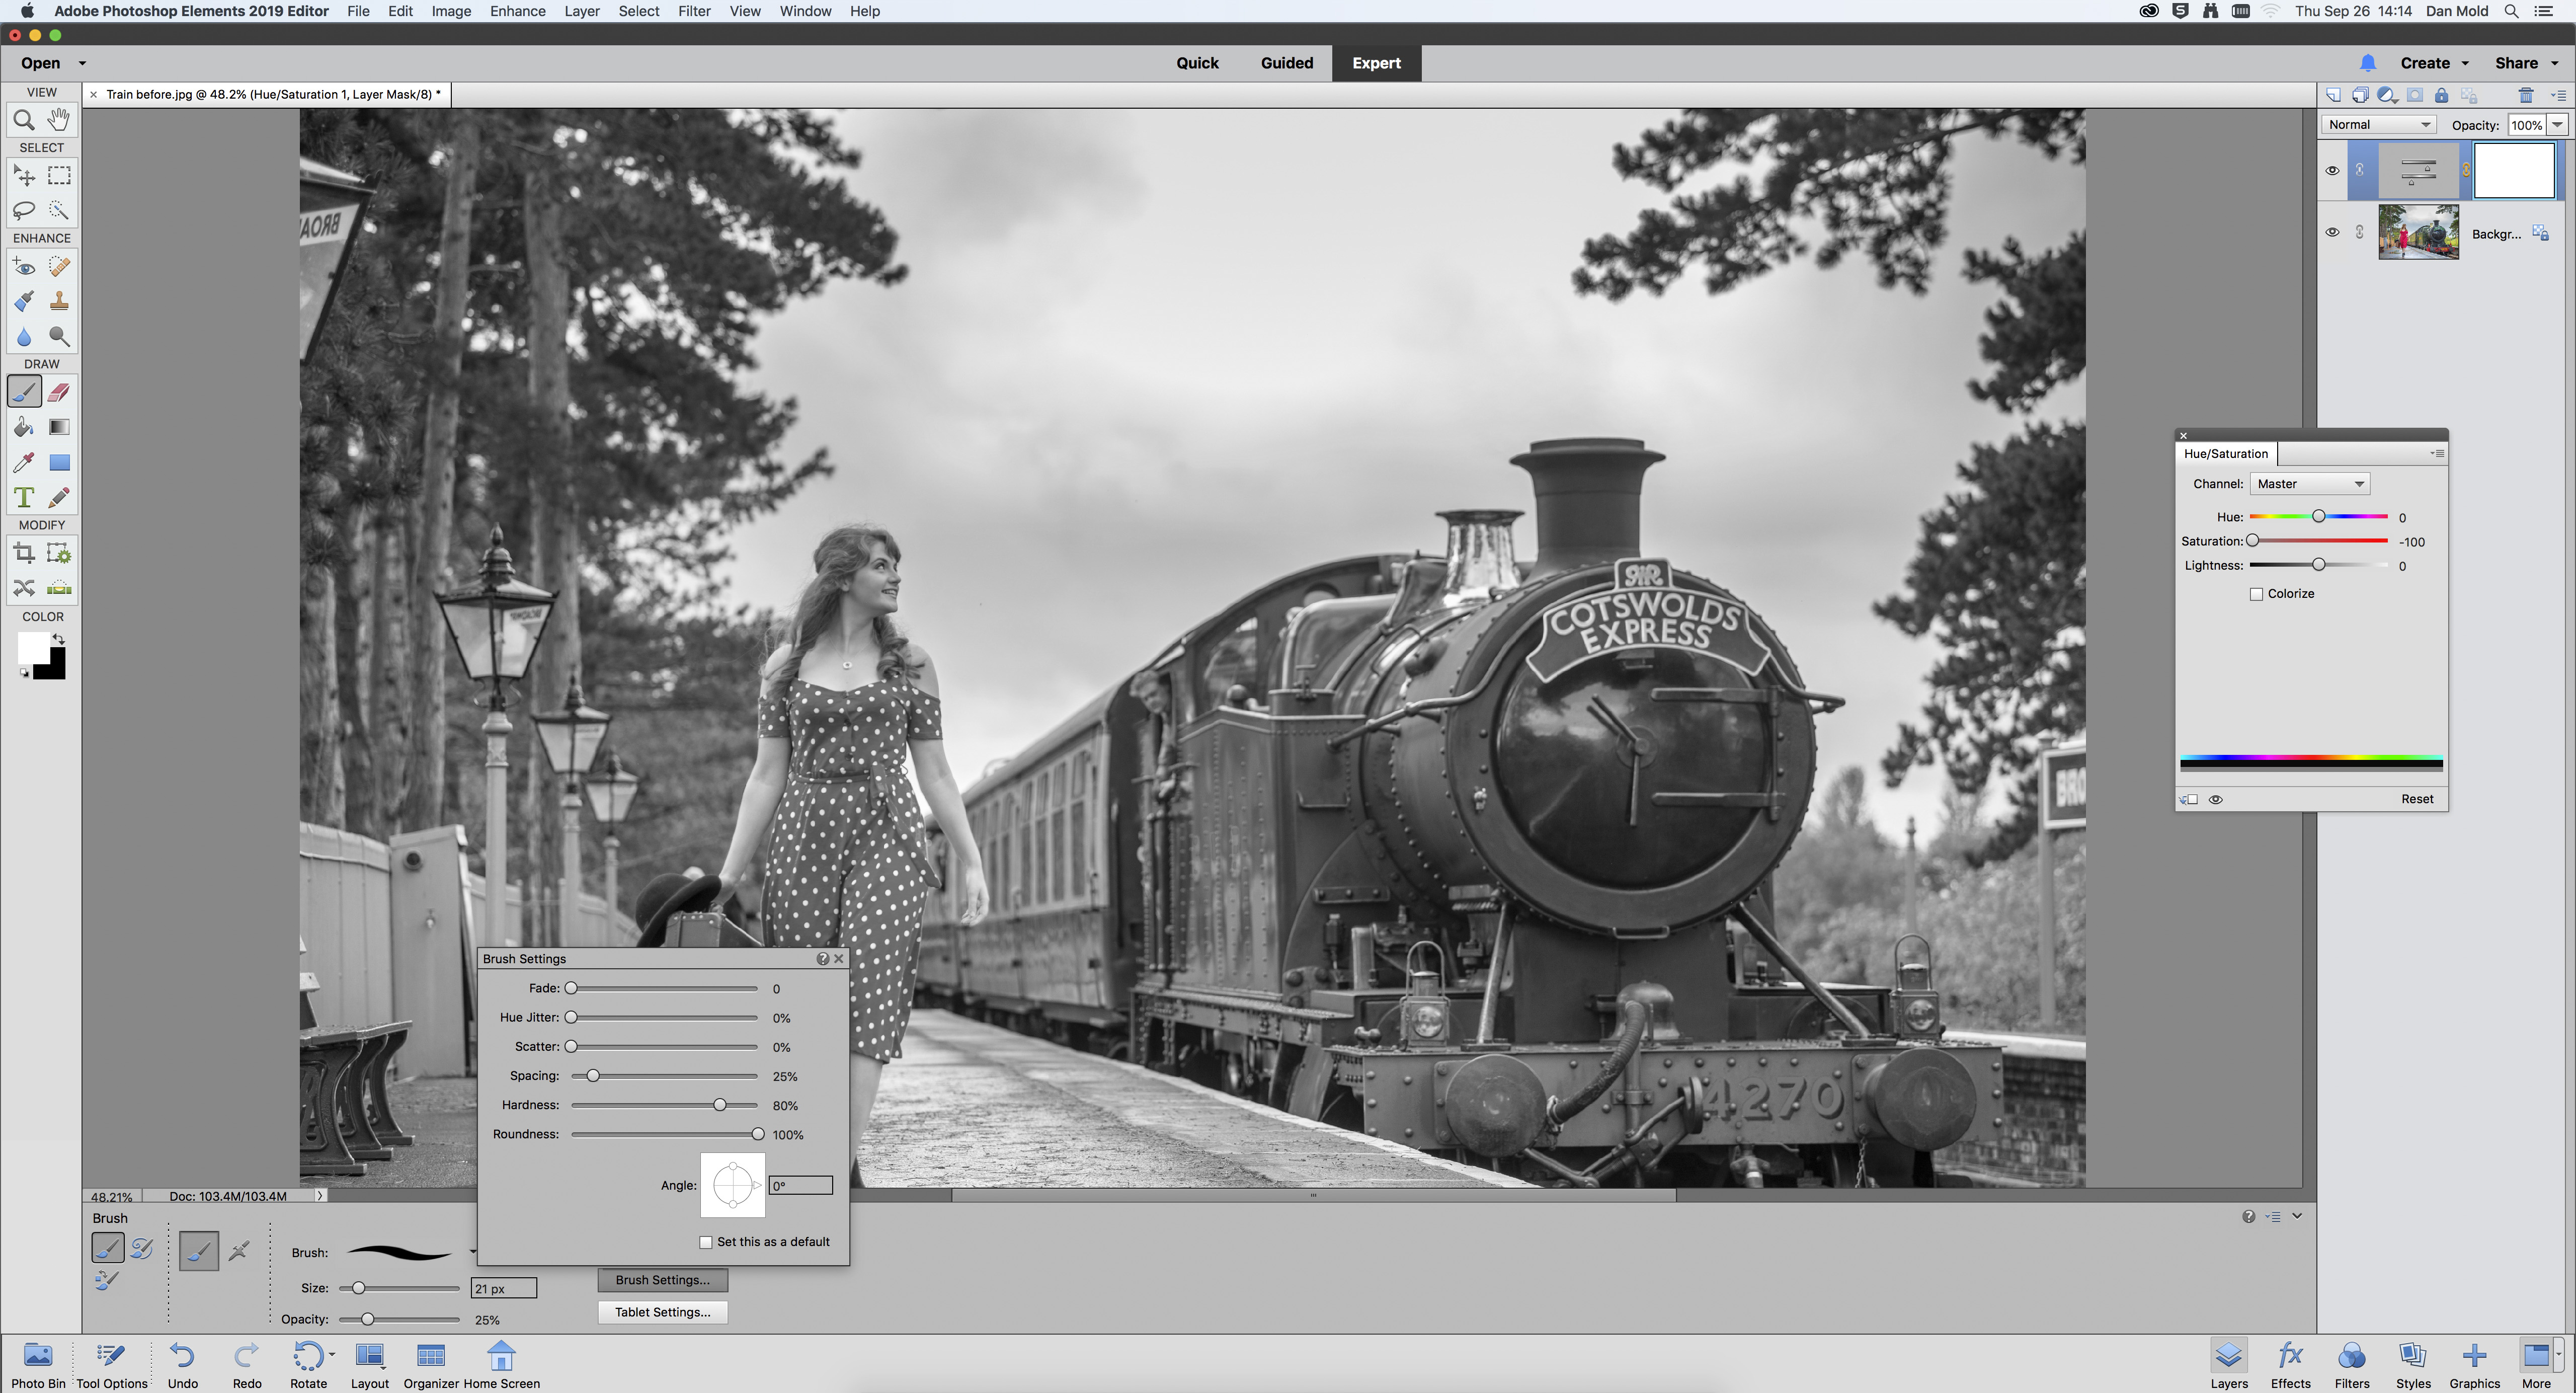
02 Set up the Brush Tool
We’ll be using the Brush Tool to paint color back into the image, so click it in the Toolbox to make it active. In the Tool Options set the Opacity to 70%, then click on Brush Settings and set the Hardness to 80%. Now resize your brush with the sliders or the square bracket keys.
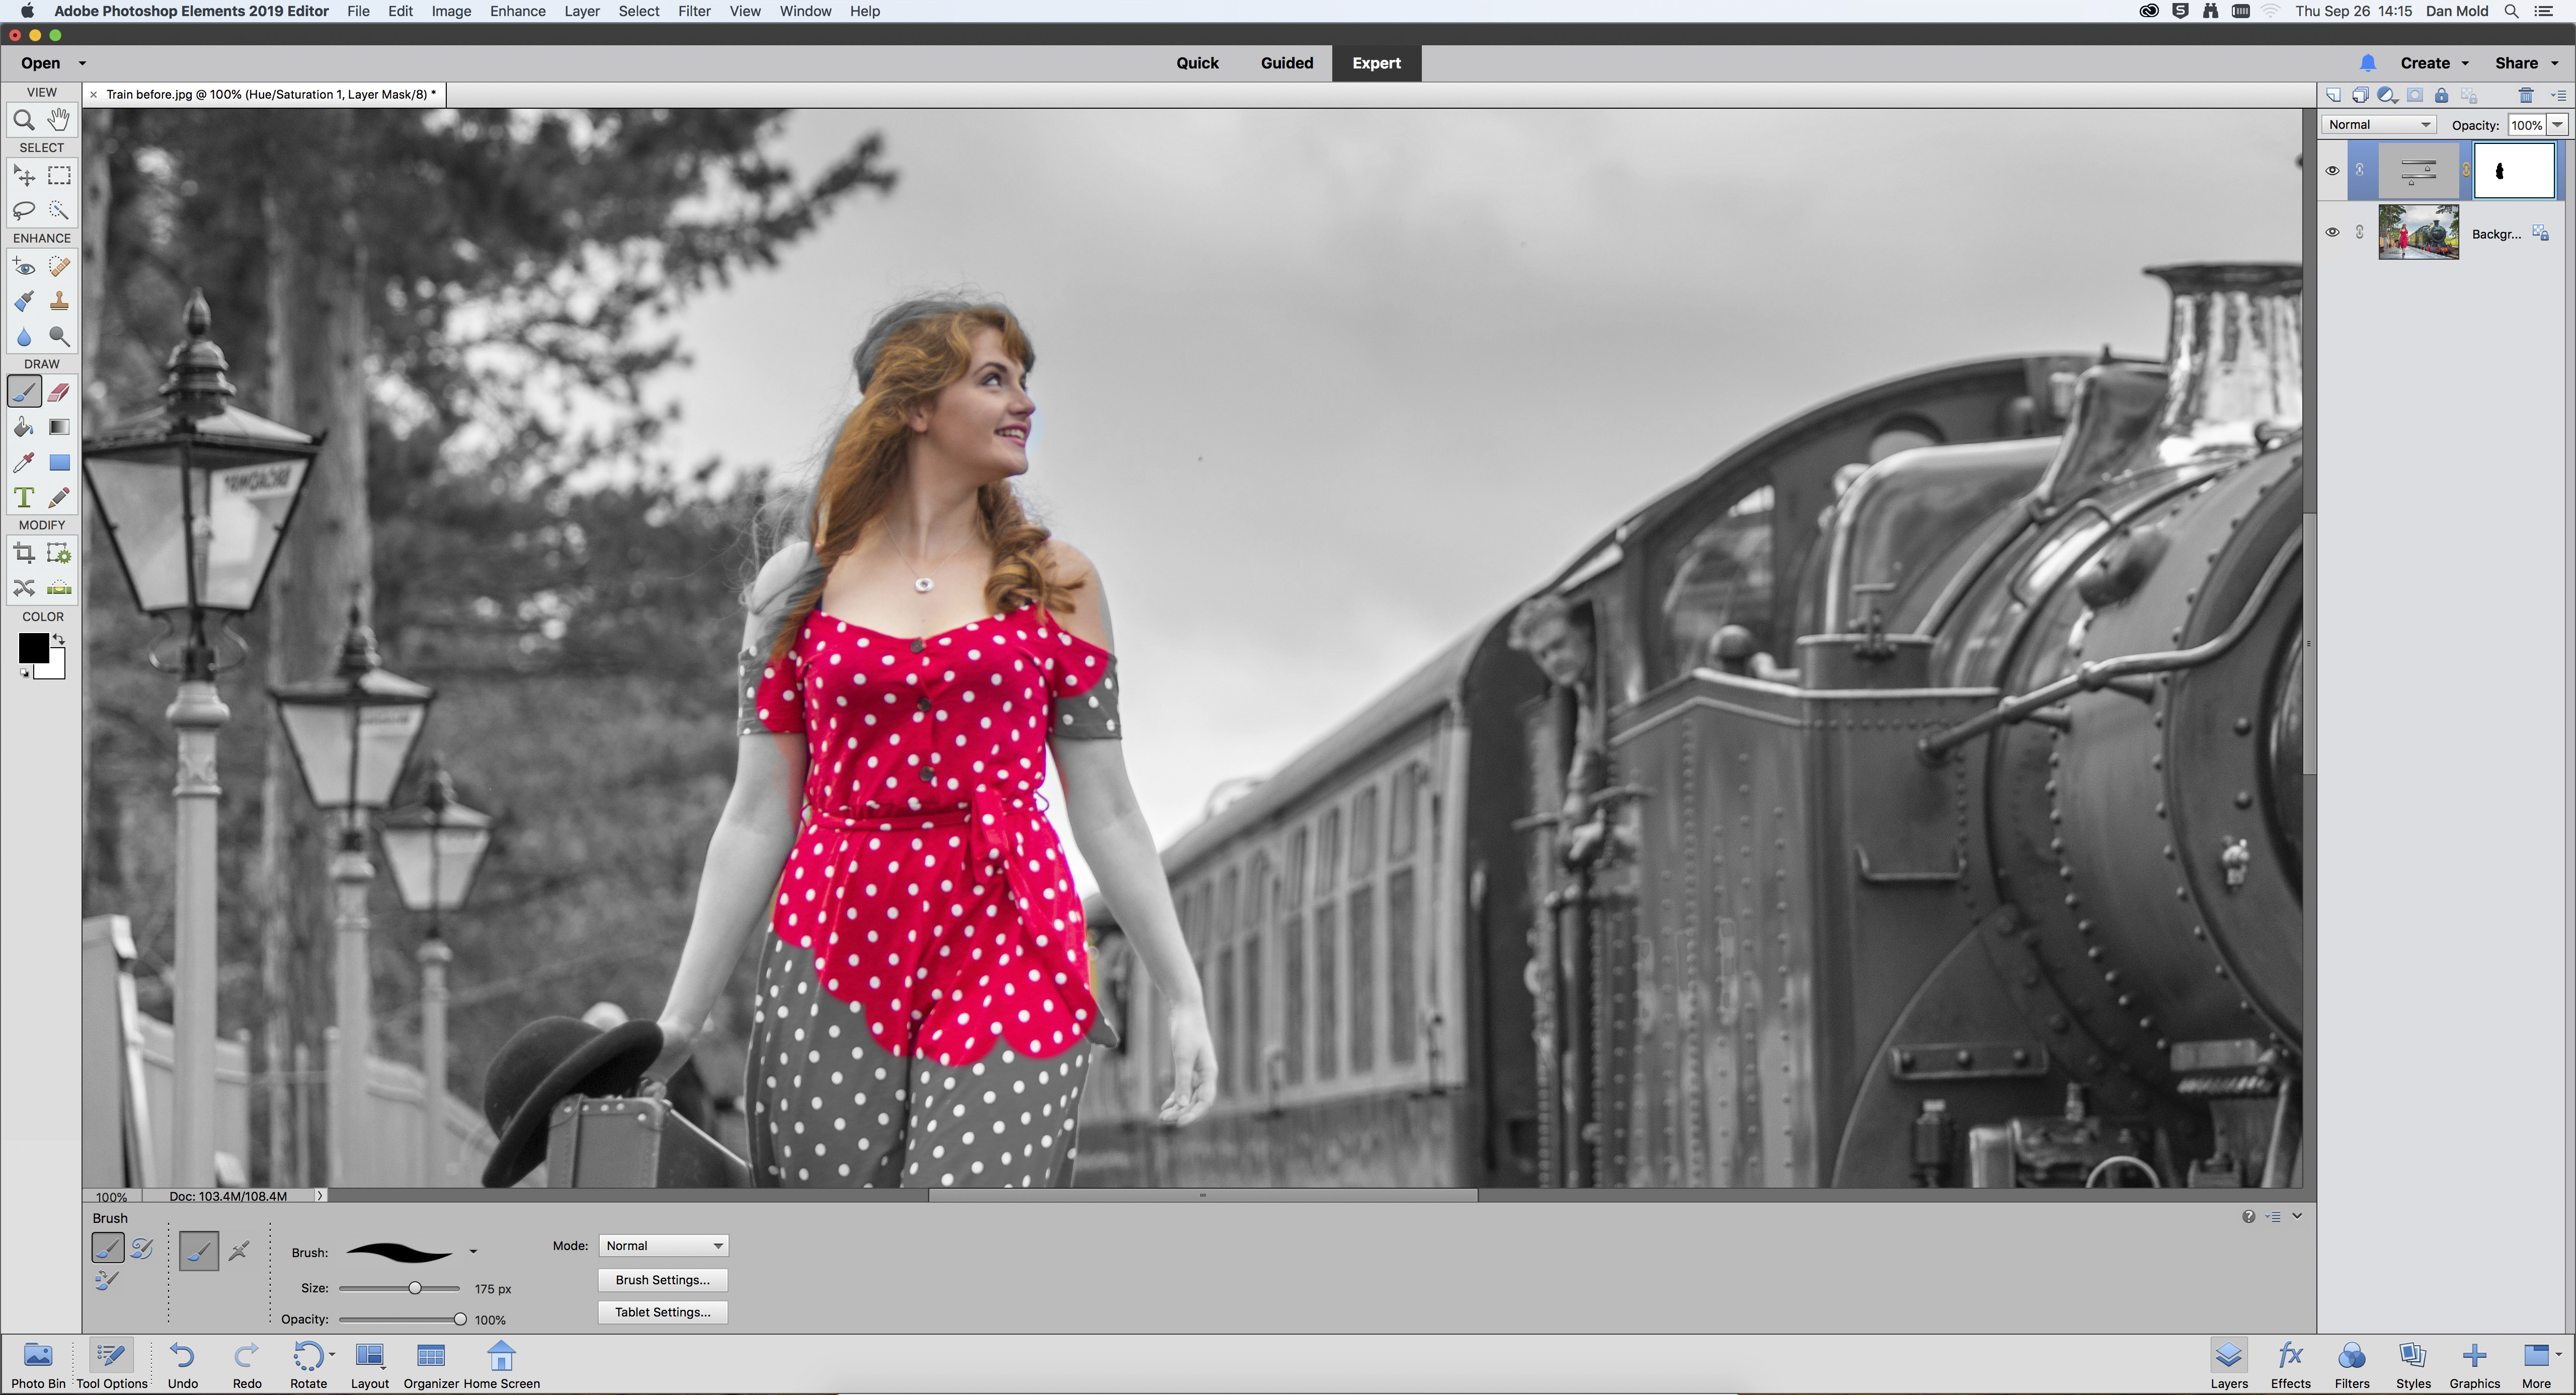
03 Work onto the Layer Mask
Click on the layer mask of your hue/saturation layer to make it active, then hit D followed by X to make your brush black. Zoom in by pressing Ctrl (PC) or CMD (Mac) along with the + key a few times, and then paint over your subject to bring back the vibrant color.
The best camera deals, reviews, product advice, and unmissable photography news, direct to your inbox!
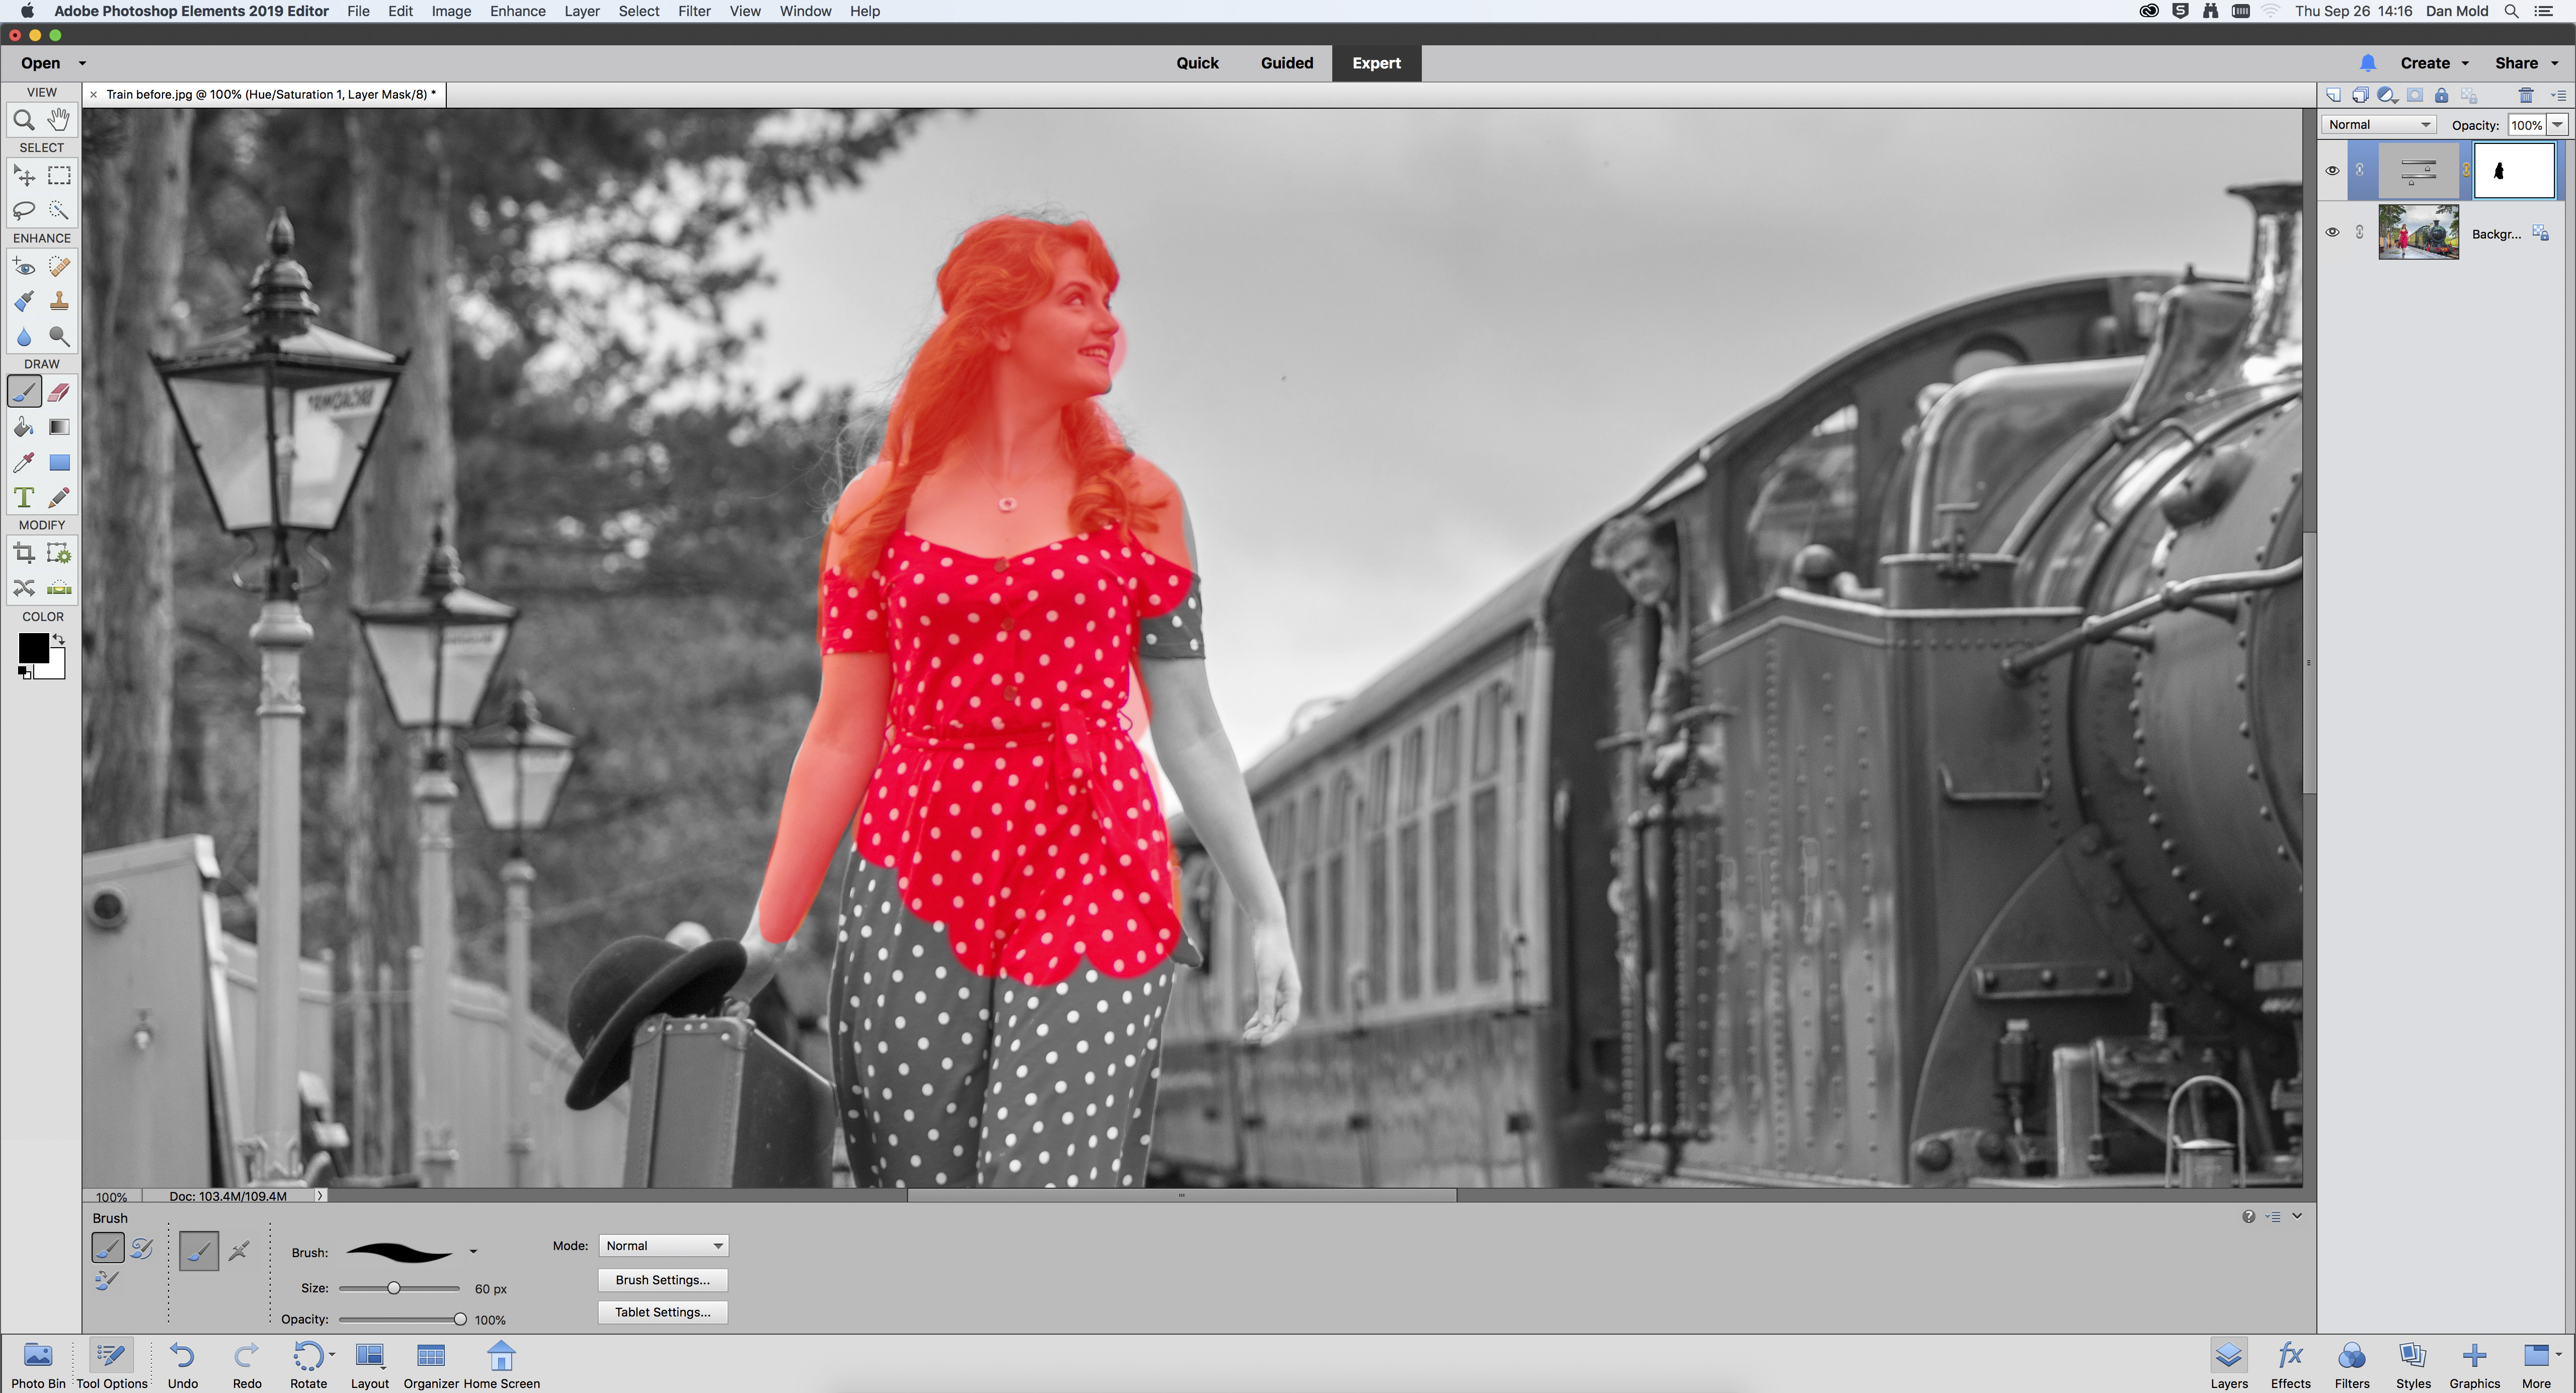
04 Use the preview overlay
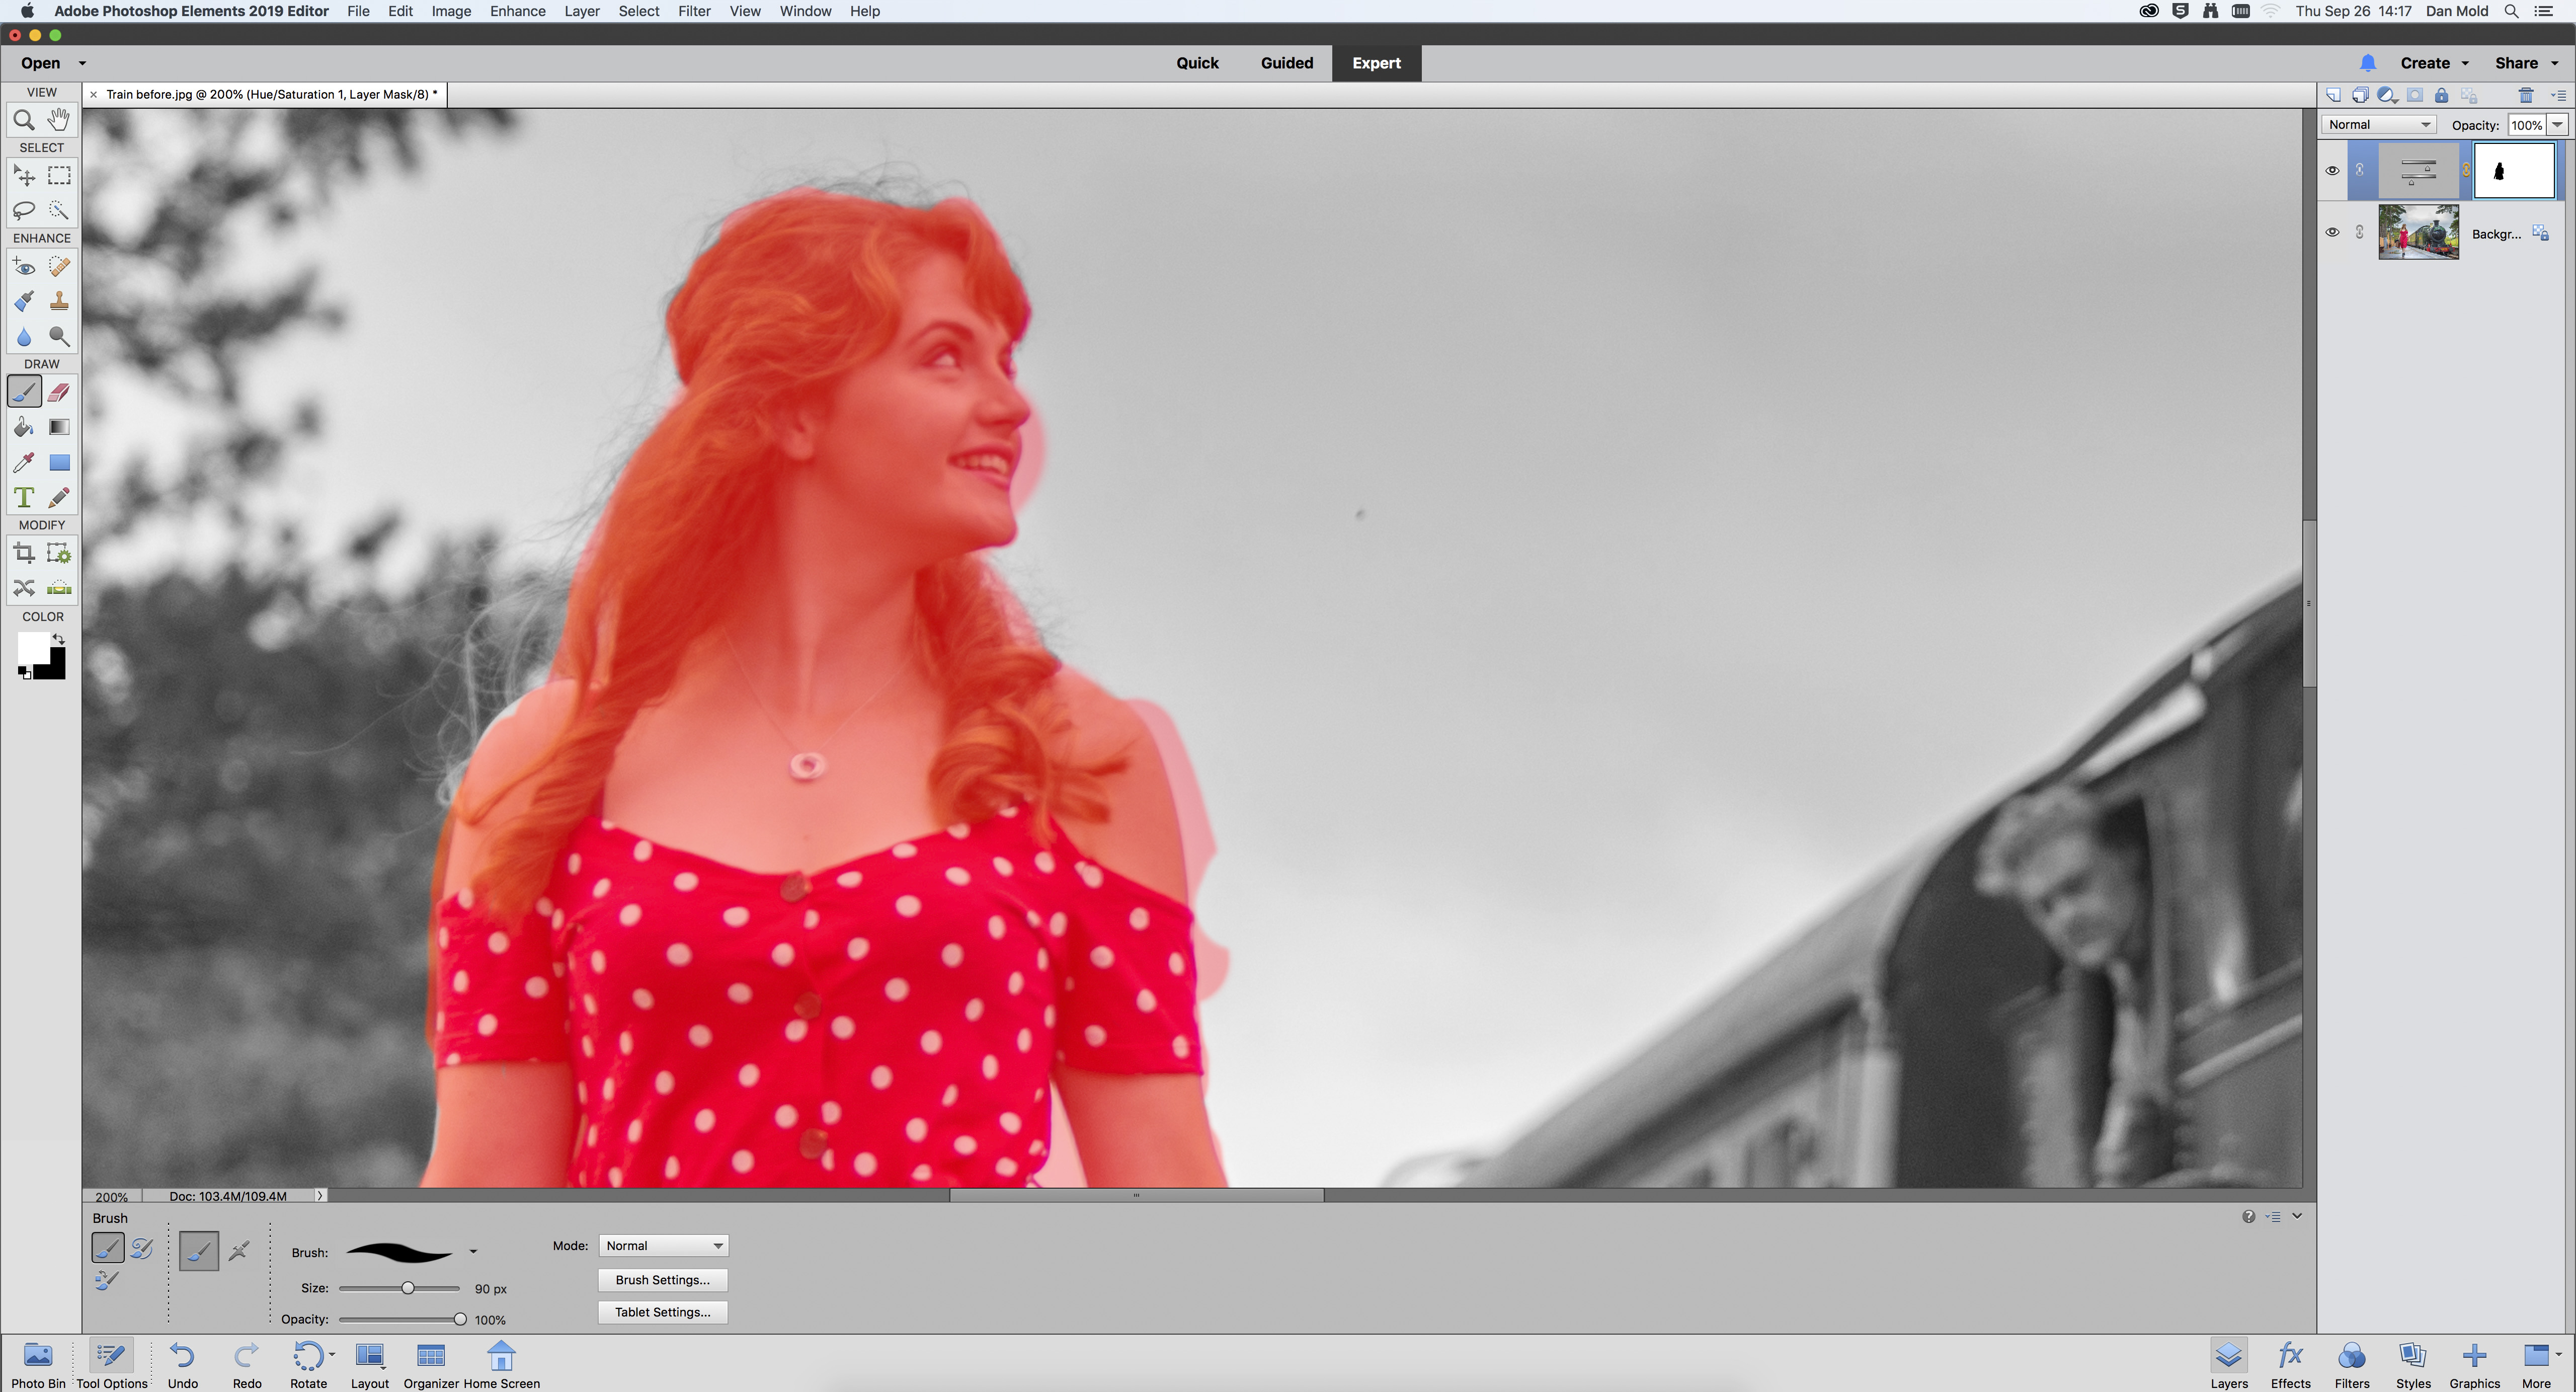
Press the \ key to activate the Rubylith overlay, which shows up any areas you’ve painted on your layer mask as a bright red, making it easier to see if you’ve missed or overpainted any areas. Toggle it on or off by pressing the \ key repeatedly.
05 Paint back over with white to hide the effect
If you accidentally paint over an area that you didn’t want to color pop, just hit X on the keyboard for a white foreground color and brush over that area to desaturate it again. When done, hit X once more for a white foreground color to continue working.
06 Boost the contrast
To give your shot one final dramatic boost we’re going to increase the contrast. Head back over to the Levels panel and click on the Create new adjustment layer icon, then choose Levels from the list. In the Levels panel, drag the Blacks and Whites sliders inwards.
PhotoPlus: The Canon Magazine is the world's only monthly newsstand title that's 100% devoted to Canon, so you can be sure the magazine is completely relevant to your system.
Read more:
The best photo editing software: image editors for novices through to pros
The best photo-editing laptops in 2020: top laptops for photographers
The best ultrawide monitor for photo editing in 2020

In addition to being a freelance photographer and filmmaker, Dan is a bona fide expert on all things Canon and Adobe. Not only is he an Adobe-certified Photoshop guru, he's spent over 10 years writing for specialist magazines including stints as the Deputy Editor for PhotoPlus: The Canon Magazine, Technical Editor for Practical Photography and Photoshop Editor on Digital Photo.

