Lightroom hack #07: How to create a solarization effect
This black and white ‘partial reversal’ effect was all the rage in black and white darkroom days

There’s some debate over the precise technical meaning of the term ’solarization’ and the related ‘Sabattier effect’, but most people now take it to mean a mix of positive and negative in a single image. In the darkroom this was done by re-exposing a print part way through development, but it’s possible to recreate it digitally.
We are publishing one hack a day this Christmas holiday period, see our other Lightroom Hacks
The results can be very striking, but at the same time they can vary widely, and small adjustments can have a big effect.
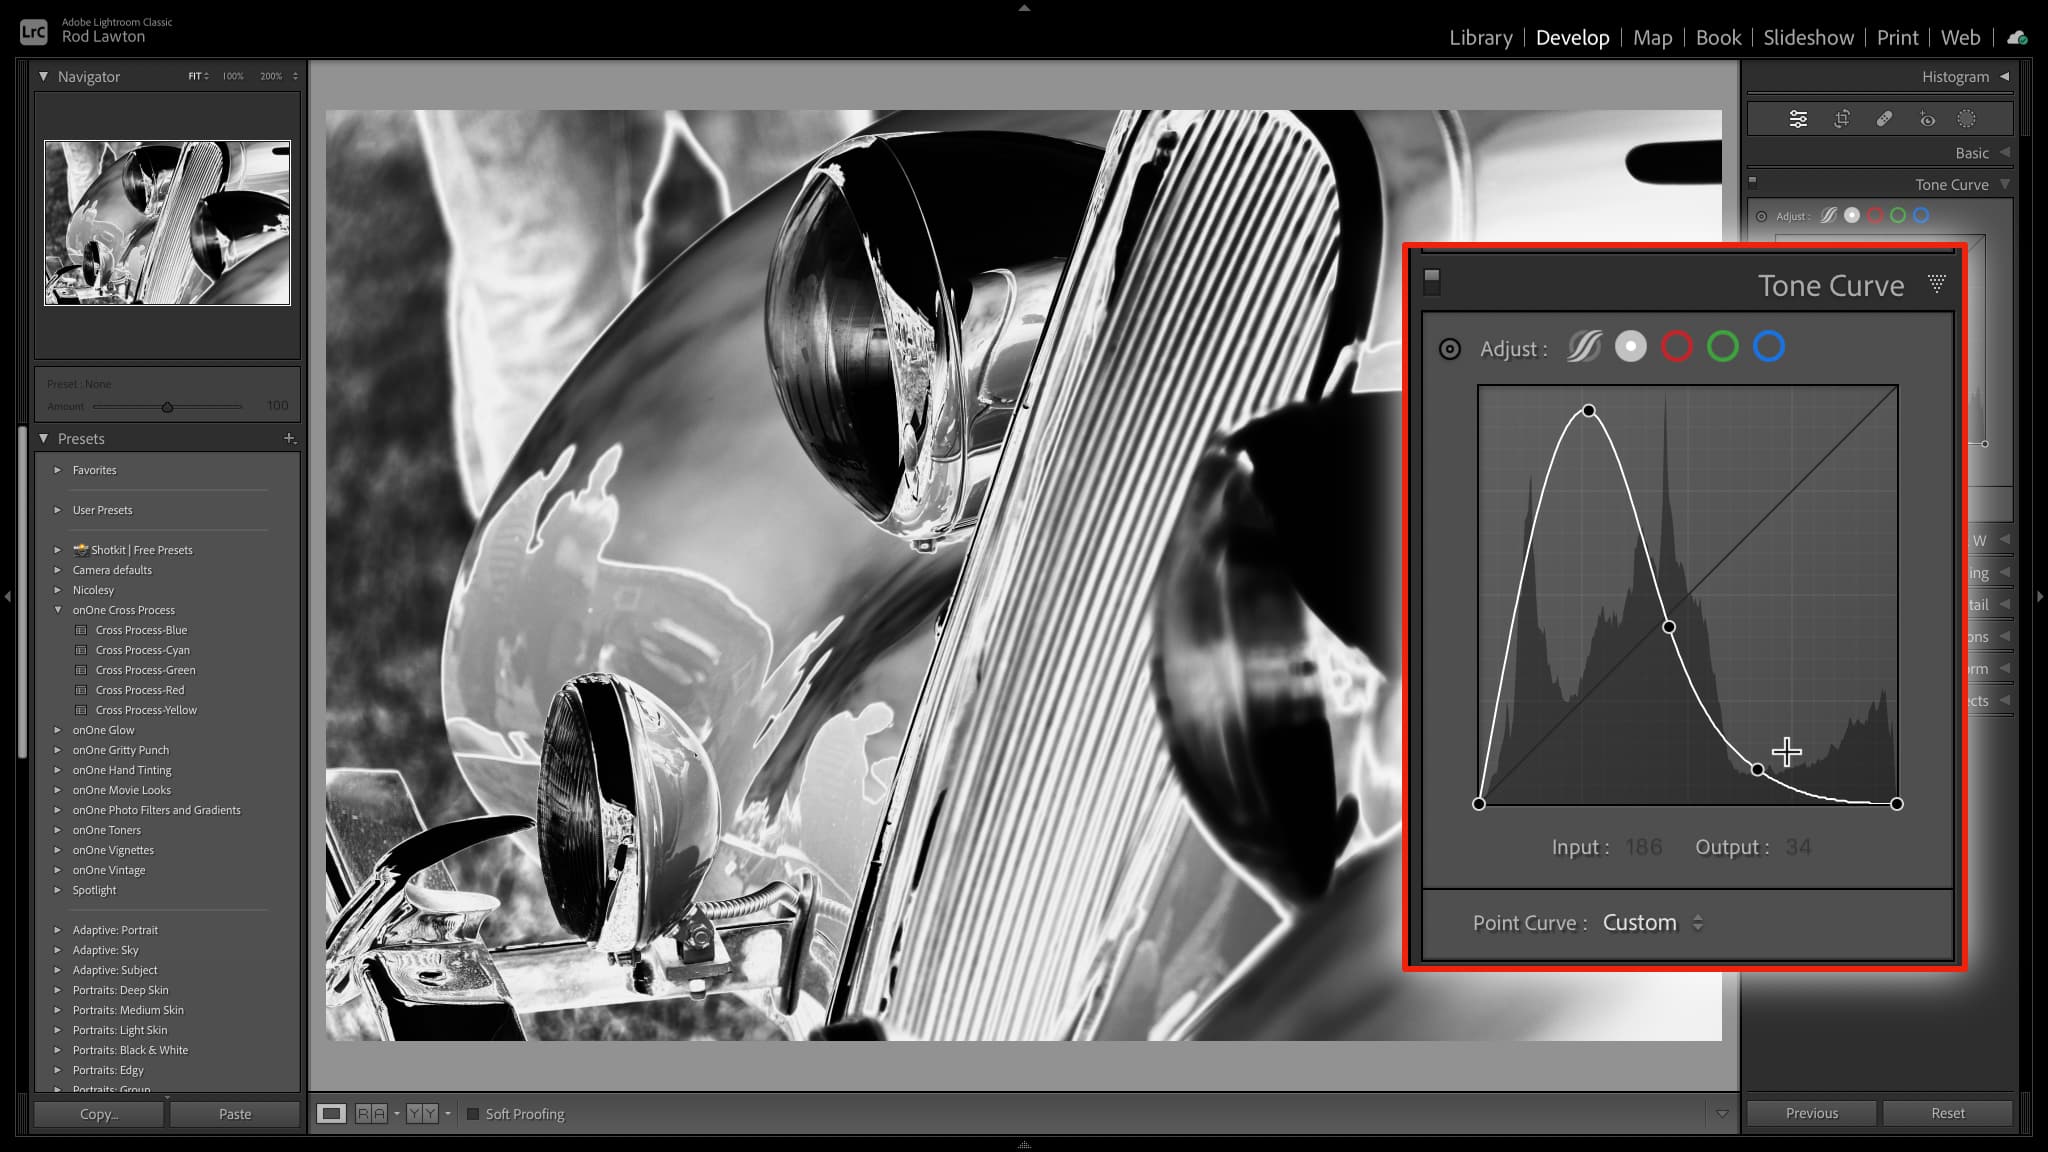
The first thing to do is swap to Lightroom’s Black and White mode in the Basic panel. The rest is done in Lightroom’s Tone Curve panel. Those pesky curves can sometimes seem to take on a life of their own with this technique, but there are ways to get them under control.
The secret of this technique is to add a control point in the middle of the curve and drag it right up to the top, and then drag the right hand control point from the top right down to the bottom. You may have to do some manoeuvring with the middle control point so that the top of the curve isn’t chopped off.
In effect, what this does is make the lower half of the image’s tonal range ‘positive’ and the upper half ‘negative’.
I find I get the best and most controllable results if the curve ‘peaks’ lower down in the shadow range, and the only way to budge that curve peak from the center is to one or two more further to the right. I can use these to control the ‘negative’ tones in the image, but they also push that ‘peak’ further over to the left where I want it.
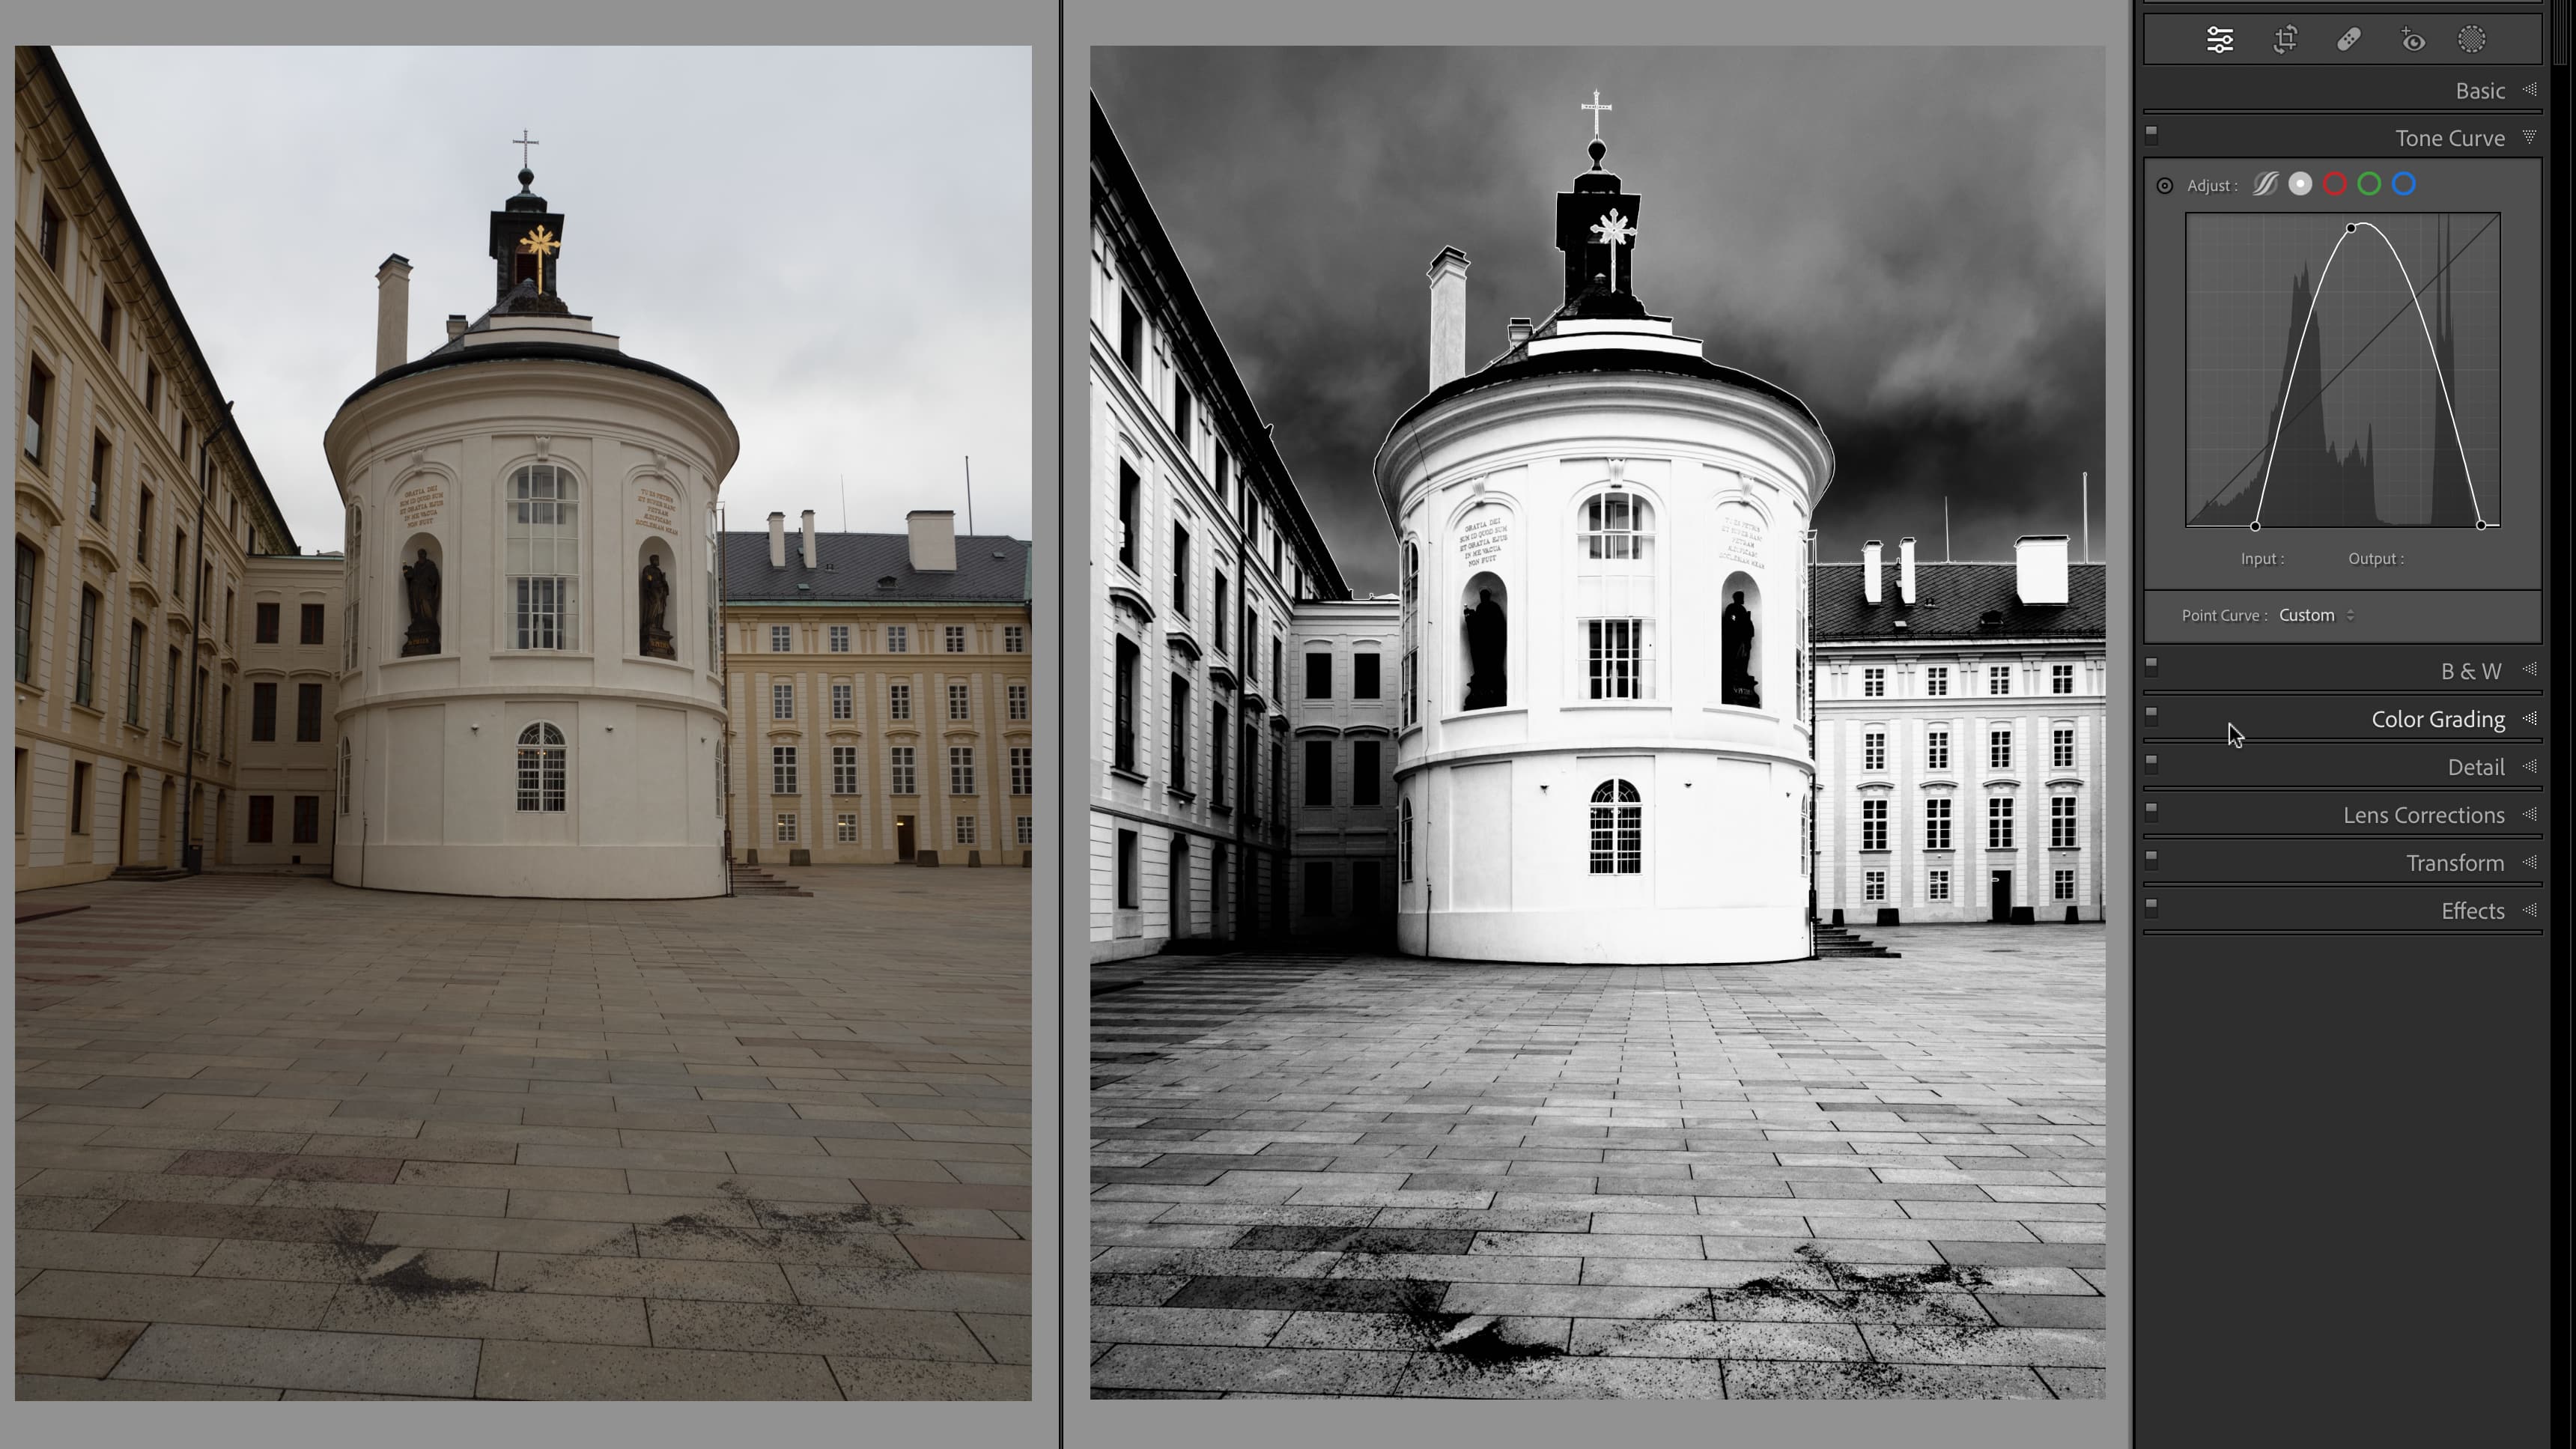
There are other ways to control this solarization effect. In this example, with the original image on the left, I’ve created a single ‘peak’ with one control point and then I’m moving the black and white control points in and out to shift the positive/negative balance. Don’t worry about clipping your histogram – solarization is not a subtle effect!
The best camera deals, reviews, product advice, and unmissable photography news, direct to your inbox!
Read more:
• Best photo editing software
• Lightroom review
• Lightroom Classic review

Rod is an independent photography journalist and editor, and a long-standing Digital Camera World contributor, having previously worked as Group Reviews Editor, Head of Testing for the photography division, Technique Editor on N-Photo, and Camera Channel editor on TechRadar, as well as contributing to many other publications.
He has been writing about digital cameras since they first appeared, and before that began his career writing about film photography. He has used and reviewed practically every interchangeable lens camera launched in the past 20 years, from entry-level DSLRs to medium format cameras.
Rod has his own camera gear blog at fotovolo.com but also writes about photo-editing applications and techniques at lifeafterphotoshop.com.


