Lens corrections in Capture One: what they do and how to use them
Pro photographer Paul Reiffer explains the value of lens corrections and how they can counteract lens aberrations
The best camera deals, reviews, product advice, and unmissable photography news, direct to your inbox!
You are now subscribed
Your newsletter sign-up was successful
No lens is perfect. All lenses, especially zoom lenses, have lens aberrations to some degree, whether it's distortion, chromatic aberration or corner shading, and the most effective way to correct these is digitally – and Capture one can do this both manually and automatically.
This series on Capture One has been specially commissioned from globetrotting pro photographer and editing expert Paul Reiffer.
• See the full Capture One series
• Capture One 21 review
• Best photo editing software
Each of our cameras, lenses, sensors and filters work together to deliver a different characteristic with each click of the shutter button. Sometimes those characteristics are wanted, other times they can be a distraction – and Capture One offers up a series of corrections to fix any undesirable aspects of a lens’ performance with just a few clicks.
In general, we should look to make any and all lens corrections prior to performing any other edits to an image – otherwise, we may make editing decisions based on a false underlying image such as oversharpening an image when it didn’t need it, or worrying about a curved horizon.
Article continues belowSo our first stop after importing images should always be the Lens Corrections tool under the Lens tab.
1. Embedded profiles
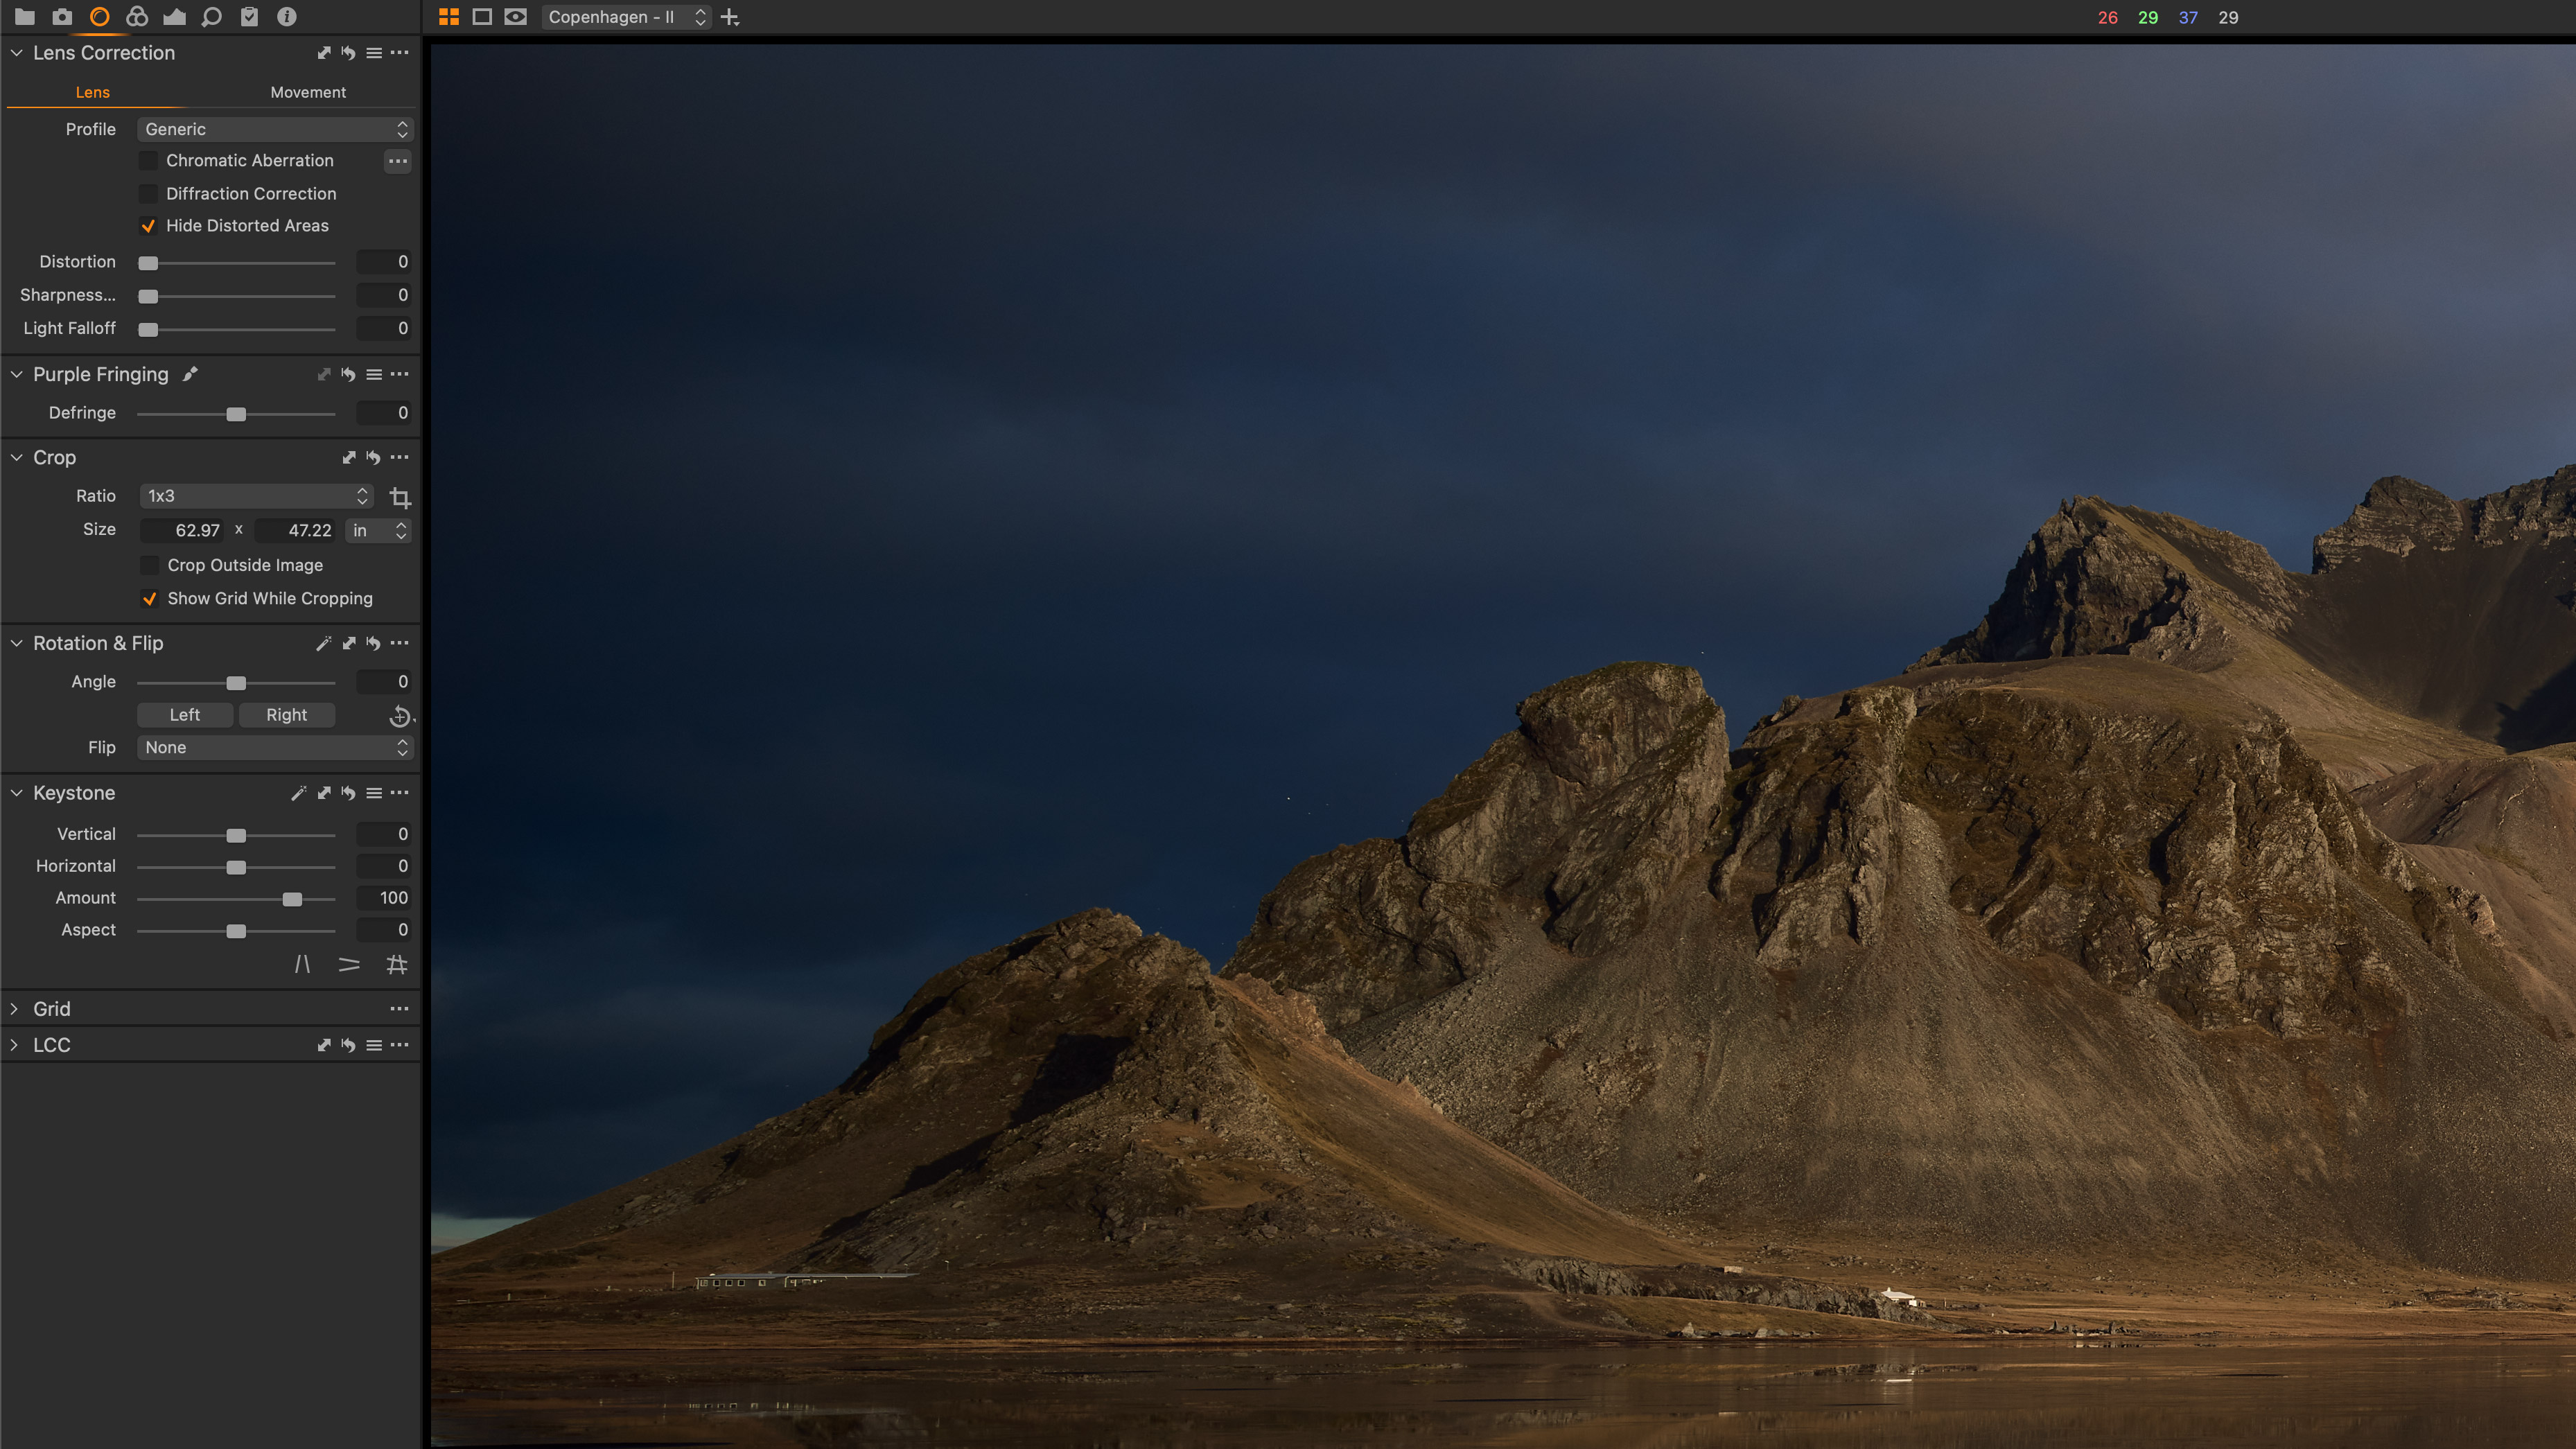
During the import, Capture One will attempt to identify the lens used at the time of capture – and if it cannot find an identical match in its database, it will then rely on either the embedded “Manufacturer Profile” or the “Generic” lens profile if all else fails.
Using an embedded profile isn’t a bad thing – it relies on the information your camera has stored within the raw file itself – but in general, our goal is to find our specific lens and apply that profile as a starting point.
2. Manual corrections
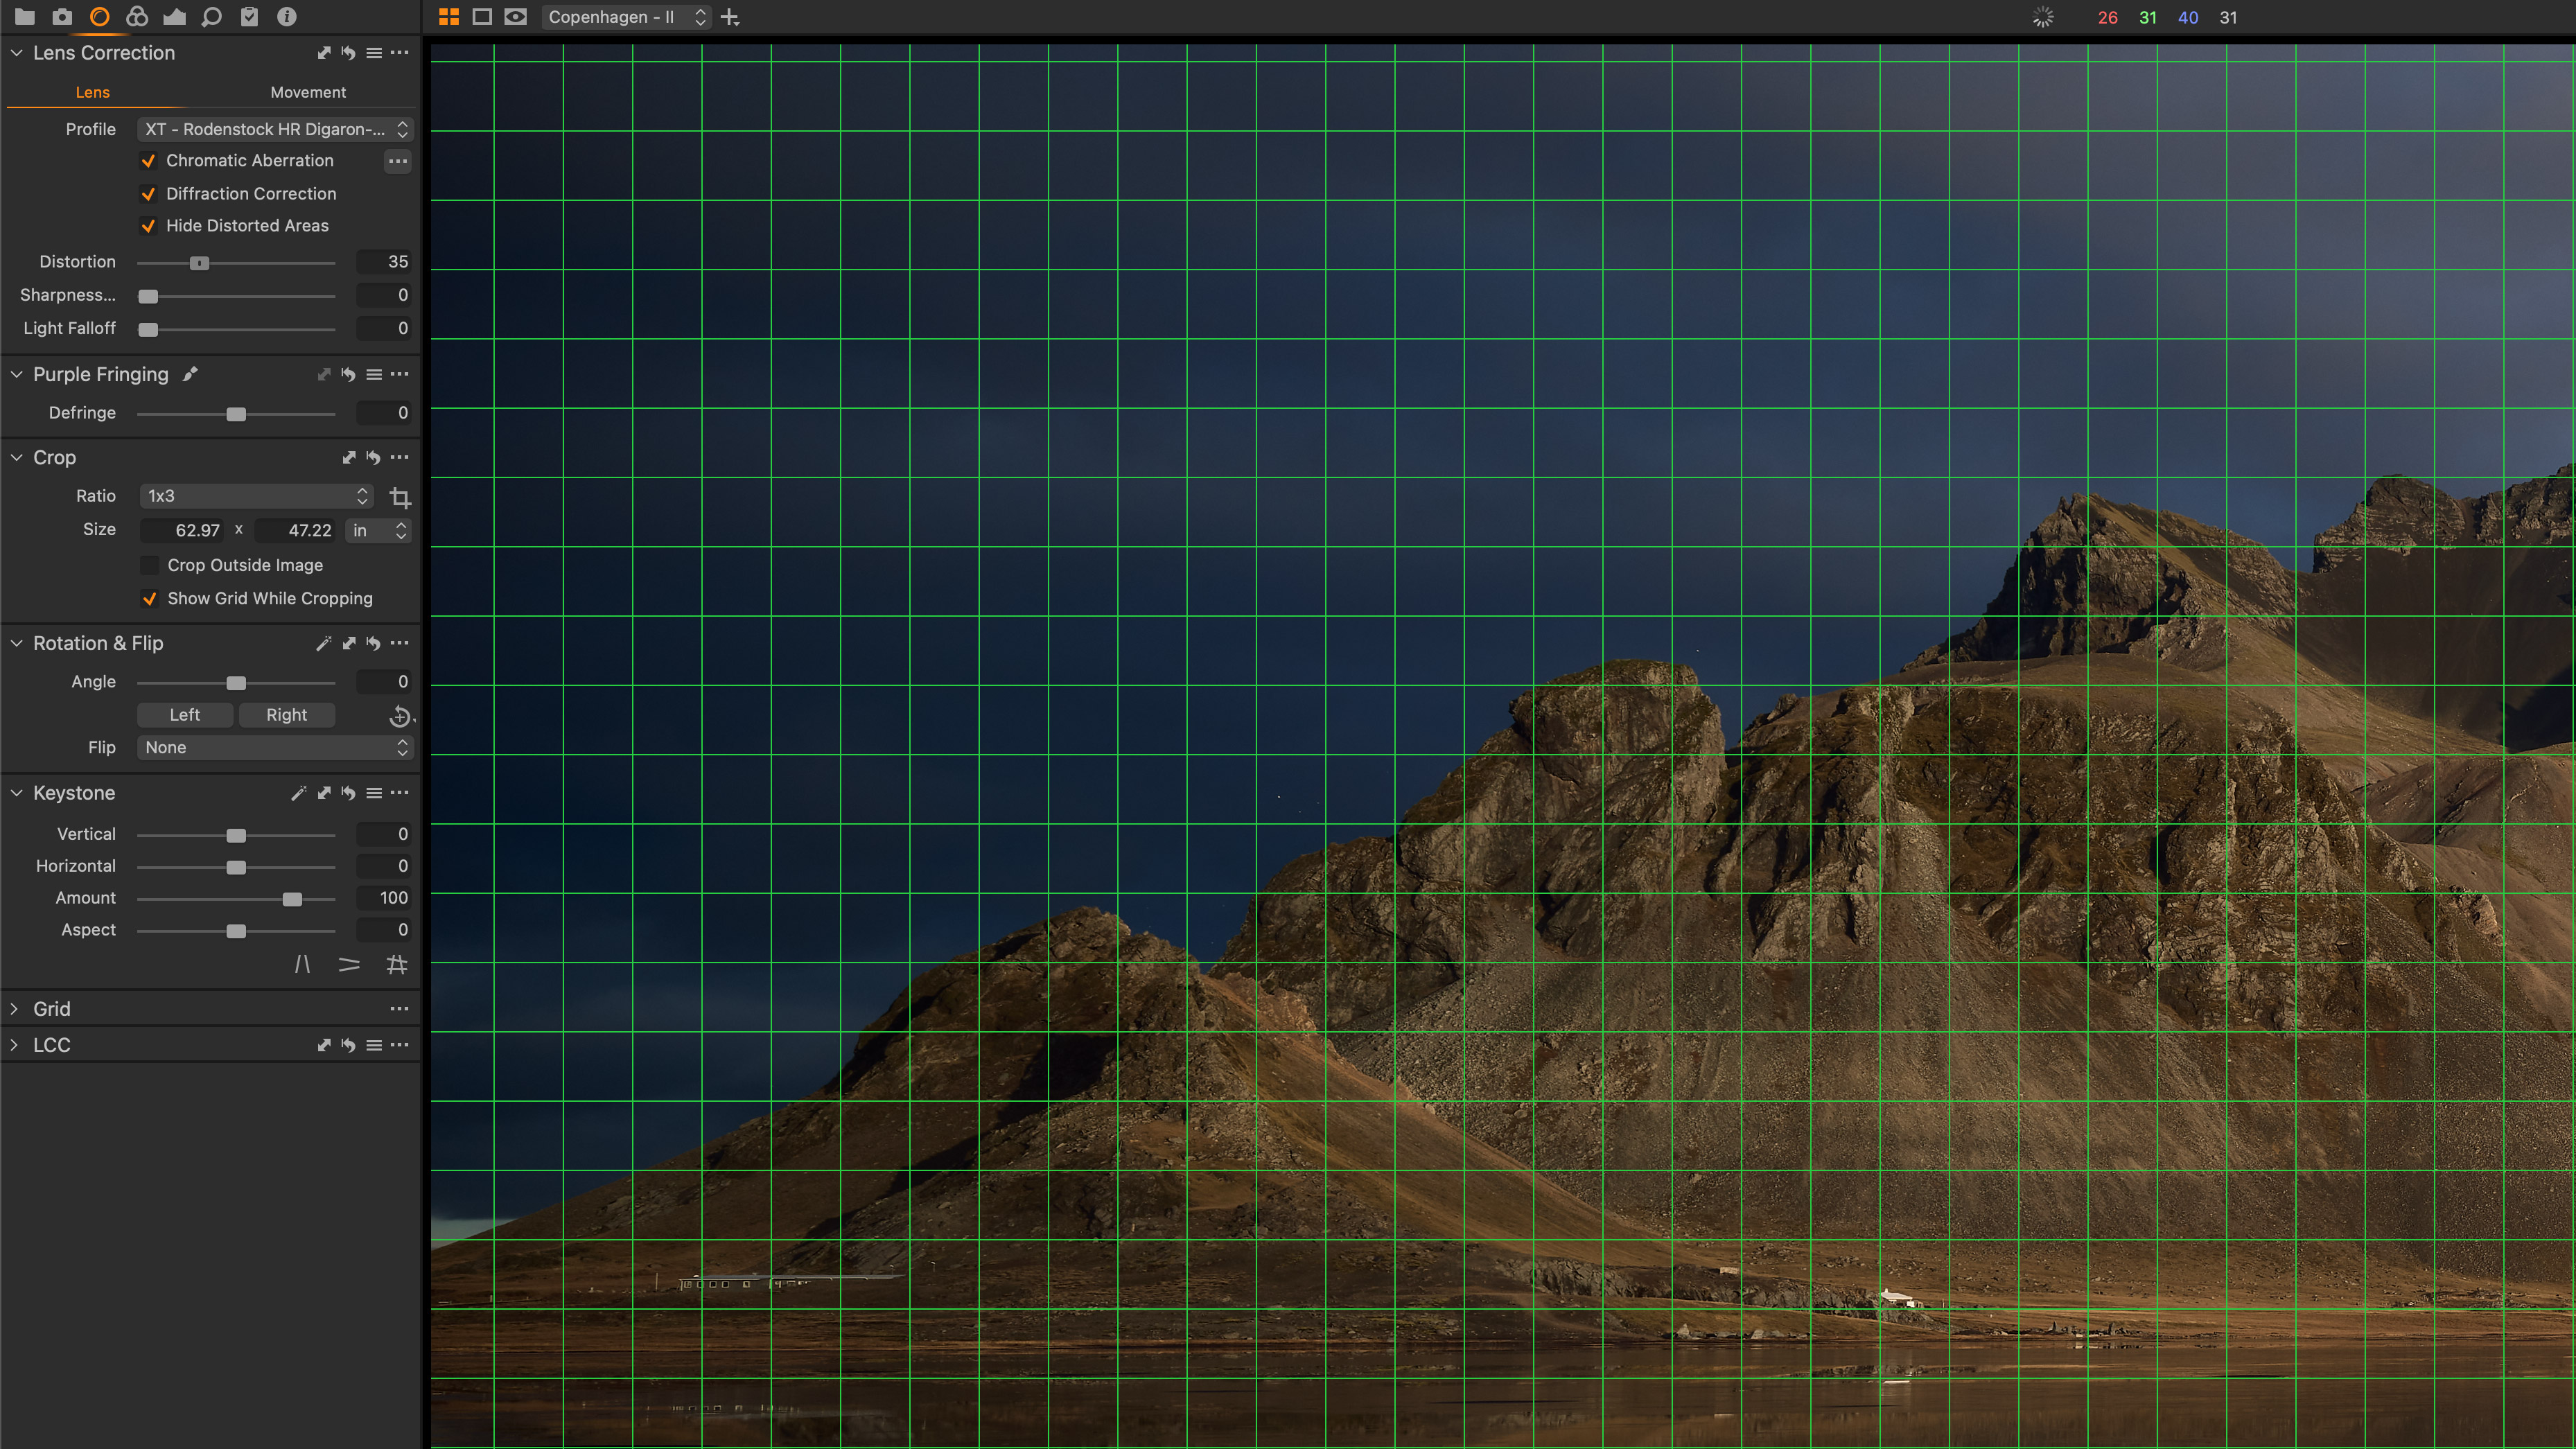
Once confirmed, we then work down the list of corrections available to us (these can also be applied to images where no profile has been found):
The best camera deals, reviews, product advice, and unmissable photography news, direct to your inbox!
• Chromatic Aberration: an unwanted flaw in the lens’ ability to resolve all colours to the same point. While the default correction is perfectly fine, telling Capture One to “Analyse” your specific image on your specific camera with that specific lens (by clicking the […] drop-down) will present a much better result for your individual picture.
• Diffraction Correction: this will attempt to correct any softening of the image (particularly at the edges) through the use of a small aperture. This is often unnecessary on lenses when shot wide open (f/2.8 – f/8), but smaller than f/8 you may find some improvements to sharpness by enabling this option.
• Distortion Correction: this allows us to correct for pincushion/barrel effects of lenses that have a pronounced distortion to them (especially with straight lines and horizons). If you find the distortion for an unknown lens needs to go “the other way”, try the “Generic-Pincushion” lens profile first.
• Sharpness Falloff: we all have that one lens that’s sharp in the middle, but slowly softens as it moves to the outside. This slider is to help with this specifically, like a radial sharpening mask that only affects the outside areas without oversharpening the middle.
• Light Falloff: think of this as an “anti-vignetting” slider, allowing Capture One to brighten the corners of a lens that produces darker edges.
• Purple Fringing: this slider actually goes from left to right, to correct for green and purple fringing at high contrast points. It’s part of the Chromatic Aberration profile of a lens, but is normally found at the edges in these two specific colours. Use this only as much as is needed to remove the colour fringe, and no more.
Lens corrections make a real difference
No lens is perfect, but with the selective, careful, use of these tools we can correct for many of those characteristics with very little fuss. Just be careful to only use these sliders where necessary, not just as a matter of course, and you can be sure that Capture One will deliver an image that shows the best of what your camera (and lens) can do.
About Capture One
Capture One is an all-in-one non-destructive image cataloguing, raw processing and editing tool, and its closest rival is Adobe Lightroom Classic. Capture One regularly features in our guide to the best photo editing software, thanks to its high-quality raw processing, in-depth color controls and layer and mask based editing.
Get Capture One Pro 22: $299 or $179/year
Capture One Pro is available either for a single one-off license fee on a paid-monthly subscription or an annual subscription which offers a big saving over the monthly option.
Paul Reiffer is an award-winning photographer and landscape artist. As a global ambassador for both Phase One and Capture One, he specialises in grand vistas, electrifying cityscapes and iconic views. His images have been published all around the world in well-known books, newspapers and magazines as well as supporting global travel and hospitality brands to reach and excite their audiences. His technical expertise is regularly called upon for industry insights, and through his luxury workshop programme as well as online channels, he’s carved out a unique style of teaching that is now appreciated by thousands worldwide. Shooting with ultra-high-resolution Phase One cameras, his work is used commercially by interior designers and clients ranging from National Geographic to British Airways, Marriott, Land Rover and many more.
