How to use the Pen tool in Photoshop to craft incredible composite images
Discover how to use the Pen tool in Photoshop to craft incredible composite images
Watch video: How to use the Pen tool in Photoshop CC
It might be one of the trickier tools on offer in Photoshop CC, but the Pen tool rewards those who persevere with a control like no other. It works by enabling you to plot a series of anchor points, with each point sprouting control handles so that you can determine the curvature of the line.
At first it might seem complicated and unwieldy, but with some practice the controls become second nature. In this tutorial we’ll use the Pen tool to trace around the car then, once done, use a layer mask to hide its original background and drop in an entirely new one.
• Read more: 100 Photoshop tips
There are different selection tools for different tasks in Photoshop. If you want to make a rough selection then you might use the Lasso tool, and if you want to select a portion of an image like a sky then it’s usually best to use the Quick Selection tool. By contrast, the Pen tool isn’t really meant for intricate selections with lots of fuzzy detail. Instead it excels at isolating hard-edged, curvy objects like the car here.
It’s worth noting too that the tool is equally adept at creating shapes as it is at selecting them, which is why it’s beloved by graphic designers and art editors. When using the pen, there are a few vital keyboard shortcuts that speed things up (see box). It’s worth spending time to learn these straight off the bat.
01 Start a path
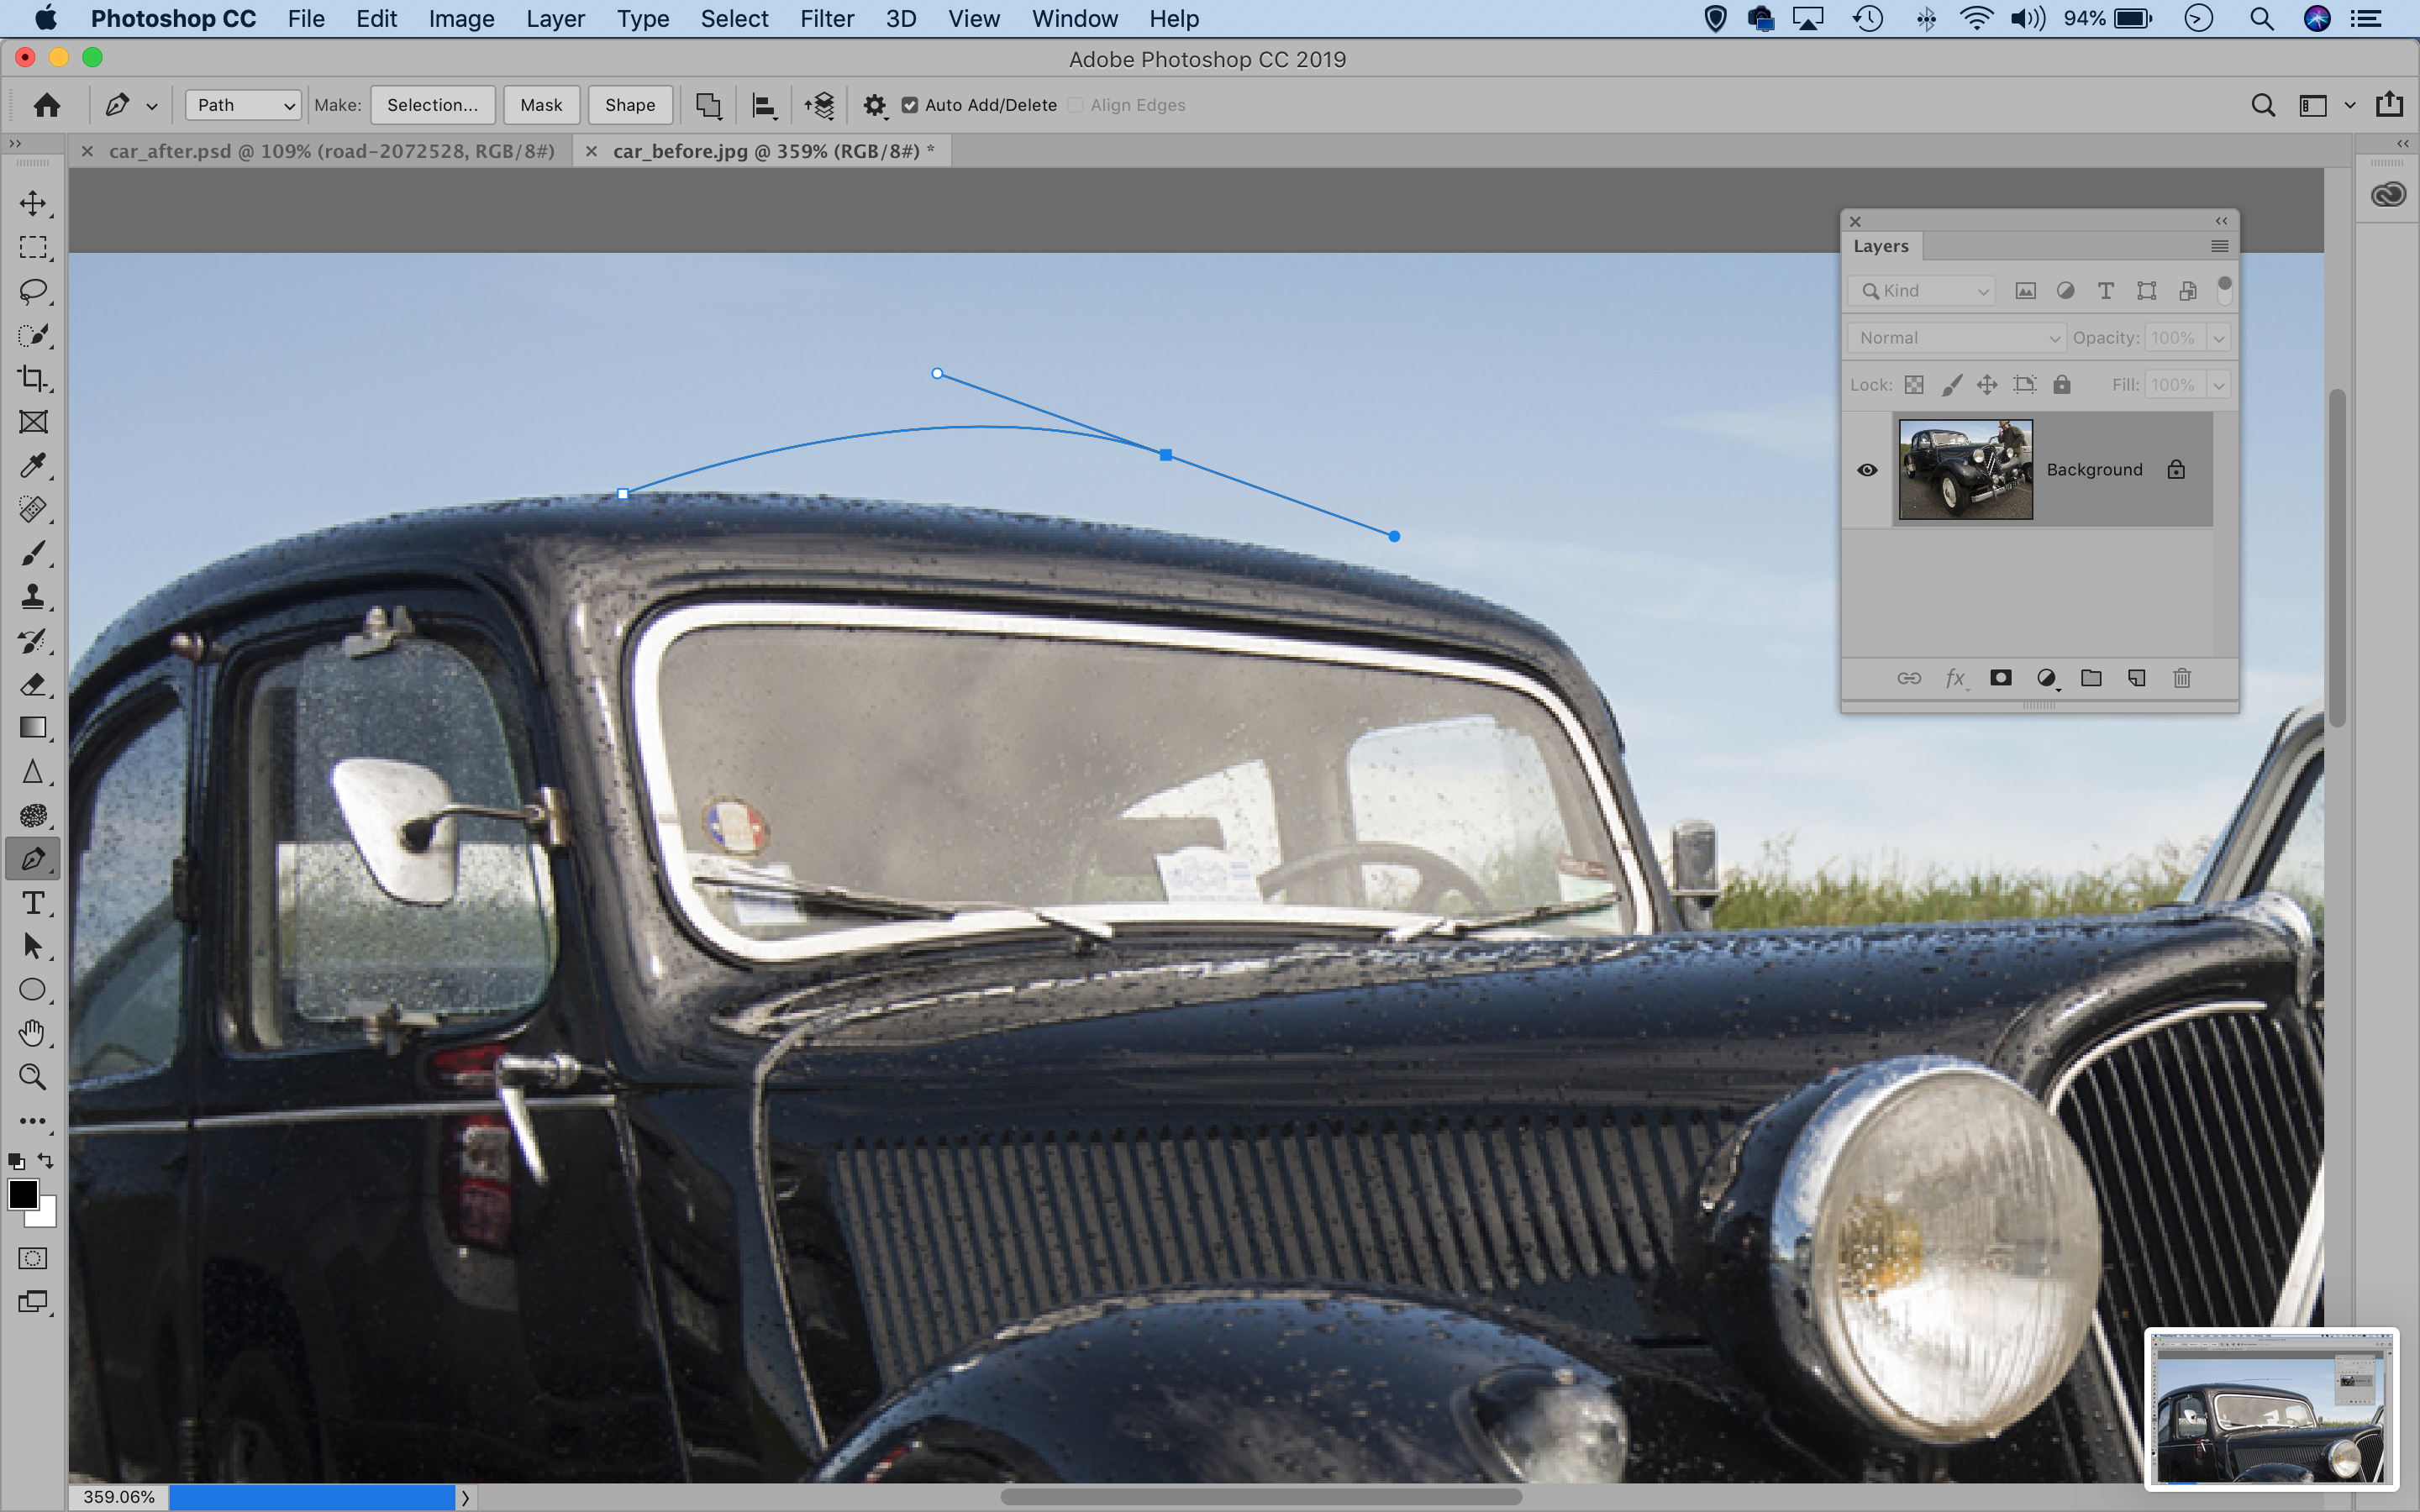
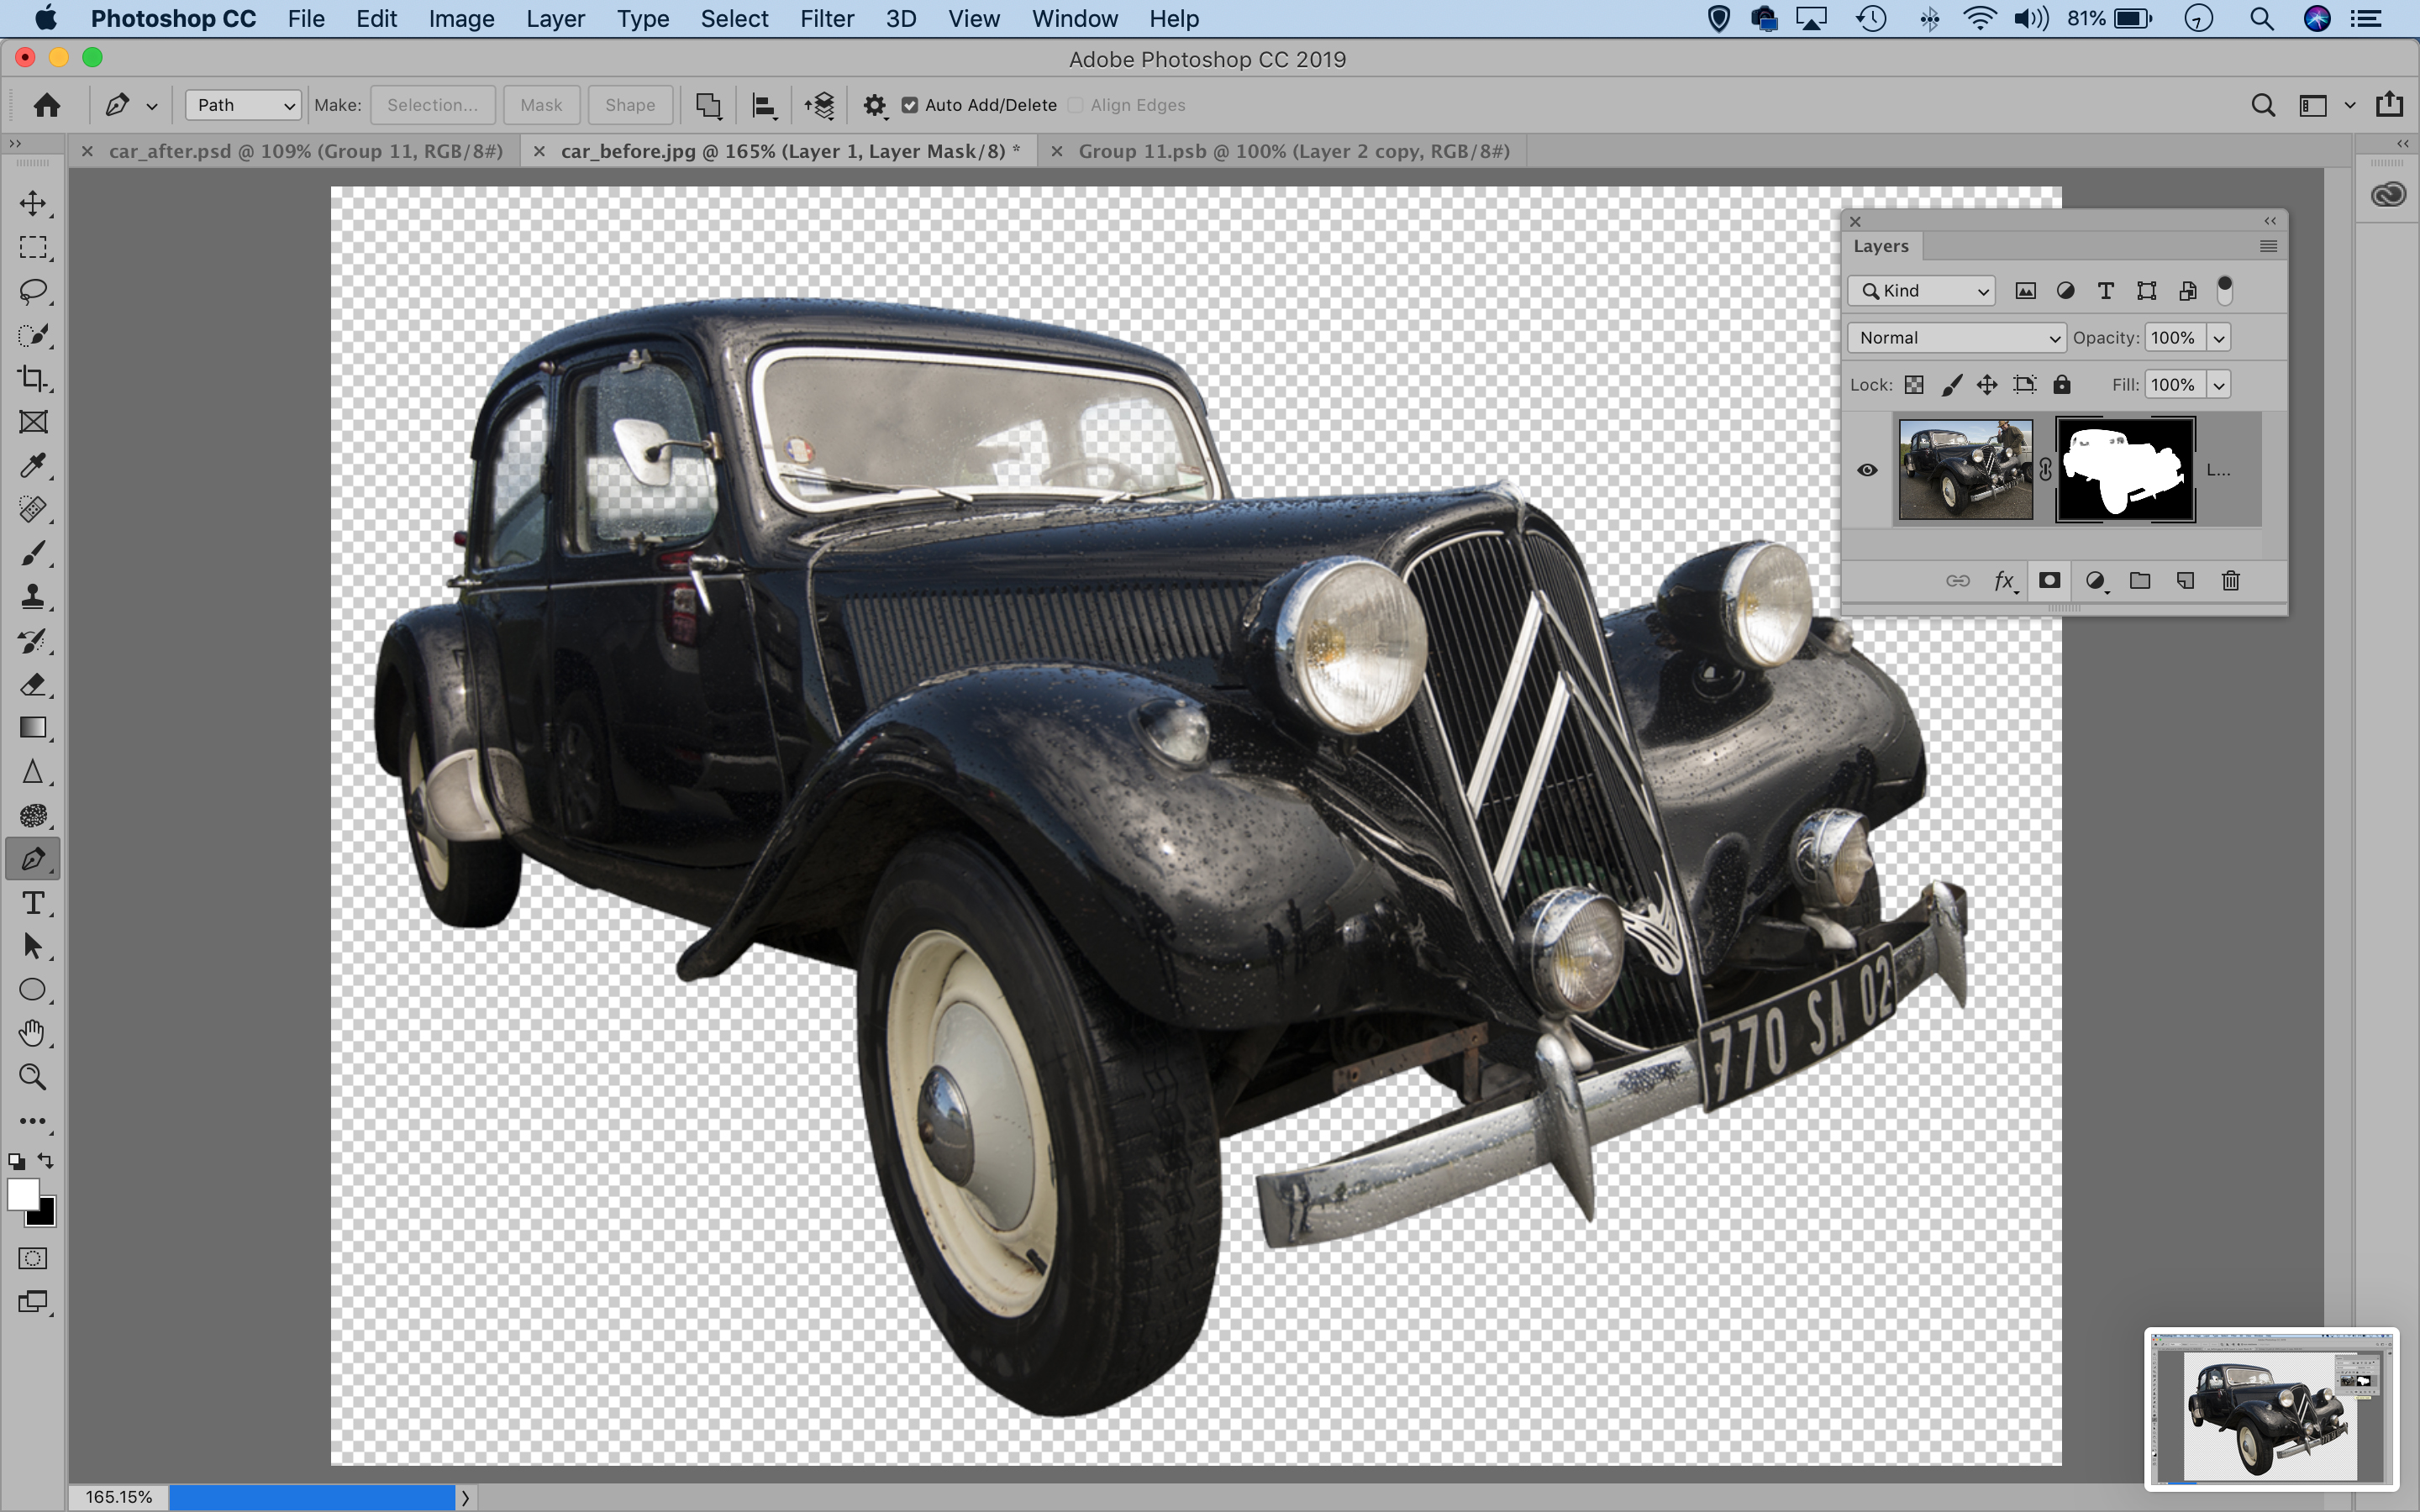
Open the car_before.jpeg and grab the Pen tool. In the top tool options, set the mode to Path then click the cog and check ‘Rubber Band’ (this attaches a line to your cursor). Click once on the top of the car, then click and drag to make a curved line.
The best camera deals, reviews, product advice, and unmissable photography news, direct to your inbox!
02 Hug the edges
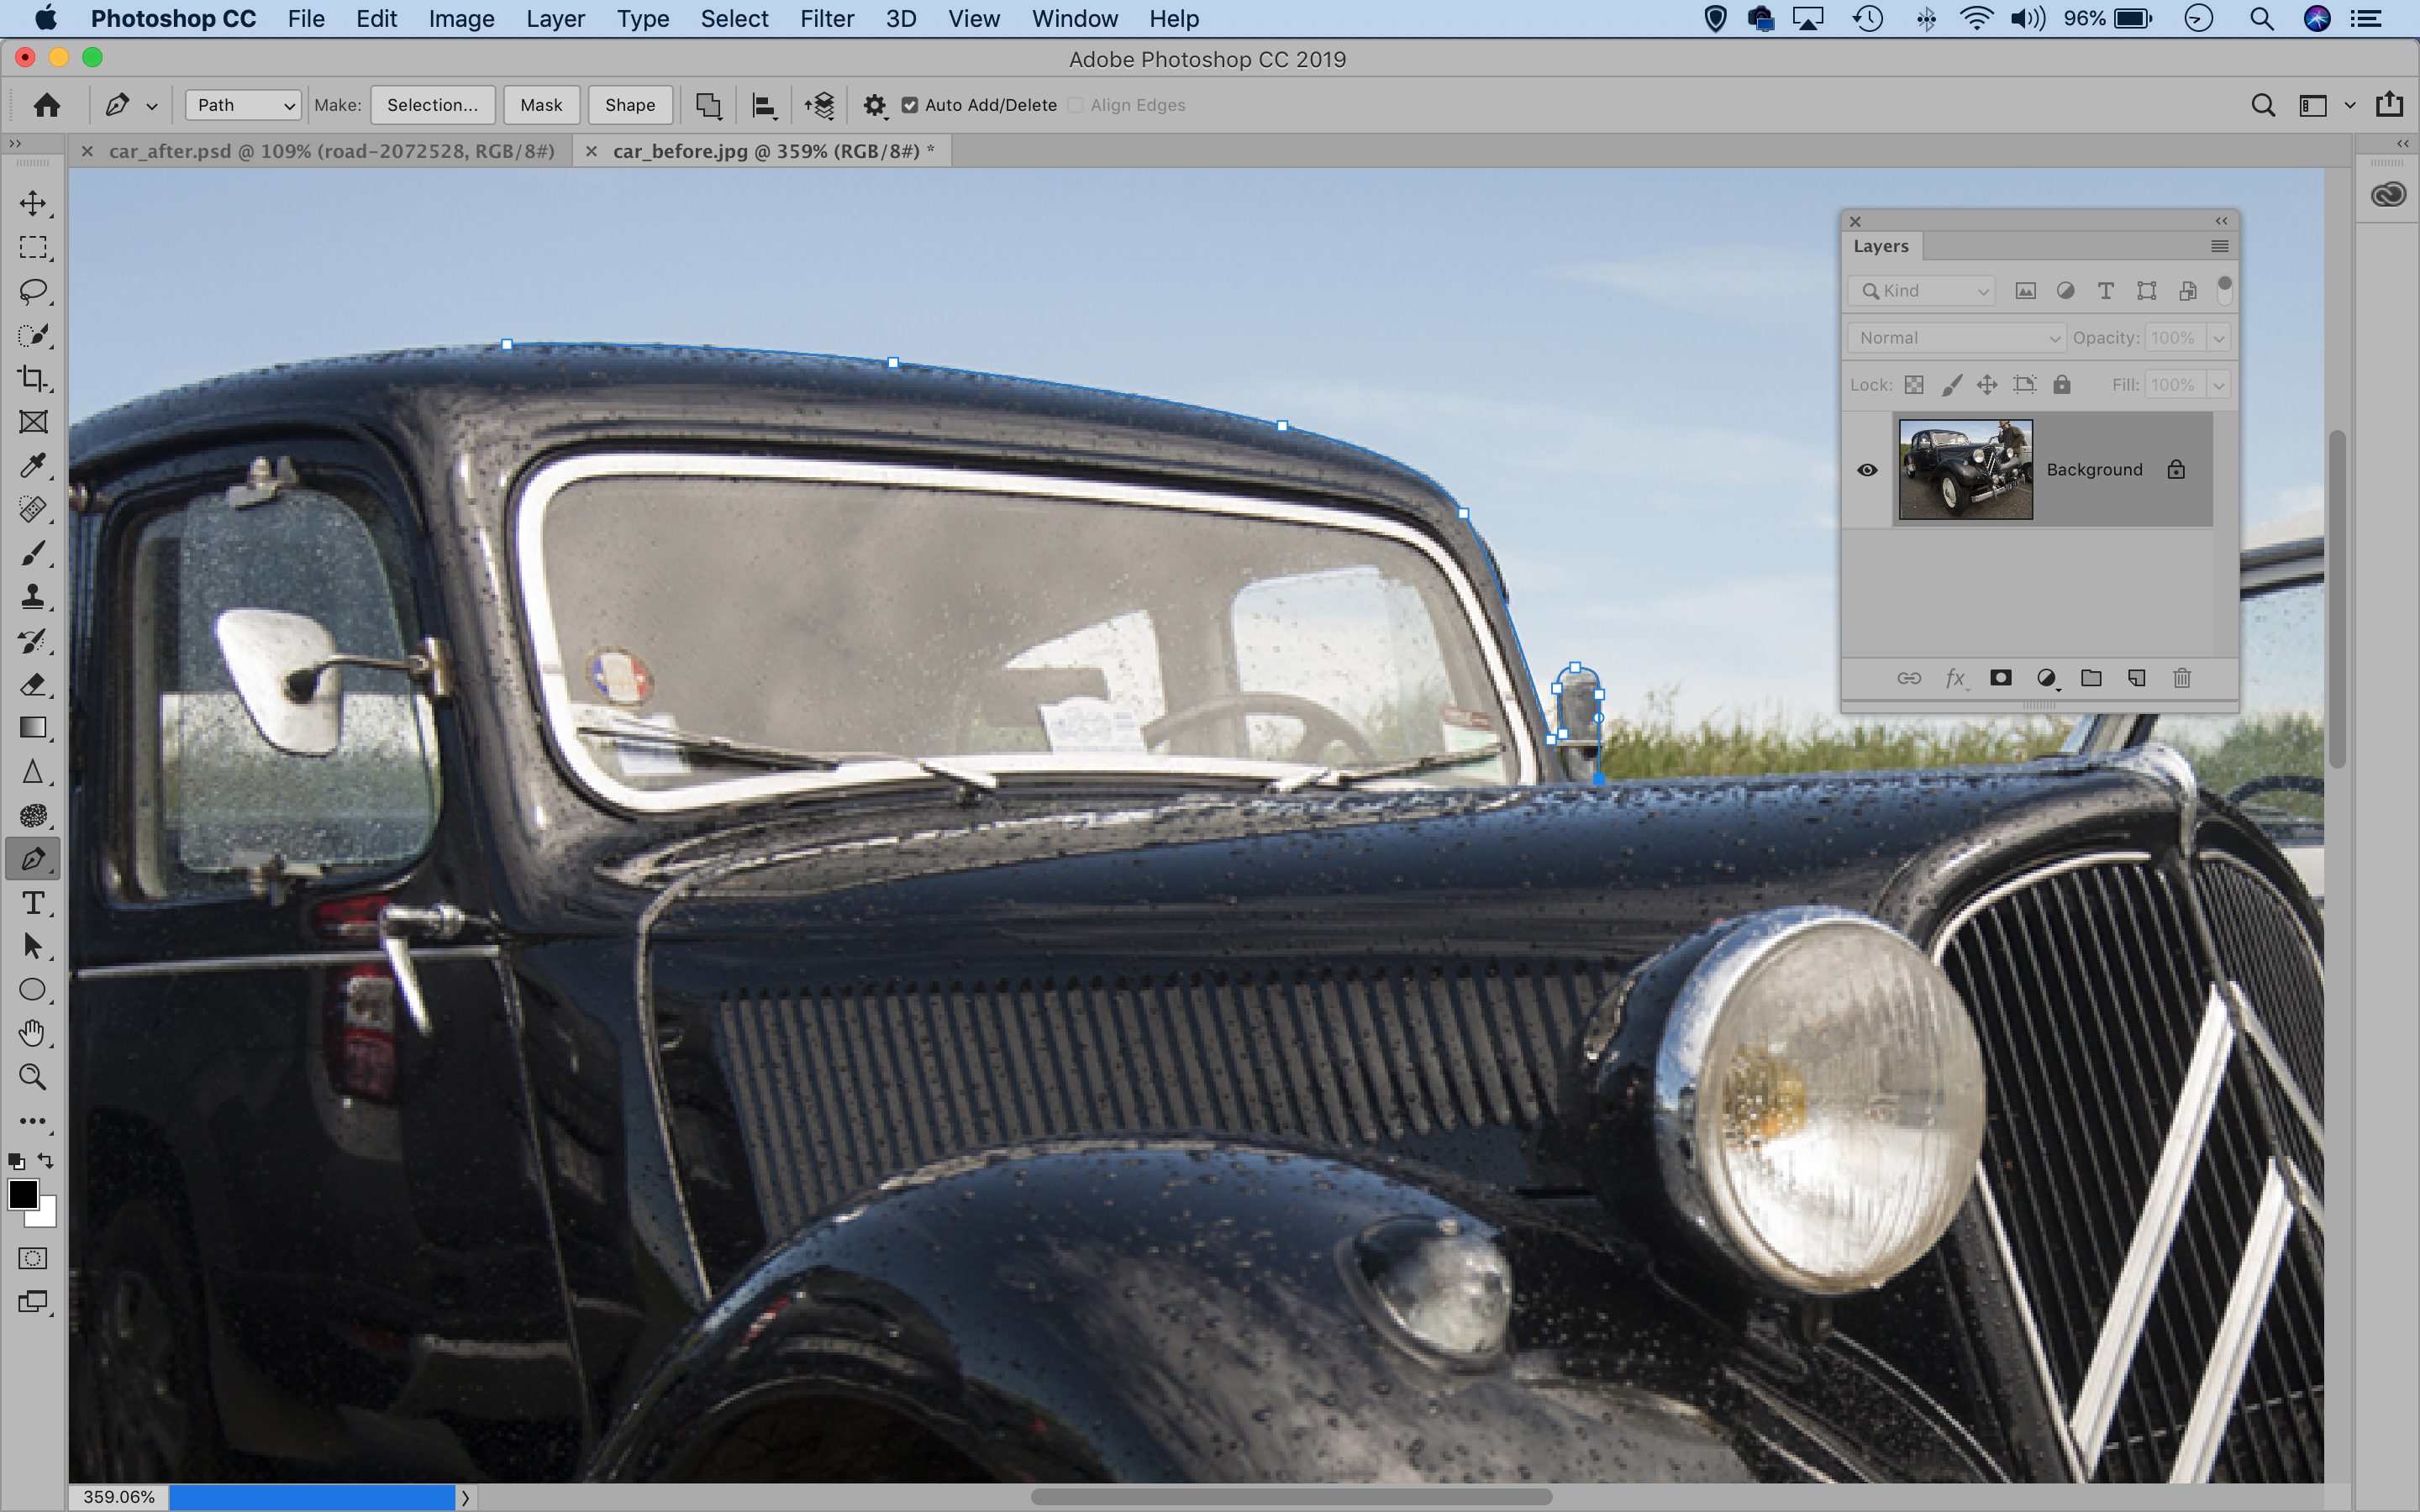
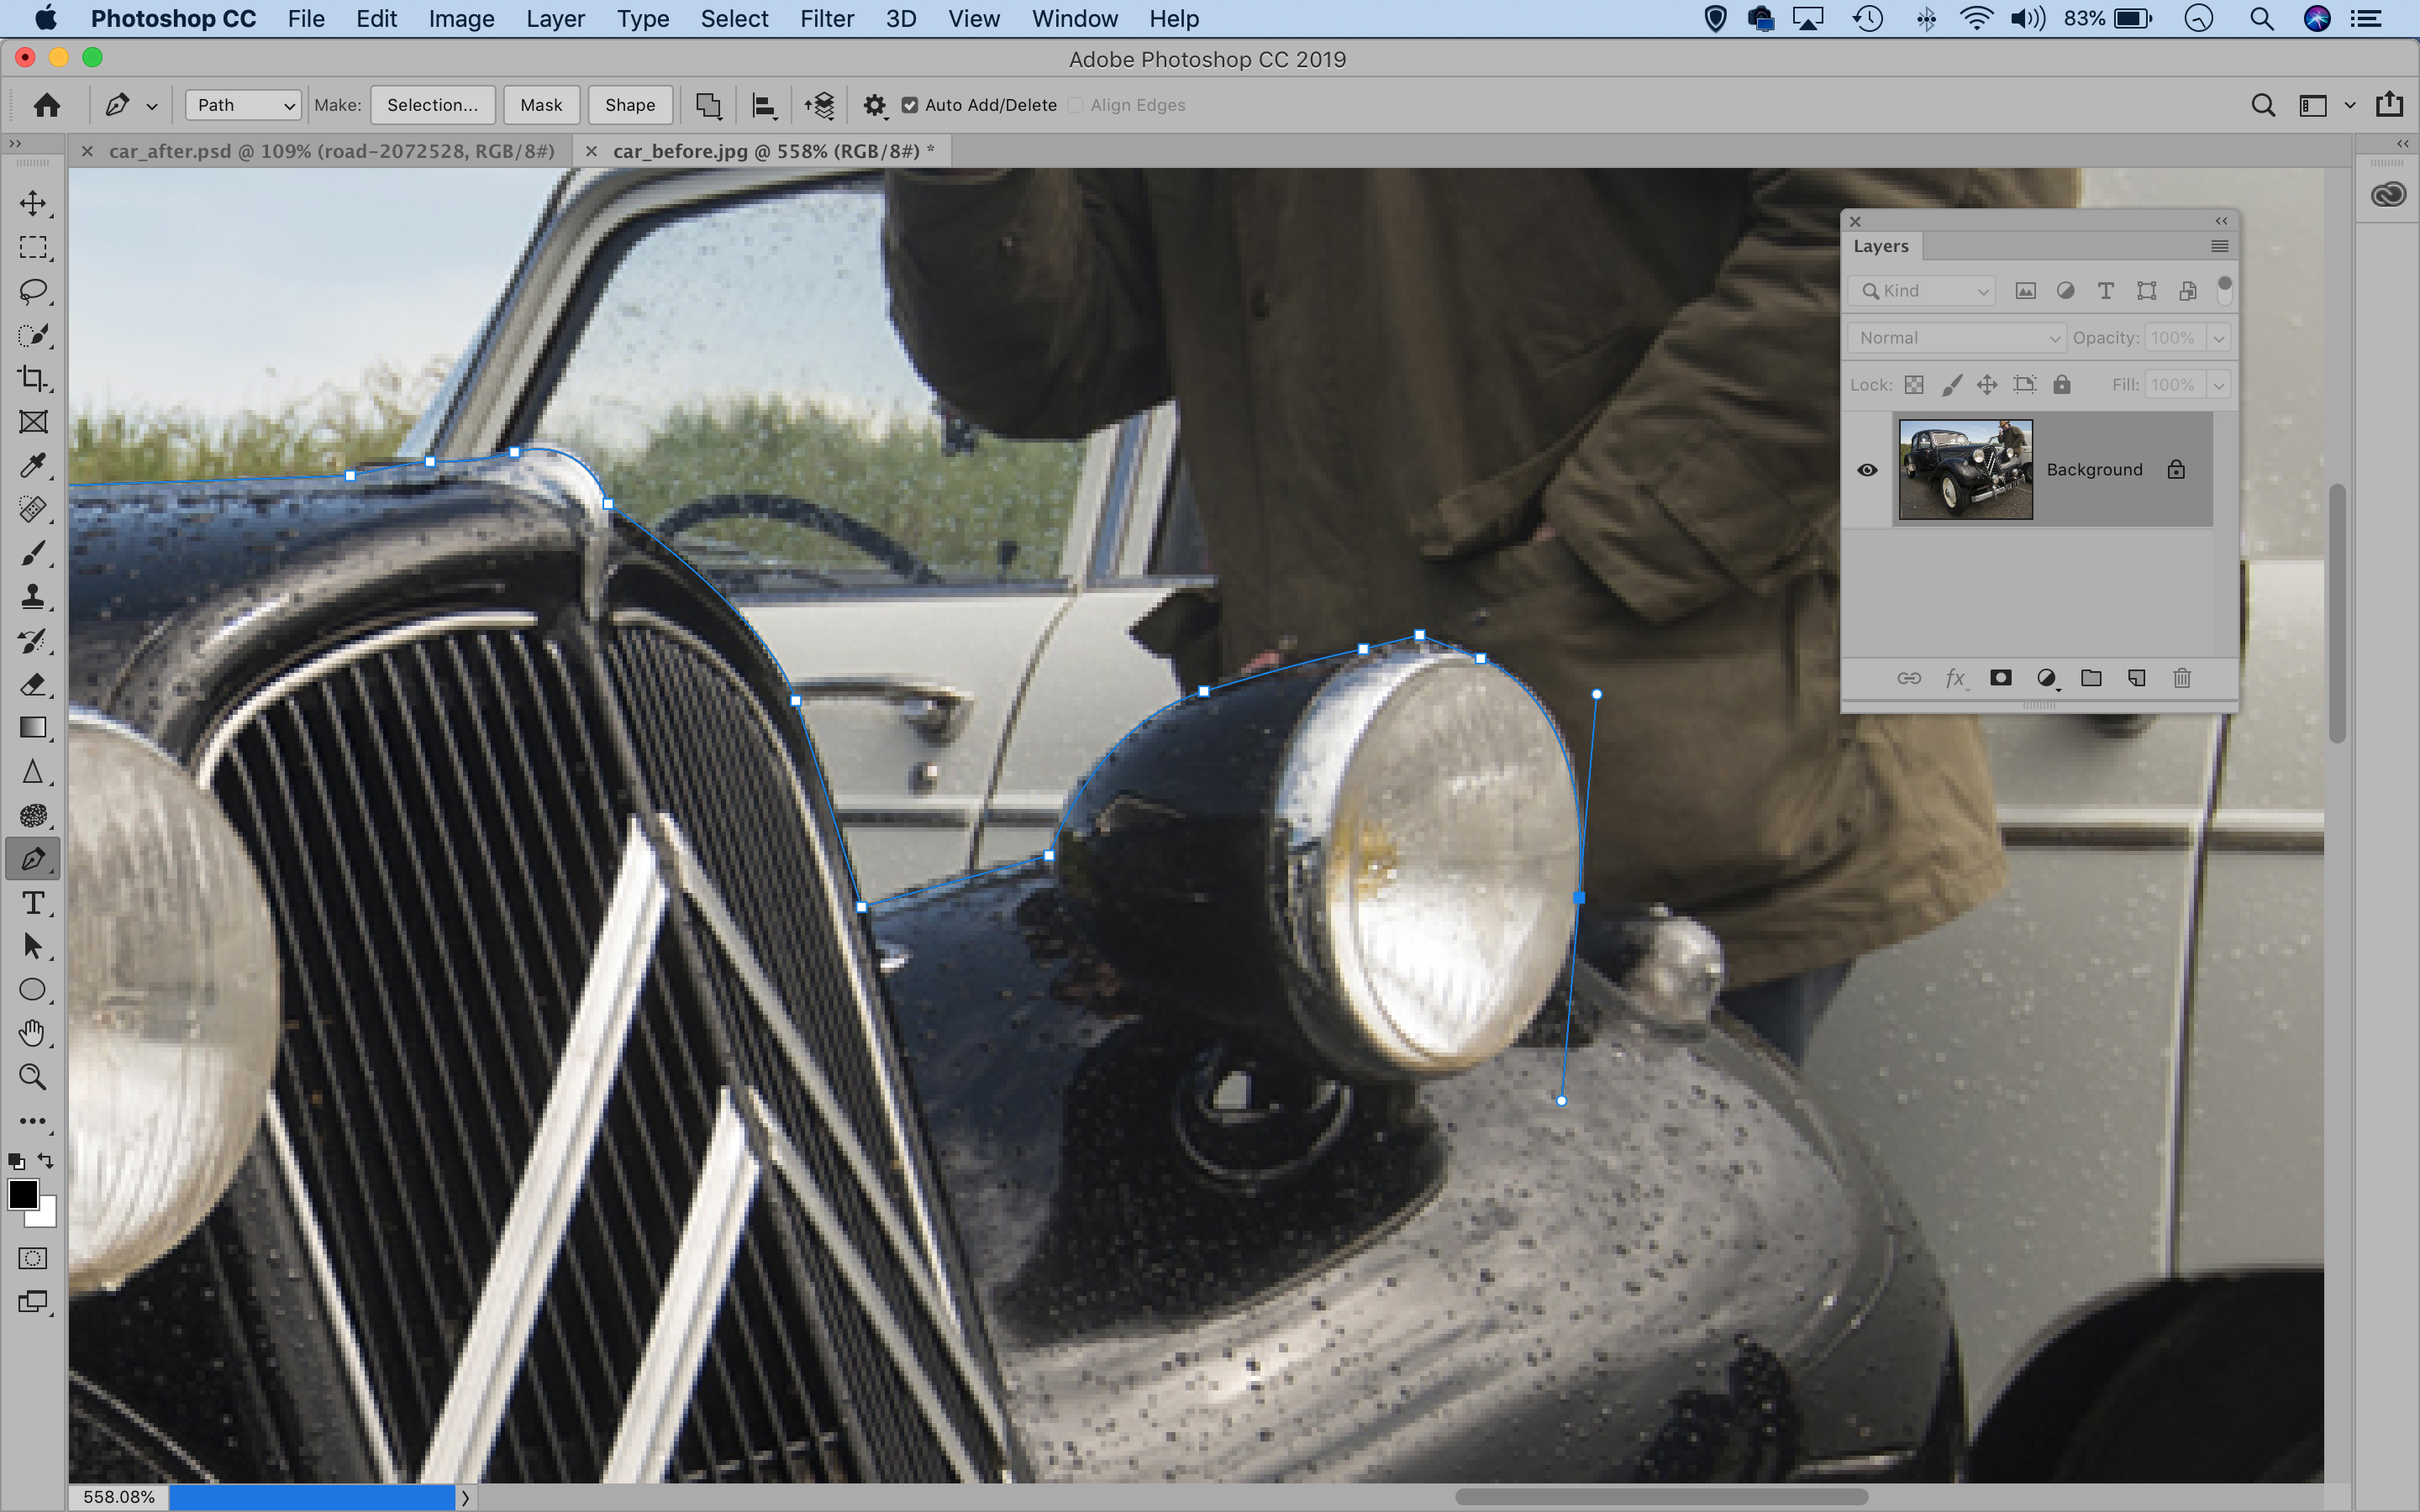
Hold Cmd/Ctrl and drag the anchor point or it’s two control handles to change either the position or the curvature of the line. Fine-tune the positioning so that the anchor point hugs the outline of the car. Click-drag again to make more anchors and trace the edges.
03 Sharp cornering
If you need the path to make a sharp turn, hold Alt and click the anchor point. This removes the outer handle, allowing you to create a corner. Continue tracing around the edges of the car until the path is complete, then click on the first point to close it off.
04 Make a mask
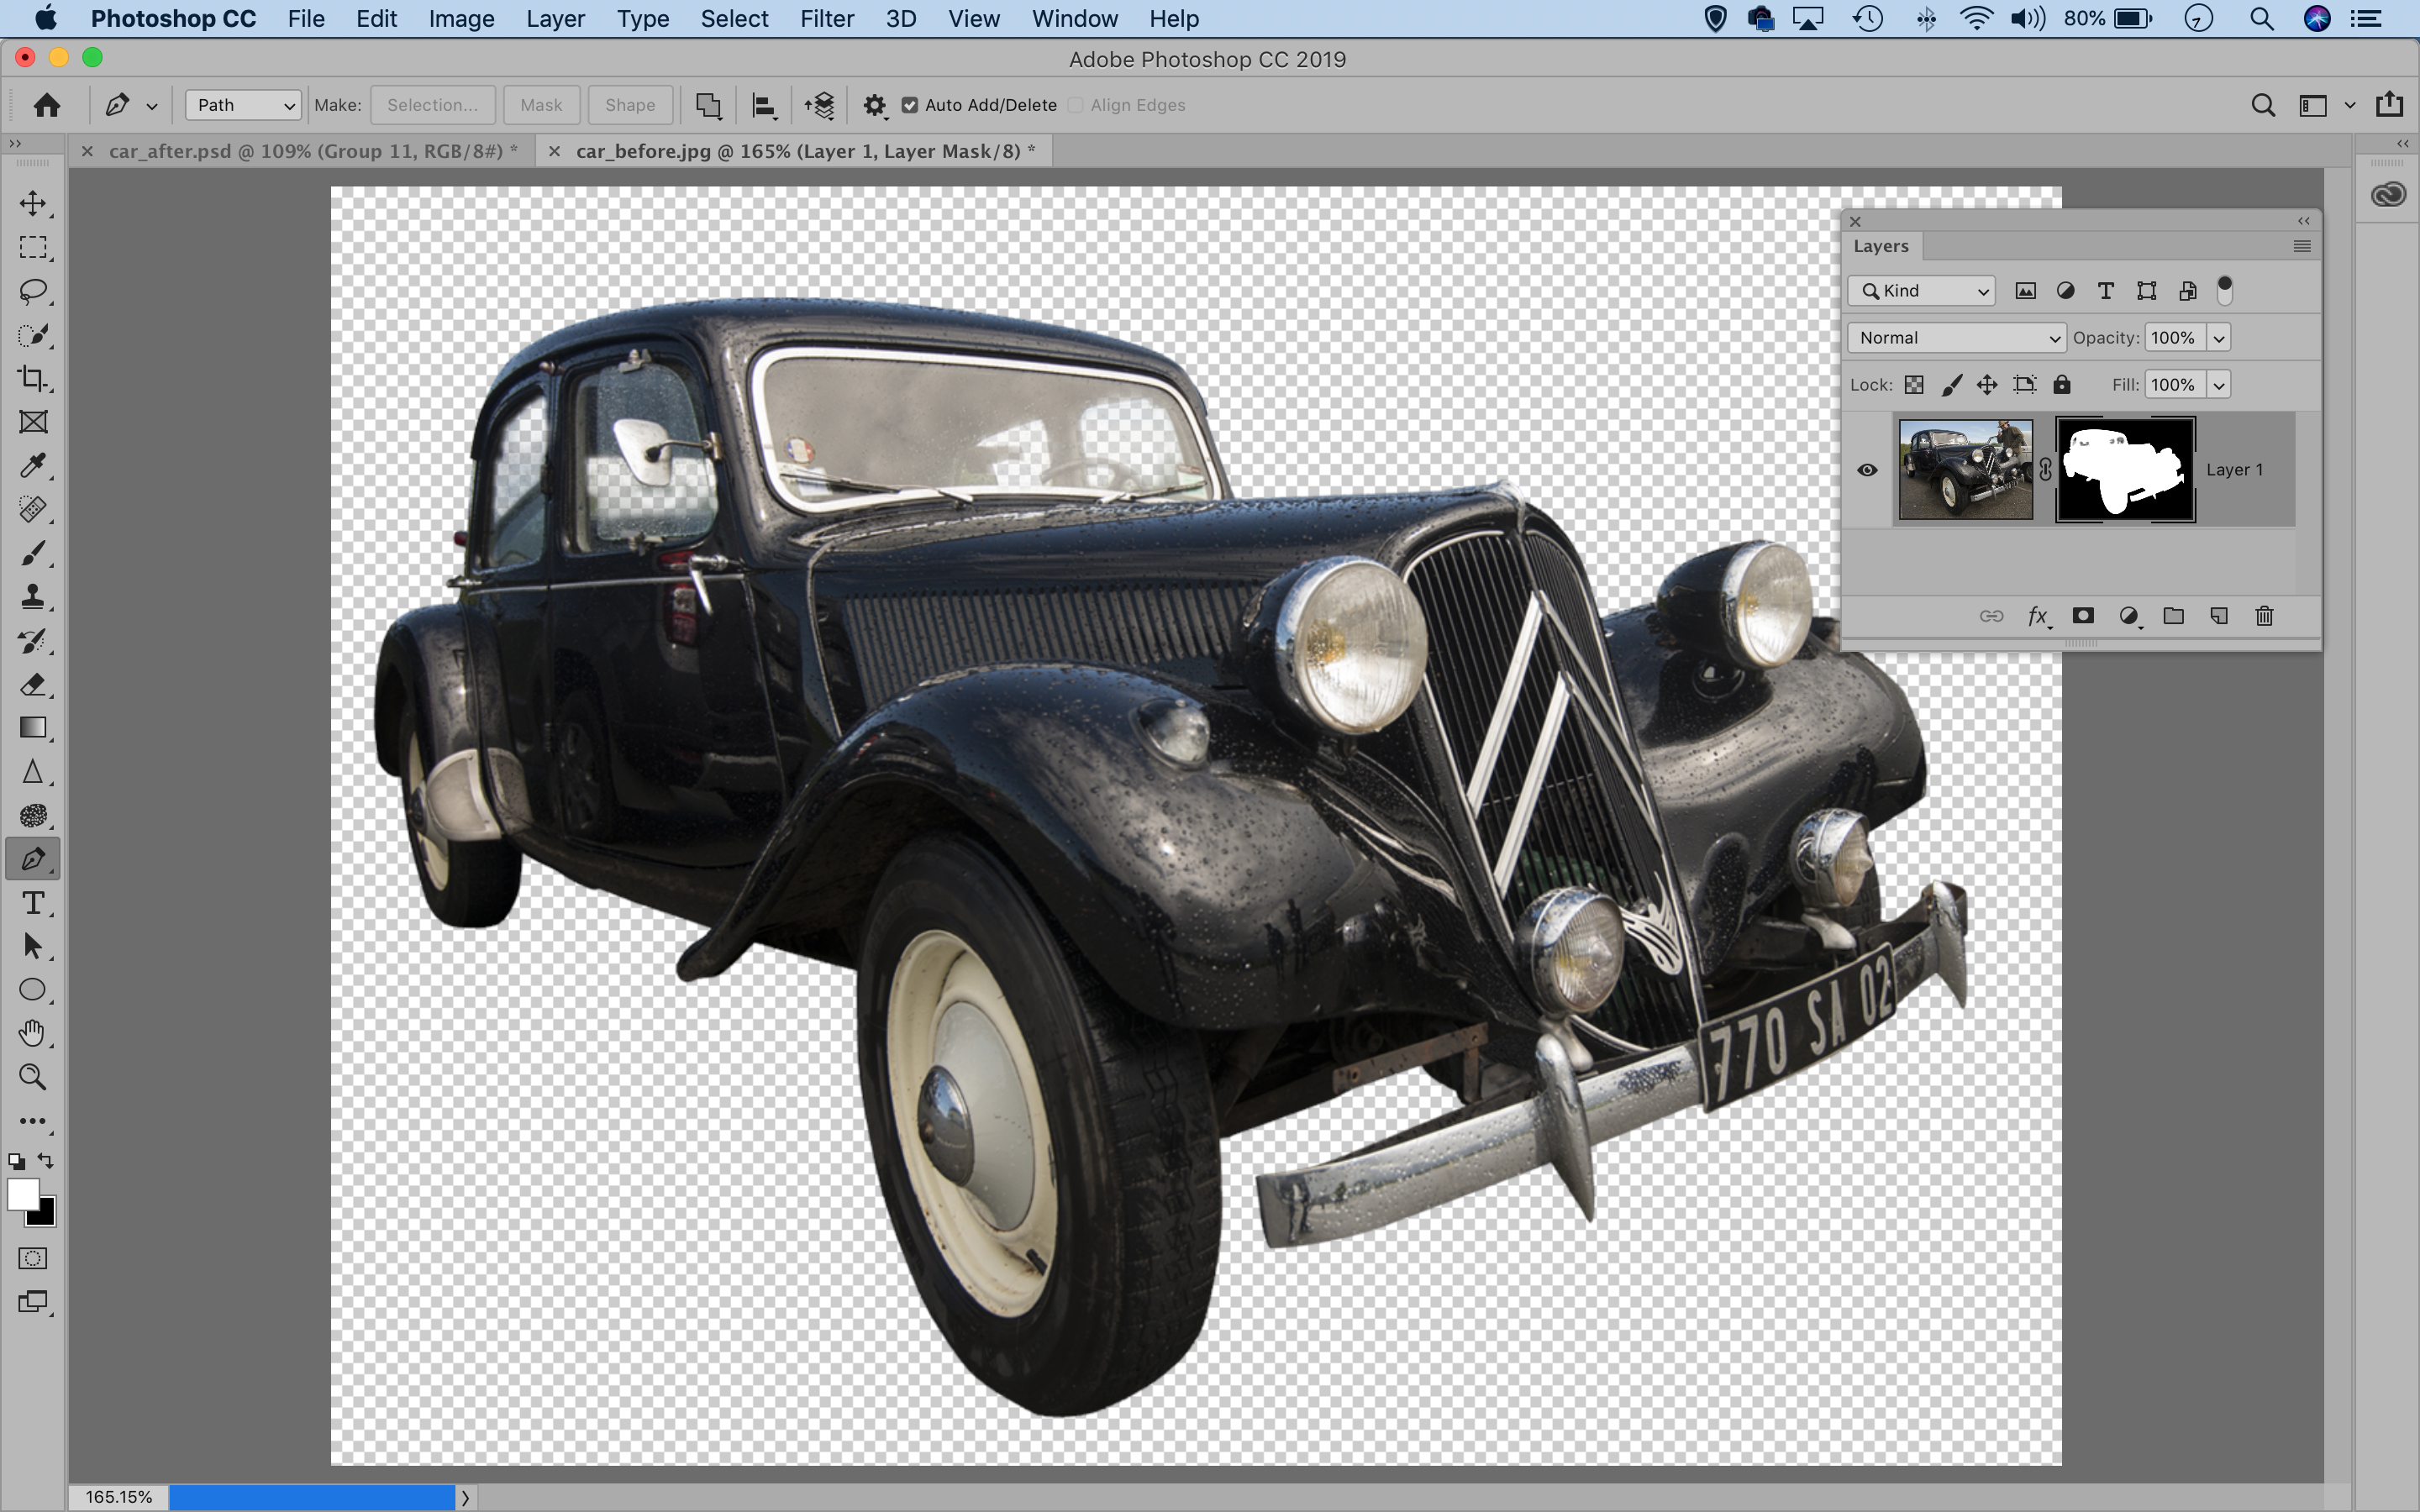
When done, Cmd/Ctrl+drag to fine-tune anchors that need adjusting until you get edges of the car. Next right-click the path and ‘Make Selection’. Set Feather Radius to 0.5 and hit OK. Go to Layers panel and click the Add Mask icon to convert the selection to a mask.
05 Drag and drop
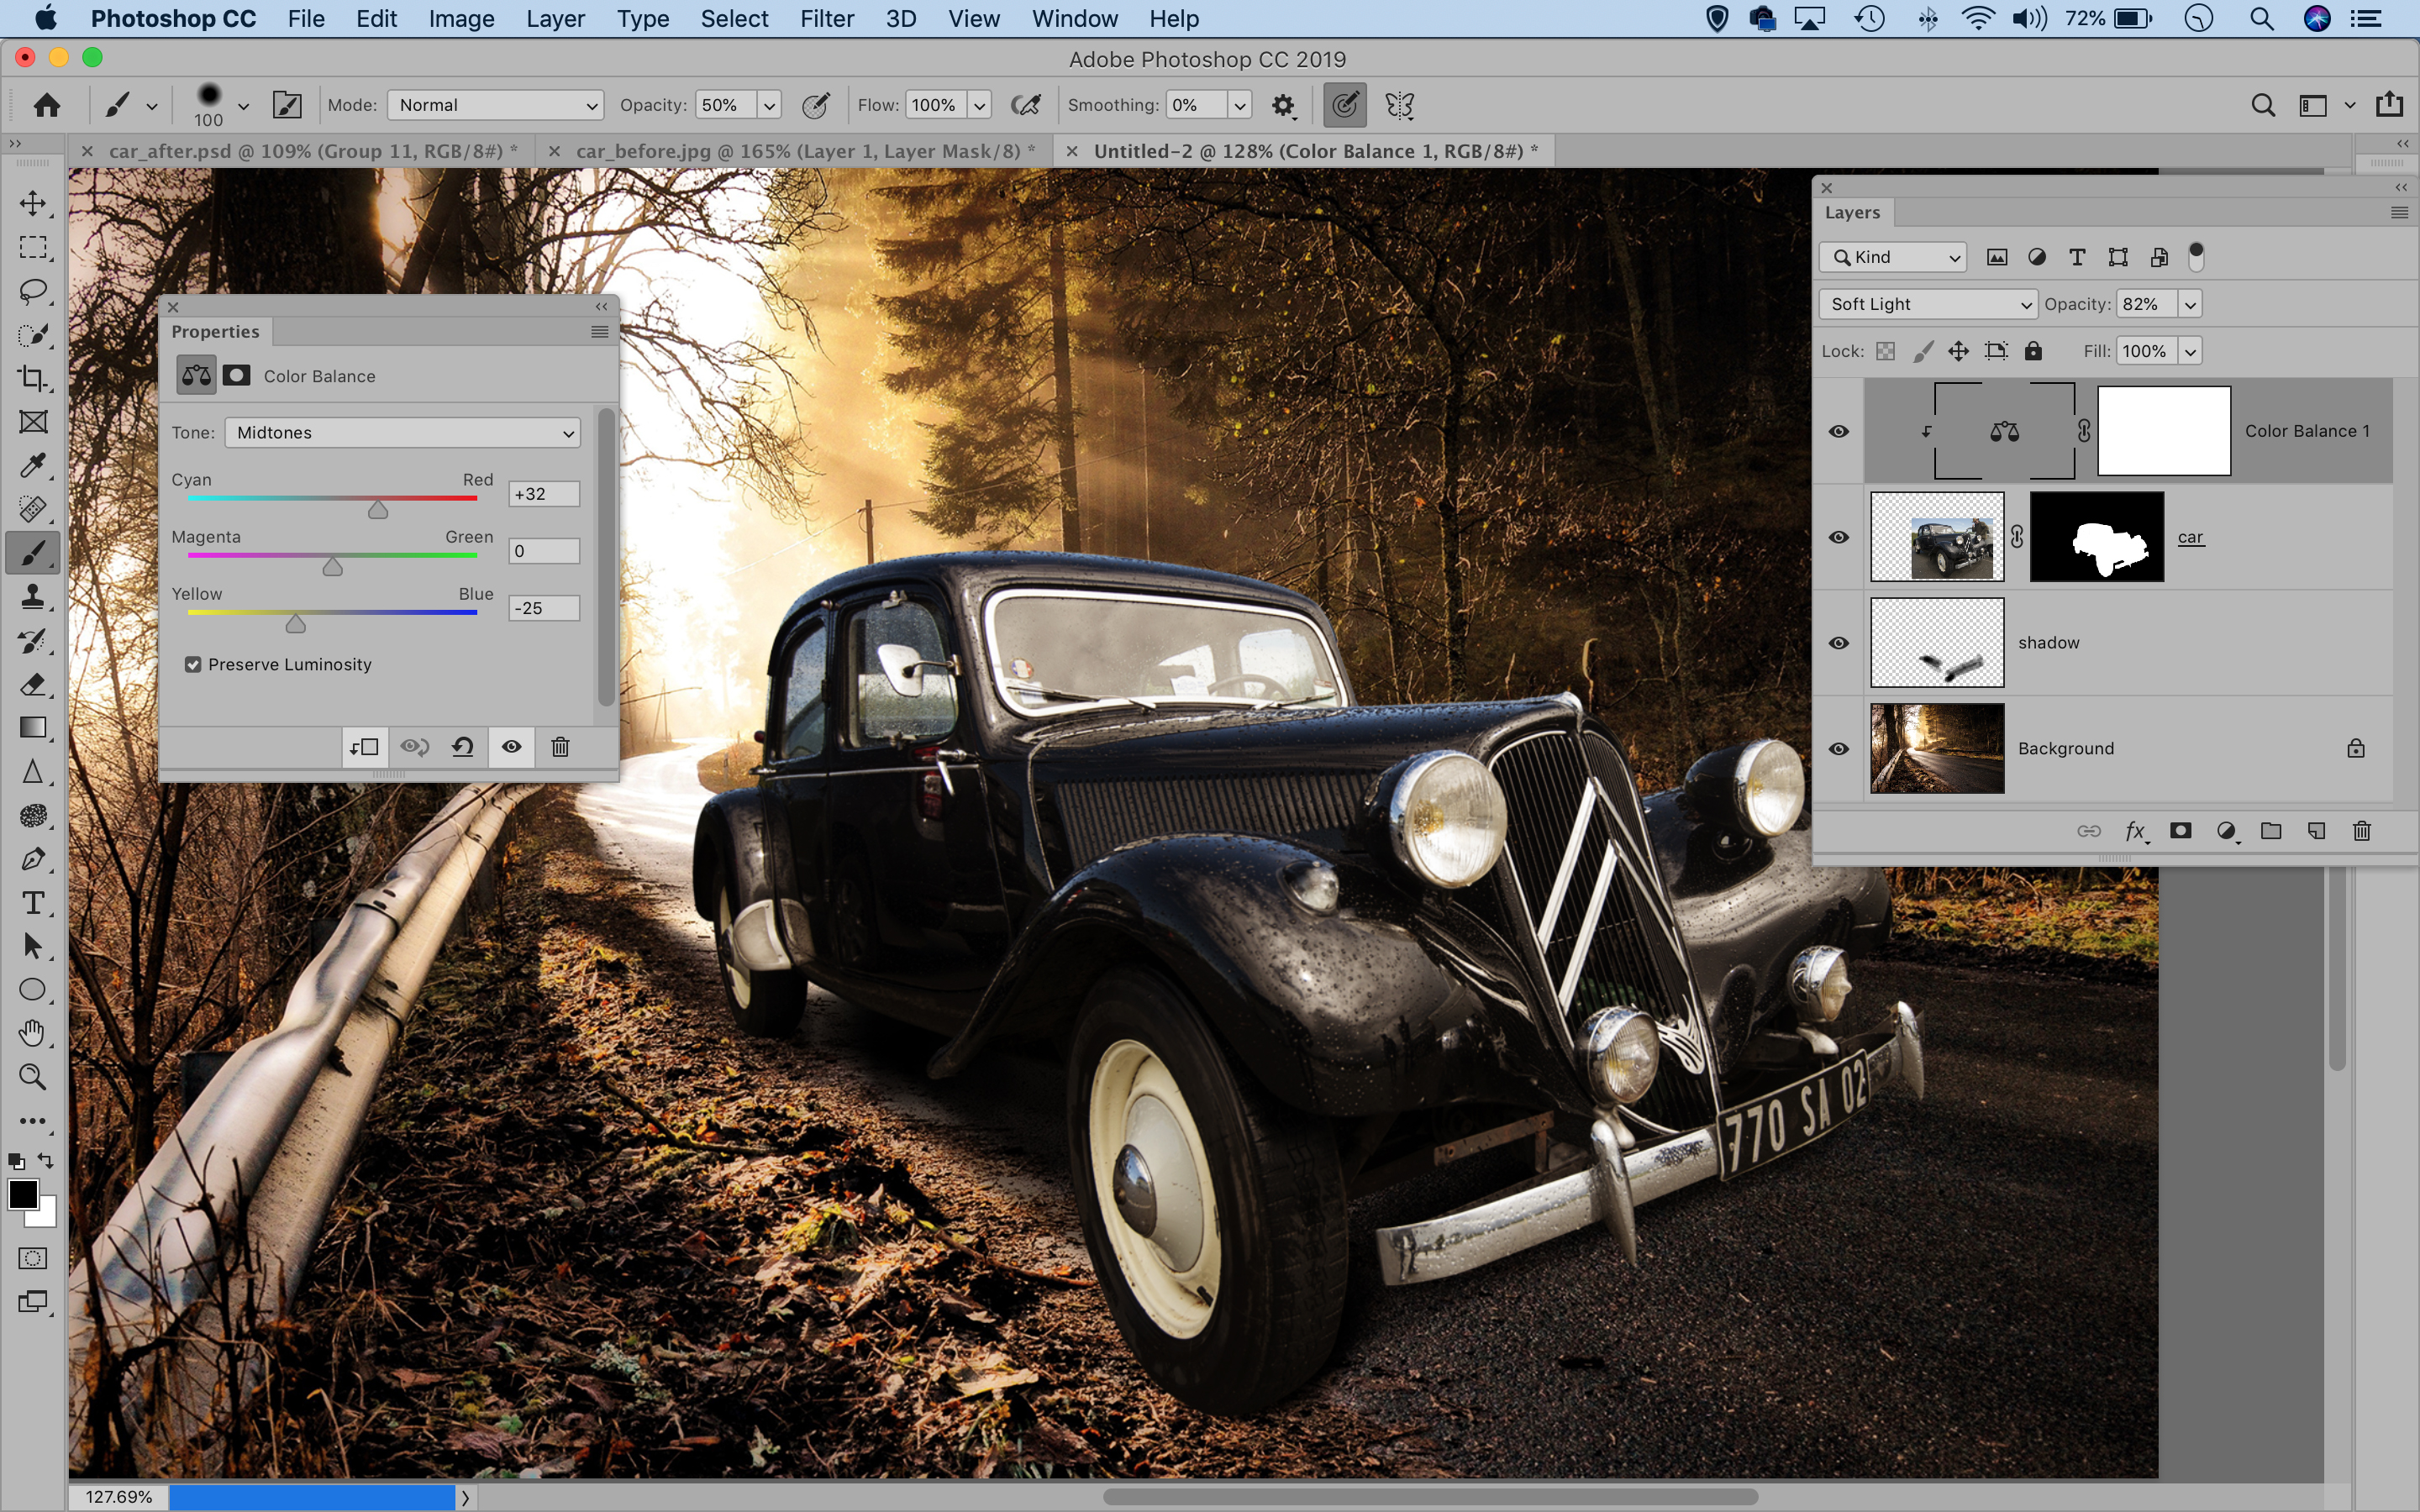
Open another shot to use as a backdrop (we used a free image from Pixabay). Grab the Move tool then drag the car into the other image to copy it. If you need to reposition, hit Cmd/Ctrl + T to transform. Next make a new layer and drag it below the car layer.
06 Boost the tones
With the brush set to black and with a 30% opacity, paint a shadow underneath the car. Highlight the top layer, click Create Adjustment Layer and pick Color Balance. Set the Blend Mode to Soft Light, click the ‘clip to layer’ icon and add yellow and red to the car.
PhotoPlus: The Canon Magazine is the world's only monthly newsstand title that's 100% devoted to Canon, so you can be sure the magazine is completely relevant to your system.
Read more:
The best photo editing software: image editors for novices through to pros
The best photo-editing laptops: top laptops for photographers
10 best online photography courses – from beginner guides to masterclasses
The lead technique writer on Digital Camera Magazine, PhotoPlus: The Canon Magazine and N-Photo: The Nikon Magazine, James is a fantastic general practice photographer with an enviable array of skills across every genre of photography.
Whether it's flash photography techniques like stroboscopic portraits, astrophotography projects like photographing the Northern Lights, or turning sound into art by making paint dance on a set of speakers, James' tutorials and projects are as creative as they are enjoyable.
He's also a wizard at the dark arts of Photoshop, Lightroom and Affinity Photo, and is capable of some genuine black magic in the digital darkroom, making him one of the leading authorities on photo editing software and techniques.

