How to use Nik Collection 2 by DxO
Now you get the Nik plug-ins and DxO PhotoLab together!
The best camera deals, reviews, product advice, and unmissable photography news, direct to your inbox!
You are now subscribed
Your newsletter sign-up was successful
When DxO bought the Nik Collection from Google and relaunched it last year, the photographic world breathed a sigh of relief. The best-loved plug-in suite of all time had found a new home where it would get the longevity and development it deserved.
And now DxO has taken it a step further, launching the Nik Collection 2 and addressing two of the biggest demands from the Nik community – freedom from dependence on Adobe’s software and subscription plans, and the ability to work directly with raw files.
What's new in Nik Collection 2?
DxO has achieved this with a move that’s as effective as it is bold – it’s bundled DxO PhotoLab Essential with the Nik Collection and made the Nik plug-ins directly accessible from within PhotoLab.
This means you get the benefit of PhotoLab’s excellent raw processing and lens corrections before images are send to the Nik plug-ins for further editing.
It has pushed up the price of the Nik Collection 2 just a little, but it’s still lower than the price of both programs bought separately.
(Be aware, though, that PhotoLab does not at this time support Fujifilm raw files, due to the different colour array used by Fujifilm’s X-Trans sensors.)
Special offer for Digital Camera World users
To celebrate, DxO and Digital Camera World are offering a special 30% discount off Nik Collection 2 for one week only, from 29 August until 23:59 on 05 September. To take advantage of this exclusive offer, follow this link to the DxO website and use the promo code NIK-DCW-30-OFF.
The best camera deals, reviews, product advice, and unmissable photography news, direct to your inbox!
So let’s take a look at the PhotoLab interface, how you launch the Nik plug-ins and the kinds of effects you can achieve. We’ll concentrate on the big four: Analog Efex Pro, Color Efex Pro, Silver Efex Pro and HDR Efex Pro.
Step 1: Pre-processing your image
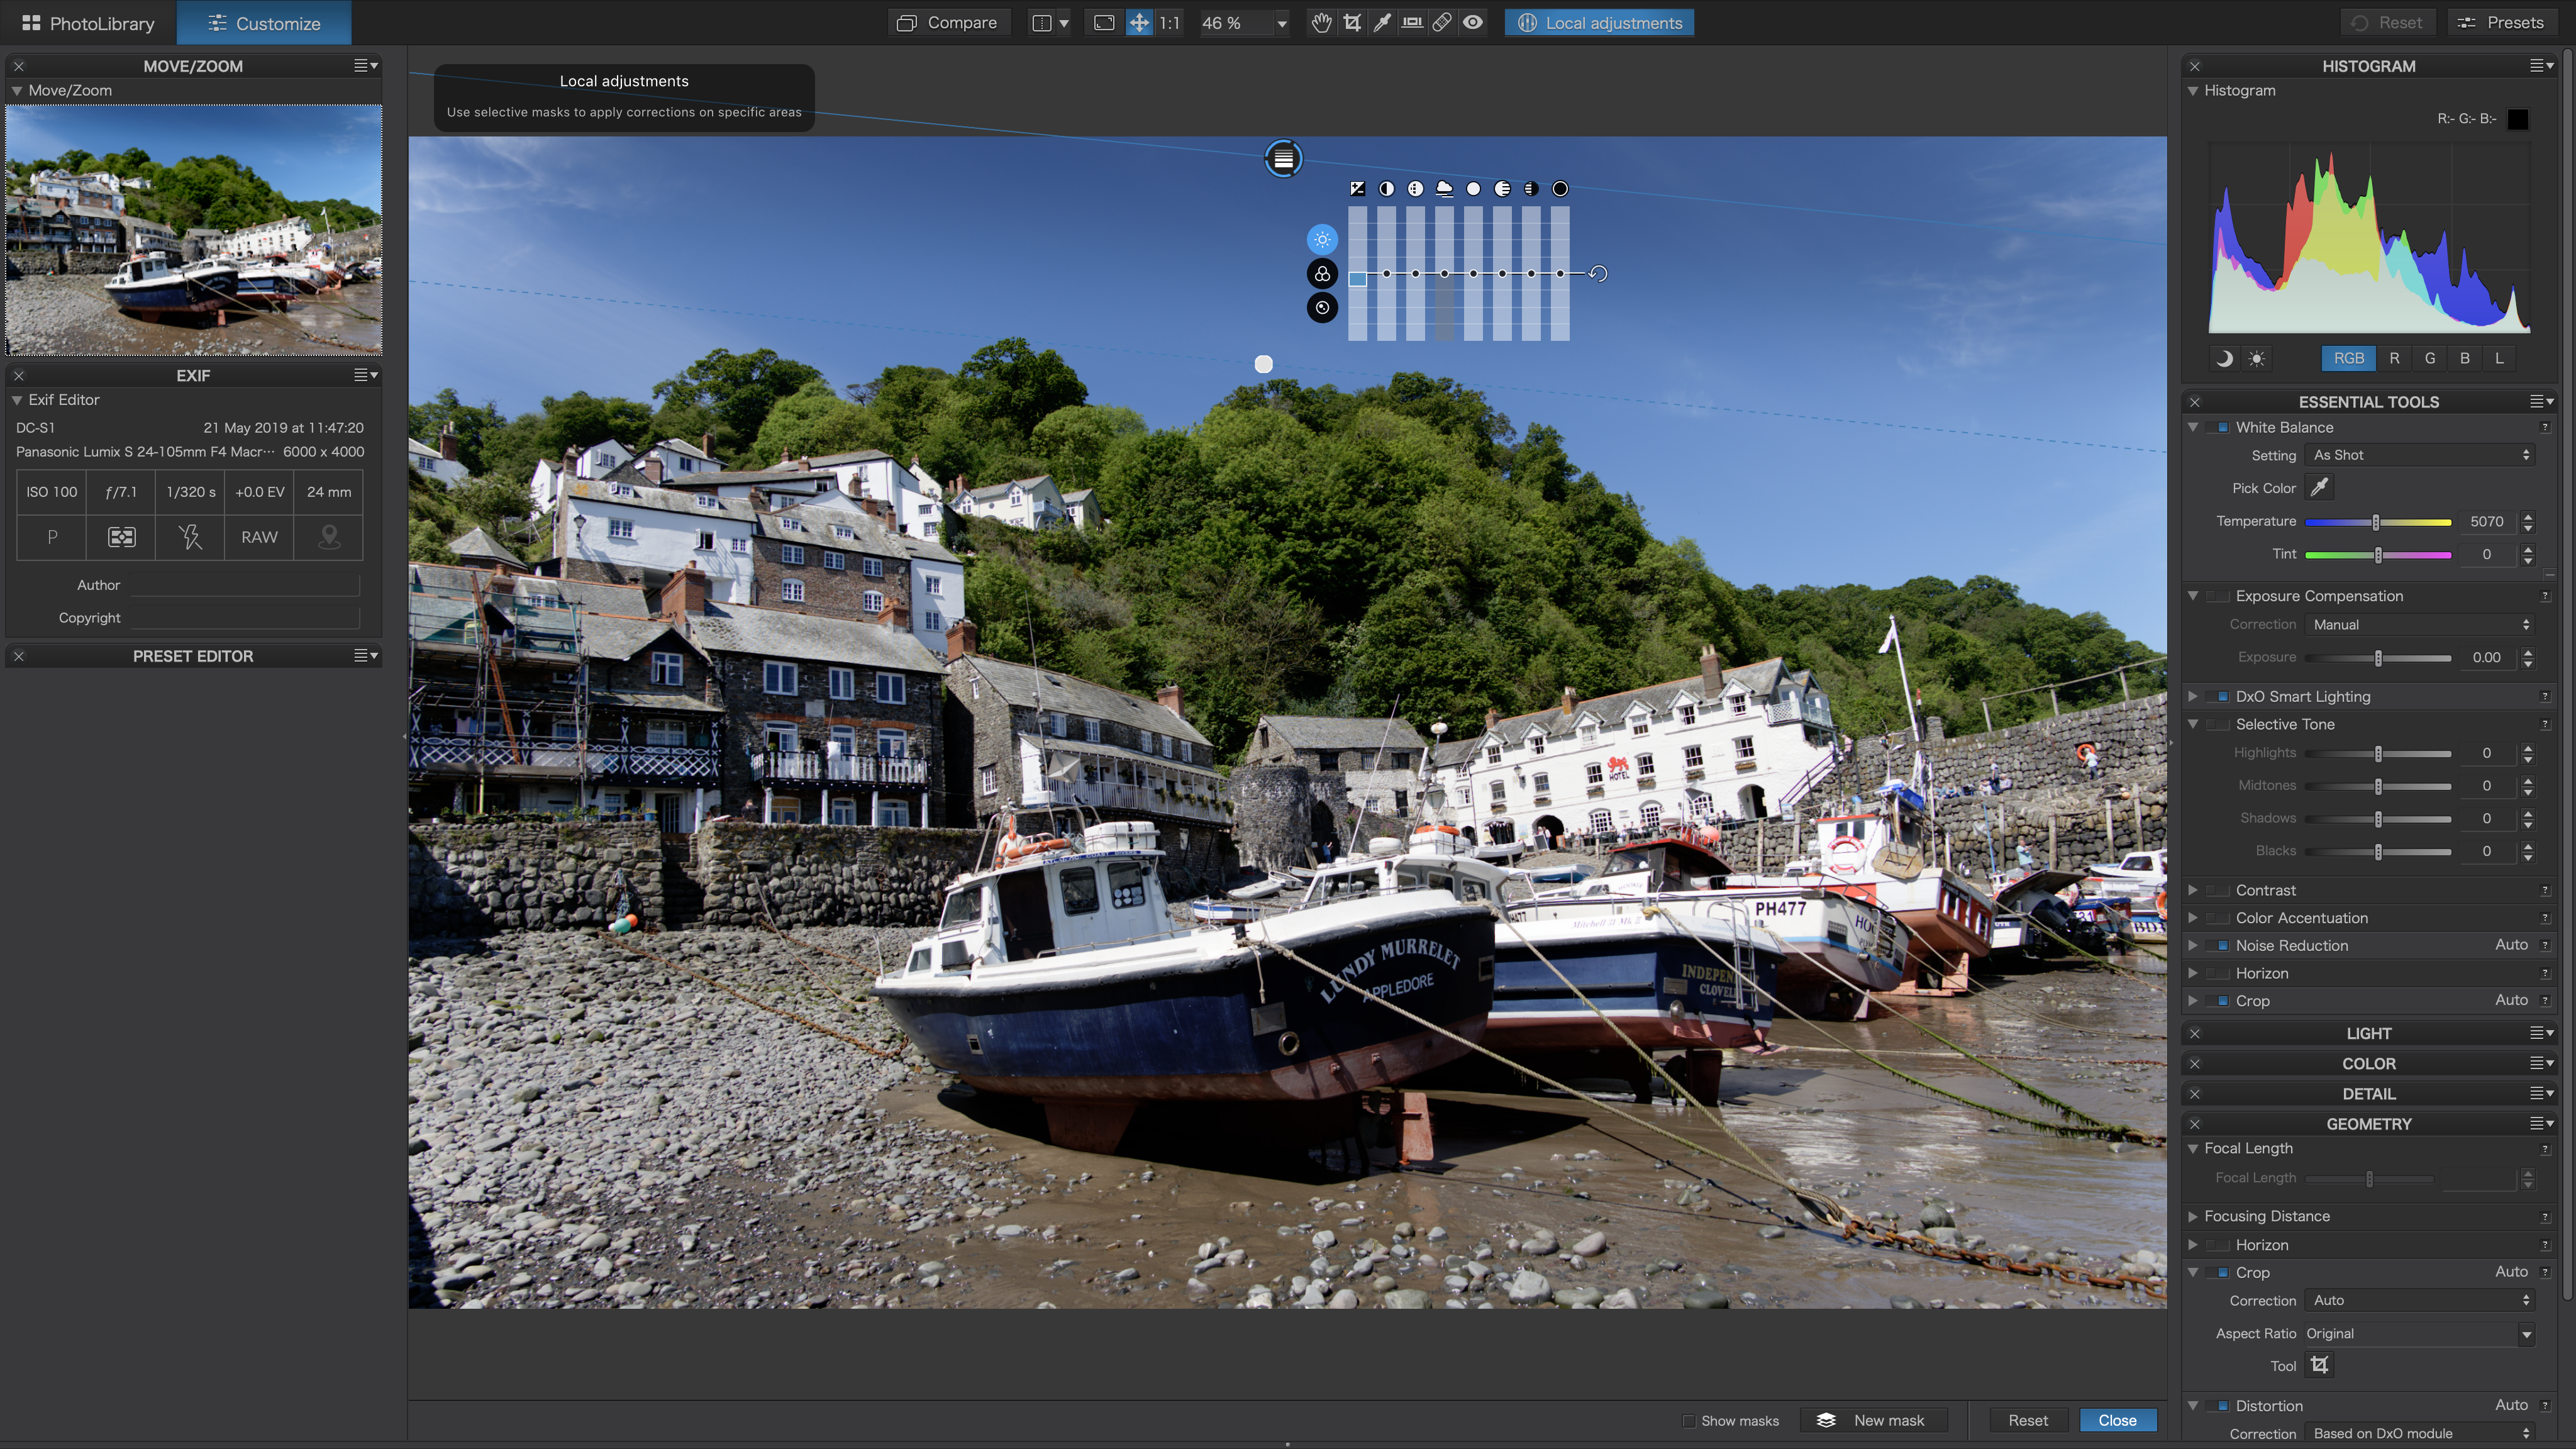
The first step is to open up the folder containing your images in DxO PhotoLab Essential. It will automatically apply a lens correction profile (or prompt you to download one) and carry out some basic tonal enhancements on your raw files.
If your picture needs it, you can also apply local adjustments to your photo, like a graduated filter to tone down a bright sky, ahead of sending the picture to one of the Nik plug-ins.
Step 2: Exporting to the Nik plug-ins
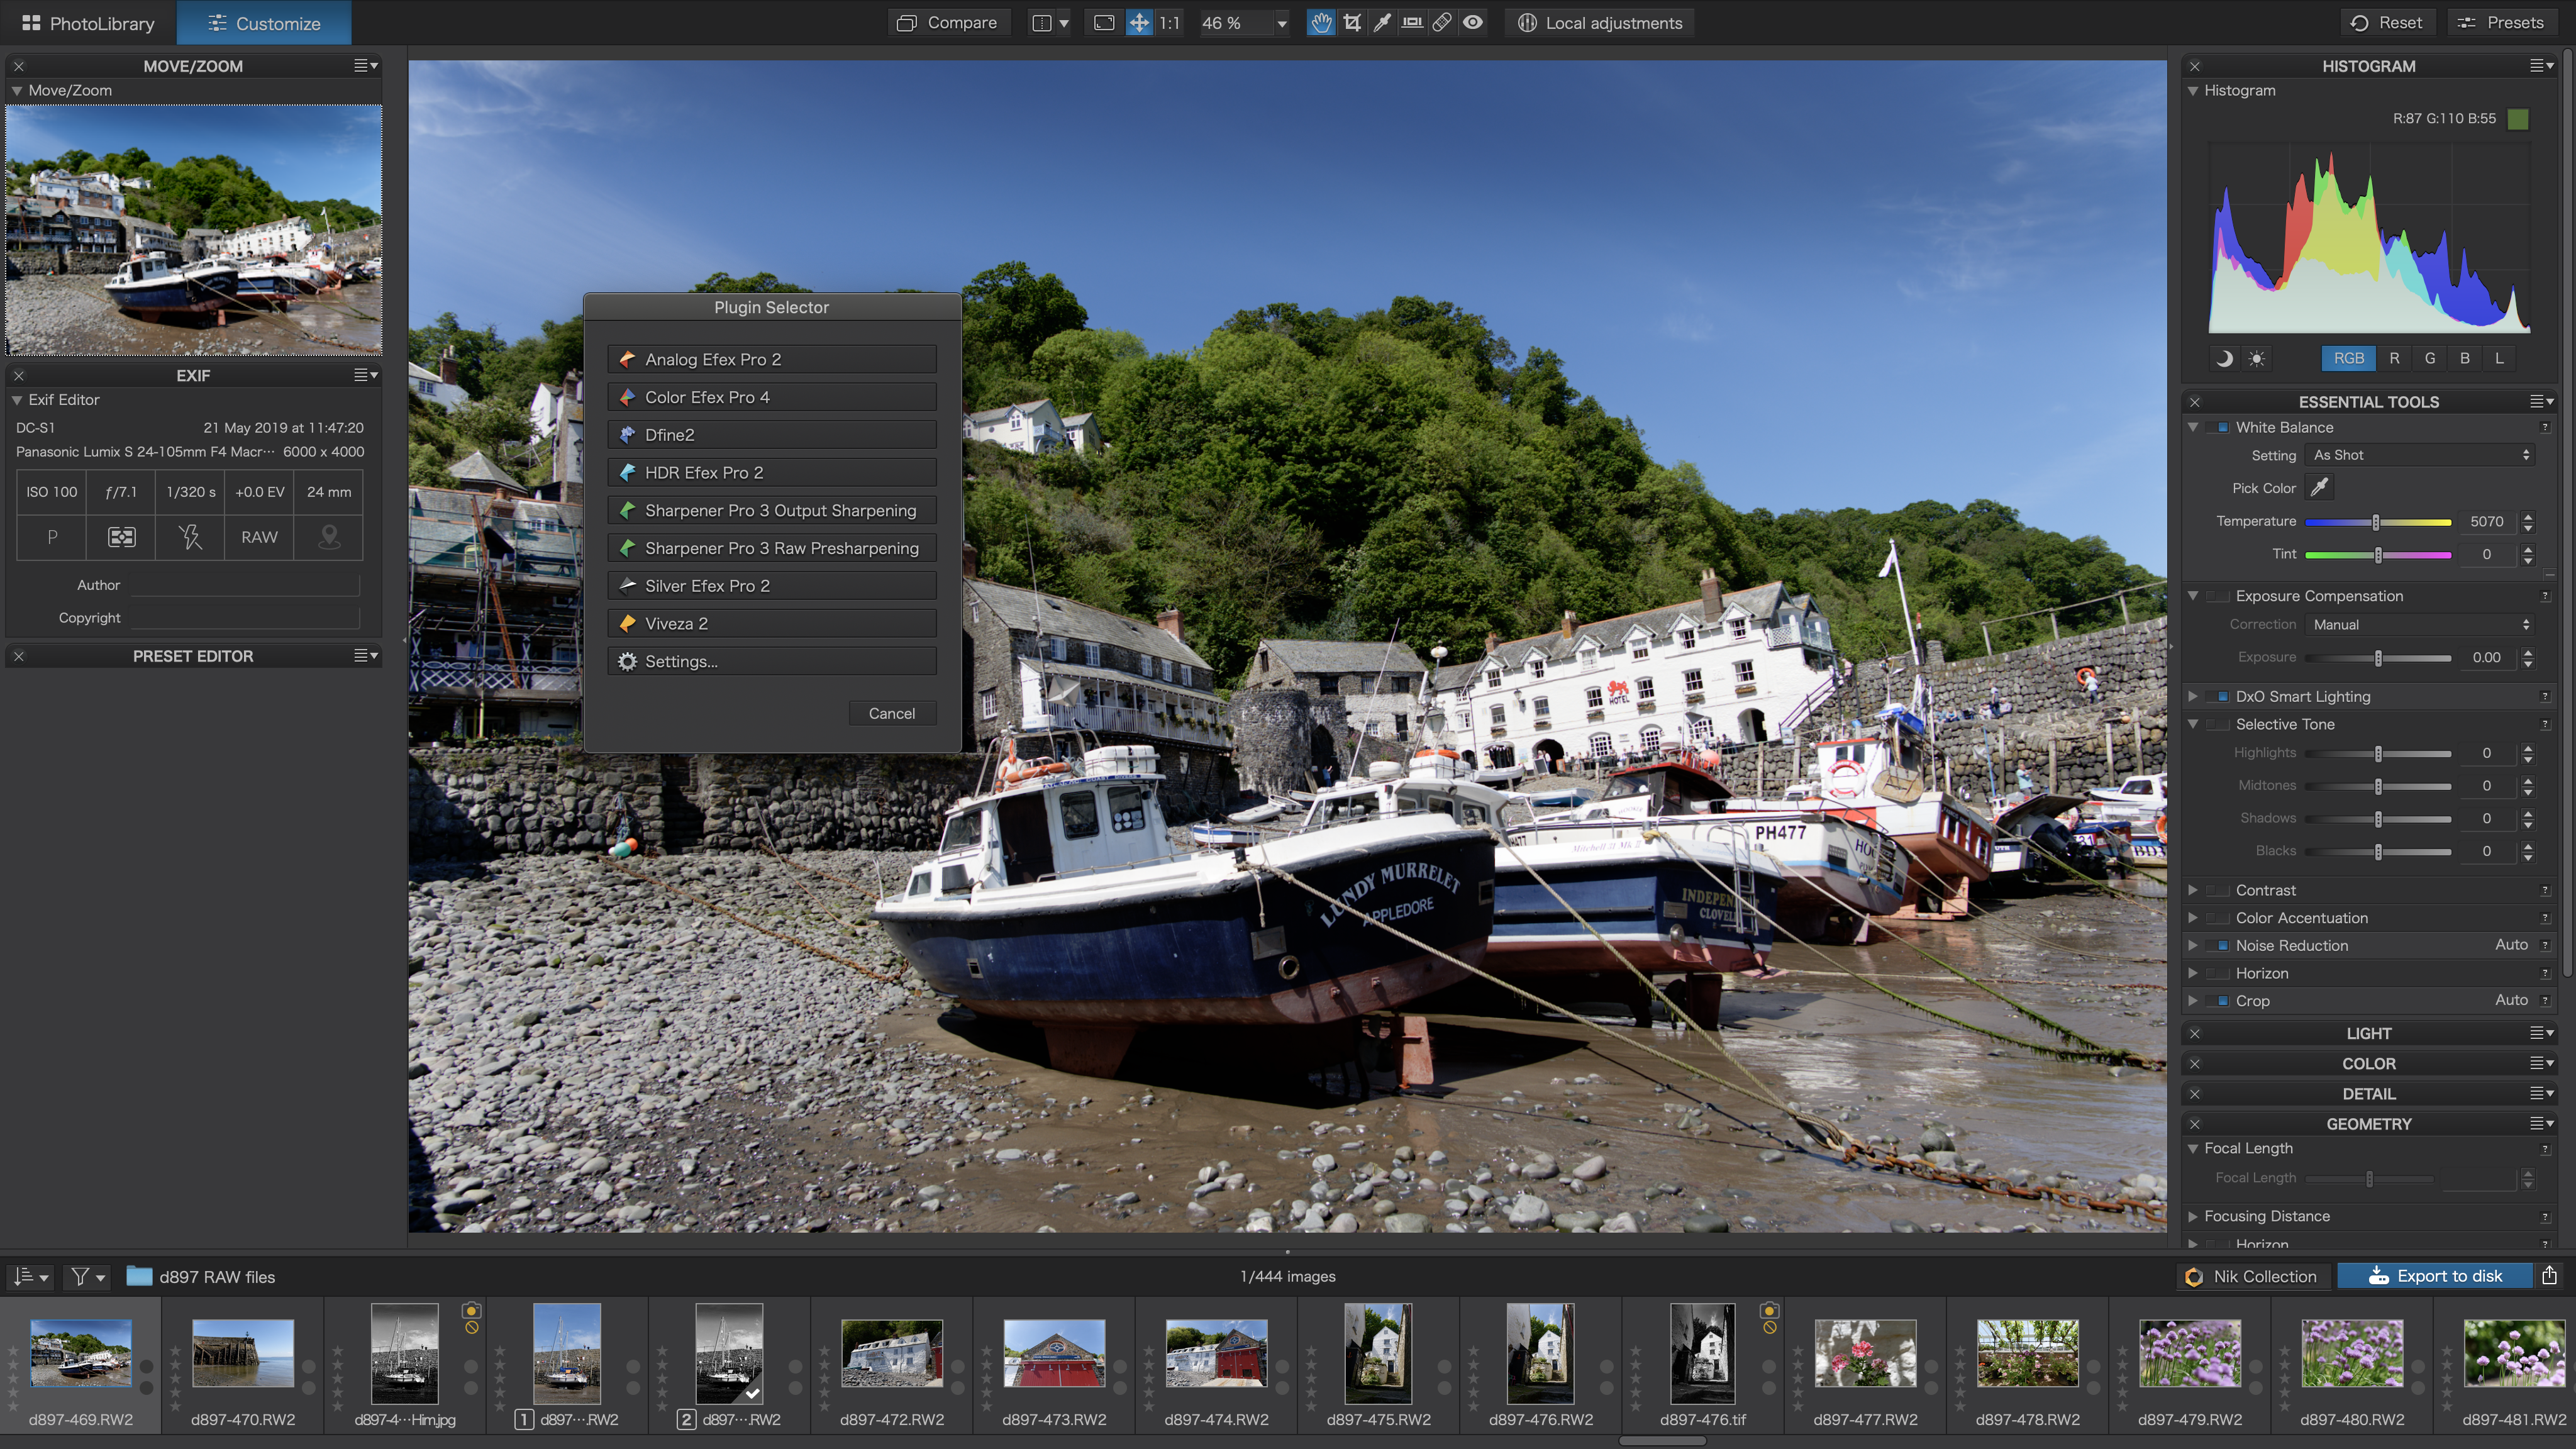
When you’re ready to use a Nik plug-in, click the Nik Collection button down at the bottom of the screen at the right hand end of the image browser panel. This pops up a window on the screen where you can choose which Nik plug-in to use.
Step 3: Duplicate file warning
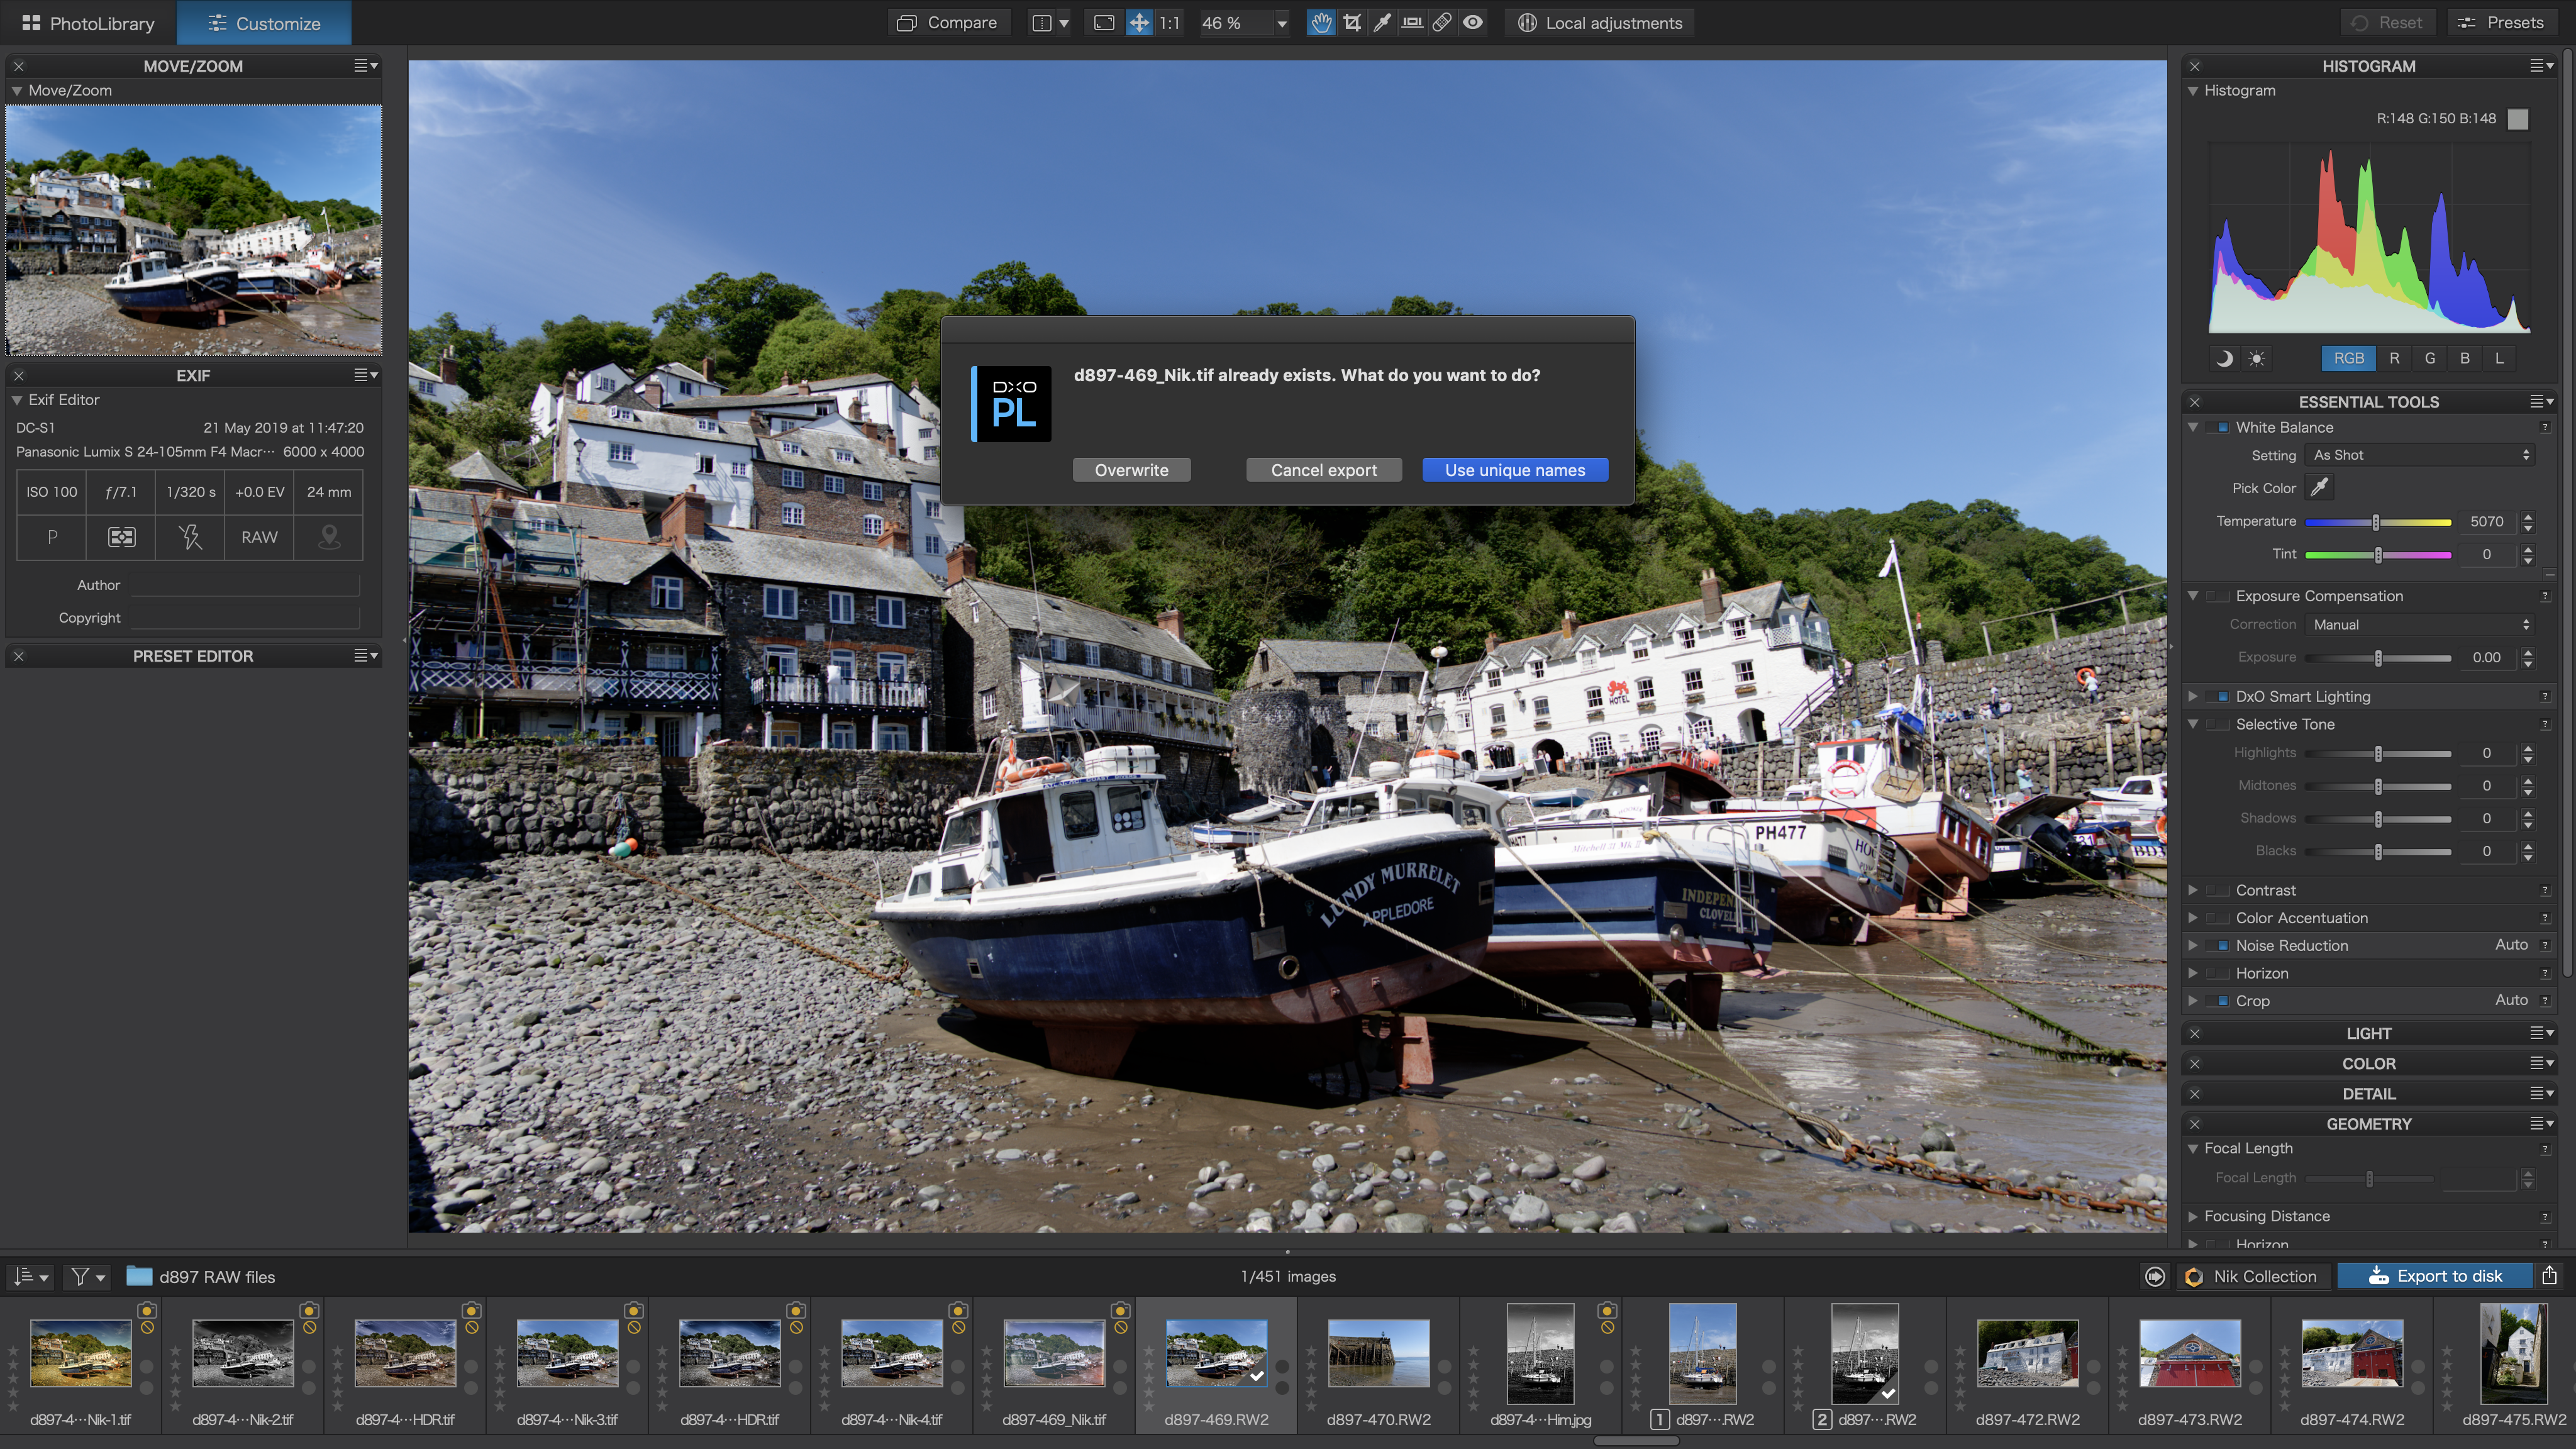
DxO PhotoLab will then export a 16-bit TIFF image to send to the plug-in you’ve chosen. The 16-bit TIFF format offers the highest image quality and much more tonal leeway when making strong adjustments to tones and colours.
Don’t worry about producing more than one version of a photo – you won’t overwrite you previous experiment because DxO will warn you and offer to create a file with a new and unique name.
Step 4: A vintage look with Analog Efex Pro

This is our photo opened up in Analog Efex Pro, and with one of the new En Vogue presets that come with the Nik Collection 2. This preset is called Burned Edges 3 and it’s made using a series of different filters combined.
We can change the settings if we want to, remove filters or add new ones to experiment with s huge range of analog film, darkroom and old camera effects.
Step 5: Photographic adjustments with Color Efex Pro
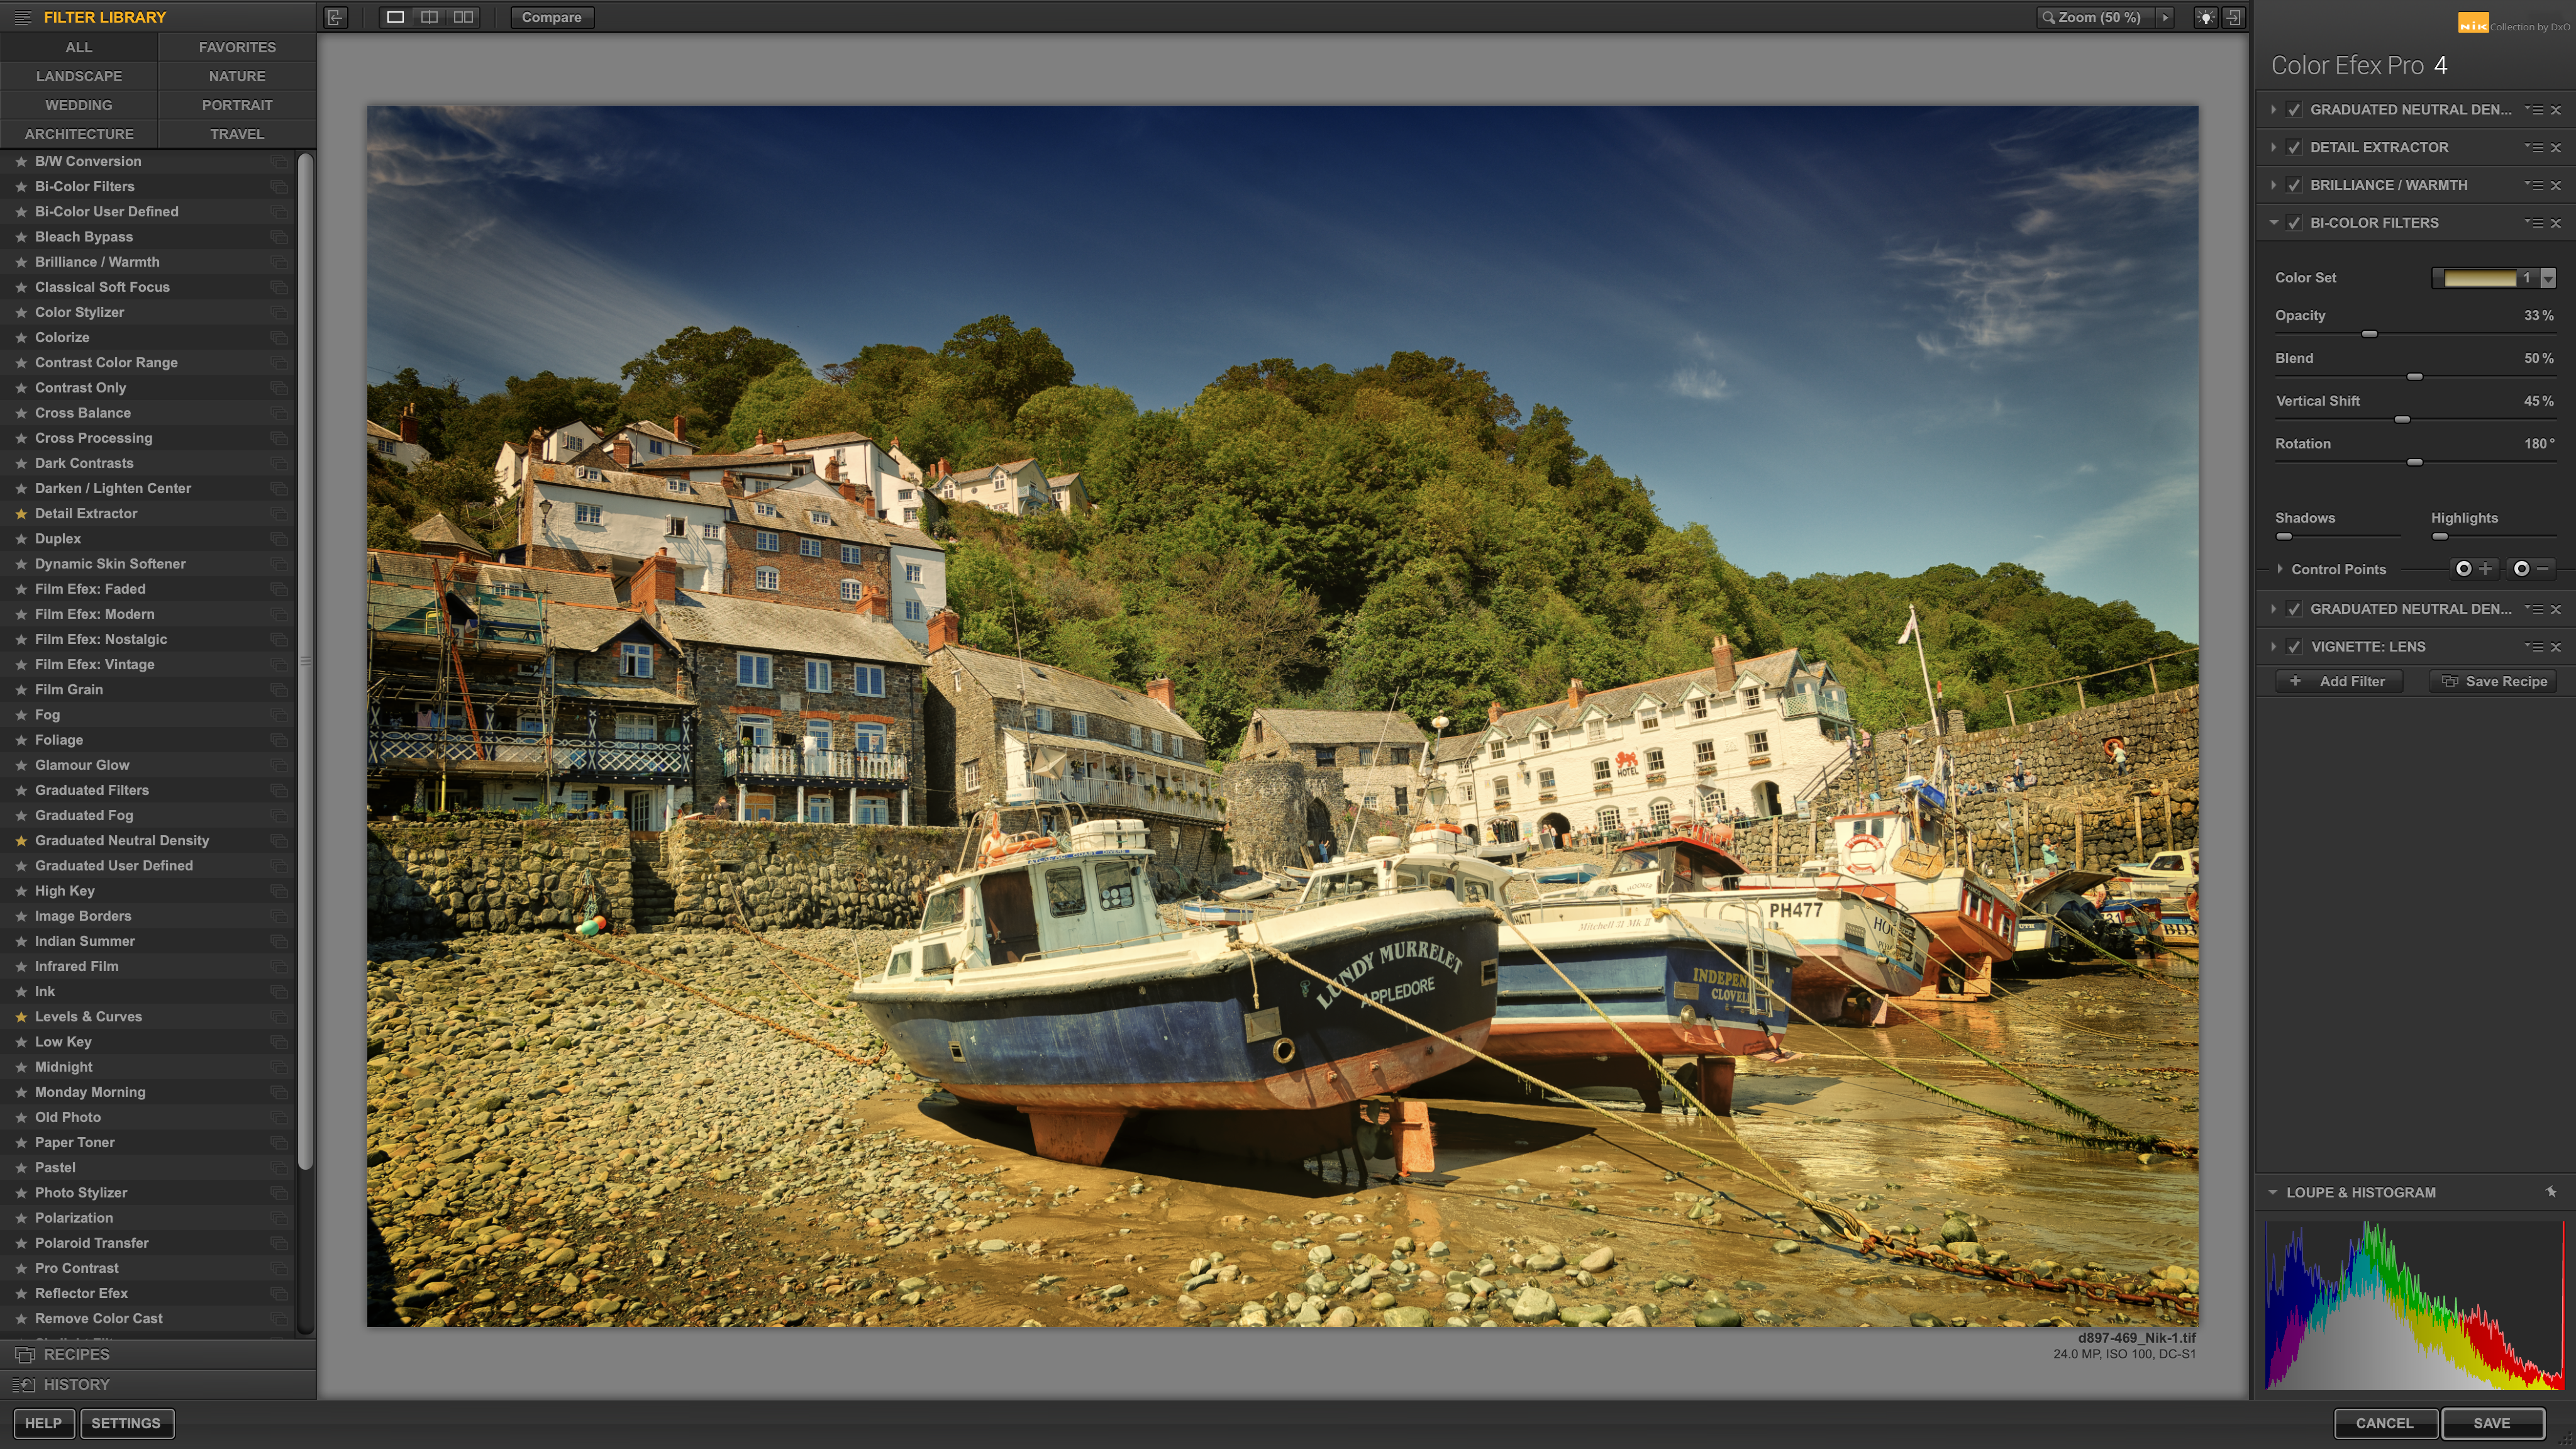
Analog Efex Pro is designed very much for creating a ‘vintage’ look, while the Color Efex Pro plug-in is for more contemporary photographic effects.
It offers over 50 different photographic filters, each with its own settings, but you can also combine these for a myriad different ‘looks’.
This photo uses six different filters in combination, and with the control point masking tools available across the Nik Collection you can mask filter effects in different parts of the picture.
Step 6: Beautiful black and white with Silver Efex Pro
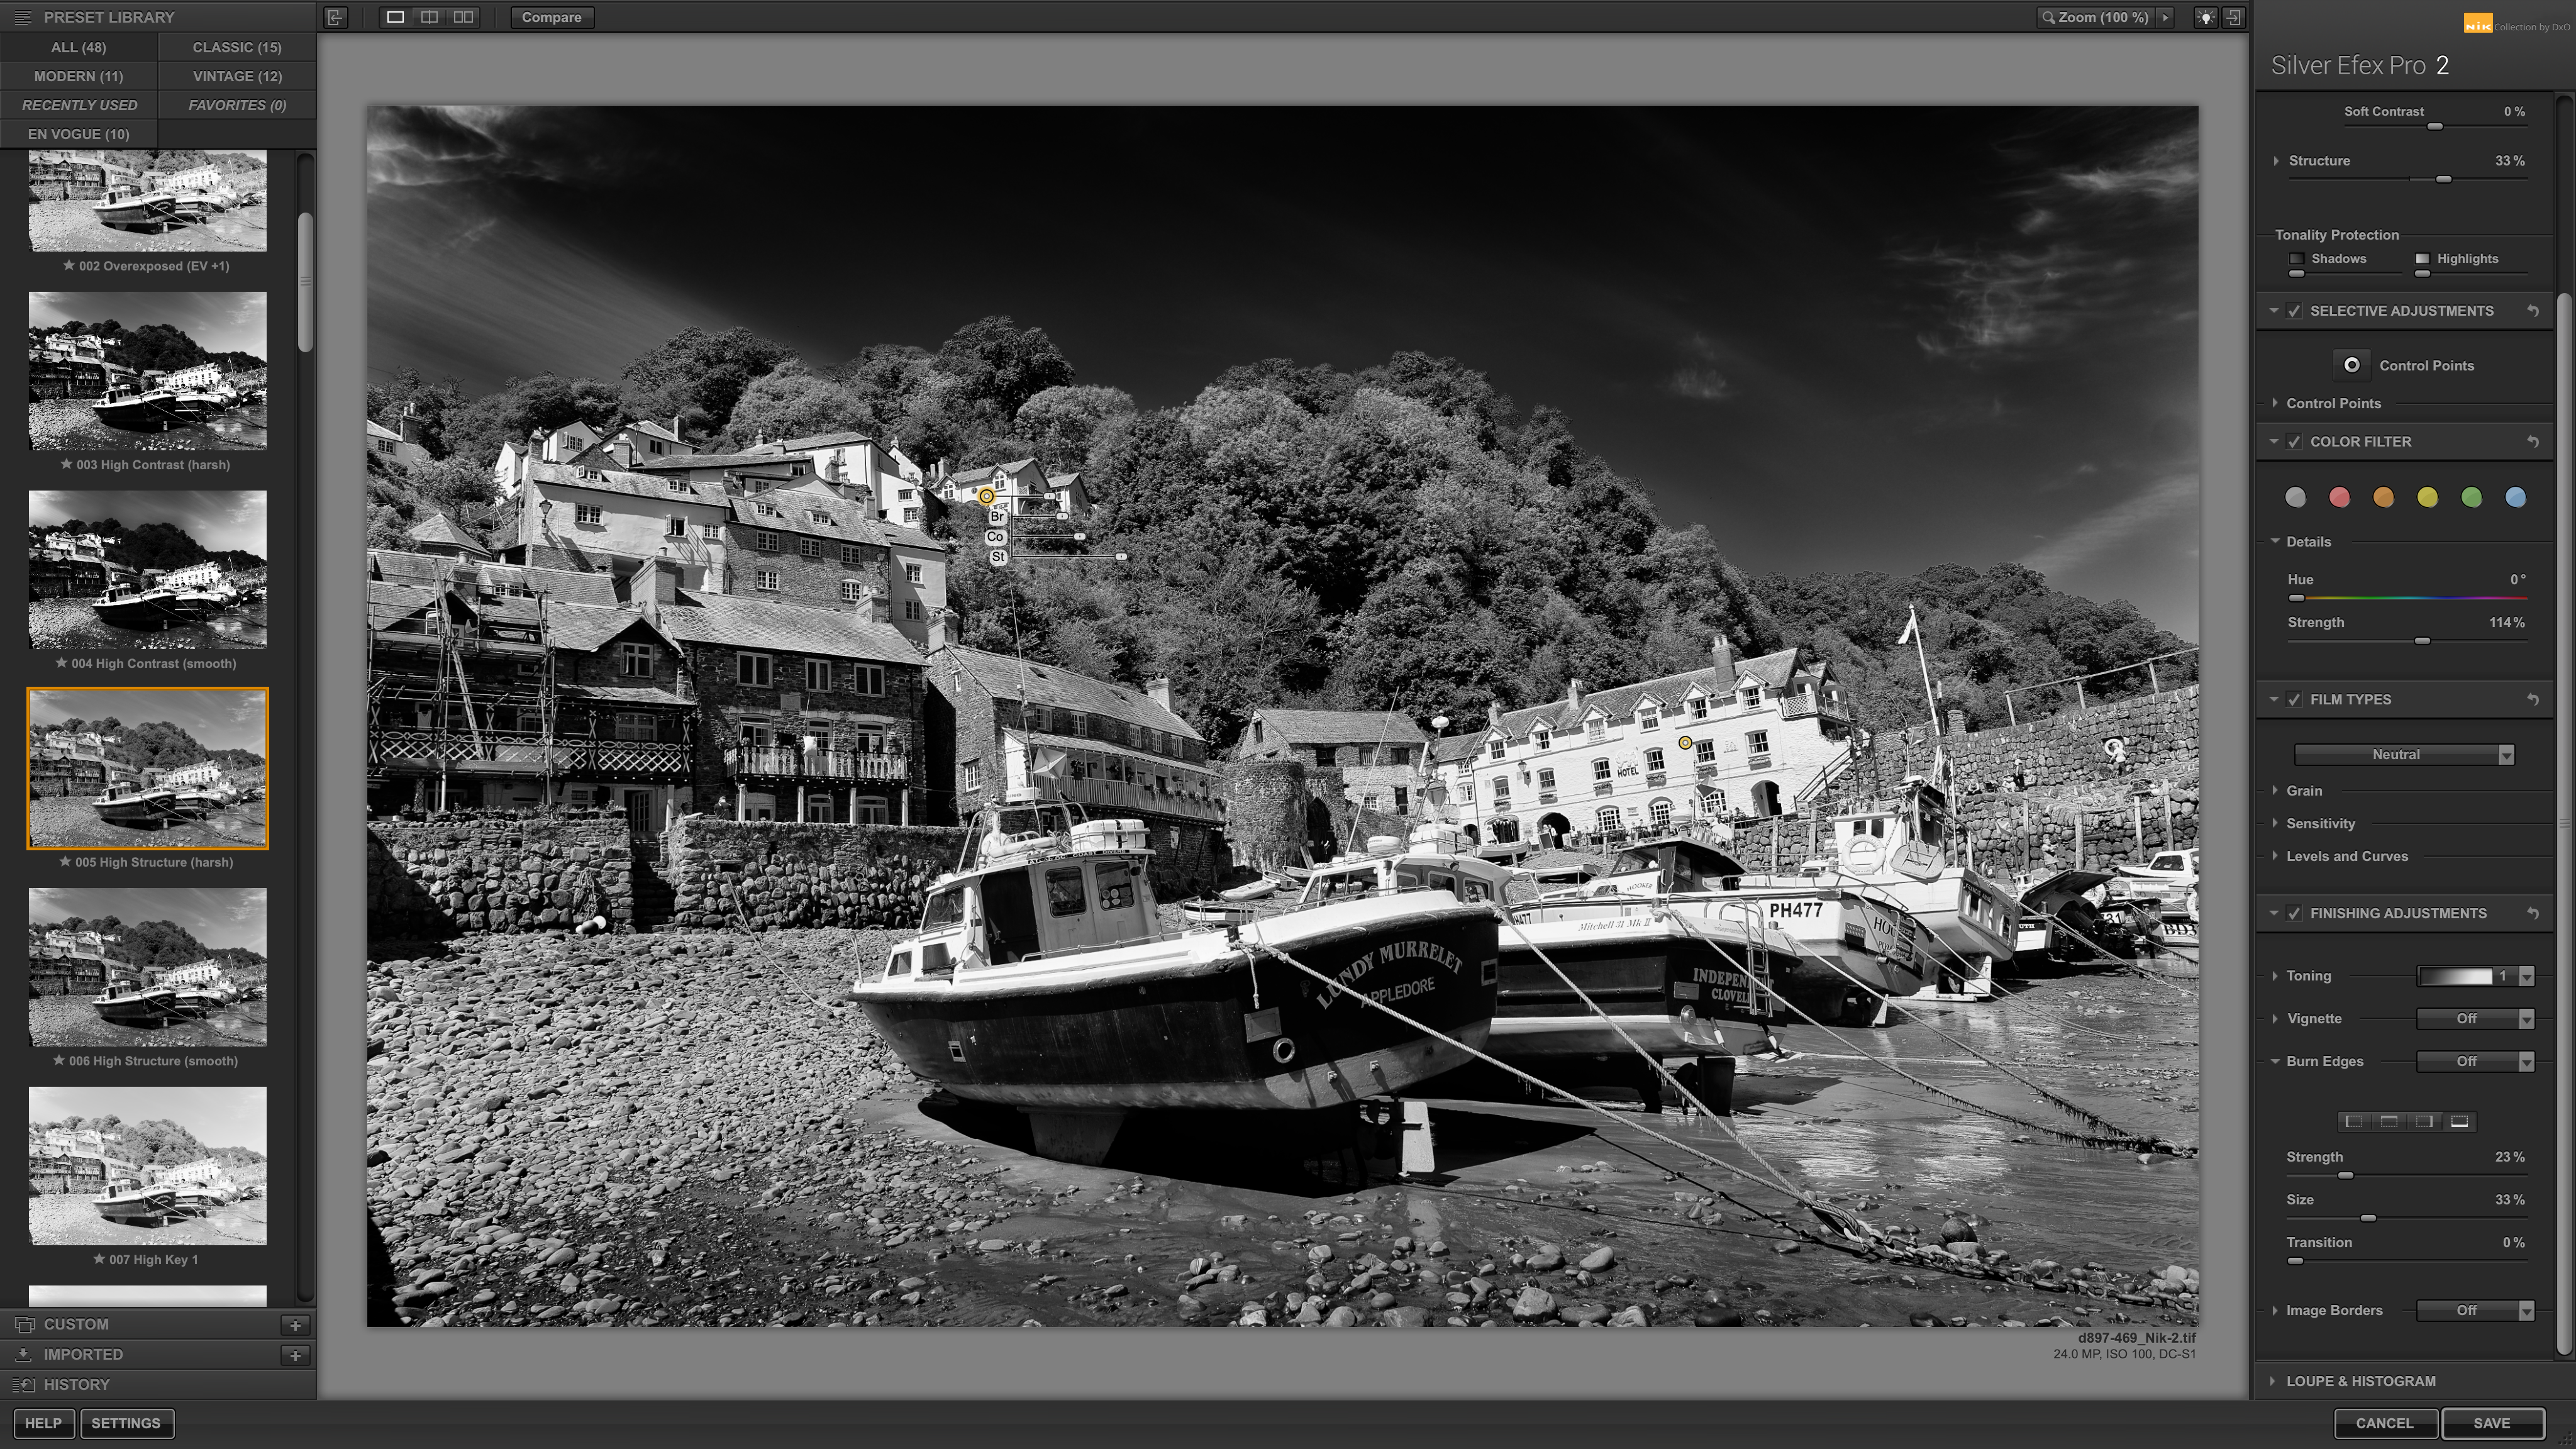
While Analog Efex Pro and Color Efex Pro can product brilliant black and white images as part of their library of effects, Silver Efex Pro is the real master of monochrome imagery.
Like the other plug-ins, it comes with a selection of preset ‘looks’ to choose from, but you can also customise and create your own and use classic ‘dodging and burning’ techniques with Nik control points.
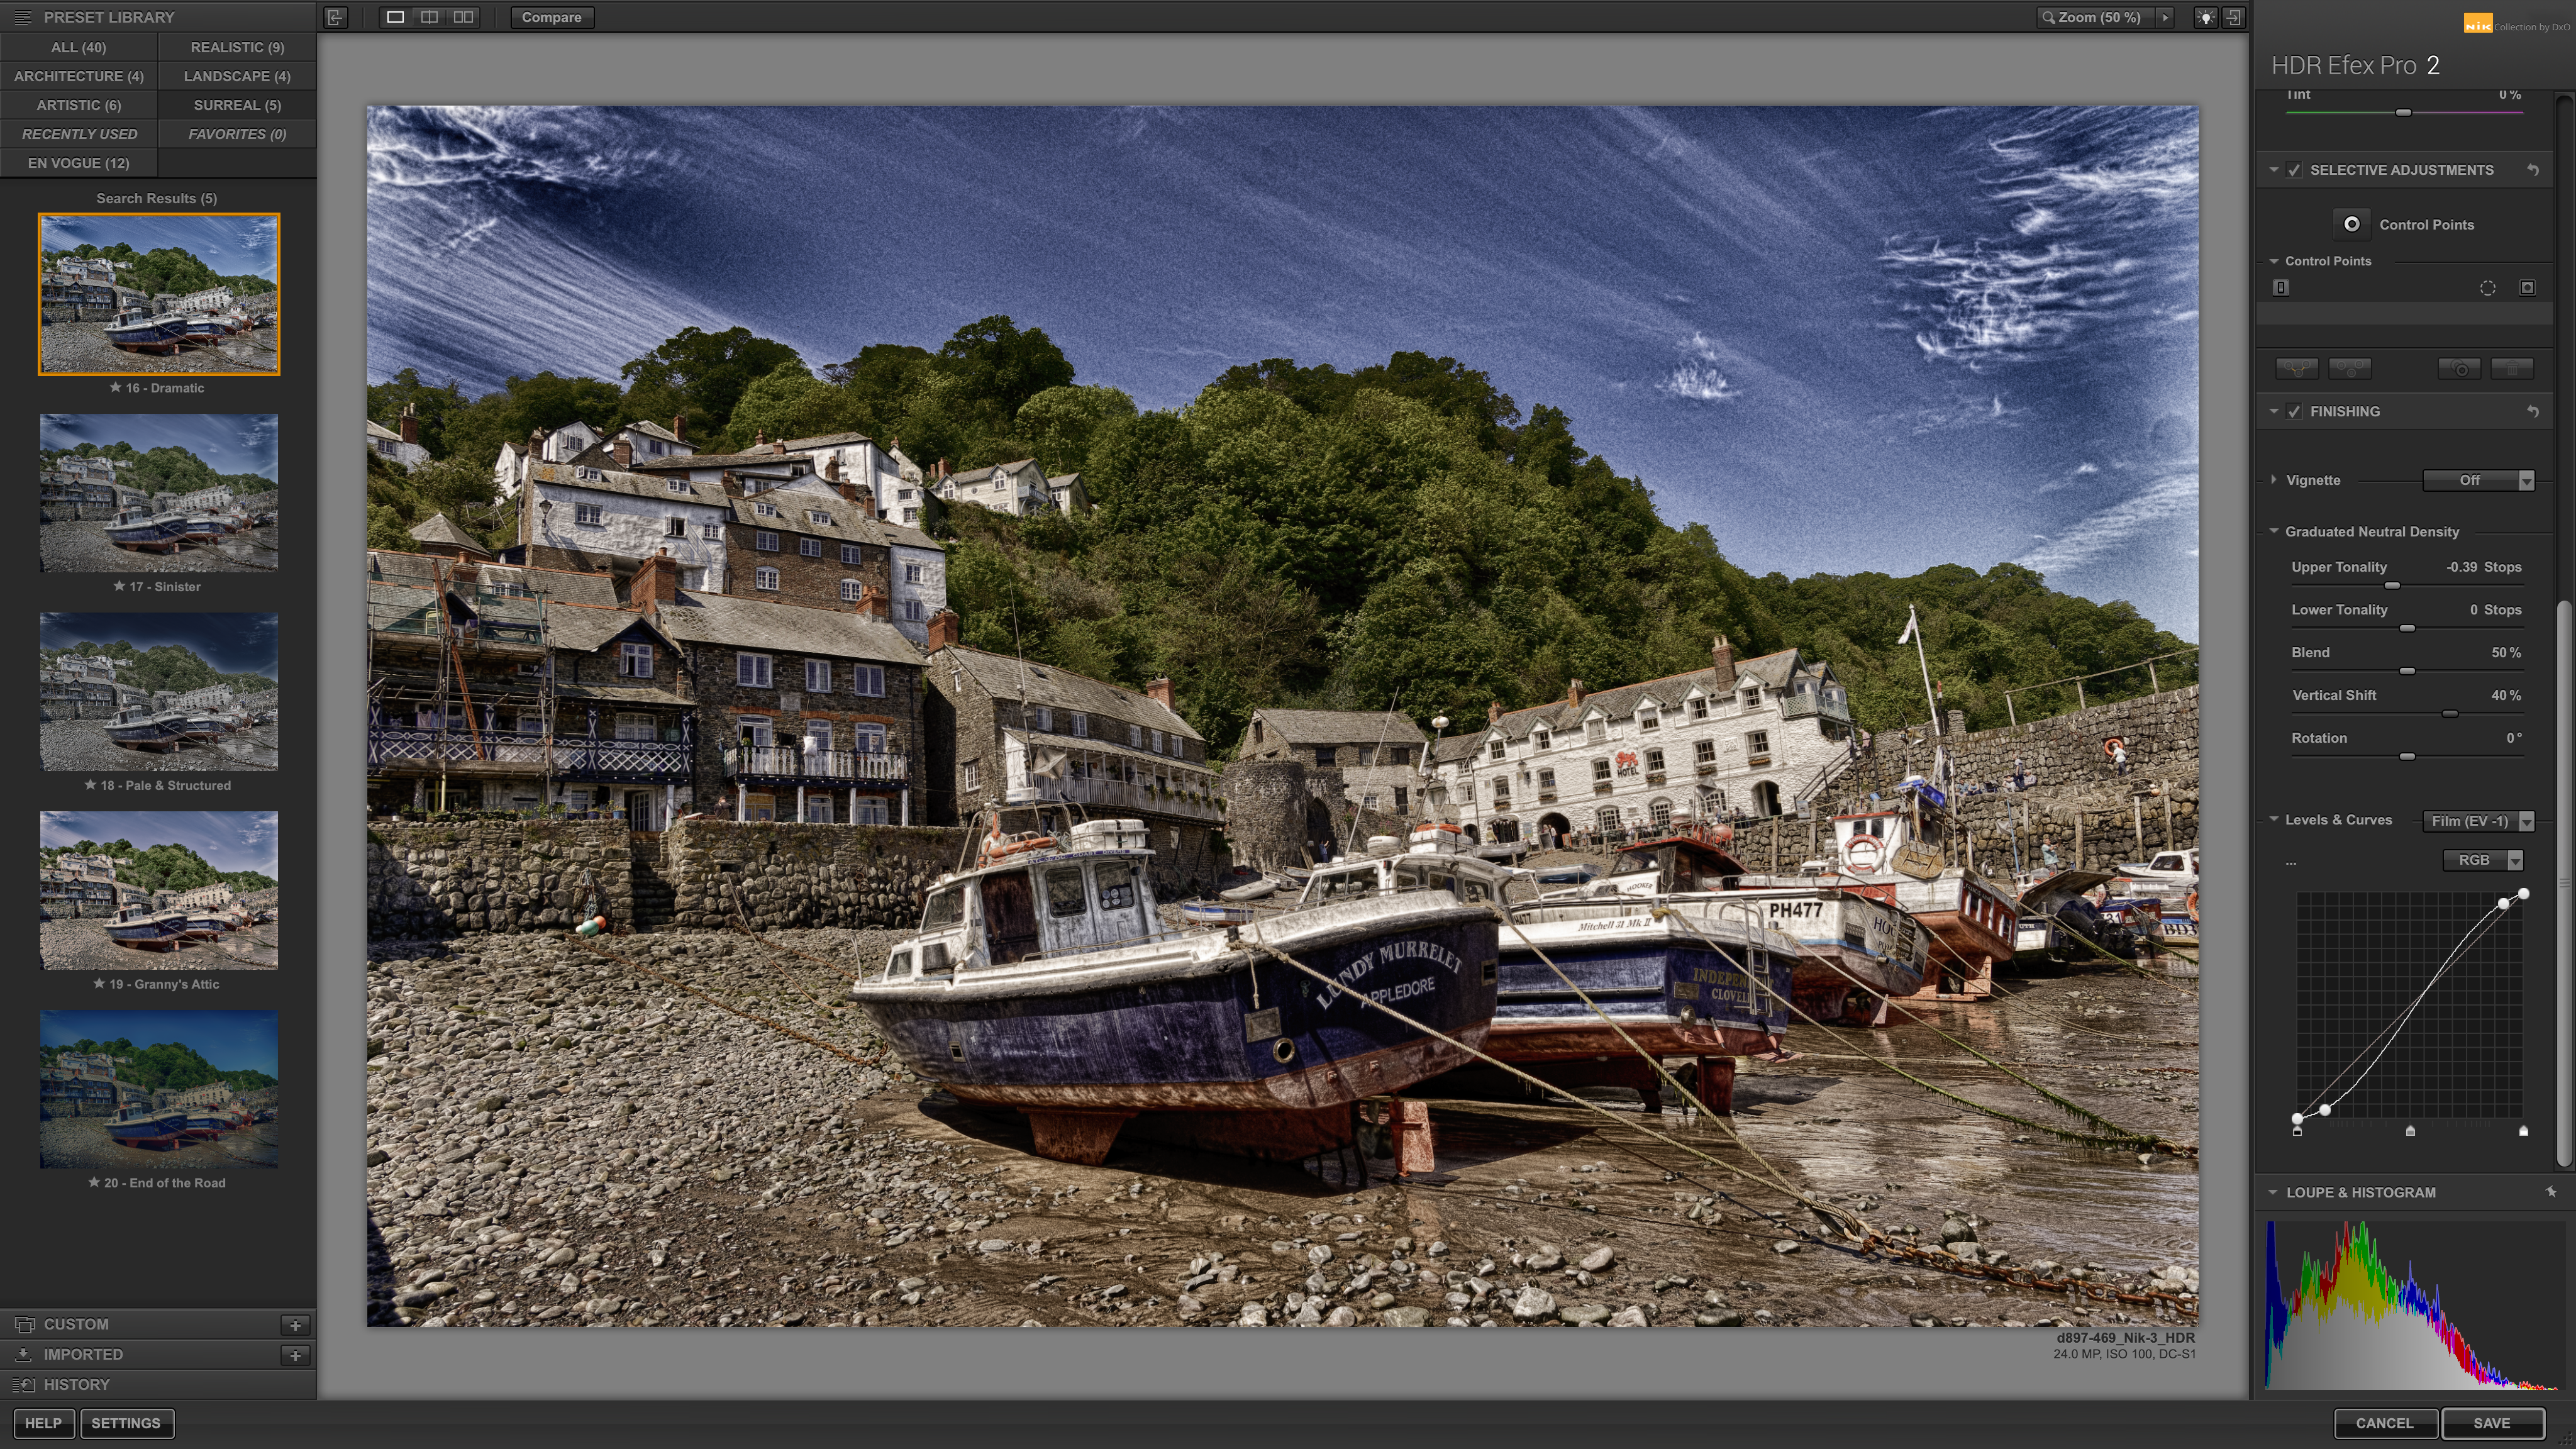
Step 7: Dramatic HDR with HDR Efex Pro
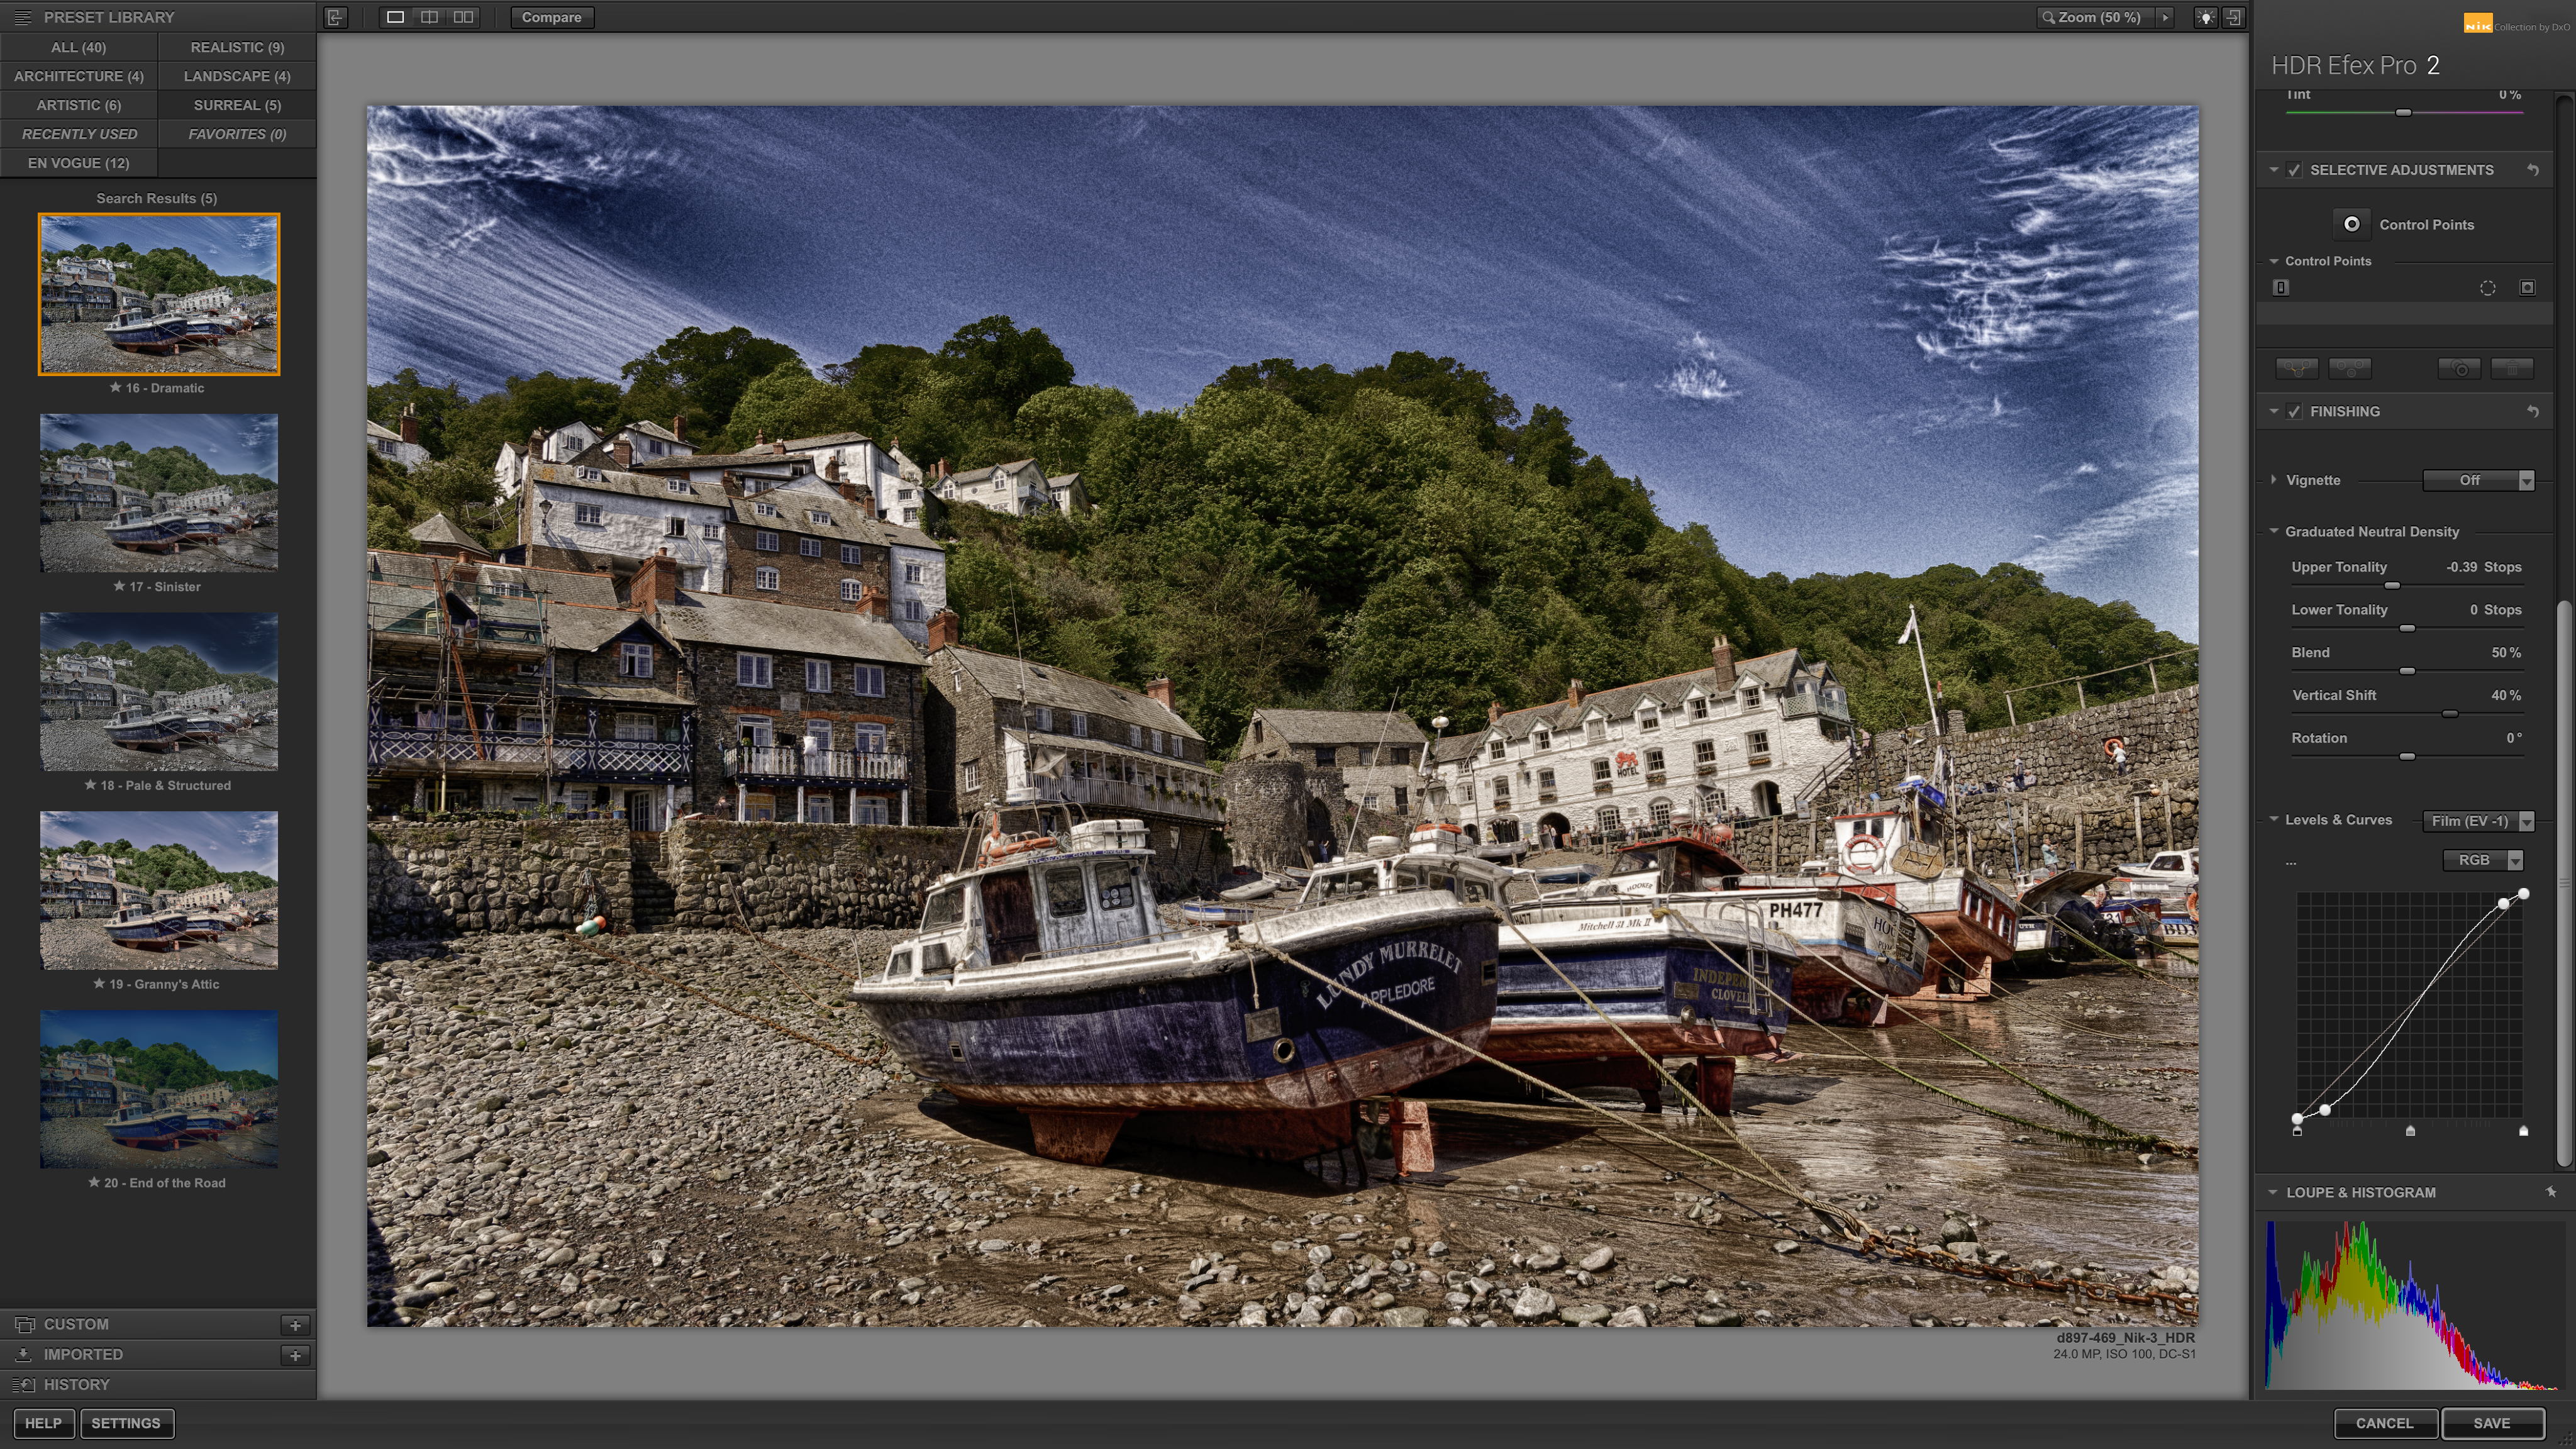
Or, if you like the surreal drama of HDR images, you can use HDR Efex Pro. This image is being edited straight from PhotoLab 2, but because it’s been ‘pre-processed’ it has a full range of tones and can still produce a great-looking HDR photo.
Alternatively, you can use HDR Efex Pro on its own to ‘merge’ a series of bracketed exposures to capture and process an even wider range of tones.
Step 8: Browsing the results
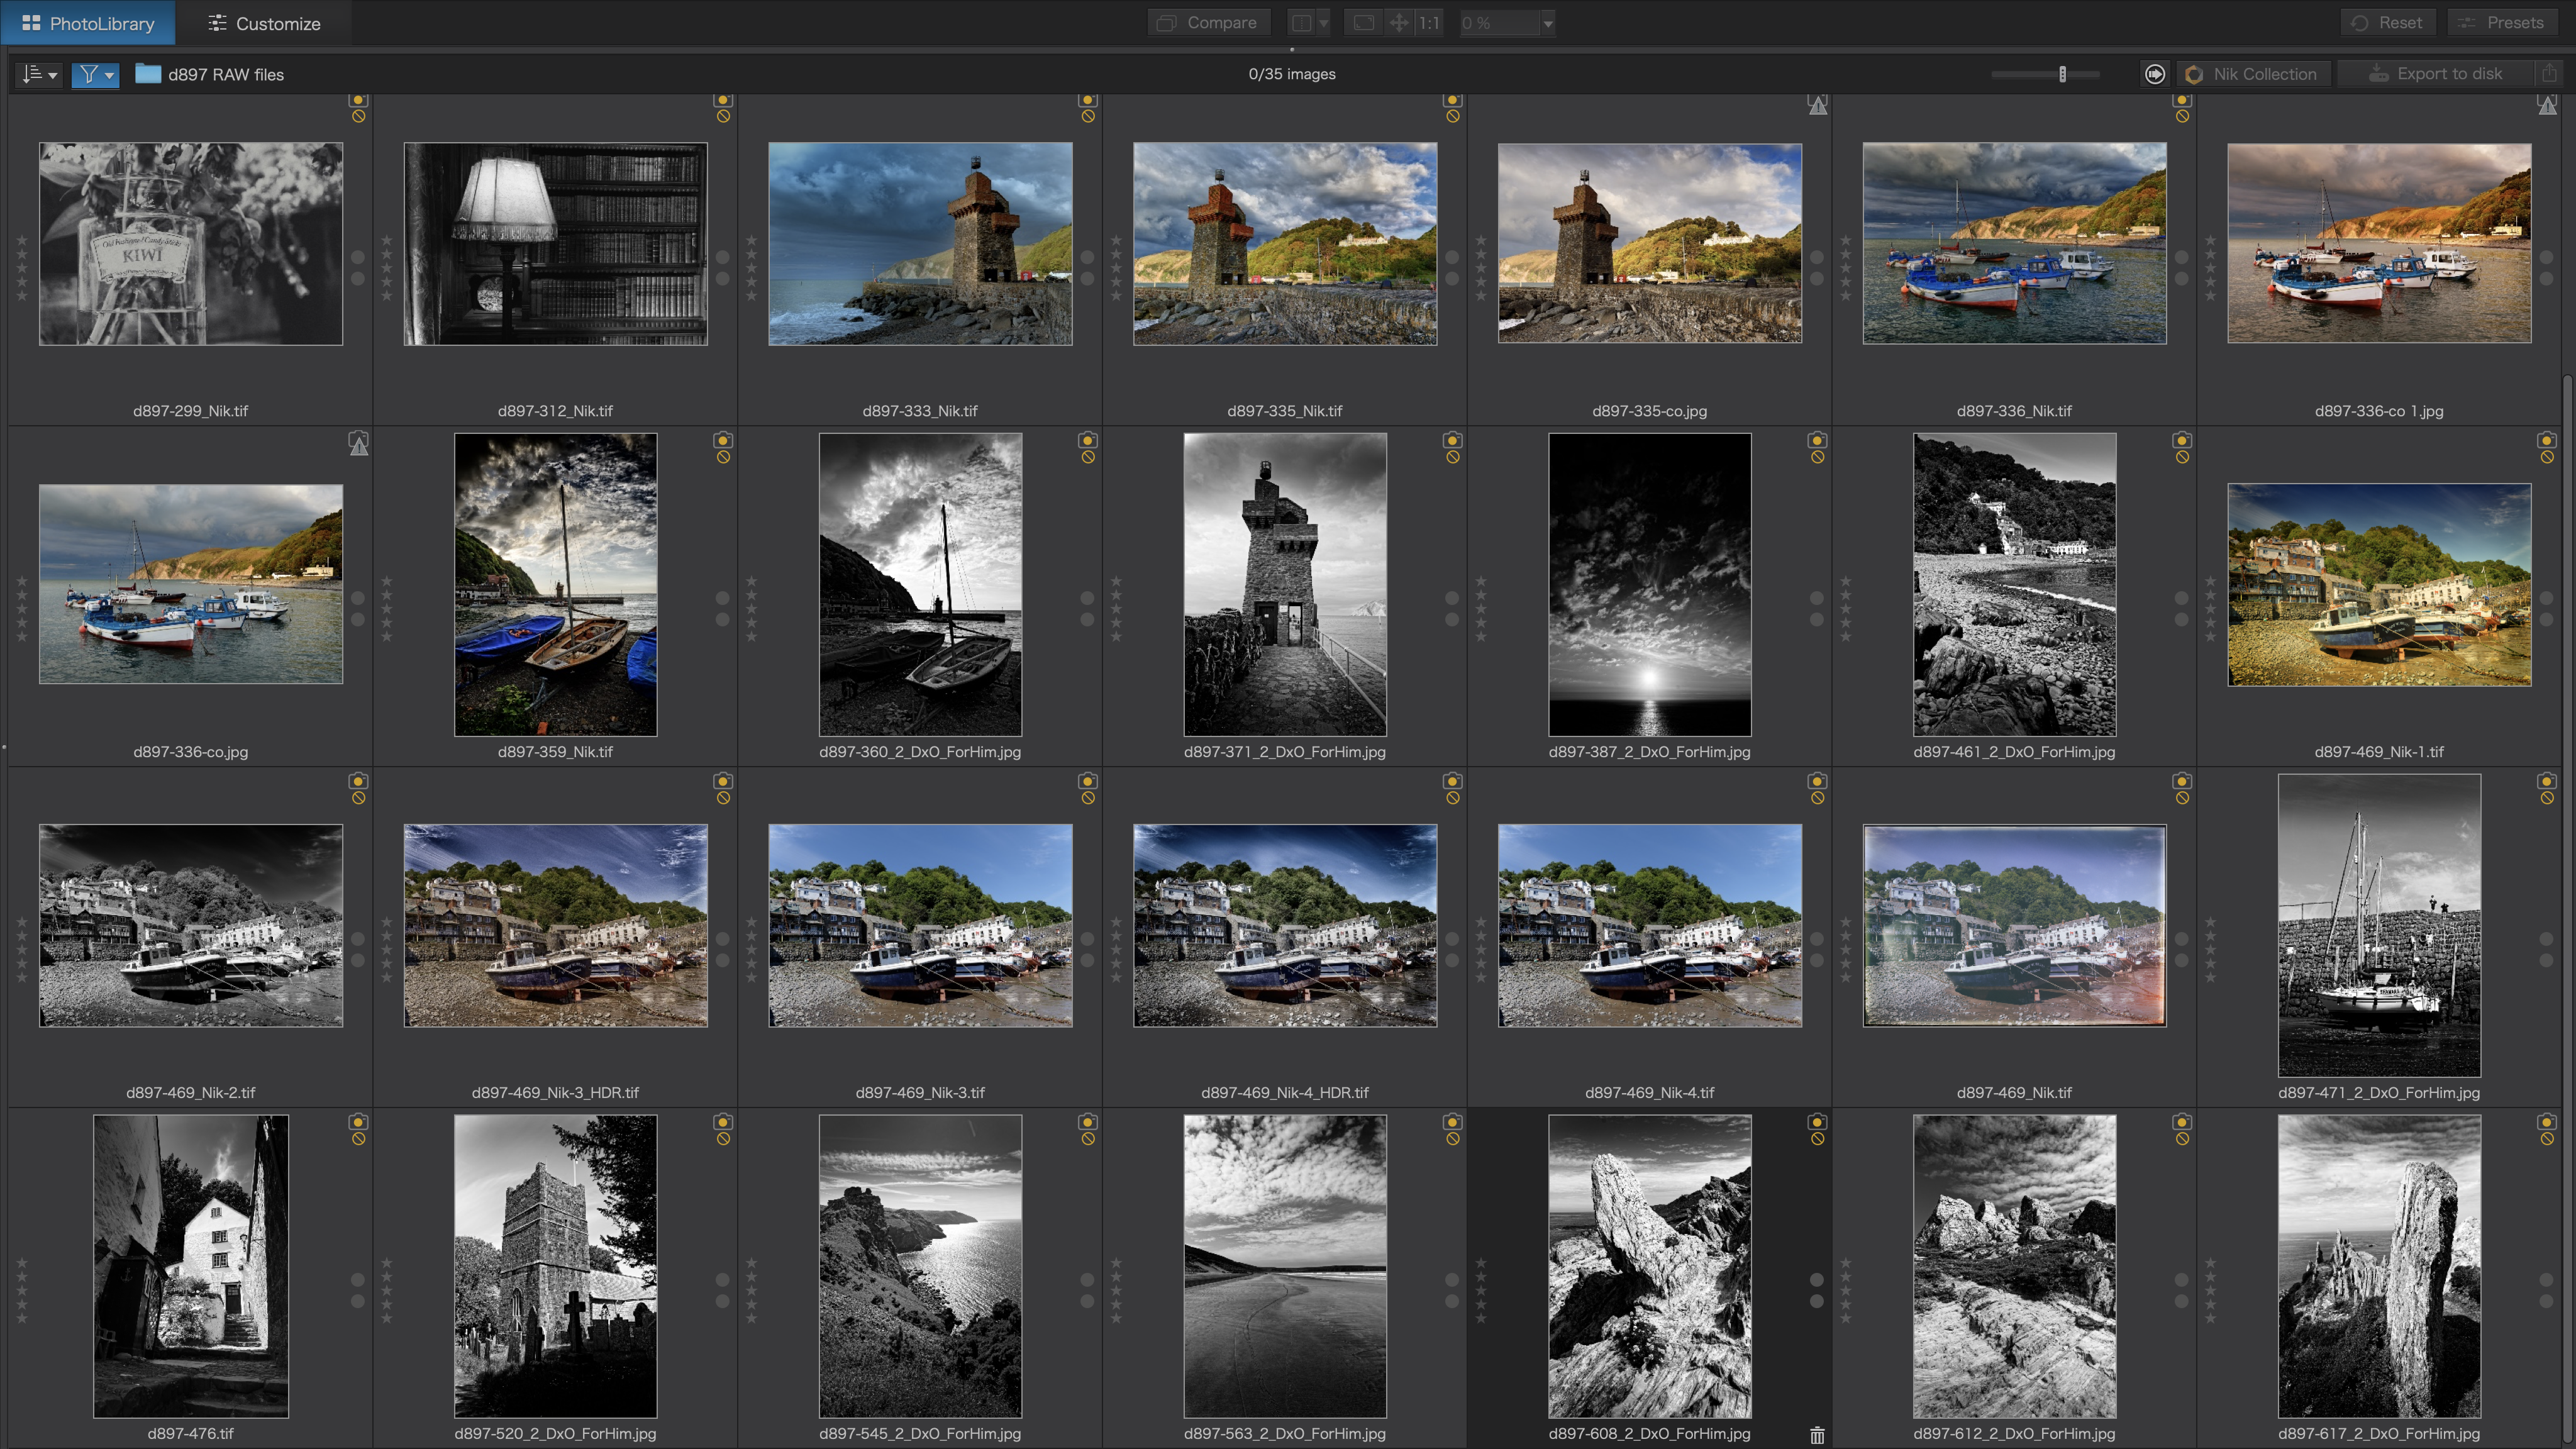
Back in PhotoLab 2 we can see that our newly-edited images are visible alongside our original raw files.
The inclusion of PhotoLab in the Nik Collection means that Nik users also have a browsing tool for organising, opening and viewing photos, which the plug-ins themselves never had before.
Here, we’ve used PhotoLab’s file type filter to display only RGB (non-raw) files, and all the images we’ve created using the Nik Collection plug-ins.
Read more:
The best photo editing software you can get right now
The best photography tips: 147 techniques, tips and tricks

Rod is an independent photography journalist and editor, and a long-standing Digital Camera World contributor, having previously worked as DCW's Group Reviews editor. Before that he has been technique editor on N-Photo, Head of Testing for the photography division and Camera Channel editor on TechRadar, as well as contributing to many other publications. He has been writing about photography technique, photo editing and digital cameras since they first appeared, and before that began his career writing about film photography. He has used and reviewed practically every interchangeable lens camera launched in the past 20 years, from entry-level DSLRs to medium format cameras, together with lenses, tripods, gimbals, light meters, camera bags and more. Rod has his own camera gear blog at fotovolo.com but also writes about photo-editing applications and techniques at lifeafterphotoshop.com
