How to add multiple images into one singular instagram story
No more endless tapping – perfect your Insta story game by adding multiple images into one upload
The best camera deals, reviews, product advice, and unmissable photography news, direct to your inbox!
You are now subscribed
Your newsletter sign-up was successful
Over the festive season, we may be tempted to post a flowing stream of images to our Instagram stories that showcase every aspect of the holiday spirit, from shopping for gifts, exploring winter markets, scarf and hat selfies, to cozying up in a blanket with a hot chocolate or egg-nog after an evening of wrapping presents.
While it can be tempting to post every image from your camera roll to your story in one go, a lot of your friends and followers may be put off when seeing a long dashed line at the top of your story, hinting that there's going to be a lot to click through.
• See our picks of the best cameras for Instagram!
When uploading images to Instagram for a feed post, there's only space for 10 images - and we imagine that as photographers you probably have a lot more to share with your friends and online followers that can't be condensed into a singular post, especially with the trend of photo dumping a month's worth of photos.
The alternative is to share more than 10 images from a trip, event, or holiday by posting them to your Instagram story, instead of your home feed, and then by proceeding to save these memories to a highlight tab so that your friends can see them anytime from your profile. This isn't always the best idea when uploading masses of images, and can be considered spamming in some ways.
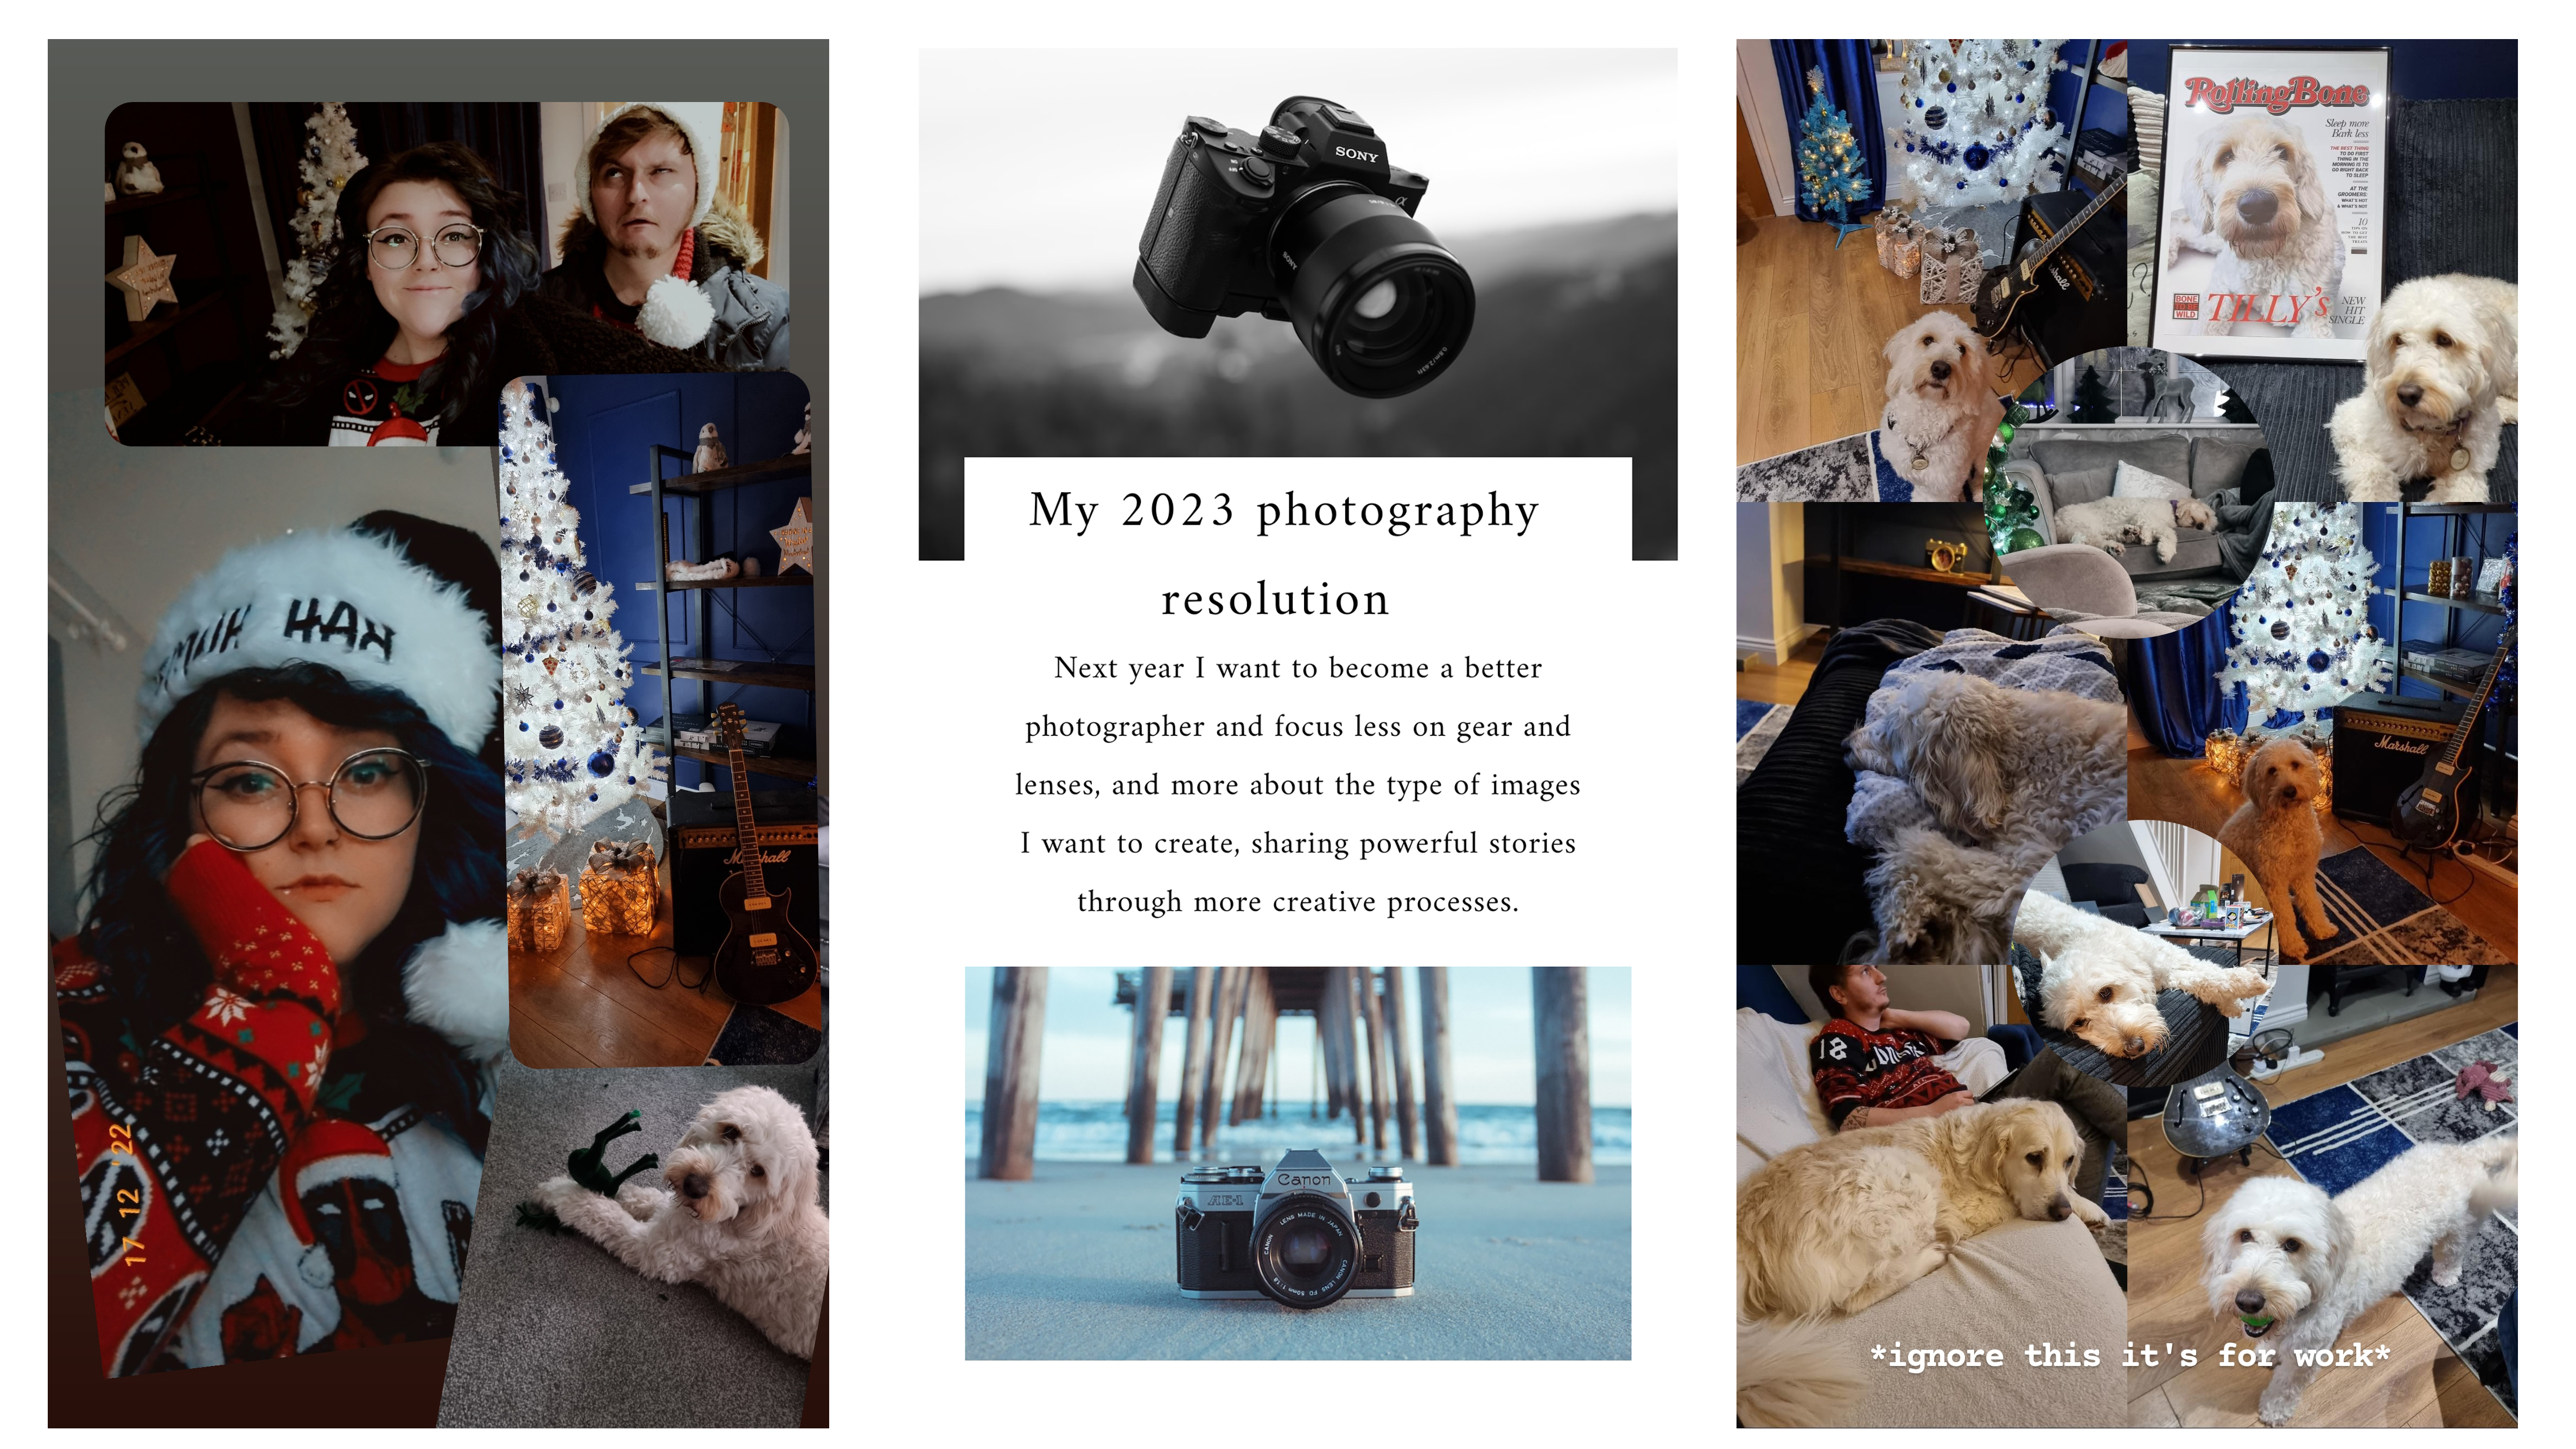
You can save yourself (and your friends) a lot of time in having to click through thirty separate images on your story by combining multiple images into one singular story, it can even make watching them back through highlights feel like a digital scrapbook experience, and we'll show you exactly how to do this in an easy guide.
How to upload an Instagram story
There are three main methods when creating an Instagram story that has multiple images, and the first one is the most straightforward.
The best camera deals, reviews, product advice, and unmissable photography news, direct to your inbox!
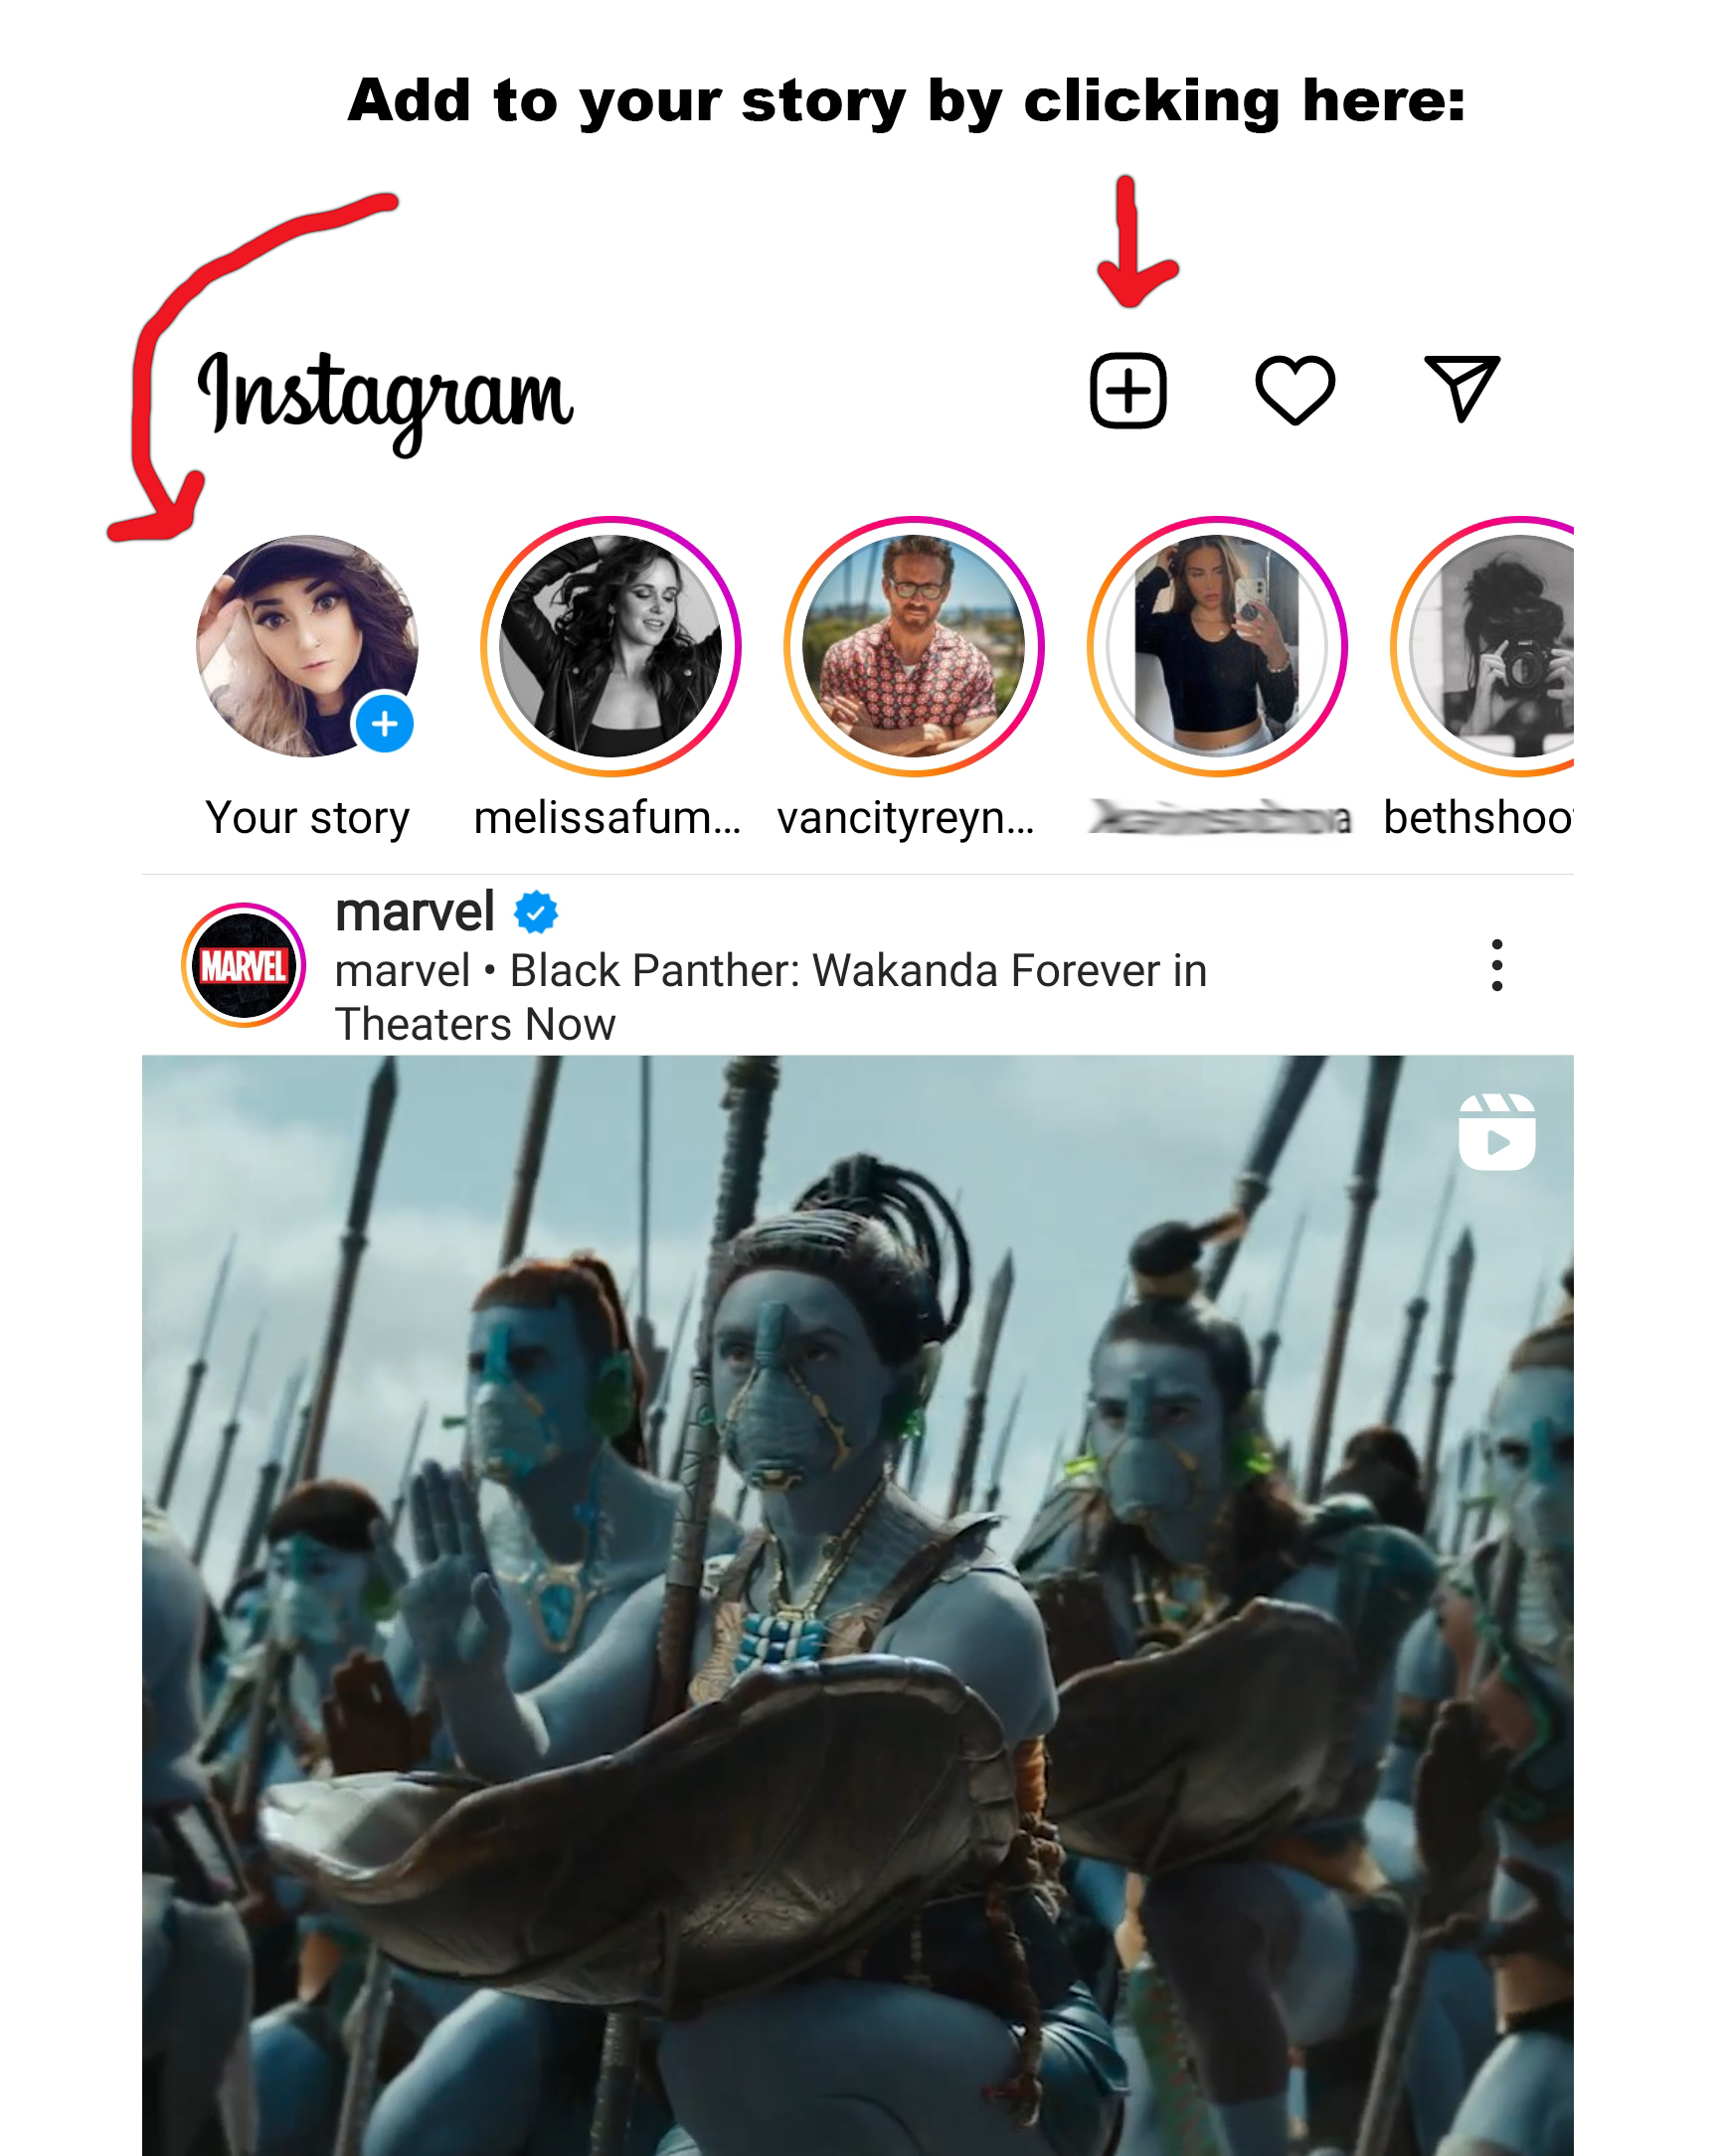
Head to your Instagram feed and begin the process of uploading a story either by selecting your own story circle at the top bar or by pressing the plus button surrounded by a square in the top right corner next to the heart-shaped notification button.
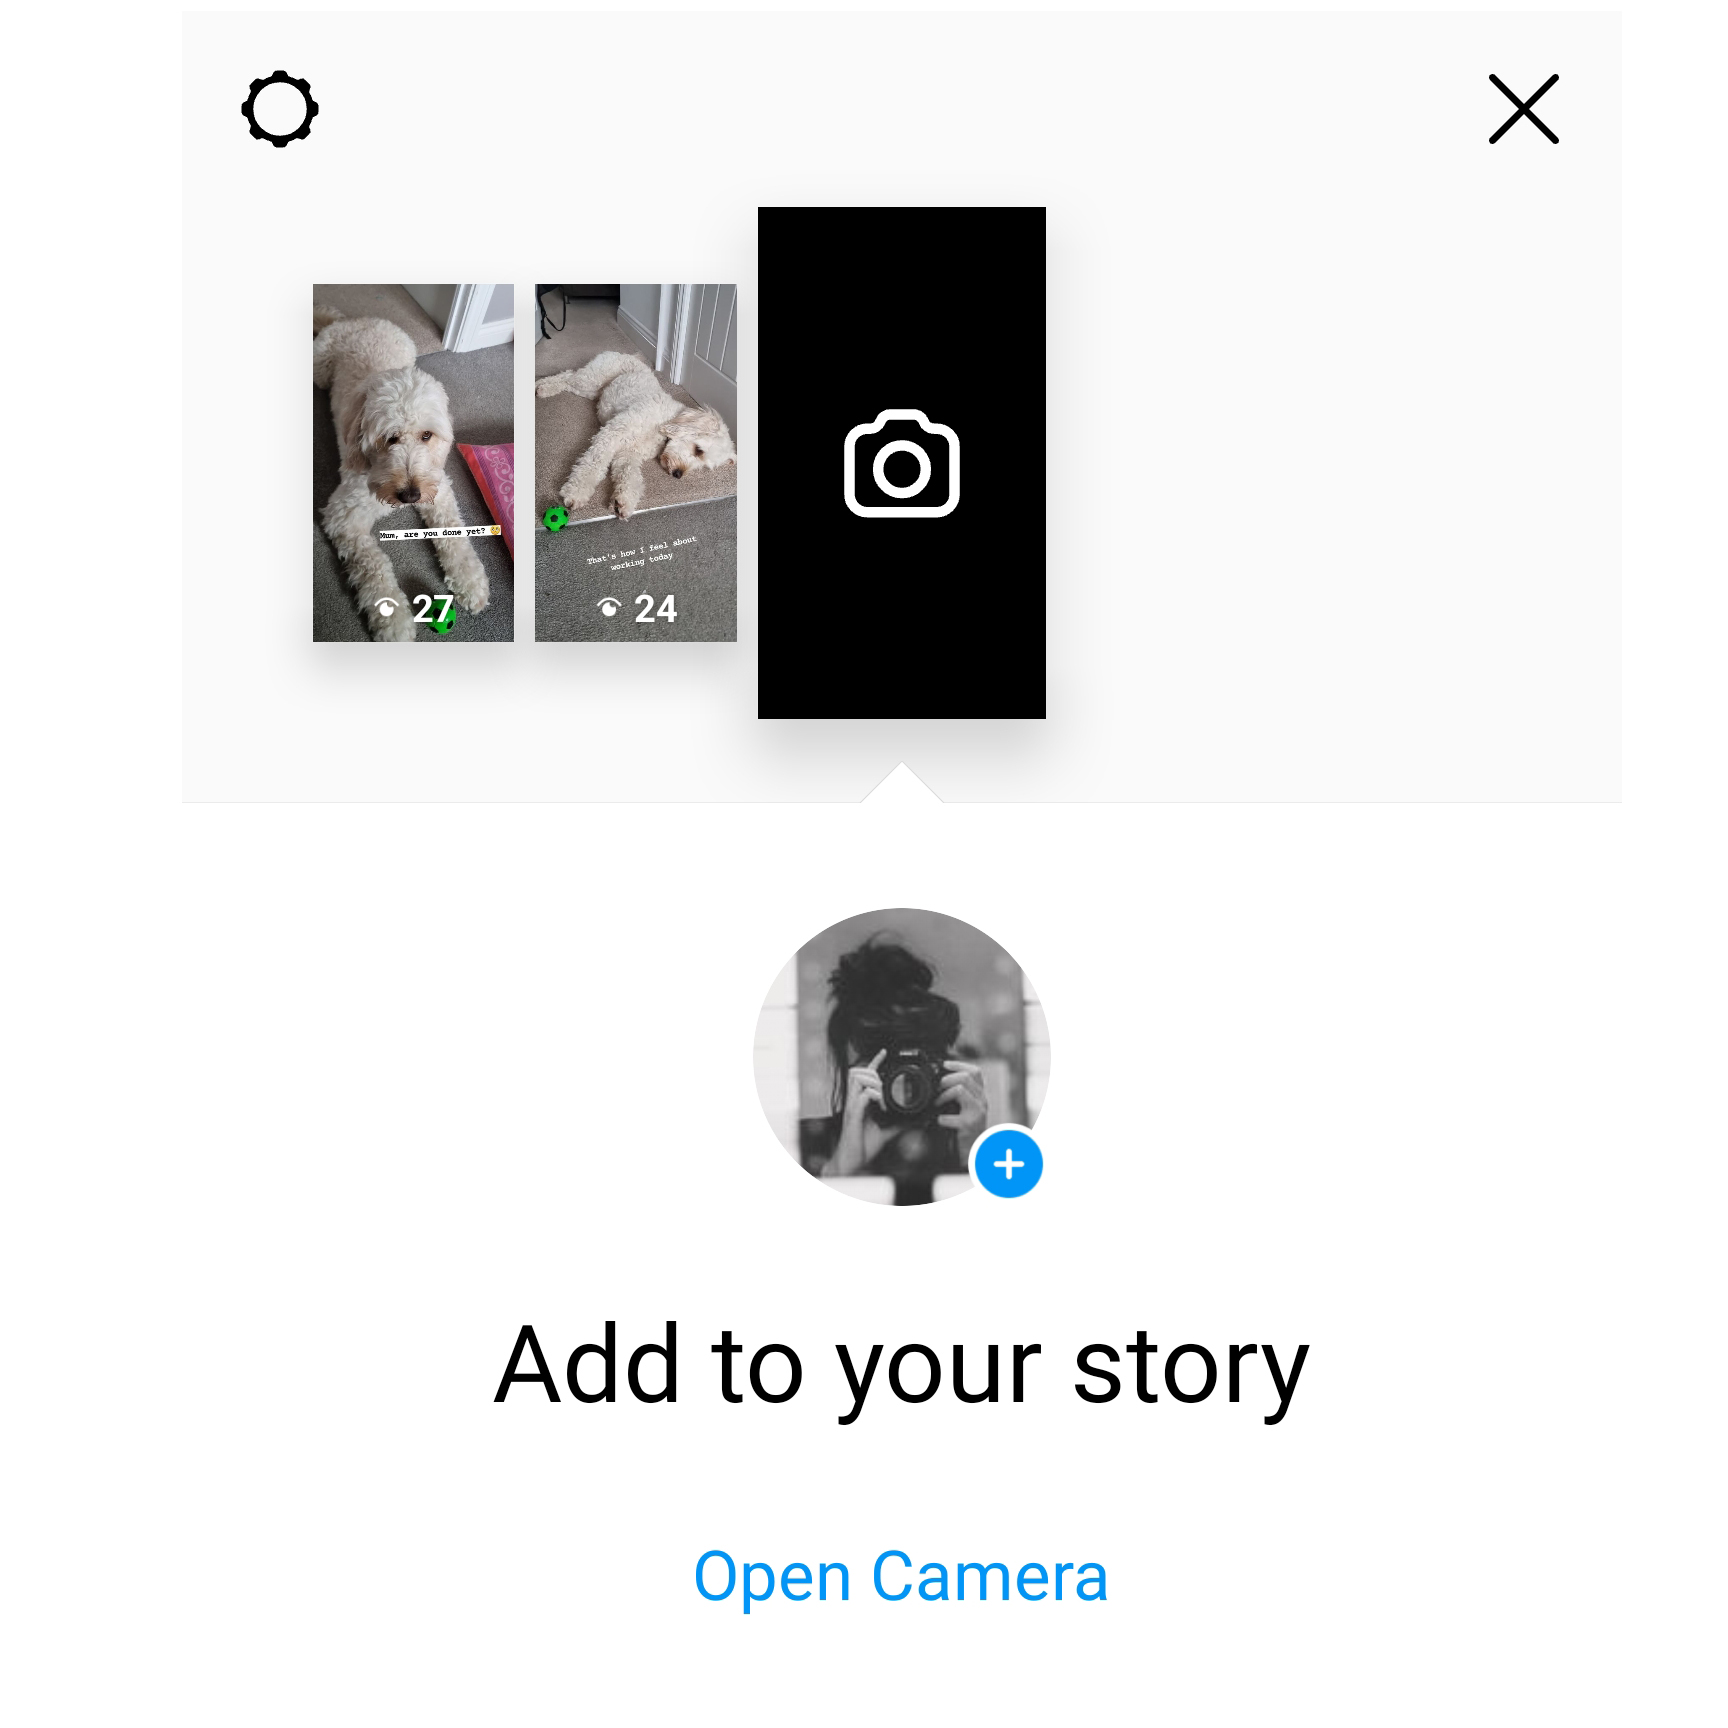
This should then open up your device's camera, and you can either swipe up to access your camera roll of recent images or tap on the box in the bottom left corner to access your image library.
Method 1: The simple way
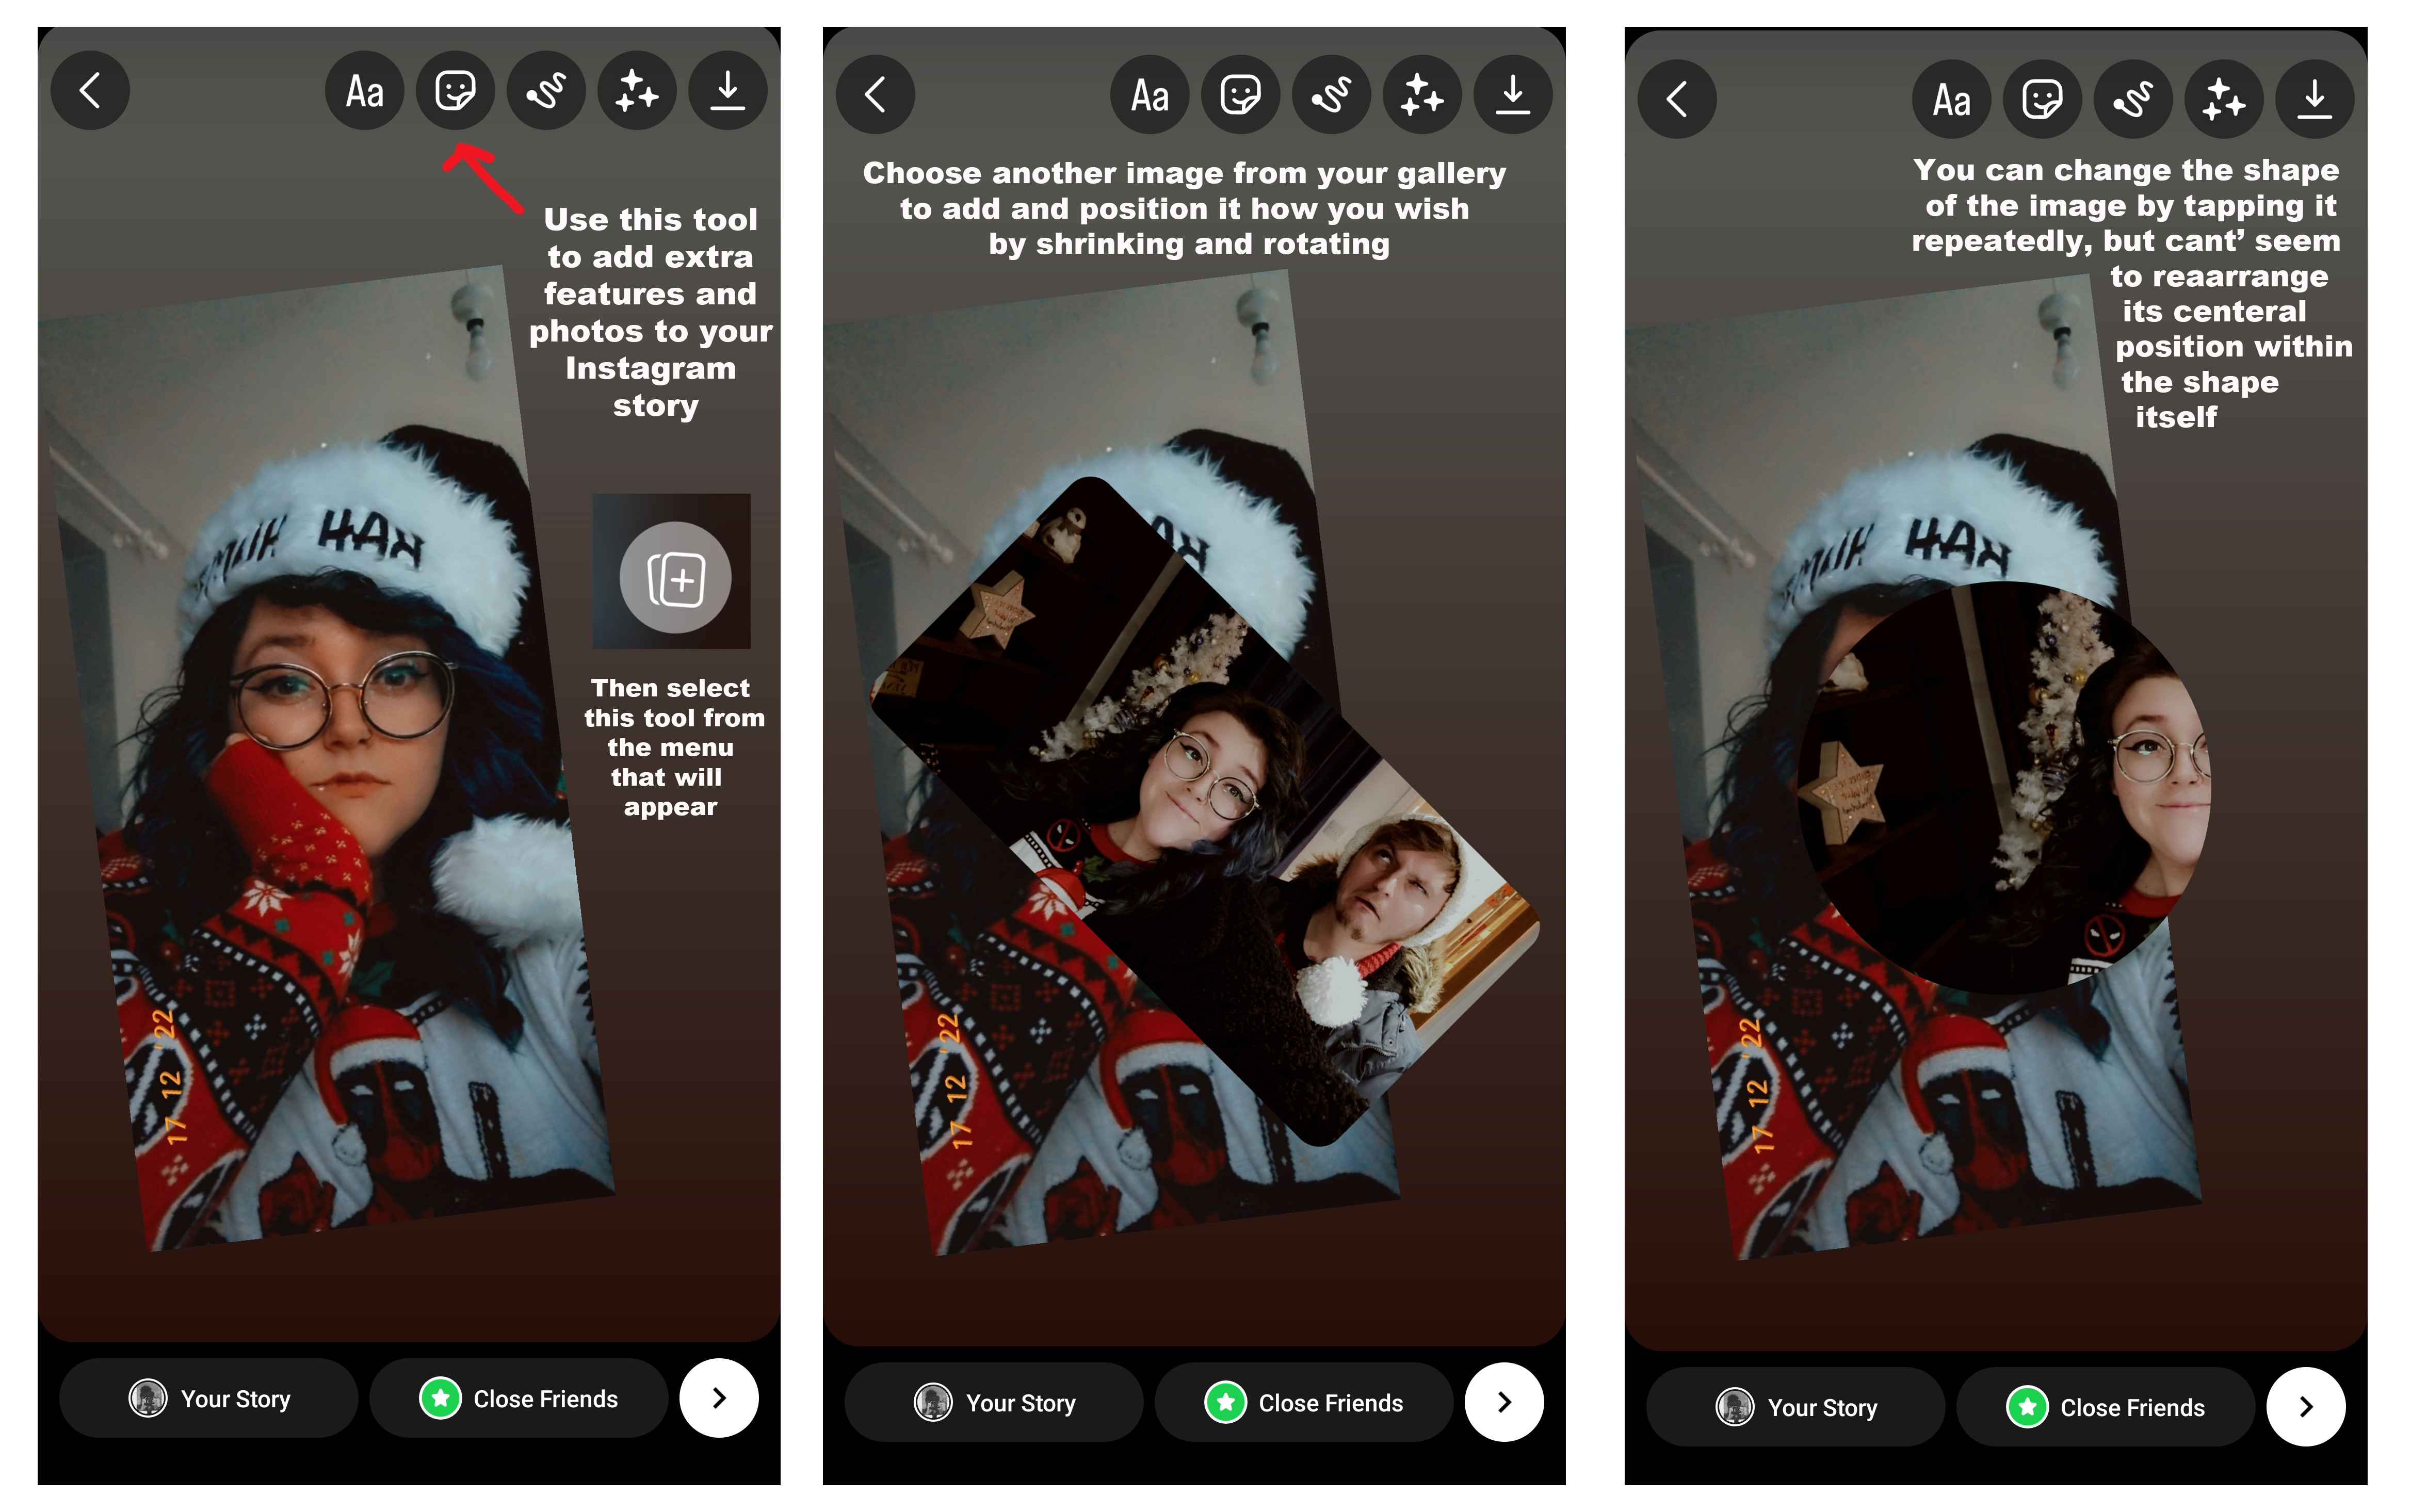
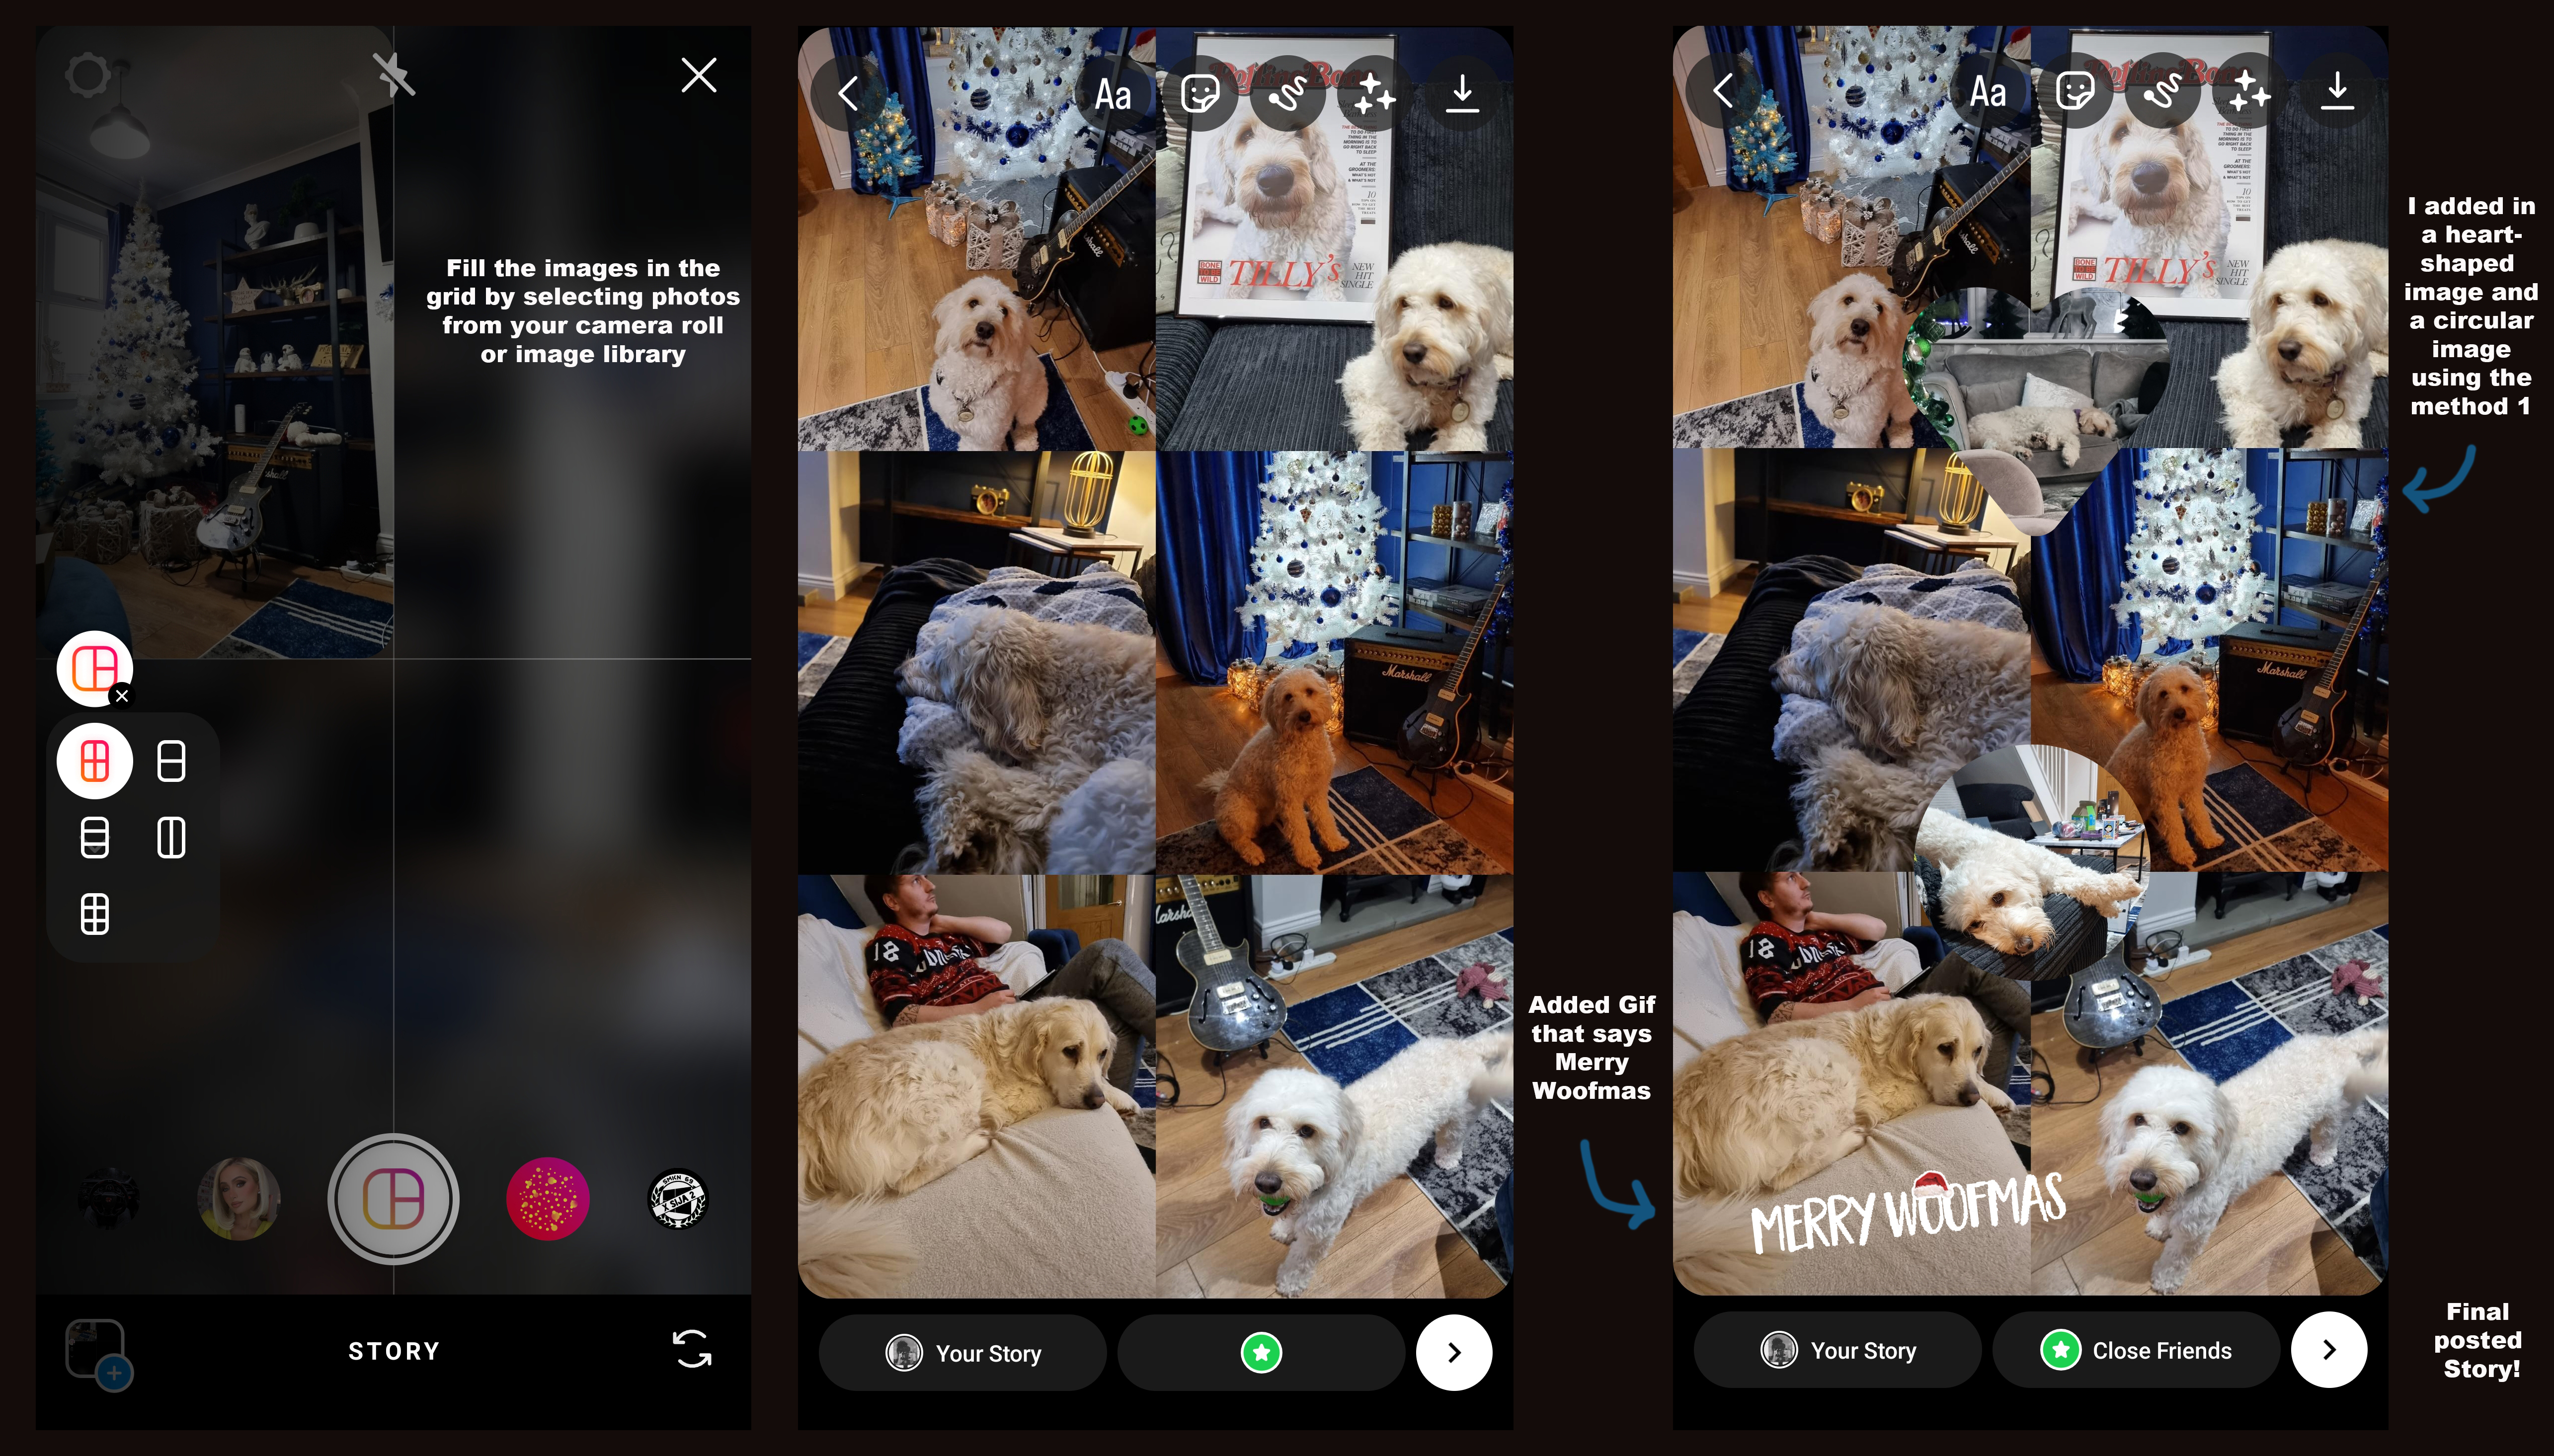
Choose any photo from your device's gallery, and once selected this should take up the entire screen of your Instagram story template. Adjust this image by shrinking or rotating it to be positioned how you would like, or leave it where it is if you plan to layer images over the top.
The next step is to tap the smiley face post-it note-looking button at the top right of the screen (or simply just swipe up) and select the greyed-out circle with a rectangle and plus in the middle. This feature will re-open your device's gallery or camera roll and allow you to choose another image that you would like to include in your story, you can include up to ten images to post in your story.
Now it's all down to your own design plans, and you can rearrange each image making it bigger or smaller to fit on the screen however you like, once you tap an image, it will be brought to the front - so bare this in mind when layering images as it can become a hassle.
You can also change the shape of the extra added images into circles, stars, and hearts too, simply by repeatedly tapping the image - but it's super irritating that you can't choose which point in the image will be the center when doing this, so it will often crop in completely the wrong place and miss out faces.
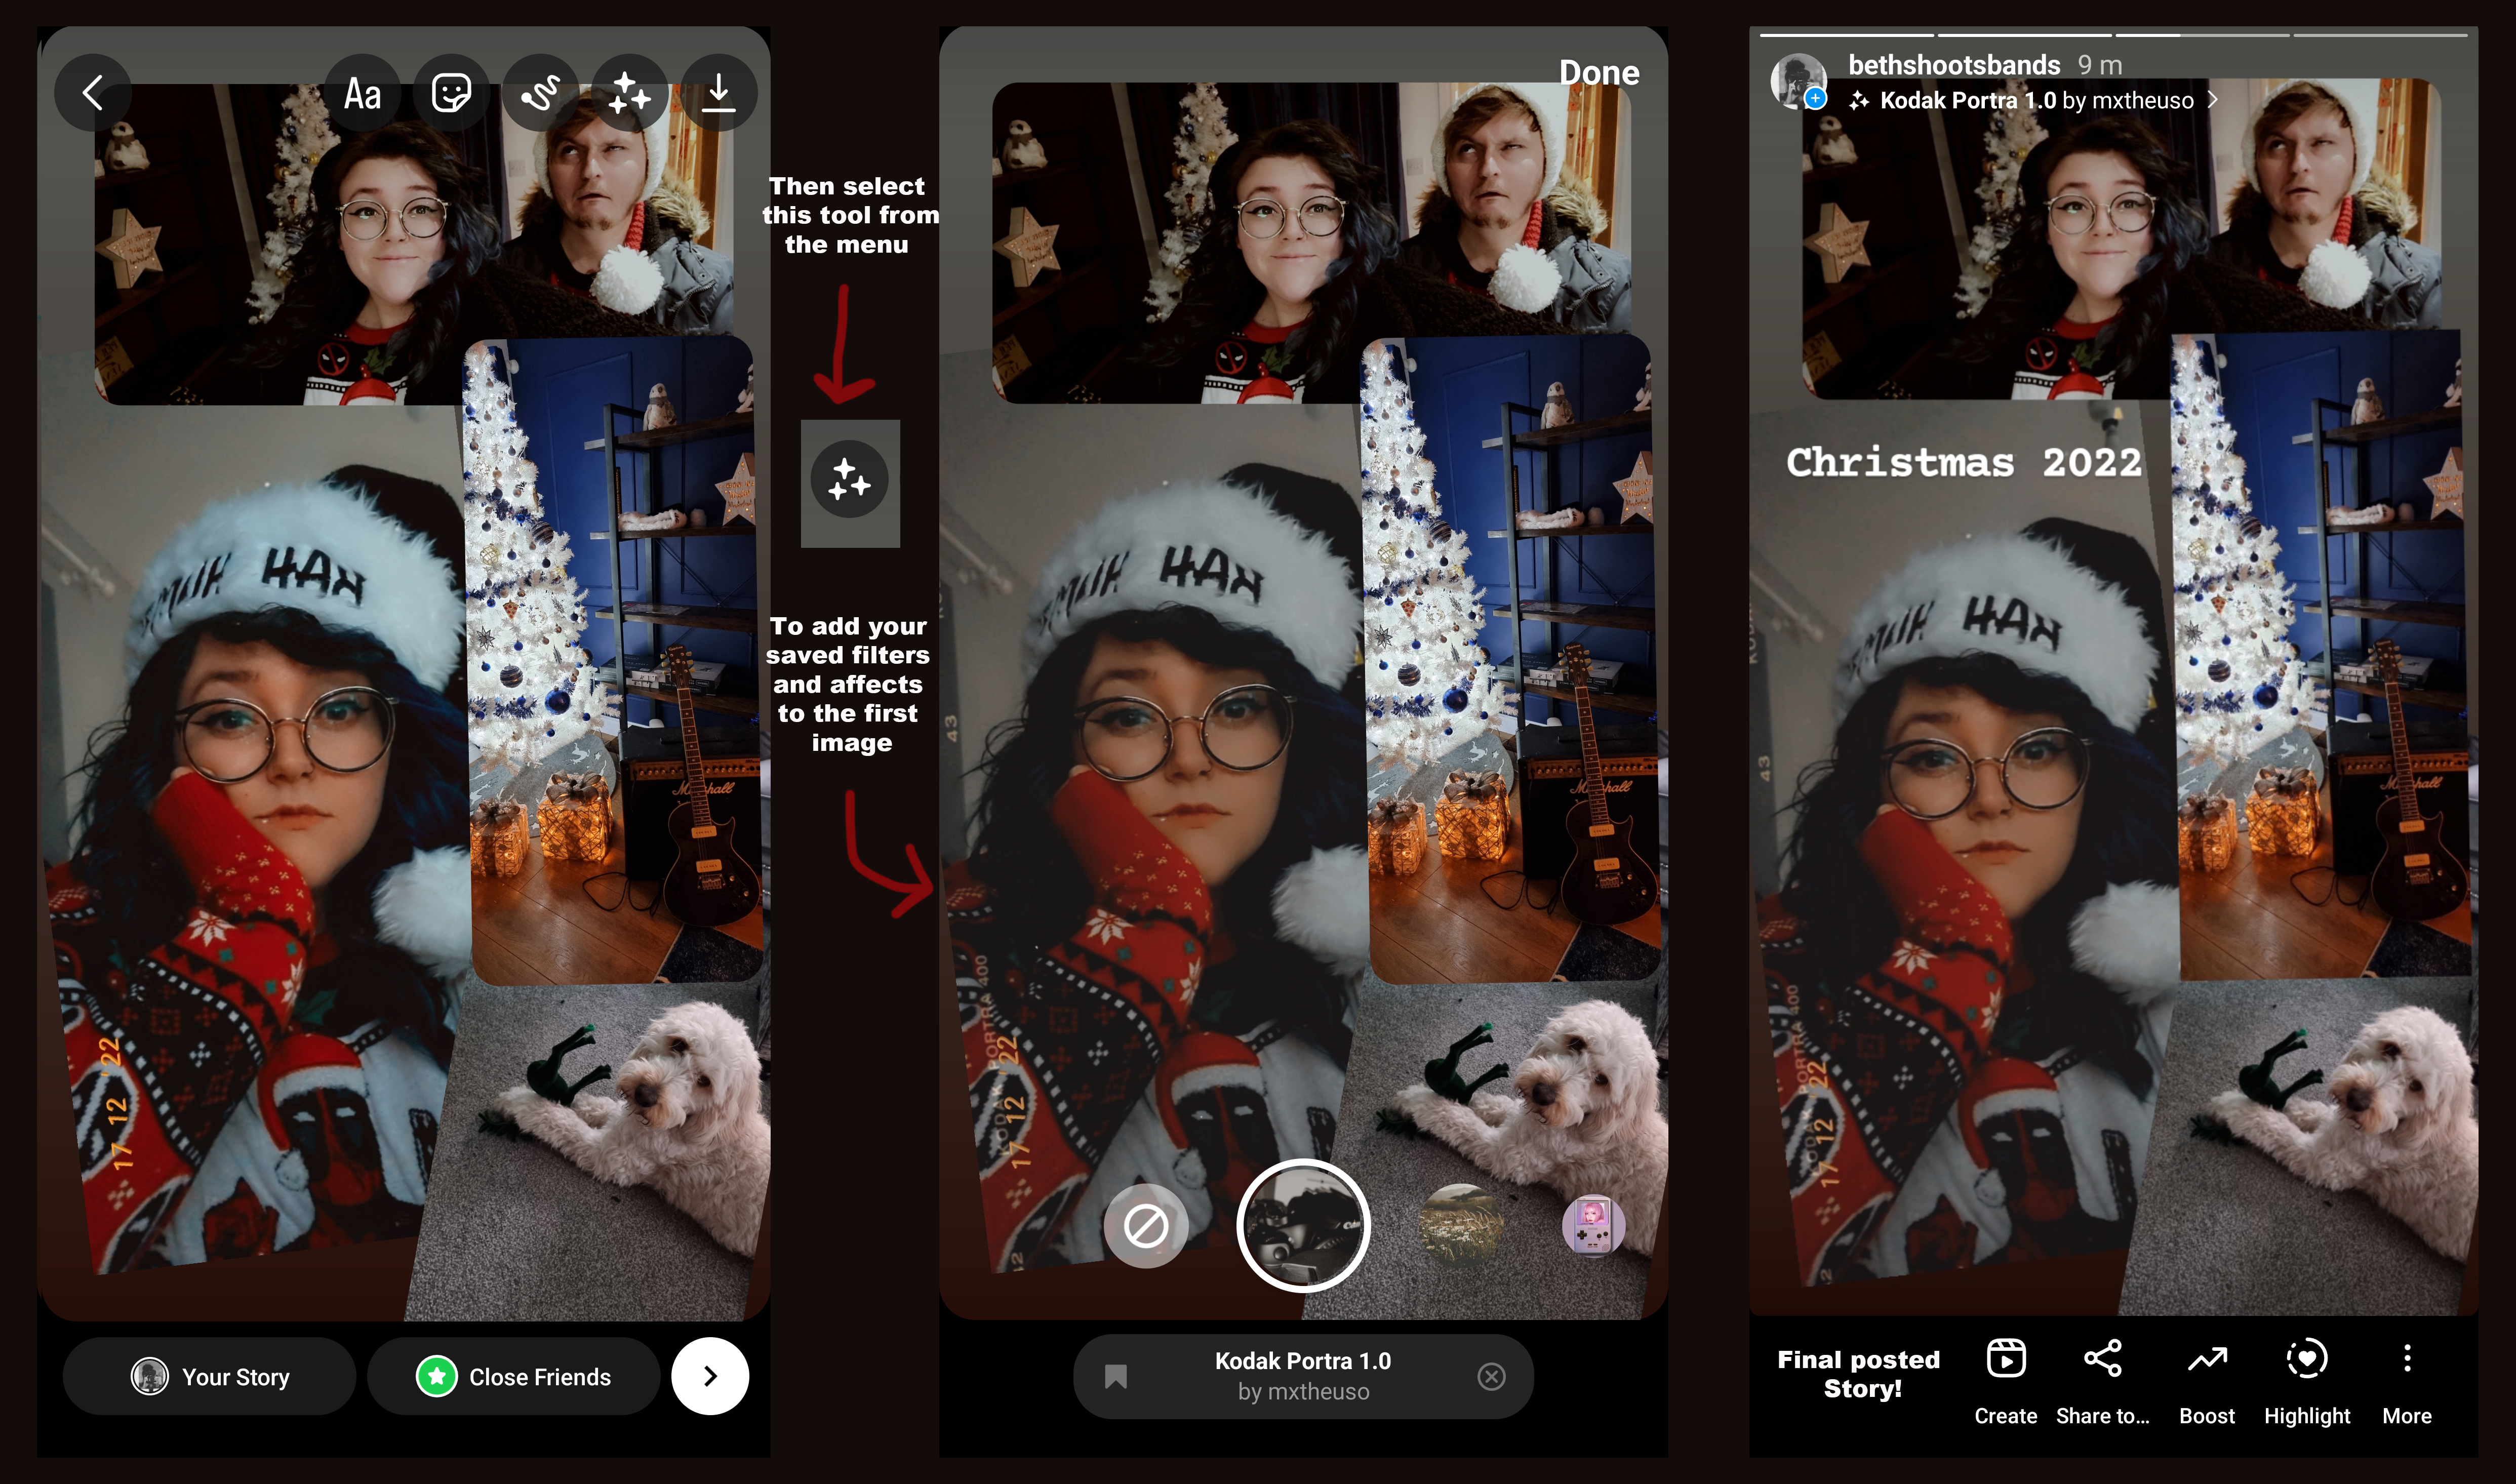
Once you're happy with the layout and placement of your story images, you're done! Simply share it with either your main story or close friends list by selecting either the left or right button on the bottom bar to choose.
However, if you want to add a bit of extra flair to your story, select the button at the top bar which has three stars in the middle of the circle, this will allow you to apply filters and themes, but strangely only to the first image that you selected for the story. You can also choose to add extras such as text, stickers, and gifs.
Method 2: Using layout
Instagram Portrait photographers especially will know the struggle of having to crop images down into the correct square ratio to post images to your home feed or use a white/black border to add an extra room, so it's usually much quicker and easier to upload photos to your story instead. Using a layout method with multiple images can look pretty awful if posted to your main feed, but on a story. It really works!
To do this, the first step is to open up your story as you usually would, but instead of choosing an image, first, select the layout button and choose the format in that you want your images to be laid out, you can always change this later. Next, select the images that you want to include in the layout by swiping up or selecting the square in the bottom left corner, or use your device to snap a photo in real-time to include.
You can tap an image to delete it or press and hold to move it to another image block. Once you're done and happy with the layout, you can add extras such as a gif or text, and you can even add more images to it should you choose, using the same method as above and selecting the grey button with the plus inside to attach more.
Method 3: Using Unfold – more professional
If you're someone who uses Squarespace to host your online website or portfolio, you may have already heard of Unfold, an app produced by Squarespace. The app is free to download, but does offer a paid Plus subscription with better features, although the example I will use below is made with one of Unfold's free templates.
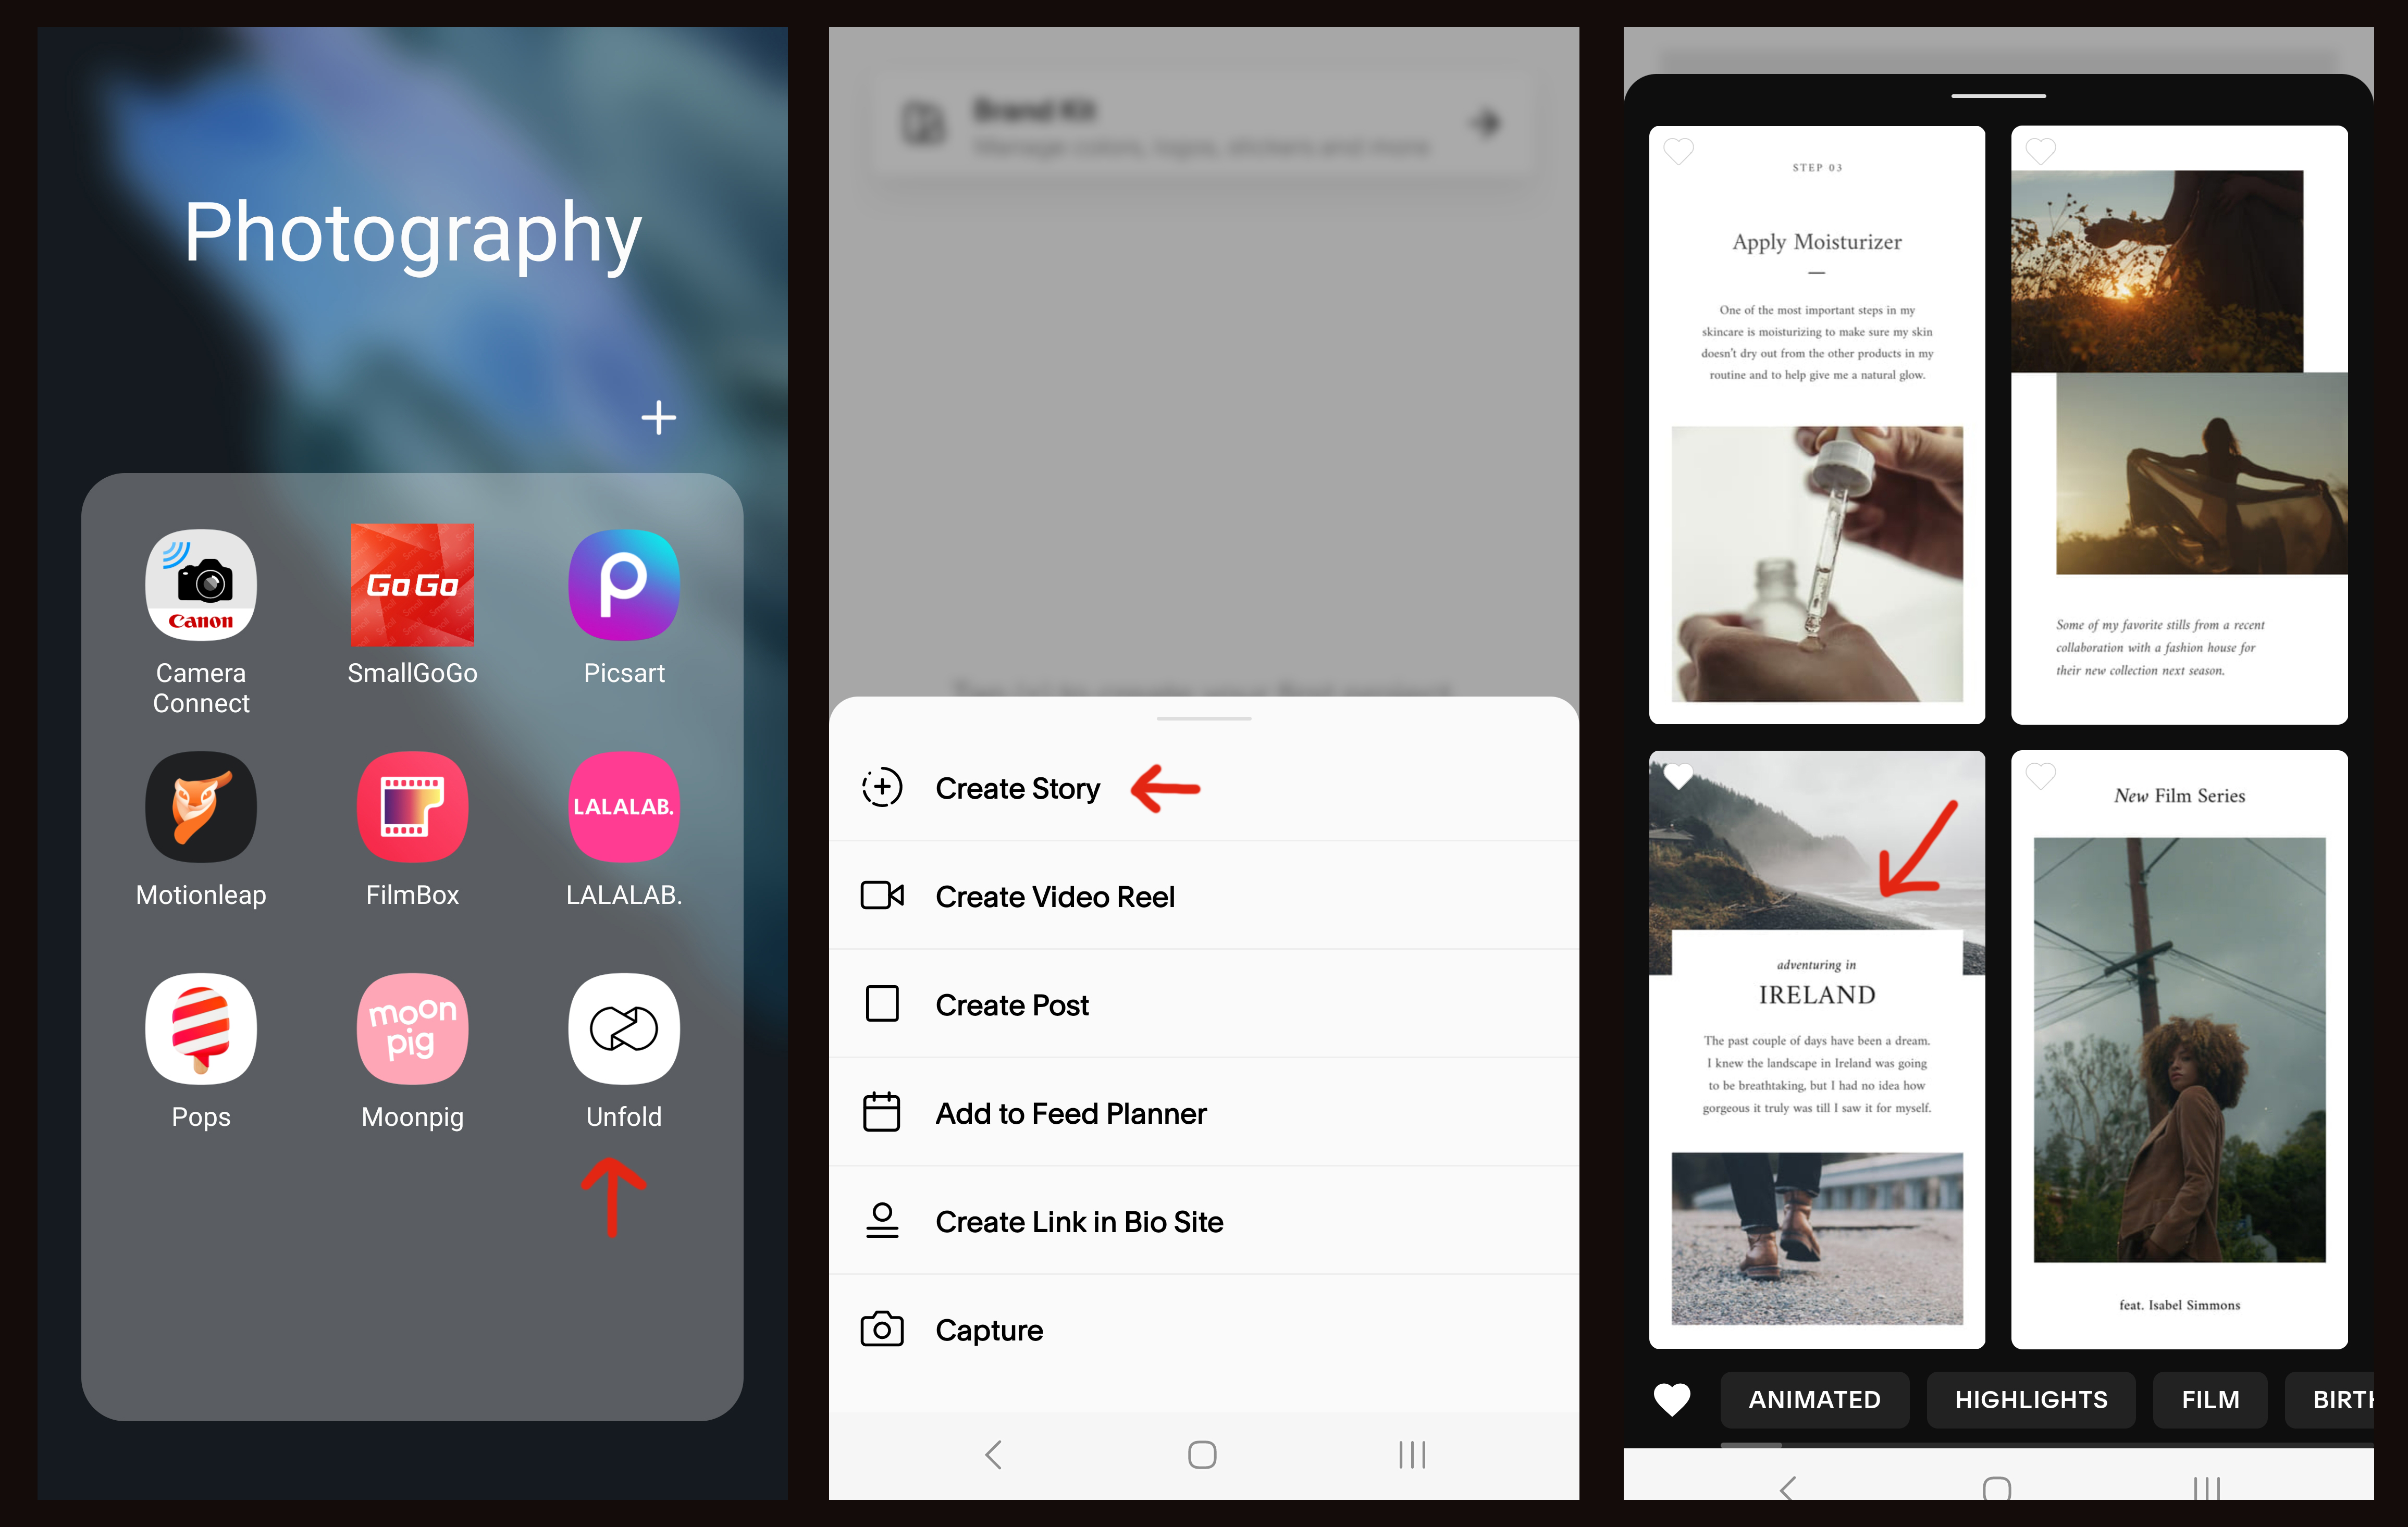
Once you've downloaded the app, you may need to create an account (again, this is free) and then create a new project by tapping the black circle with a plus in the middle, and select 'Create Story'. This will then provide you with a selection of templates to choose from, though be aware that some are locked for Plus tier only.
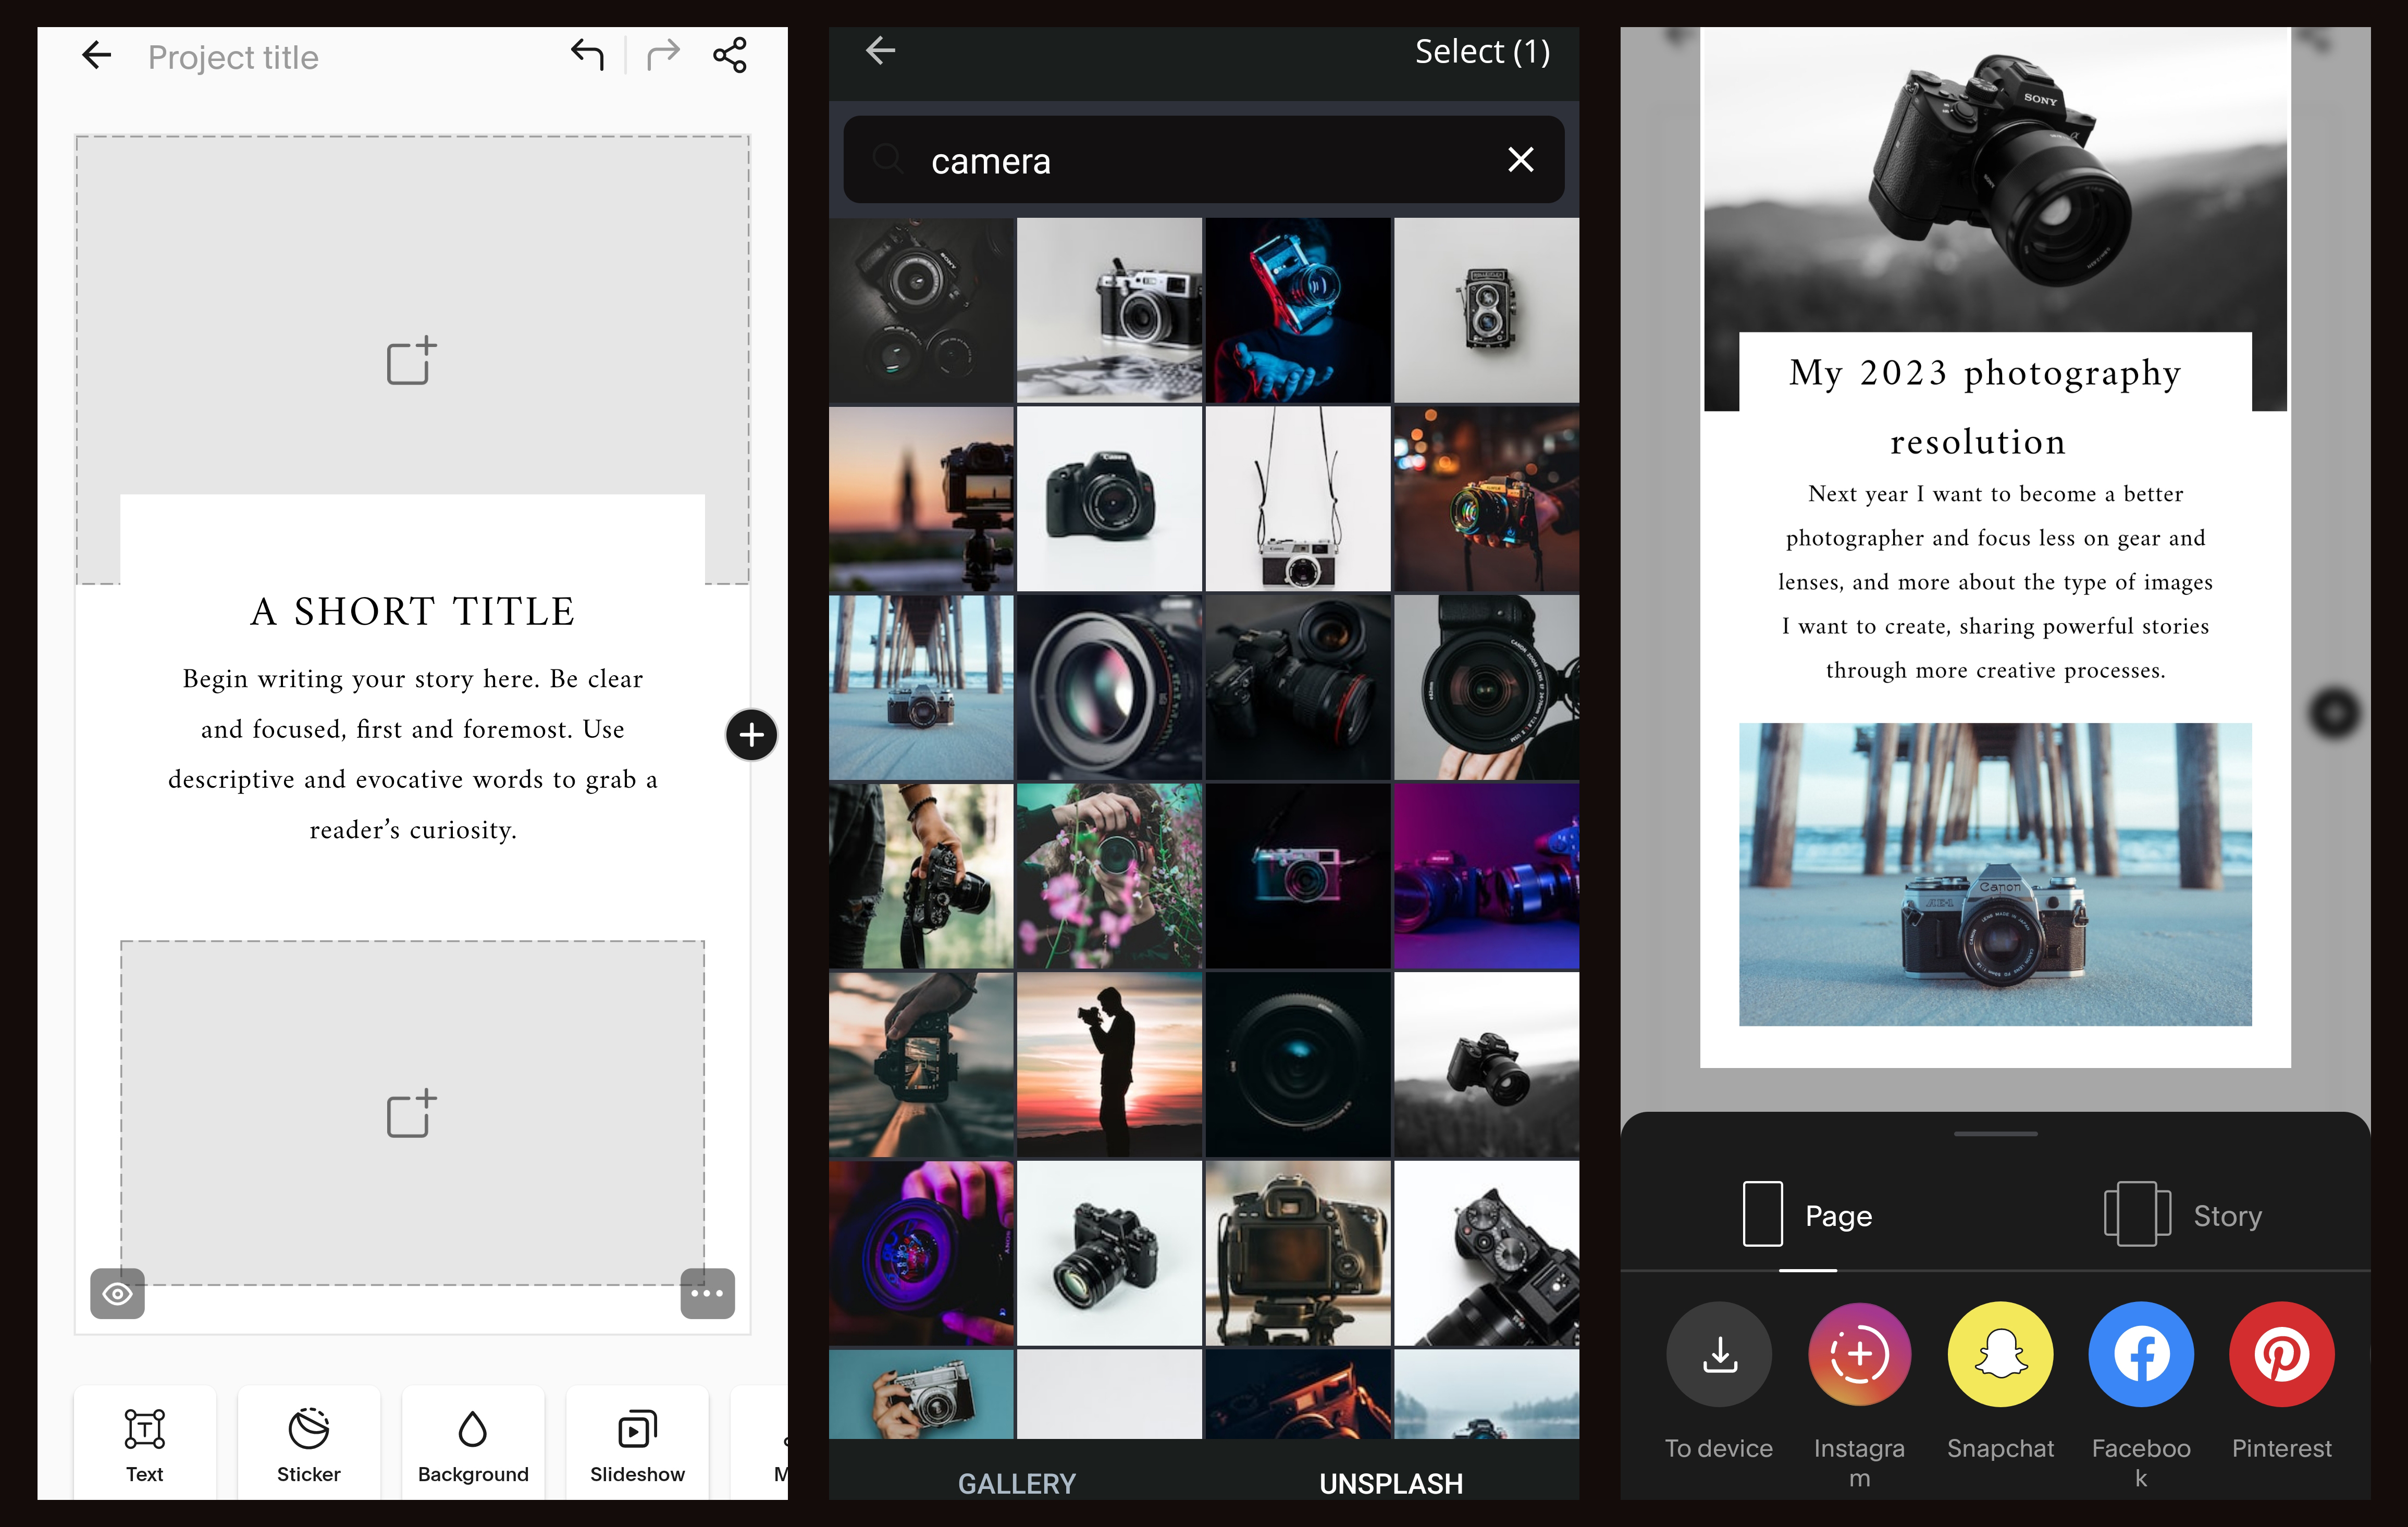
Once you've chosen a template, simply replace the sample text and blank squares with your own text and images, the app will also let you search for and include free-use images from Unsplash to use instead.
You can export your story template straight to your Instagram story, your smartphone gallery, or even Facebook, Snapchat, and Pinterest. The Unfold app will also let you create a story series, as opposed to just one 'page' of a story should you choose to create one that flows and looks professional.
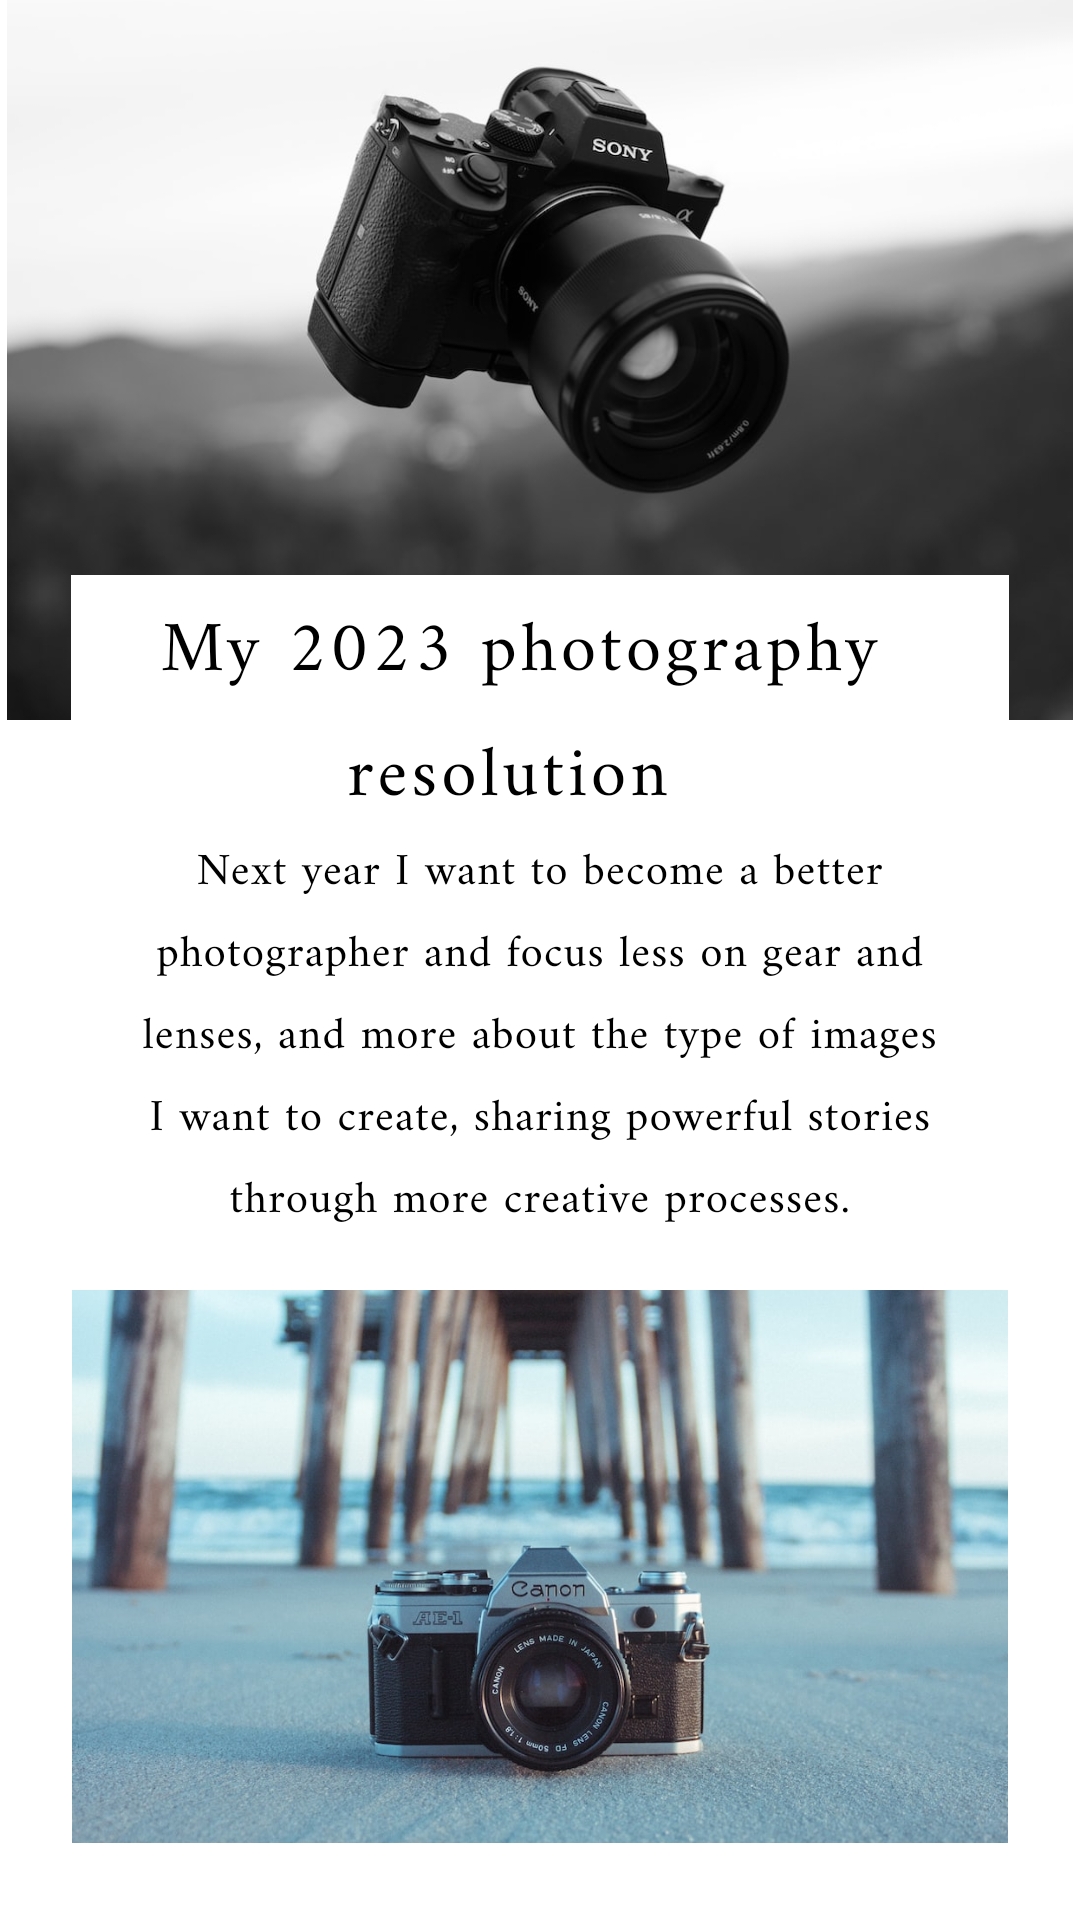
Whan uploading the template to Instagram, you can again add even more images if you wish using Method 1 to attach more to the story, though if you're going for a sleek and professional vibe then this may be best avoided.
So there you have it, three quick and easy ways to add more images and content to a single Instagram story upload without having to upload 10 singular images separately and annoy your followers. Nobody likes viewing a long and dragged-out story, unless it's professional and engaging of course.
• You may also be interested in learning how to use Instagram Reels, or perhaps you need to know How to use Instagram filters and want to understand the best way to create Instagram-style filters, and while you're at it organize your grid with similar or matching content.
Beth kicked off her journalistic career as a staff writer here at Digital Camera World, but has since moved over to our sister site Creative Bloq, where she covers all things tech, gaming, photography, and 3D printing. With a degree in Music Journalism and a Master's degree in Photography, Beth knows a thing or two about cameras – and you'll most likely find her photographing local gigs under the alias Bethshootsbands. She also dabbles in cosplay photography, bringing comic book fantasies to life, and uses a Canon 5DS and Sony A7III as her go-to setup.
