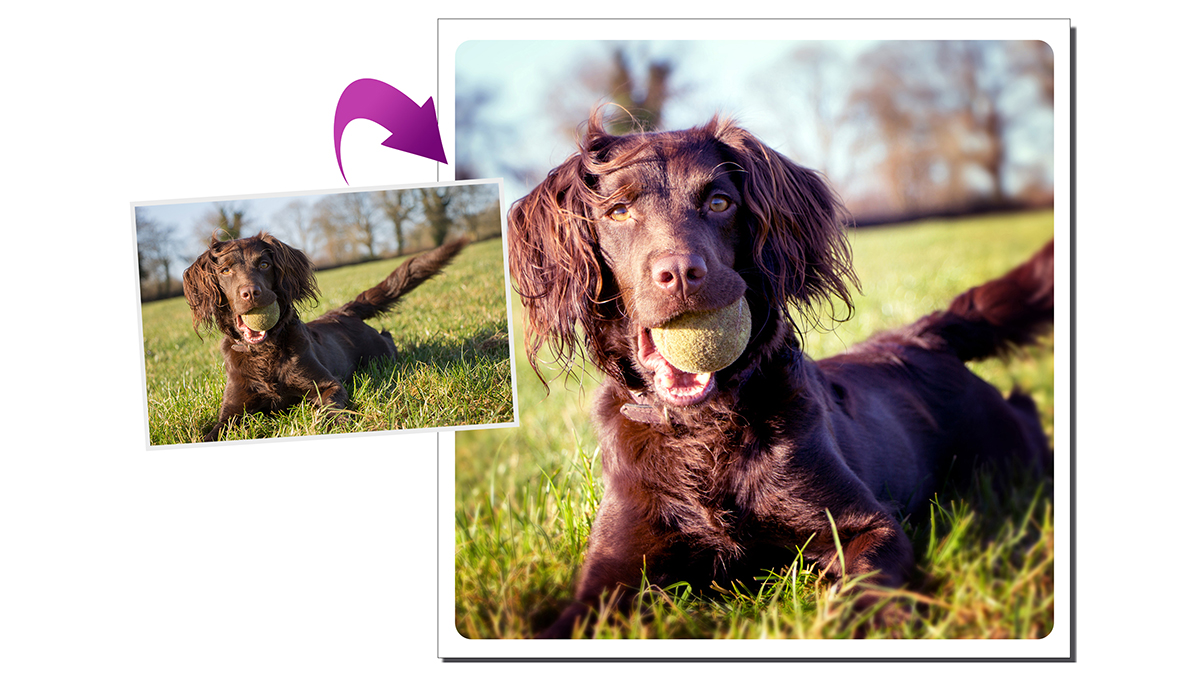
- Download project files here
With smartphones offering increasingly better cameras, photography has come accessible to even the most technically challenged. With social media playing a large part in people’s daily routines, you can’t escape the hordes of photo updates of people’s whereabouts – or even go a day without seeing what they had for lunch…
Lend a funky lo-fi ‘Instagram’ look to your images
Time needed: 10 minutes
Skill level: Easy
Kit needed: Photoshop Elements
As ‘iPhoneography’ has grown in popularity, we’ve seen an array of image-editing and sharing apps, offering a whole host of weird and wonderful ways to process your photos. None more so than with Instagram, which offers numerous vintage and retro-inspired filters with a tap of a finger.
Although image quality can’t hope to match that of a DSLR, it doesn’t matter too much if you’re only uploading to social media sites such as Facebook and Twitter. So if you’ve ever tried, or are considering, printing your retro phone snaps, don’t expect quality prints.
• 10 tips for Instagram success
If you want to create high-quality images with a retro feel then it’s easy enough to do it in Photoshop, however, while it will require more than one click of a button, you’ll have far more control over the finished image. In this tutorial we’ll show you how to get the Instagram look by showing you how to achieve some key effects. We’ll begin with a square crop, then show you how to achieve a retro and contrasty colour look, how to recreate the tilt-shift and vignette effects, and finally how to add a rounded, rectangular border to add the finishing flourish.
Step-by-step guide: Getting the Instagram look
Don't be so destructive
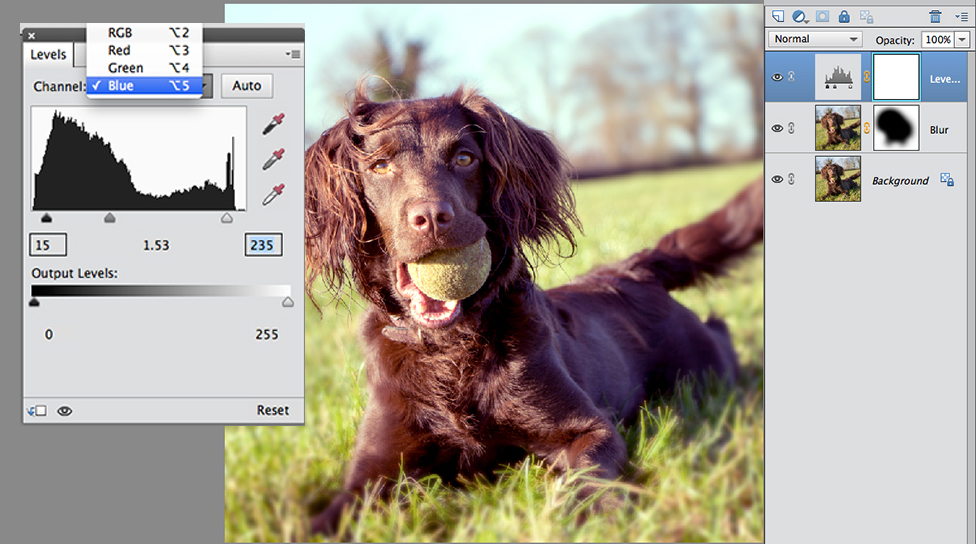
By working with layers and layer masks you can edit our image non-destructively. This means that you can easily return to the original image by removing layers that you decide you don’t want and you can go back and tweak each of the adjustments applied at any time, too. For example, if you want to tweak the colours, double-click on the Levels adjustment layer thumbnail above the ‘Background’ layer; you can go into the channels the same way as before and adjust until you’re happy with the final look.
Hit D to reset the foreground to black and background to white, and hit X to toggle between the two when working with masks
1. Make it square
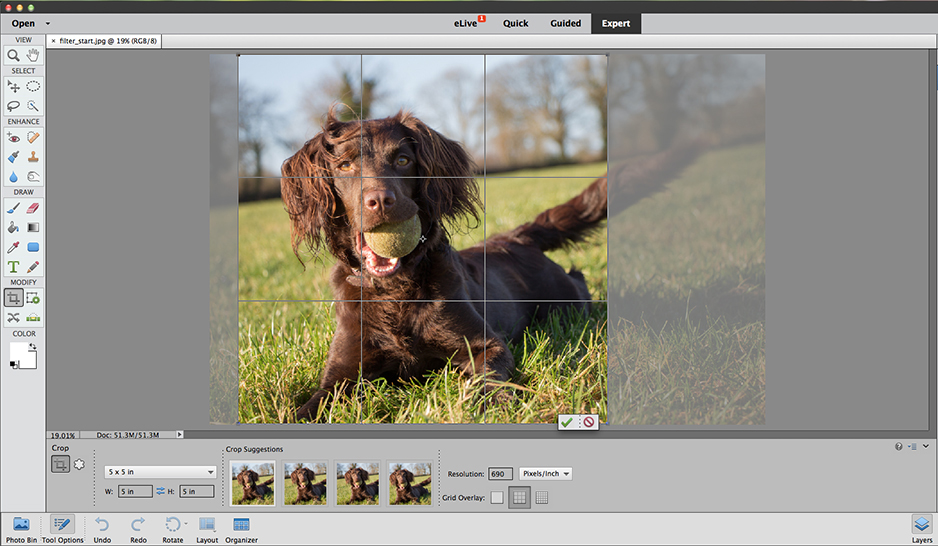
Open filter_start.jpg or your own photo into Elements. Grab the Crop tool and select the 5x5in preset for a square crop. Elements will suggest crops to choose from – or position it yourself by clicking on the box and moving it around. Click the green tick to apply.
2. Blur the background
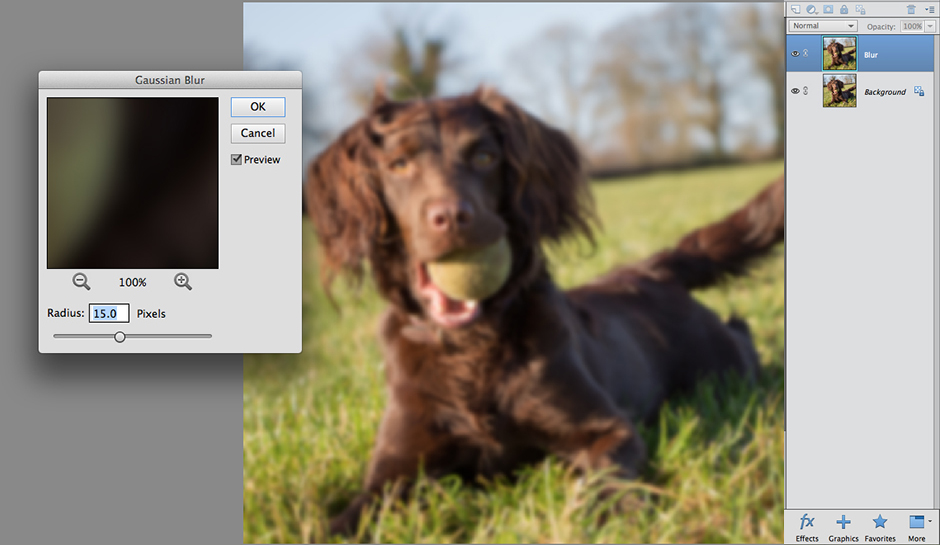
Duplicate the ‘Background ‘layer, rename it ‘blur’. Go to Filter>Blur>Gaussian Blur, set Radius to 15 pixels. Add a layer mask and paint with black at 100% opacity to reveal the sharp subject on the layer beneath. Lower the brush opacity to blend the edges.
3. Adjust the colours
Add a Levels adjustment layer, select the Red channel and set Shadows: 10, Midtones: 1.39, Highlights: 234. Target the Green channel, set Shadows: 15, Midtones: 1.06, Highlights: 225. On the Blue channel set Shadows: 15, Midtones: 1.54, Highlights: 235.
4. Create a vignette
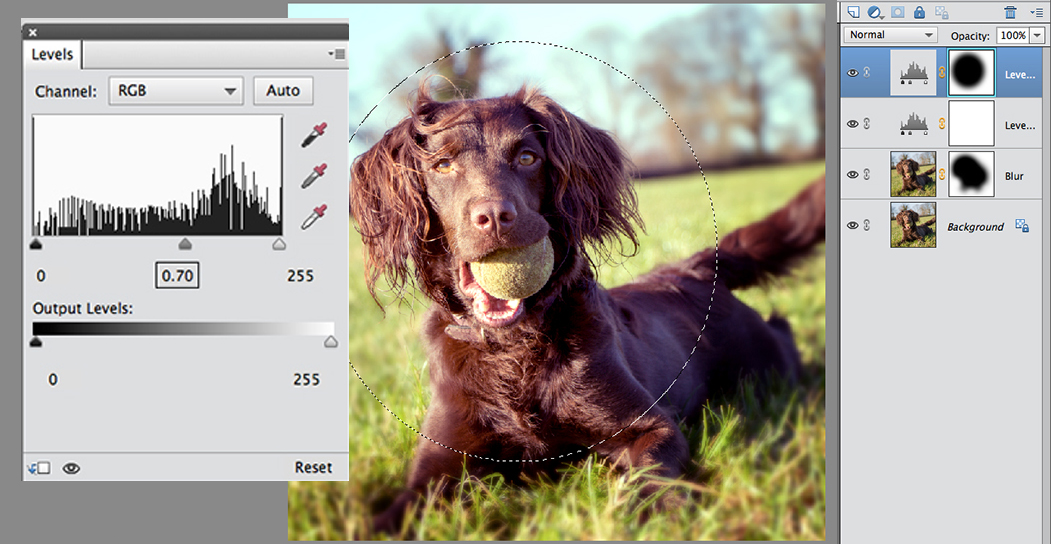
Add another Levels adjustment layer. Set Midtones: 0.70 to darken the image. Grab the Elliptical Marquee tool, set Feather: 200px. Click-drag to create a circular selection around the subject and hit Ctrl+I to invert the Levels adjustment to create a vignette.
5. Boost contrast
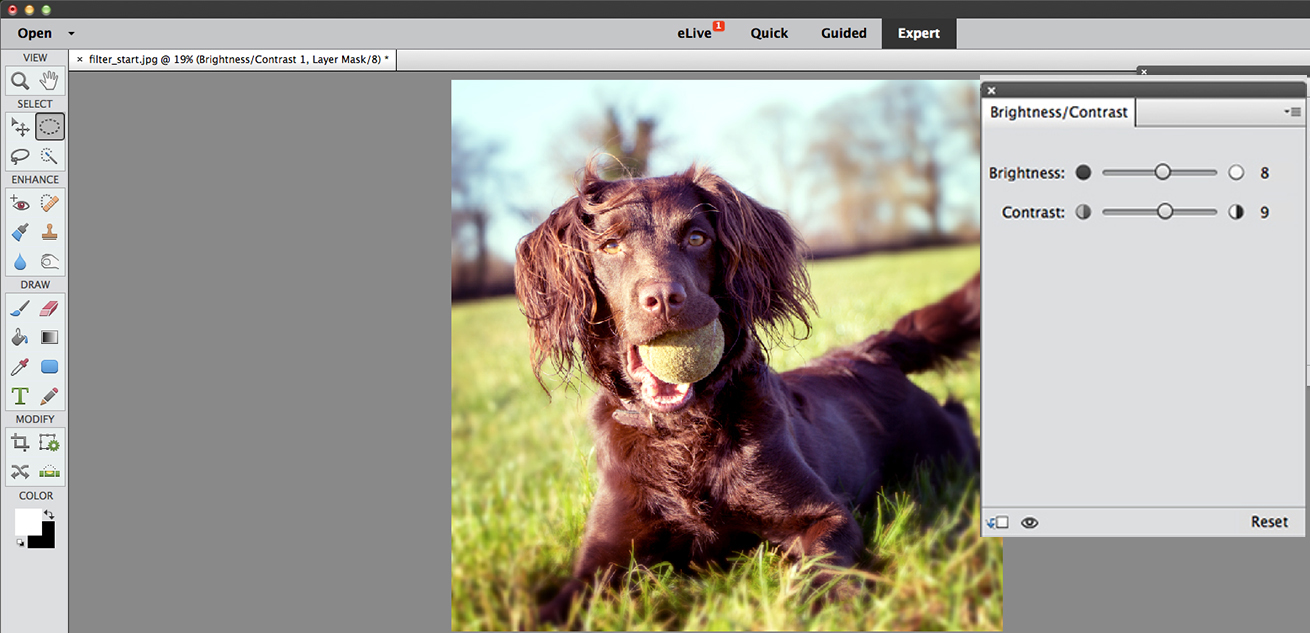
Add a Brightness/Contrast adjustment layer, with Brightness: 8, Contrast: 9. Grab Shape tool and select Rounded Rectangle. Set Radius: 90px and Geometry Options: Square. With Shape Layer: Normal, click just outside the top-left corner and drag to bottom-right.
6. Add a border
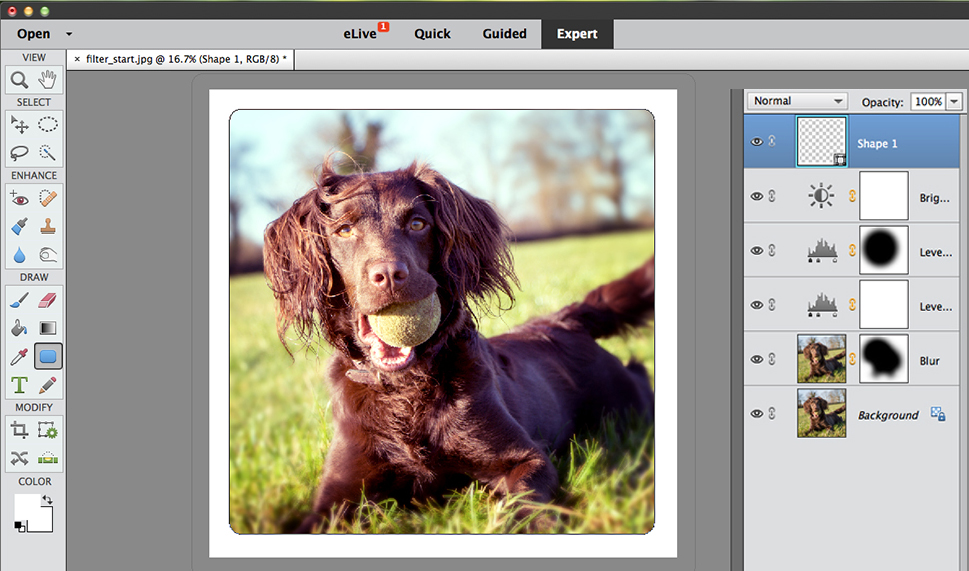
A rounded rectangle will cover entire image. Select Subtract from Geometry Options and draw another a little further inside to remove the middle, creating a border. Use the Move tool to fine-tune. Select white for the border, in keeping with the Instagram look.
Read more: How to use Instagram for your photography
The best camera deals, reviews, product advice, and unmissable photography news, direct to your inbox!
PhotoPlus: The Canon Magazine is the world’s only 100% Canon-focused title on the newsstand. Launched in 2007, for 14 years it has delivered news, reviews, buying guides, features, inspirational projects and tutorials on cameras, lenses, tripods, gimbals, filters, lighting and all manner of photography equipment.
Aimed squarely at enthusiast photographers who use the Canon DSLR or mirrorless camera systems, all content is tailored to Canon users – so everything from techniques to product tests are tailored to those using the EOS camera system.
Editor Peter Travers brings 14 years of experience as both a journalist and professional photographer, with Technique Editor Dan Mold shoring up the magazine with his 6 years of expertise.

