Get the 19th Century wet plate look in Affinity with these FREE texture files
Here's how to create the 19th Century wet plate look in Affinity, using a selection of FREE texture files
The best camera deals, reviews, product advice, and unmissable photography news, direct to your inbox!
You are now subscribed
Your newsletter sign-up was successful
Watch video: Make wet plate photo effects in Affinity Photo
If you want to evoke the past in your photos, why not style them to look as if they were captured decades – or even centuries – ago. There are all sorts of tricks we can employ in Affinity Photo to do so.
We’ll explore a host of vintage editing techniques here. First, we’ll use a texture in combination with a layer blending mode. This is an easy way to add faded areas, dirt and grime to our image, as we can transfer the messy bits from our texture onto our photo with ease.
Once done, we’ll use Adjustment Layers to remove the color and add a tint just like an old vintage photo. We can also use filter effects to mimic the imperfections we’d often see in old photos, like soft blurry corners and heavy, dark vignetting. Finally, we can add a vintage border to give the image the look of an old wet plate.
We’ve supplied a fabulous array of old borders among the free project files for you to experiment with. They’re based on the wet plate collodion technique used by photographers in the 19th Century. This required photo processing in a mobile darkroom, and resulted in a negative image on a glass plate.
Over time the chemicals on the glass would deteriorate and flake, and the surface might become covered in dust and grime. As such, the ten border files we've supplied come with two layers – one for the edges, another for the dusty center, area which can be blended with your photos with ease.
1. Copy and paste
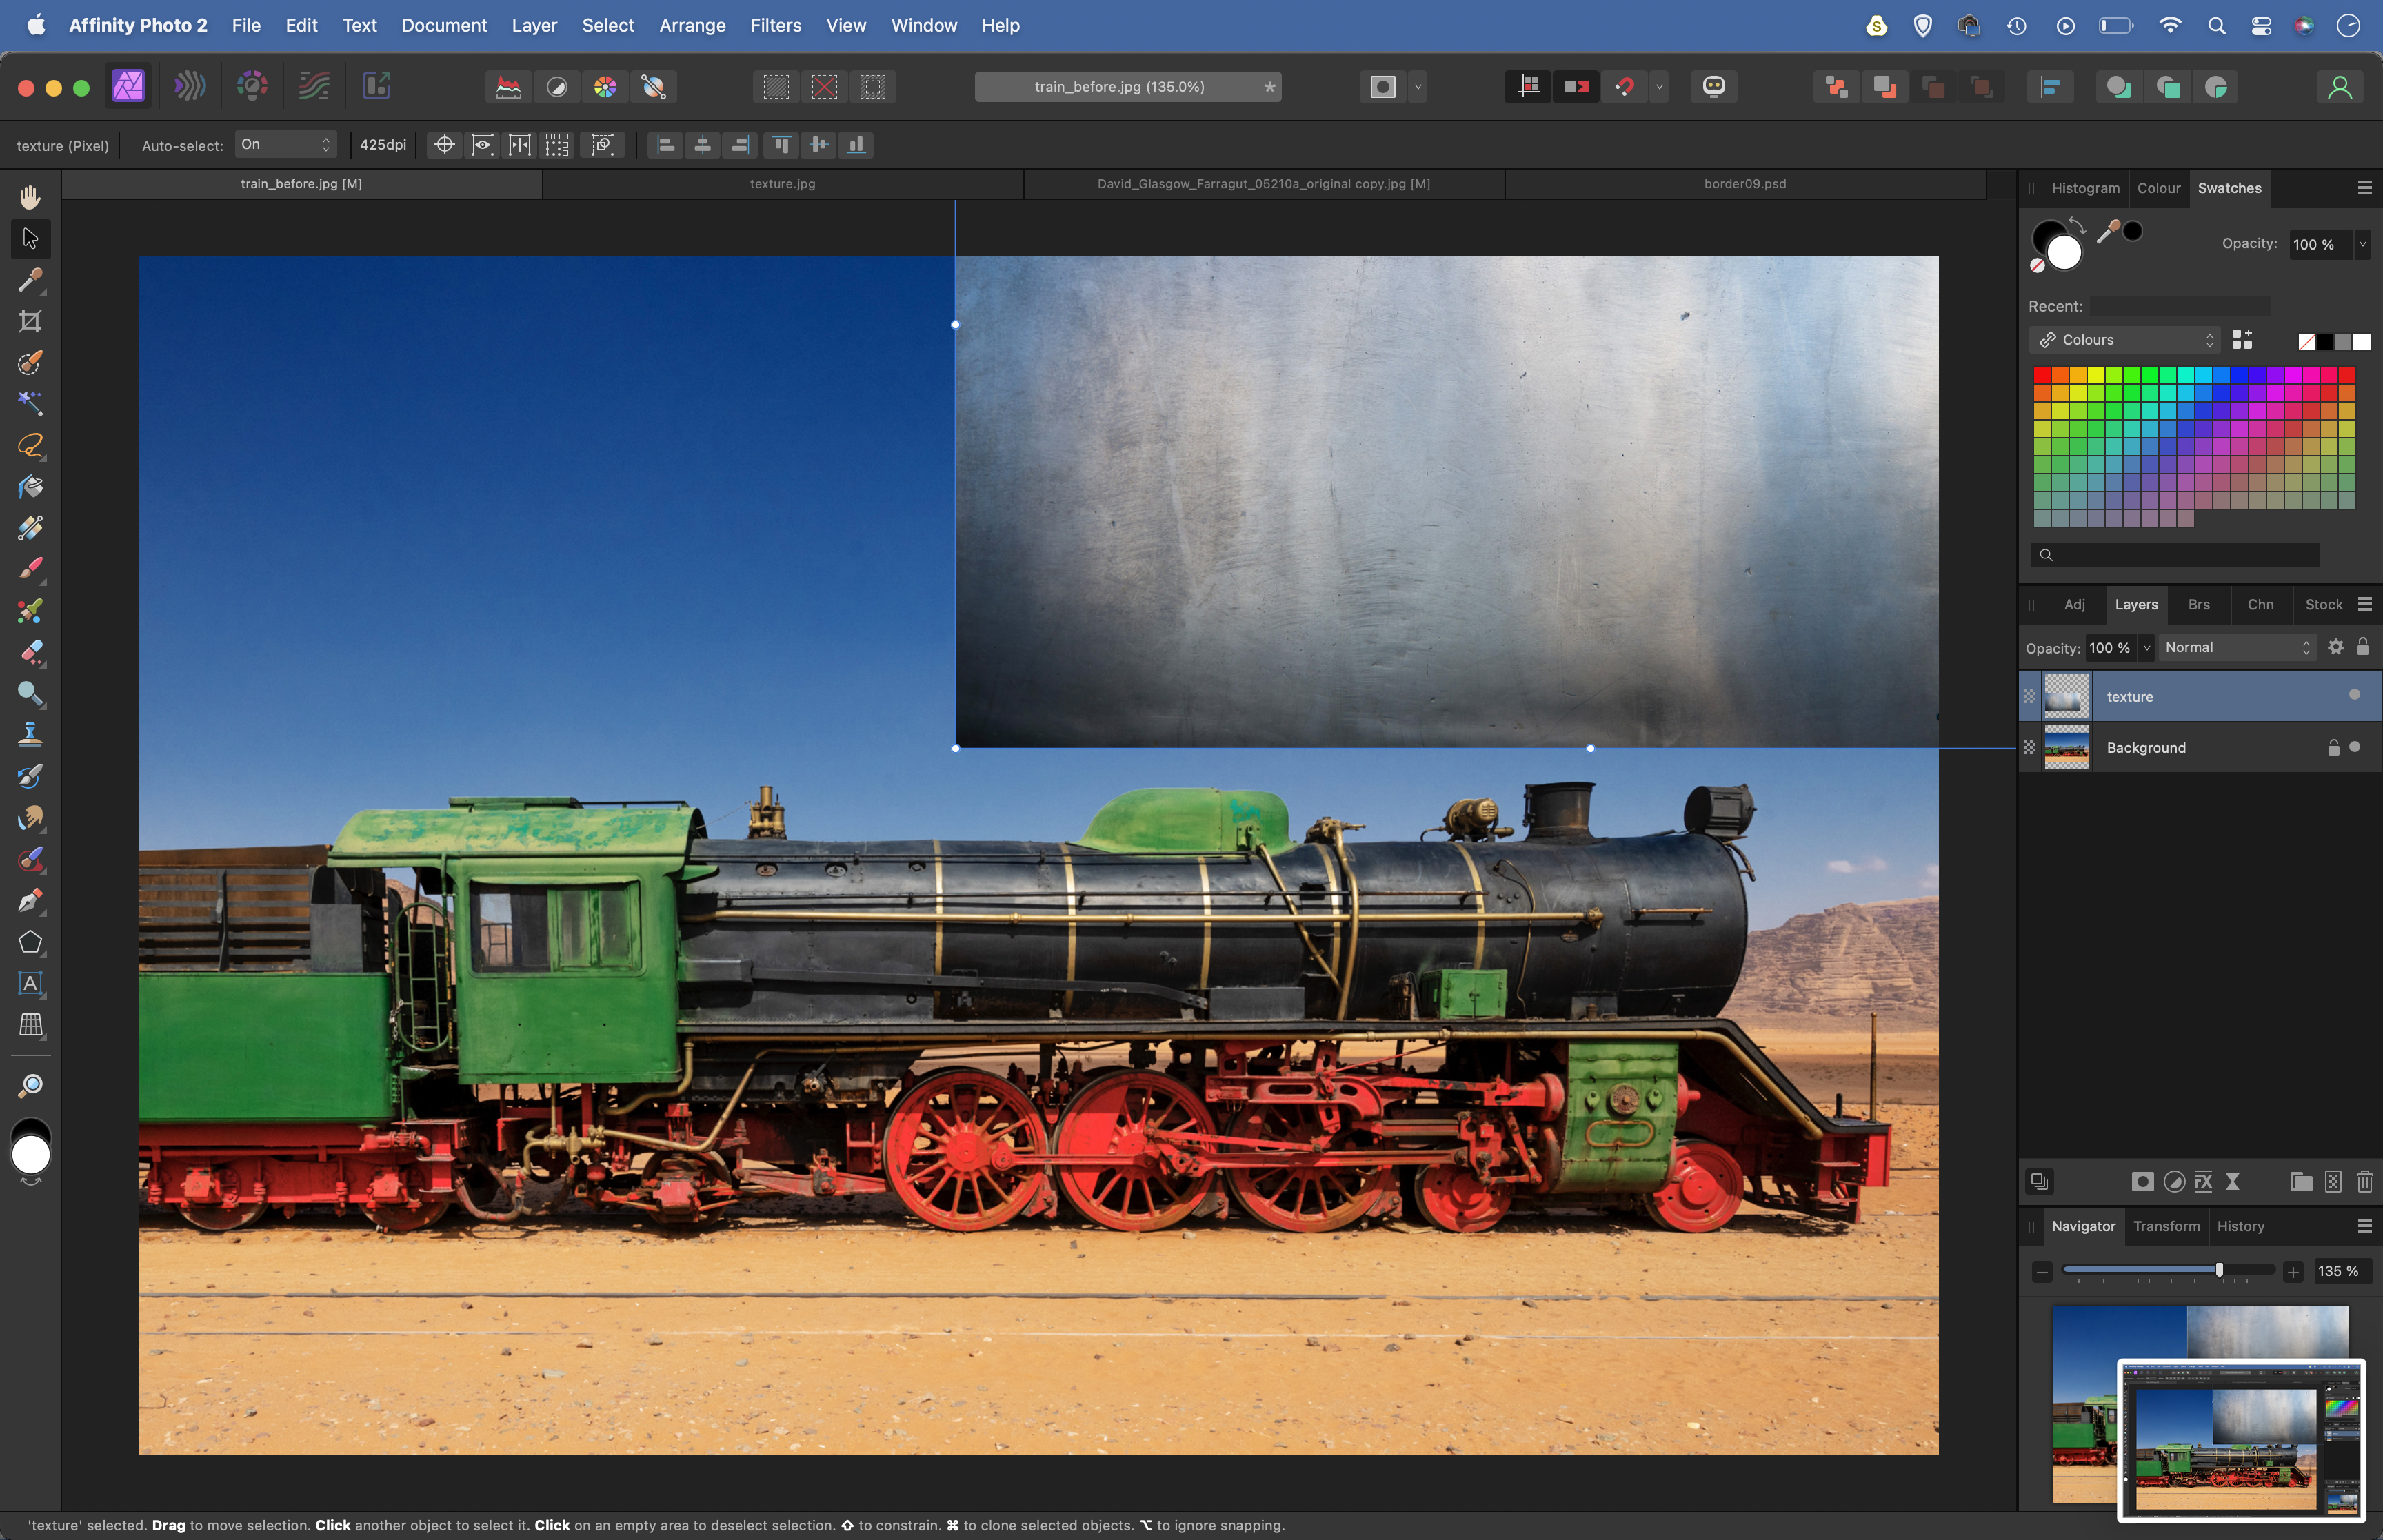
Open the train.jpg and texture.jpg starter images into Affinity Photo. Go to the texture image, copy (Cmd/Ctrl + C) then go to the train image and paste (Cmd/Ctrl + V). Grab the Move tool and use the bounding box to resize the texture to fit over the train image.
The best camera deals, reviews, product advice, and unmissable photography news, direct to your inbox!
2. Blend the texture
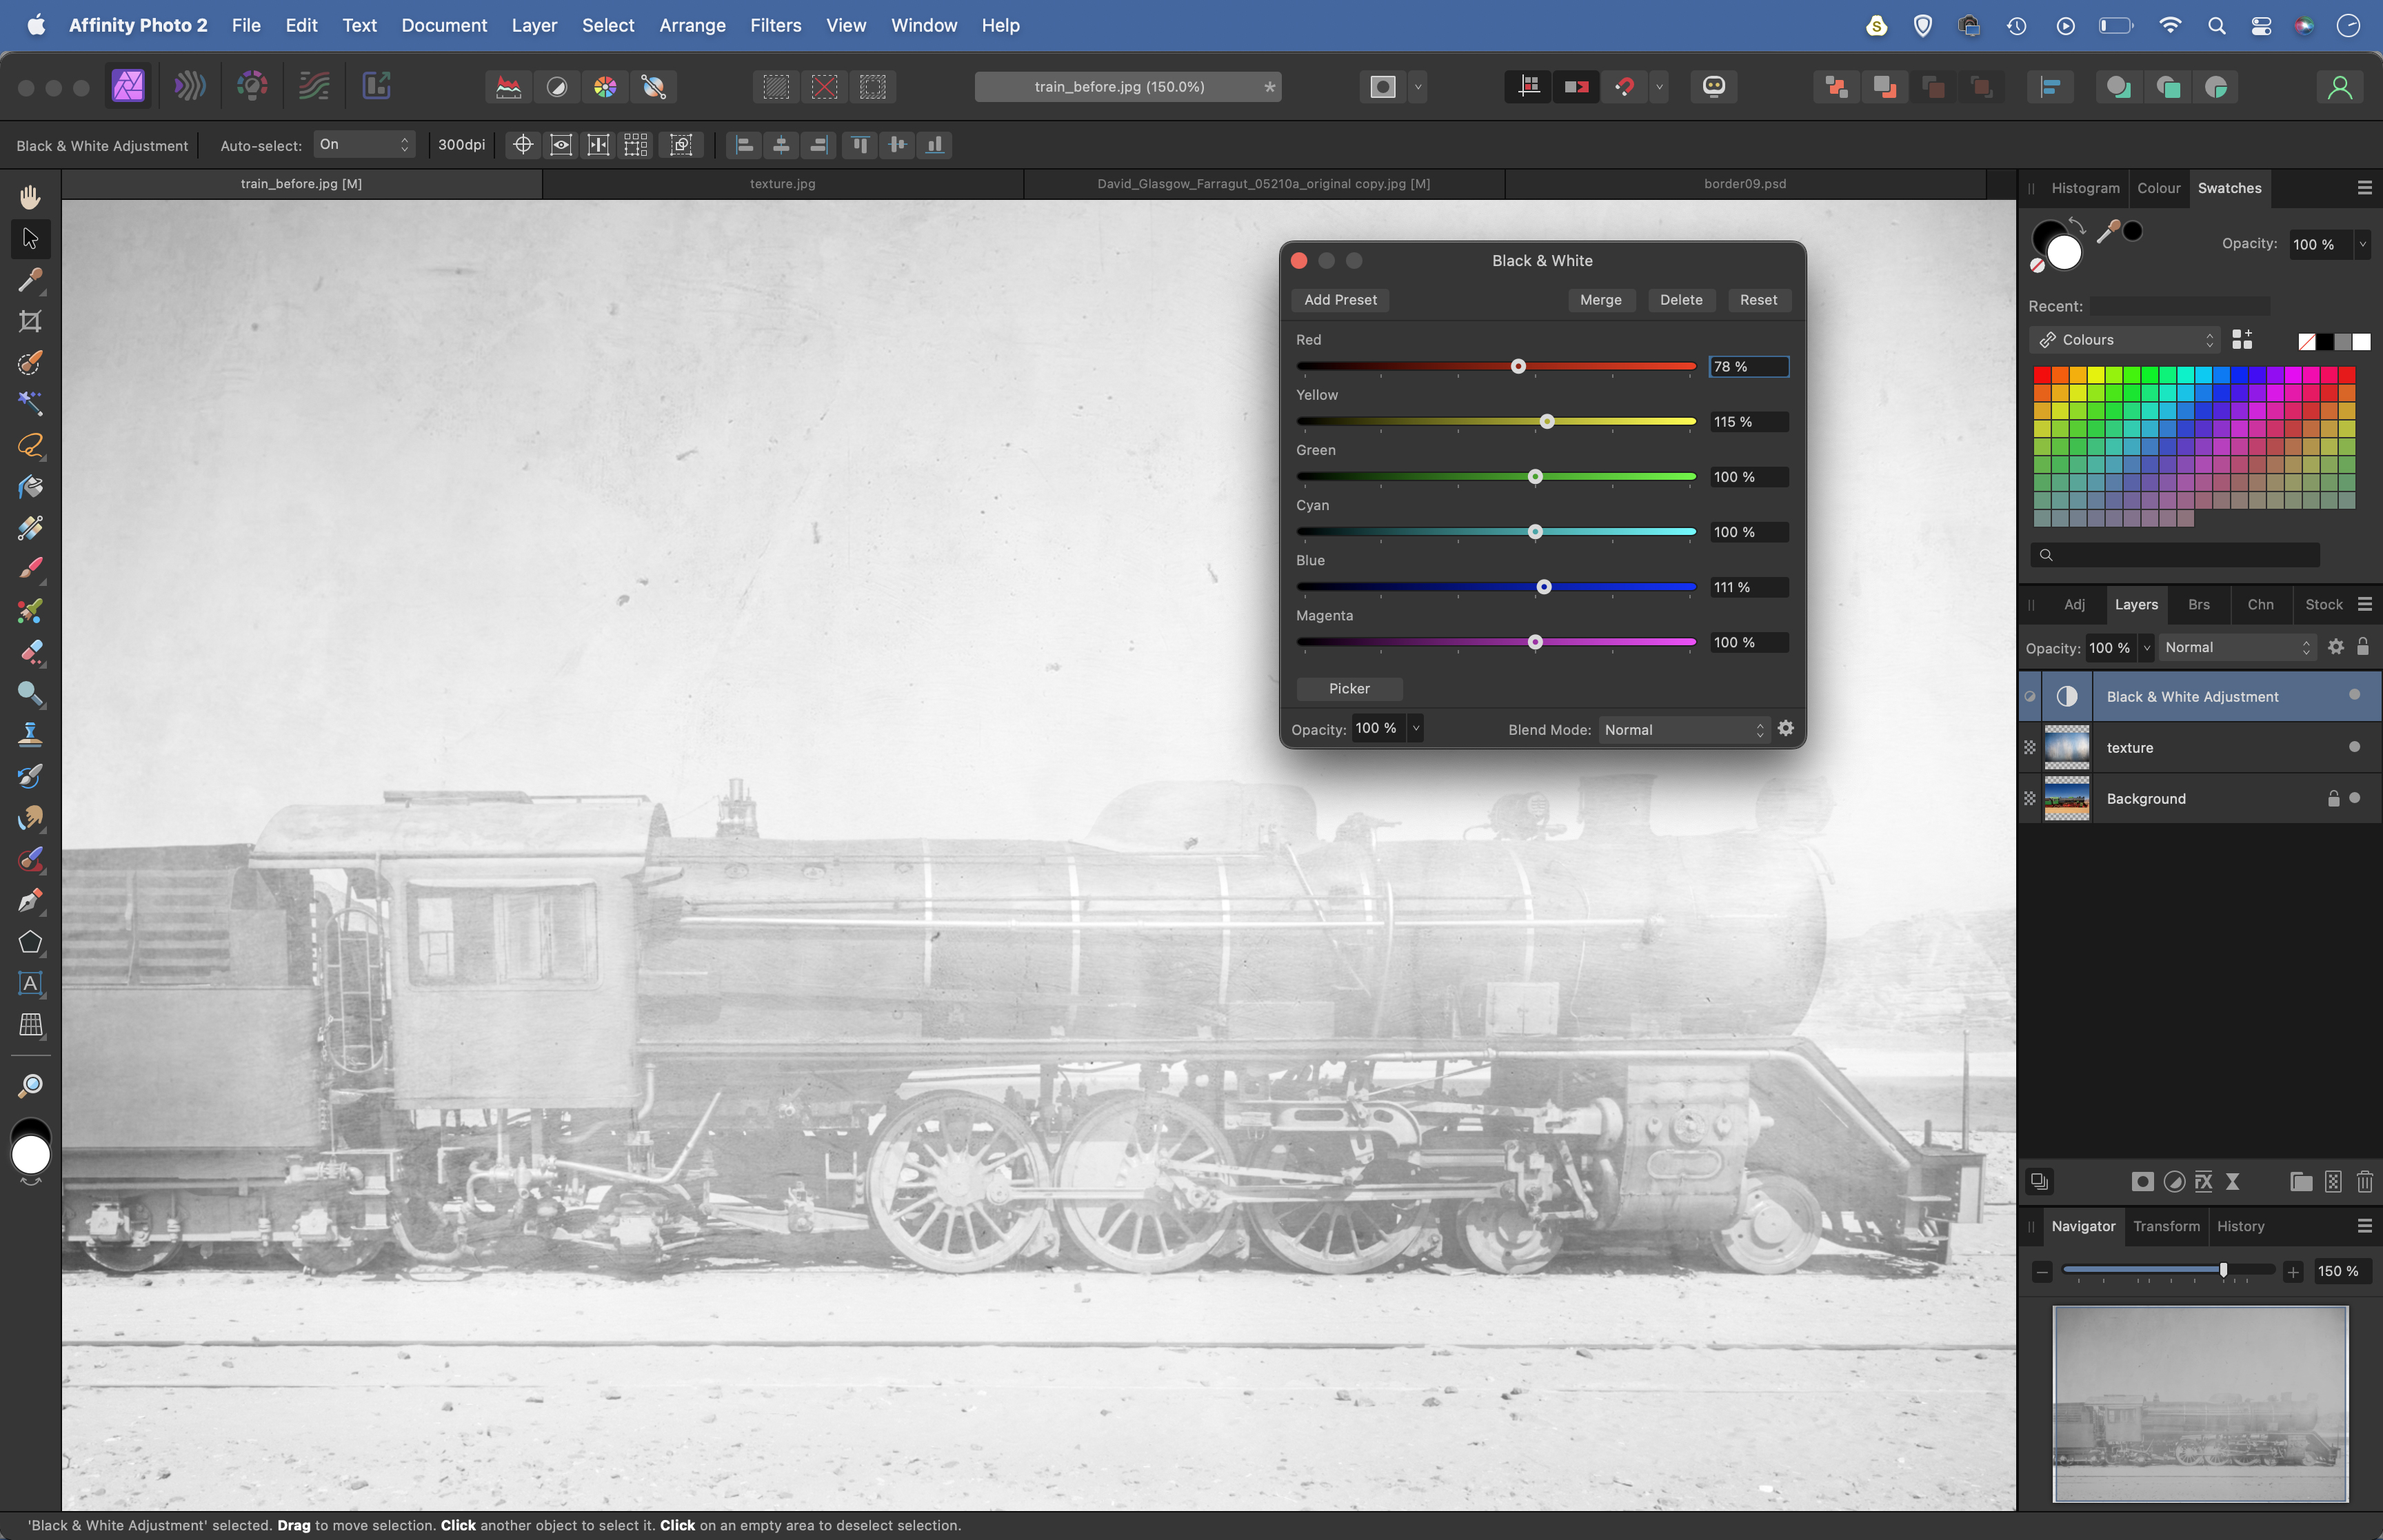
Go to the Layers Panel, click the Blend Mode drop-down at the top, and change the Blend Mode of the texture layer from Normal to Screen. Next click the Adjustment icon in the Layers Panel and choose Black and White. Use the sliders to fine-tune the conversion.
3. Tweak with Curves
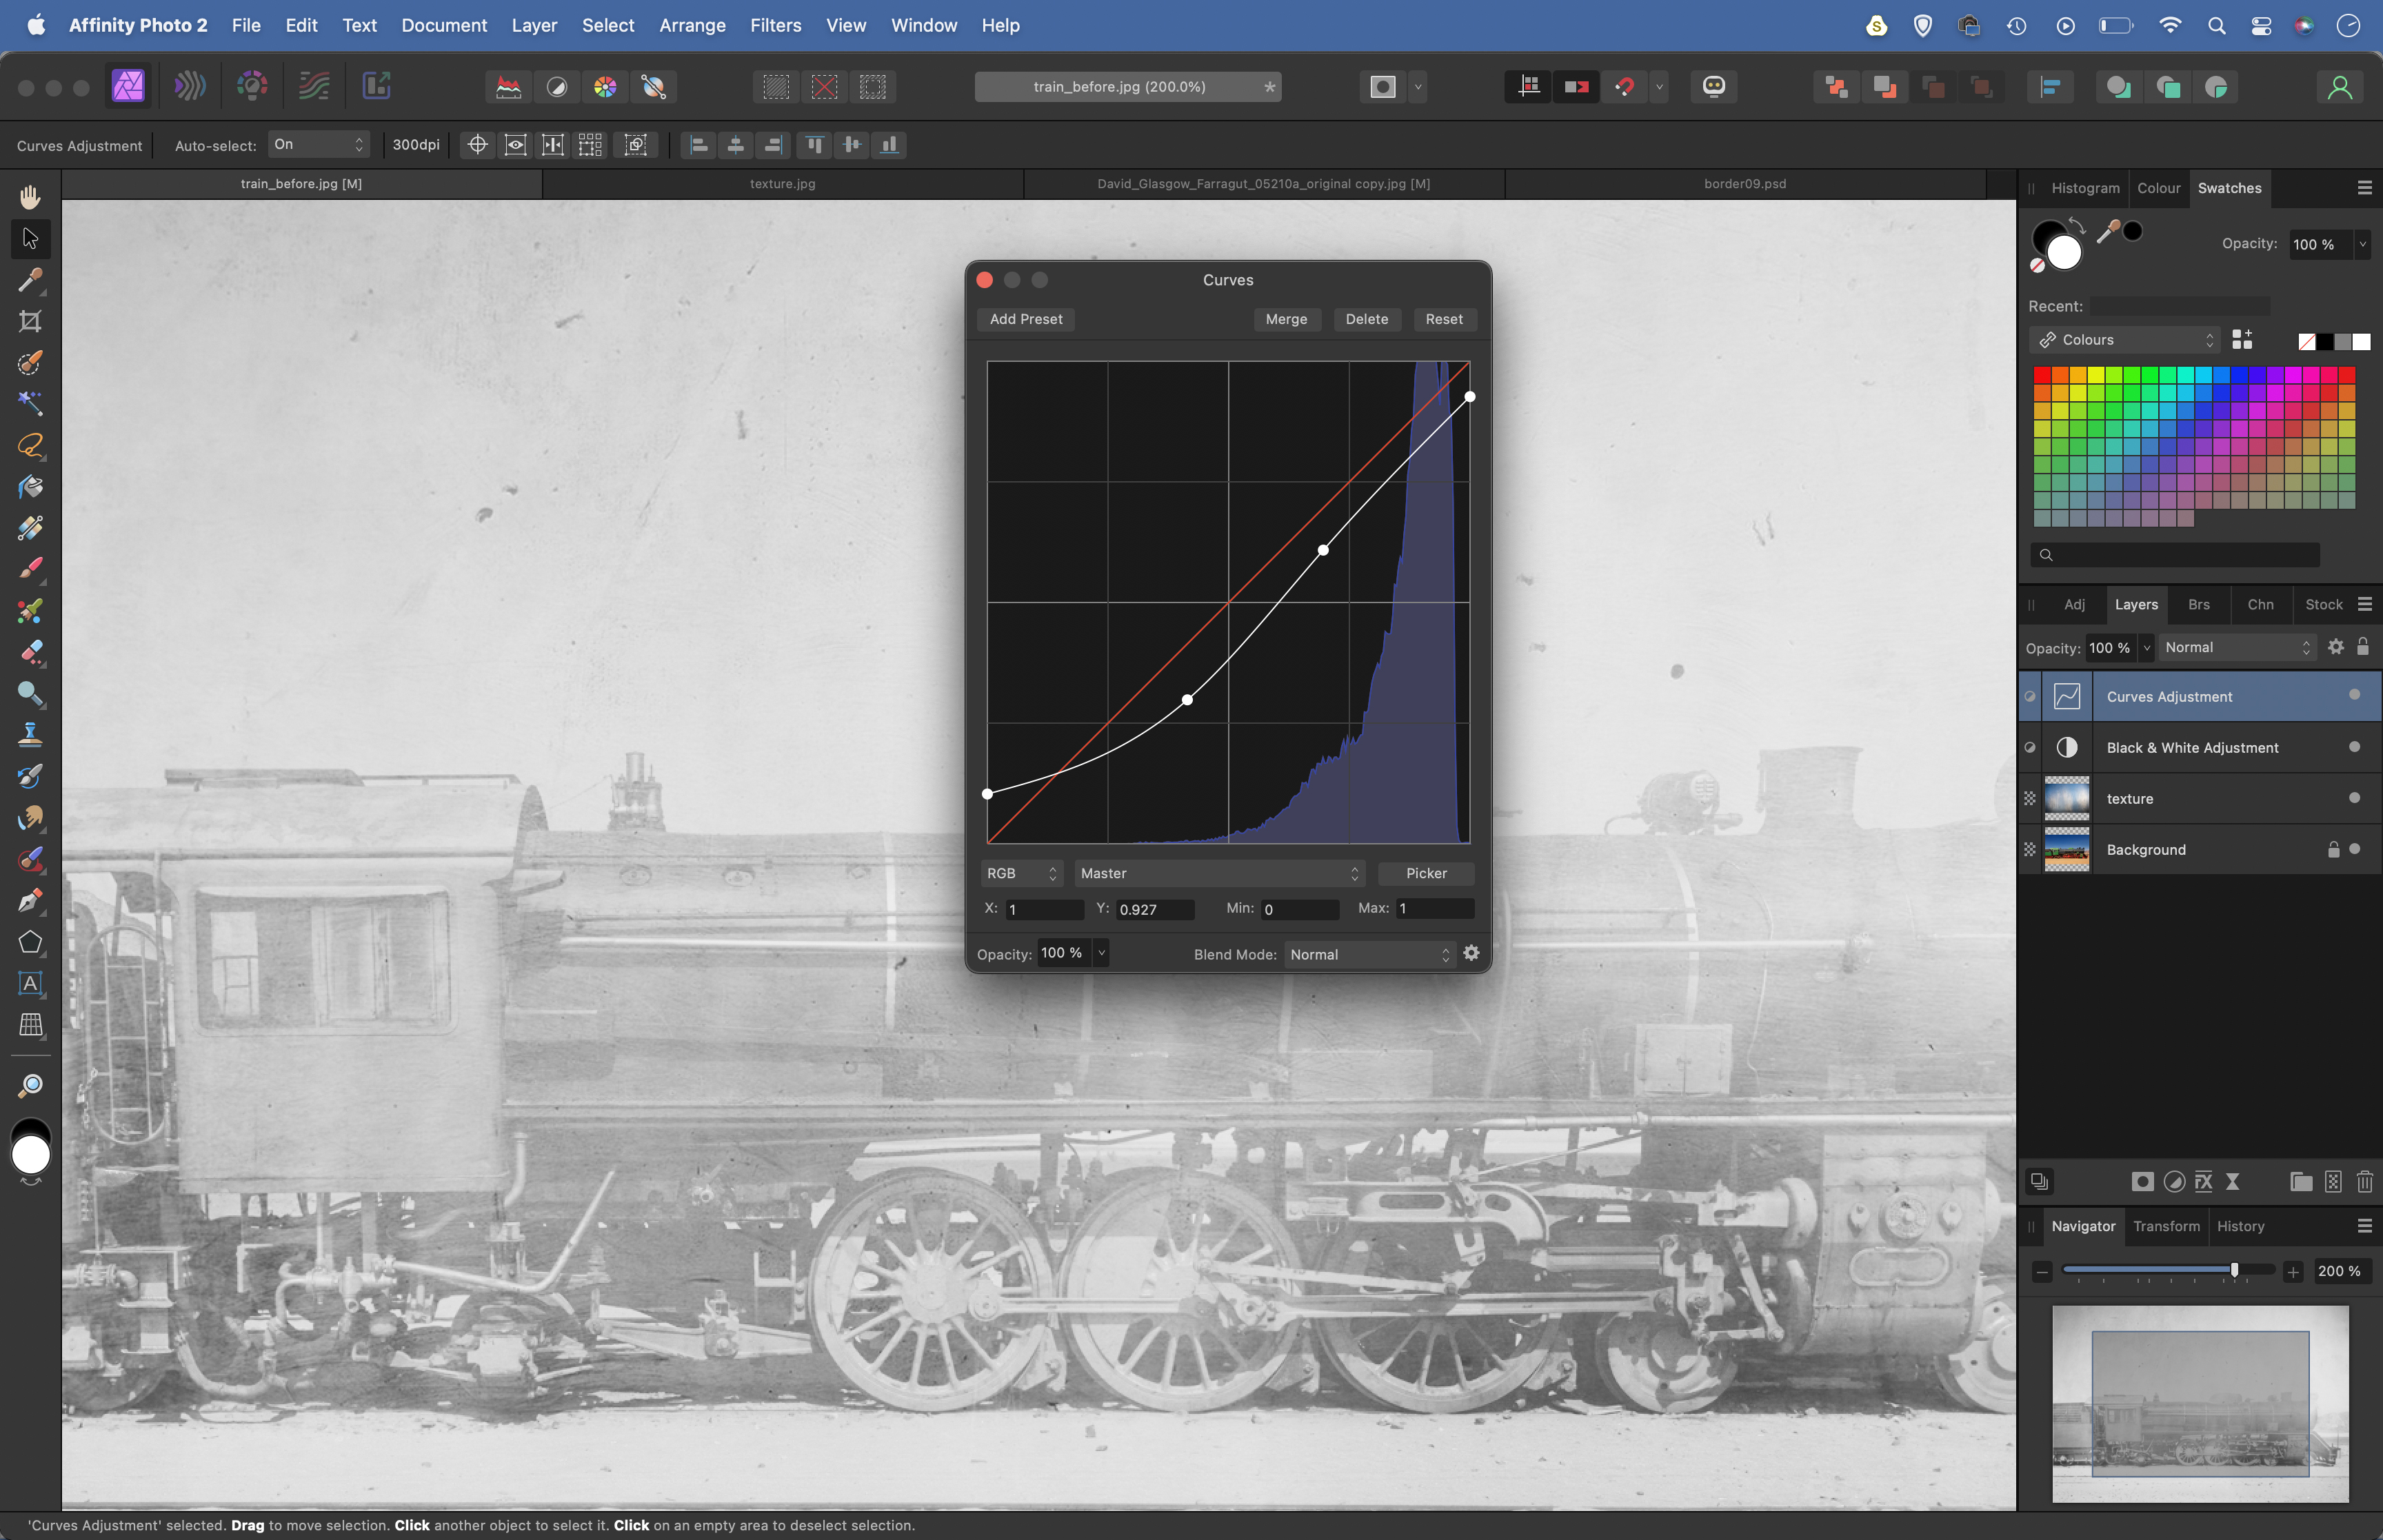
Click the Adjustment icon and choose Curves. Drag the bottom-left point upwards and the top-right point downwards. This fades out the black-and-white point in the image. Drag the line up or down in the middle to fine-tune the overall brightness as shown.
4. Blur and vignette
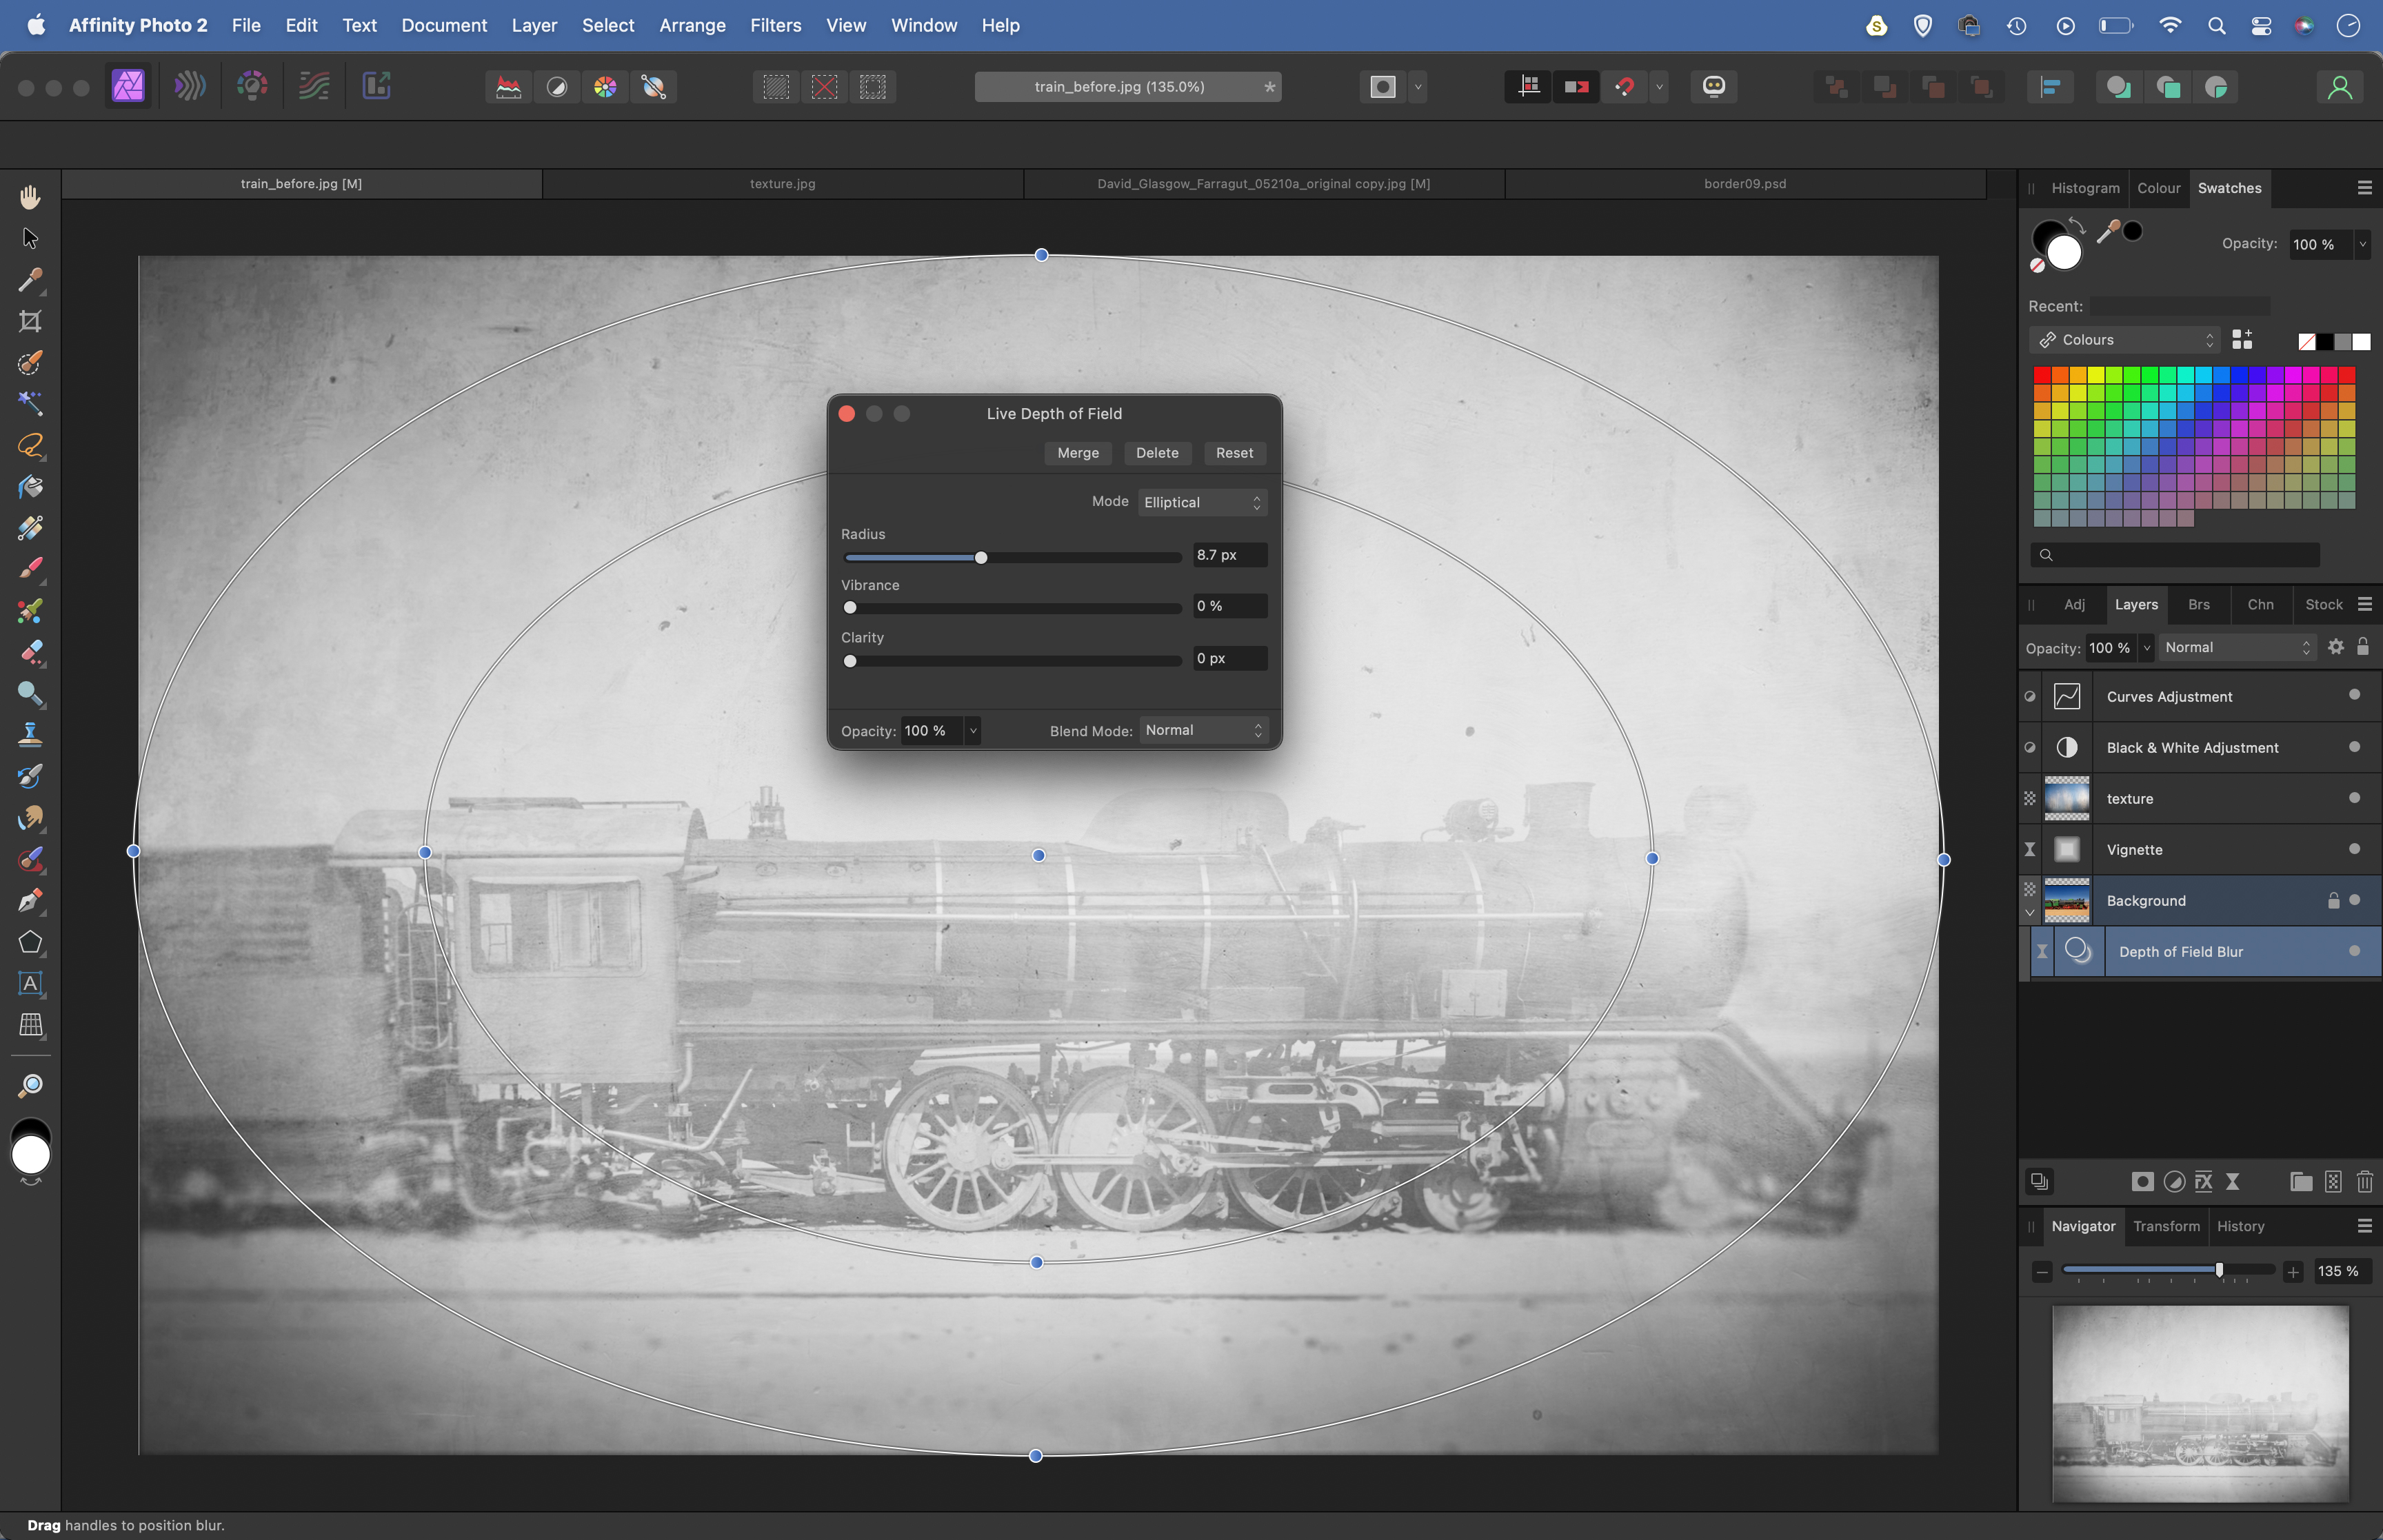
Highlight the bottom layer and go to Layer > New Live Filter Layer > Blur > Depth of Field. Choose Mode: Elliptical then adjust the circles to fit the image. Increase the Radius to blur the corners. Next go to Layer > New Live Filter Layer > Colours > Vignette.
5. Blend the border
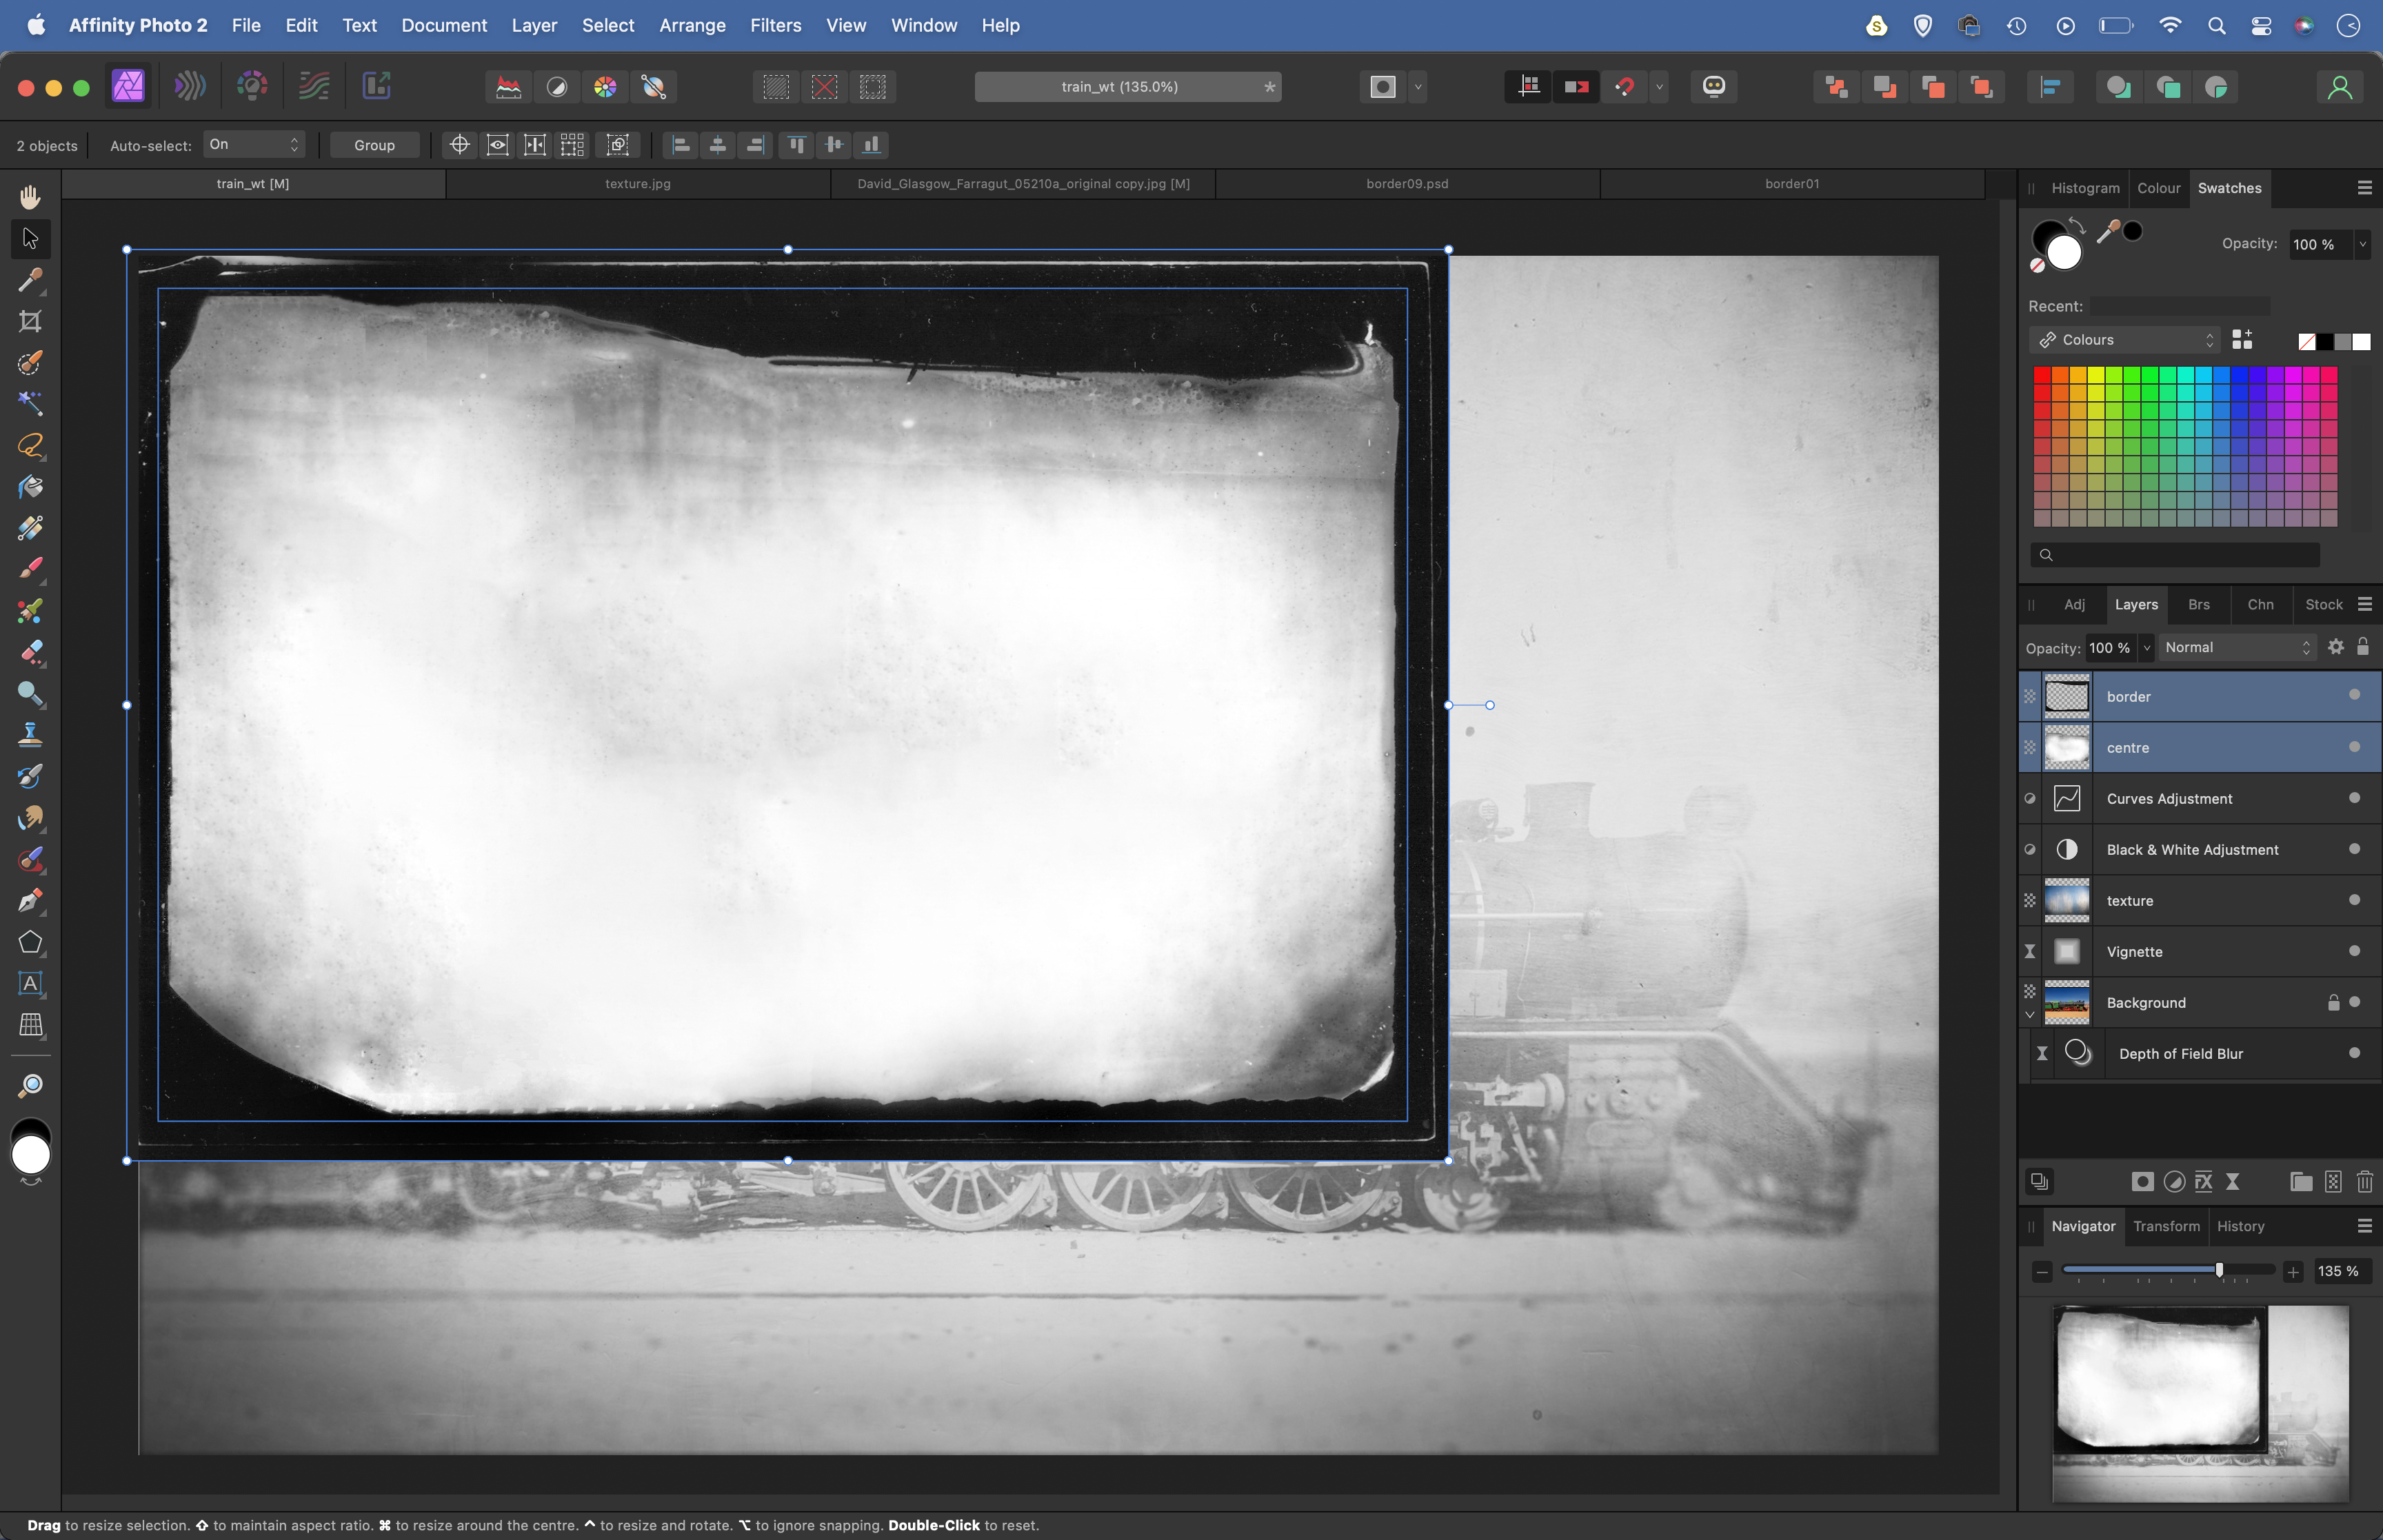
Open a border starter image and copy and paste it into the train image. Hold Cmd/Ctrl and click on both layers (Border and Center) to highlight them, then copy and paste into the main image. Drag the layer to the top of the stack, then resize and rotate it to fit.
6. Add a split tone
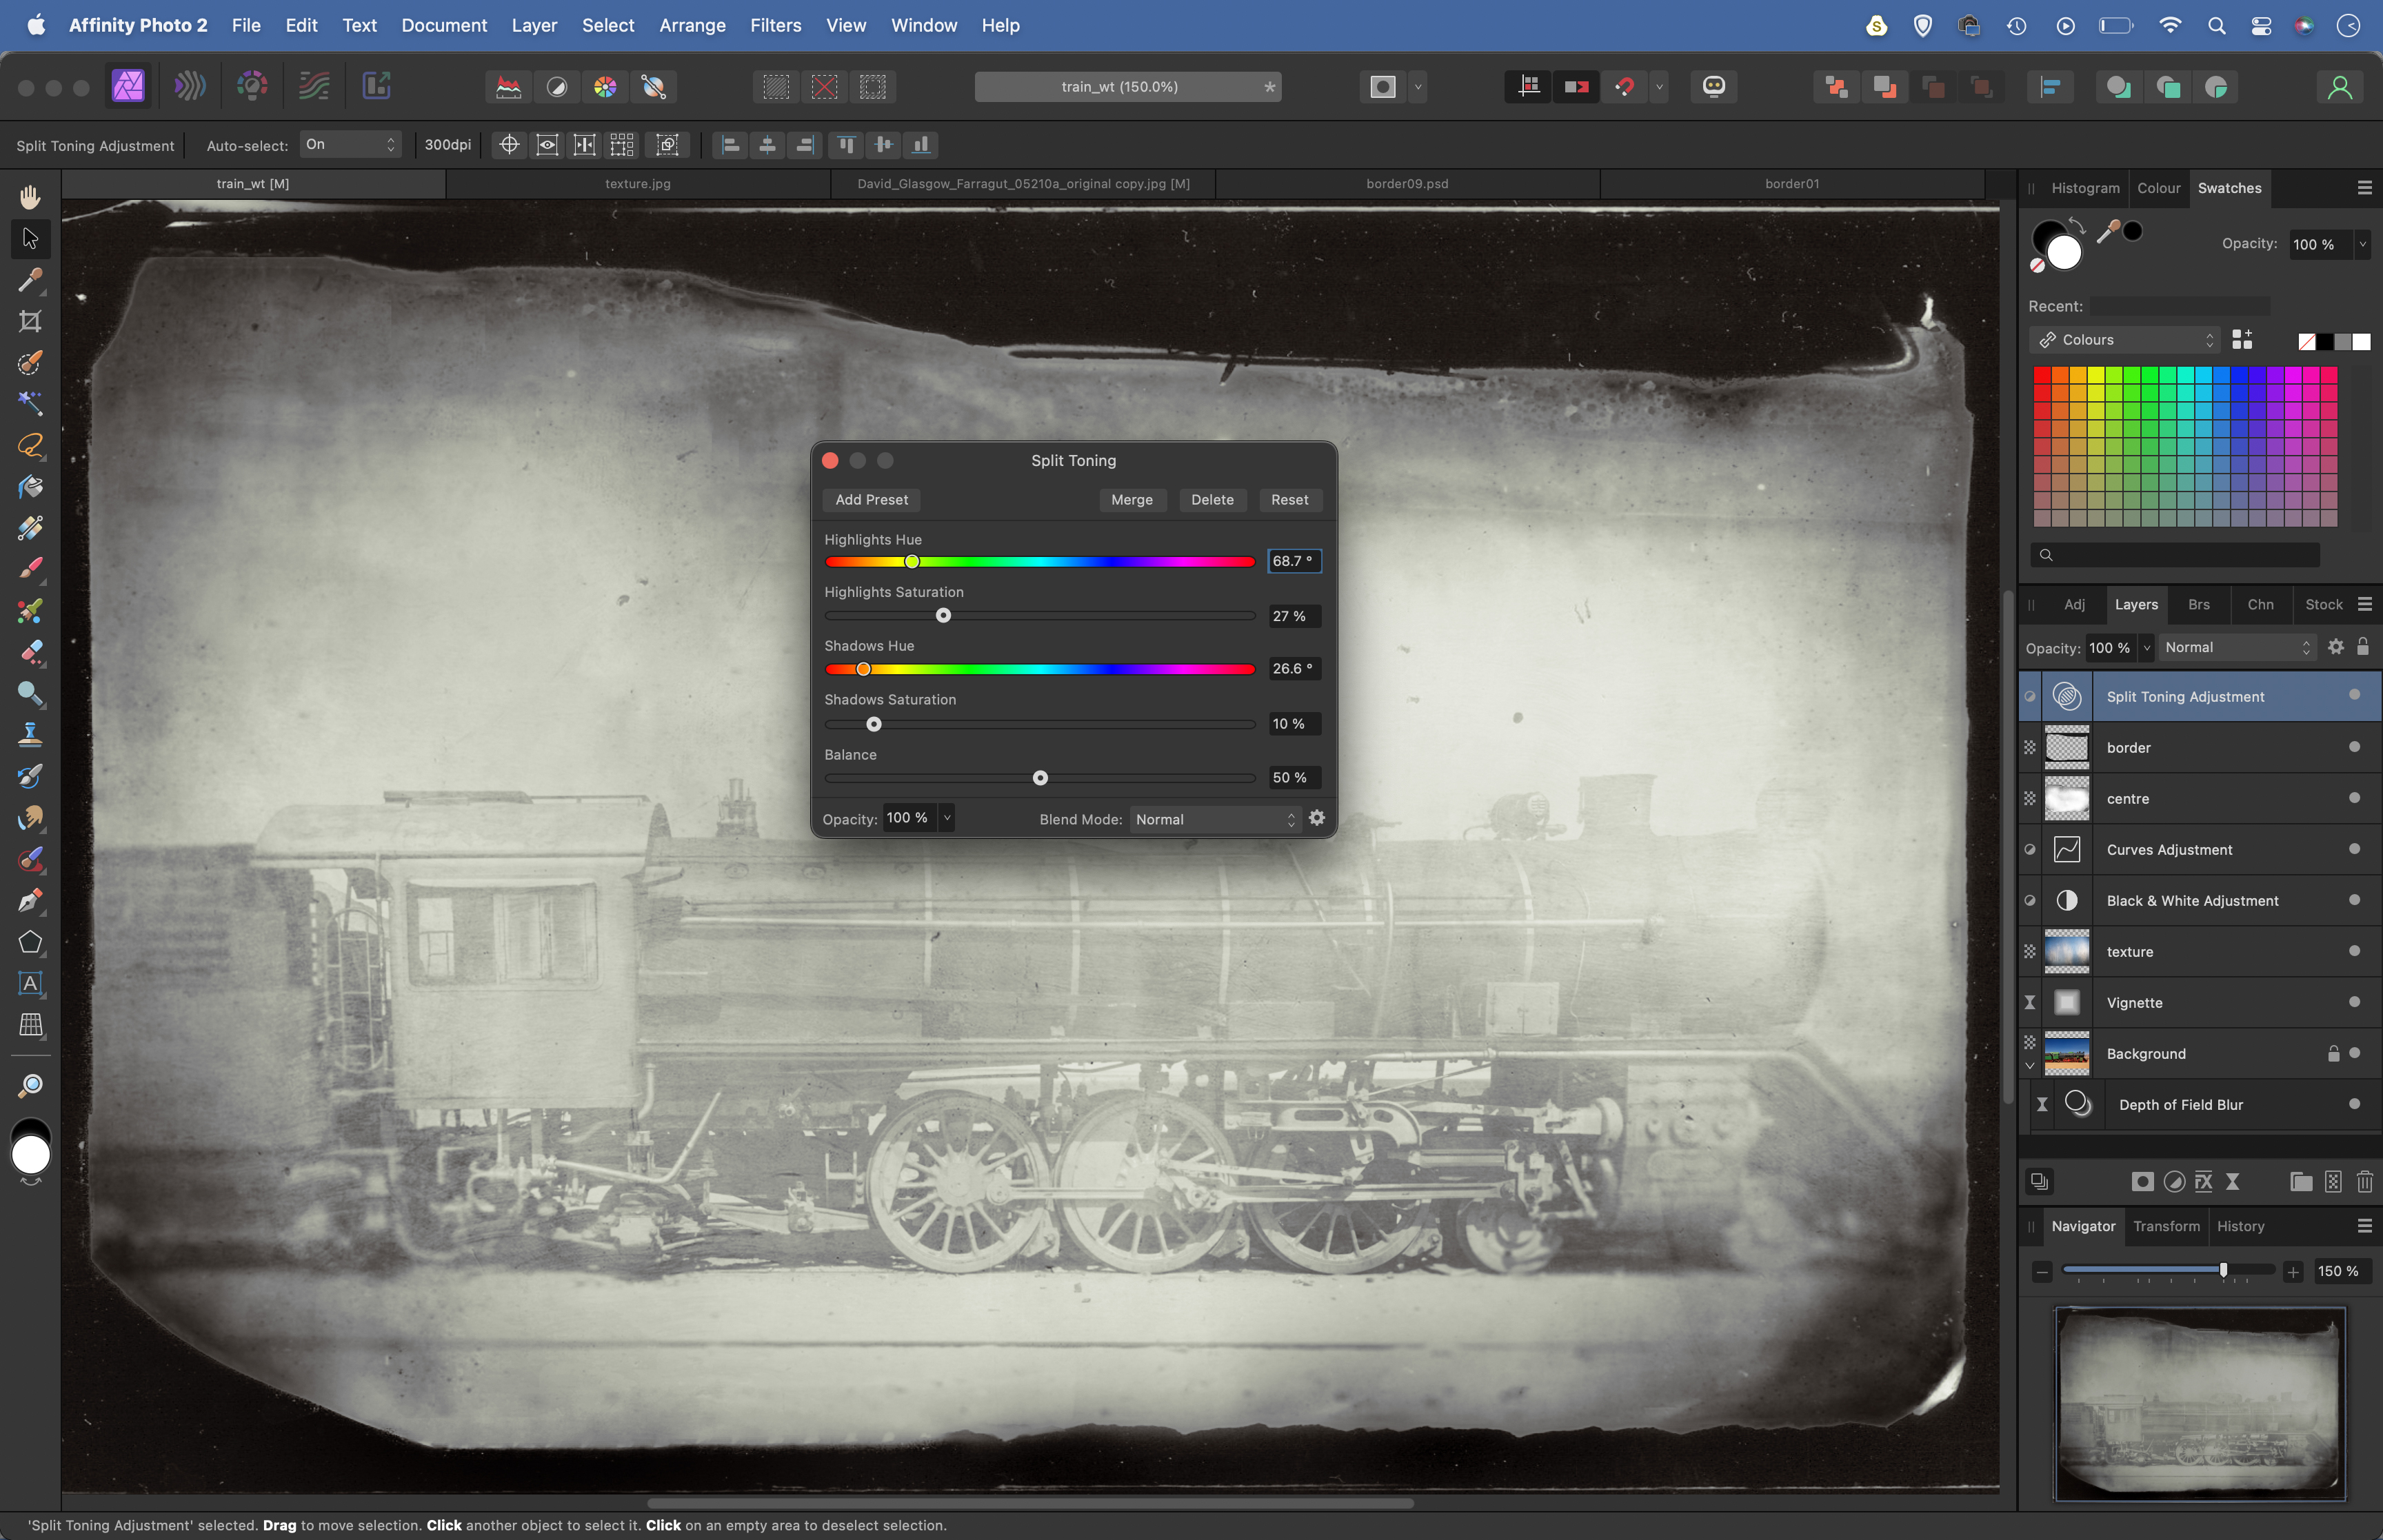
Change the blend mode of the Centre layer to Soft Light, Overlay, Screen or Multiply. You might need to tweak the brightness of the image – if so, double-click the Curves layer and drag the line up or down. Click the Adjustment icon again and choose Split Toning.
• See more of our Affinity Photo tutorials
PhotoPlus: The Canon Magazine is the world's only monthly newsstand title that's 100% devoted to Canon, so you can be sure the magazine is completely relevant to your system.
If you enjoyed this tutorial but want a bit more power from your laptop, why not look at the best photo-editing laptops? If you're really keen to improve your skills further then online photography courses could be the way to go.
The lead technique writer on Digital Camera Magazine, PhotoPlus: The Canon Magazine and N-Photo: The Nikon Magazine, James is a fantastic general practice photographer with an enviable array of skills across every genre of photography.
Whether it's flash photography techniques like stroboscopic portraits, astrophotography projects like photographing the Northern Lights, or turning sound into art by making paint dance on a set of speakers, James' tutorials and projects are as creative as they are enjoyable.
He's also a wizard at the dark arts of Photoshop, Lightroom and Affinity Photo, and is capable of some genuine black magic in the digital darkroom, making him one of the leading authorities on photo editing software and techniques.
