Digital Camera World Verdict
The Sermon P1 is a fantastic package, that covers a lot of ground. From laser and IR scanning, to being able to balance performance vs portability with its options for tethered or standalone modes, it can capture anything, anywhere. It's an expensive device but you do get what you pay for, making it an ideal contender for anybody looking to scan a wide range of objects in a variety of locations.
Reasons to buy
- +
Compact and rugged
- +
Hot swappable batteries
- +
Laser and IR scanning
- +
No tether needed
Reasons to avoid
- -
Expensive
- -
Texture mapping is a bit lacking
Why you can trust Digital Camera World Our expert reviewers spend hours testing and comparing products and services so you can choose the best for you. Find out how we test.
3D scanners have, until recently, been easy to categorize, with a definite split between those aimed at smaller target objects and those aimed at capturing larger subjects. Then there’s the choice of scanning method. Do you opt for IR or laser scanning?
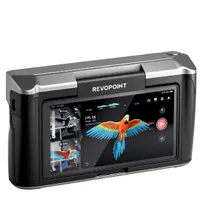
Well, that choice is less of a problem now, with some developers producing tools that encompass all of the above. The Creality Sermoon P1 is just such a device, and it could be the answer for those looking to capture a wide range of objects. The form factor is similar to others on the market, like the Revopoint Miraco, with an all-in-one, portable design that has lenses up front and a big touchscreen behind, and not dissimilar features.
Creality is best known for its range of 3D printers, so it isn’t entirely surprising to see it add to its line of scanners in this way, but is it up to the competition? I spent some time with it to see how it handles scanning a variety of objects and how easily it does so.
Creality Sermoon P1: Specifications
Power |
Hot-swappable batteries |
Scan type |
Blue laser and IR |
Size range |
.02mm – 4000mm |
Screen |
6in touchscreen |
Connectivity |
USB-C and WiFi 7 |
Storage |
256GB |
Creality Sermoon P1: Price
The Sermoon P1 comes in at a rather hefty $3,299 / £2,799 / AU$5,499. That is a significant investment, but if you consider that it covers a wide range of scanning jobs, can be used tethered or wirelessly, and has overall excellent performance, it is a reasonable cost. Revopoint’s Miraco costs less but doesn’t quite match the fidelity, frame rate, or arguably the user experience of the Sermoon.
Creality Sermoon P1: Design & Handling
The P1 ships in a semi-rigid case, with shaped inserts to hold everything in place. A nice grab handle is there, but there’s also a shoulder strap inside the case, should you prefer to use that. A couple of pockets in the lid house paperwork, some tracking markers, and a calibration board, and the main compartment contains the main unit, cables, and a spare battery.
The extra battery is a good addition, but I found the release mechanism particularly annoying. Maybe it’s my large hands, but pinching the two release knobs was tricky. They are stiff, and the recesses that allow purchase are really too small. That said, I’d rather have the convenience of swappable batteries with a small struggle than having to recharge and wait to continue a job.
The P1 itself is a really nicely built device, with a mix of material finishes. There’s a harder plastic for the most part, but a soft-touch variation where you interact with it most, making it comfortable to hold while reducing slip risks, which you really don’t want while scanning.
You won’t find many buttons on the P1, as it is mostly controlled by the touchscreen, but there is a power button on the top and a ‘play’ button on the right-hand side. Elsewhere, you’ll find a cooling vent on the underside, next to a ¼"-20 tripod mount.

All the lenses sit on the upper section of the front side, above another vent. Finally, on the top side, there’s a small speaker, used mostly for playback of the built-in video tutorials.
I found the size and weight of the P1 to be just right. Small enough to handle for long scanning sessions but with enough heft to keep the scanning process smooth. If it had been lighter, there would be the possibility of micro jitters, just like with a film camera, and that could cause issues with capture.
Then there is the screen. It’s a six-inch touchscreen, and while I couldn’t find any specifications for it, it is high enough resolution to work with and bright enough (just) for outdoor use. The surface is glossy, so bright skies can be a problem, but it’s all workable.
The touch aspect of the screen is about as good as it gets. I haven’t found myself poking repeatedly, like some devices, and it registers input very well indeed. It feels smooth, accurate, and responsive.
Lastly, if you’re working tethered, there is often anxiety about catching the cable and pulling it out mid-scan. The P1 has a locking USB-C cable, which is great news for a little extra security.

Creality Sermoon P1: Performance
Let’s start by talking about the setup process, which is very well guided, as the P1 has a number of built-in video tutorials. They are well worth watching and will help get you up and running in no time. Having used many 3D scanners, I did consider skipping these, but I'm glad I didn’t, as each device works slightly differently.
Once you’ve watched those and set up the language and Wi-Fi options, you need to calibrate the scanner, which is done by binding it to the calibration board. This is done by using it to capture the QR code on the rear, then running through the calibration process. Again, this is very well guided and is essentially a case of matching the P1 to a virtual version on screen, keeping a target in place. Now, I struggled with this the first time, but that was purely user error, as I hadn’t noticed the orientation of the markers, and they aren’t symmetrical. Once I’d realized my mistake, I flew through the process and was scanning in no time.
The layout of the screen and menus isn’t all that different from other similar devices, but I have to say it’s the clearest I’ve used. The design choices and color schemes make it very easy on the eye, and everything is laid out very nicely, so navigating is a breeze.

To get going, you’ll first need to decide on which scanning method to use, depending on your target. For engineering-type projects, the laser option tends to work best, but you will need to place markers on the object first. For more organic shapes, I find IR is better. There are further options for the laser, and they work best for slightly different applications. The 22 and 7 line modes are good for larger surfaces, without too many recesses to capture. The single-line laser is much better for the finer details and deep recesses.
Luckily, the P1 can utilize all three modes while scanning one object and does a very good job of aligning the separate passes into one cohesive piece of geometry.
Although you can manually adjust the exposure, I found that automatic exposures worked very well, at least in well-lit environments. In darker spaces, manual works better, as boosting the exposure seems to give better results.
While scanning, you can have the P1 automatically remove the base plane, ideal for when you work on a table and don’t want to trim away the unwanted geometry yourself. You can, of course, keep that and deal with it afterwards, and sometimes this might be better, but that will depend on the materials in question and the light in the scene.
Down the right-hand side of the 3D view is a distance scale, color-coded, so it’s easy to see when you are at the optimal distance from your object. It’s a very clear visual that really helps to get the best results, especially if your spatial awareness isn’t great.
Both laser and IR modes feel responsive and smooth when scanning, and if you move a bit too fast around the target, all is not lost. The P1 pops up a message asking you to reorient towards an already-tracked section. At that point, you can continue the scan just a little slower while keeping an eye on the distance.

Results using either method are very good, with excellent resolution, and the resulting meshes are very usable, although for production tasks, you will most likely want to reduce the polygon count, using decimation tools in your 3D software, but that is normal upon importing any scan.
One interesting aspect of the P1 is the three modes it has to work in. Like older scanners, you can run it tethered to your computer via a cable. This does give the highest frame rate of 100fps, but has the obvious disadvantages of a wired connection, mainly the limited working distance from the computer and potential trip hazard from the cable.
Secondly, there's wireless tethering, which still offers an excellent 80fps but reduces the anxiety of pulling a cord. Although the P1 has a locking USB-C port, your computer will likely not. Then there’s the standalone mode, my favorite. This negates all the above worries, meaning you can scan on location, while the lower 60fps frame rate is still very good.
Better yet is the battery life. One battery lasts around an hour of continuous use, which may sound underwhelming, but considering the fact that there’s an 8-core chip running alongside the lasers and sensors, I think that’s more than acceptable. Plus, you get a second battery in the kit, and they are hot swappable, so there’s no downtime while changing to a fresh one. The batteries charge in an hour, too, so you should be able to keep scanning without breaks, so long as you have a charging solution with you.
The P1 will take all of your scan passes and align them into one mesh, which can be saved onboard or offloaded to your computer. As I mentioned, you will want to refine and reduce the geometry, partly for density but also to reduce file sizes. I scanned some objects that were nearly 4GB on the P1 but managed to get them down to a much more manageable 300MB, while retaining fidelity.

Much of the post-processing can be done using Creality’s scan software, but I’d recommend quickly moving the mesh over to your preferred 3D app, which will be where you are most comfortable and will have far more tools for integrating into projects. That said, if all you want to do is create a digital archive or 3D print a copy, the Creality software will work just fine.
If UV unwrapping and painting textures isn’t your thing, don’t worry, as the P1 will also capture color information, which will be automatically applied, so you can export an .obj file with colors applied. Color is captured alongside the 3D scan, and for the most part works fine. I did hit a few issues, with some odd seams, but that’s less a fault of the scanner and more to do with lighting. The P1 can’t account for changes in light conditions, and creating an environment with consistent lighting from all angles is near impossible for the uses the P1 is intended for. That means where one part of the color map is captured next to another section, you may see seams where the brightness changes. It’s fixable in post, so all is not lost, and in a lot of cases, it won’t be too noticeable.
Creality Sermoon P1 Verdict
I don't imagine many casual hobbyists would spend this amount on a 3D scanner, but if you are more of an enthusiast, archivist, or engineering type, then it could be just the ticket. The multiple scanning modes make it ideal for a wide variety of applications and target sizes, and the fact that it has hot-swappable batteries and works standalone means it can be taken anywhere.
Fidelity is excellent too, in all modes, as are both frame rates and tracking stability, so long as you use markers where needed. It's a hefty but fair price tag and, if you're in the market for such a device, it should be on your shortlist.
Features ★★★★★ |
One of the most fully featured 3D scanners out there. |
Design ★★★★☆ |
Other than a tricky battery door, the design is excellent. |
Performance ★★★★★ |
Excellent stability and fidelity, in all modes. |
Value ★★★★☆ |
It's a fair price but there's no denying it's a large investment. |
Alternatives