Digital Camera World Verdict
The Boyalink 3 is an affordable option to enhance audio quality for video presentations. It offers 48 kHz / 24-bit recordings for clear sound, even from 60 meters away. With two mics, you can easily record interviews on the go without cables. However, the small transmitter mic can experience signal drop-out if it loses line of sight with the receiver, and placing it into the windshield can be challenging. While AI-assisted noise cancellation effectively reduces background noise, it may make your voice sound a bit processed. If your budget allows, the Boyamic 2 is worth considering as it addresses the signal drop-out issue and has better noise cancellation.
Pros
- +
No latency
- +
Clear 24-bit audio
- +
Affordable price
- +
Compact size
- +
App controllable
Cons
- -
Hard to attach windshield
- -
Disappointing noise reduction quality
Why you can trust Digital Camera World
Since February 2022, I’ve tested and reviewed 24 more wireless mic kits (including the subject of this review - the Boyalink 3). For the most part, these mic kits are similar in that they have two microphones with built-in transmitters that send a signal to a receiver that’s plugged into your DSLR, mirrorless camera or smartphone.
Over the years, the best wireless mics specs have evolved, with some (such as the RØDE Wireless Pro) solving the problem of signal drop-out by offering onboard recording - a high-quality digital audio file that is recorded directly onto the mic itself. You can then plug the mic directly into your PC and import the onboard recorded audio file into your editing software to fill in any sound gaps.
I must be quick to point out that the Boyalink 3 doesn’t feature onboard recording. The Boyalink 3 was released by Boya in May 2025 alongside the higher-specced Boyamic 2. The Boyalink 3 is the cheaper of the two and is aimed at the consumer market, such as YouTubers or travel doc makers who want to talk to camera as they walk and talk without being tethered by a cable from the mic to the camera. The Boyamic 2 targets the professional filmmaker who needs to capture audio without a second take, and can ensure that they have a decent recording thanks to the Boyamic 2’s onboard recording feature.
RØDE has similarly targeted both consumers and professionals. The RØDE Wireless Pro features onboard recording, while the cheaper consumer RØDE Wireless Micro is aimed at the needs of entry-level vloggers - the same target consumer market as the Boyalink 3.
Boyalink 3: Specifications
Built-in Mic | 6 mm Condenser Microphone |
Sample Rate / Bit Depth | 48 kHz / 24-bit |
Signal-to-Noise Ratio | > 85 dB |
Max SPL | 15 dB |
Noise Cancellation | AI Noise Cancellation (-40 dB Strong & -15 dB Light) |
Low Cut | 75 Hz / 150 Hz |
Battery Life | 6 hours |
Transmission Range | 300 m |
Size | 26.1 x 10 mm |
Weight | 9 g |
Boyalink 3: Price
The official price for the Boyalink 3 is $159 / £189 (although it was heavily discounted at the time of writing). This price is for the version of the kit that has a charging case, two transmitter mics, and both a USB-C and Lightning adaptor to connect the receiver to an old iPhone or a newer iPhone and Android device. If you don’t need the Lightning adaptor, then you should purchase the slightly cheaper USB-C only kit at $139 / £159.
If you’re a solo shooter who doesn’t require two wireless mics, then you can purchase a kit containing a single mic and a receiver for a very budget-friendly $129 / £139. However, this low-budget kit doesn’t include the carry case that doubles up as a charger, so there’s more danger of you losing power during a shoot. I’d recommend buying a version of the Boyalink 3 that has a carry/charging case (and the tiny mics will be less likely to be lost when stored in the case alongside the receiver).
The Boyalink 3 has a similar spec and consumer target user as the RØDE Wireless Micro; however, the RØDE Wireless Micro is less prone to signal drop-out, so saving a buck or two shouldn’t be a factor in deciding which mic kit to purchase.
The best camera deals, reviews, product advice, and unmissable photography news, direct to your inbox!
Boyalink 3: Design & Handling
When I first started testing wireless mic kits for Digital Camera World back in 2022, they tended to have a similar design. The mics with built-in transmitters tended to be chunky plastic bricks - see the Boya BY-XM6-S2 review for an example. Brick-like mics tended to be rather conspicuous when clamped to a shirt, so kits such as the Boya BY-XM6-S2 also shipped with more discrete cabled lavalier mics that would plug into the receiver that was attached to your belt. A crocodile clip would then attach the smaller lavalier mic to your lapel.
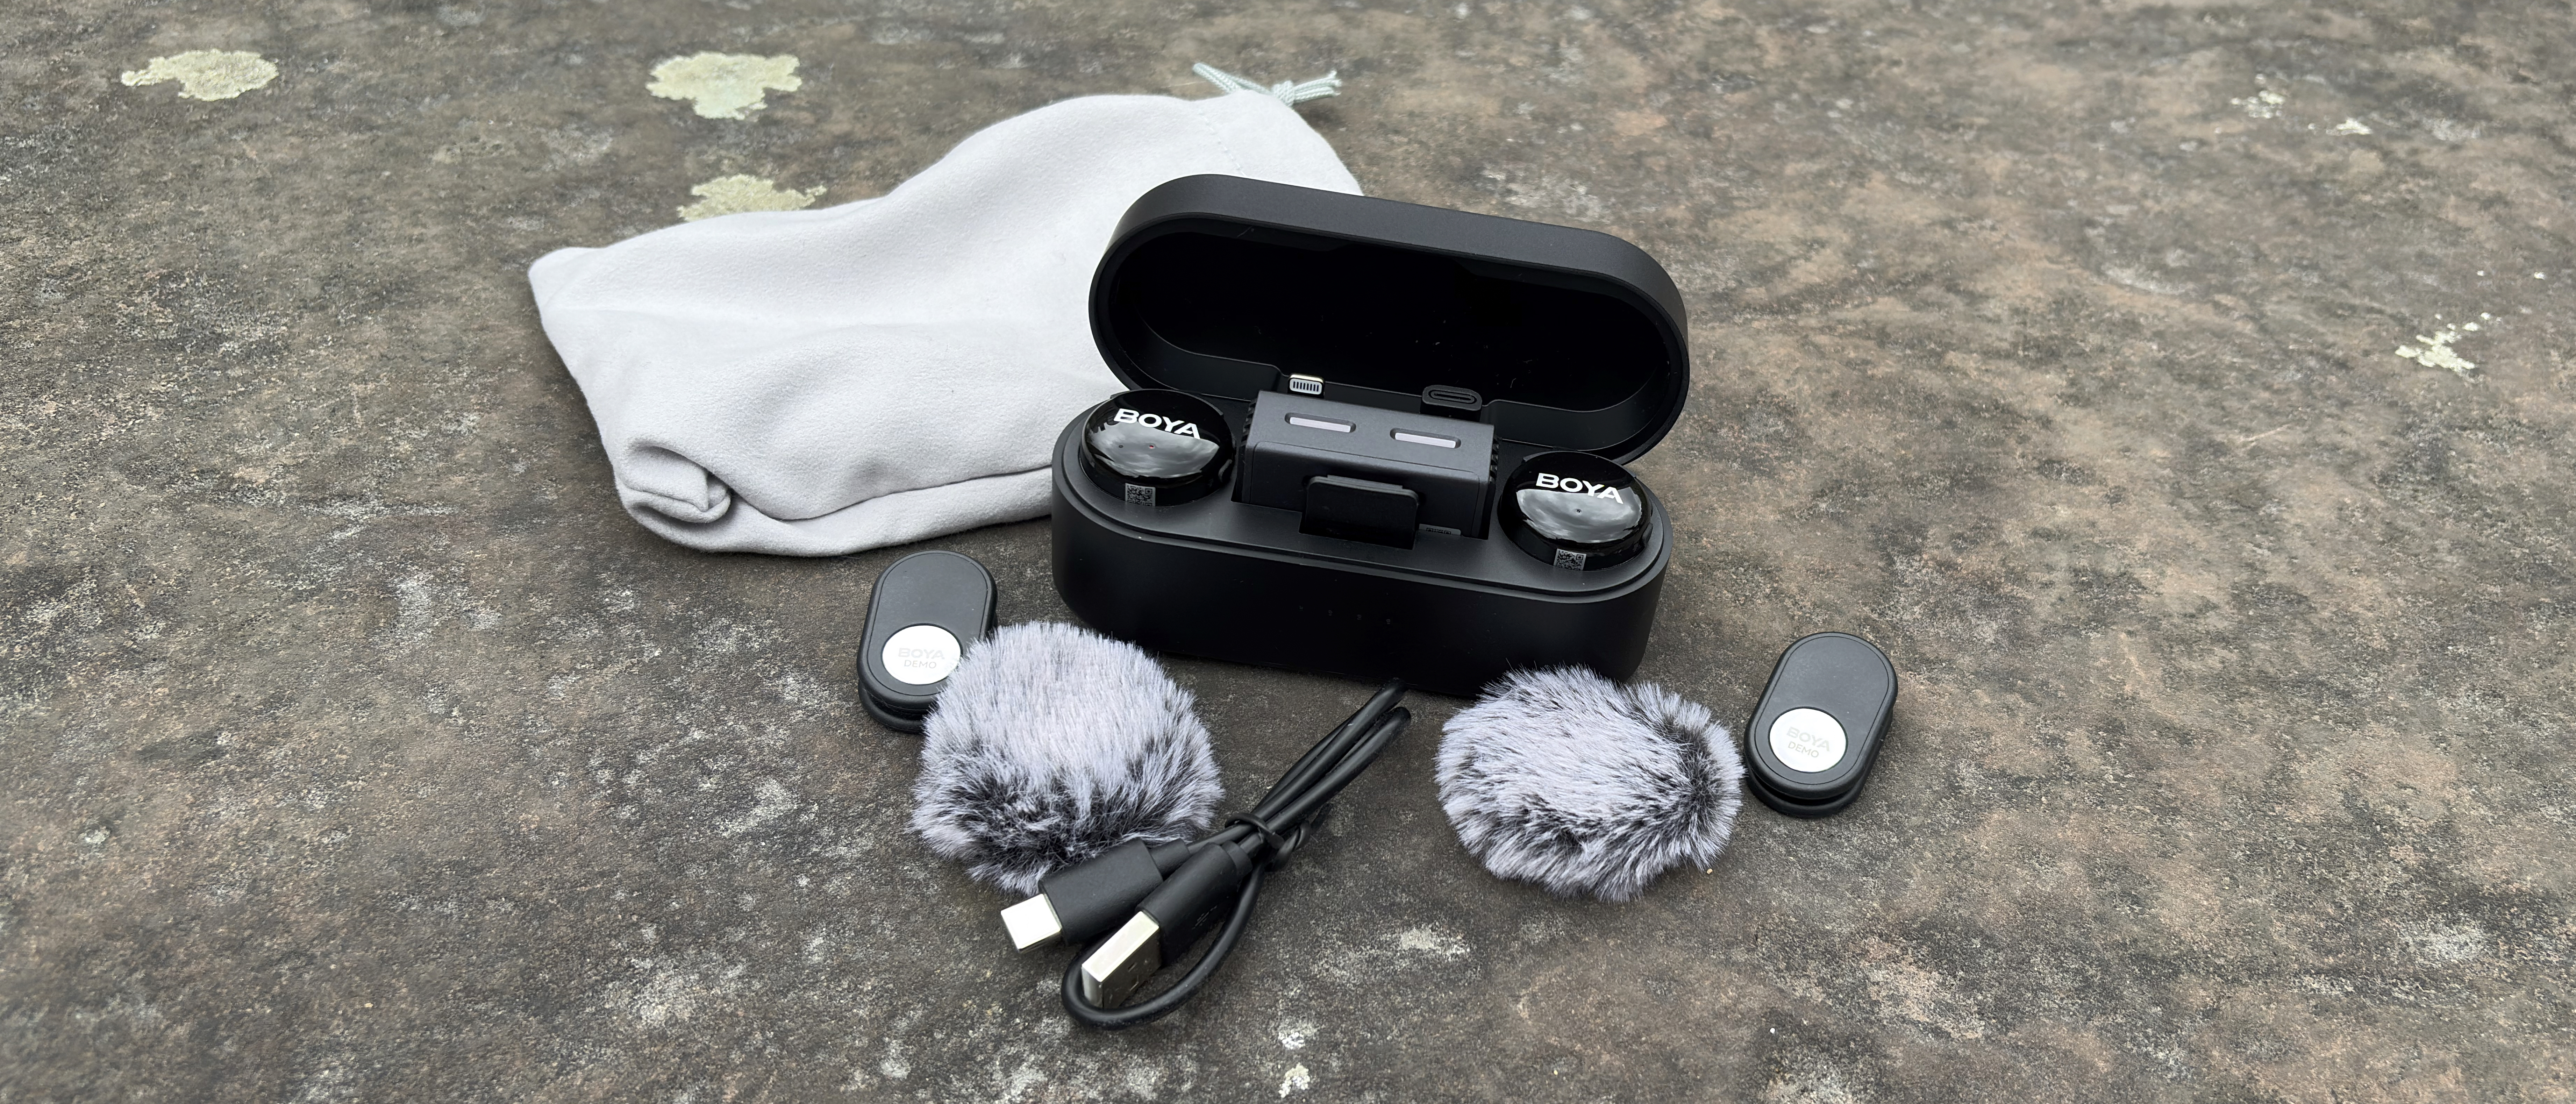
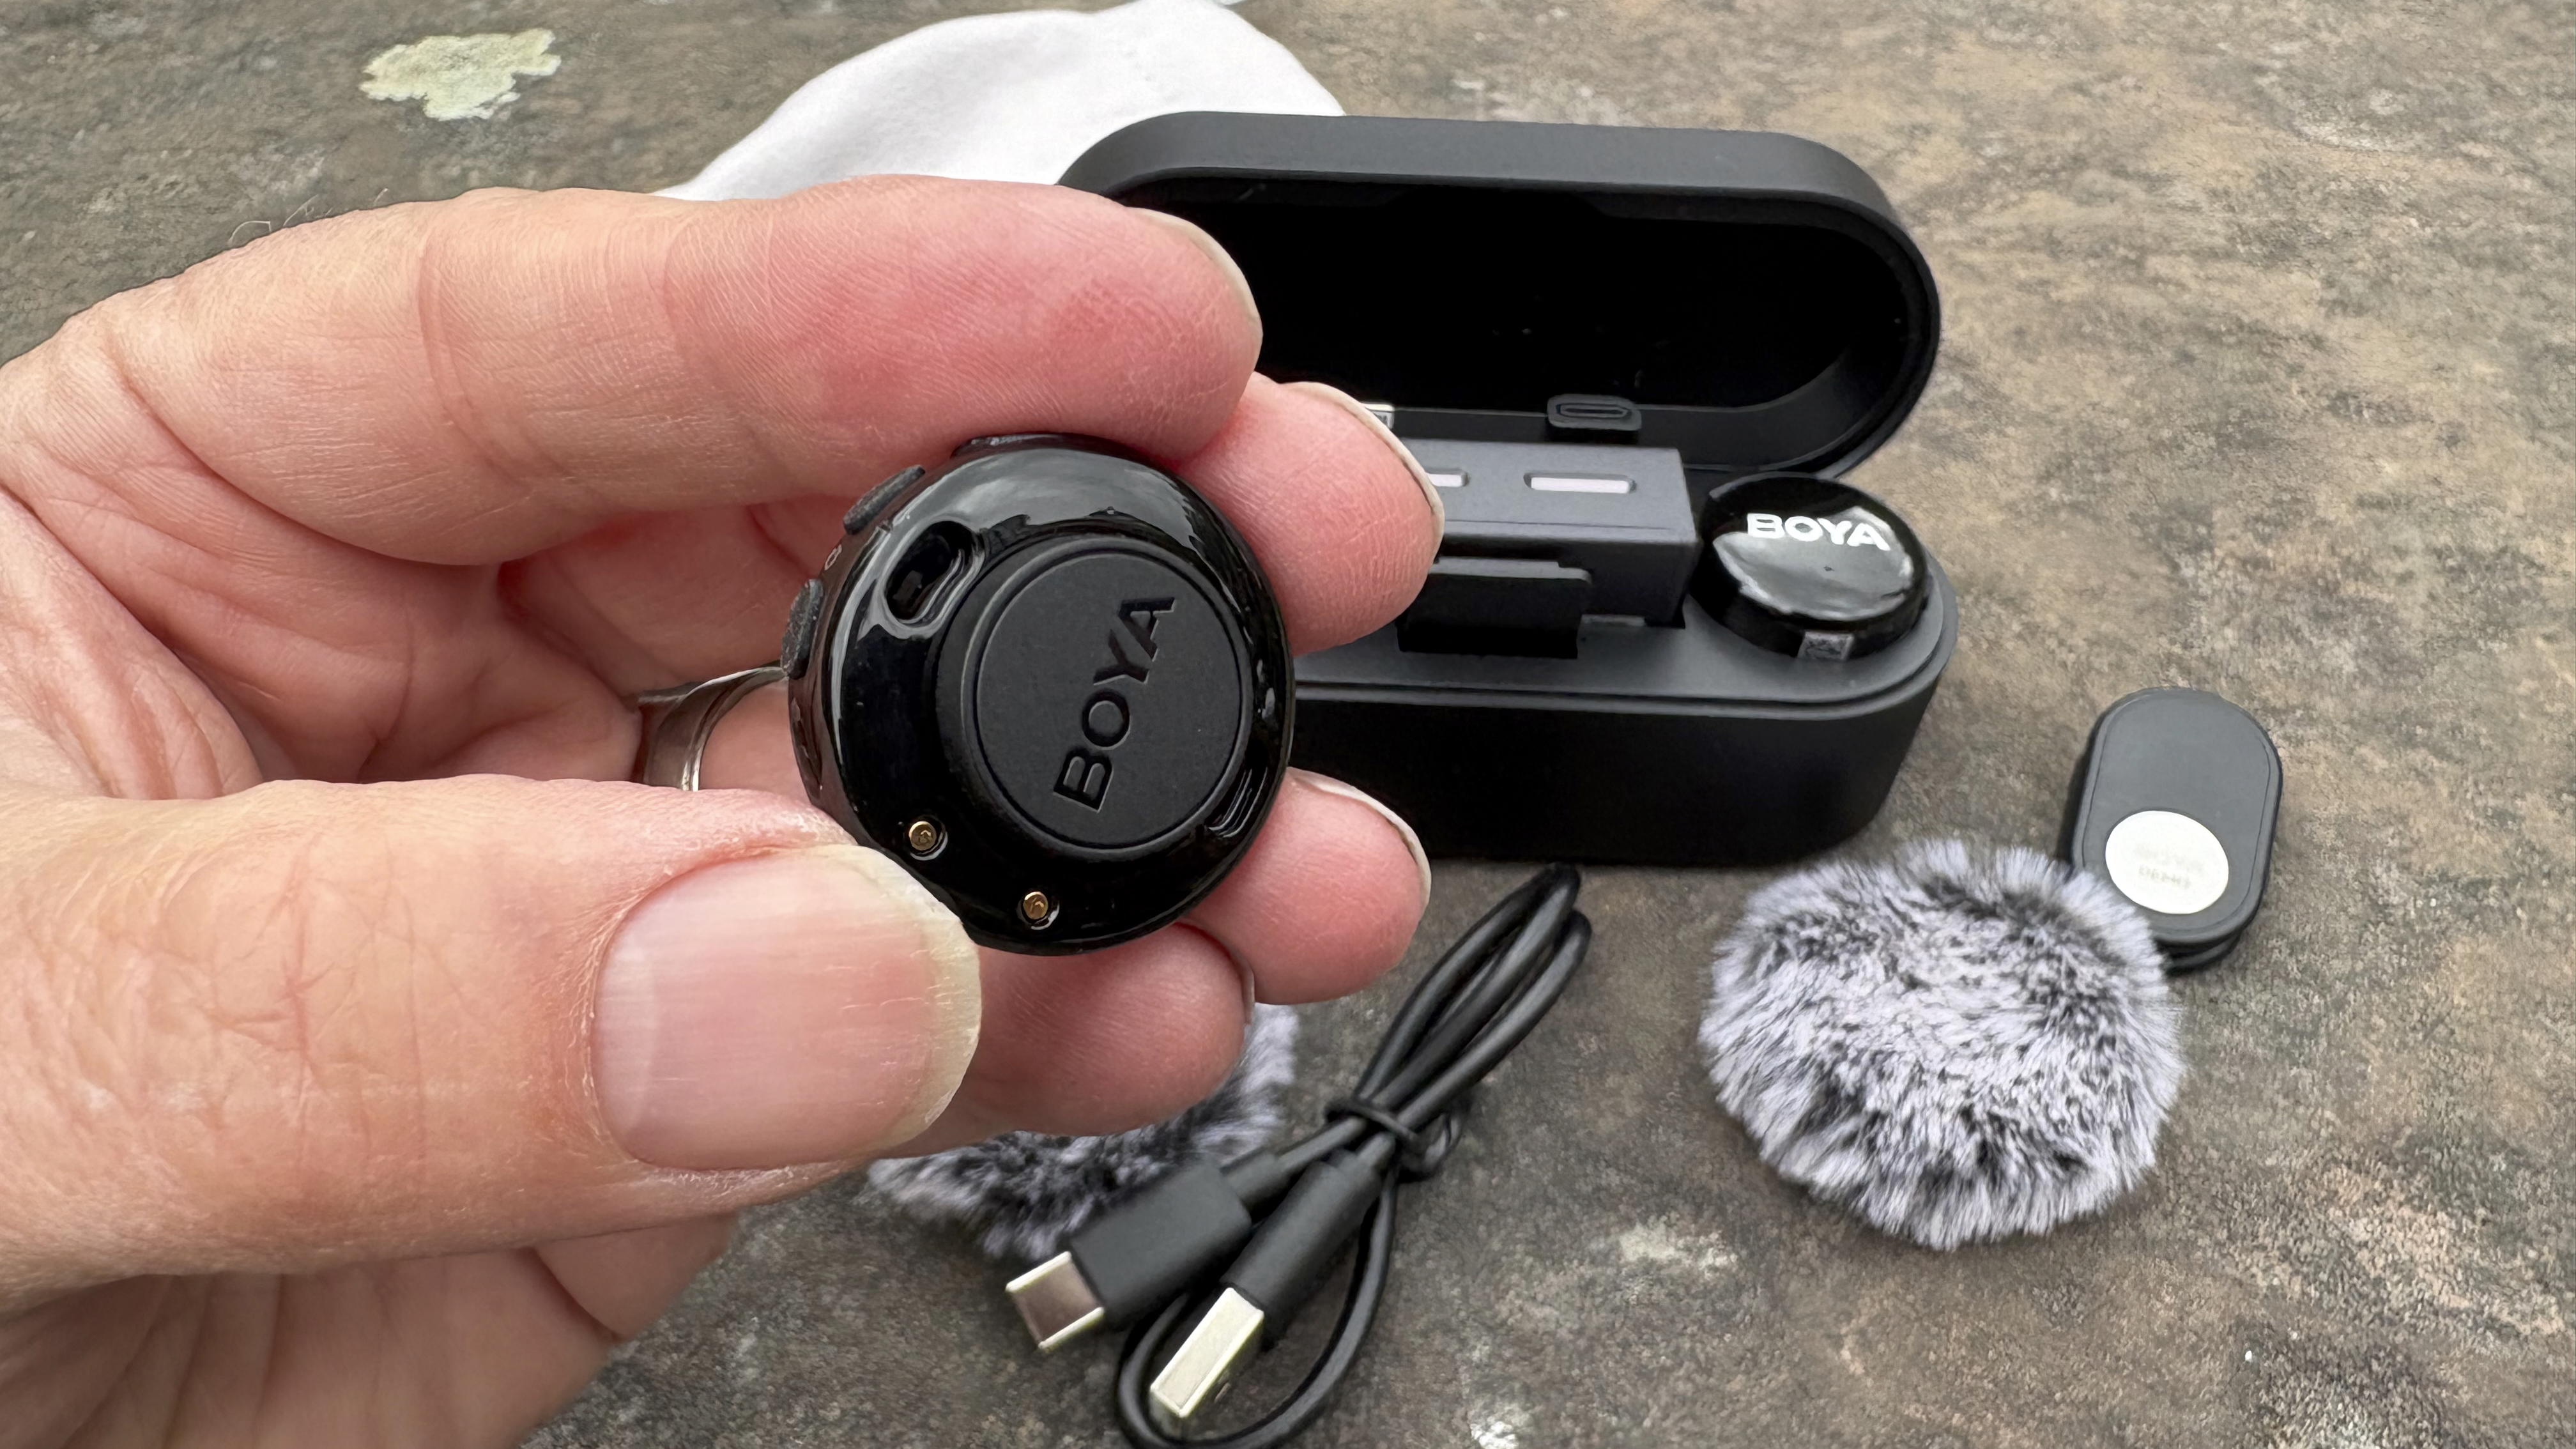
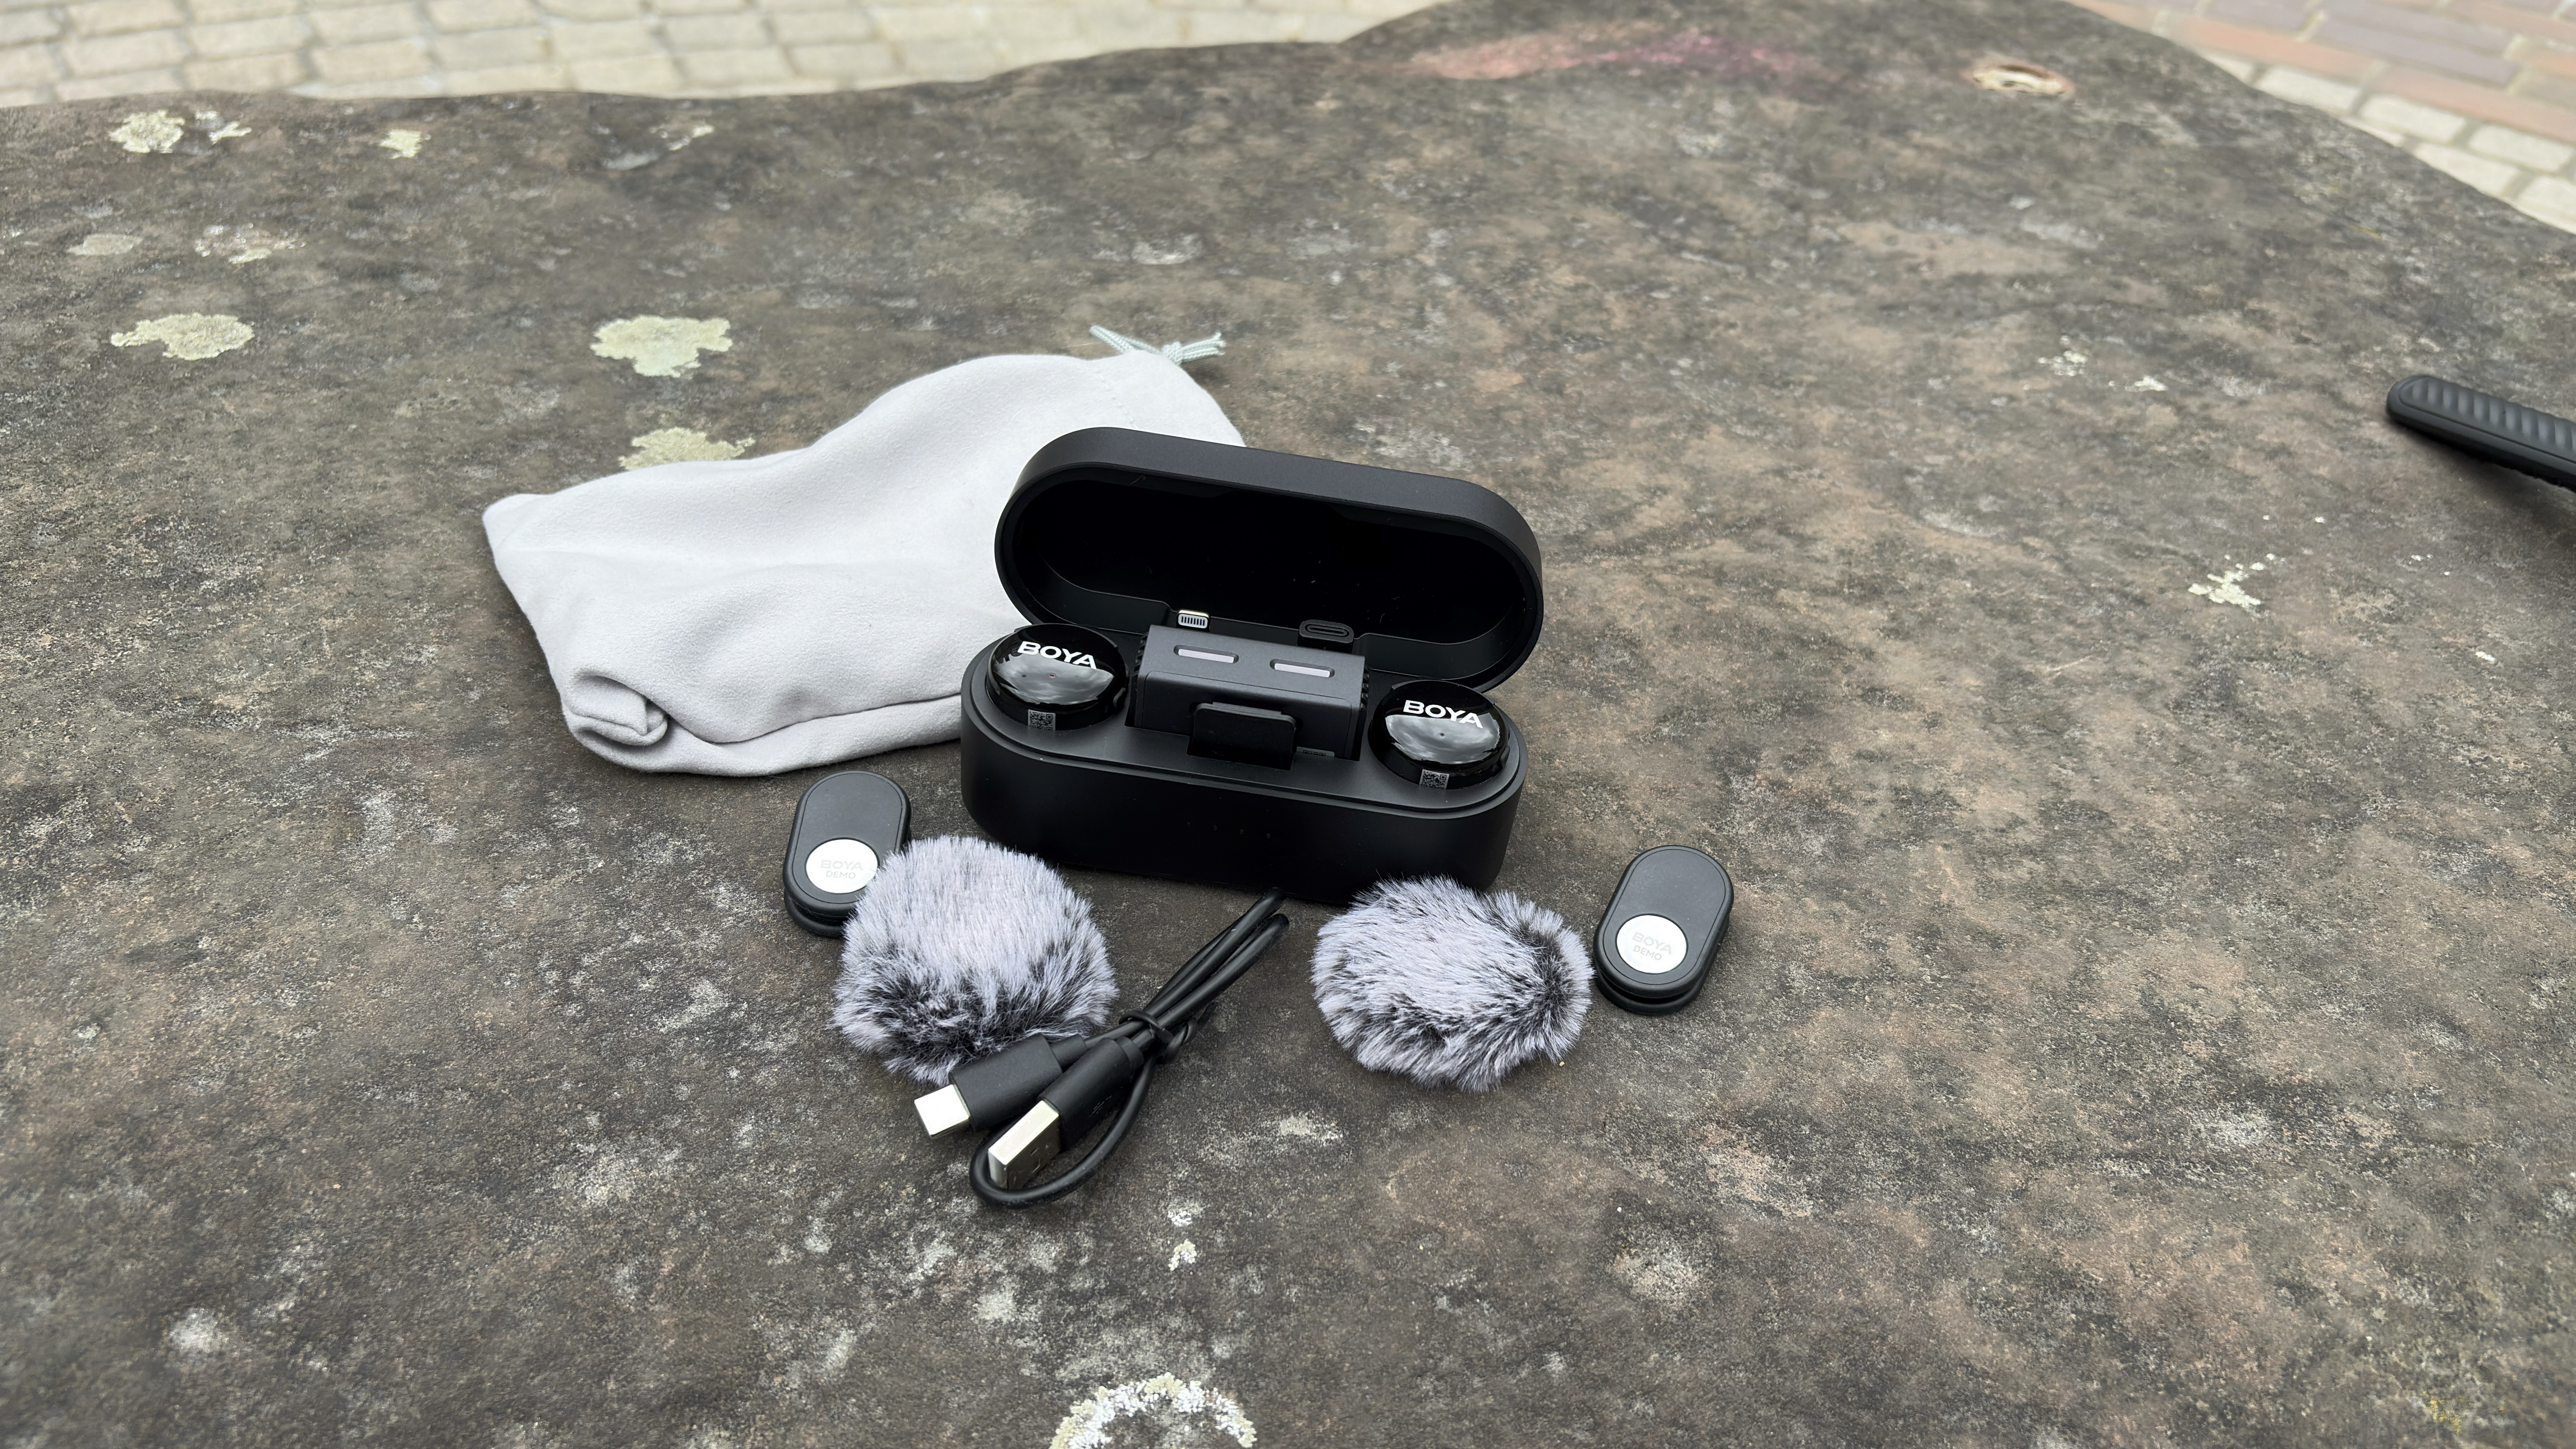
As time rolled on, some consumer mics, such as the Boyalink 3, have ditched the brick-like shape and cabled lavalier mics in favour of a smaller circular button-shaped transmitter mic. Indeed, the preceding Boyalink 2’s mics were more traditional rectangular plastic ‘bricks.’ The spring clips favoured by older mics have been replaced by magnets that slip under the subject’s shirt to hold the Boyalink 3’s mic in place. The Boyalink 3 also includes a clip mount that has a built-in magnet, so you can still clip a mic to a shirt or lapel if you desire (and there’s less chance of you losing a magnet when you detach the mic and the magnet slips down inside your shirt!).
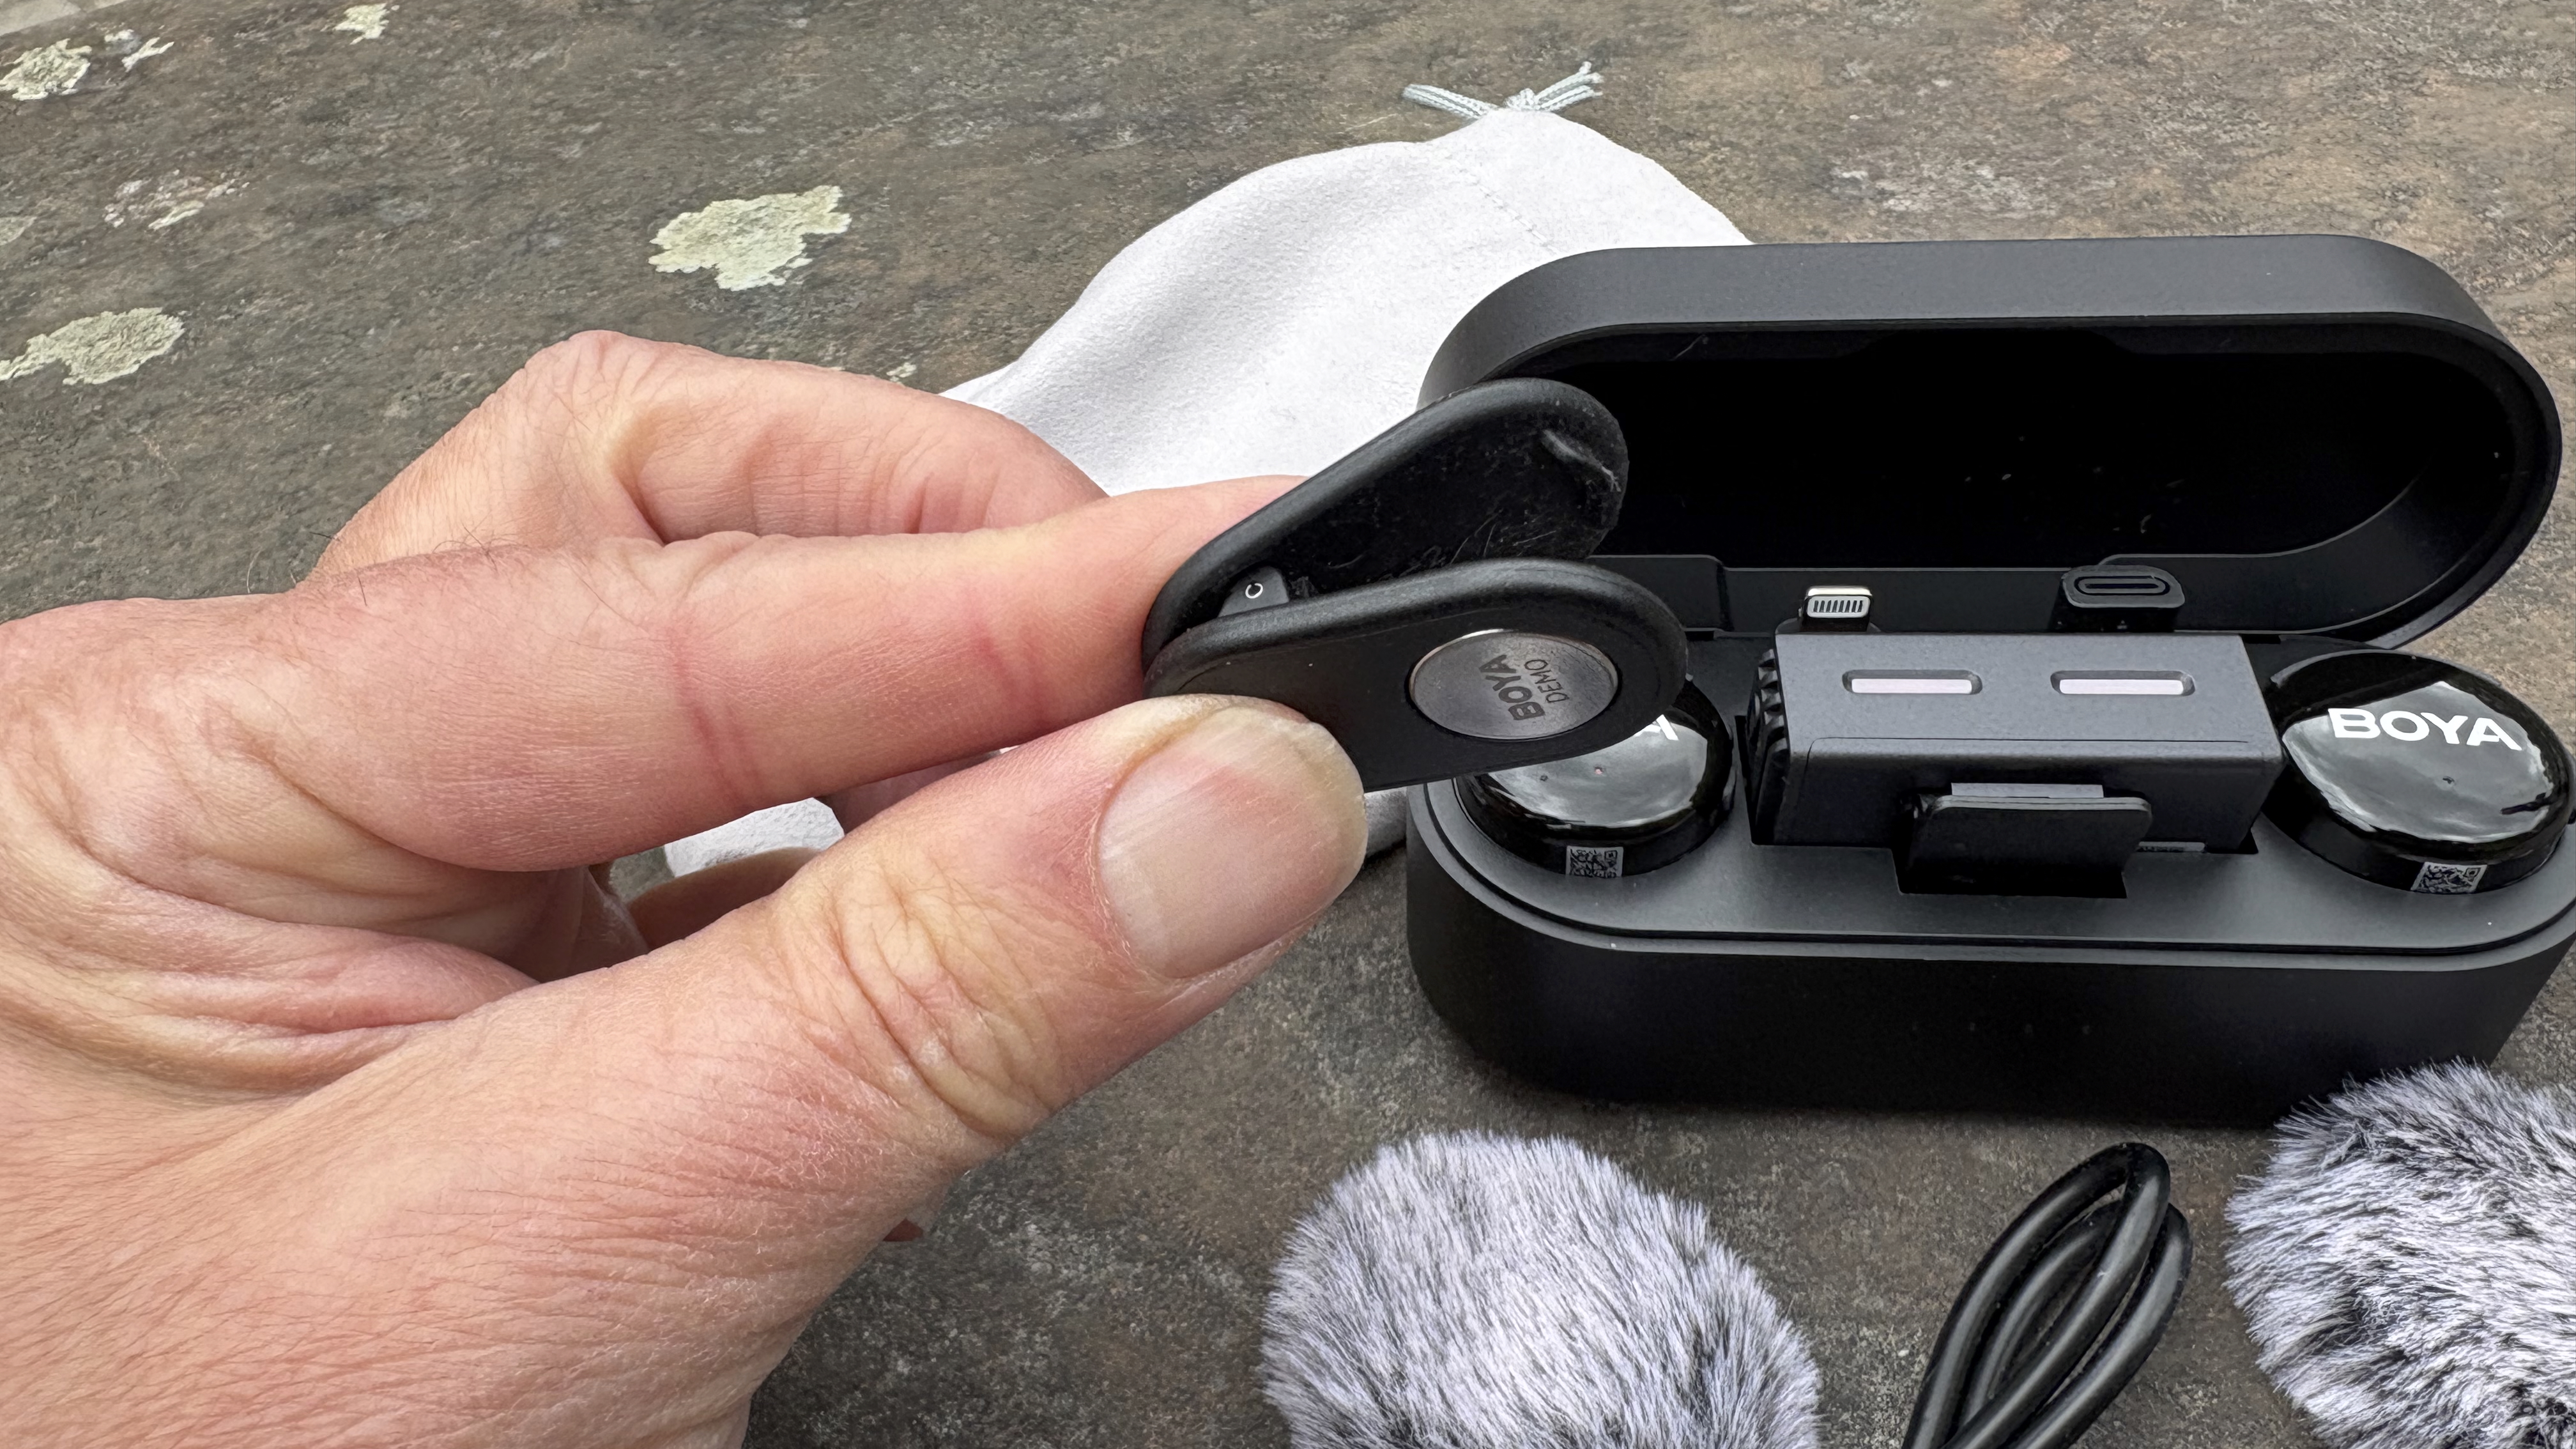
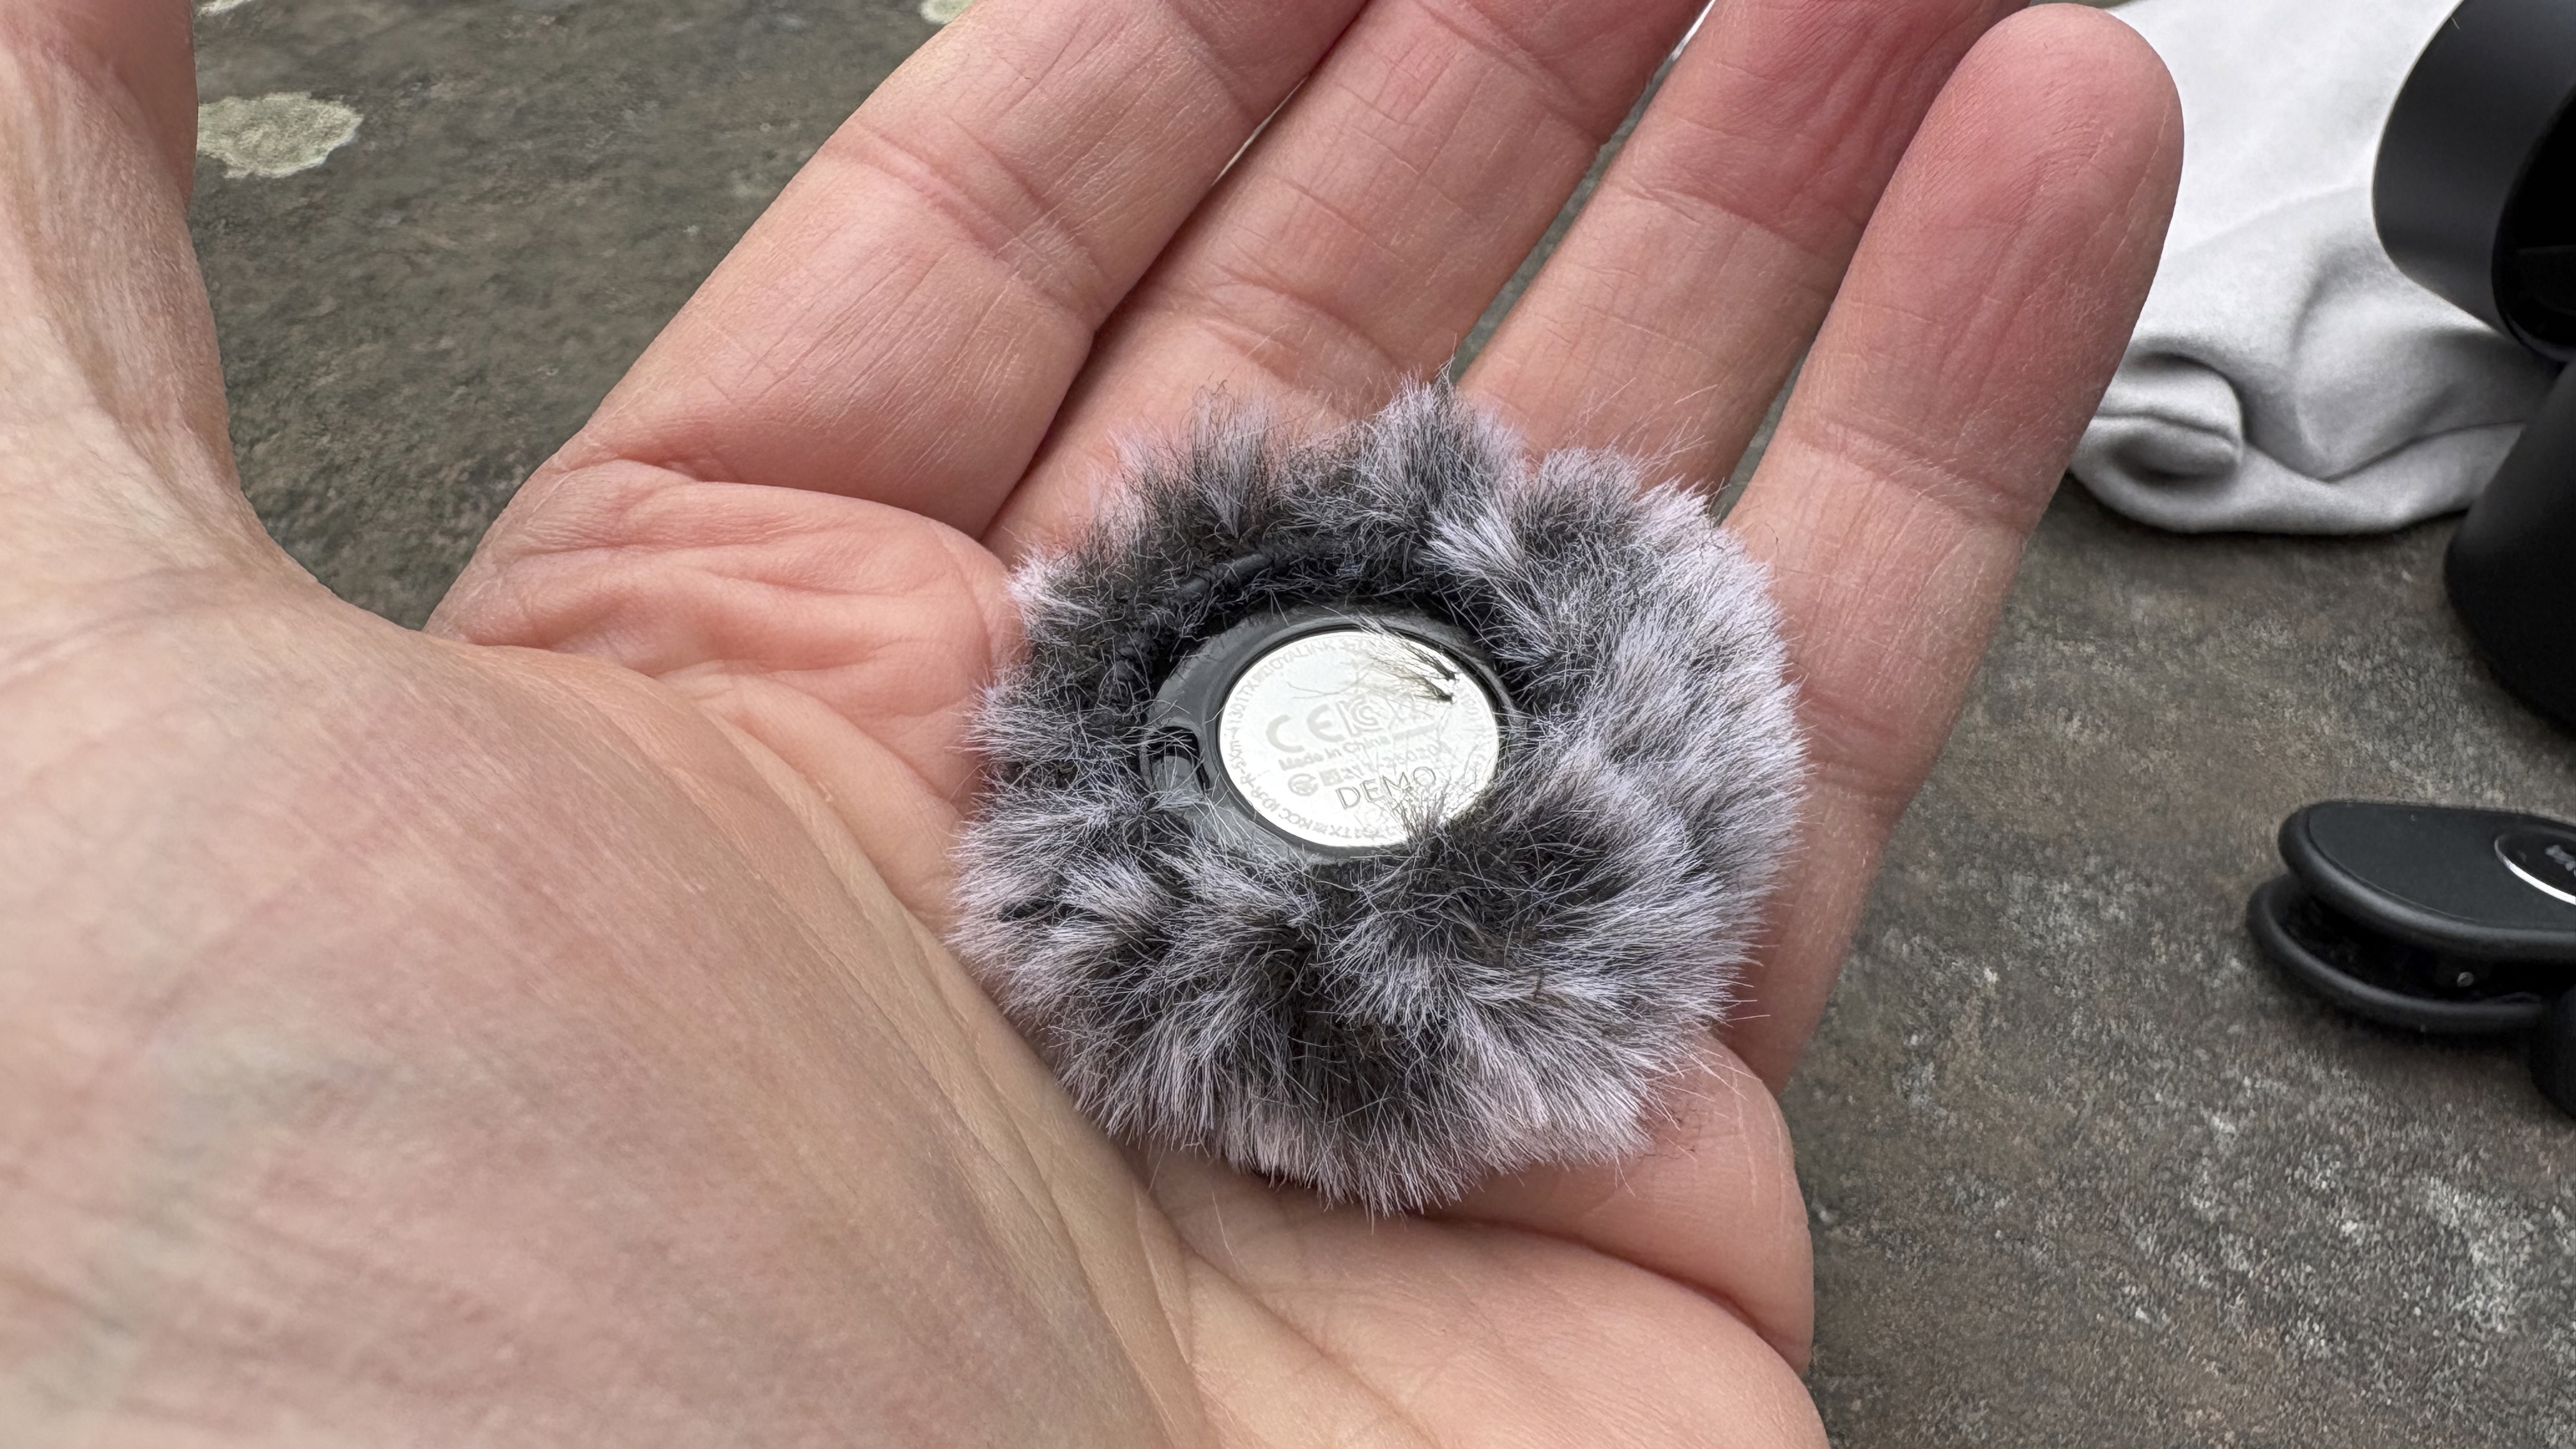
The Boyalink 3’s button-shaped mic is very similar to the disc-shaped mics in the Hollyland Lark M2 Wireless Lavalier Mic kit. The Lark M2 also uses magnets to keep the mic attached. Check out our Alternative section for more on the similar Lark M2.
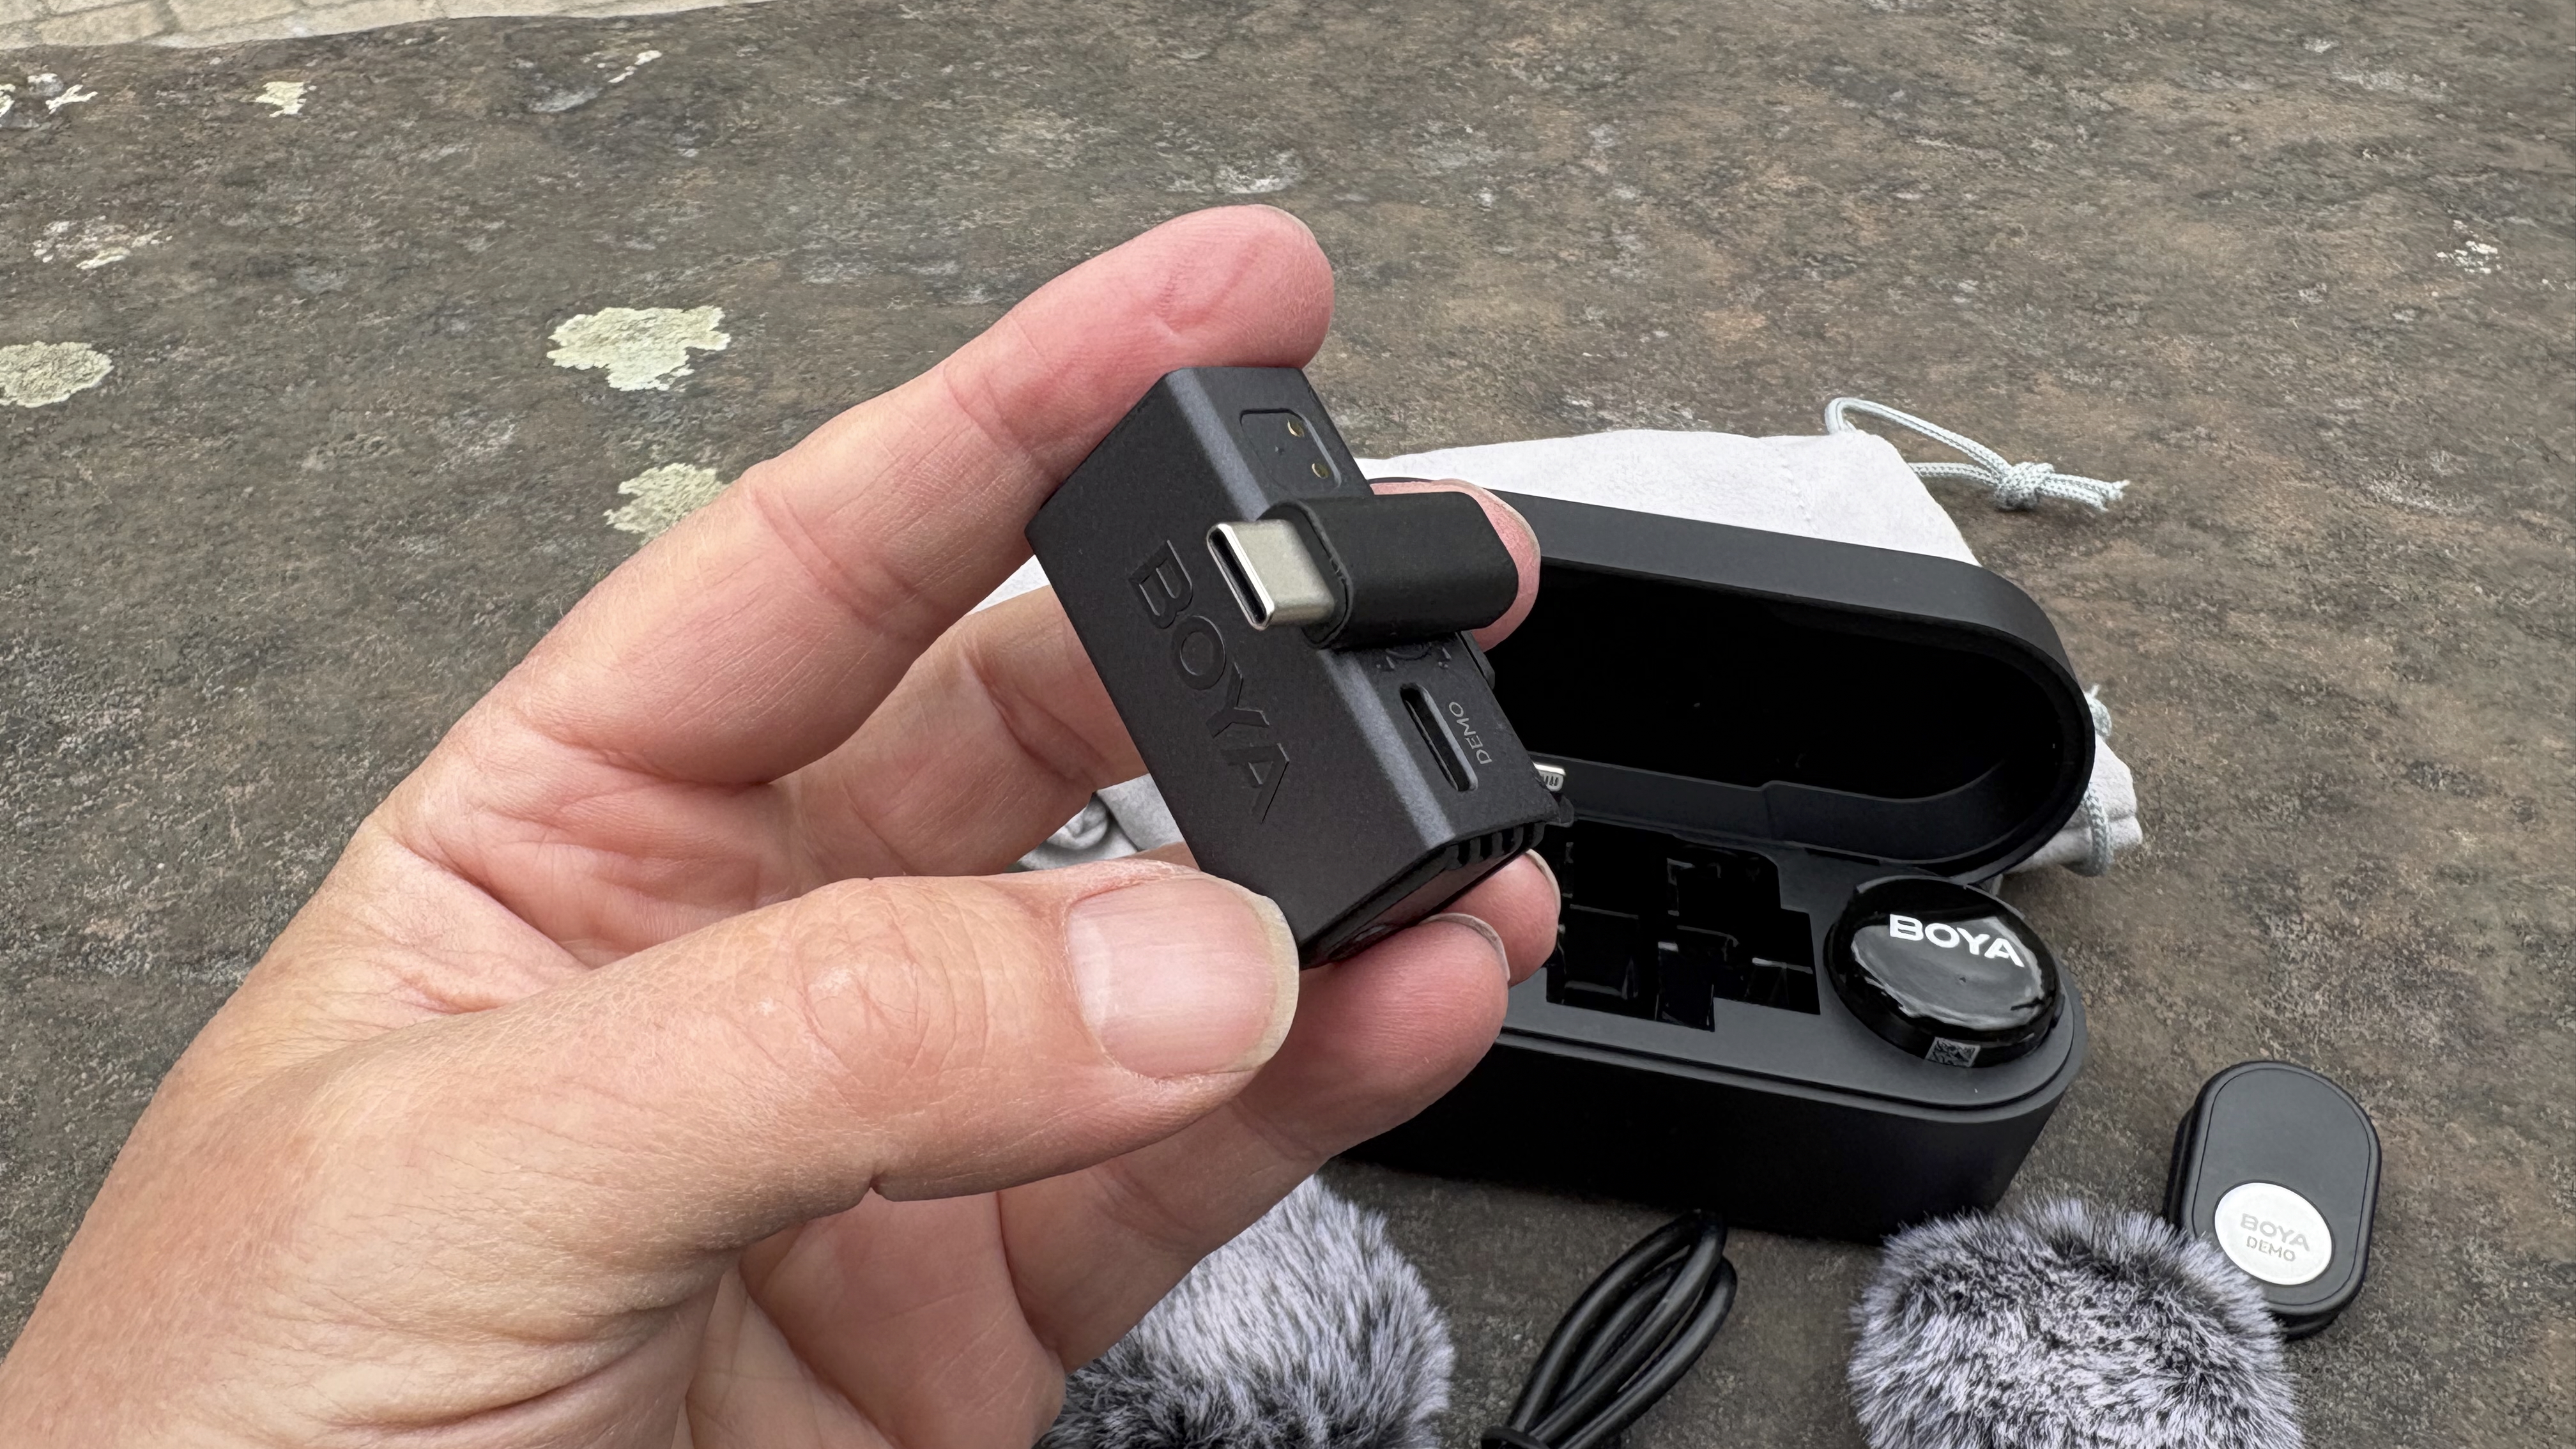
As with most wireless mic kits, the Boyalink 3 ships with a plastic carry case that keeps the two mics and receivers safely together during transit to the shoot. The case also charges the mics and transmitters to ensure that they all perform equally on a shoot. The receiver can be attached to an Android smartphone (or newer iPhone) using a supplied USB-C adaptor plug, or to an older iPhone courtesy of the supplied Lightning connector. There’s also a TRS cable to connect the receiver to a DSLR/mirrorless camera.
Boyalink 3: Performance
To test the Boyalink 3, I took it to London’s Barbican Centre. The open spaces between the tall towers tend to be very windy, so it’s a great place to test the effectiveness of the supplied ‘dead cat’ windshields. Windy locations can be difficult to film in as the wind adds a rumbling base noise to your dialogue, and that can ruin a take.
Normally, you can clip a windshield to the top of a mic so that its fluffy textured material absorbs wind and keeps noise at bay. However, the Boyalink 3’s circular mic needs to be completely inserted inside the circular windshield. As the mic is made of a very smooth and shiny plastic, this makes it very slippery to handle when trying to slide it inside the circular windshield. I spent quite a while trying to get the mic to fit into the tightly elasticated windshield, and on a couple of occasions, the mic slipped out of my fingers and onto the floor, which was quite frustrating.
Eventually, I was able to get the windshield on, but that involved pulling its fluff so hard that some of it came off. This was the trickiest windshield to attach of any microphone I’ve tested. Oh - there’s also the danger of pressing a button by accident when trying to get the mic into the windshield, and this can result in you accidentally muting the mic! So, keep an eye out for a red warning light on the mic that says that it is in Mute mode.
Once the windshield was finally attached, the wind-induced rumble was still audible (as you can hear from the start of my test video). Fortunately, the rumble quickly abated. There is an AI-assisted noise cancellation feature built into the mic, which can be activated by pressing a button on the side, but this button isn’t visible when the mic is wearing the windshield. We’ll come back to noise reduction later in this review, but first, I performed a distance test.
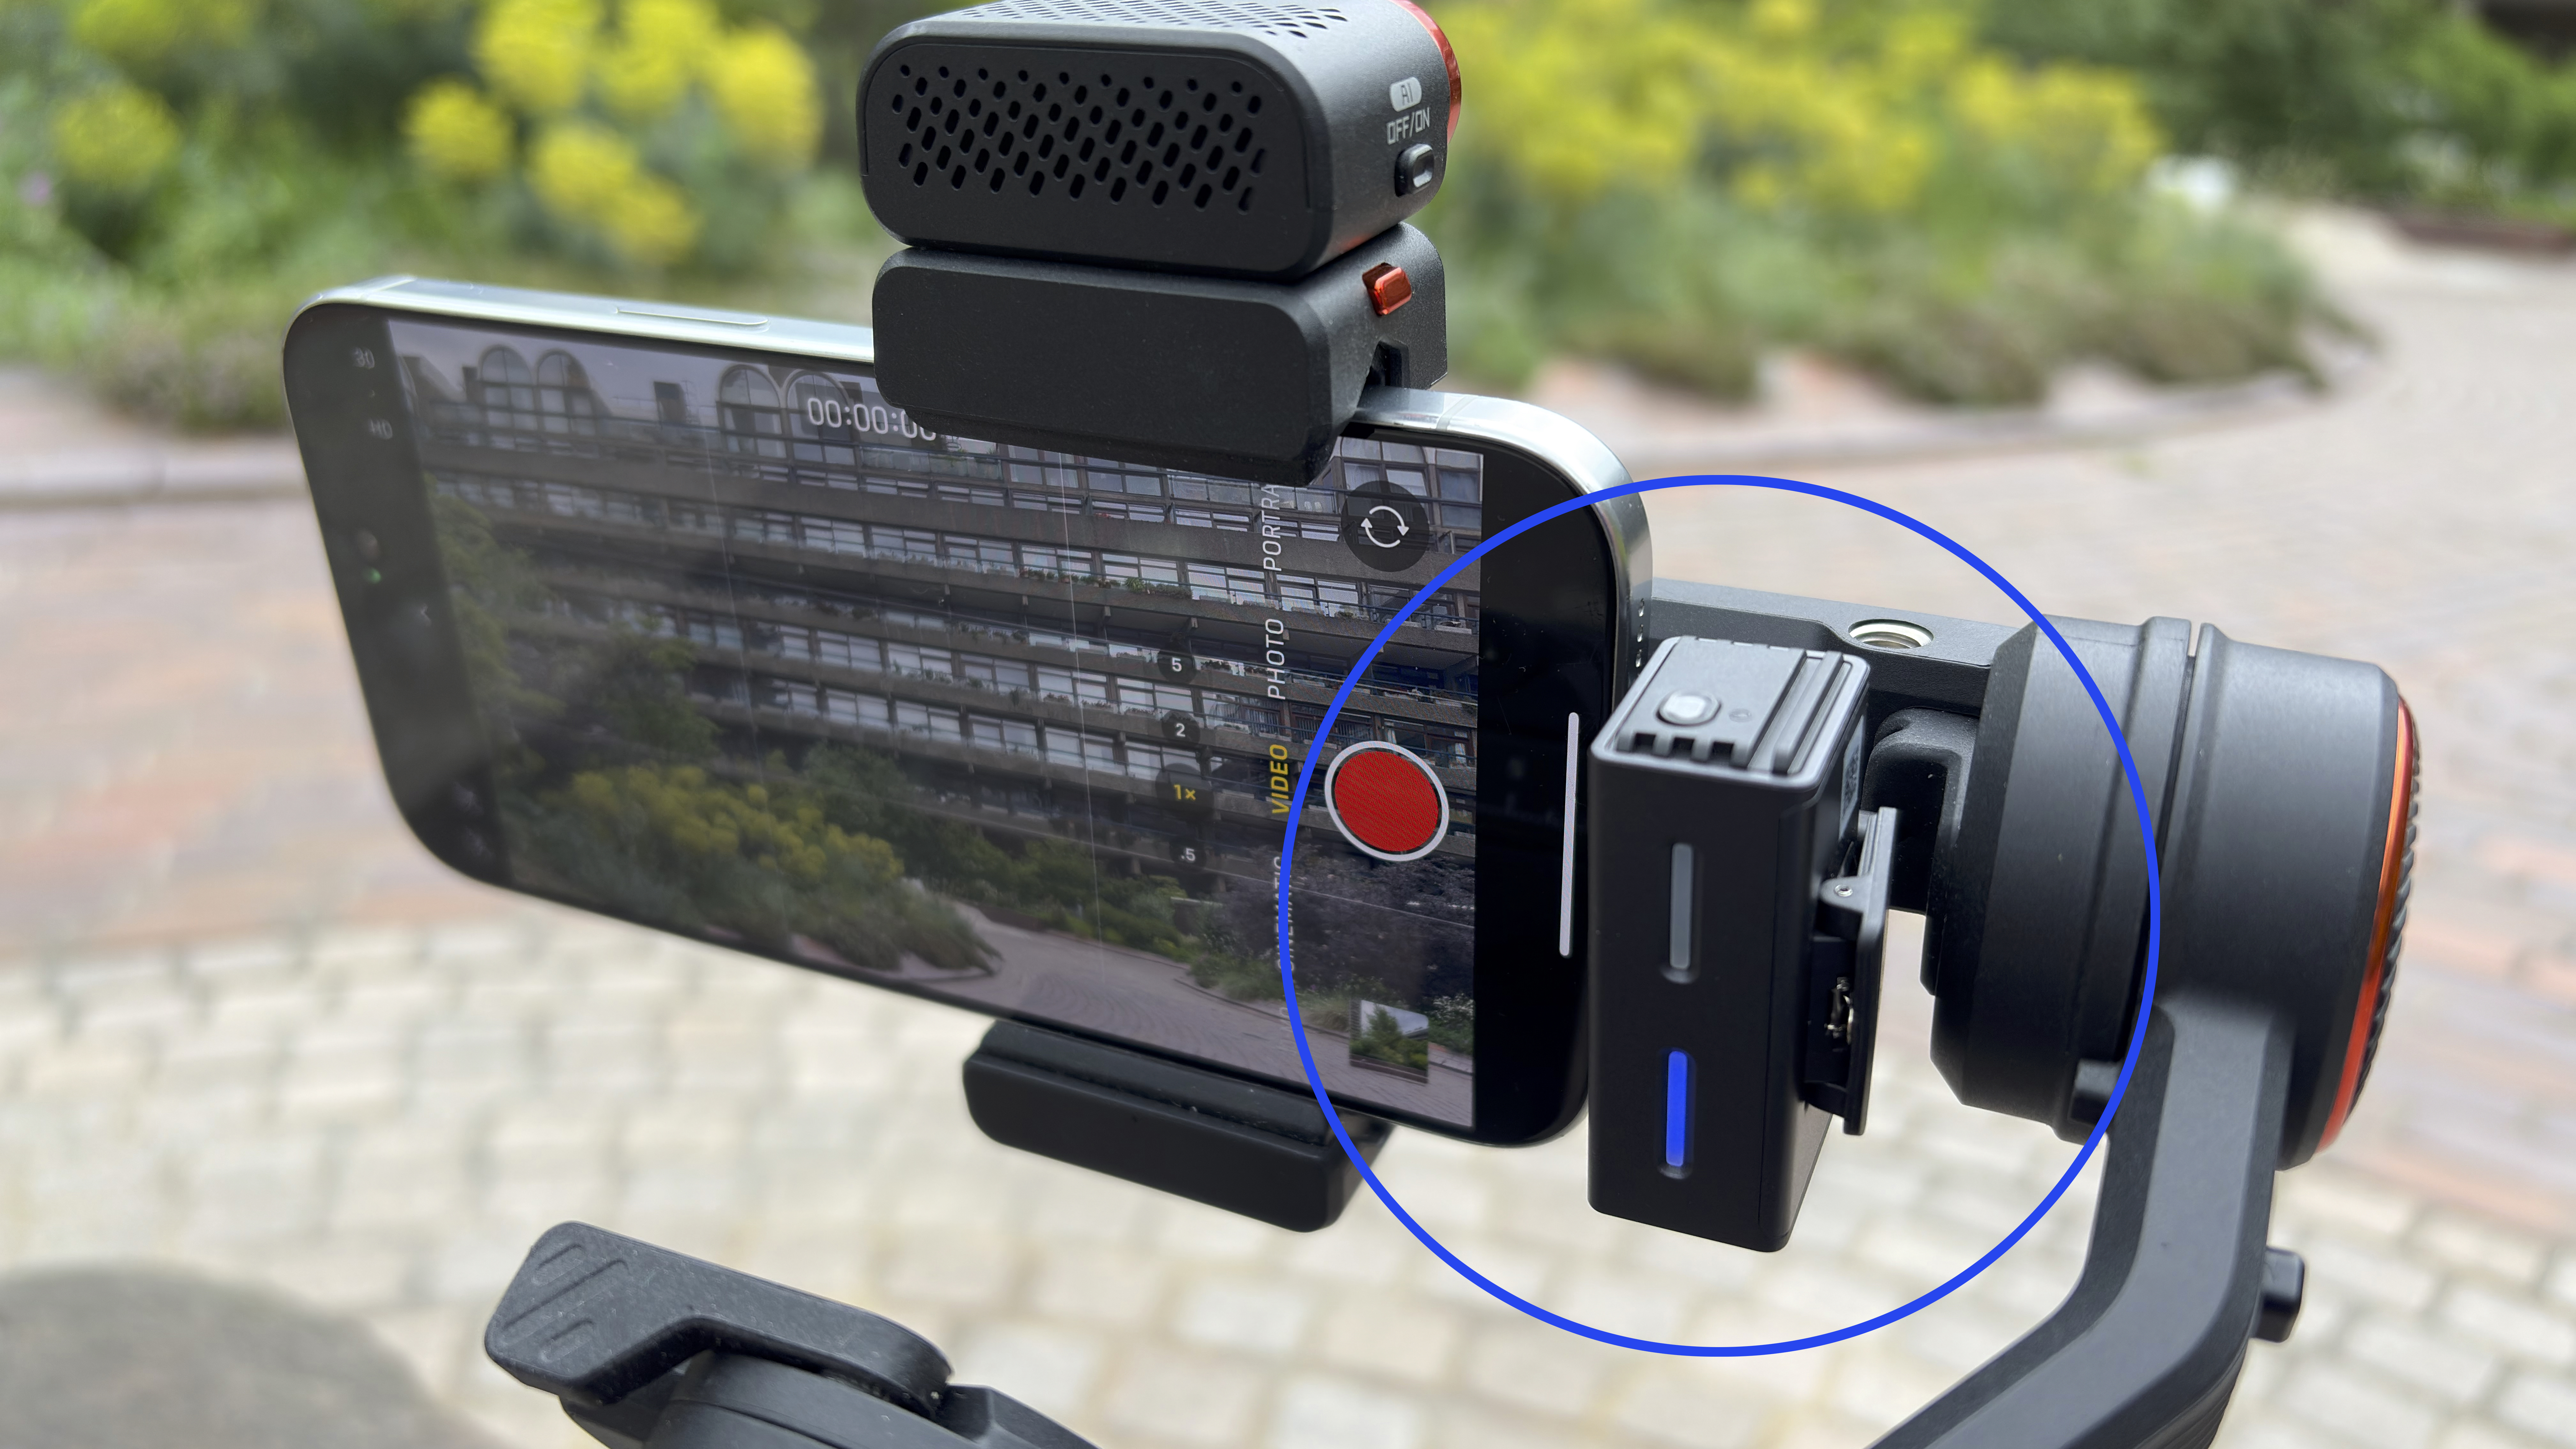
The specifications of the Boyalink 3 say that it can transmit audio from the transmitter to the receiver from 300 metres. There’s nowhere in London that I can shoot where I can safely leave my iPhone 16 Pro 300 metres away, plus you’d not be able to see me at that distance! I tested the mic from up to 60 metres away, and the signal was loud, clean, and clear. Even from that distance, I was a dot on the screen (as you’ll see from my test video). The audio quality sounded as good from 60 metres as it did from 1 metre. However, the signal did begin to drop out when I turned my back on the camera at around 30 meters, and the transmitter mic clipped to my shirt lost line of sight with the receiver attached to the iPhone. Drop-out like this is not unusual, and for most shoots, you’d be facing the camera anyway, so it shouldn’t be a major issue.
If you have to capture sound when you turn away from the camera, then consider the Boyamic 2, which was released at the same time as the Boyalink 3. The more expensive Boyamic 2’s mic supports onboard recording, so you can any plug holes caused by signal dropout. With some wireless mics, there can be a little delay between seeing a subject’s lips moving and hearing their voice. This latency is usually only a few frames and can easily be fixed in post-production software such as Adobe Premiere Pro. I was pleased to see that there was no noticeable latency when viewing footage captured by the Boyalink 3.
My next job was to test the AI-assisted noise-cancelling feature on the Boyalink 3 mic. I sat by a noisy fountain and removed the windshield so I could see/hear how effective the noise cancellation feature would be. After removing the windshield, I could see and tap the noise cancellation button. The mic’s blue light turned green to indicate that it was in noise-cancellation mode.
The noise-cancelling feature did an effective job of removing the white noise caused by the fountain, but the trade-off was that there was a slight electronic warble to my voice. To be honest, if the source of background noise (such as a fountain) is visible in the frame, it’s better to avoid using the Boyalink 3’s noise reduction feature and keep the fountain noise audible (or try manually reducing background noise in editing software such as Final Cut Pro).
Boyalink 3: Verdict
The Boyalink 3 is worth considering if you’re a consumer-level videographer who wants the production values of their social media channel’s sound to match the HD quality of their video footage. The auto-gain feature means that you don’t need to worry about manually setting sound levels (though you can take more control via the Boya Central smartphone app). You can also tweak the EQ of the Boyalink 3 from within the app to fine-tune its recording. The mic’s high-fidelity 48KHz/24-bit audio quality sounds great. However, once you’ve recorded a piece to camera, it’s essential to play it back to check for signal drop-out. You can then re-take the sequence if necessary. Pro video makers (such as wedding videographers) might not have the time to check the audio quality of their footage. They won’t be able to ask for a retake either during a busy and stressful wedding shoot, so they should consider purchasing the more expensive professional-level new release from Boya - the Boyamic 2. This mic features onboard recording, so it will record audio without any signal drop-out.
The Boyalink 3’s button-shaped mics are more discreet than the typical plastic brick shape of other manufacturers, but this compact design leads to challenges, such as getting the windshield to attach to the mic and then being unable to see and press the noise-cancelling button on the mic. There’s also the danger when wrestling the mic into the windshield that you might press the mute button by mistake, but a red warning light will help you avoid filming a scene with no audio. You could also accidentally trigger noise-cancellation mode, which could lead to a slightly warbly soundtrack, but fortunately, a larger and more noticeable green light appears on the receiver when noise-cancellation is active.
For its price, this is an affordable solution to improving the audio quality of your videos and freeing you to be heard as you walk and talk wirelessly from a distance (as long as you face the camera). However, I was surprised and frustrated at how tricky it was to get the windshield onto the mic, which loses it a star in the rating, and the noise cancellation feature wasn’t particularly effective despite the marketing blurb about its AI-assisted pedigree.
Features ★★★★☆ | 24-bit audio, a -6B safety track (to reduce the chance of distortion) and the option to record in mono or stereo gives you flexible control in the post-production stage |
Design ★★★☆☆ | The Boyalink 3’s disc-shaped mics are discrete and easy to attach via magnets, but their smooth slippery surfaces make it a challenge to slip them into their windshields. |
Performance ★★★☆☆ | If you’re careful not to let mic lose line of sight with receiver then you’ll capture clean clear Hi-Fi sound from a distance. Noise cancellation works, but with a drop in voice quality. |
Value ★★★★☆ | This is an affordable entry-level consumer mic that is competitively priced. |
Alternatives
Like the Boyalink 3, the RØDE Wireless Micro is also an entry-level mic. It may cost around a tenner more than the Boyalink 3, but it is less prone to signal dropout than the Boya. Unlike the Boyalink 3, the RØDE Wireless Micro doesn’t have a noise-cancellation feature, but you’re better off cancelling noise more effectively in a post-production editing app.
Read the full RØDE Wireless Micro review
George has been freelancing as a photo fixing and creative tutorial writer since 2002, working for award winning titles such as Digital Camera, PhotoPlus, N-Photo and Practical Photoshop. He's expert in communicating the ins and outs of Photoshop and Lightroom, as well as producing video production tutorials on Final Cut Pro and iMovie for magazines such as iCreate and Mac Format. He also produces regular and exclusive Photoshop CC tutorials for his YouTube channel.
You must confirm your public display name before commenting
Please logout and then login again, you will then be prompted to enter your display name.
