Use time blending to merge the best light in your landscape photography
James Paterson explains time blending for gorgeous sunset landscapes
The best camera deals, reviews, product advice, and unmissable photography news, direct to your inbox!
You are now subscribed
Your newsletter sign-up was successful
How often have you shot a beautiful sunset, then, later on, had to lift the darker foreground to balance out the scene? We’ve all attempted a heavy-handed shift to the Shadows slider, but perhaps there’s a better way.
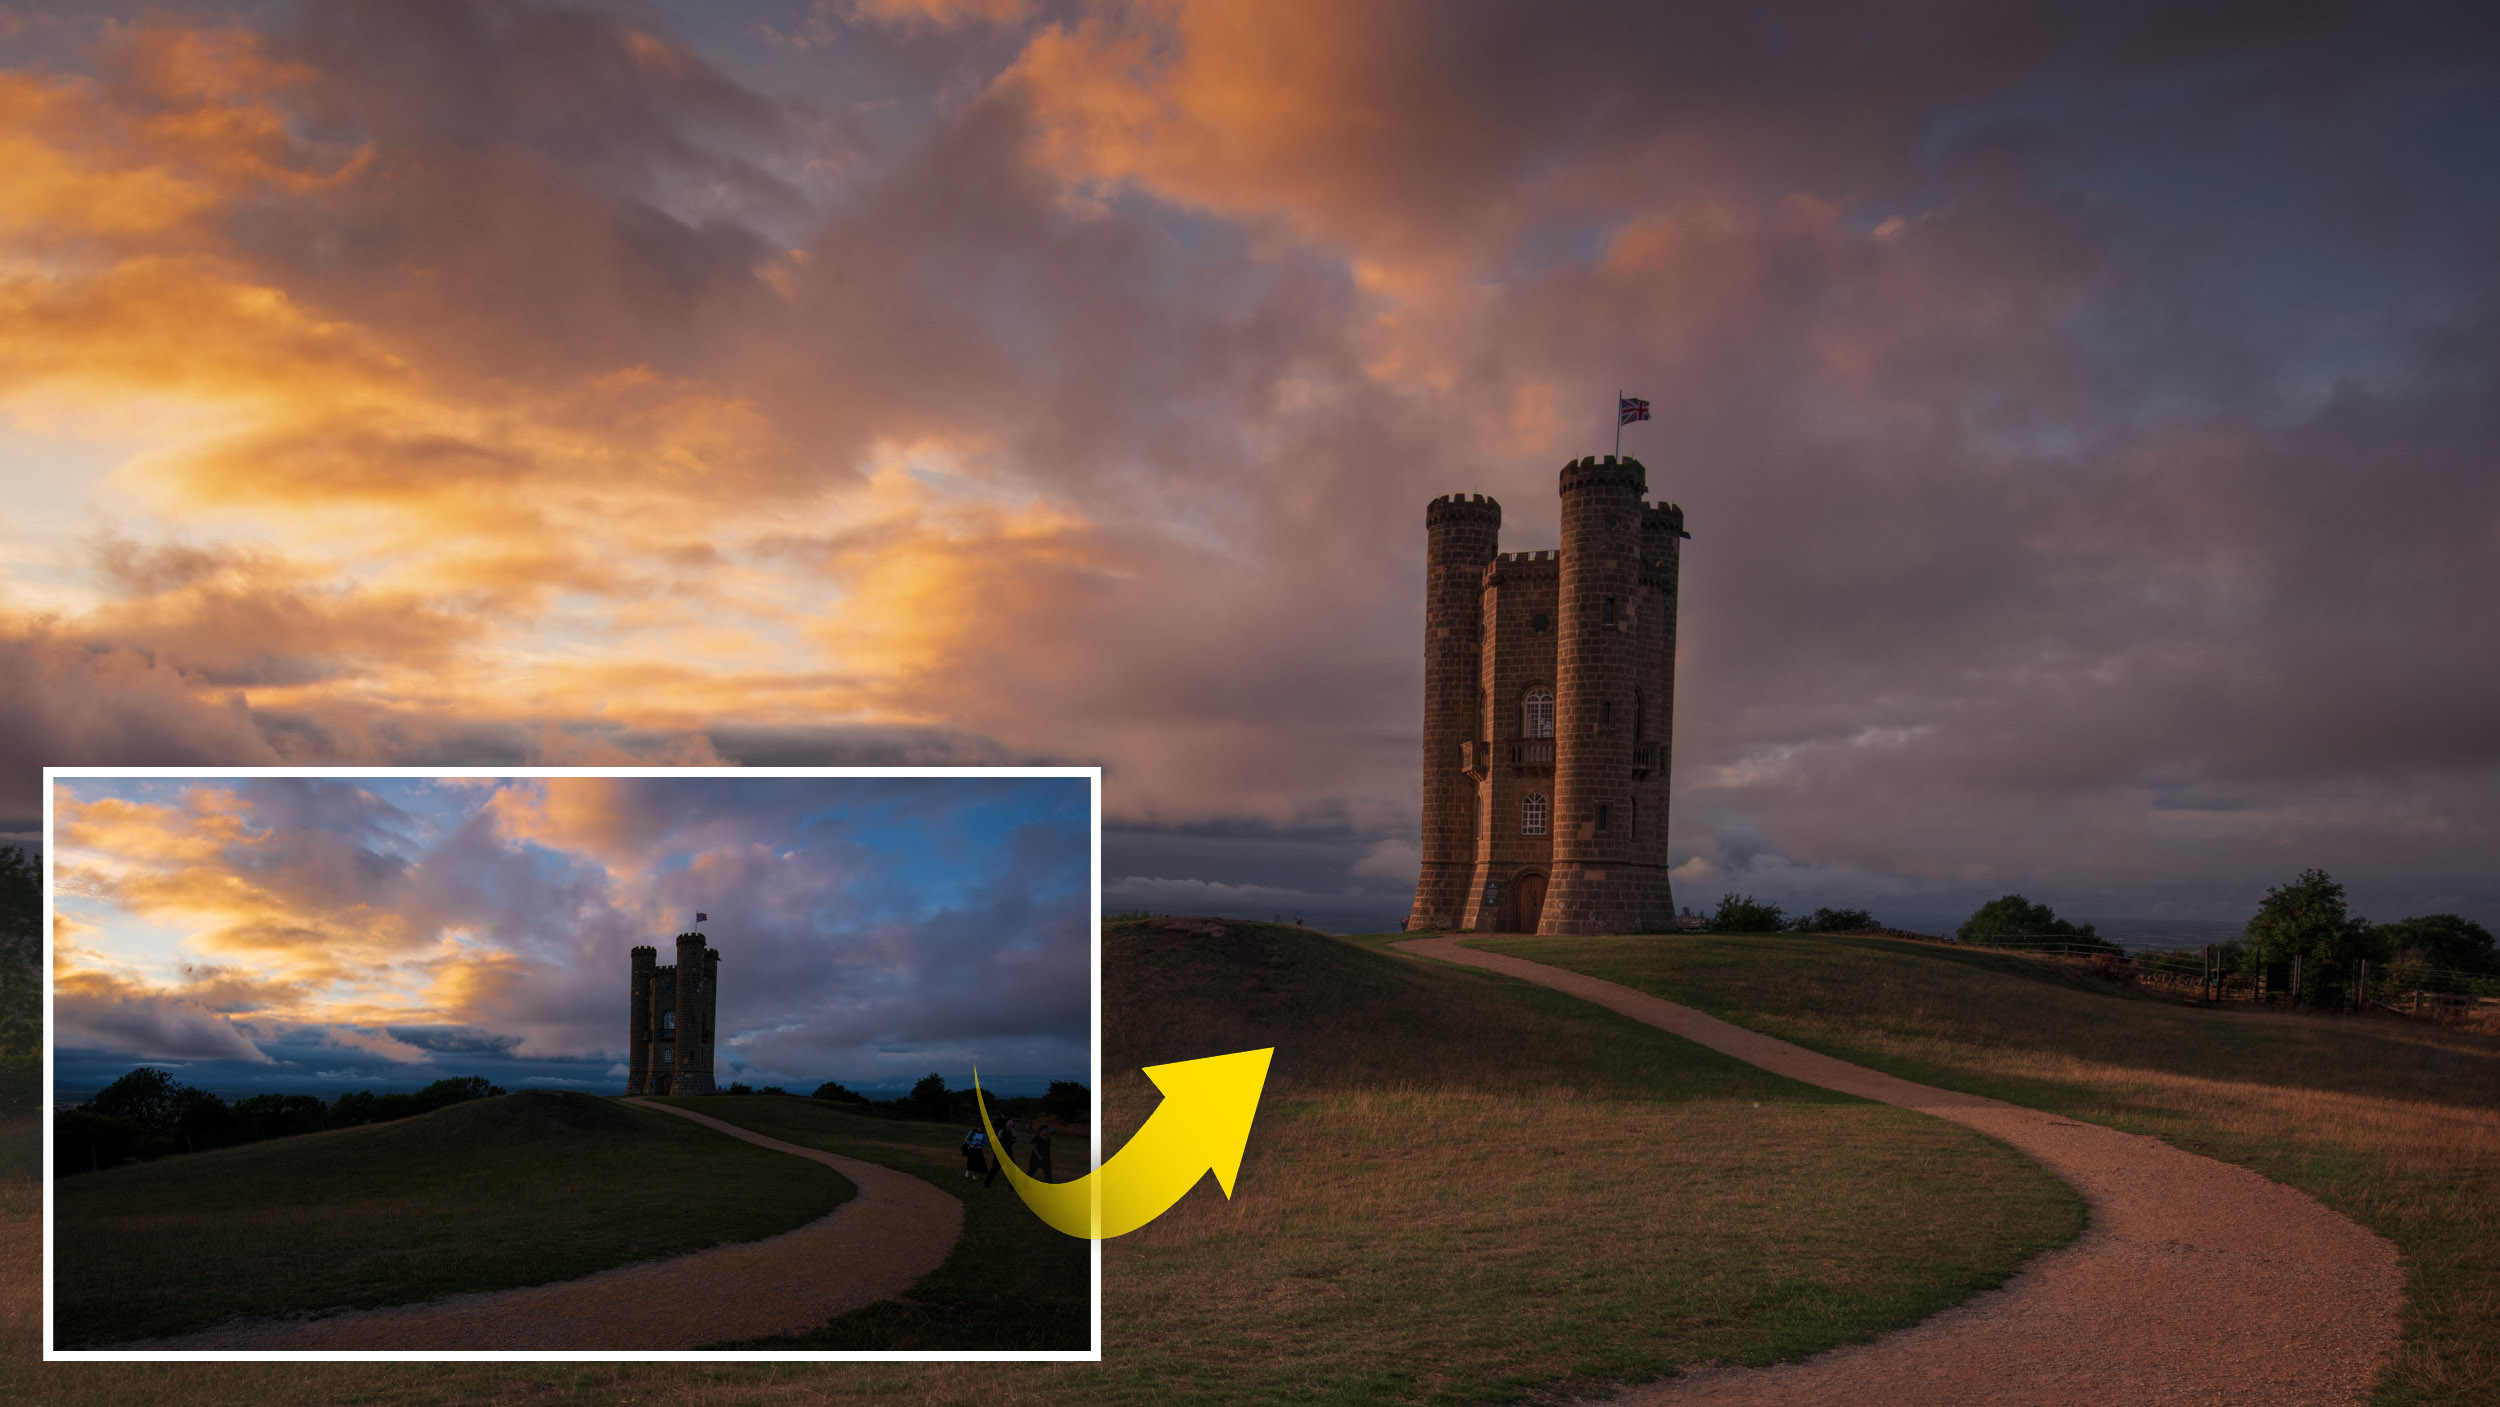
How about time blending instead? This is simply a fancy term for shooting the same scene several times over a period of time, then blending together the best bits. This way, we can choose the best frame for the sunset sky, and blend it with earlier frames when the landscape is bathed in better light.
By shooting a scene several times over the course of an afternoon – from golden hour to sundown to twilight – then combining the best parts from each frame, you can effectively pick and choose the optimum lighting conditions for each part of the scene. Here the tower looks beautiful and golden when the sun is low, but the sky behind is more atmospheric a little while later, when the sun drops even further and oranges and reds begin to tint the clouds.
Of course, this involves a cunning combination of shooting and editing techniques. First off, we need to capture a range of frames for the land, then wait around for the best sky. They say that landscape photography takes patience, but still, it takes an extra level of endurance to stay rooted to the same spot for an hour or more. Thankfully, the rewards can be worth the effort.
1. Aperture priority
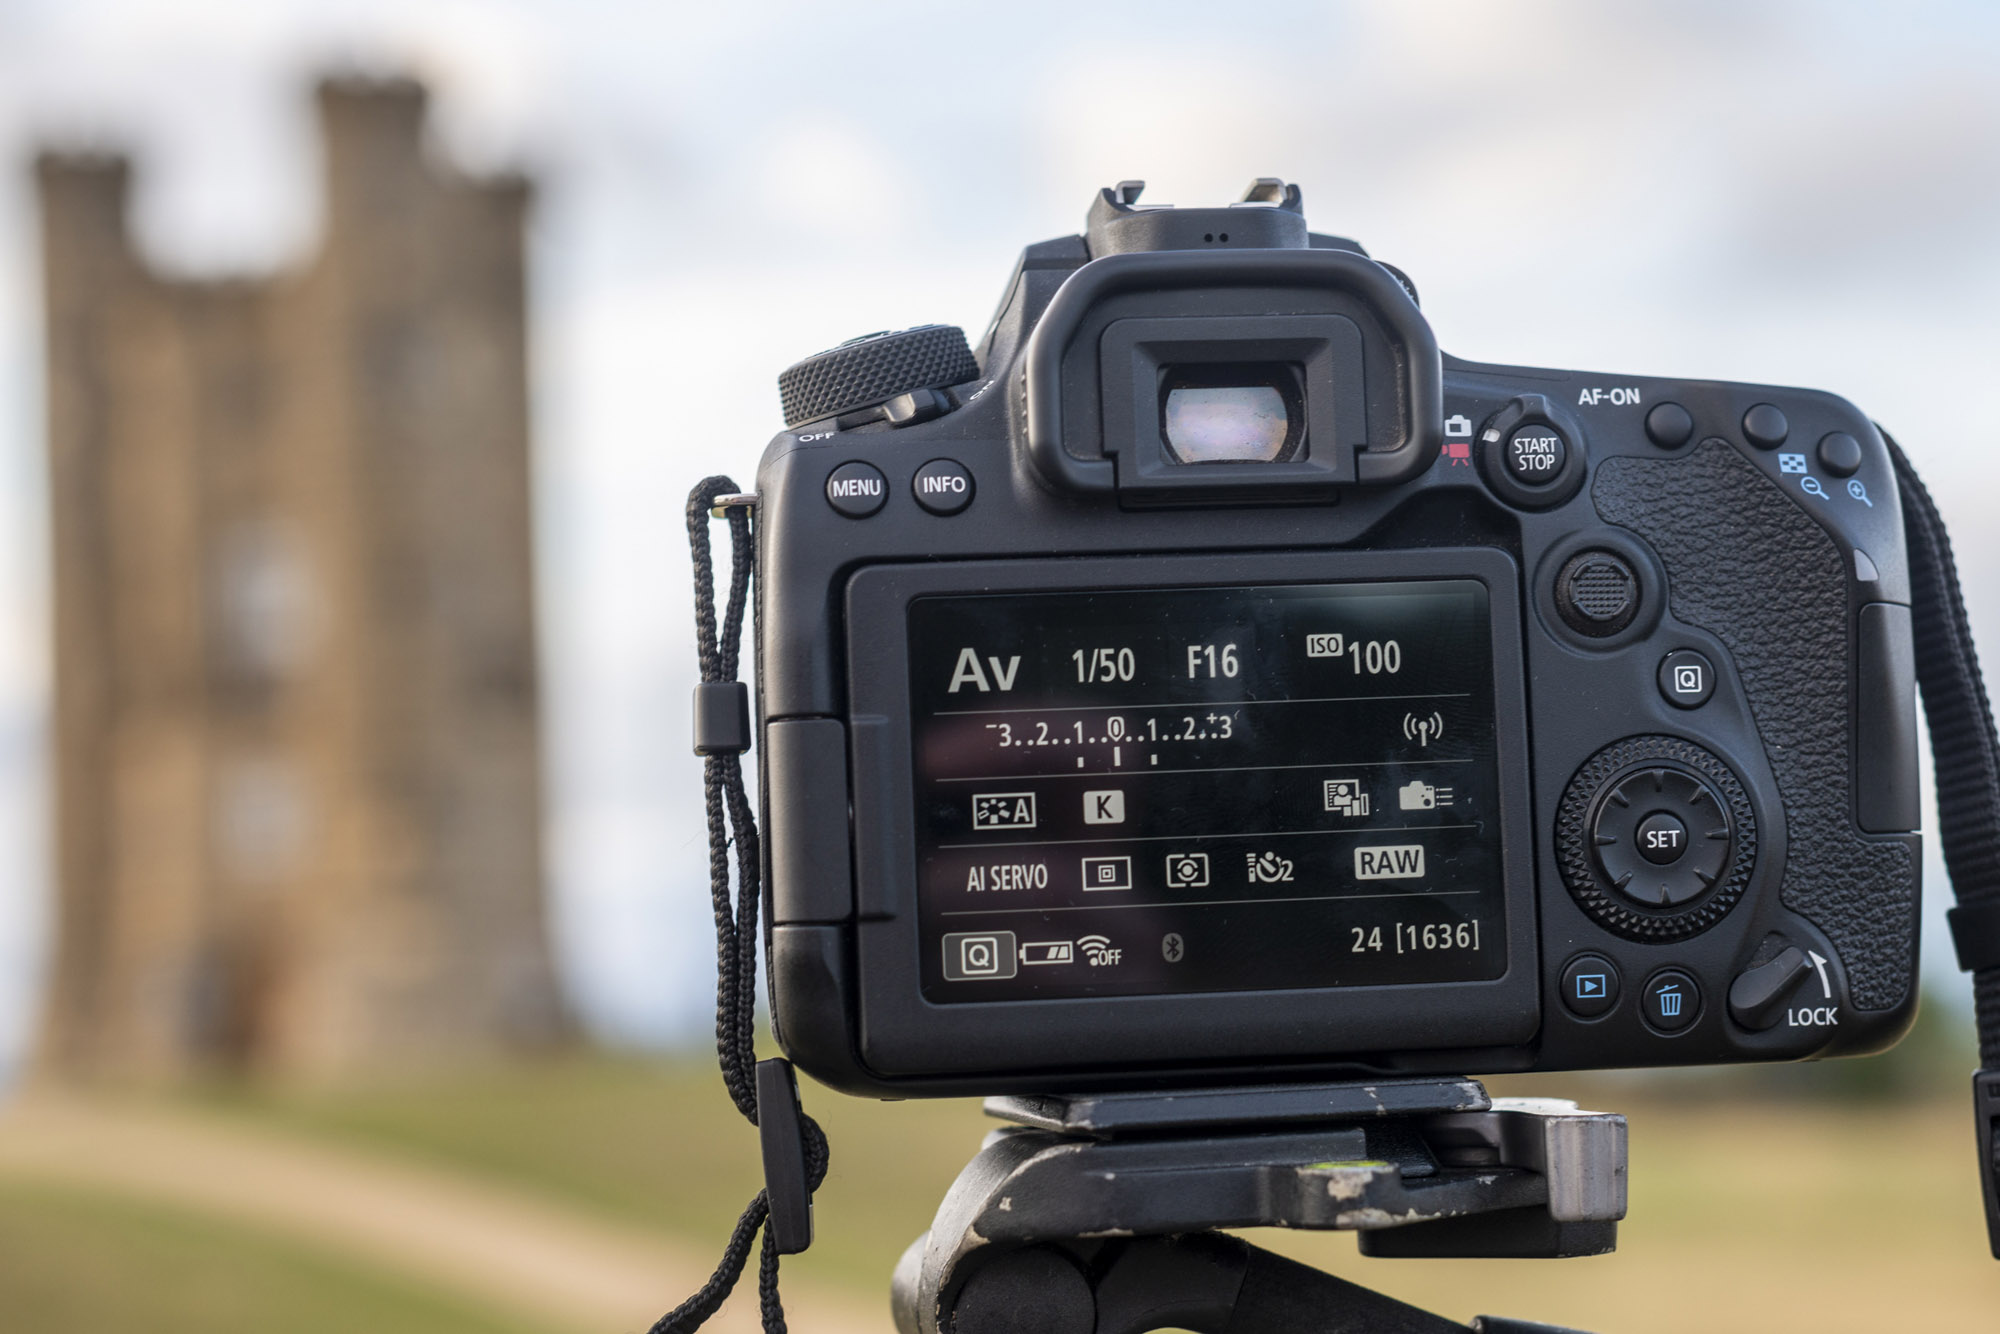
A set and forget exposure mode is easiest here. Aperture Priority mode is ideal as we can use a narrow aperture of f/16 for maximum depth of field, and set ISO100 for the best quality, then let the Evaluative metering work out the correct shutter speed to change as light levels drop.
2. Bracket your shots
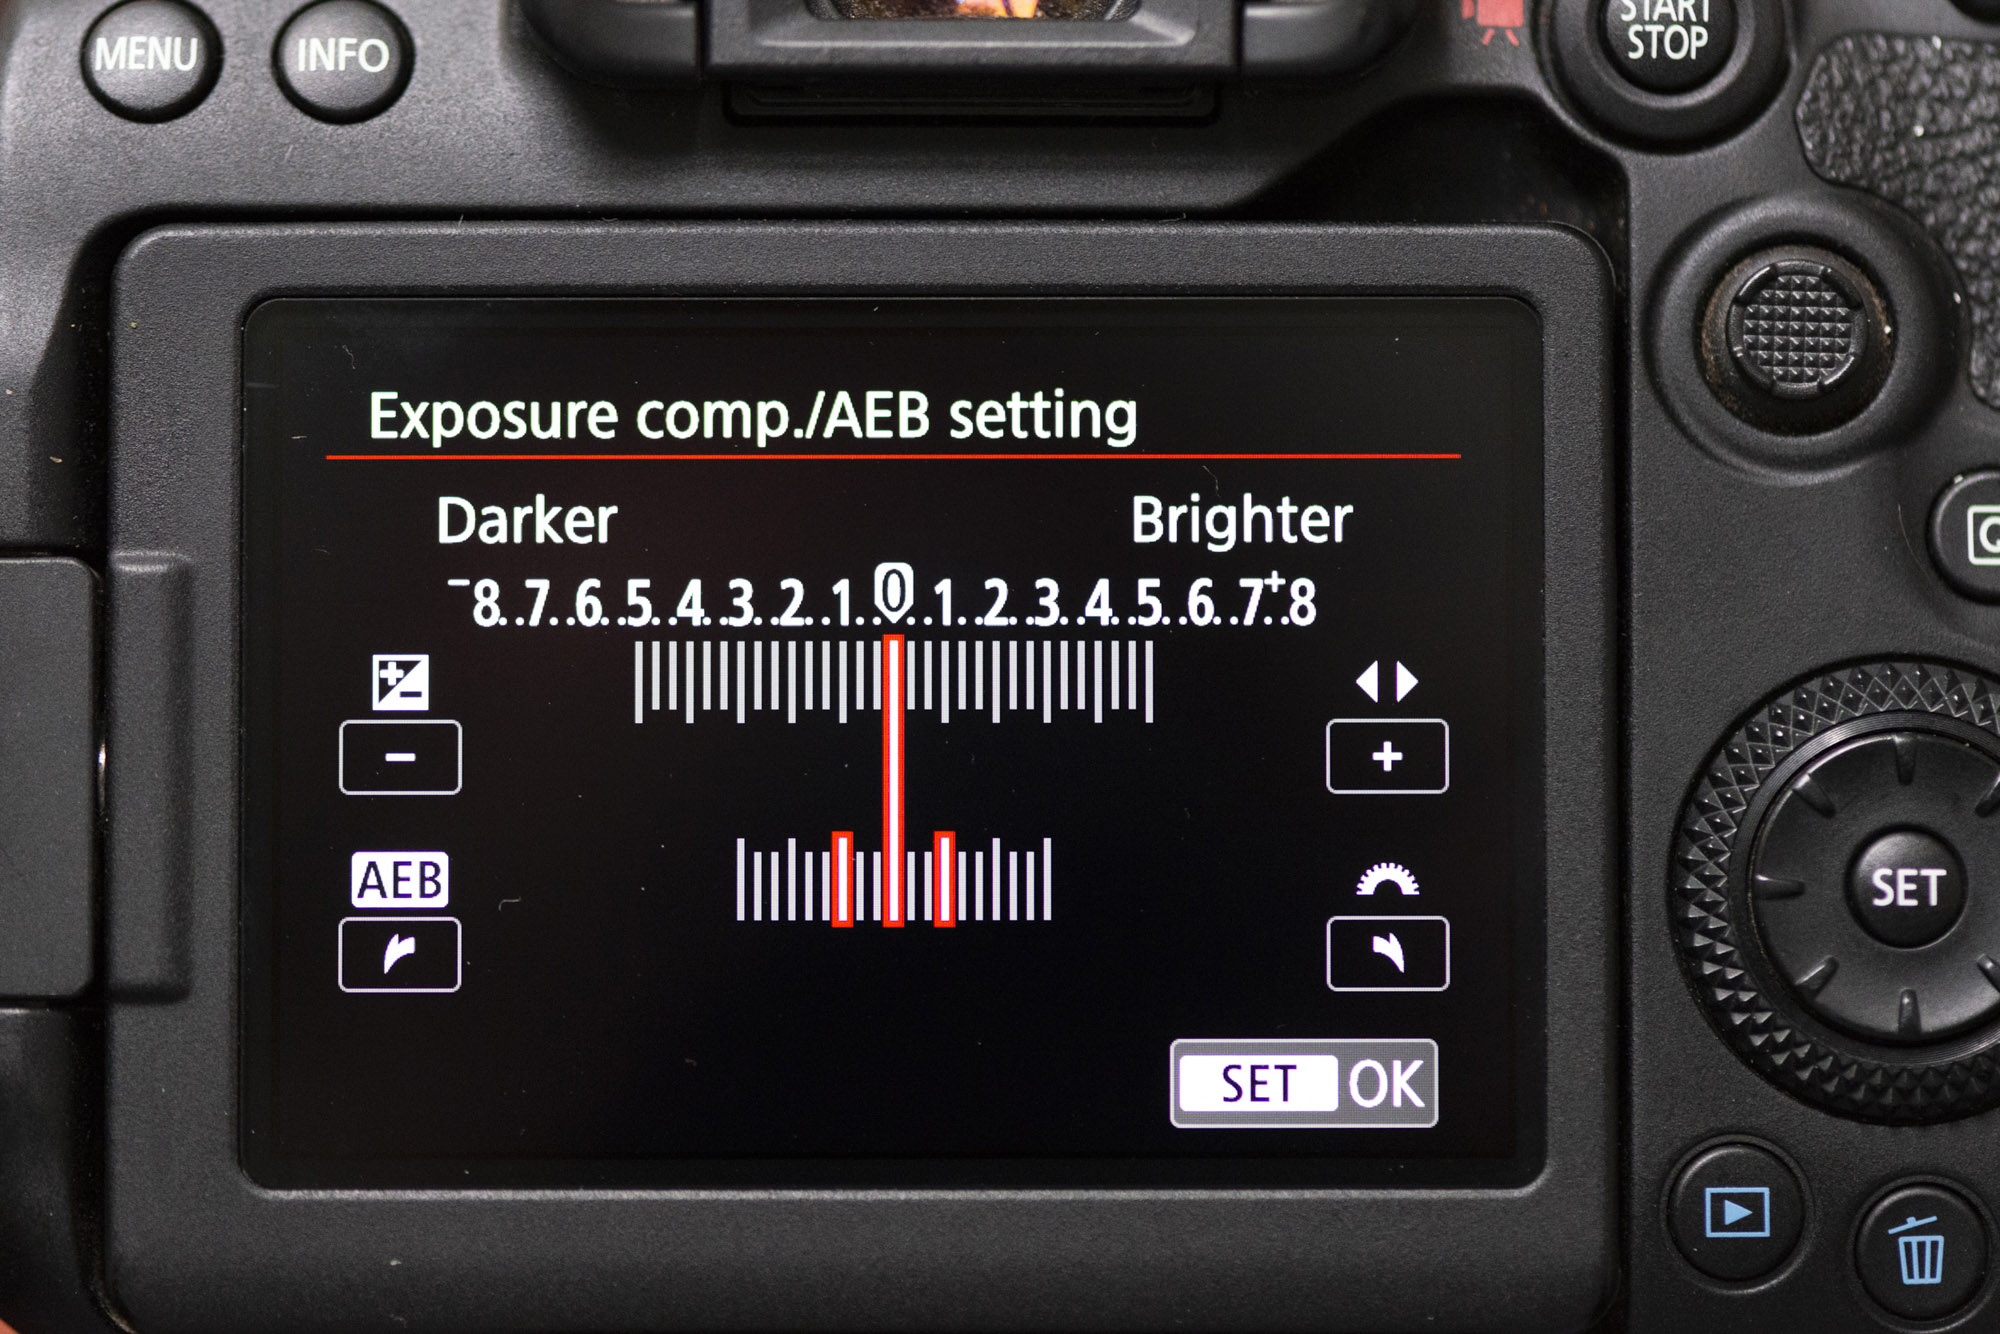
Time blending involves combining frames taken at different times. As such, it can be difficult to predict which frames you’ll use and how they’ll look once blended. To give yourself a safety net, bracket your shots. We set up to take three frames at a time with one-stop increments between each.
3. Try a timelapse
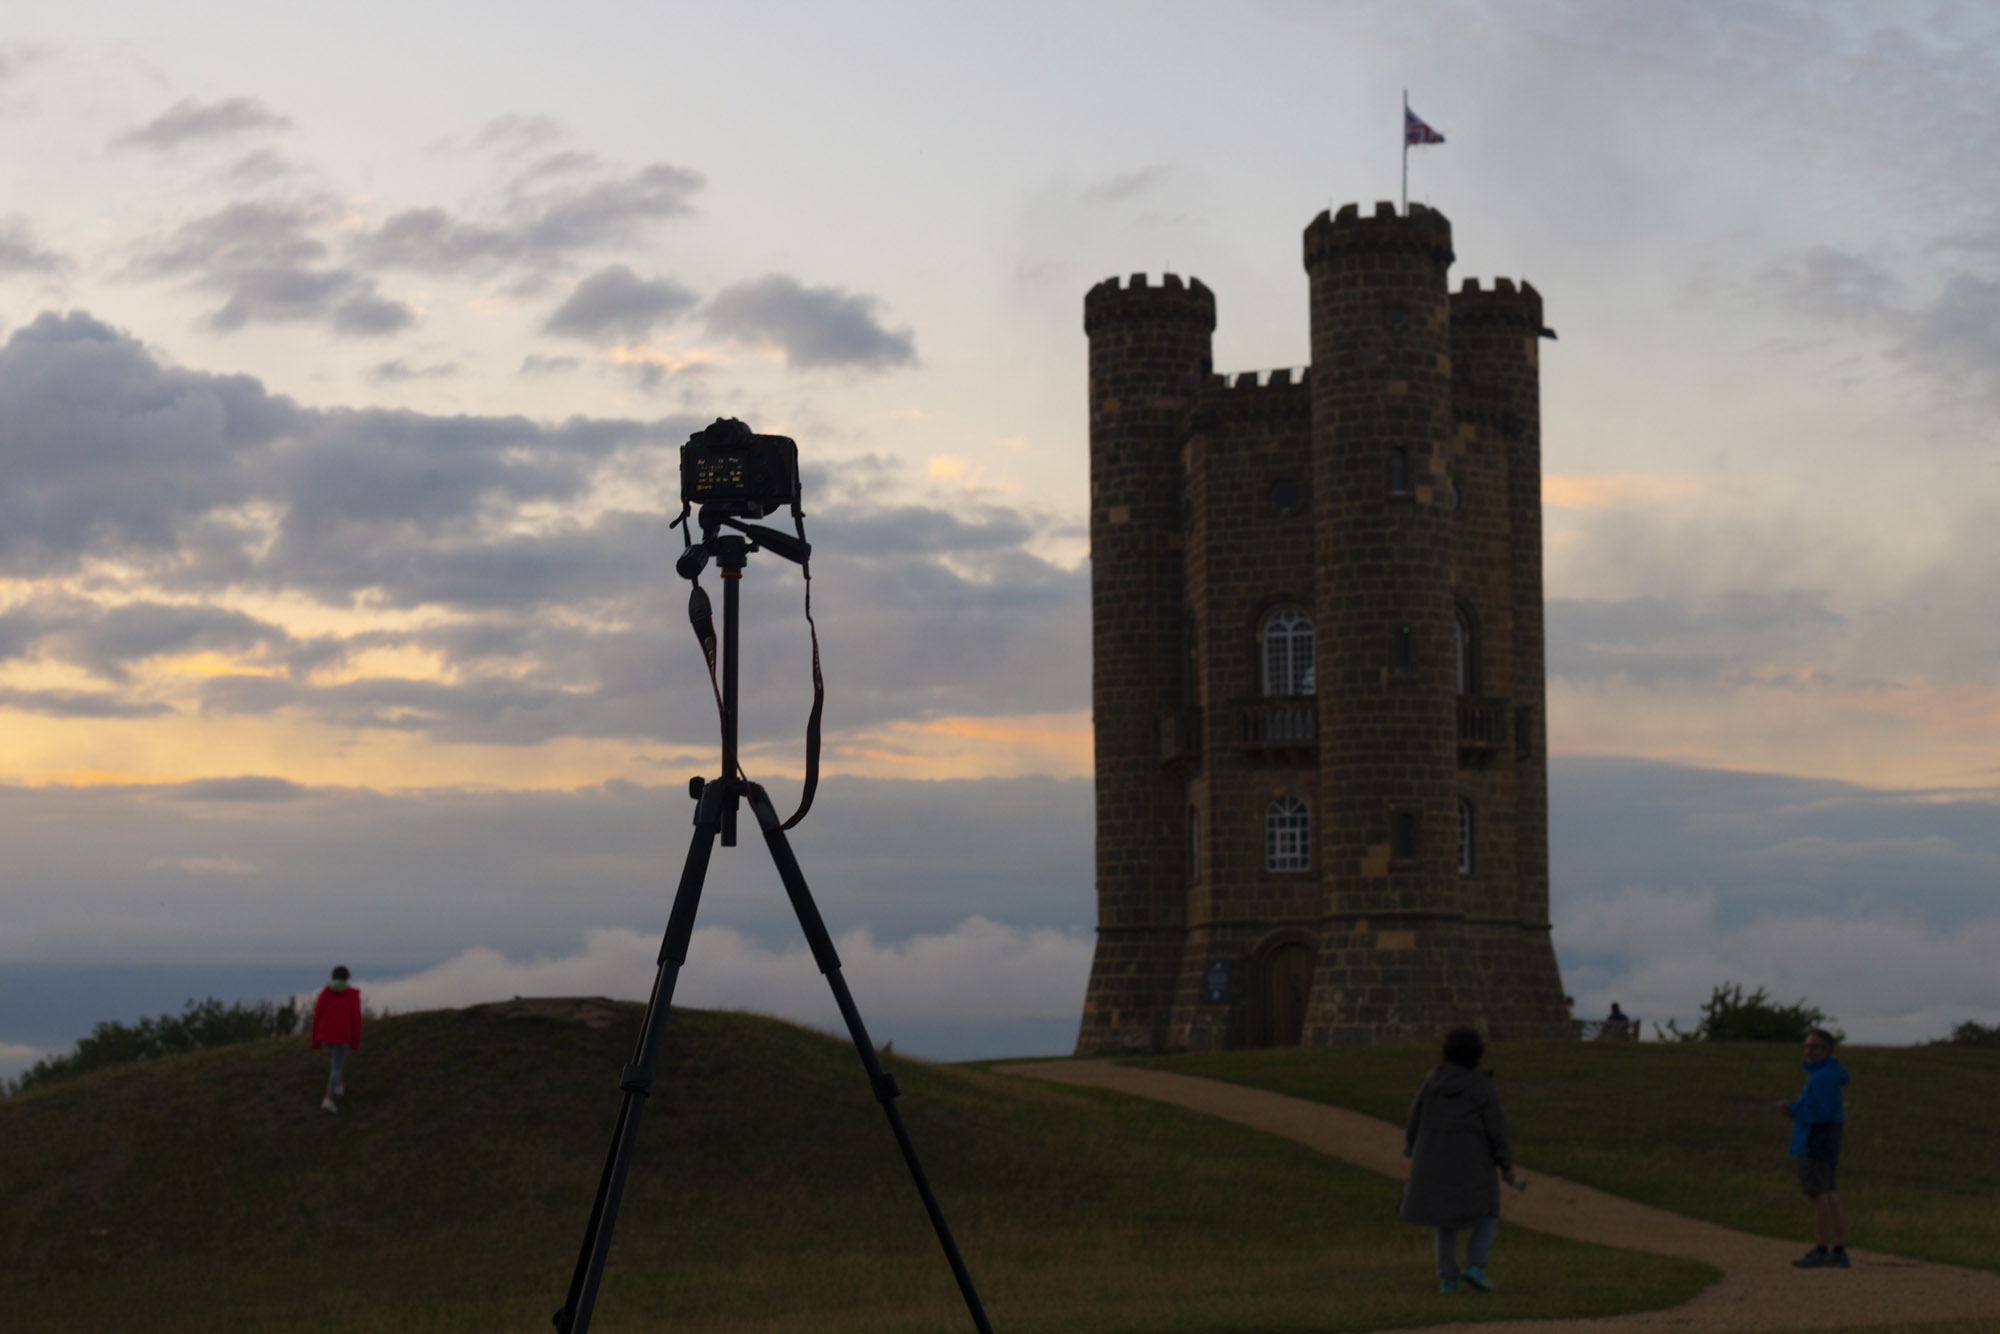
If you want to leave your camera unmanned, you can simply set it up to shoot a timelapse by firing frames at regular intervals. Of course, if you have an old timelapse sequence already on file, you could try the Photoshop blending technique on the existing set.
The best camera deals, reviews, product advice, and unmissable photography news, direct to your inbox!
4. Prepare the photos
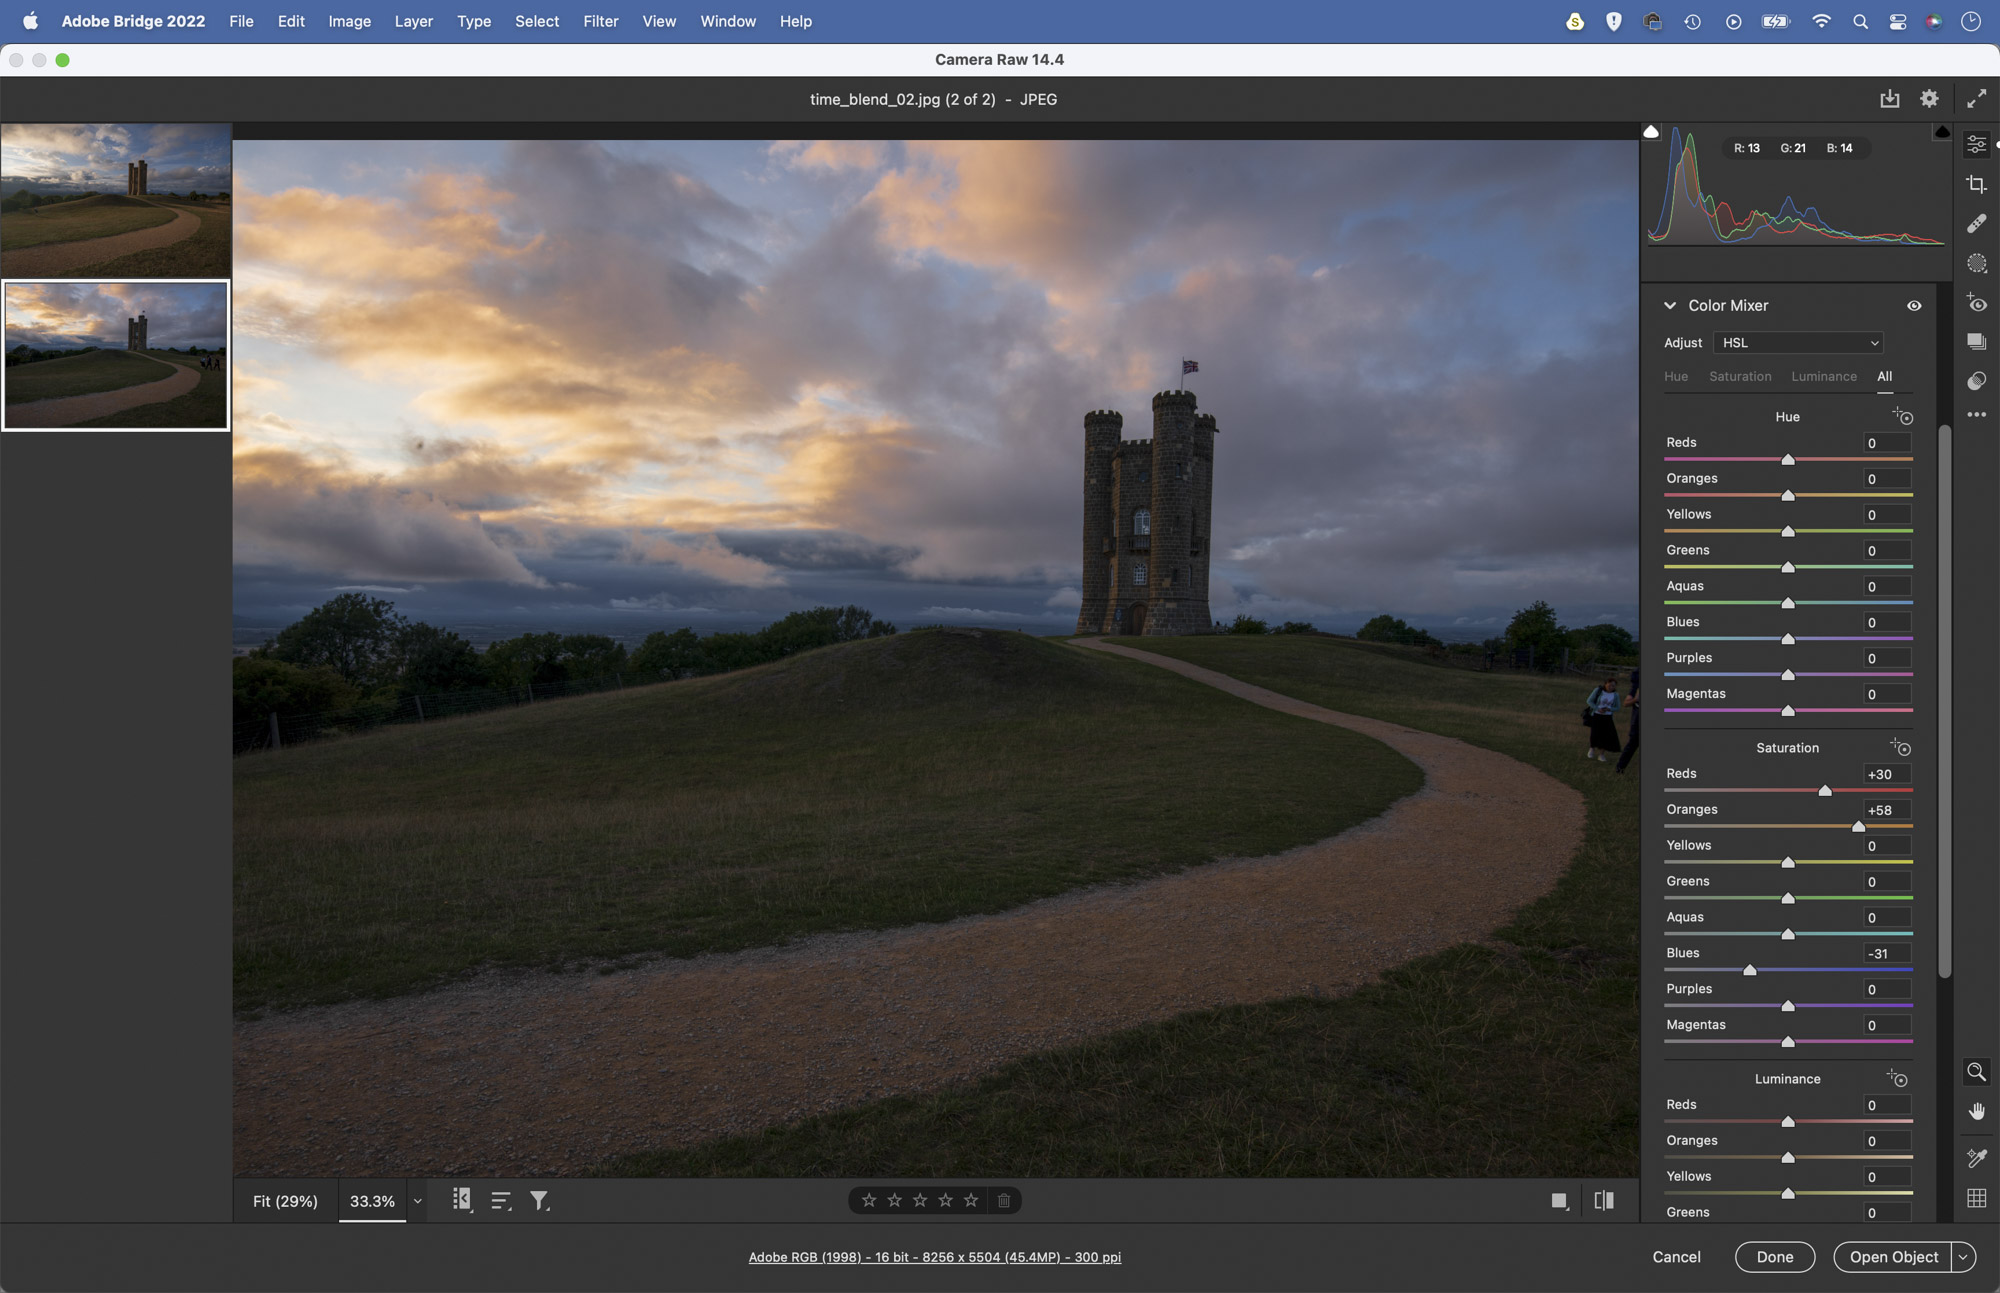
Use Adobe Bridge to select your frames – we picked one for the sky, another for the land. Highlight them, right-click, select Open In Camera Raw, then use the tonal tools. Here a saturation boost to the reds and oranges in the Color Mixer panel enhances the clouds.
5. Align the layers
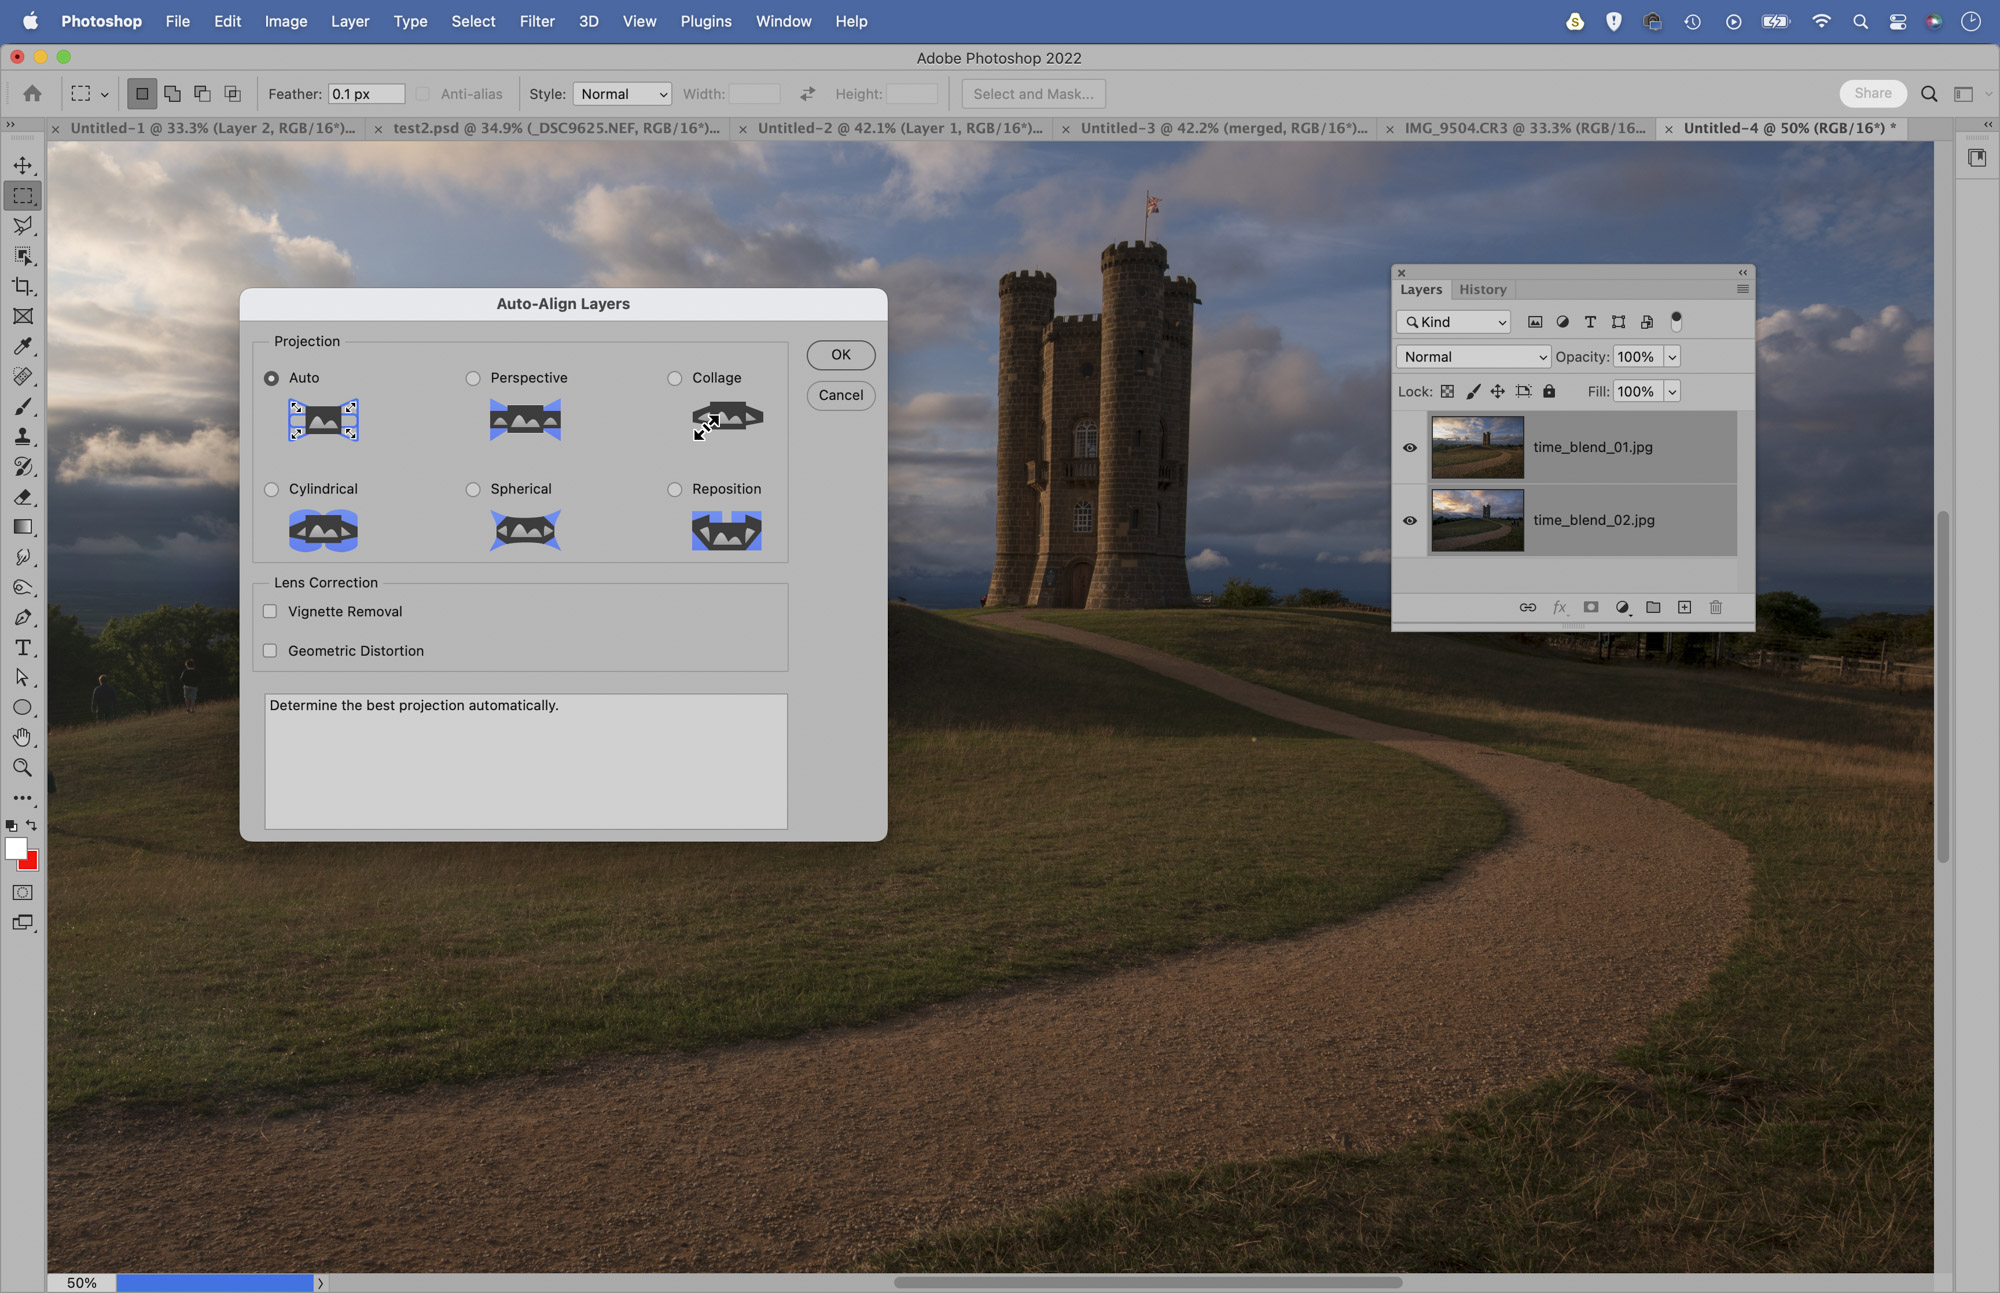
Exit Bridge, then – with the images still highlighted – go to Tools>Photoshop>Load Files Into Photoshop Layers. Go to the Layers panel and Cmd/Ctrl+click to highlight all the layers. Go to Edit>Auto-Align Layers. Set Auto and hit OK to correct minor misalignment.
6. Add a full mask
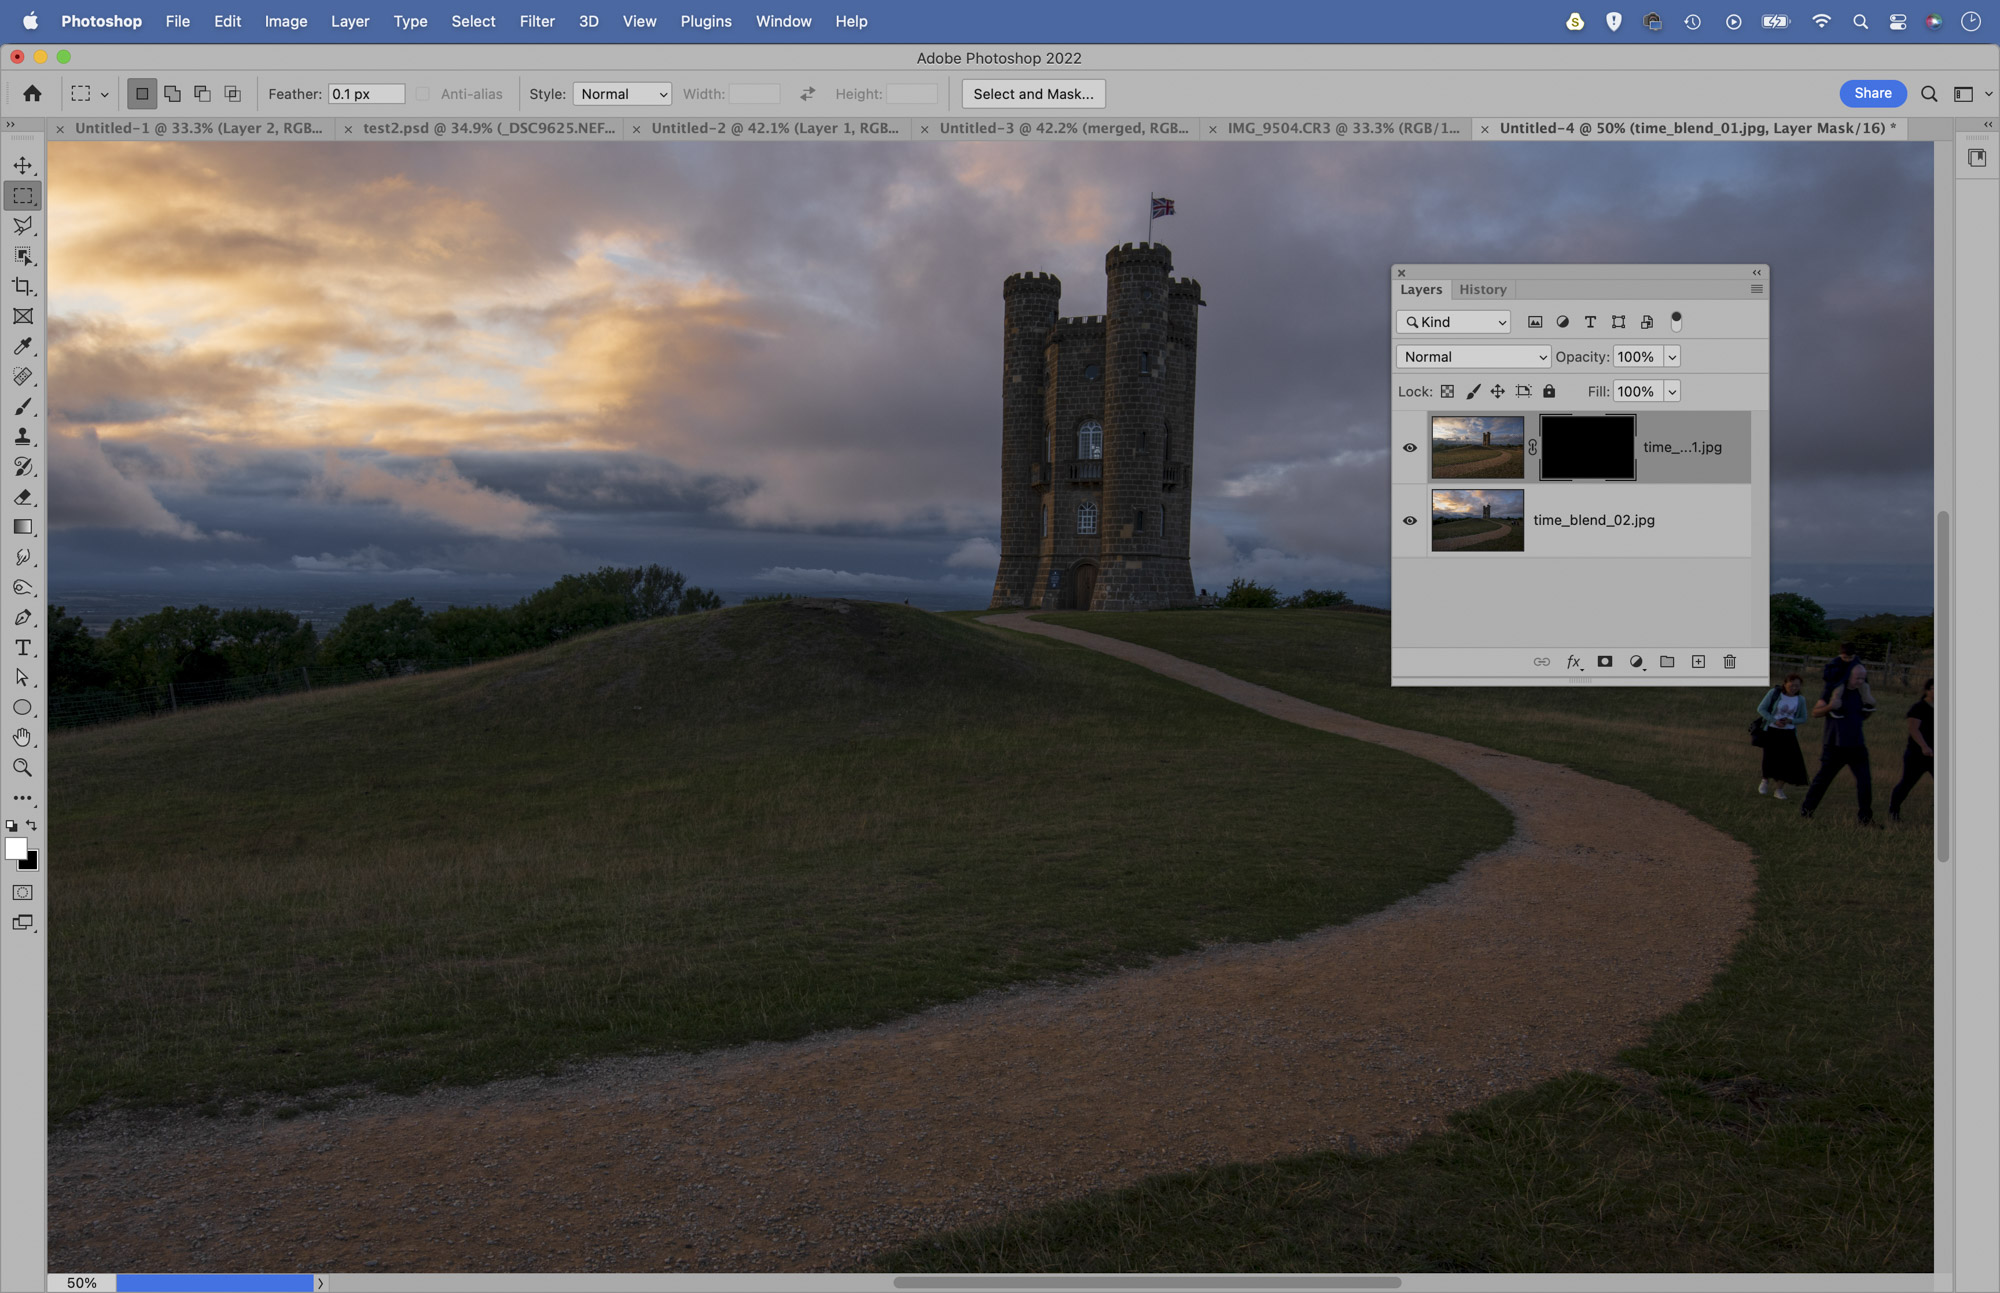
Drag the layer with the brighter sunlight to the top. Highlight the top layer, hold Alt and click the Add Layer Mask icon in the Layers panel. This adds a full black mask that hides everything on the layer. Now we can add white to the mask to reveal just the parts we want.
7 Reveal the sunlight
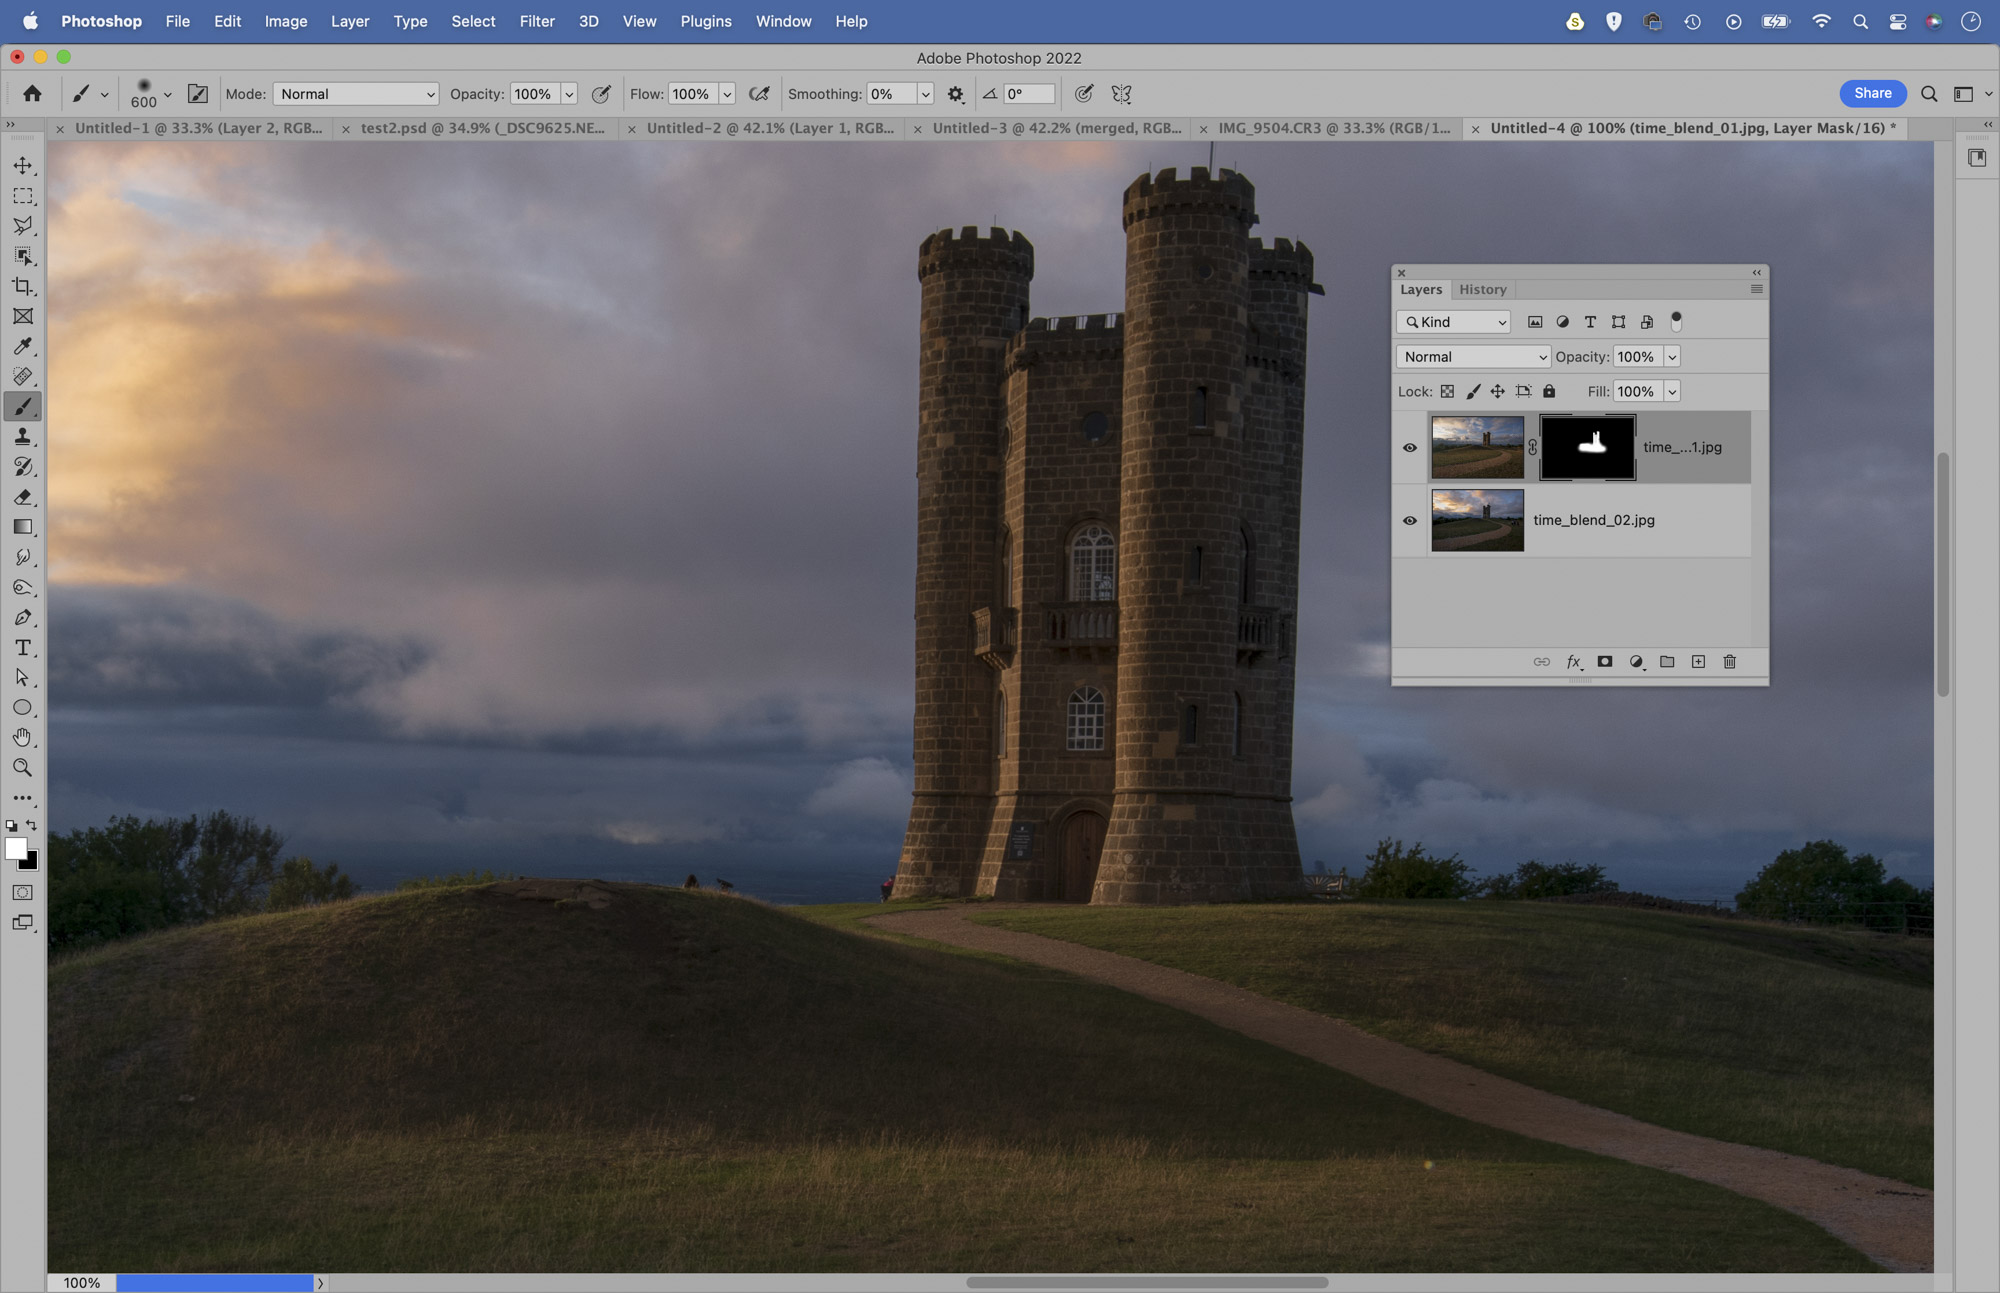
Grab the Brush tool. Hit D to set colour to white, press 4 for 40% opacity and take the hardness to 0. Paint over the scene to reveal the brighter sunlight. The low opacity allows you to gradually lighten areas, so you can decide exactly how much sunlight to give them.
8. Merge and tone
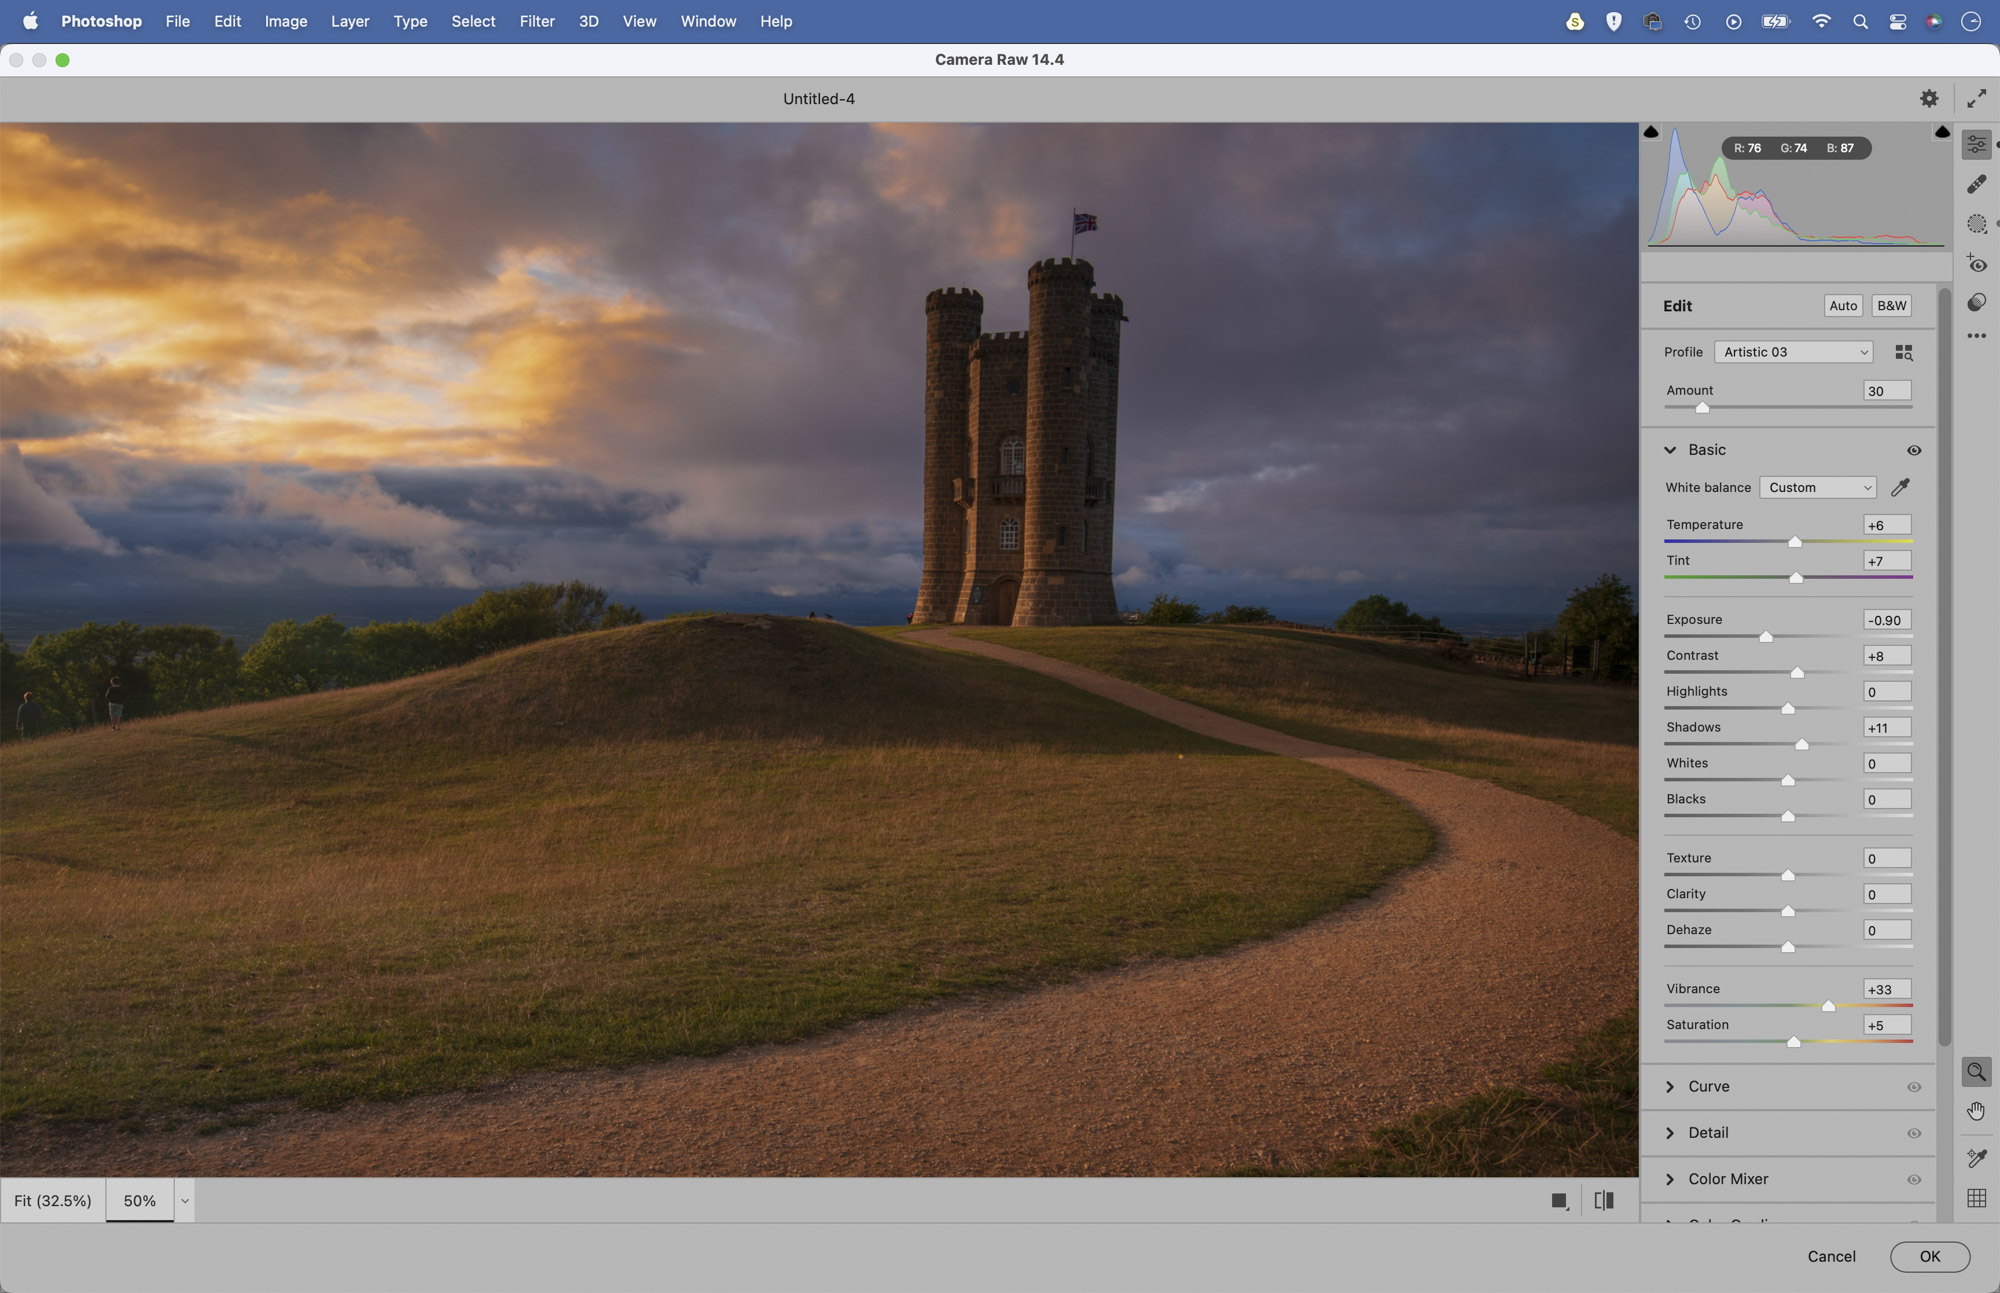
Press Cmd/Ctrl+Shift+Alt+E to merge all the layers into a new layer, then go to Filter>Camera Raw Filter. Now tweak the colours and contrast using the sliders available in the Basic panel, and make any other changes you like to boost the image.
9. Dodge and burn
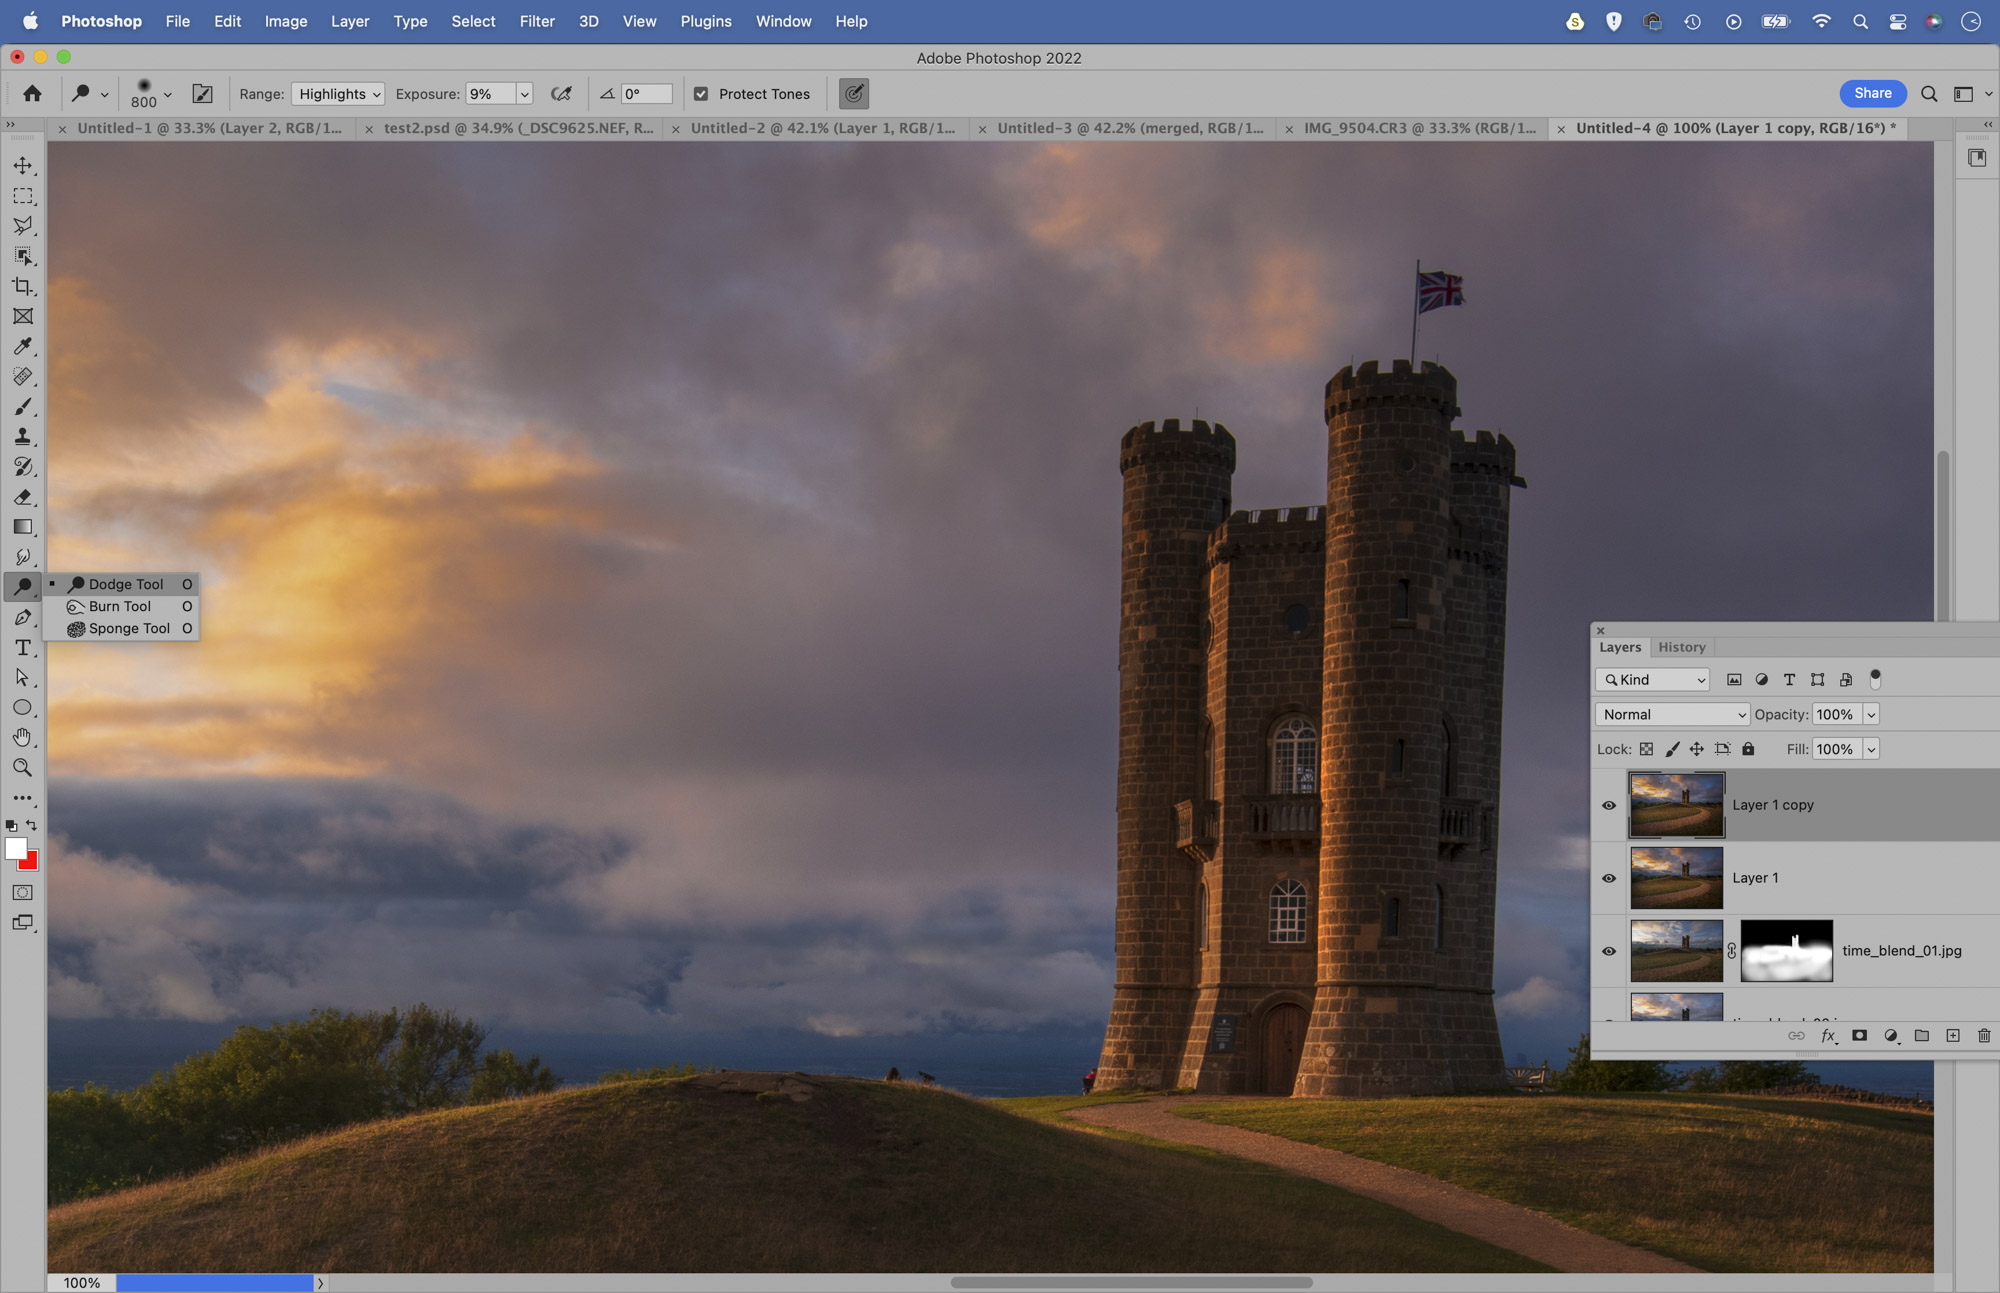
The Dodge and Burn tools can accentuate the play of light and shade over the scene. Copy the layer (Cmd/Ctrl+J), grab the Dodge tool, set Range: Highlights and paint over the land to lift areas, then switch to the Burn tool, set Range: Shadows and darken the clouds.
You might like the best photo editing software and the best photo-editing laptops. Check out these landscape photography tips.
The lead technique writer on Digital Camera Magazine, PhotoPlus: The Canon Magazine and N-Photo: The Nikon Magazine, James is a fantastic general practice photographer with an enviable array of skills across every genre of photography.
Whether it's flash photography techniques like stroboscopic portraits, astrophotography projects like photographing the Northern Lights, or turning sound into art by making paint dance on a set of speakers, James' tutorials and projects are as creative as they are enjoyable.
He's also a wizard at the dark arts of Photoshop, Lightroom and Affinity Photo, and is capable of some genuine black magic in the digital darkroom, making him one of the leading authorities on photo editing software and techniques.
