The best camera deals, reviews, product advice, and unmissable photography news, direct to your inbox!
You are now subscribed
Your newsletter sign-up was successful
Watch video: Landscape photography masterclass – depth of field & aperture
Depth of field and aperture are terms you’ve likely heard before, but do you know what they mean and how to use them effectively for your landscapes? These two fundamentals are intertwined due to physics; change your aperture, a ring inside your camera’s lens, and you’ll also change the depth of field, which basically means how much of your image is in sharp or shallow focus.
It’s particularly useful to get to grips with these terms when shooting landscapes, as we generally want to aim for a scene that is sharp all the way through the scene using a high aperture value such as f/11 or f/16.
• Read more: Best lenses for landscapes
Luckily for landscapes, you don’t need an expensive lens with a super-wide aperture, unless you’re shooting stars at night and need to suck in lots of light. A standard wide-angle like a 16-35mm with a maximum aperture of f/4 will be perfect, and you can even get great results with a kit lens like an 18-55mm optic on an APS-C camera.
Here's how to start mastering aperture and depth of field to elevate your landscape to snaps to finely tuned photographs…
01 Use aperture priority
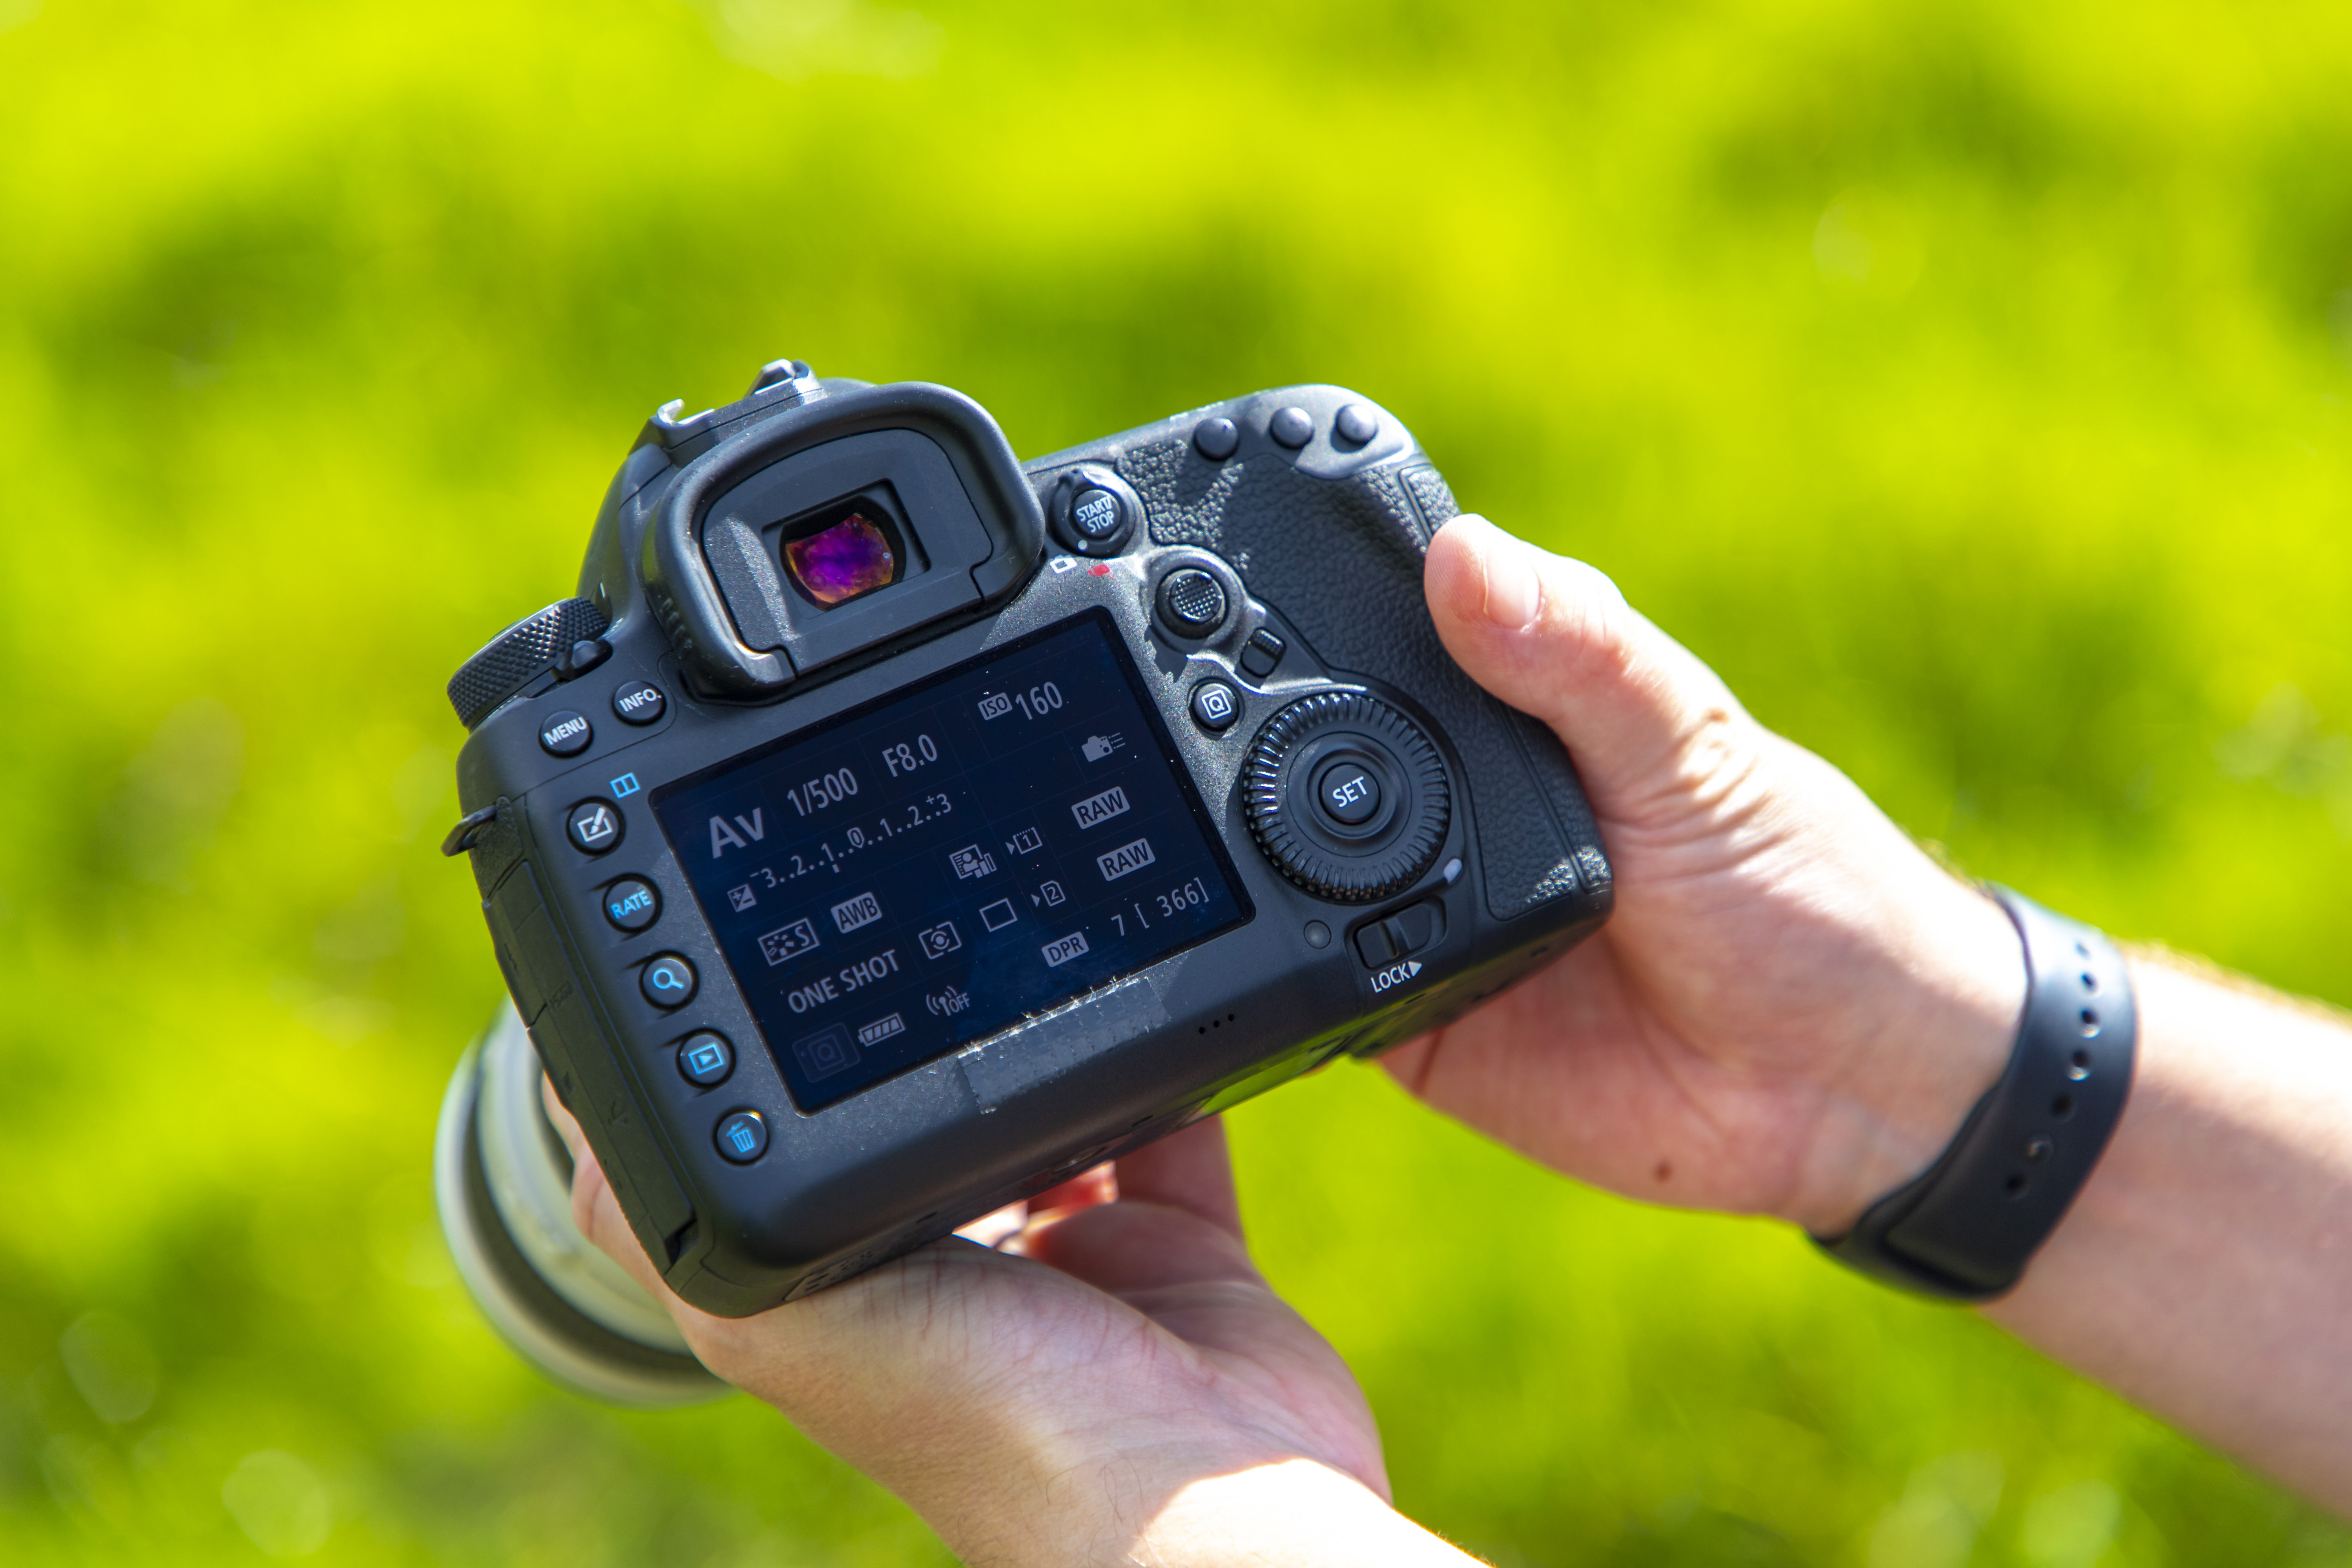
Aperture Priority mode is a semi-automatic mode that enables you to set the aperture value – the camera then works out the corresponding shutter speed, based on your set metering mode, to achieve a standard exposure. We recommend the evaluative / matrix metering mode for landscapes, which assesses the whole frame to work out a good exposure.
The best camera deals, reviews, product advice, and unmissable photography news, direct to your inbox!
The aperture is a ring of blades inside your lens that can be opened to a value of, say, f/2.8 or f/3.5 to let in more light. However, this will also make the depth of field shallower – so the scene will be brighter, but less of it will be sharp throughout.
A narrow aperture value of f/16 or f/22 will let in less light, so you’ll need a longer exposure, but will capture more depth of field to give a larger zone of focus – and thus sharper shots throughout the scene.
02 Include interesting foreground
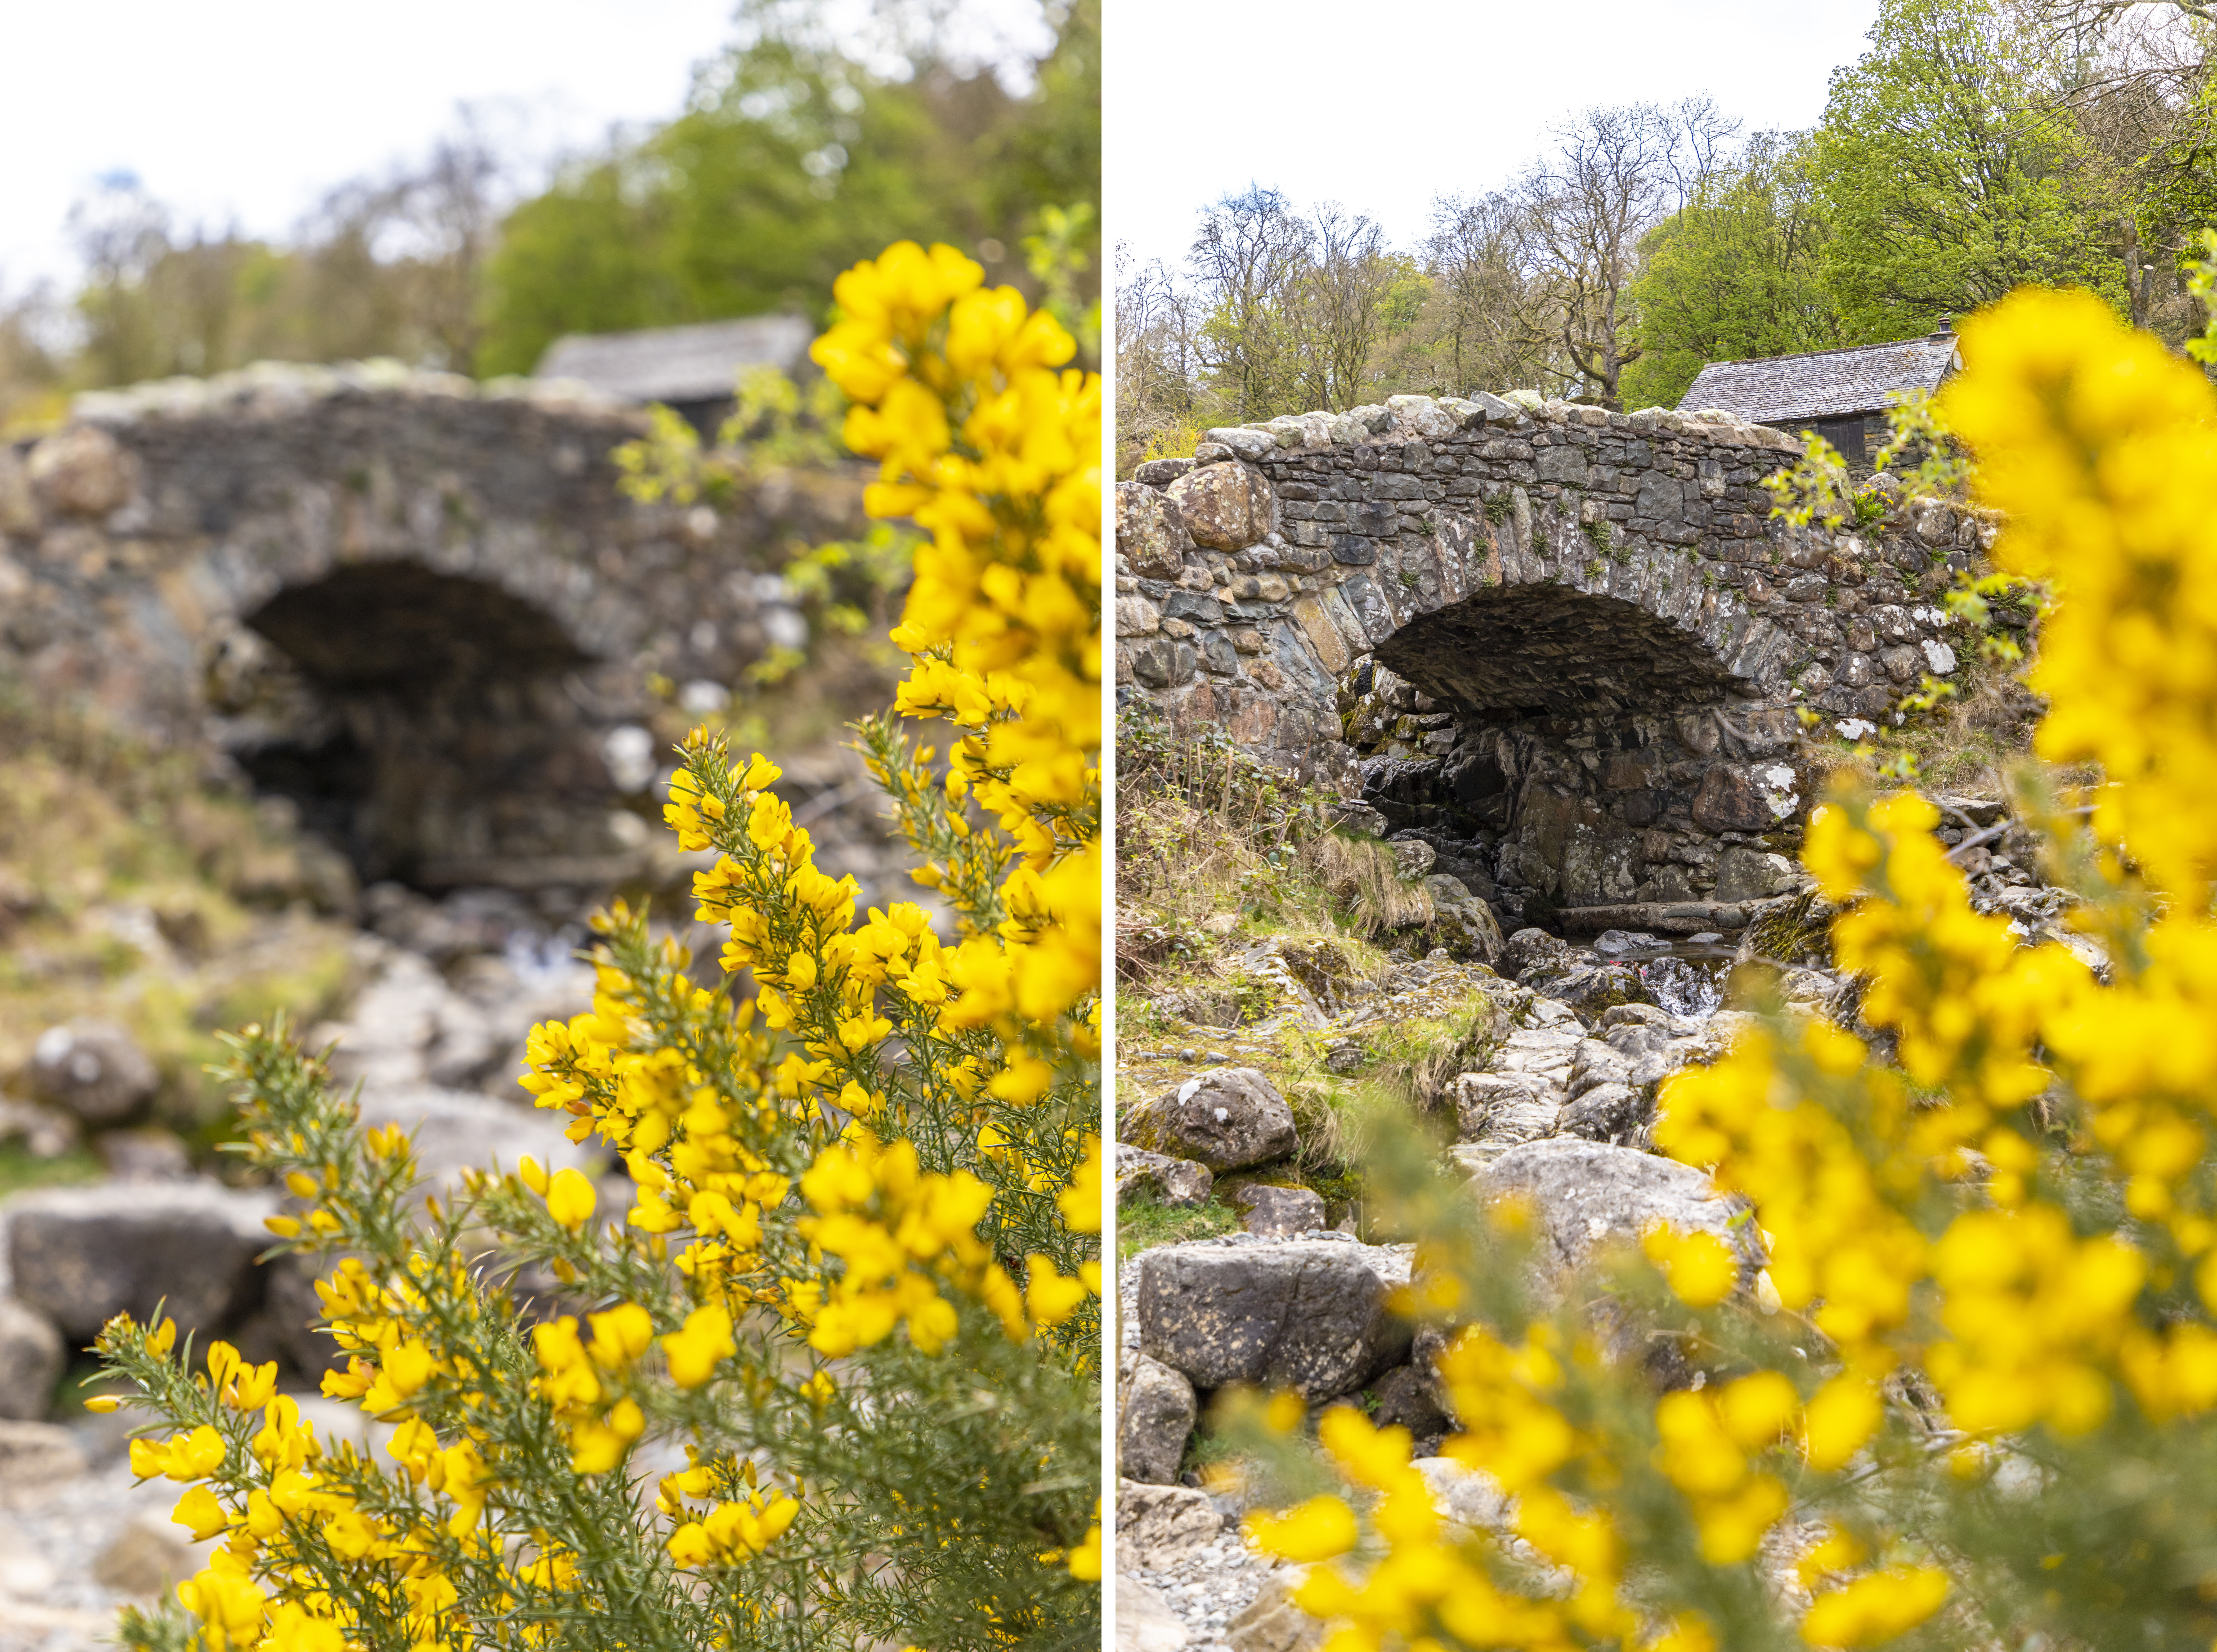
A strong foreground, mid-ground and background are characteristic of a great landscape photo, helping to add depth to your picture. Be on the look out for foreground you can use, such as flowers, rocks, boulders, fences, and so on. Try not to position your foreground too close to the camera, though, as we have with the yellow gauss; when your foreground is super close to the lens, it makes it very difficult to achieve sharp focus throughout the scene – even with high apertures.
Both photographs here were taken with an aperture of f/4. Focusing on the gauss meant that the bridge became blurry, and focusing on the bridge meant the flowers came out blurred. There’s no right or wrong way to shoot landscapes, but it’s generally preferred to have the whole scene in sharp focus with landscapes – so this is something to be aware of and watch out for when shooting.
03 Achieve maximum depth of field
A narrow aperture value like f/22 will result in more depth of field, but not necessarily lead to a sharper overall image due to the diffraction experienced at these top-end apertures. Instead, you’re better off shooting at around f/11; this is the sweet spot for depth of field without diffraction being a big issue, and so it is seen to be the sharpest part of the lens, though this changes from optic to optic.
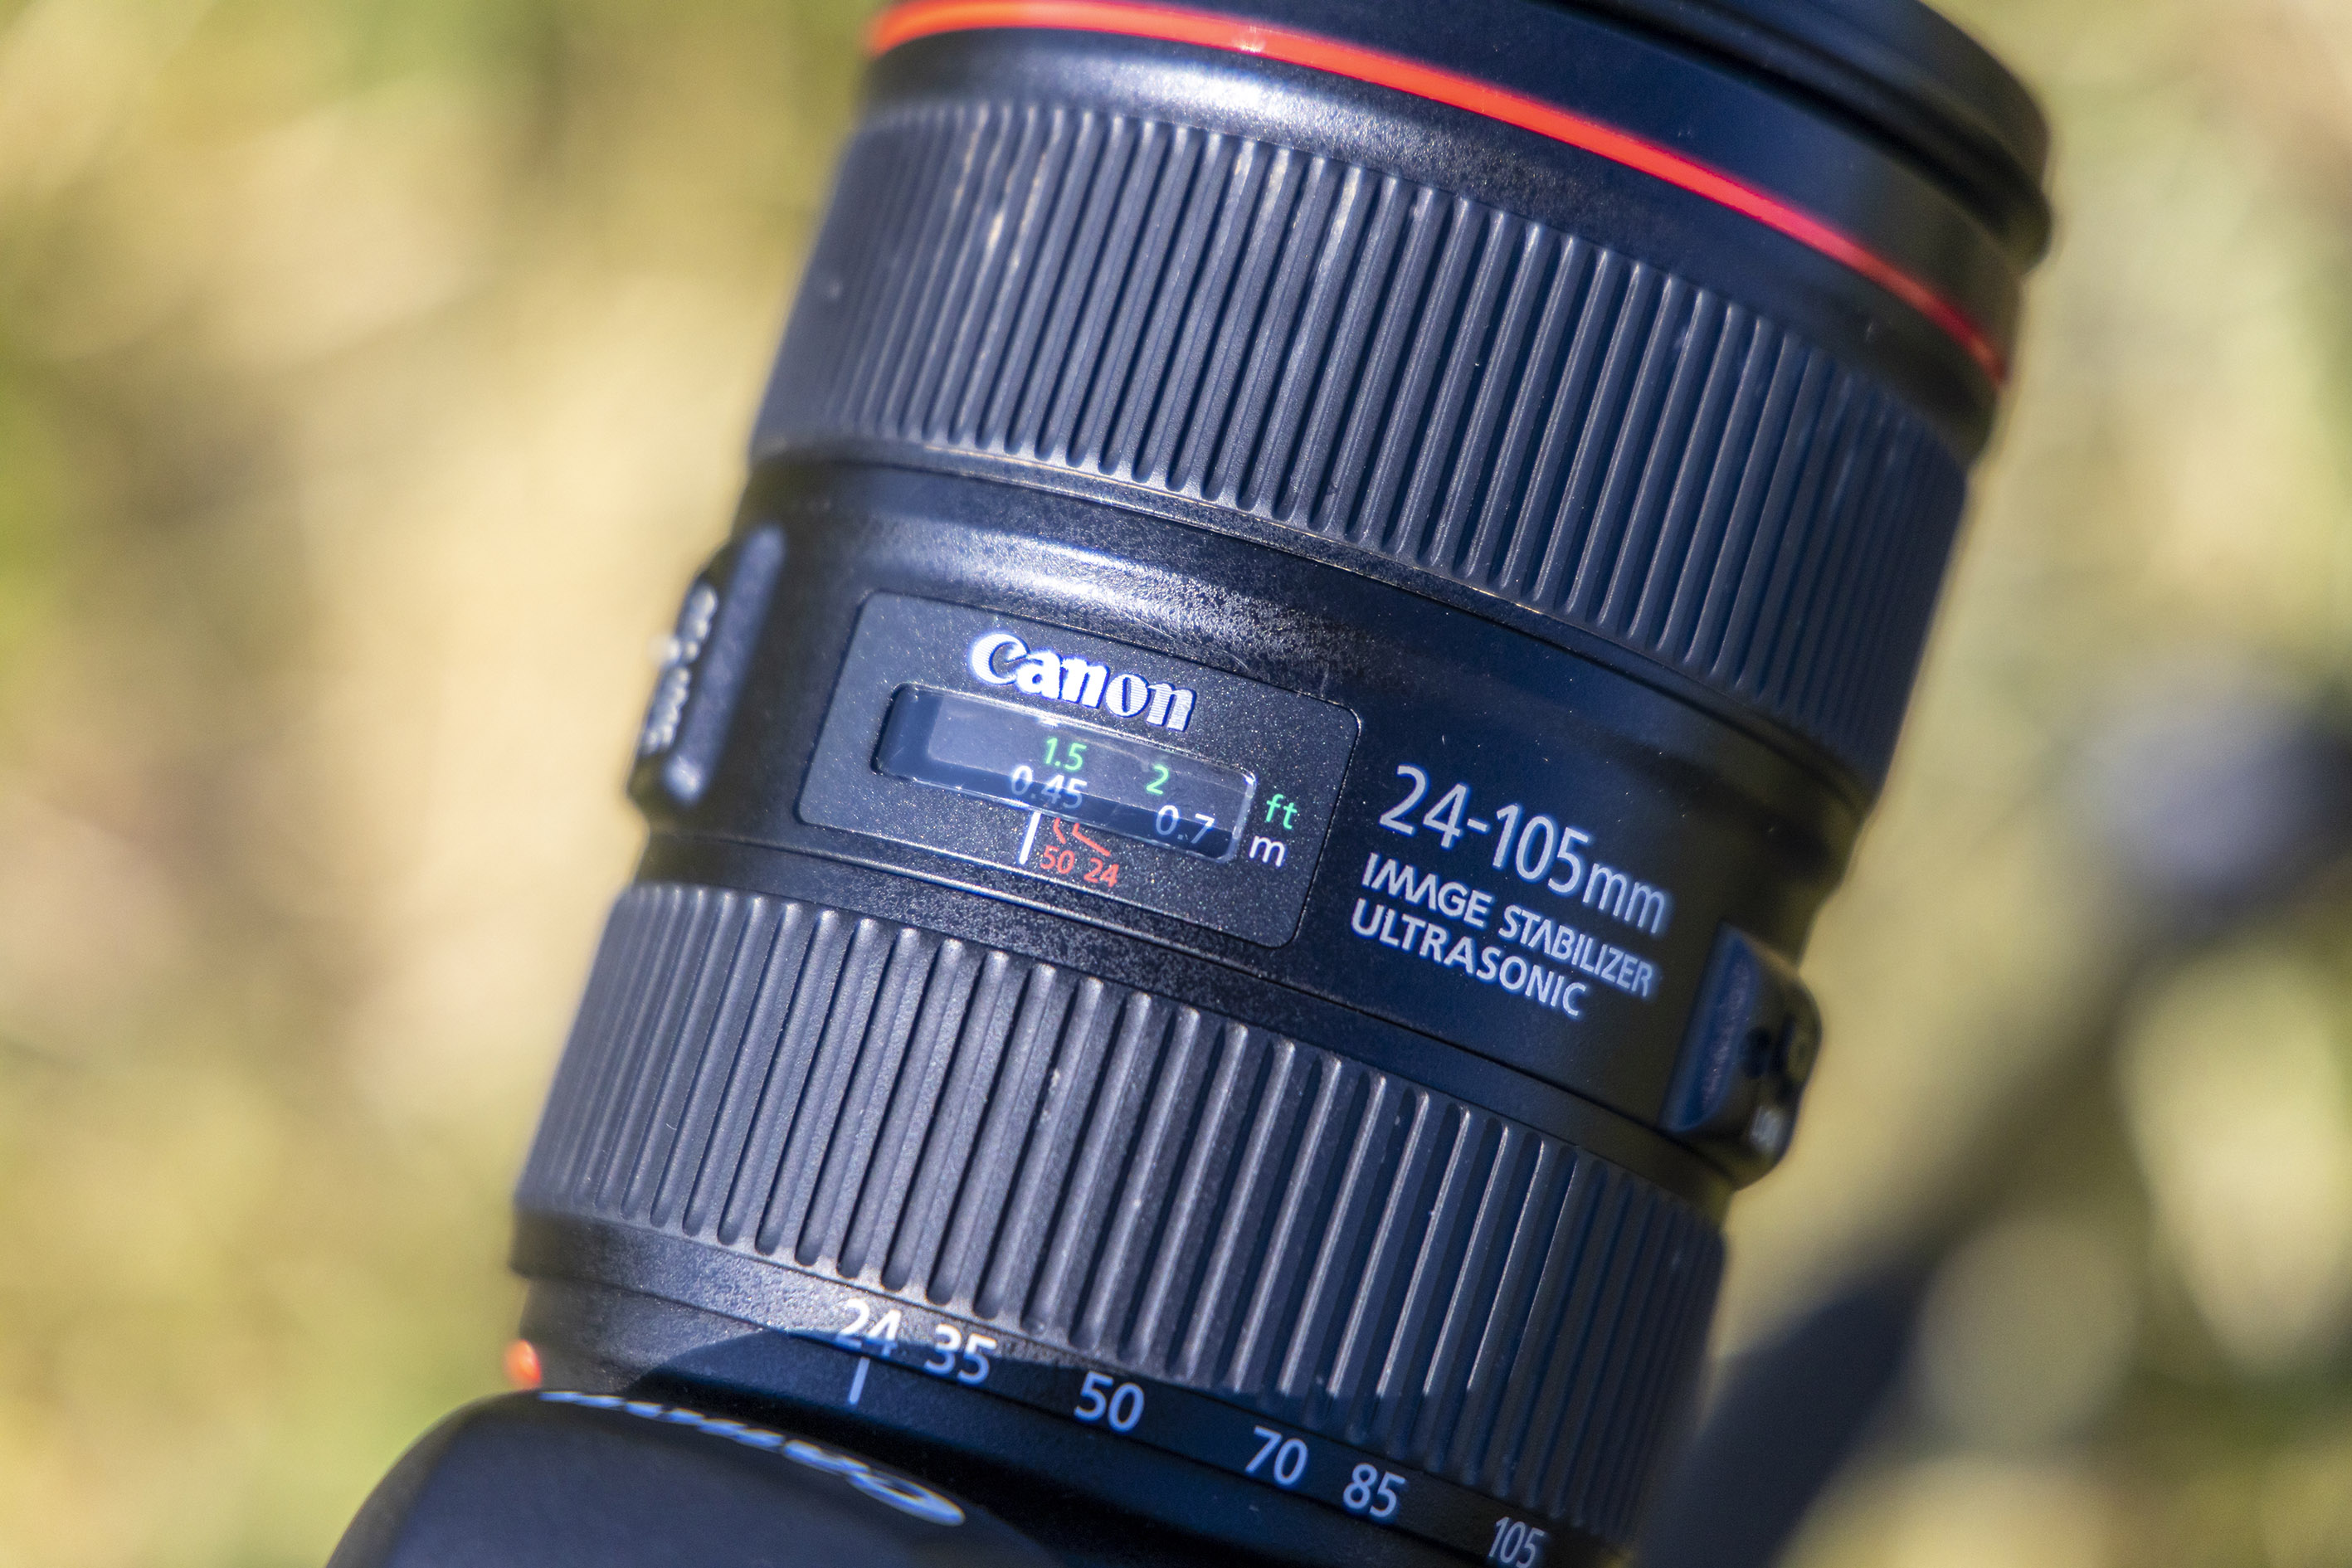
To maximize your depth of field and get as much of the landscape in sharp focus as possible, set your focus to about a third of the way into the scene – this is also called the ‘hyperfocal distance’. Some lenses have a focus distance window built in, which makes it easier to see how far into the scene you've set the focus.
04 Try a focus stack
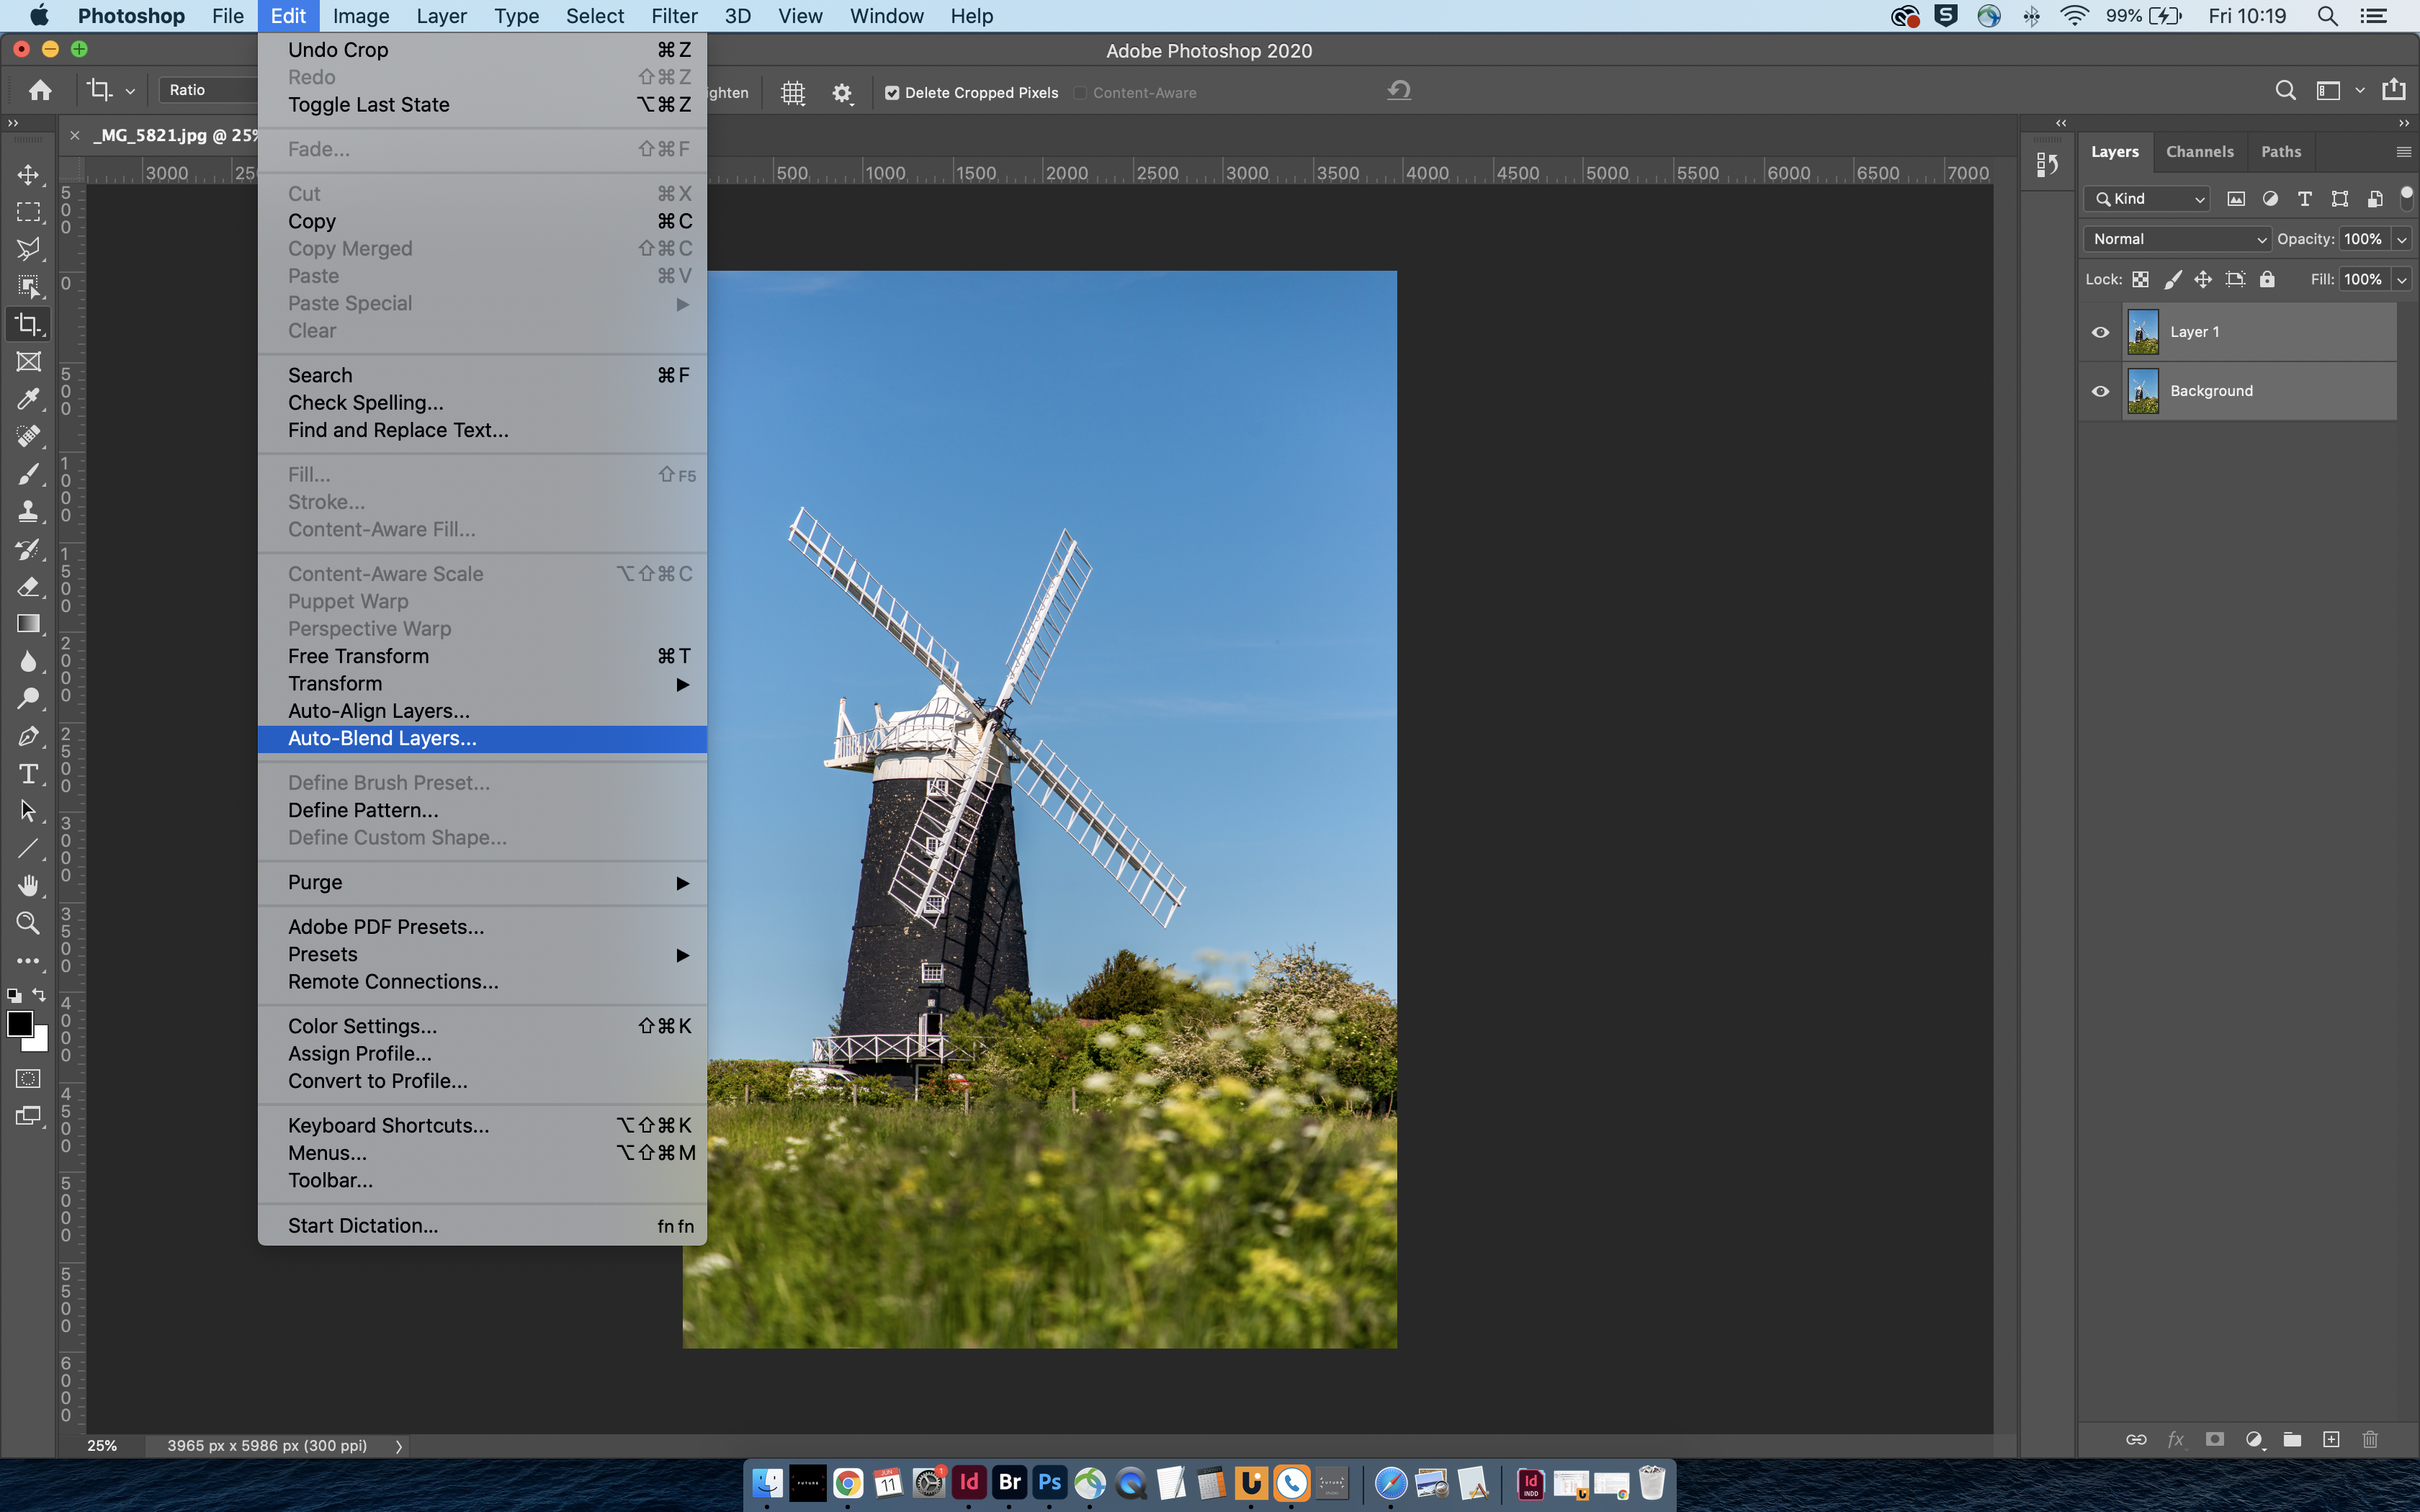
If you’re unable to get the levels of sharpness you want with the above hyperfocal distance tip, try focus stacking. Set your camera on a tripod and take various exposures of the scene focusing on the different parts of the image, it helps if you use an aperture of f/11 to begin with for maximum depth of field in each shot. Then select your exposures in Adobe Bridge and go to Tools > Photoshop > Load files into Photoshop Layers.
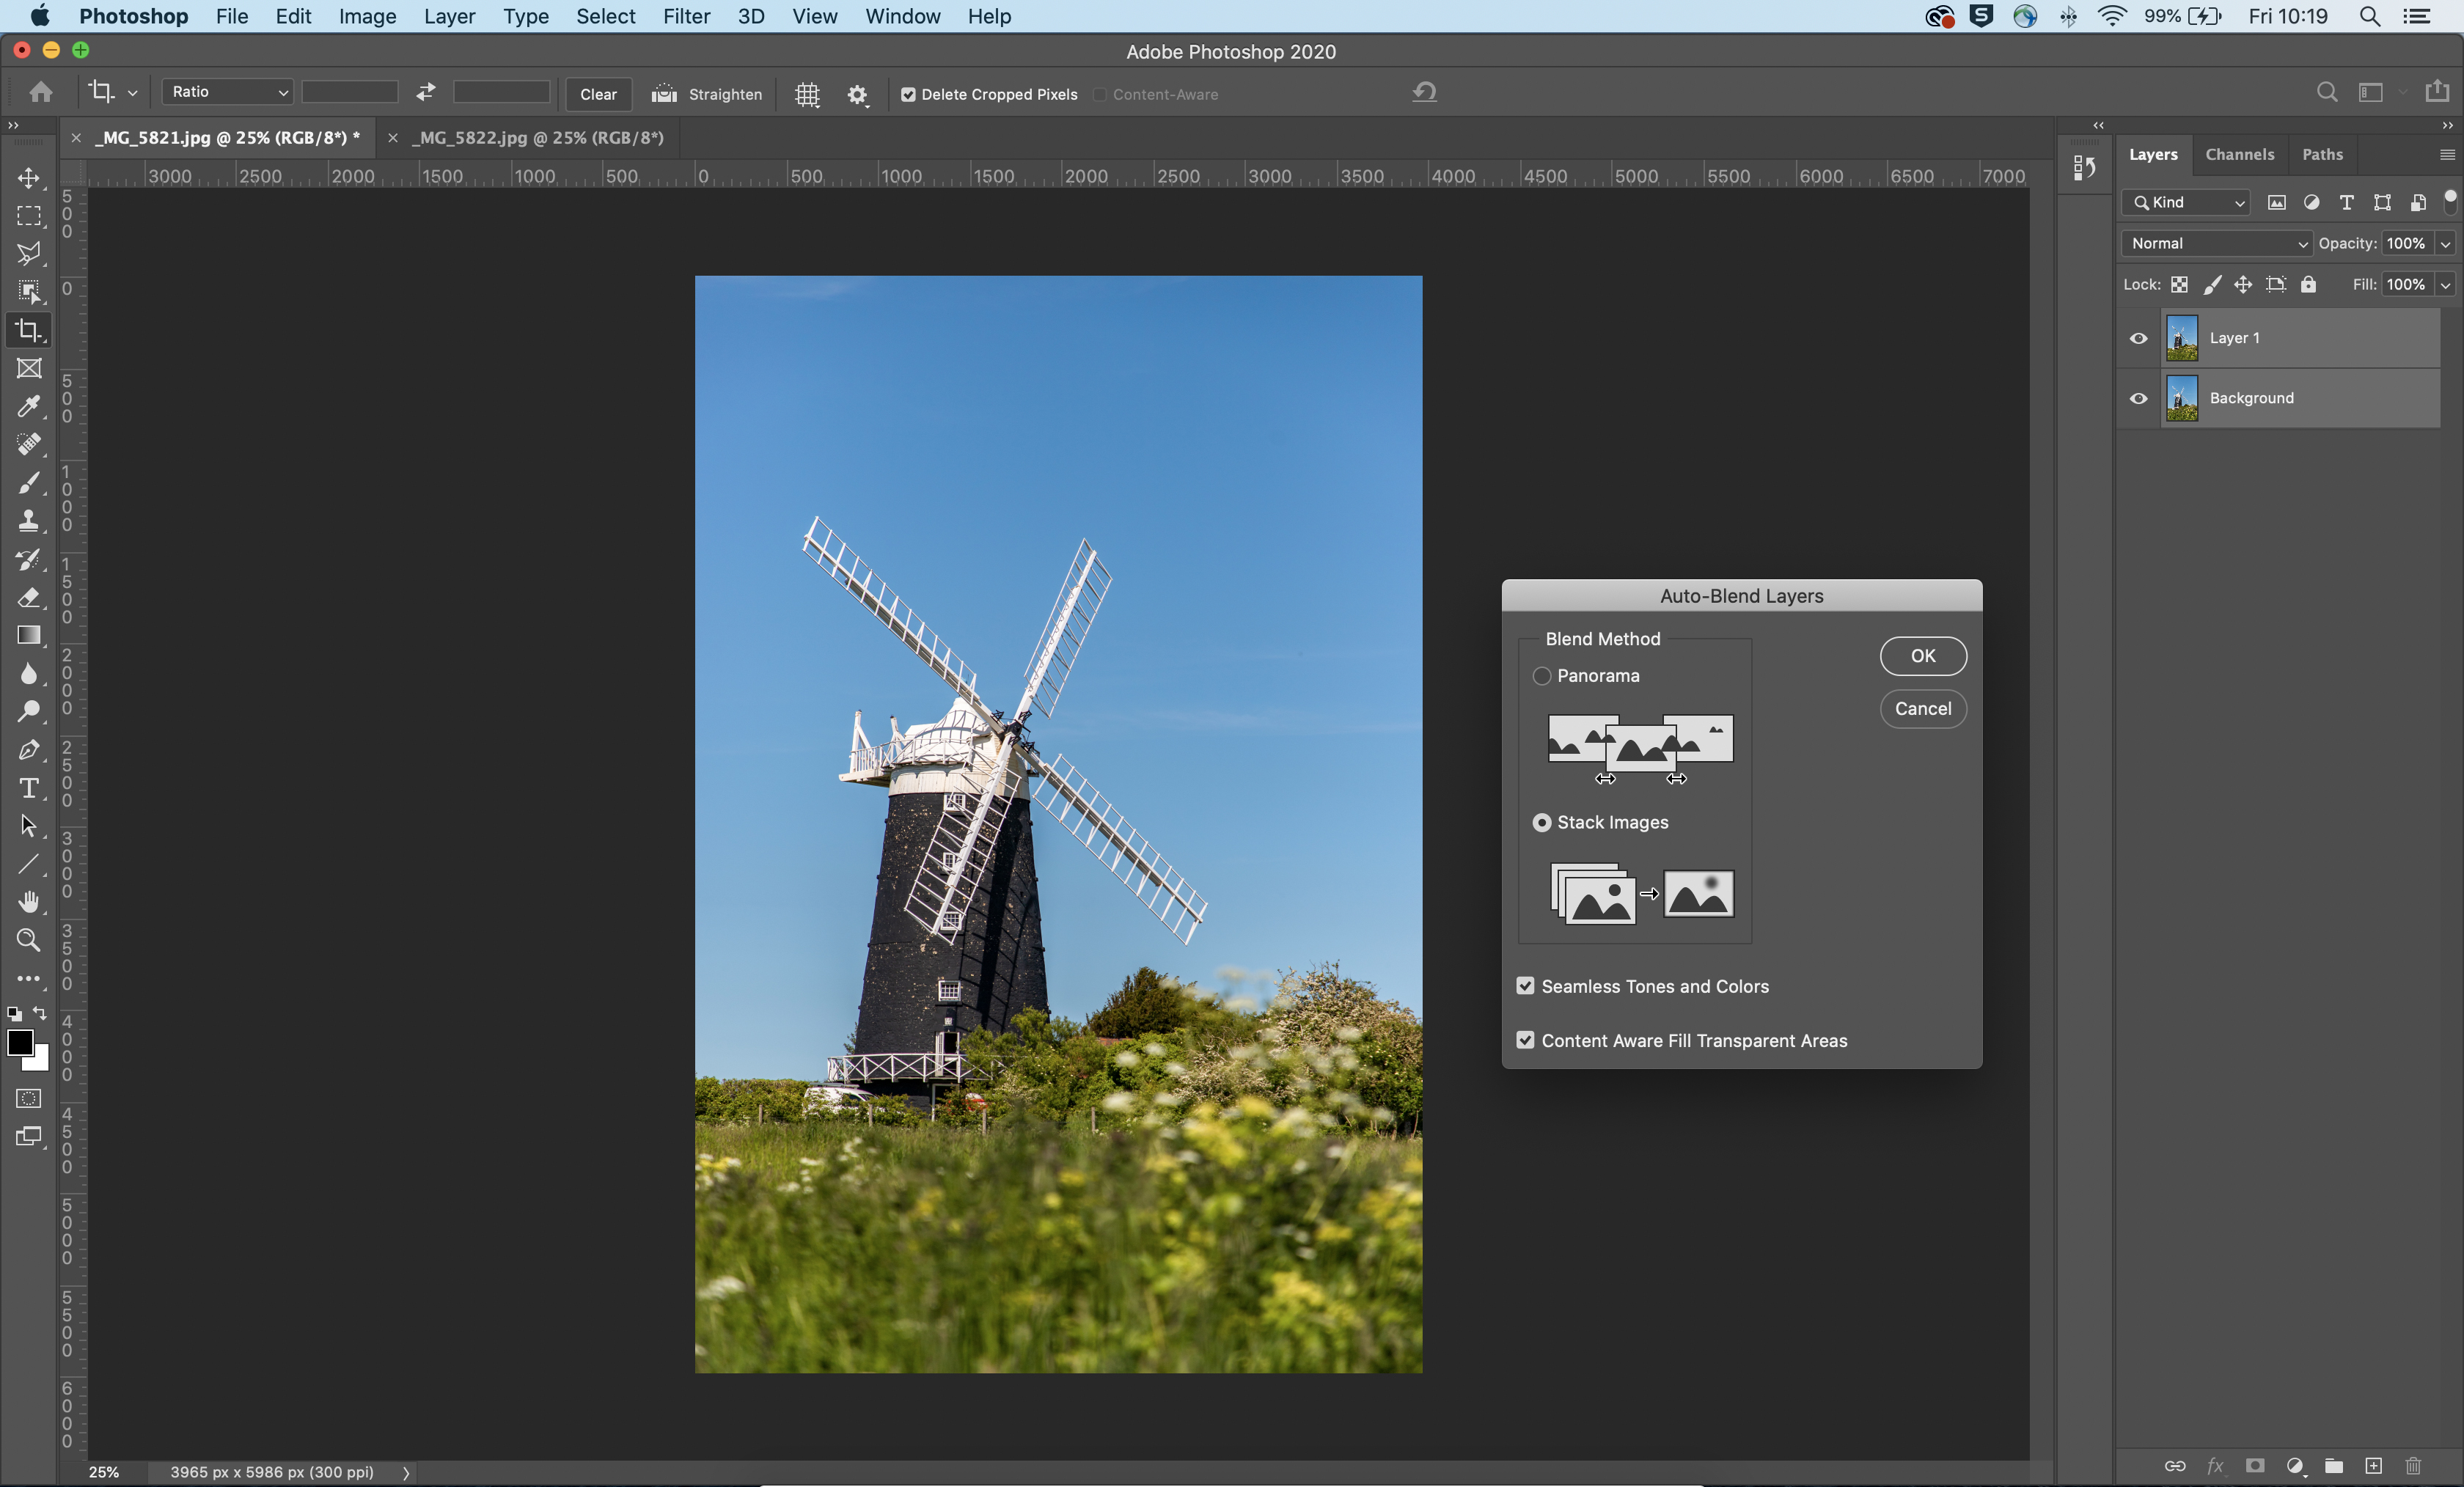
Now in Photoshop, select all of the images in the Layers panel and go to Edit > Auto Blend Layers. In the menu that appears choose Stack Images and hit OK and you’ll see it merge together the sharpest pieces of each layer to create one completely sharp photo.
PhotoPlus: The Canon Magazine is the world's only monthly newsstand title that's 100% devoted to Canon, so you can be sure the magazine is completely relevant to your system.
Read more:
Landscape photography tips
Best cameras for landscape photography
Best lenses for landscape photography
Best wide-angle lenses
How to shoot landscapes with a telephoto lens

In addition to being a freelance photographer and filmmaker, Dan is a bona fide expert on all things Canon and Adobe. Not only is he an Adobe-certified Photoshop guru, he's spent over 10 years writing for specialist magazines including stints as the Deputy Editor for PhotoPlus: The Canon Magazine, Technical Editor for Practical Photography and Photoshop Editor on Digital Photo.
