How to shoot a vintage photograph at home using clever DIY tricks
Learn how to turn a simple indoor portrait into a tattered vintage photograph using homemade textures
Watch video: How to shoot a vintage-themed photograph at home
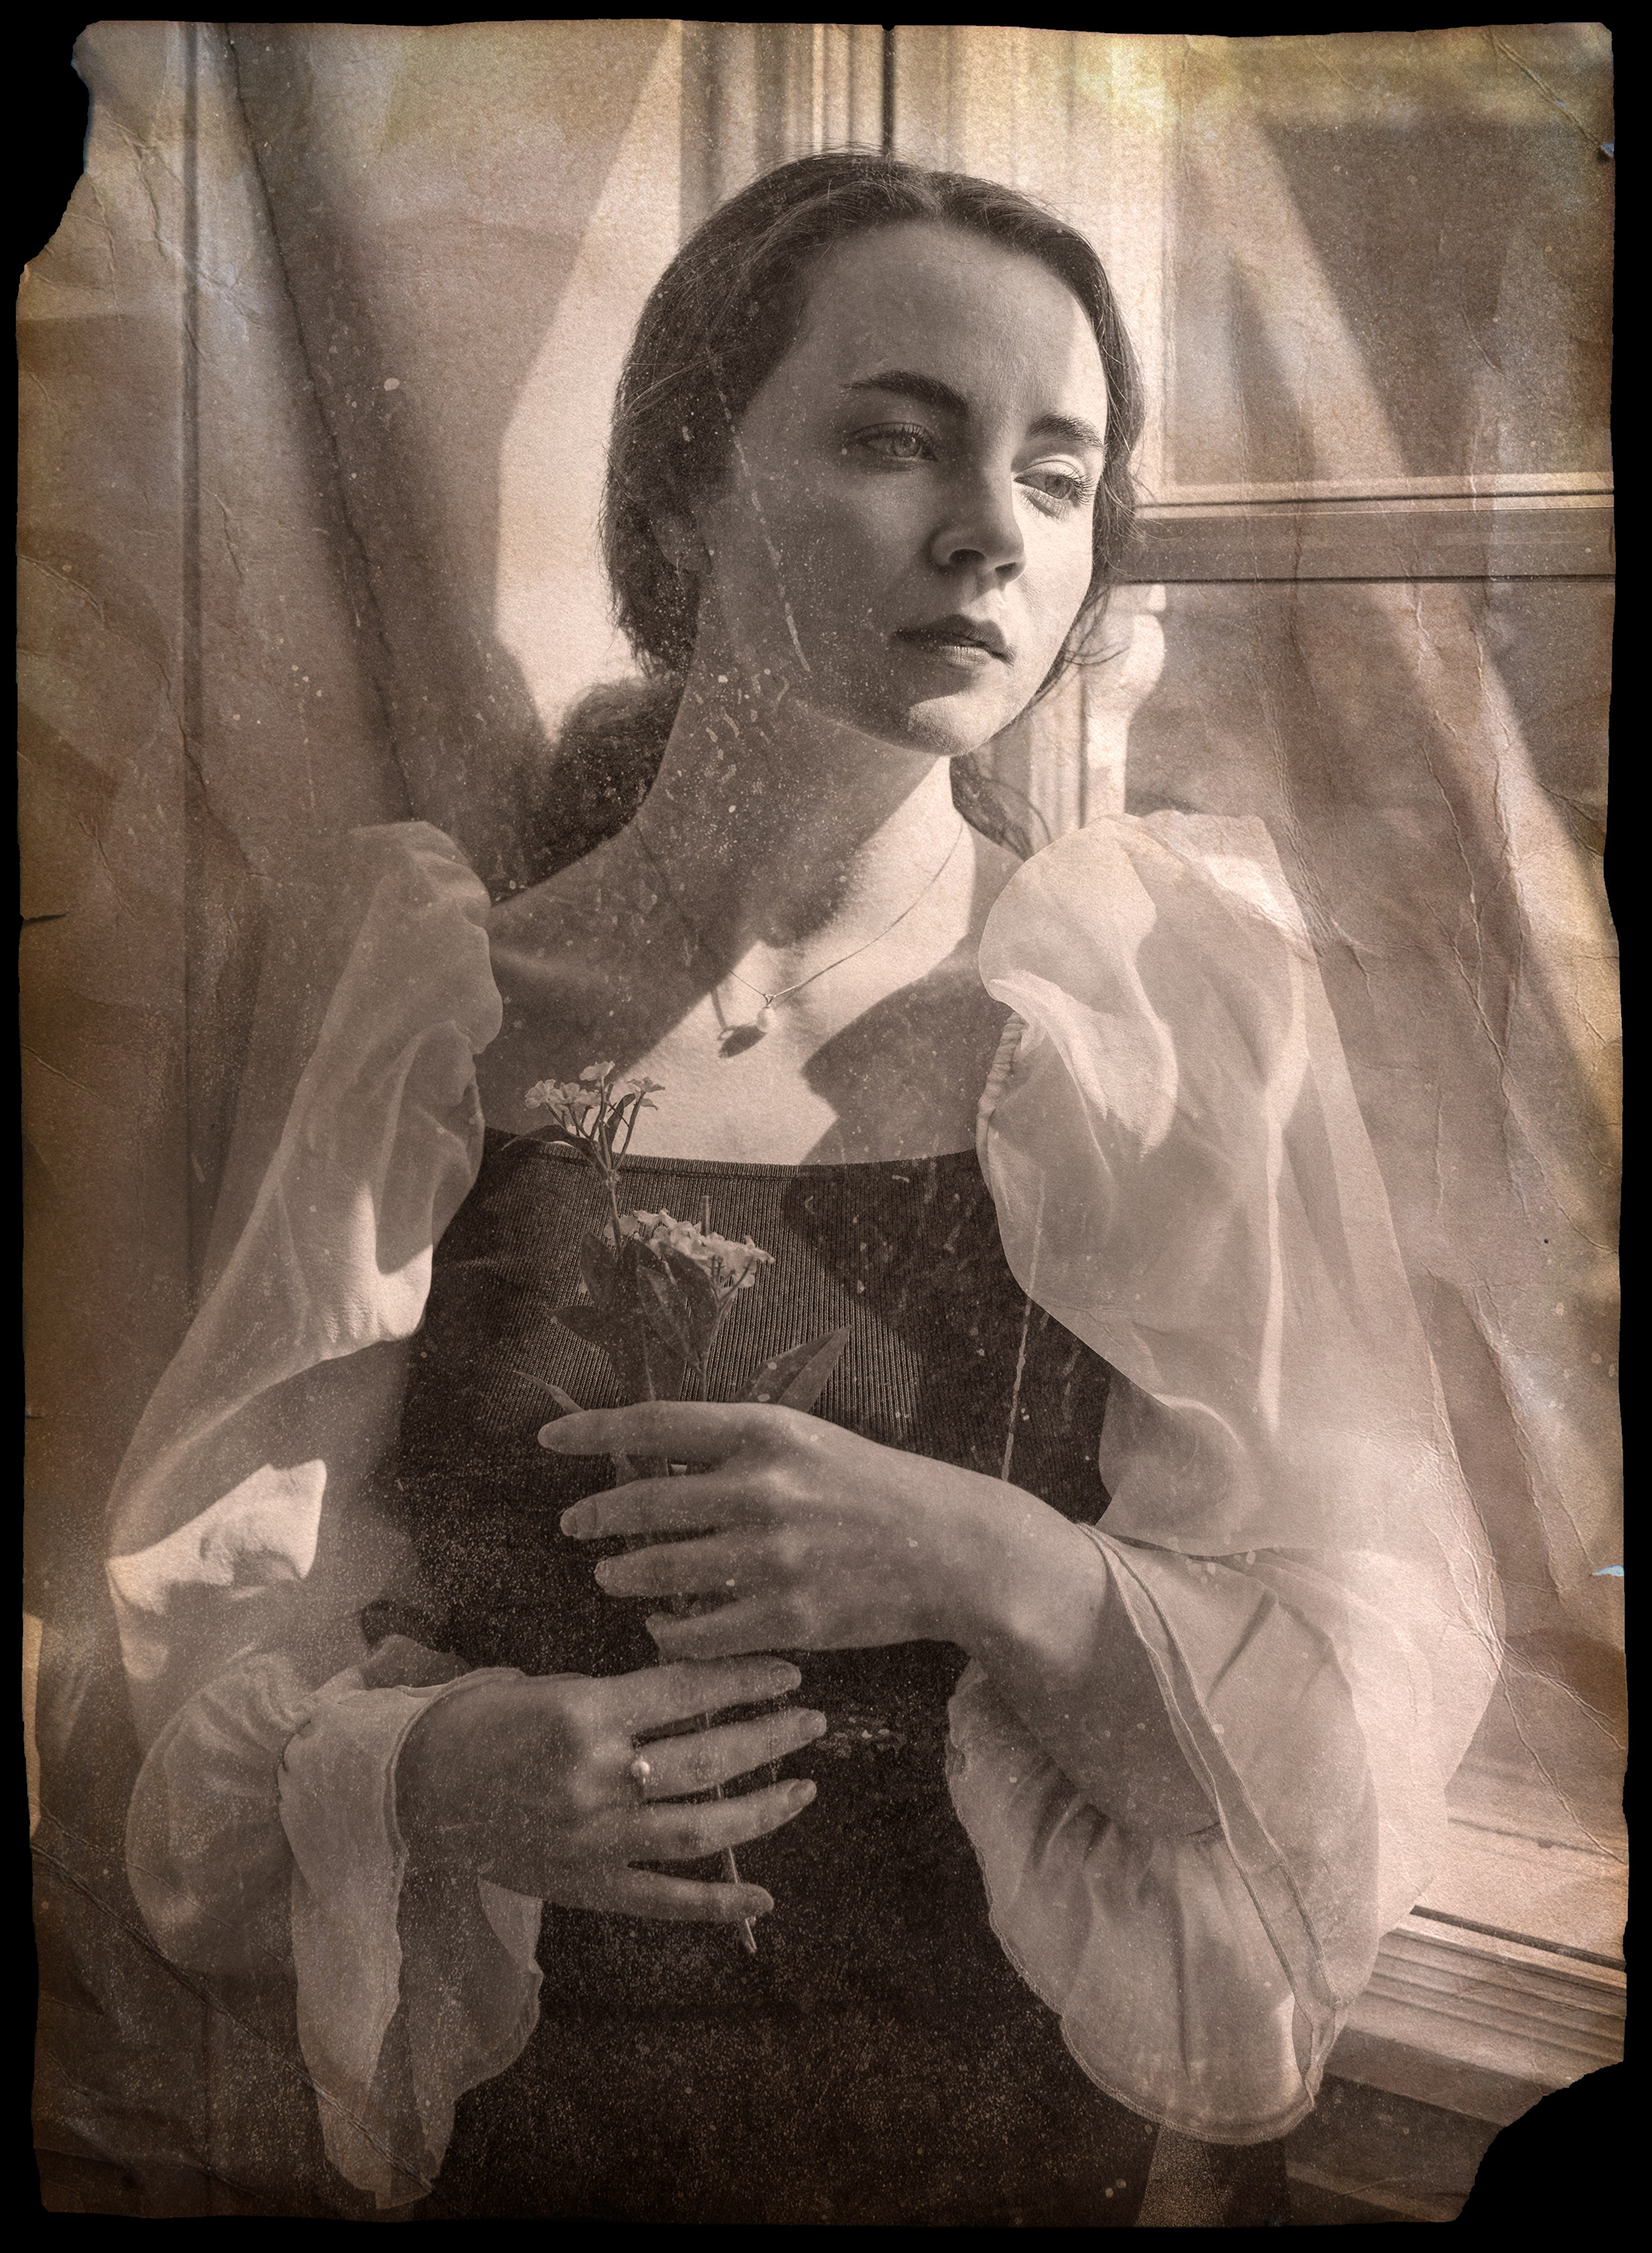
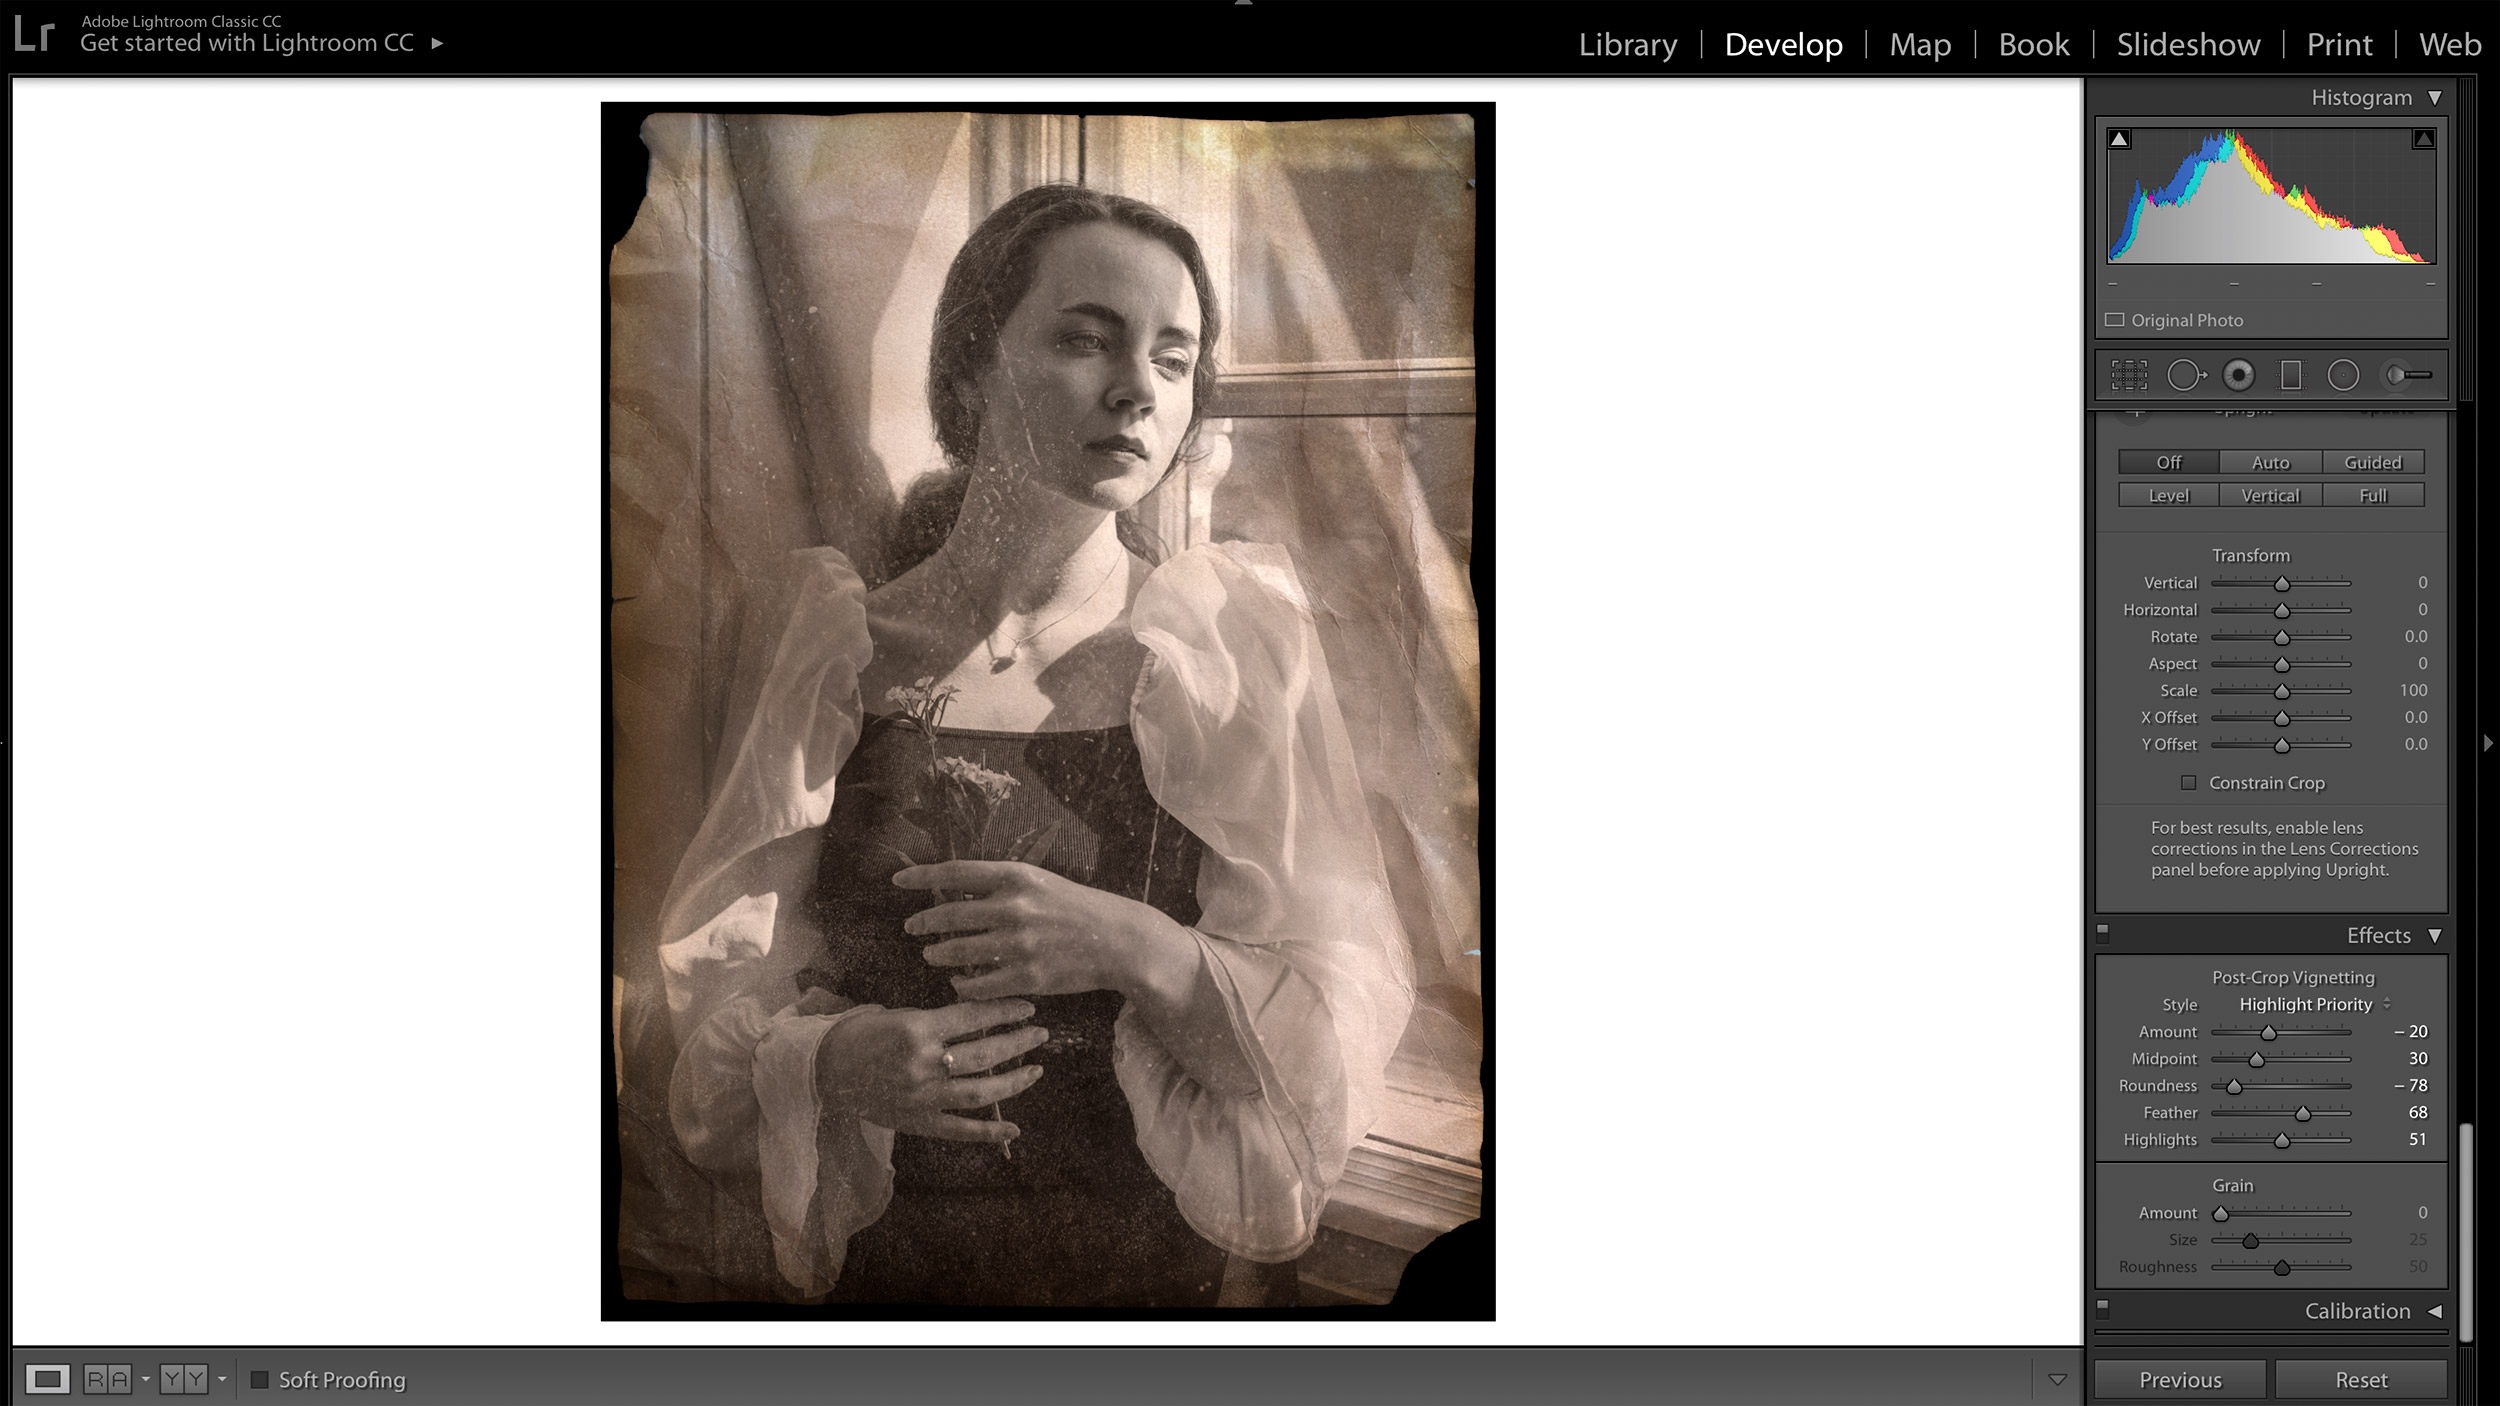
Vintage portraits might look old, but they never look dated. Long after Instagram filters have faded into obscurity, there will still be an appetite for vintage-style photography. In this tutorial we’re going to show you how to convert digital files into convincing vintage-themed portraits, all from the comfort of your own home.
We’ll also show you how to create a DIY vintage texture using little more than a piece of paper and a few tea bags. If you have any children – or grandchildren – this might be the perfect project to enlist their help and get them involved!
The portrait itself can be shot by a window, and if you don’t have a proper reflector you can use a roll of aluminum foil or a sheet of foam board. Your photograph’s appeal will be its vintage vibe, so don’t worry if your background isn’t exciting or if the lighting isn’t perfect.
Once you’ve imported everything into Photoshop you can use blending modes to overlay textures onto the original shot. The tea-stained texture will provide an aged aesthetic, which can be amplified by overlaying a suitable Look Up Table (LUT).
So, read on and make your very own vintage portrait – it’s much more fun than just applying a ready-made filter!
Shoot your portrait
Step 1: Window light
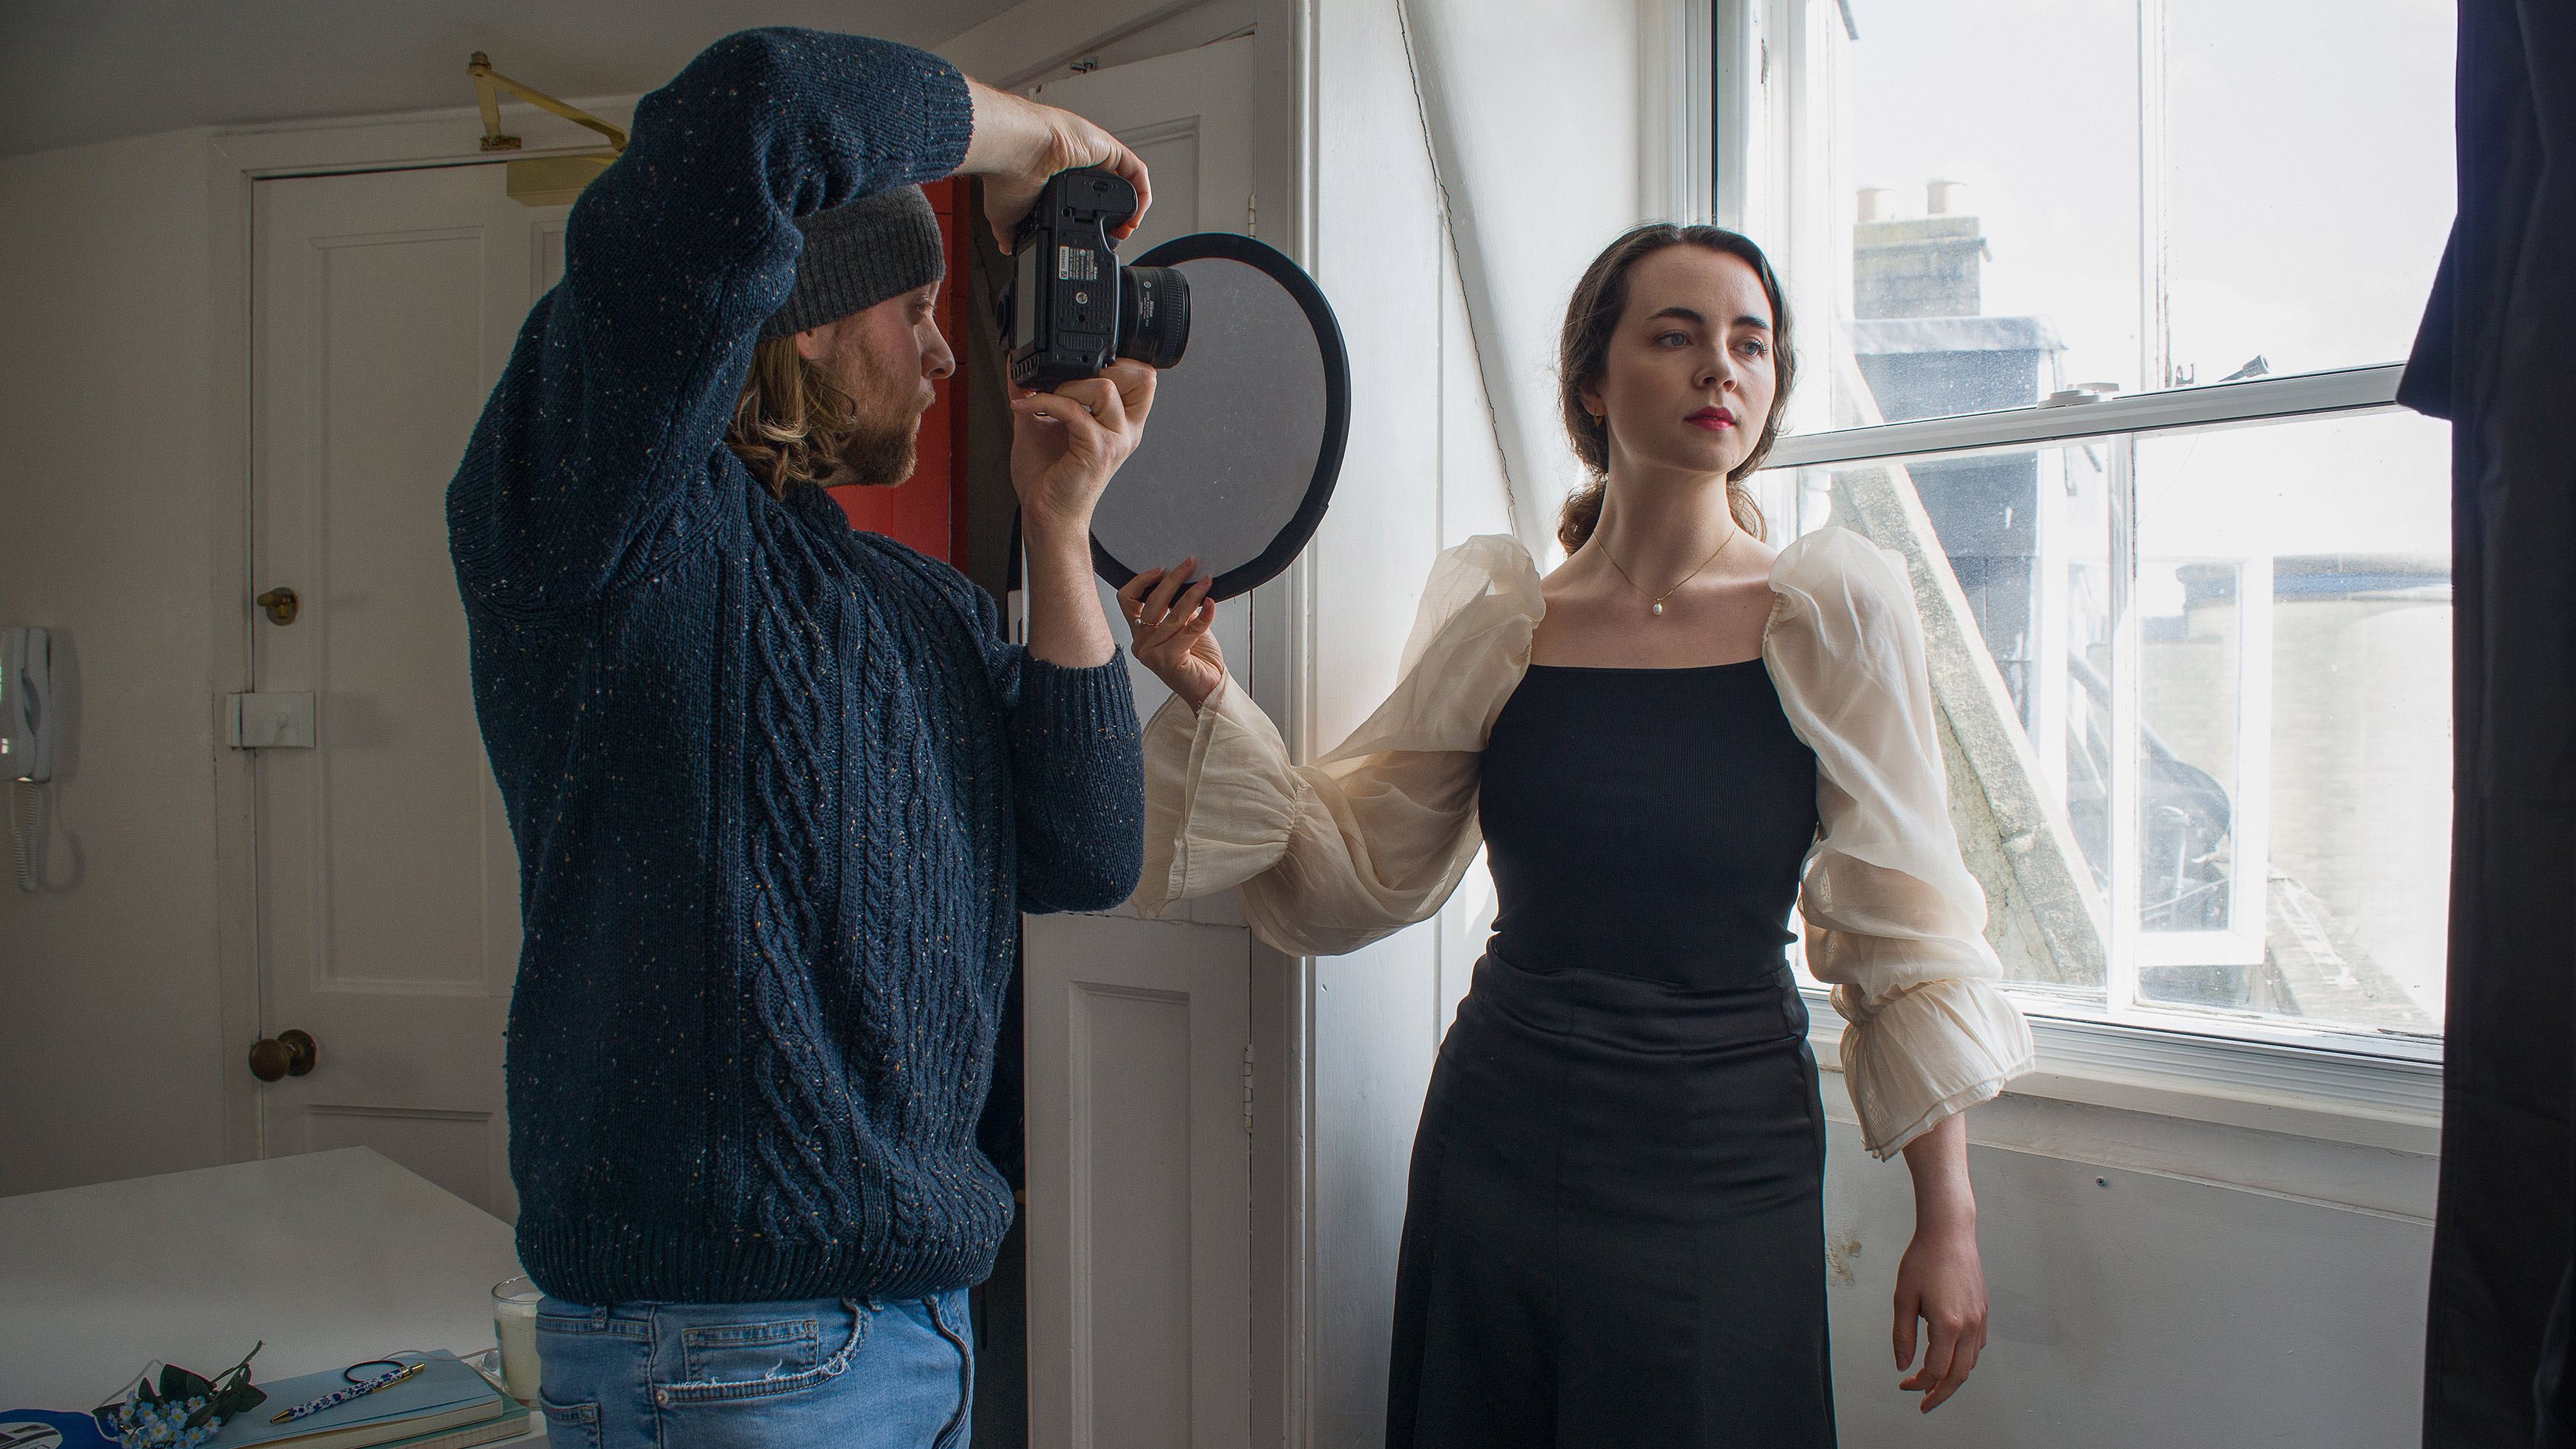
We asked our model to stand by a large window, which was letting in plenty of sunlight. Switch your metering mode to spot, which will enable you to expose for the precise area where your focus point is positioned. This will help you to expose for your subject and not the bright window.
The best camera deals, reviews, product advice, and unmissable photography news, direct to your inbox!
Step 2: DIY reflectors
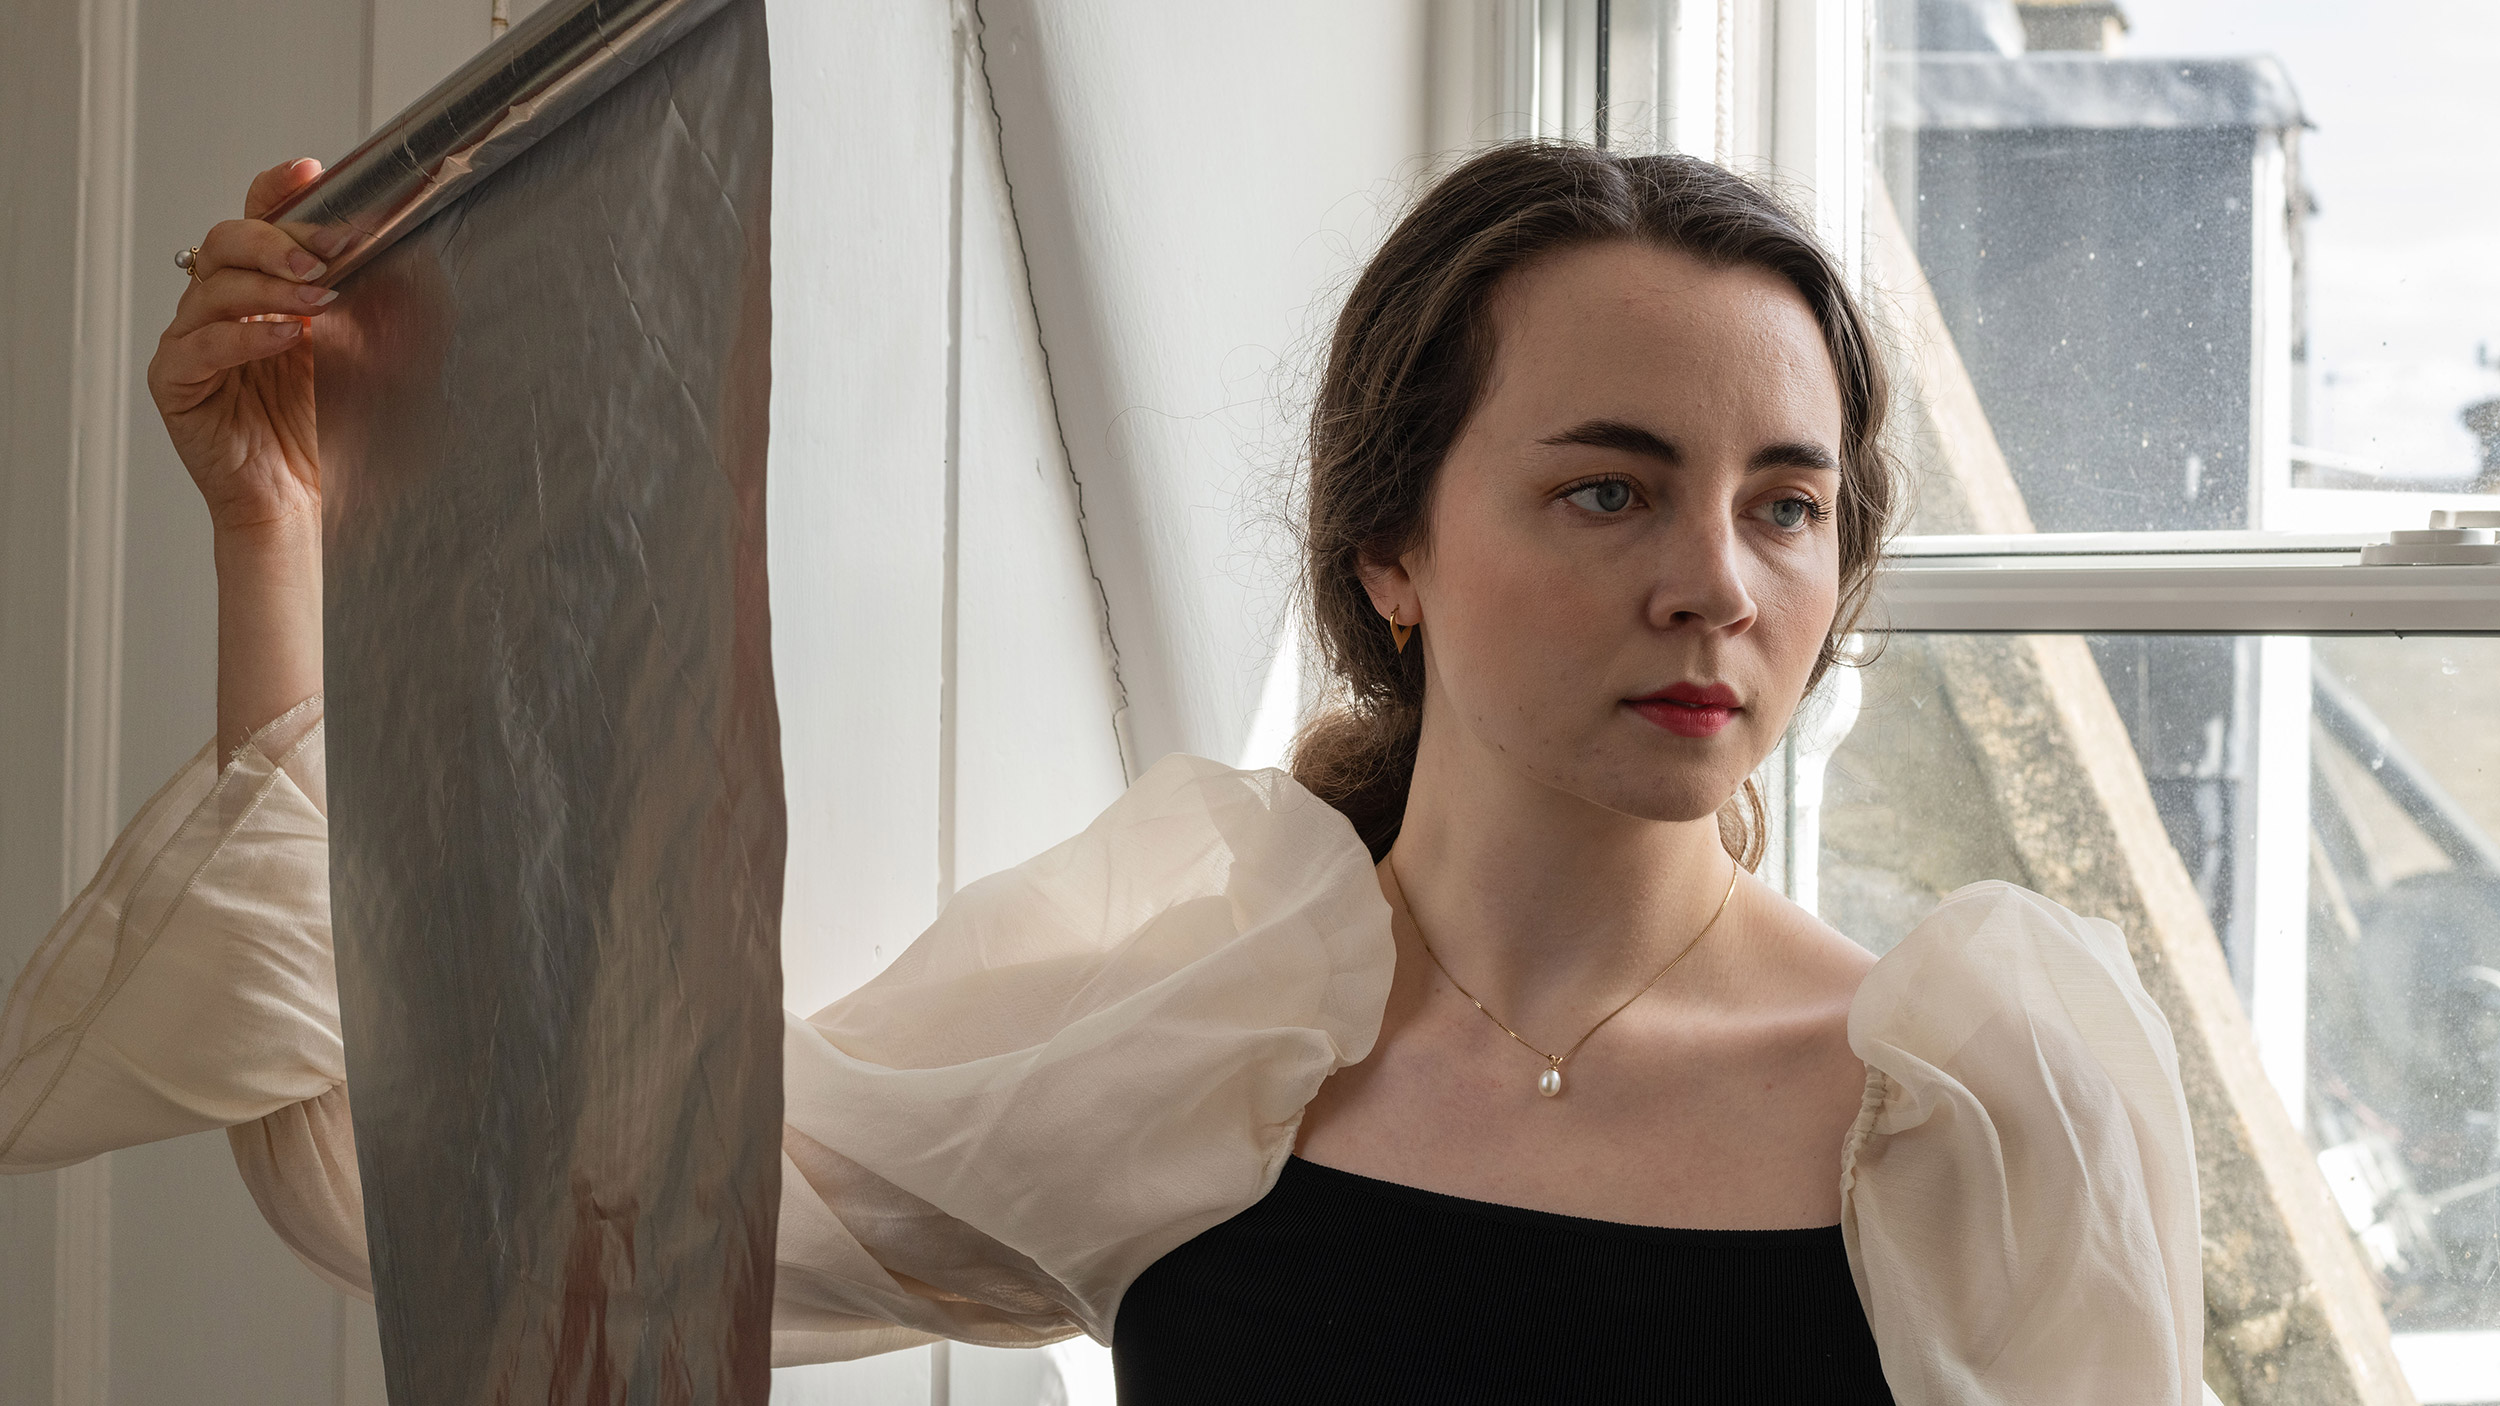
If you want a little more control over your lighting, use a reflector to fill in the shadows. If you don’t have a reflector, try using a sheet of foam board, or a roll of aluminum foil. Foil is useful because it has dull and shiny sides, which can be interchanged to suit the intensity of light required.
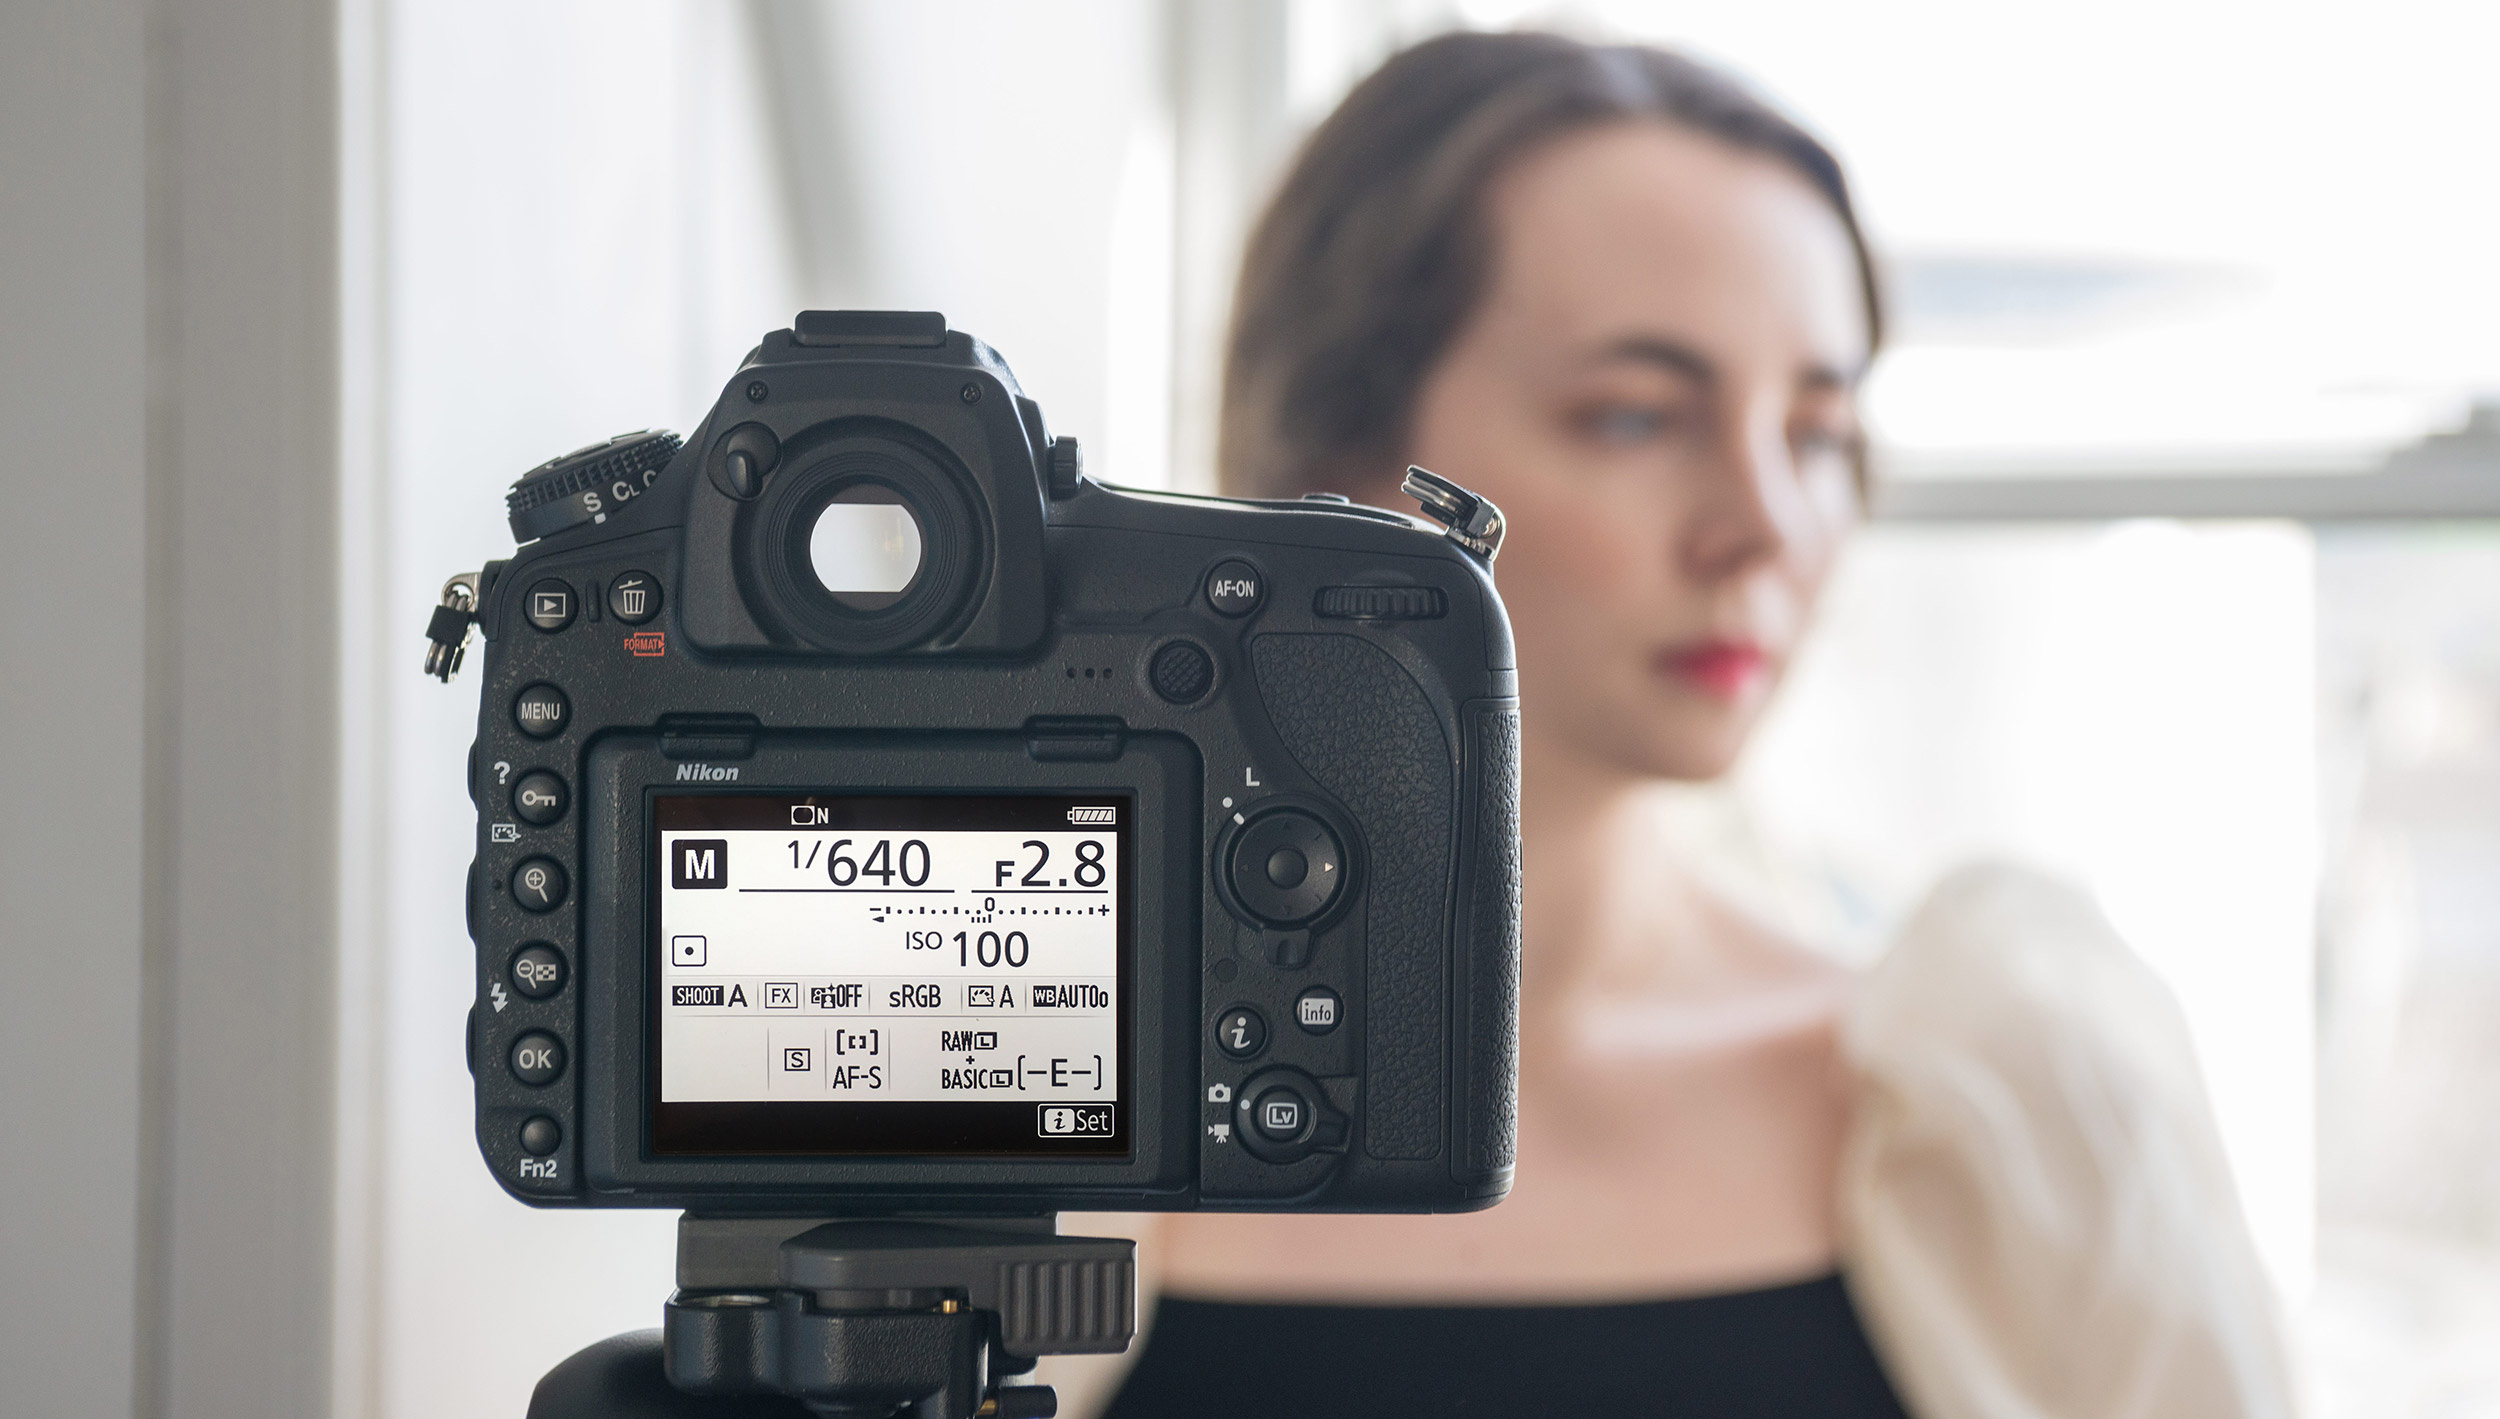
Step 3: Camera settings
If you're using a modern mirrorless camera, you'll have the luxury of plenty of focus points (and maybe even Eye AF as well). If you're using a DSLR, make use of single-servo AF and single-point AF to focus on the eye that’s closest to the camera, focusing and recomposing accordingly. If you’re shooting in direct sunlight, be wary of overexposing the highlights; underexpose your image slightly, if you need to, and use your reflector to help fill in the shadows.
Create your own vintage texture
Step 1: One we made earlier
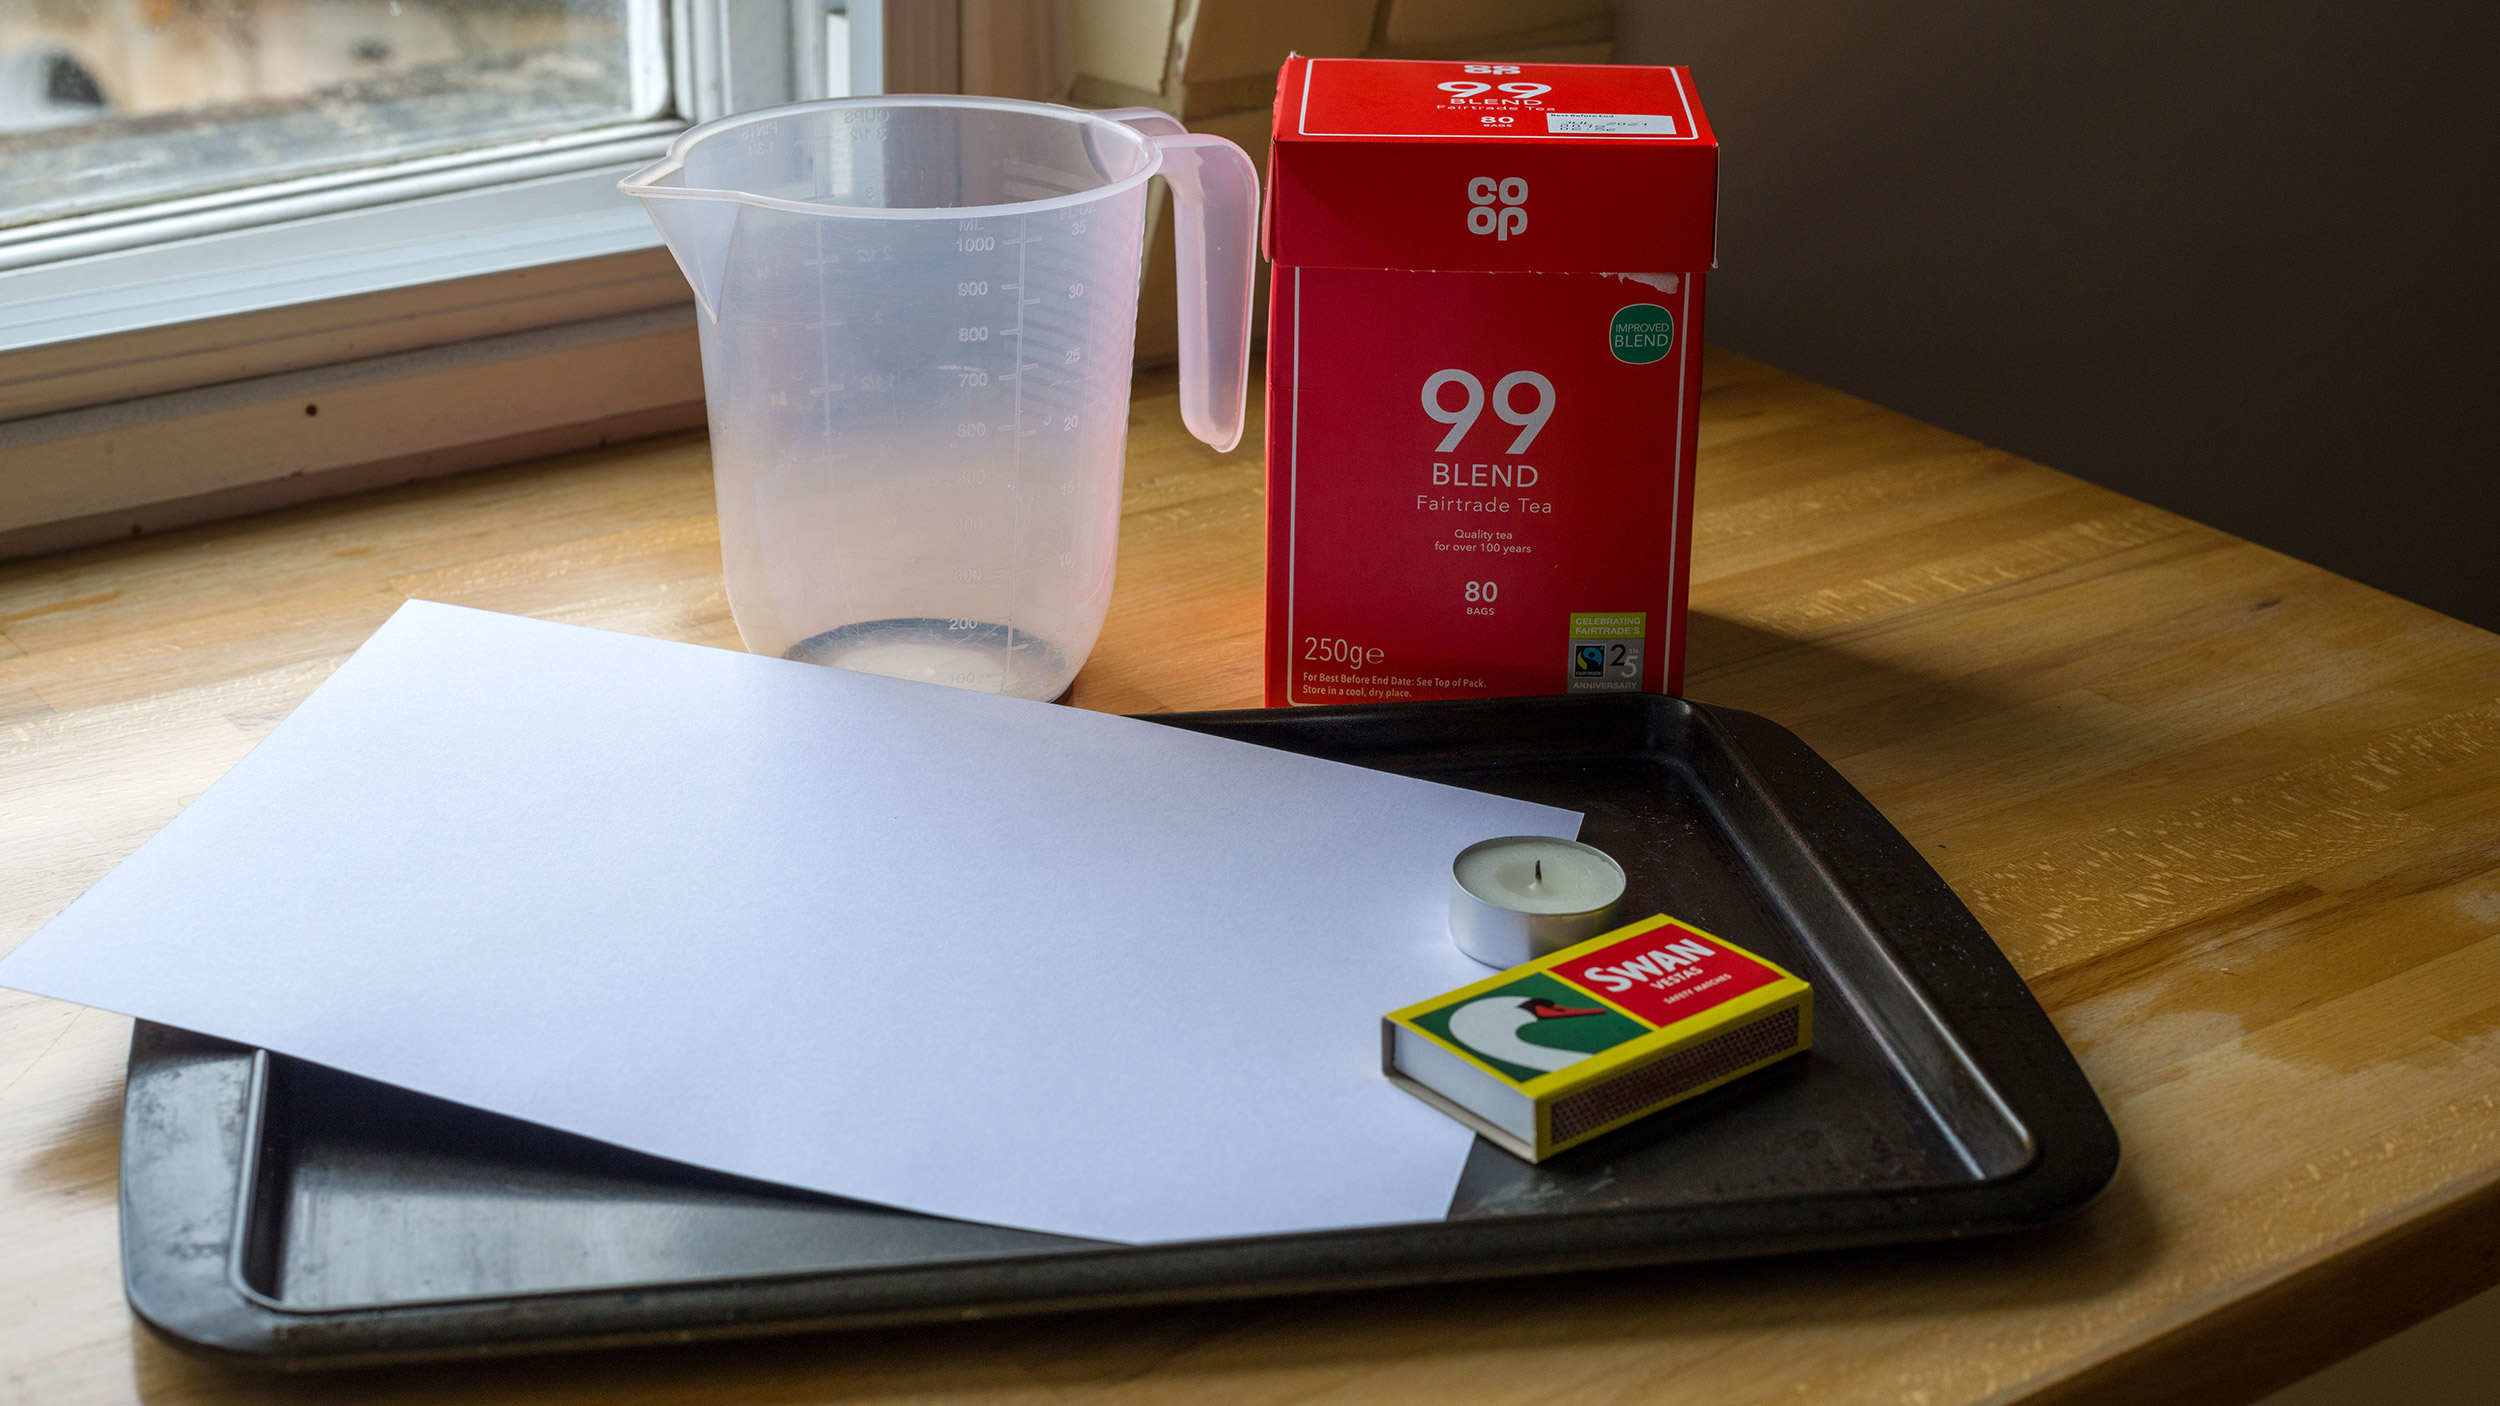
It doesn’t take long to make your own textures – and once they’re done, you can use them in other projects as well. To create the vintage paper texture, you’ll need a thick sheet of white paper, a measuring jug and a tea light. You’ll also need a baking tray with a flat surface (since ridged baking trays will cause dark ridges to appear on your paper).
Step 2: Put the kettle on
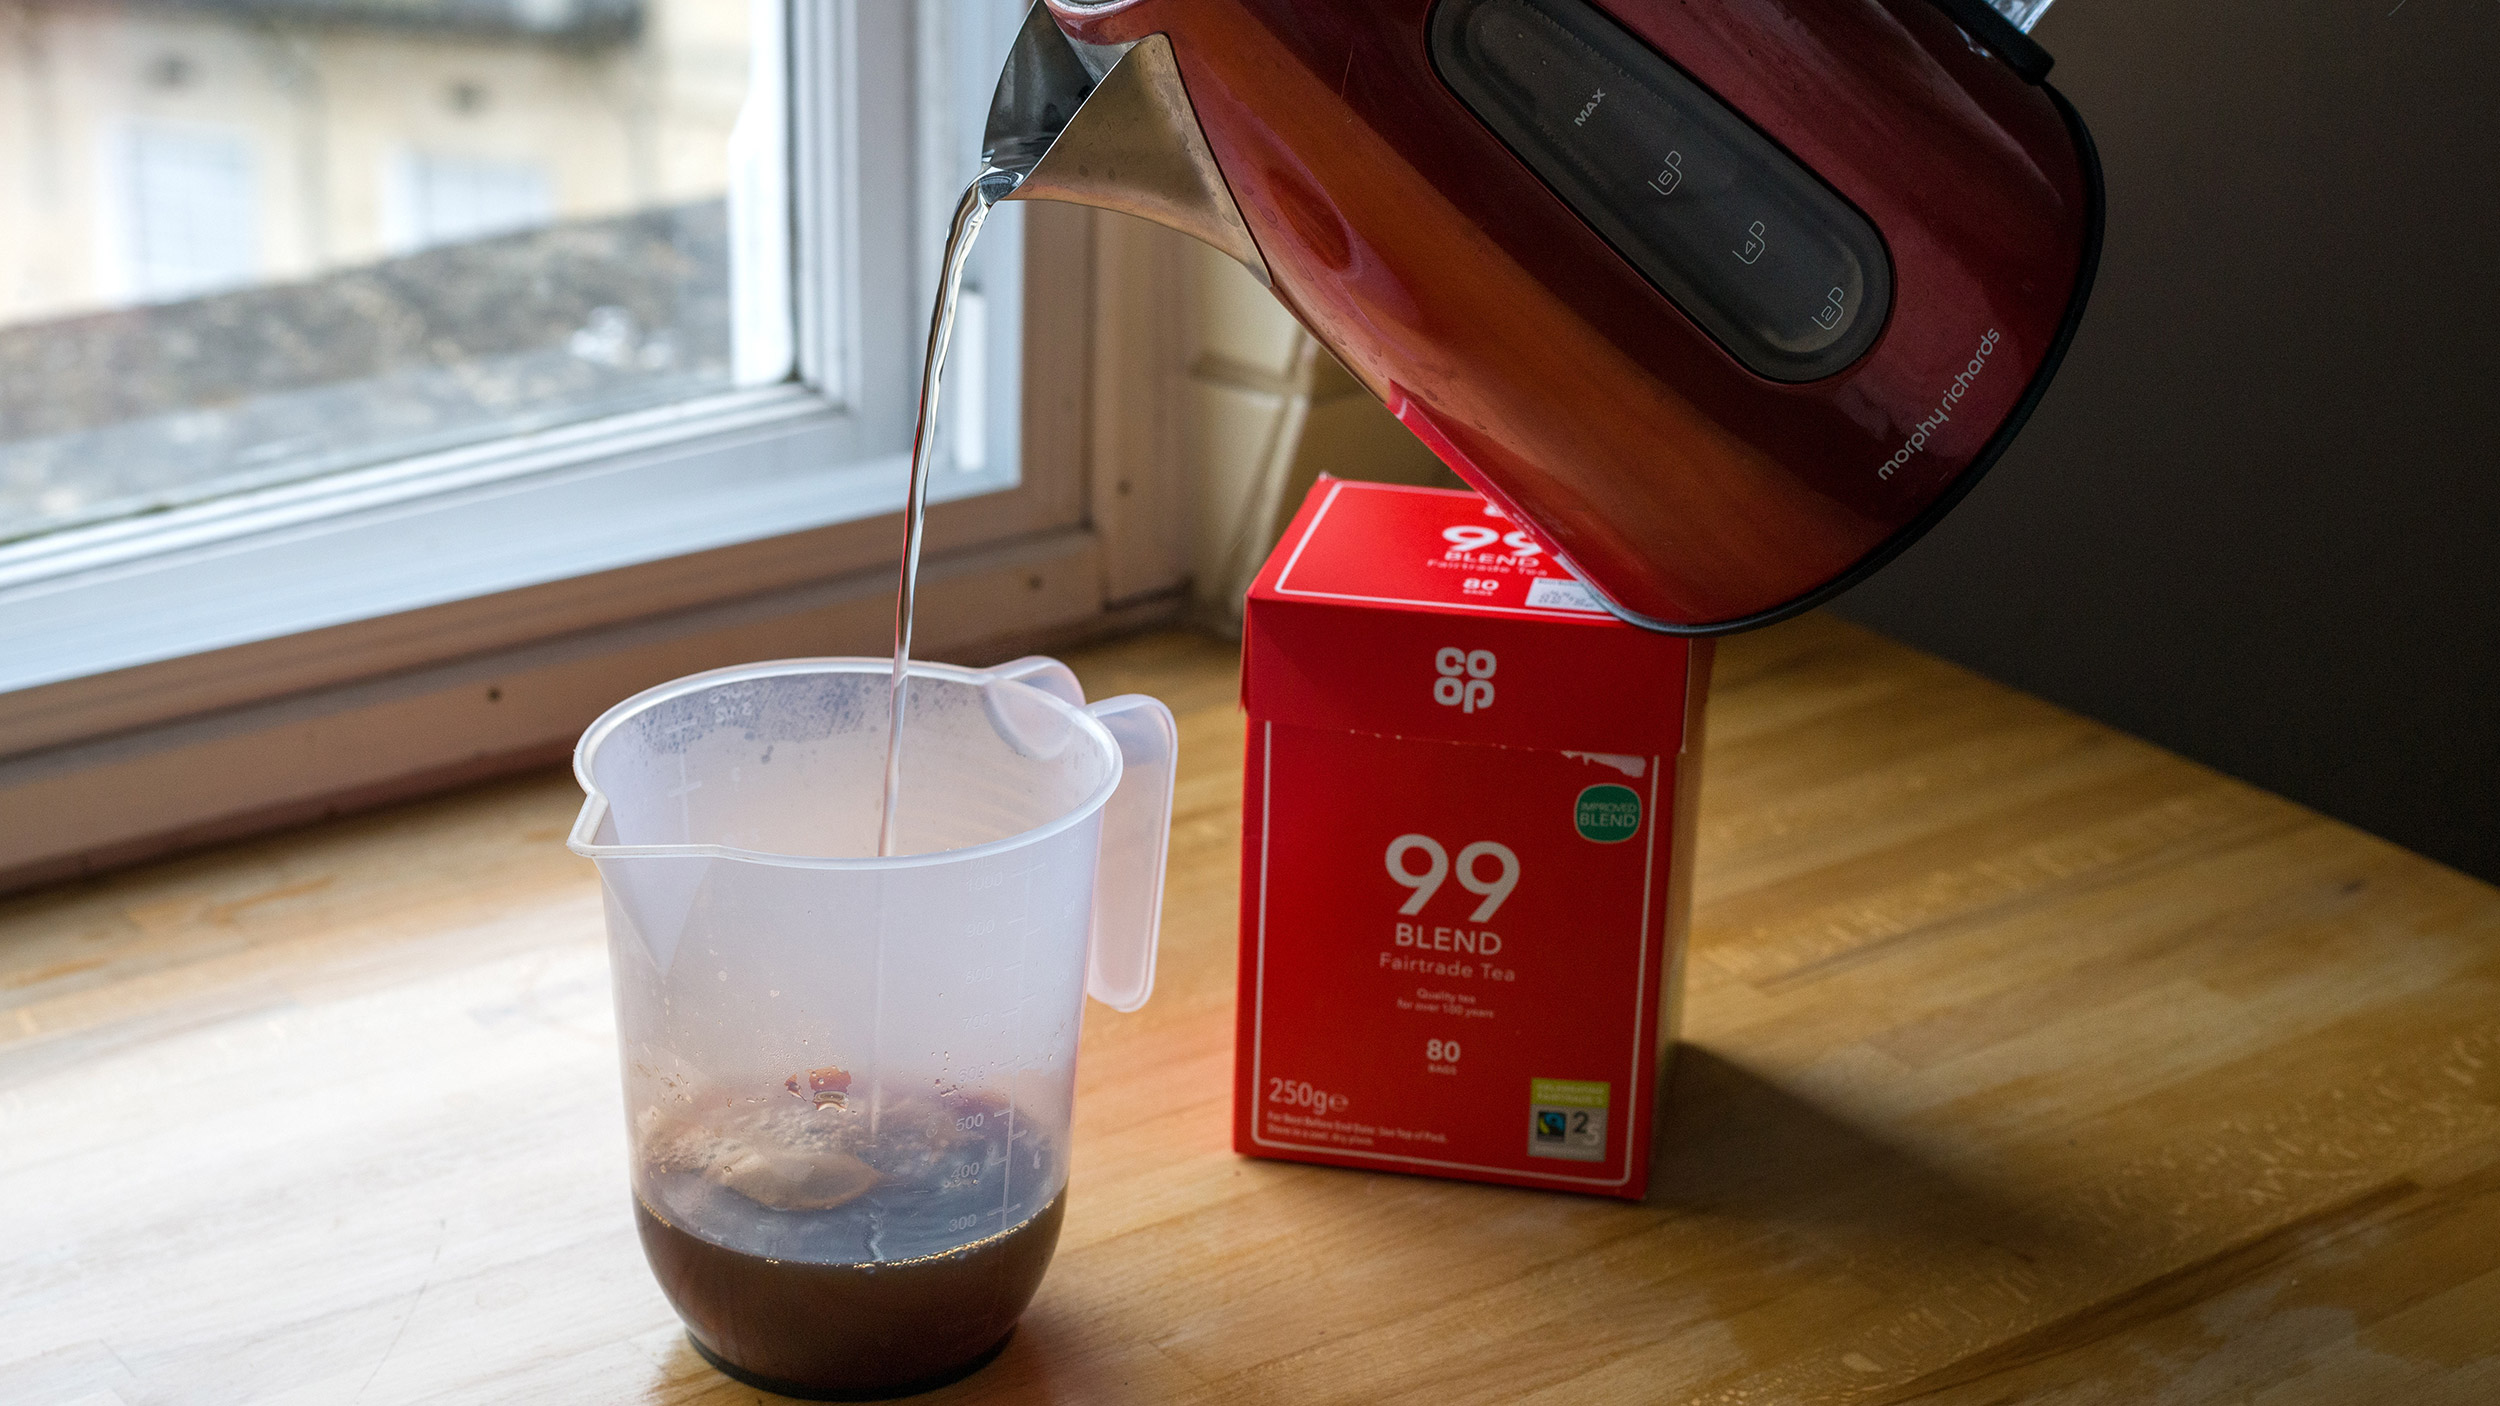
Boil the kettle and place three teabags in the measuring jug. Fill the jug with roughly 400ml of boiling water and stir thoroughly with a spoon. Leave the liquid until it turns a dark, coppery brown. You may need to experiment with different strengths to achieve the desired paper effect.
Step 3: Paper traybake
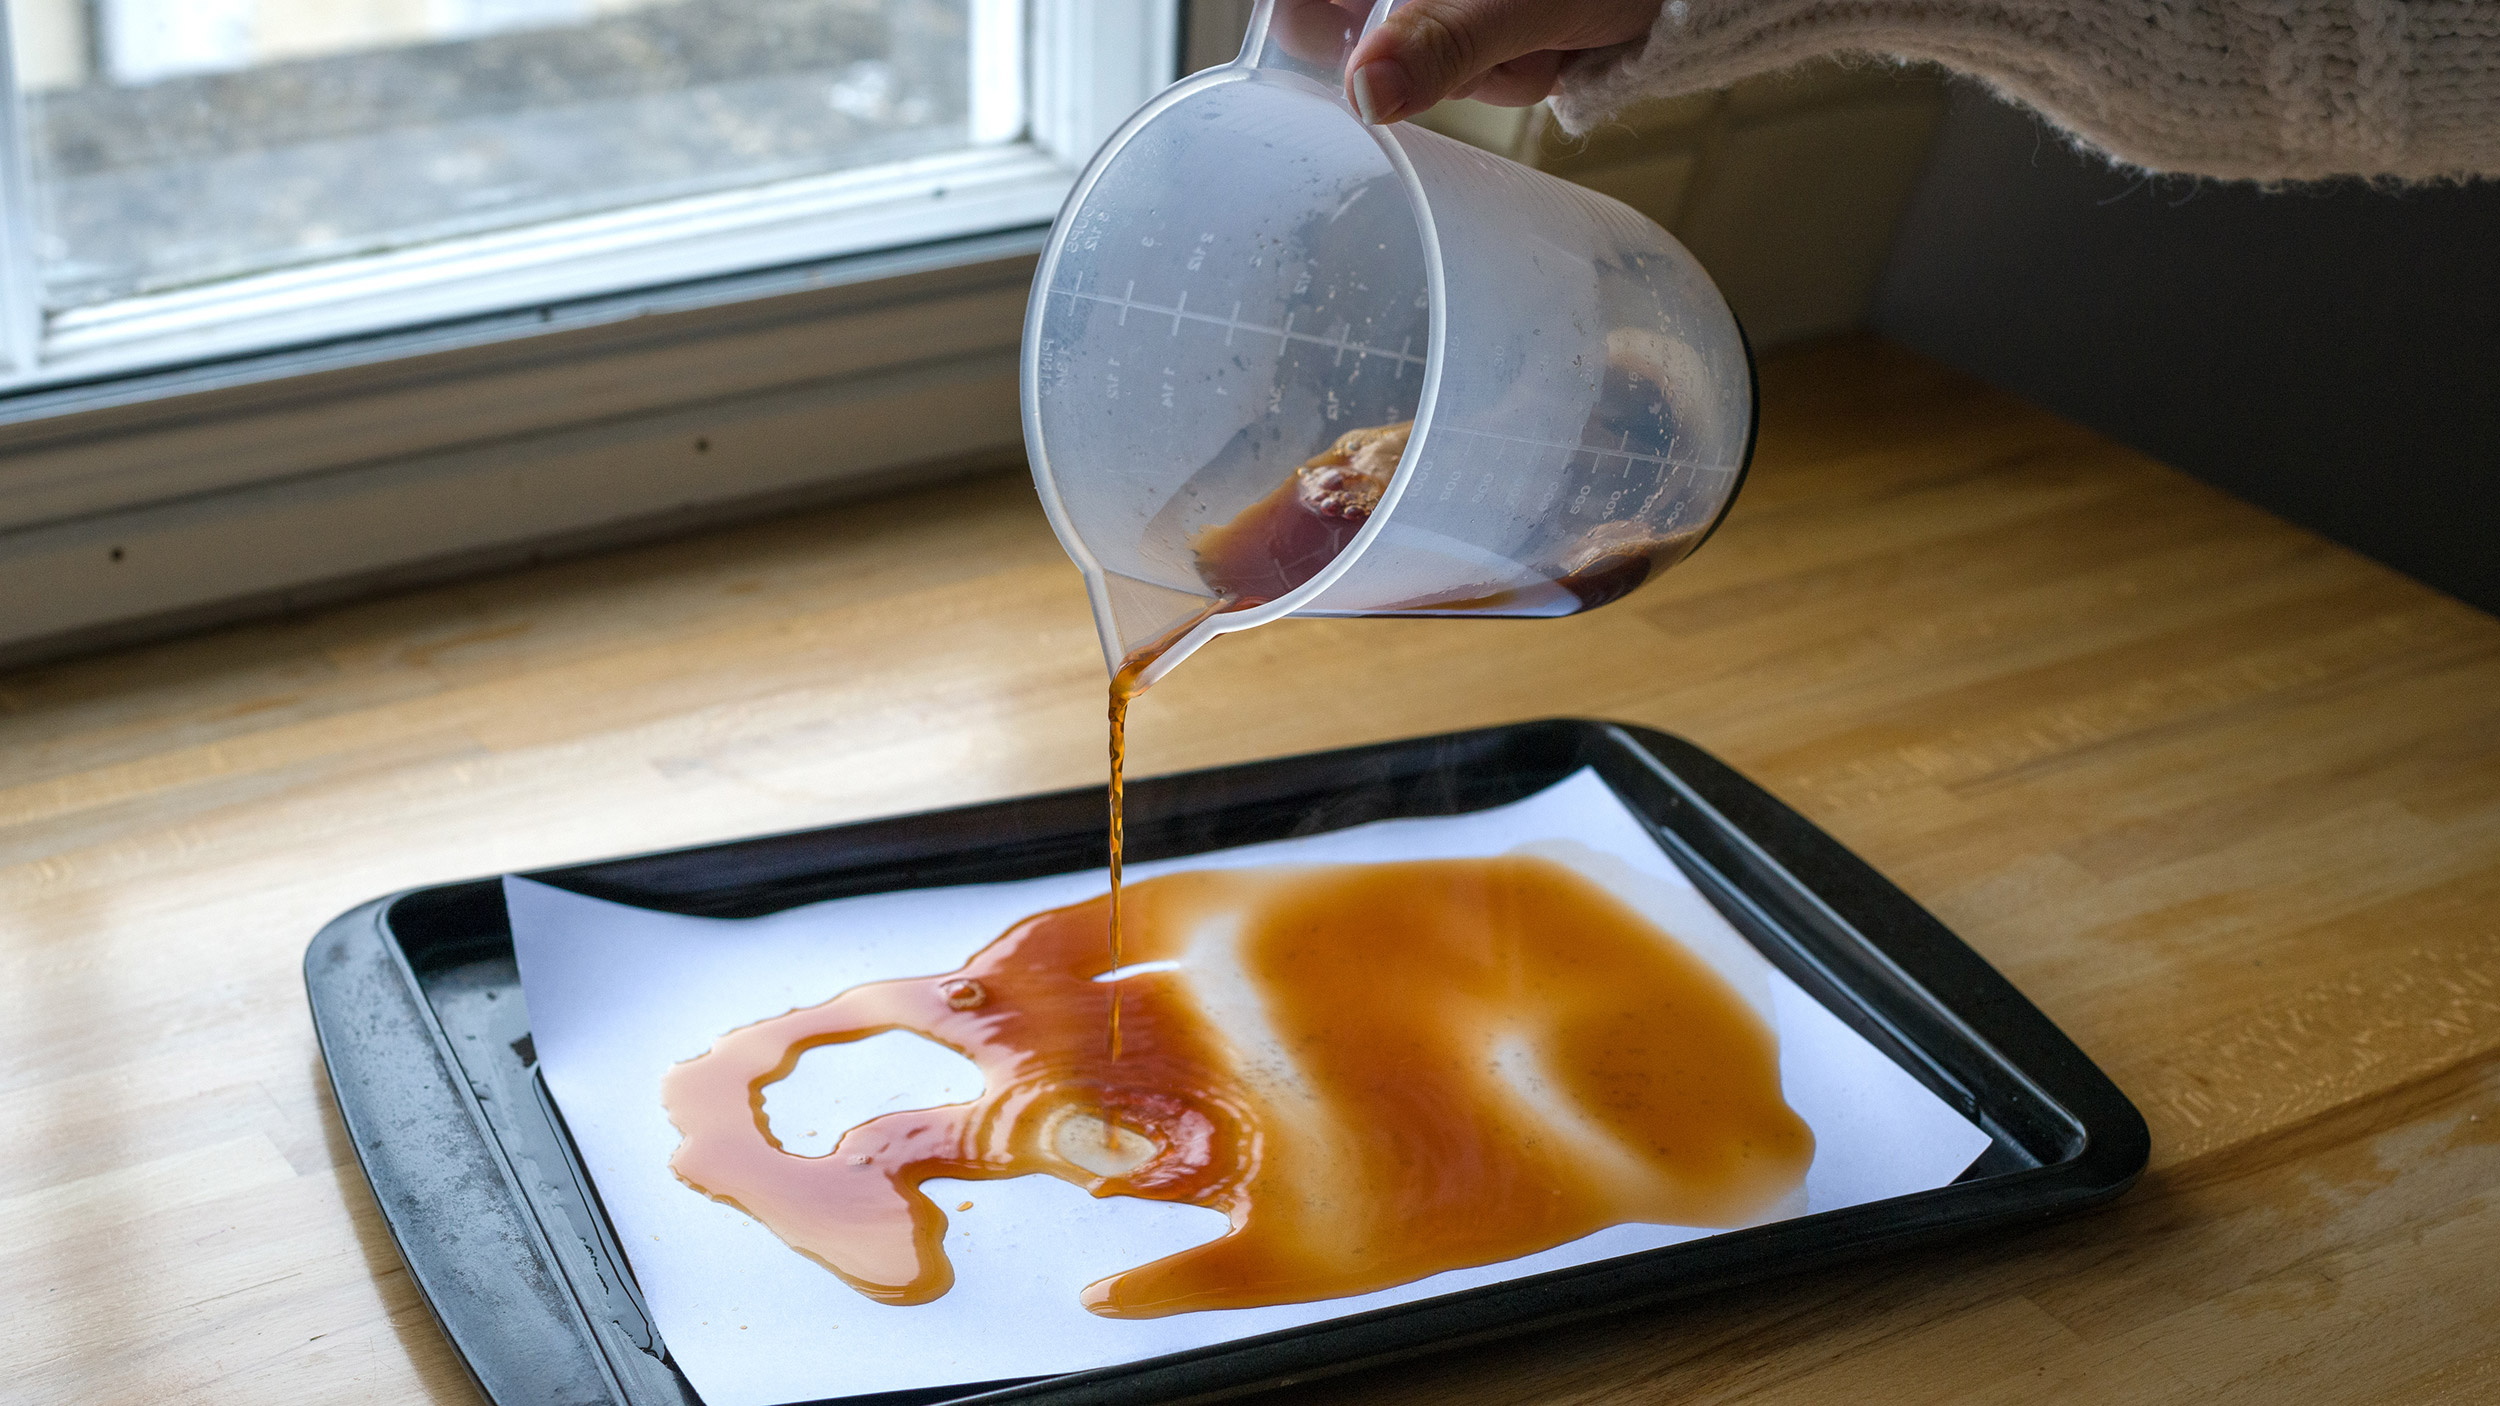
Pour some of the liquid into your baking tray so it covers the bottom evenly. Put the paper in the tray and cover it with more liquid. Leave for eight minutes and then place in the oven at 350°F / 180°C. Check the paper regularly and do not leave it unattended. Ours took about five minutes to dry fully.
Step 4: Scrunch and singe
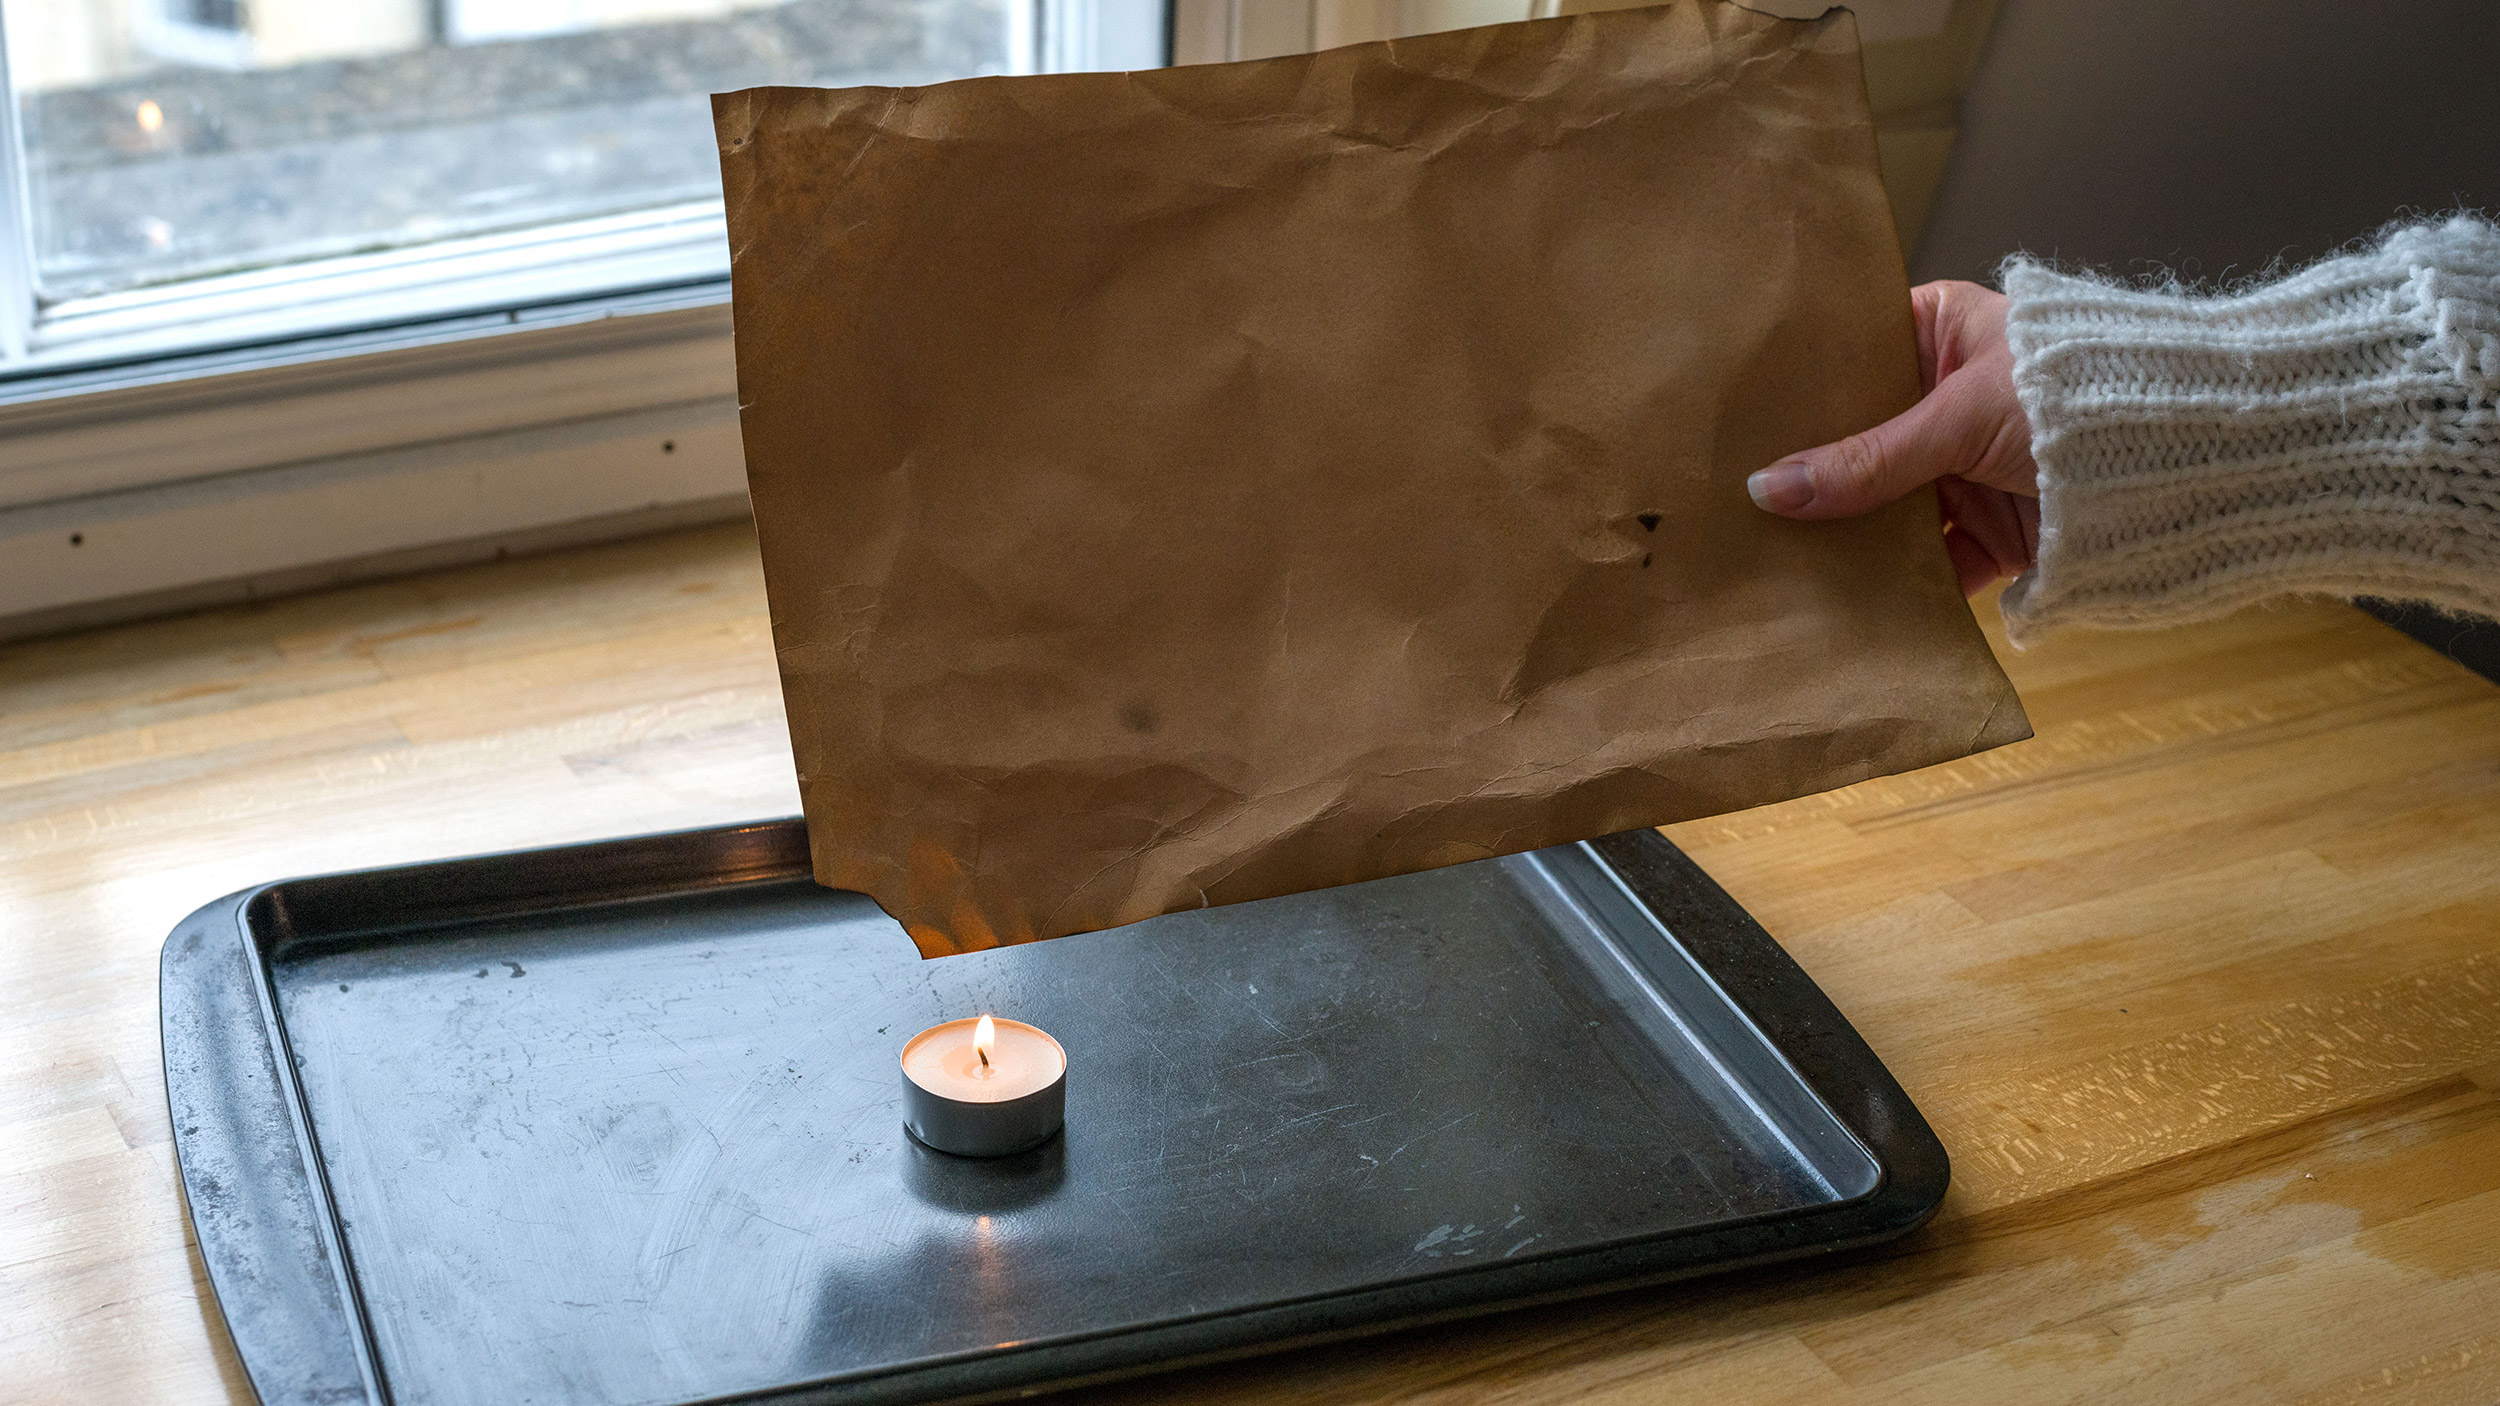
Once your paper is dry, you can scrunch and fold the edges to create cracks and dents. If you want to age it further, lightly singe the edges by quickly passing them through the flame of a tea light. Always adhere to strict fire safety precautions when working with naked flames. Ideally you'll want to work with two textures, so repeat the process again to create a second.
Photoshop magic
Step 1: Shoot or scan
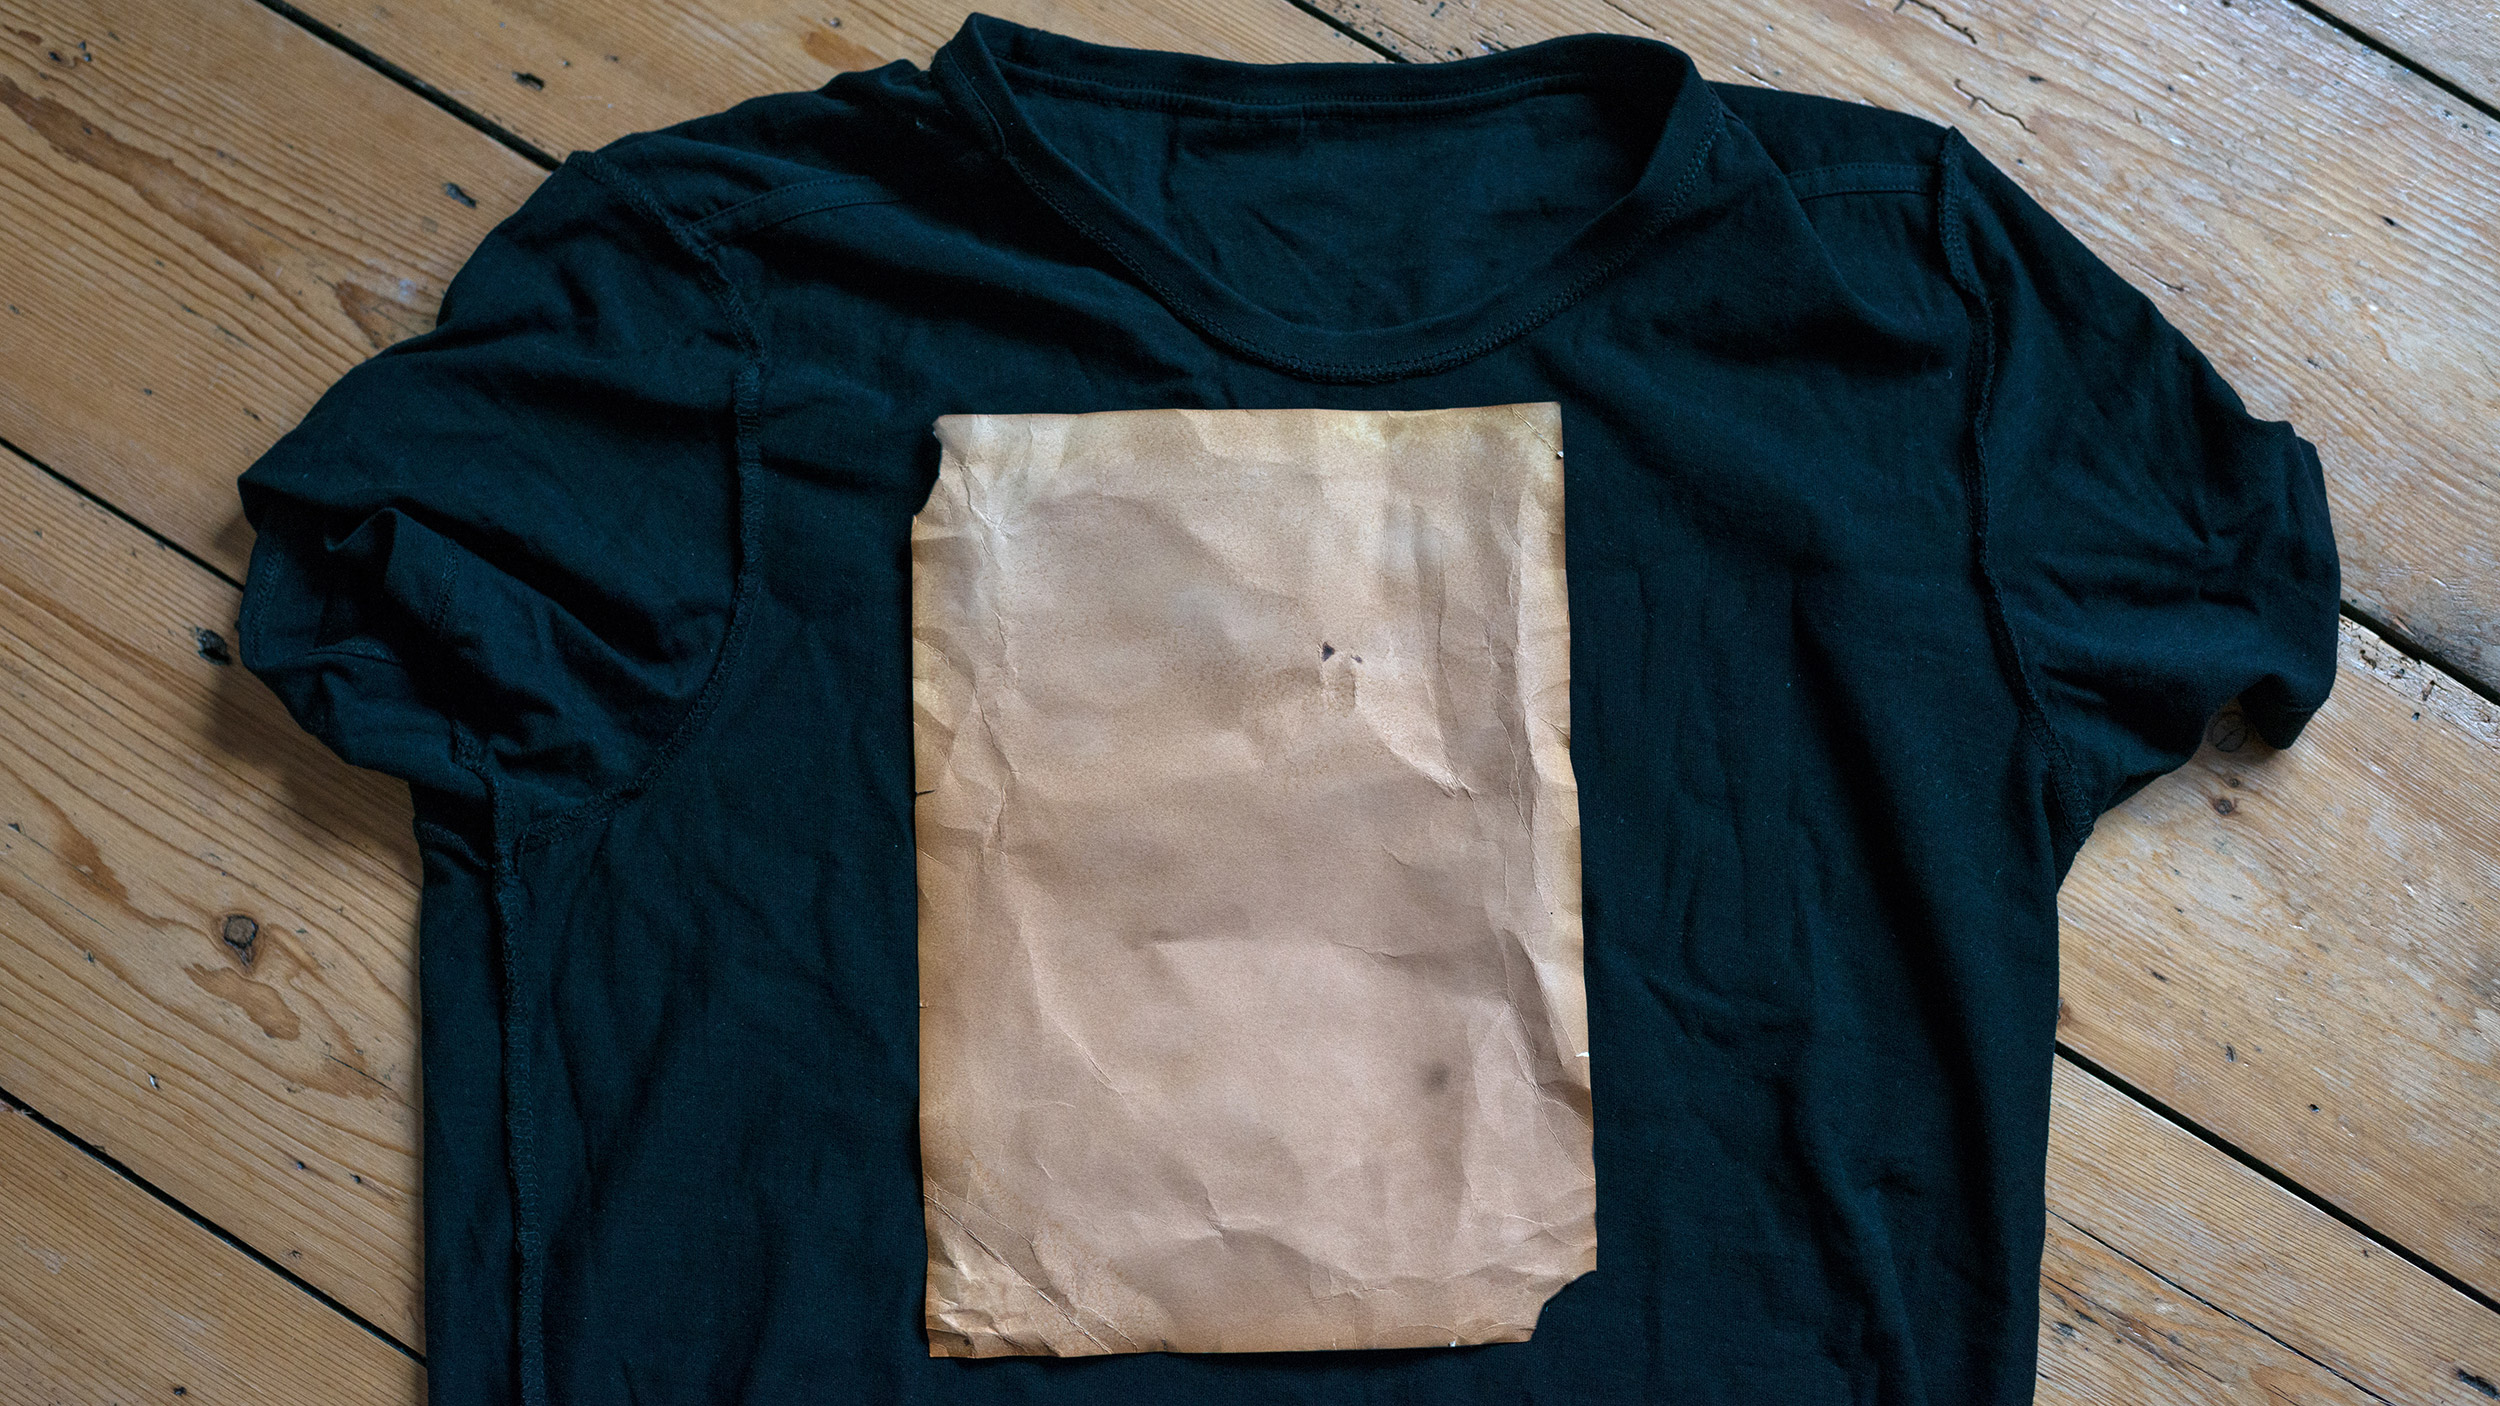
Shoot or scan your vintage paper – we shot ours on a black T-shirt in natural window light. Now import it into Photoshop and crop it accordingly to suit the photograph you want to work with.
Step 2: Make it mono
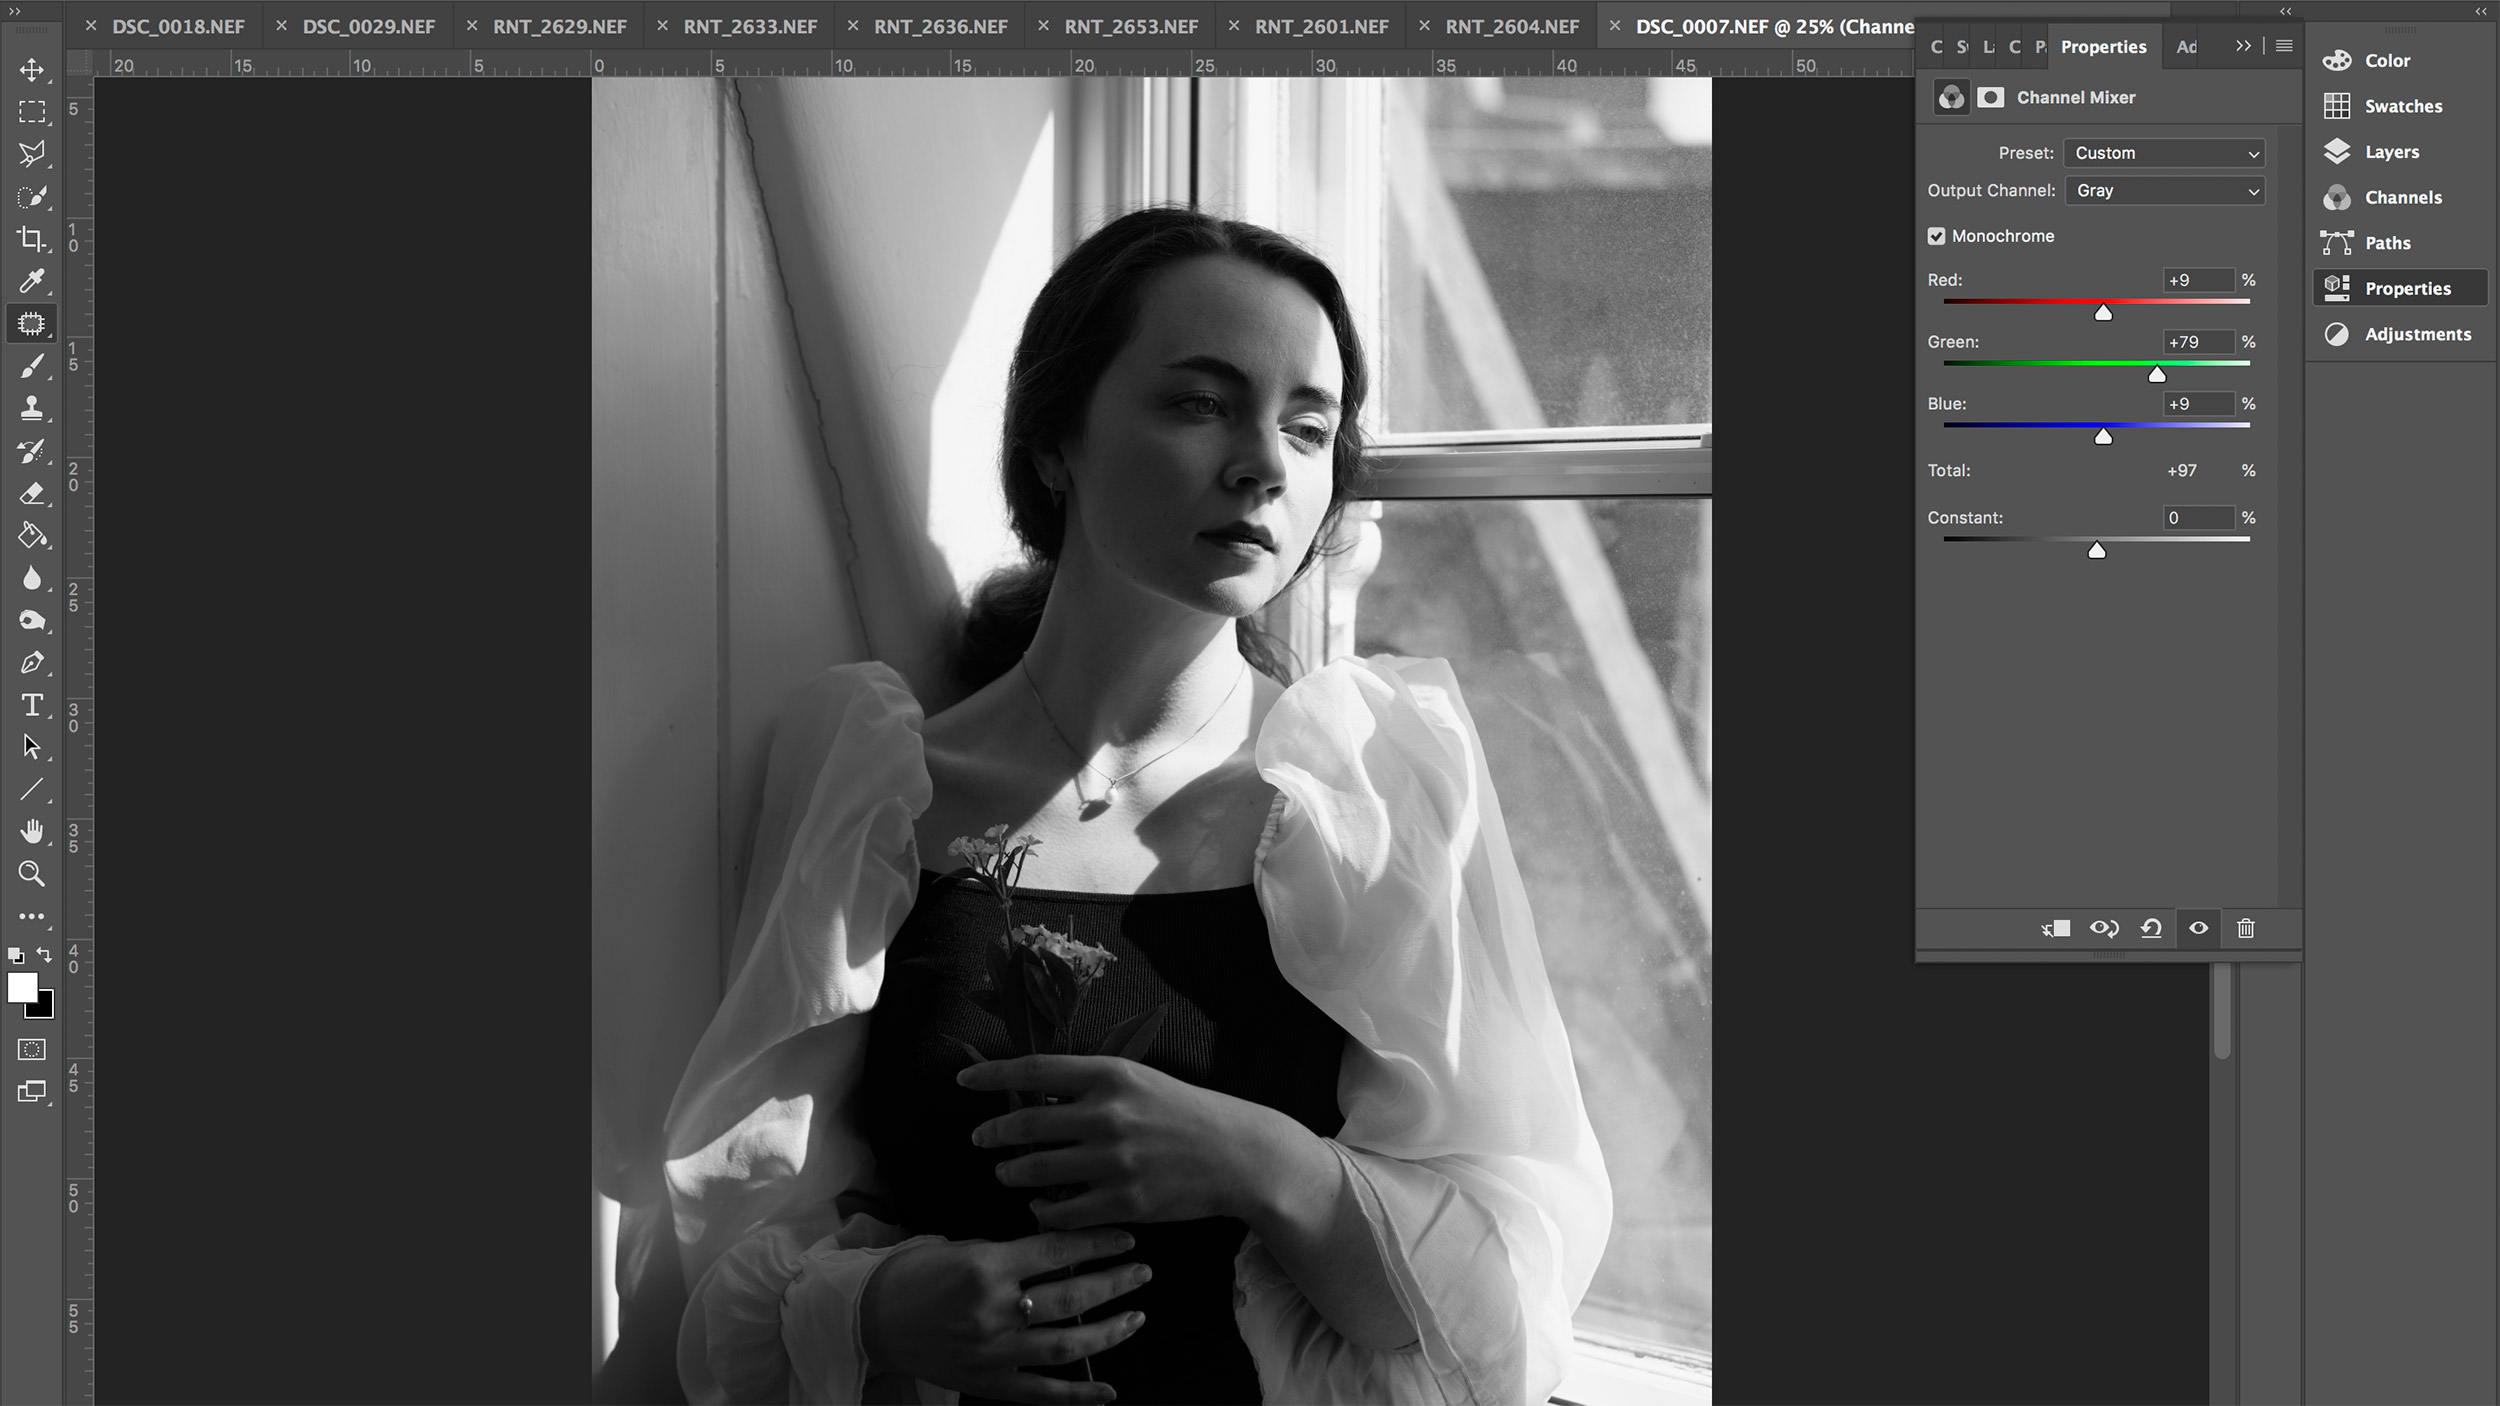
Open your portrait in Photoshop. Duplicate the ‘Background’ layer and click on the Adjustment Layer icon at the bottom of the Layers panel. Select Channel Mixer and tick the Monochrome checkbox. Use the Red, Green and Blue sliders to modify the image accordingly.
Step 3: Texture 1
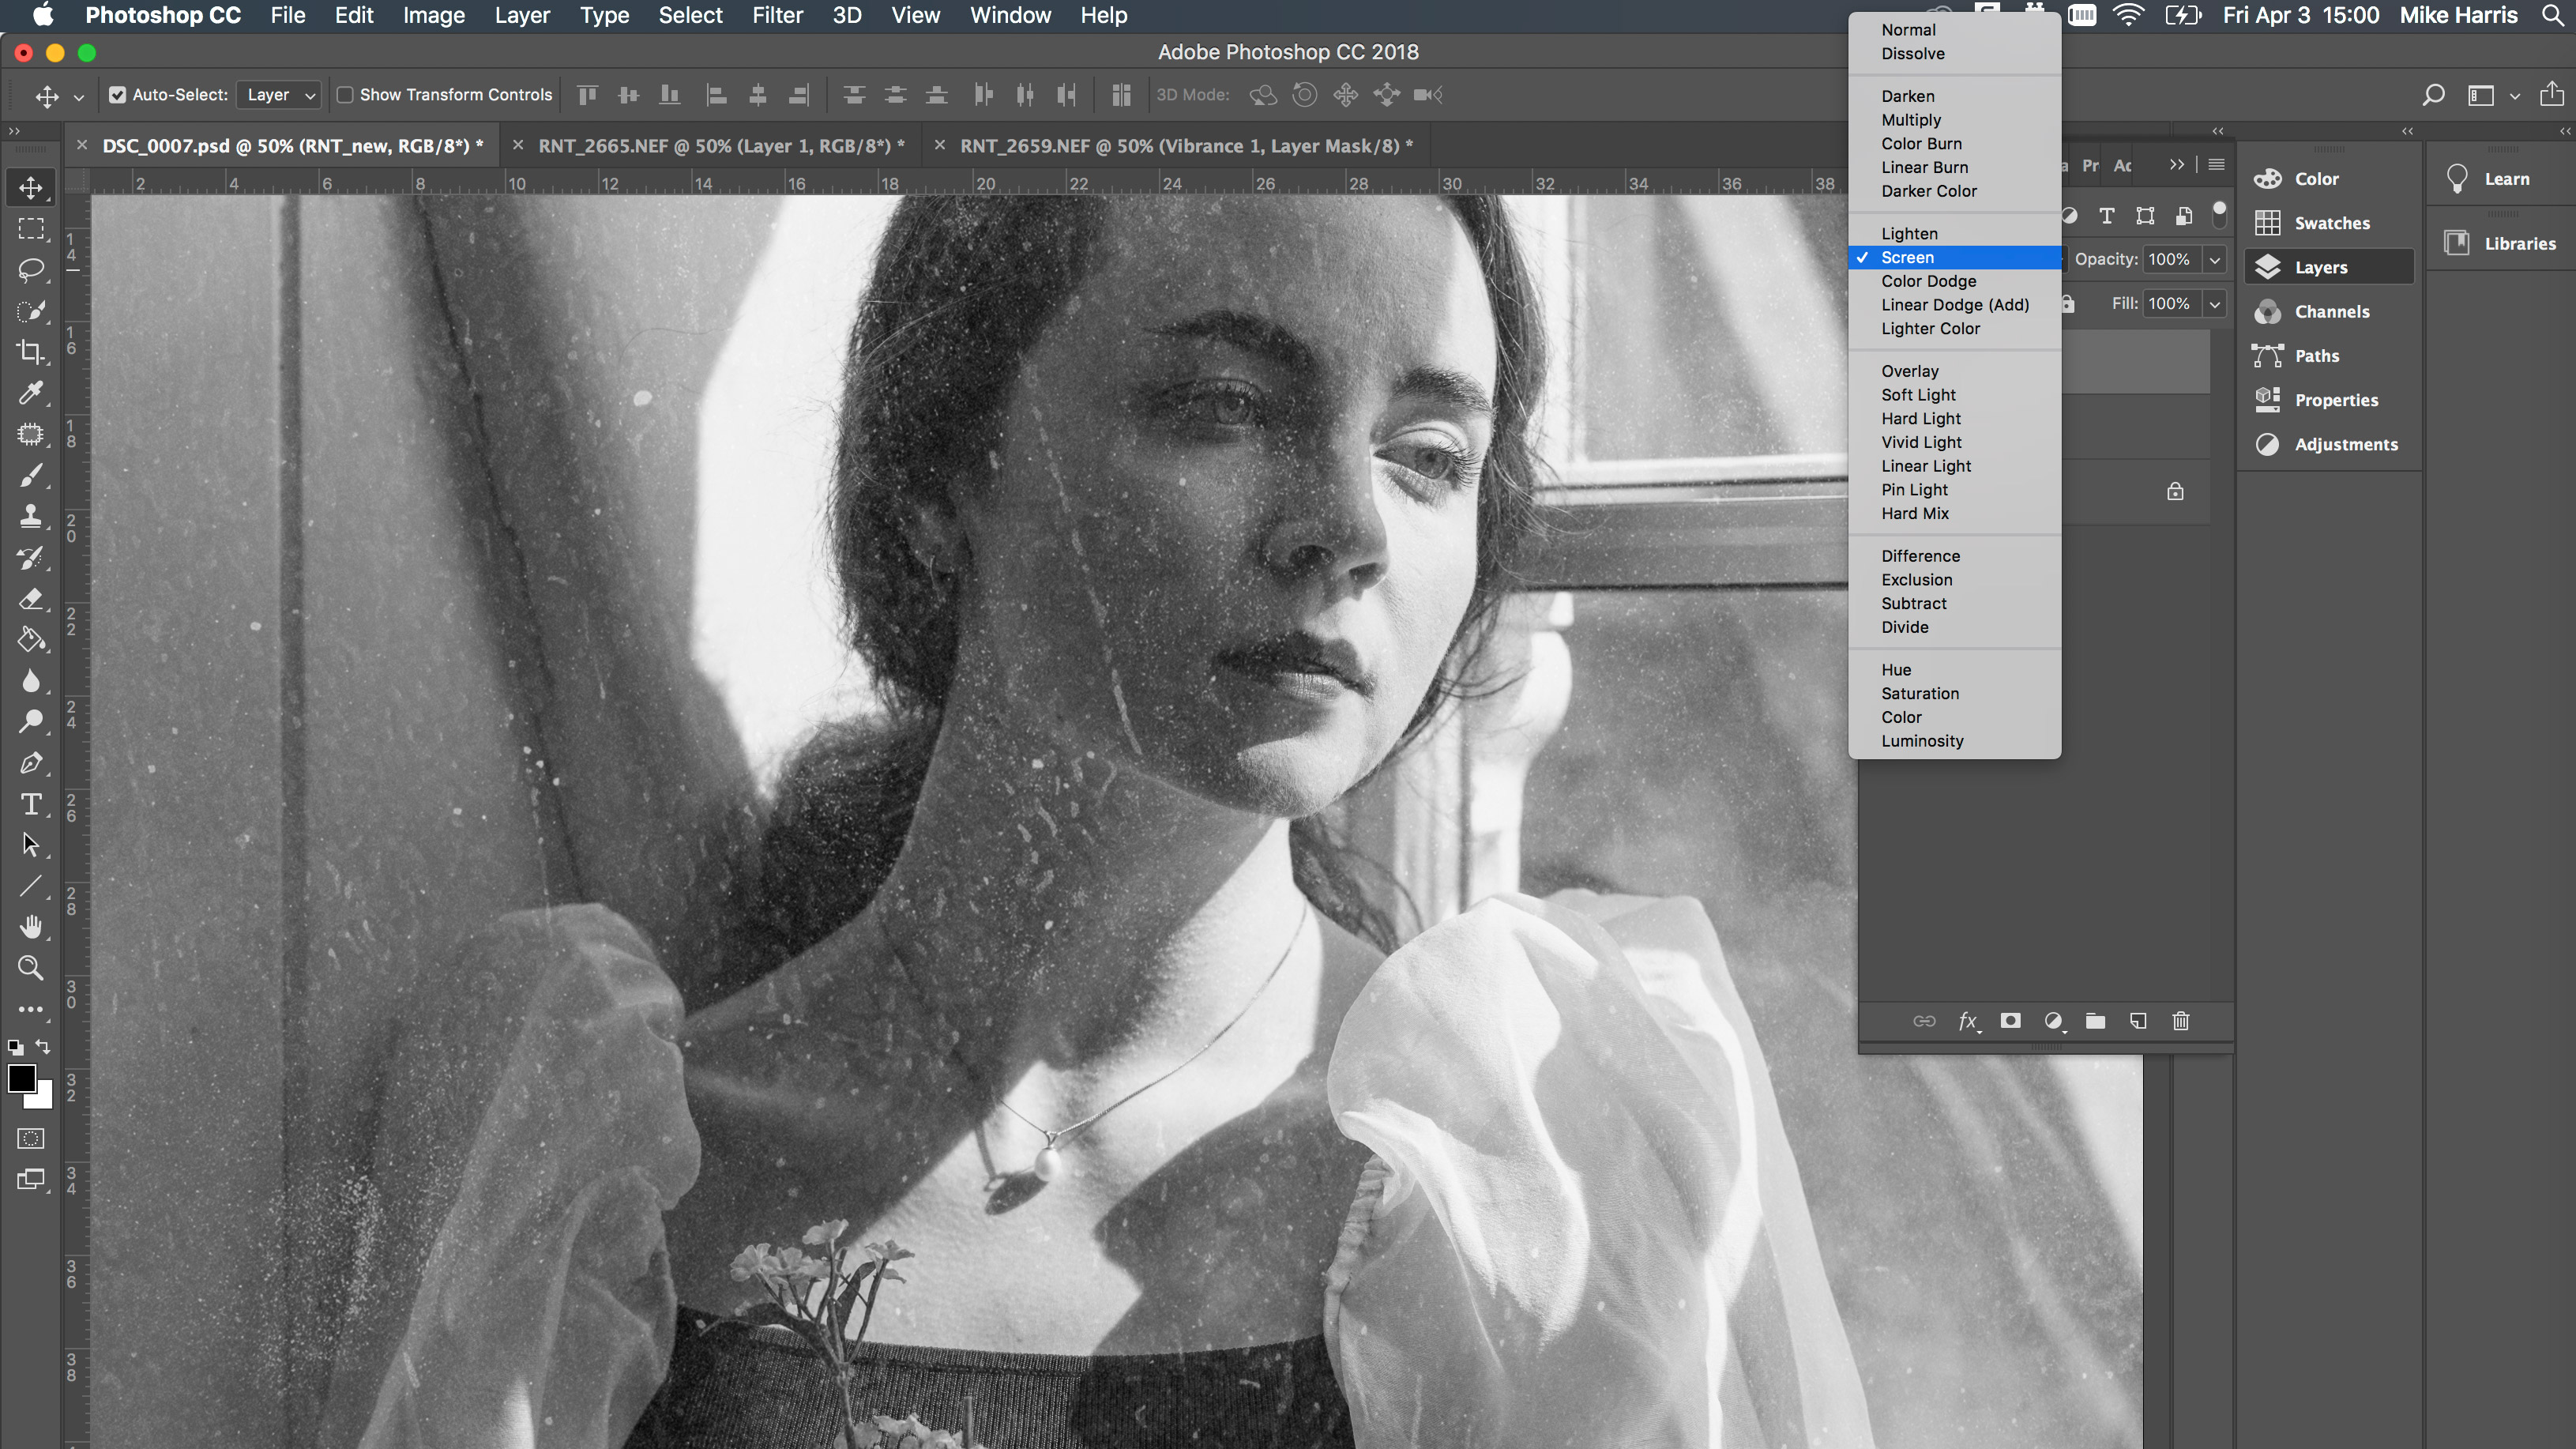
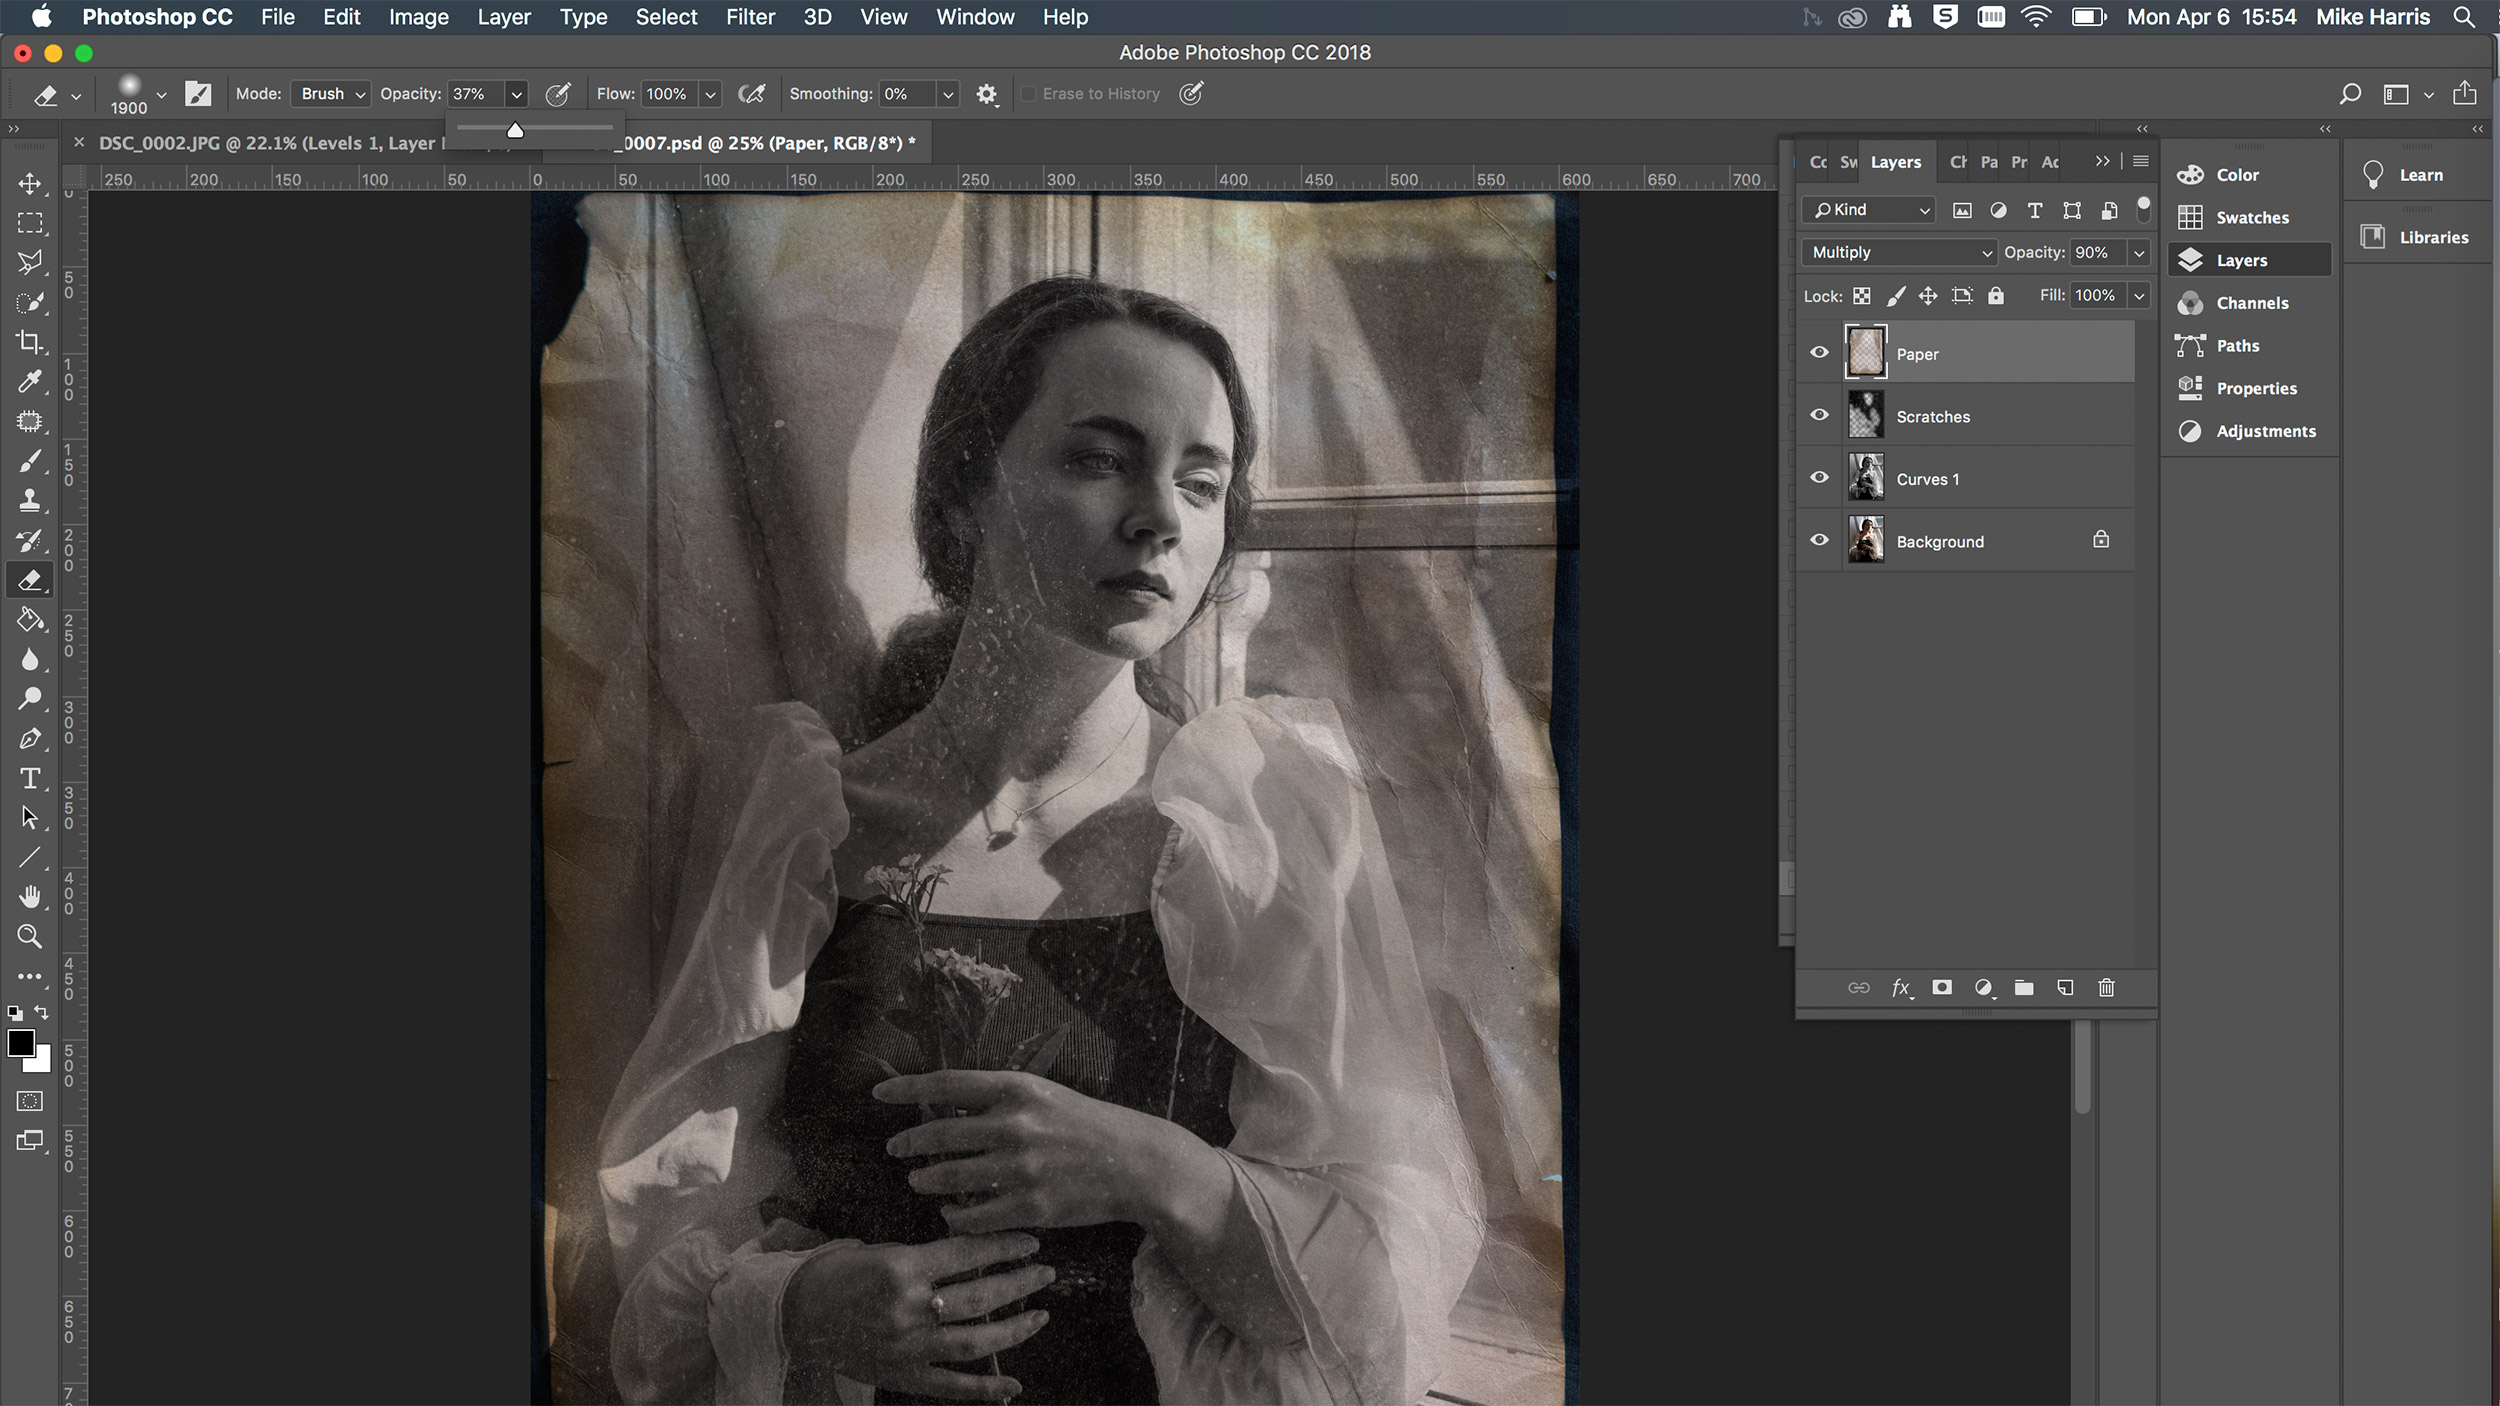
Drag the first created texture onto your Photoshop document. Use the Scale tool to resize it so that it stretches across the whole canvas. Change the blending mode to Screen and use the Move tool to fine-tune the position of the texture. We were careful not to obscure the model’s face too much.
Step 4: Texture 2
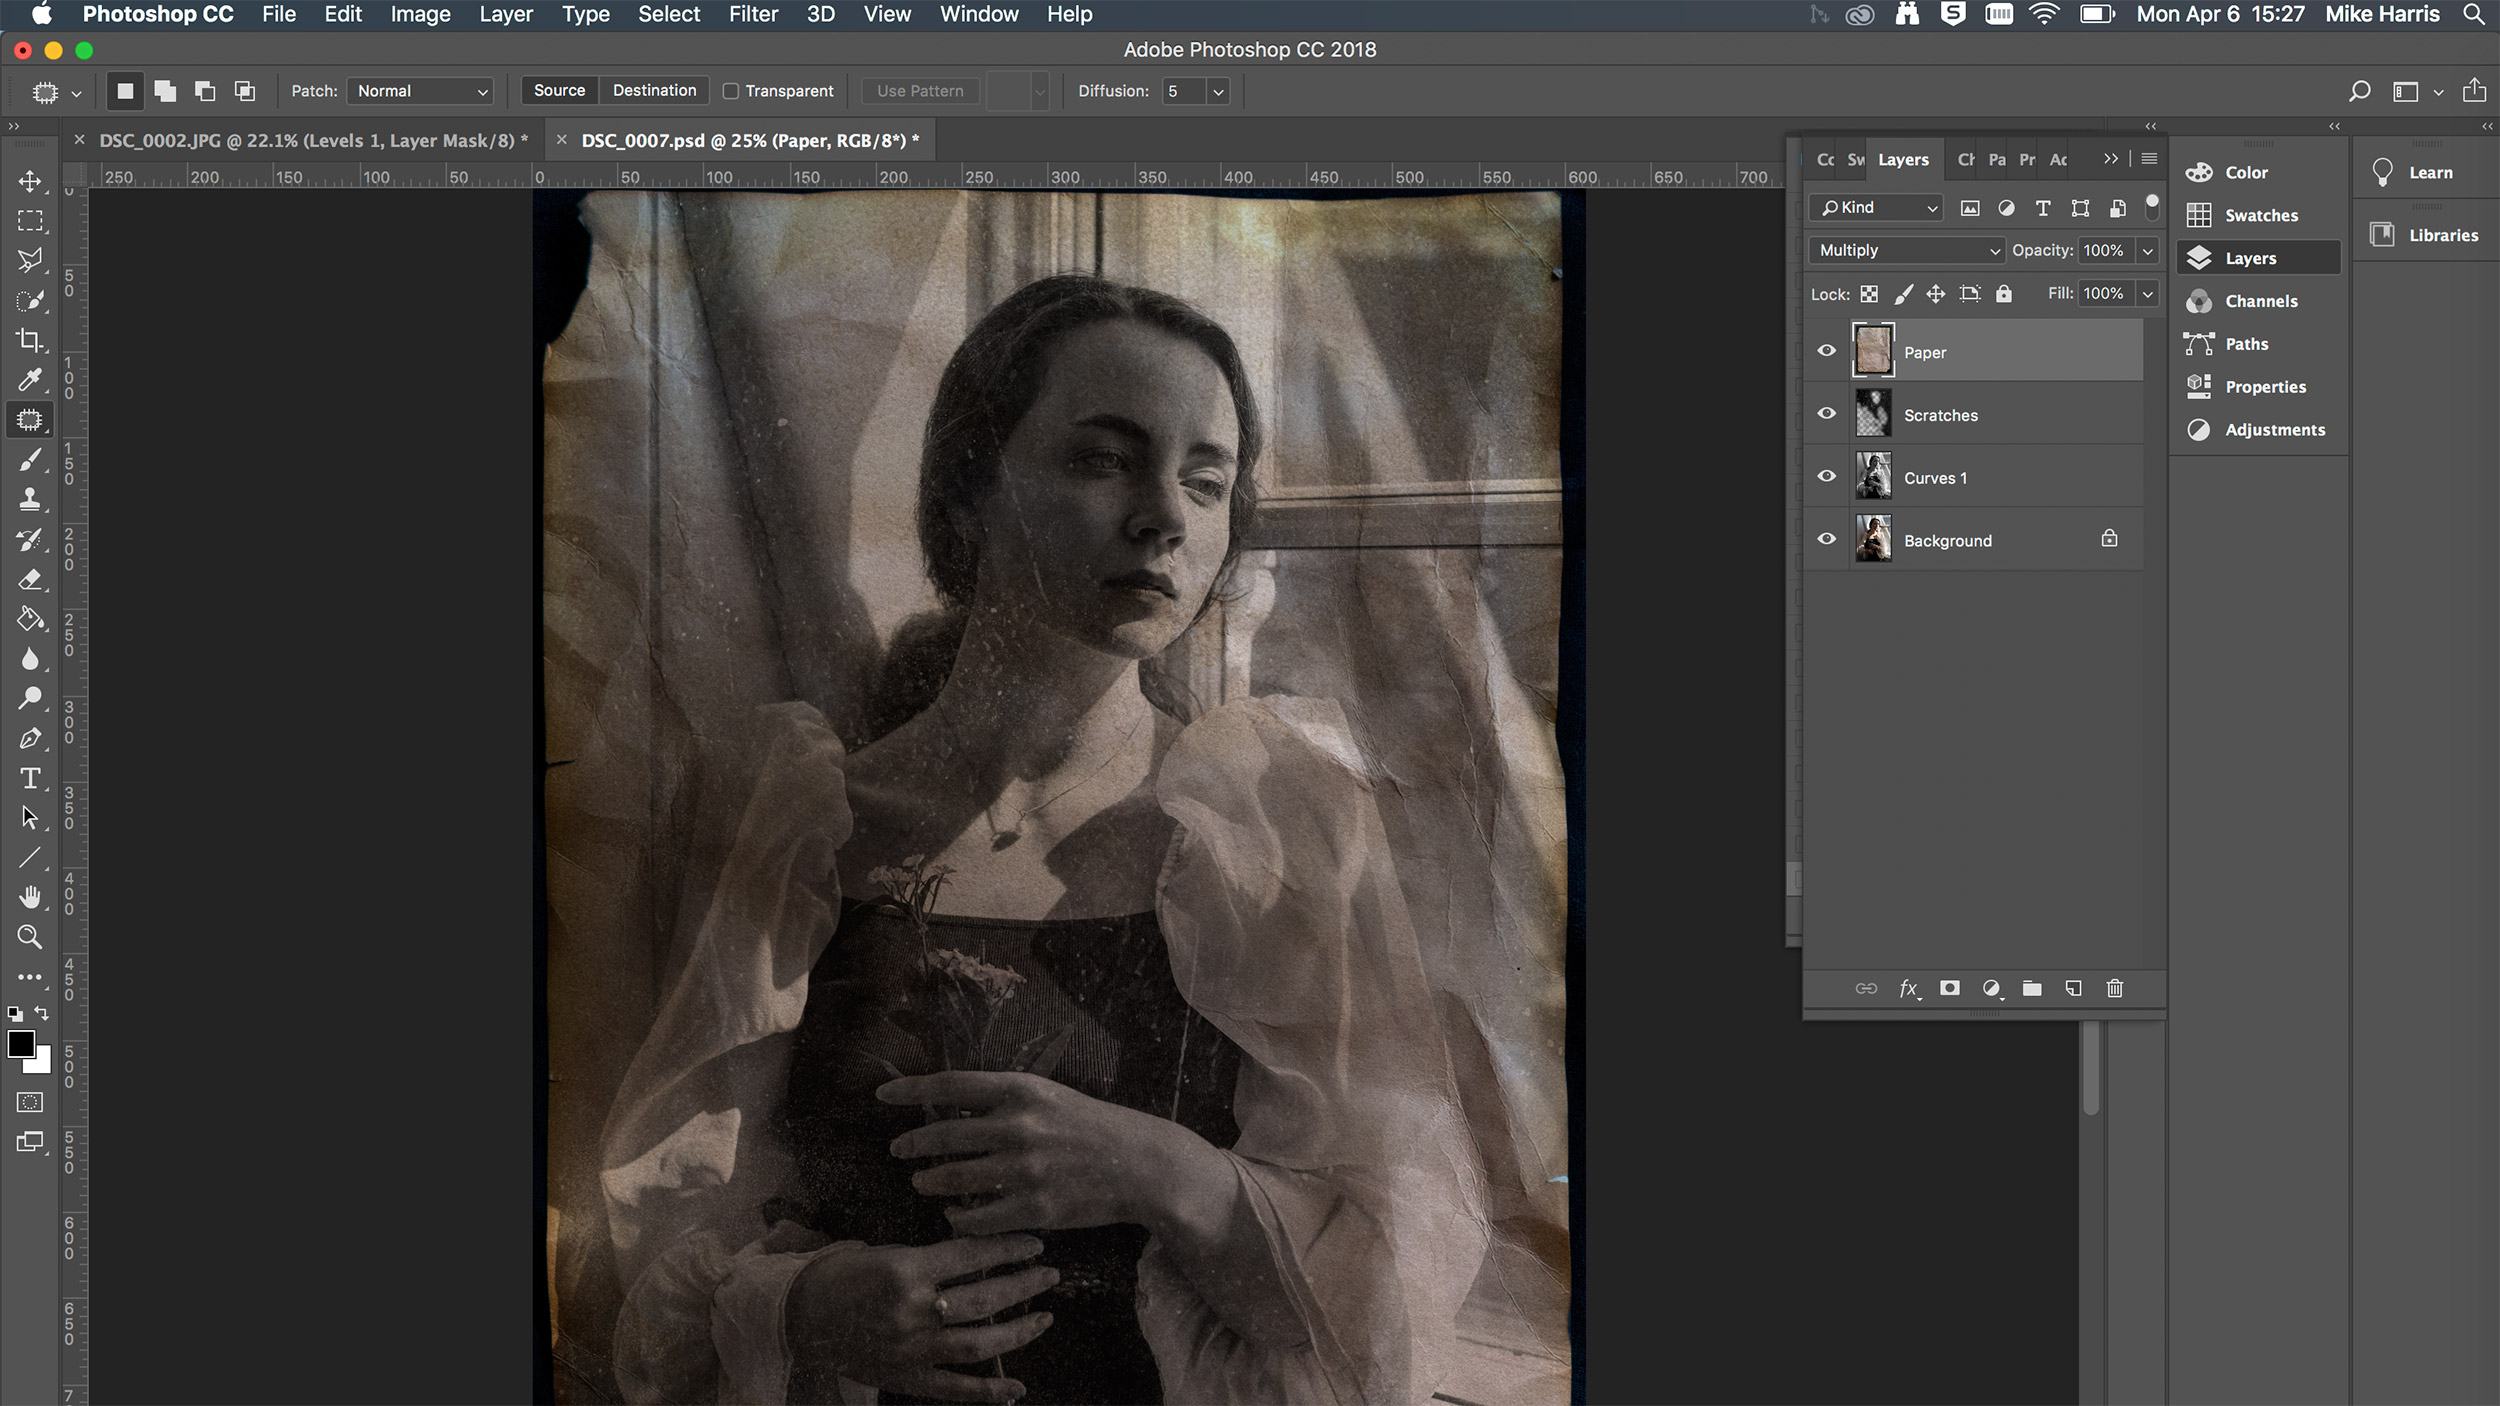
Drag in your second texture and use the Scale tool to line up its corners with the corners of the canvas. Right-click on this layer and select Rasterize Layer. Use the Spot Healing Brush to remove any unwanted imperfections and set the blending mode to Multiply.
Step 5: Give it some punch
Add some punch to your subject by selectively erasing and reducing the opacity of the ‘Texture_2’ layer. Set the Eraser tool’s hardness to 0% and opacity to 37%. Erase areas you want to make more prominent. We paid attention to the face, sleeves and flower.
Step 6: The aging process
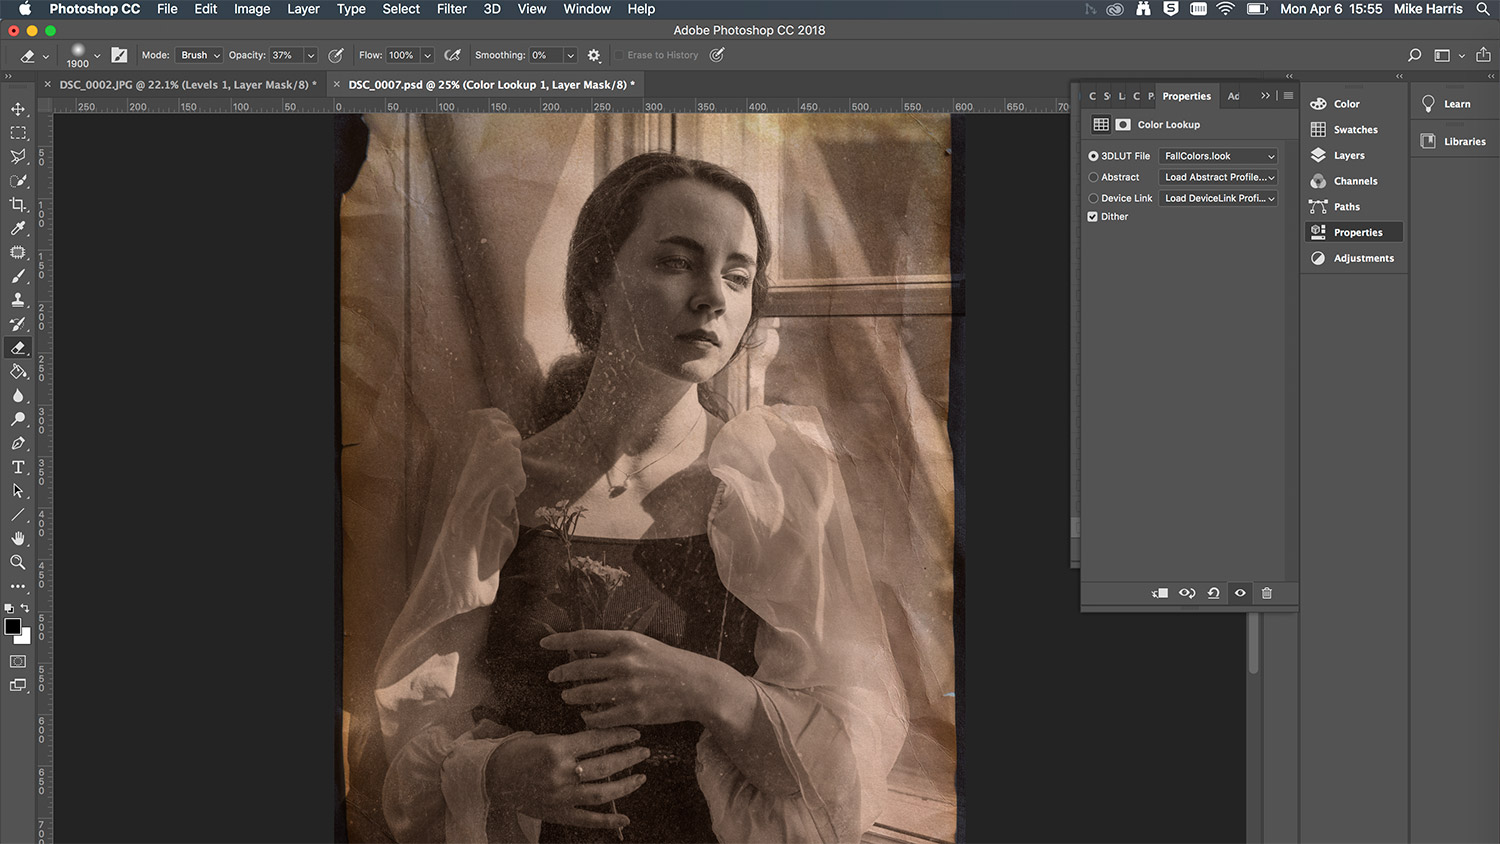
Highlight and right-click the upper layers (not ‘Background’) and click Merge Layers. Then, select the Color Lookup Adjustment Layer and click Load 3D LUT. Pick FallColors.look from the dropdown to produce an aged tone and lower the layer opacity.
About N-Photo magazine
This tutorial originally appeared in N-Photo, the monthly newsstand magazine for Nikon photographers. Why not subscribe to a print edition, and have the magazine delivered direct to your door every month?
Alternatively, we have a number of different digital options available, including:
• Apple app (for iPad or iPhone)
• Zinio app (multi-platform app for desktop or smartphone)
• PocketMags (multi-platform app ideal for Android devices)
• Readly (all-you-can-eat digital magazine subscription service)
If you wanted a printed version of any of our most recent issues we have a selection of back issues to choose from in our online store.
Read more:
Portrait photography how to: essential tips to get you started
Download Photoshop and try it for free!
25 premium Lightroom presets and plugins for serious photographers
Free Lightroom presets

Mike studied photography at college, honing his Adobe Photoshop skills and learning to work in the studio and darkroom. After a few years writing for various publications, he headed to the ‘Big Smoke’ to work on Wex Photo Video’s award-winning content team, before transitioning back to print as Technique Editor (later Deputy Editor) on N-Photo: The Nikon Magazine.
With bylines in Digital Camera, PhotoPlus: The Canon Magazine, Practical Photography, Digital Photographer, iMore, and TechRadar, he’s a fountain of photography and consumer tech knowledge, making him a top tutor for techniques on cameras, lenses, tripods, filters, and more. His expertise extends to everything from portraits and landscapes to abstracts and architecture to wildlife and, yes, fast things going around race tracks...
