How to finish off your edits and export your photos in Lightroom Classic CC
Don't blindly export your photos – here's how to do it properly in Lightroom Classic CC
Watch video: How to export in Lightroom Classic CC
So you’ve edited your photo to perfection in Adobe Lightroom Classic, minutely tweaking each slider to get the ideal result – but what do you do with your edit now?
Blindly exporting your photo without ensuring that you have the right settings is almost like cooking a gourmet meal and then slathering it with ketchup. Your hours of hard work will be disguised through incorrect settings and file formats.
While learning how to properly export your photos might not be the most scintillating technique to master, you’ll thank yourself for it in the long run. It doesn’t matter if you want to upload your picture to Instagram, or you want to create a high quality print fit for the wall – the settings you choose are vitally important.
From the link below you can download the Engagement.jpg photo or use your own shots to follow this tutorial – and don’t forget to watch the above video for more tips and tricks.
01 Edit the raw file
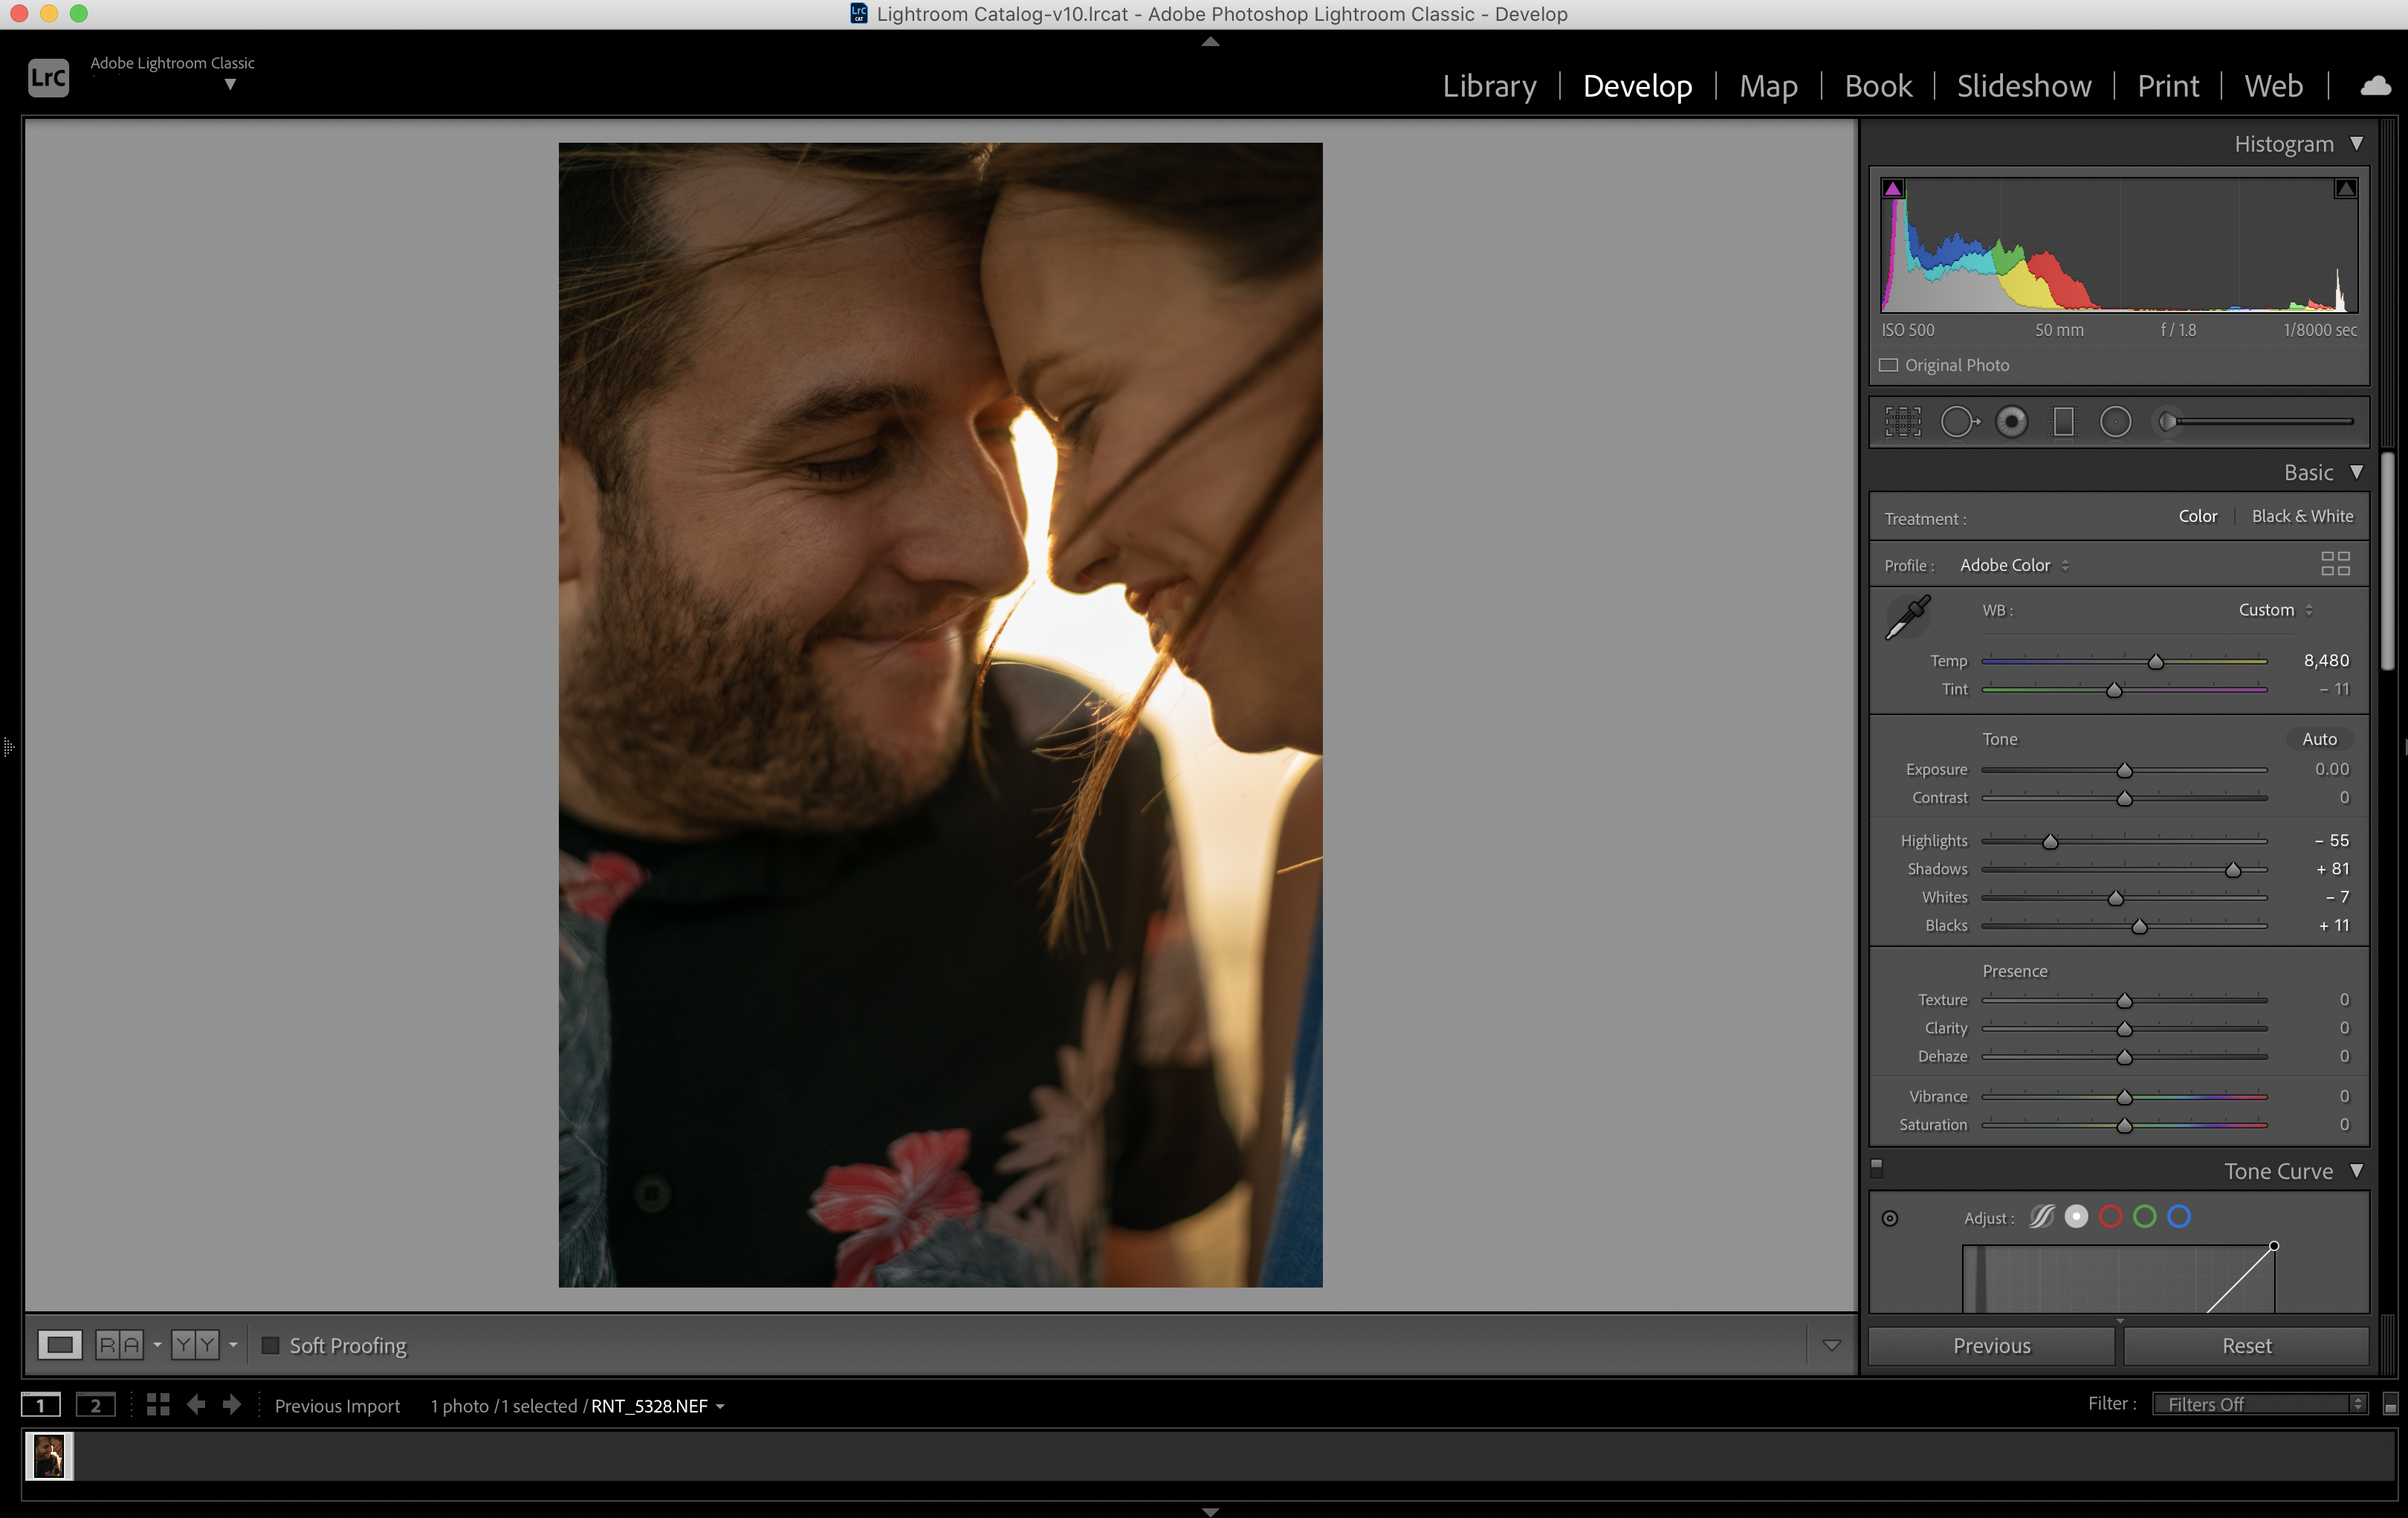
Open your image into Lightroom Classic CC and make any edits that you see fit. For this image we warmed up the tones, tweaked the exposure and lifted the shadows in the Develop module.
02 Start the export process
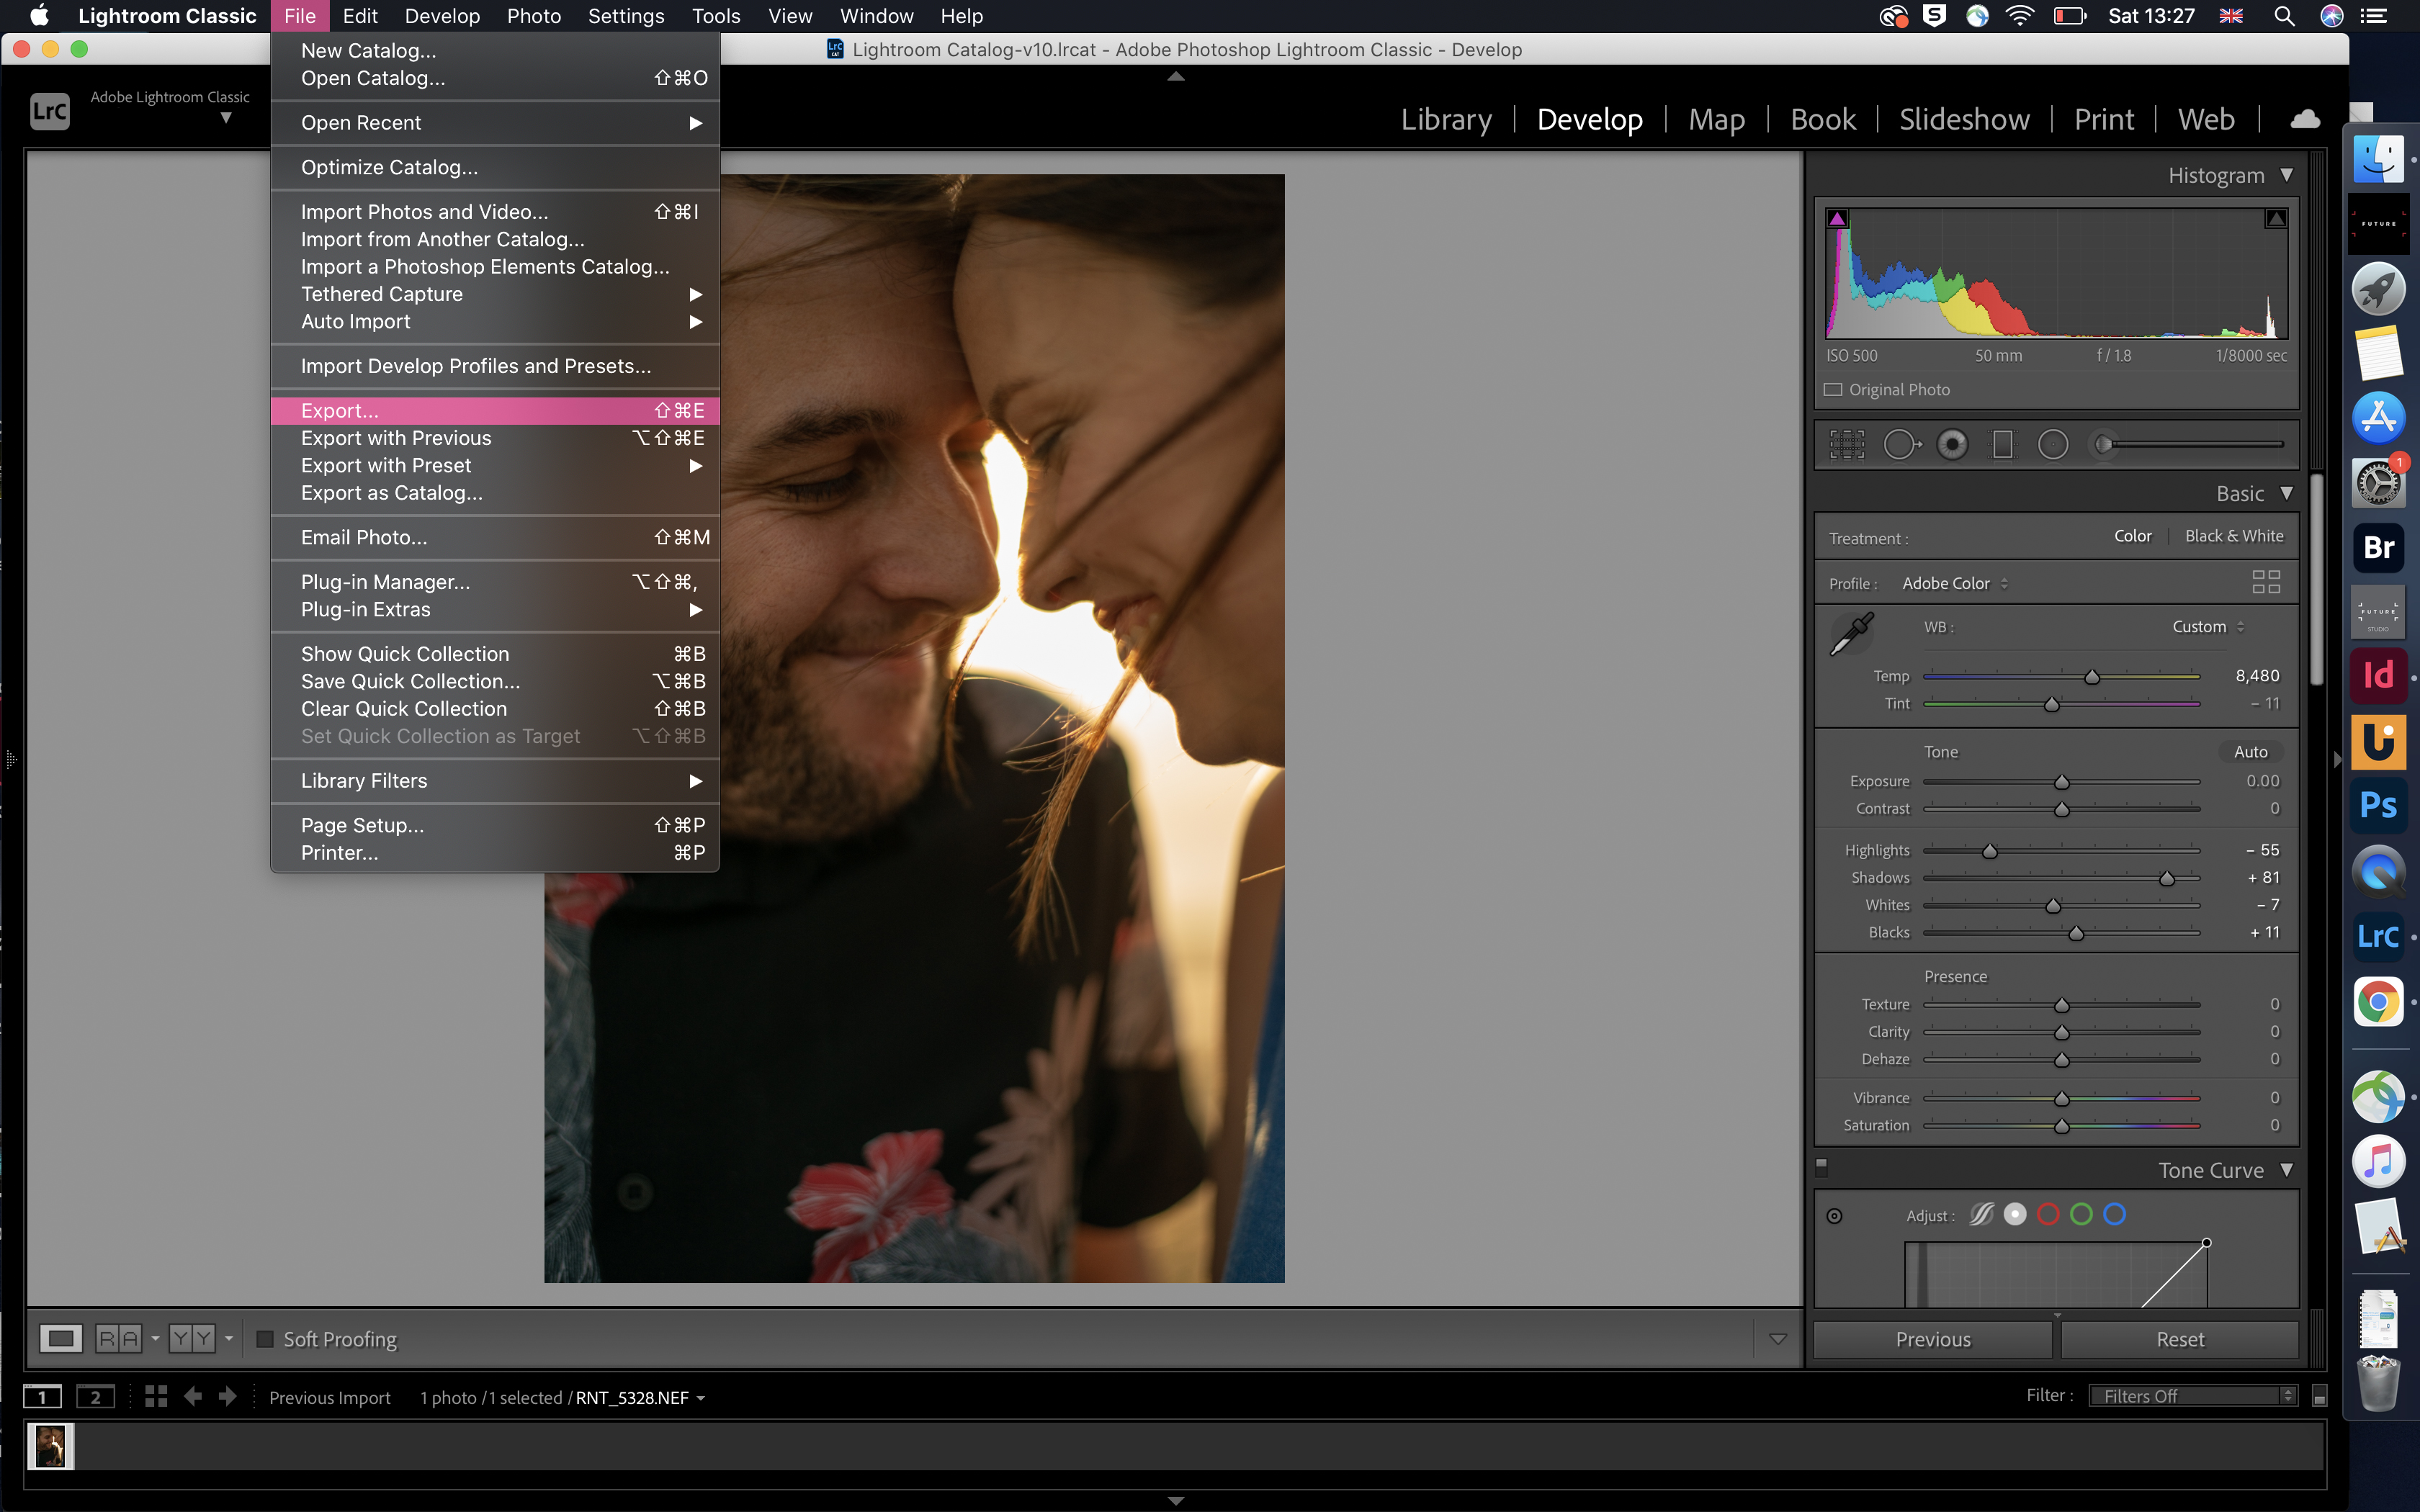
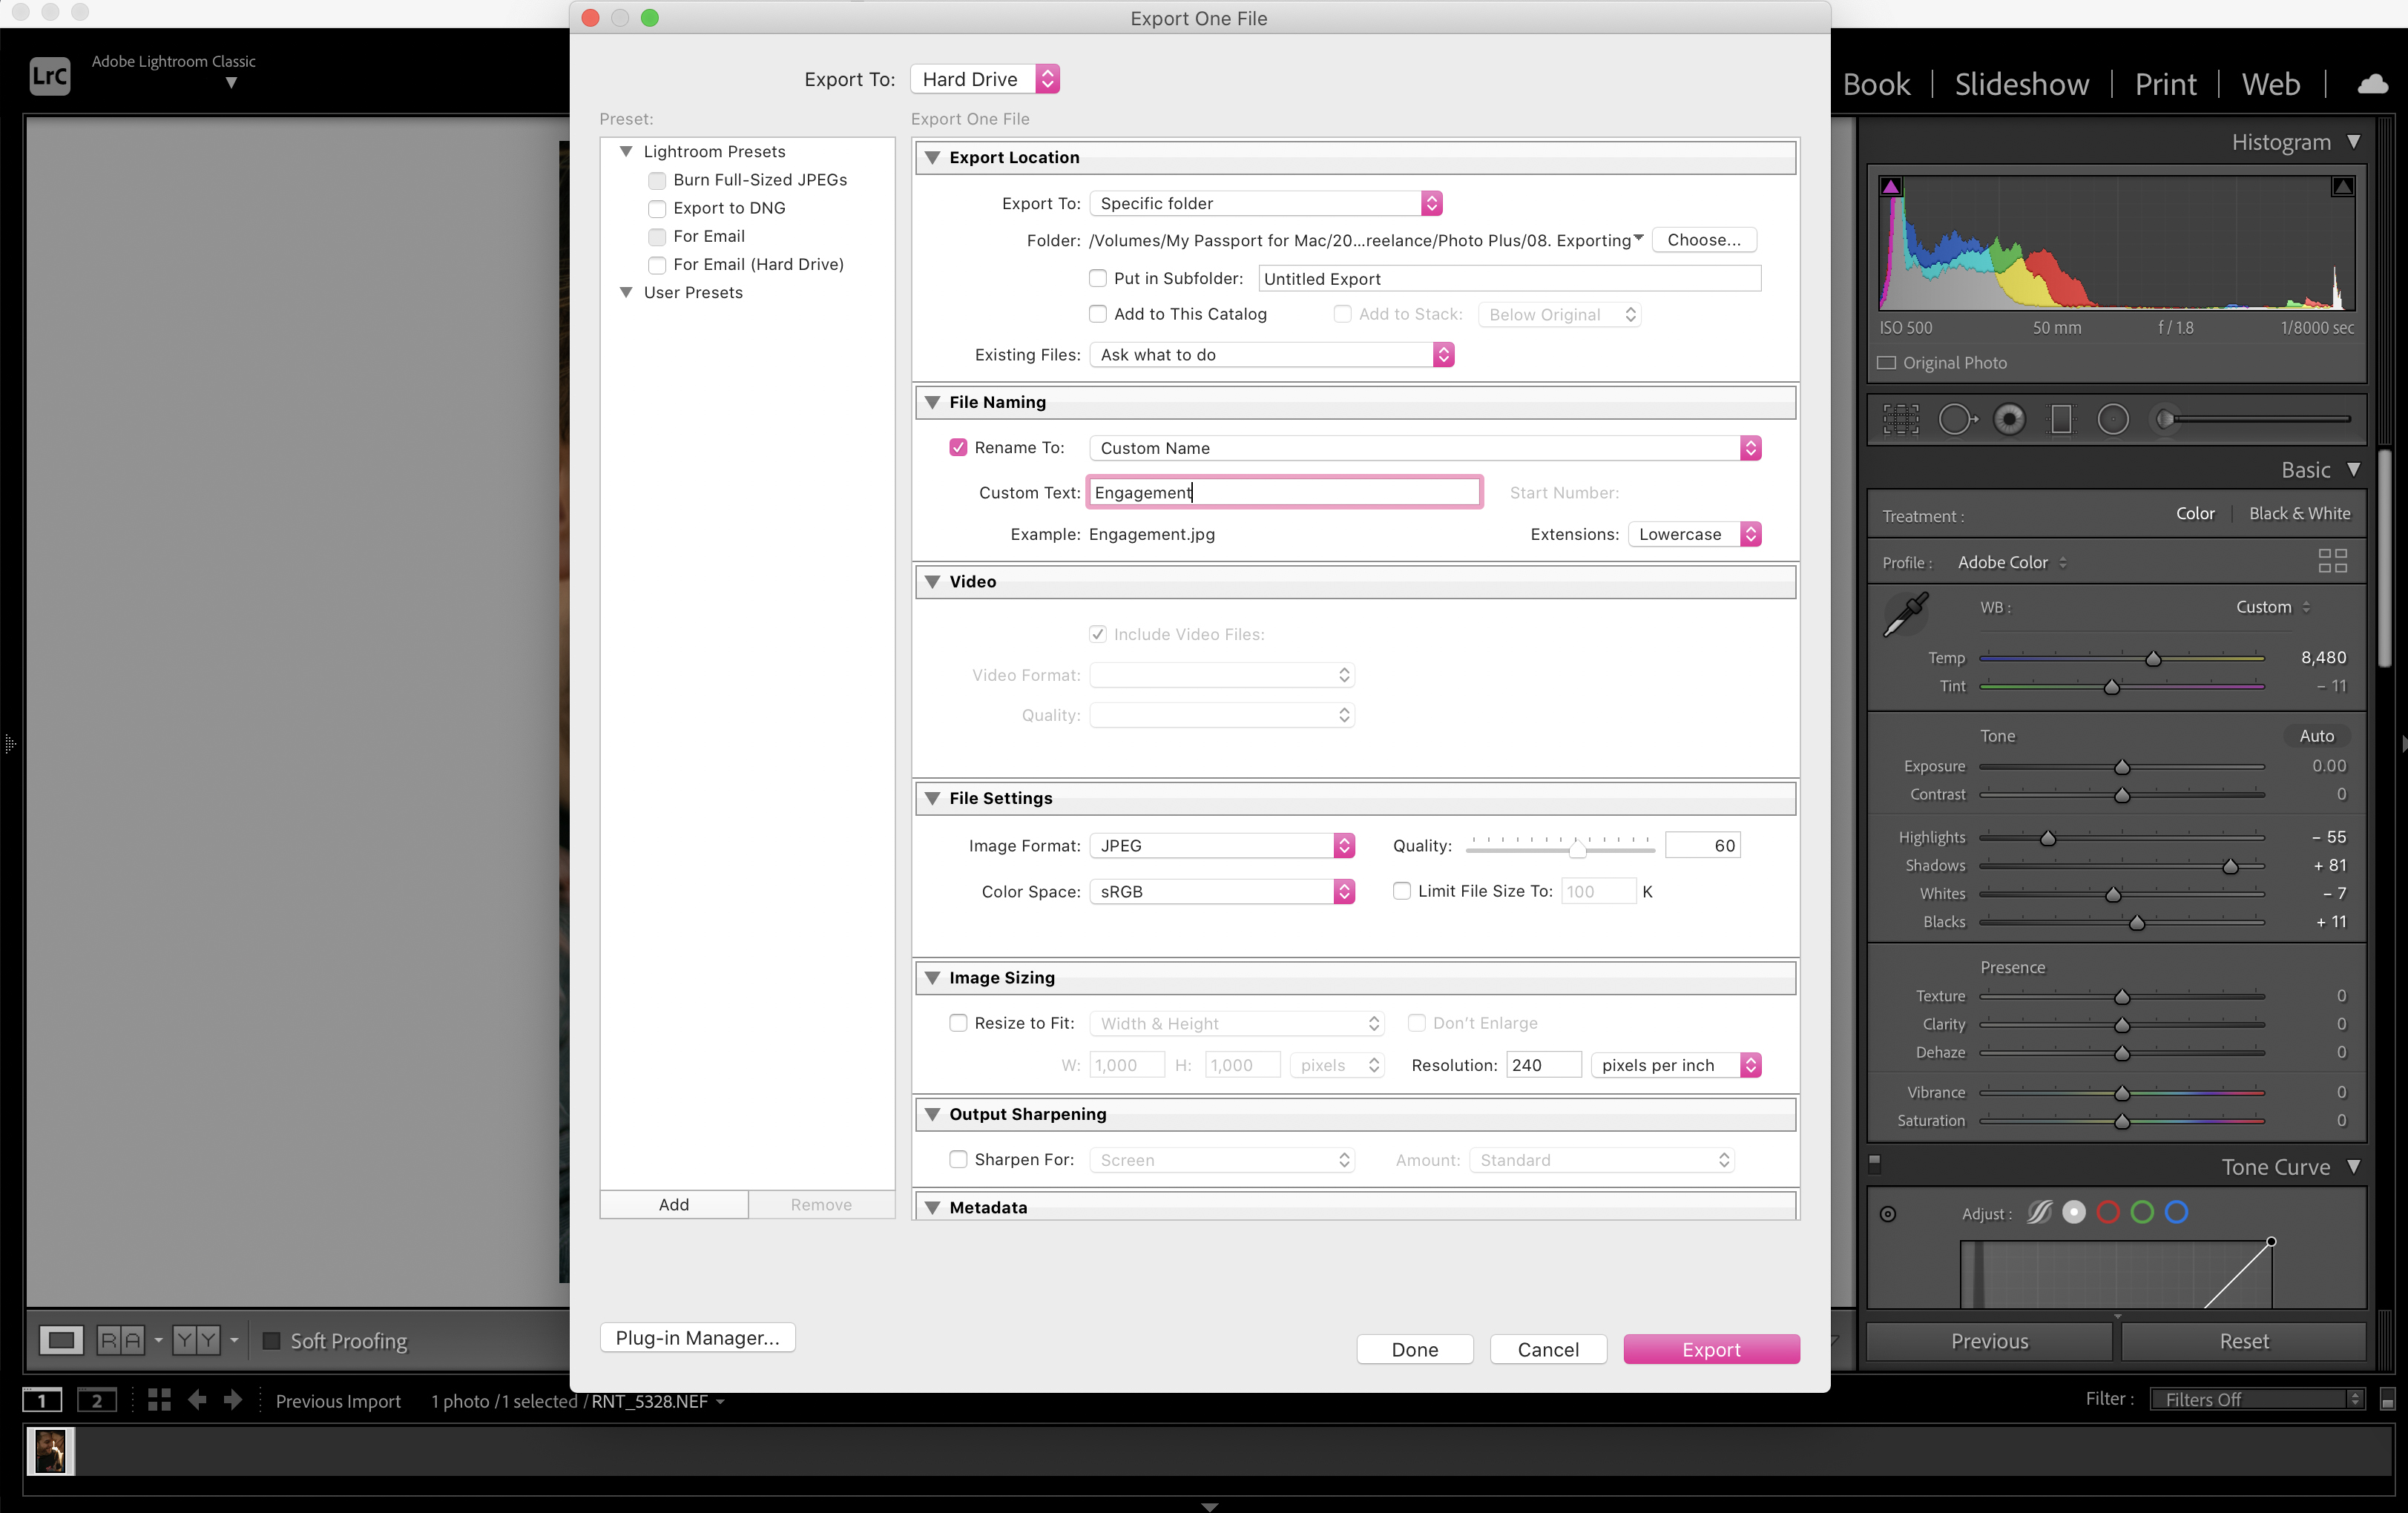
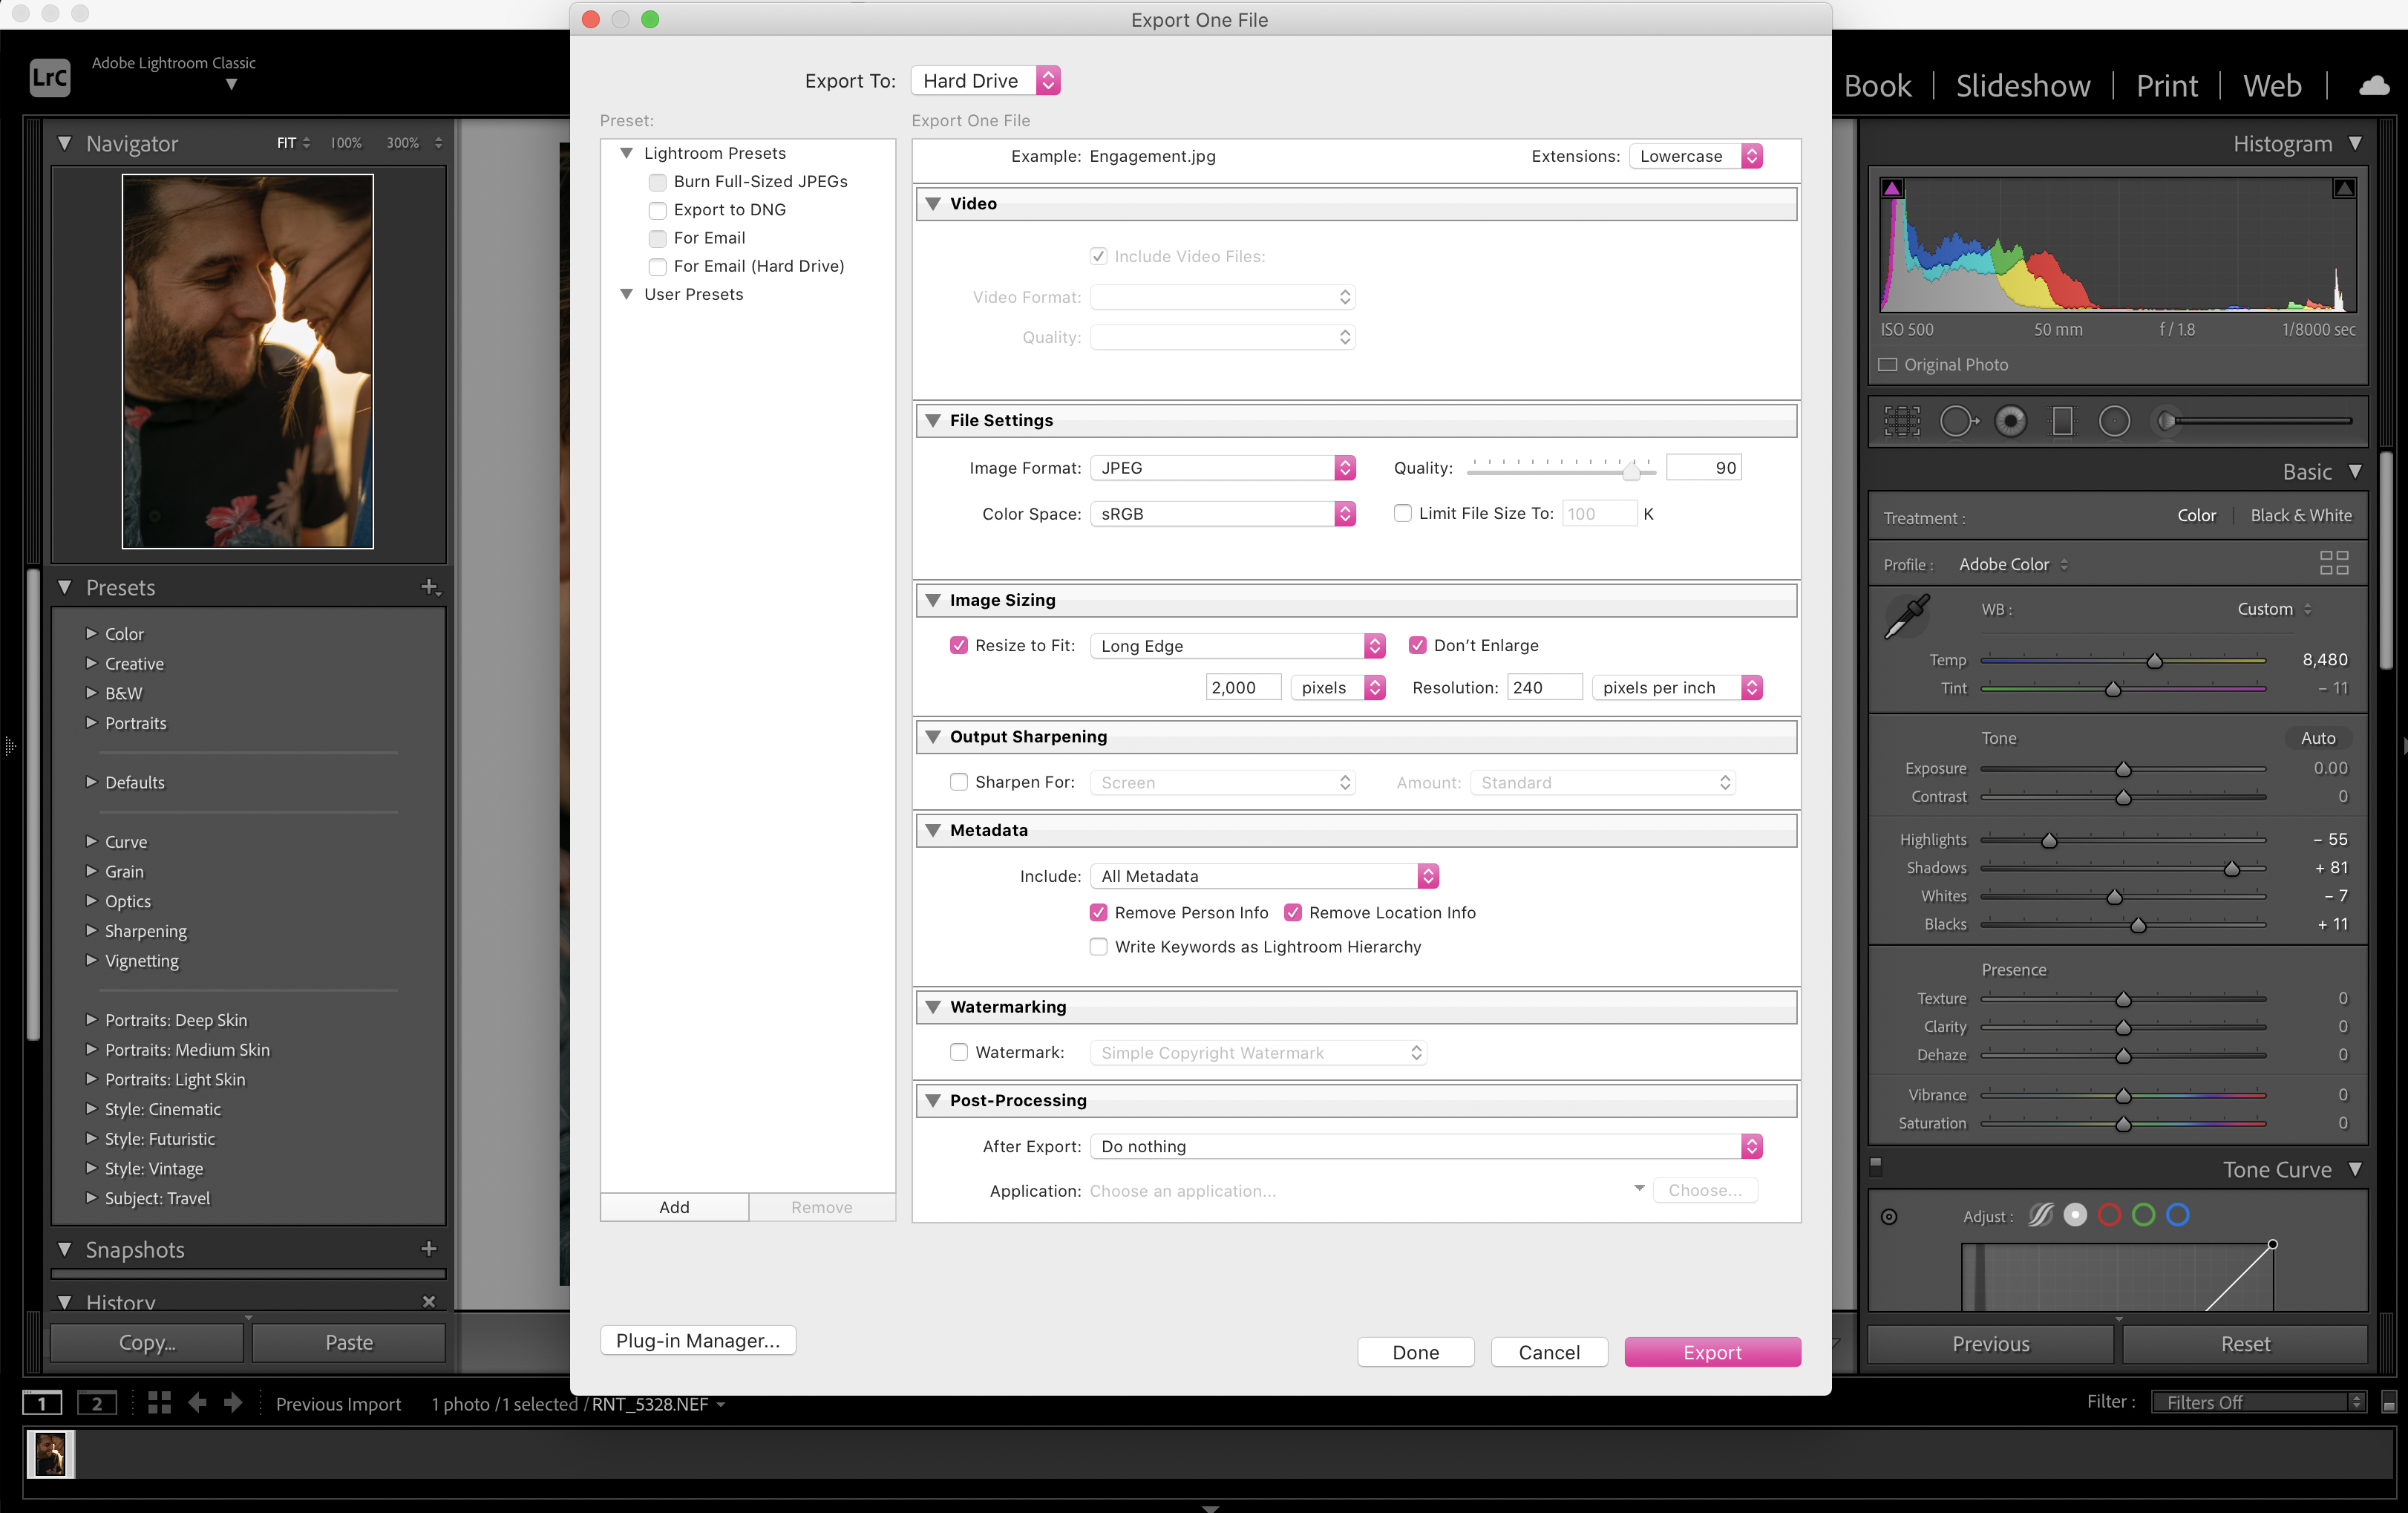
Once you’re happy with your edits, go to File > Export. Under ‘Export Location’ go to the ‘Export to’ drop-down menu and select ‘Specific folder.’ This will then enable you to click the ‘Choose’ button to select the location to which you’d like to export.
The best camera deals, reviews, product advice, and unmissable photography news, direct to your inbox!
03 Rename your files
If you’re exporting multiple images at once, the File Naming section is helpful. Check the ‘Rename to’ box and then the dropdown menu – we chose ‘Custom Name.’ Lightroom then automatically numbers all your images.
04 Select file settings
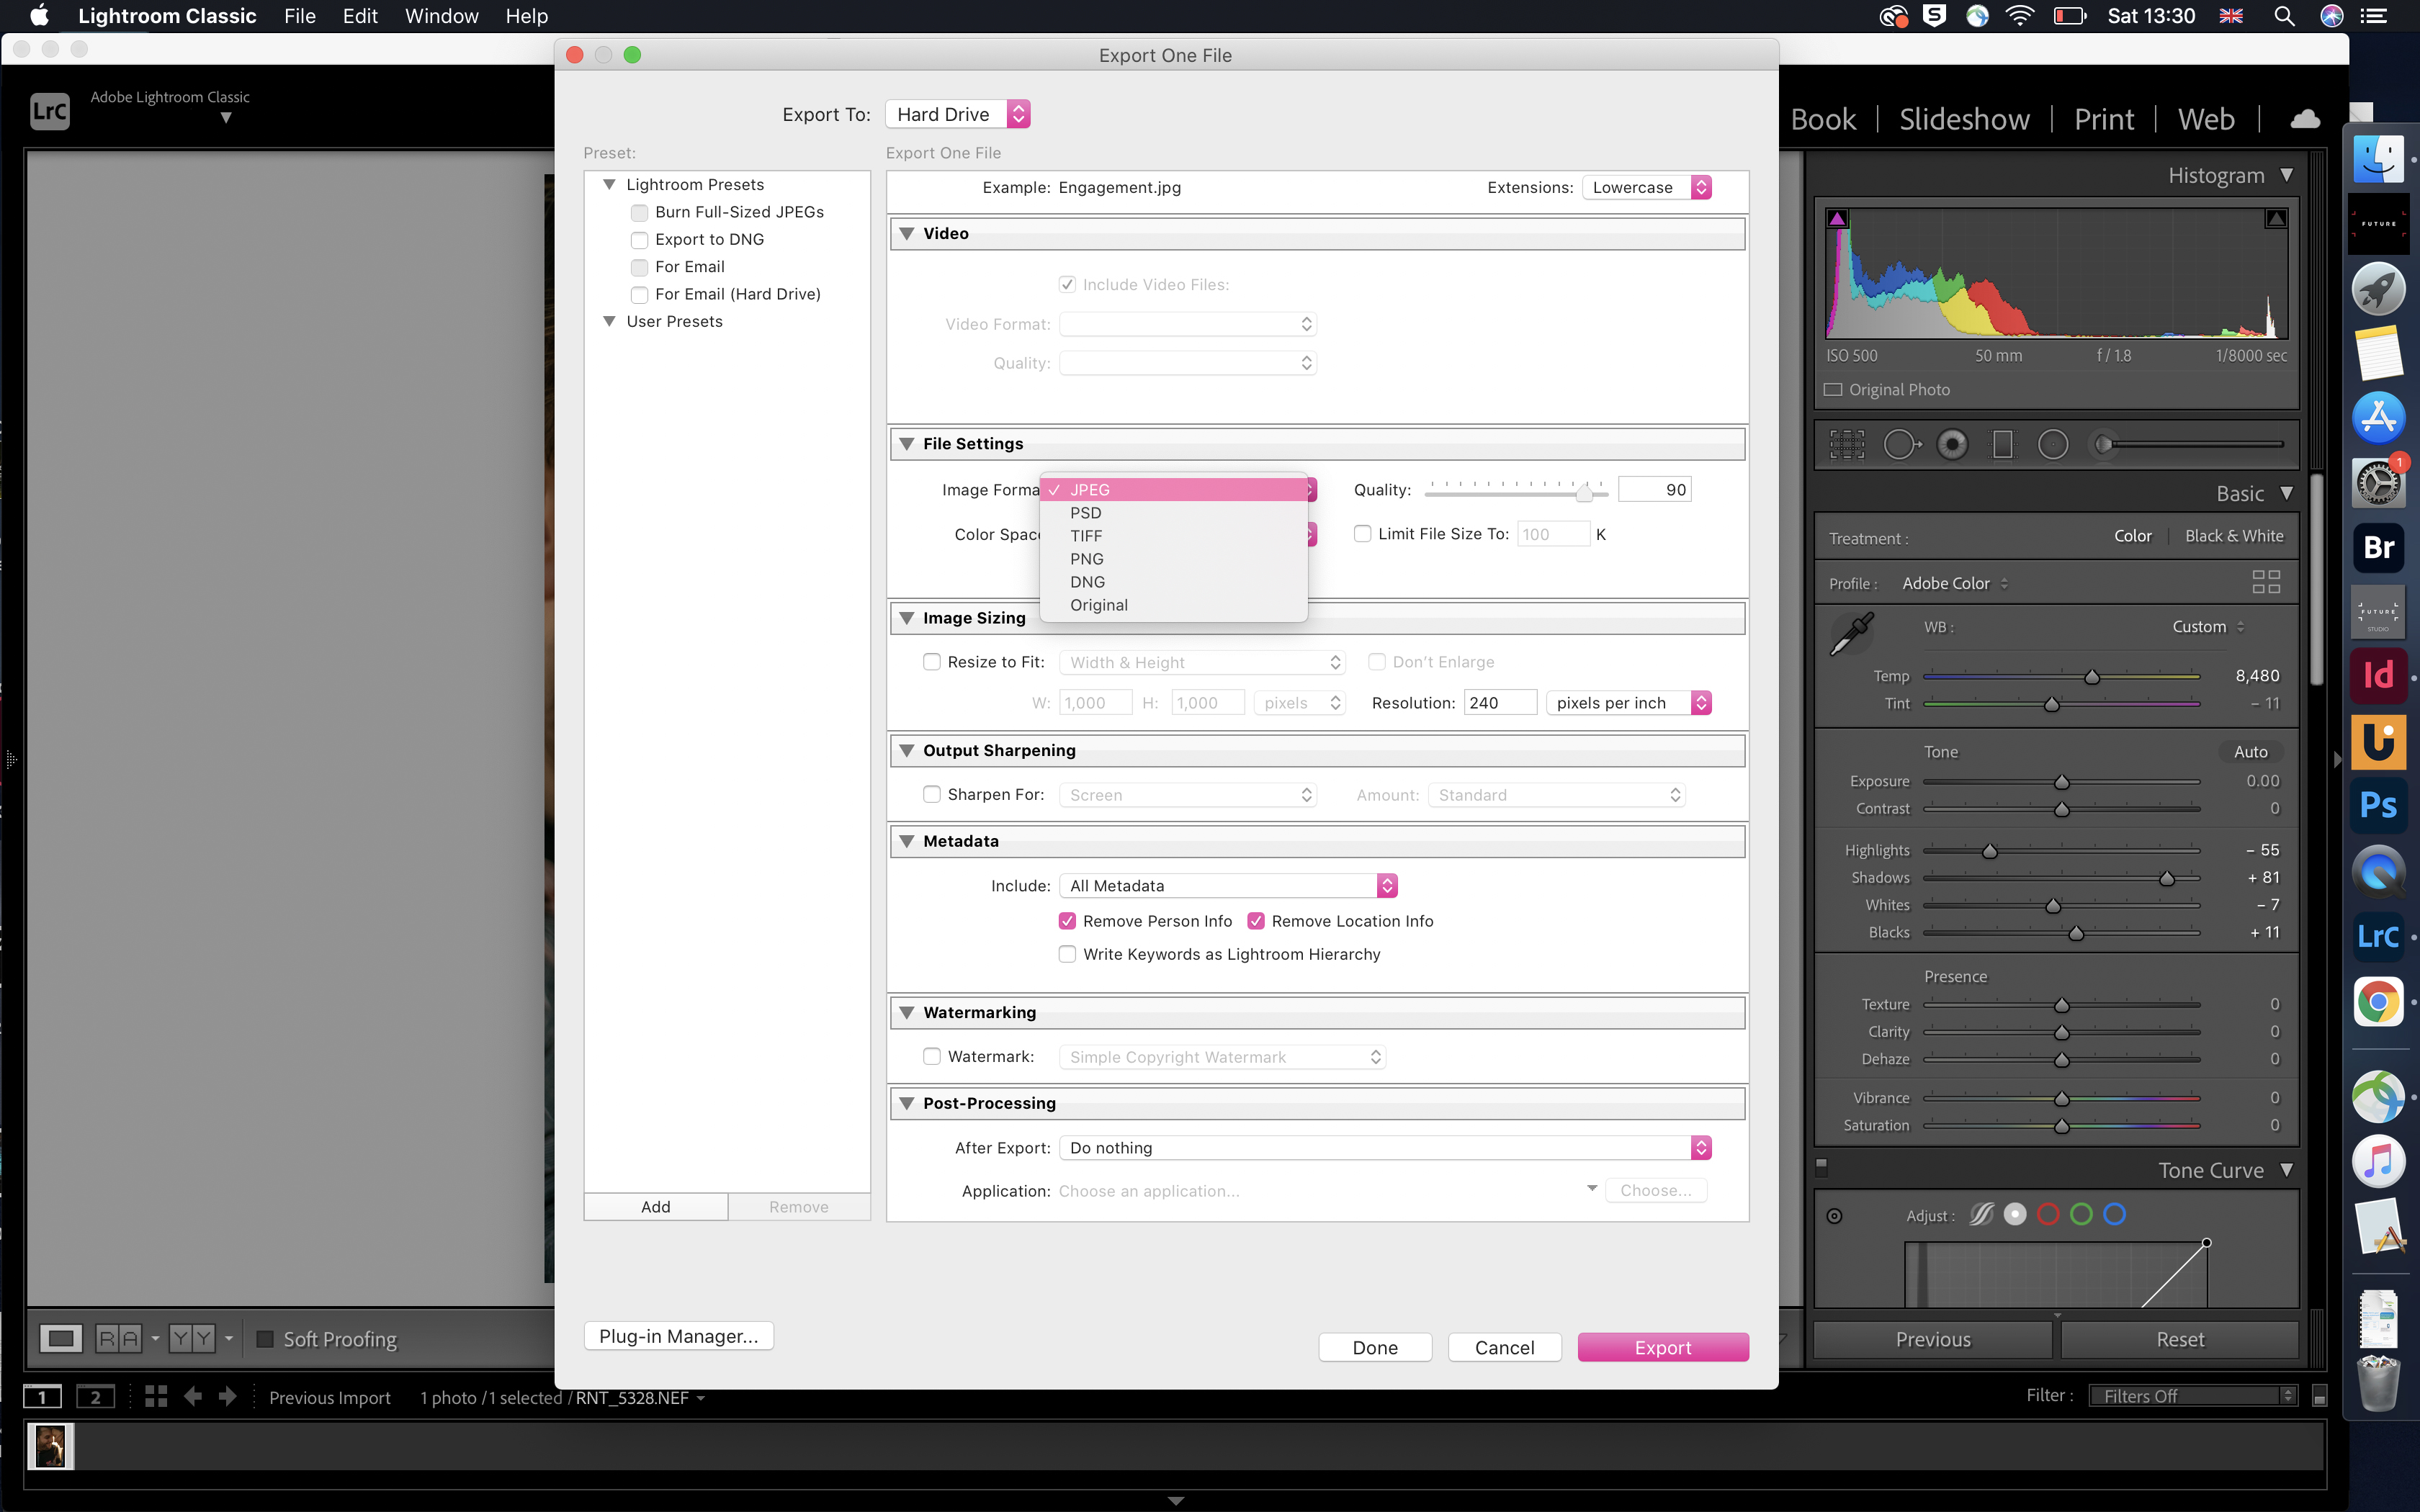
Under File Settings you can save your image as the universally recognized JPEG format. Here you can set the quality (a lower quality will produce a smaller file) and you can also set a filesize limit, if you need a smaller file that’s easier to share.
05 Choose the right size
Tick the ‘Resize to Fit’ box and pick ‘Long Edge’ from the dropdown menu. Input the number of pixels you want the longest edge of your shot to be (2,000 is enough for web use, but leave this option unchecked for high resolution prints).
06 Add the finishing touches
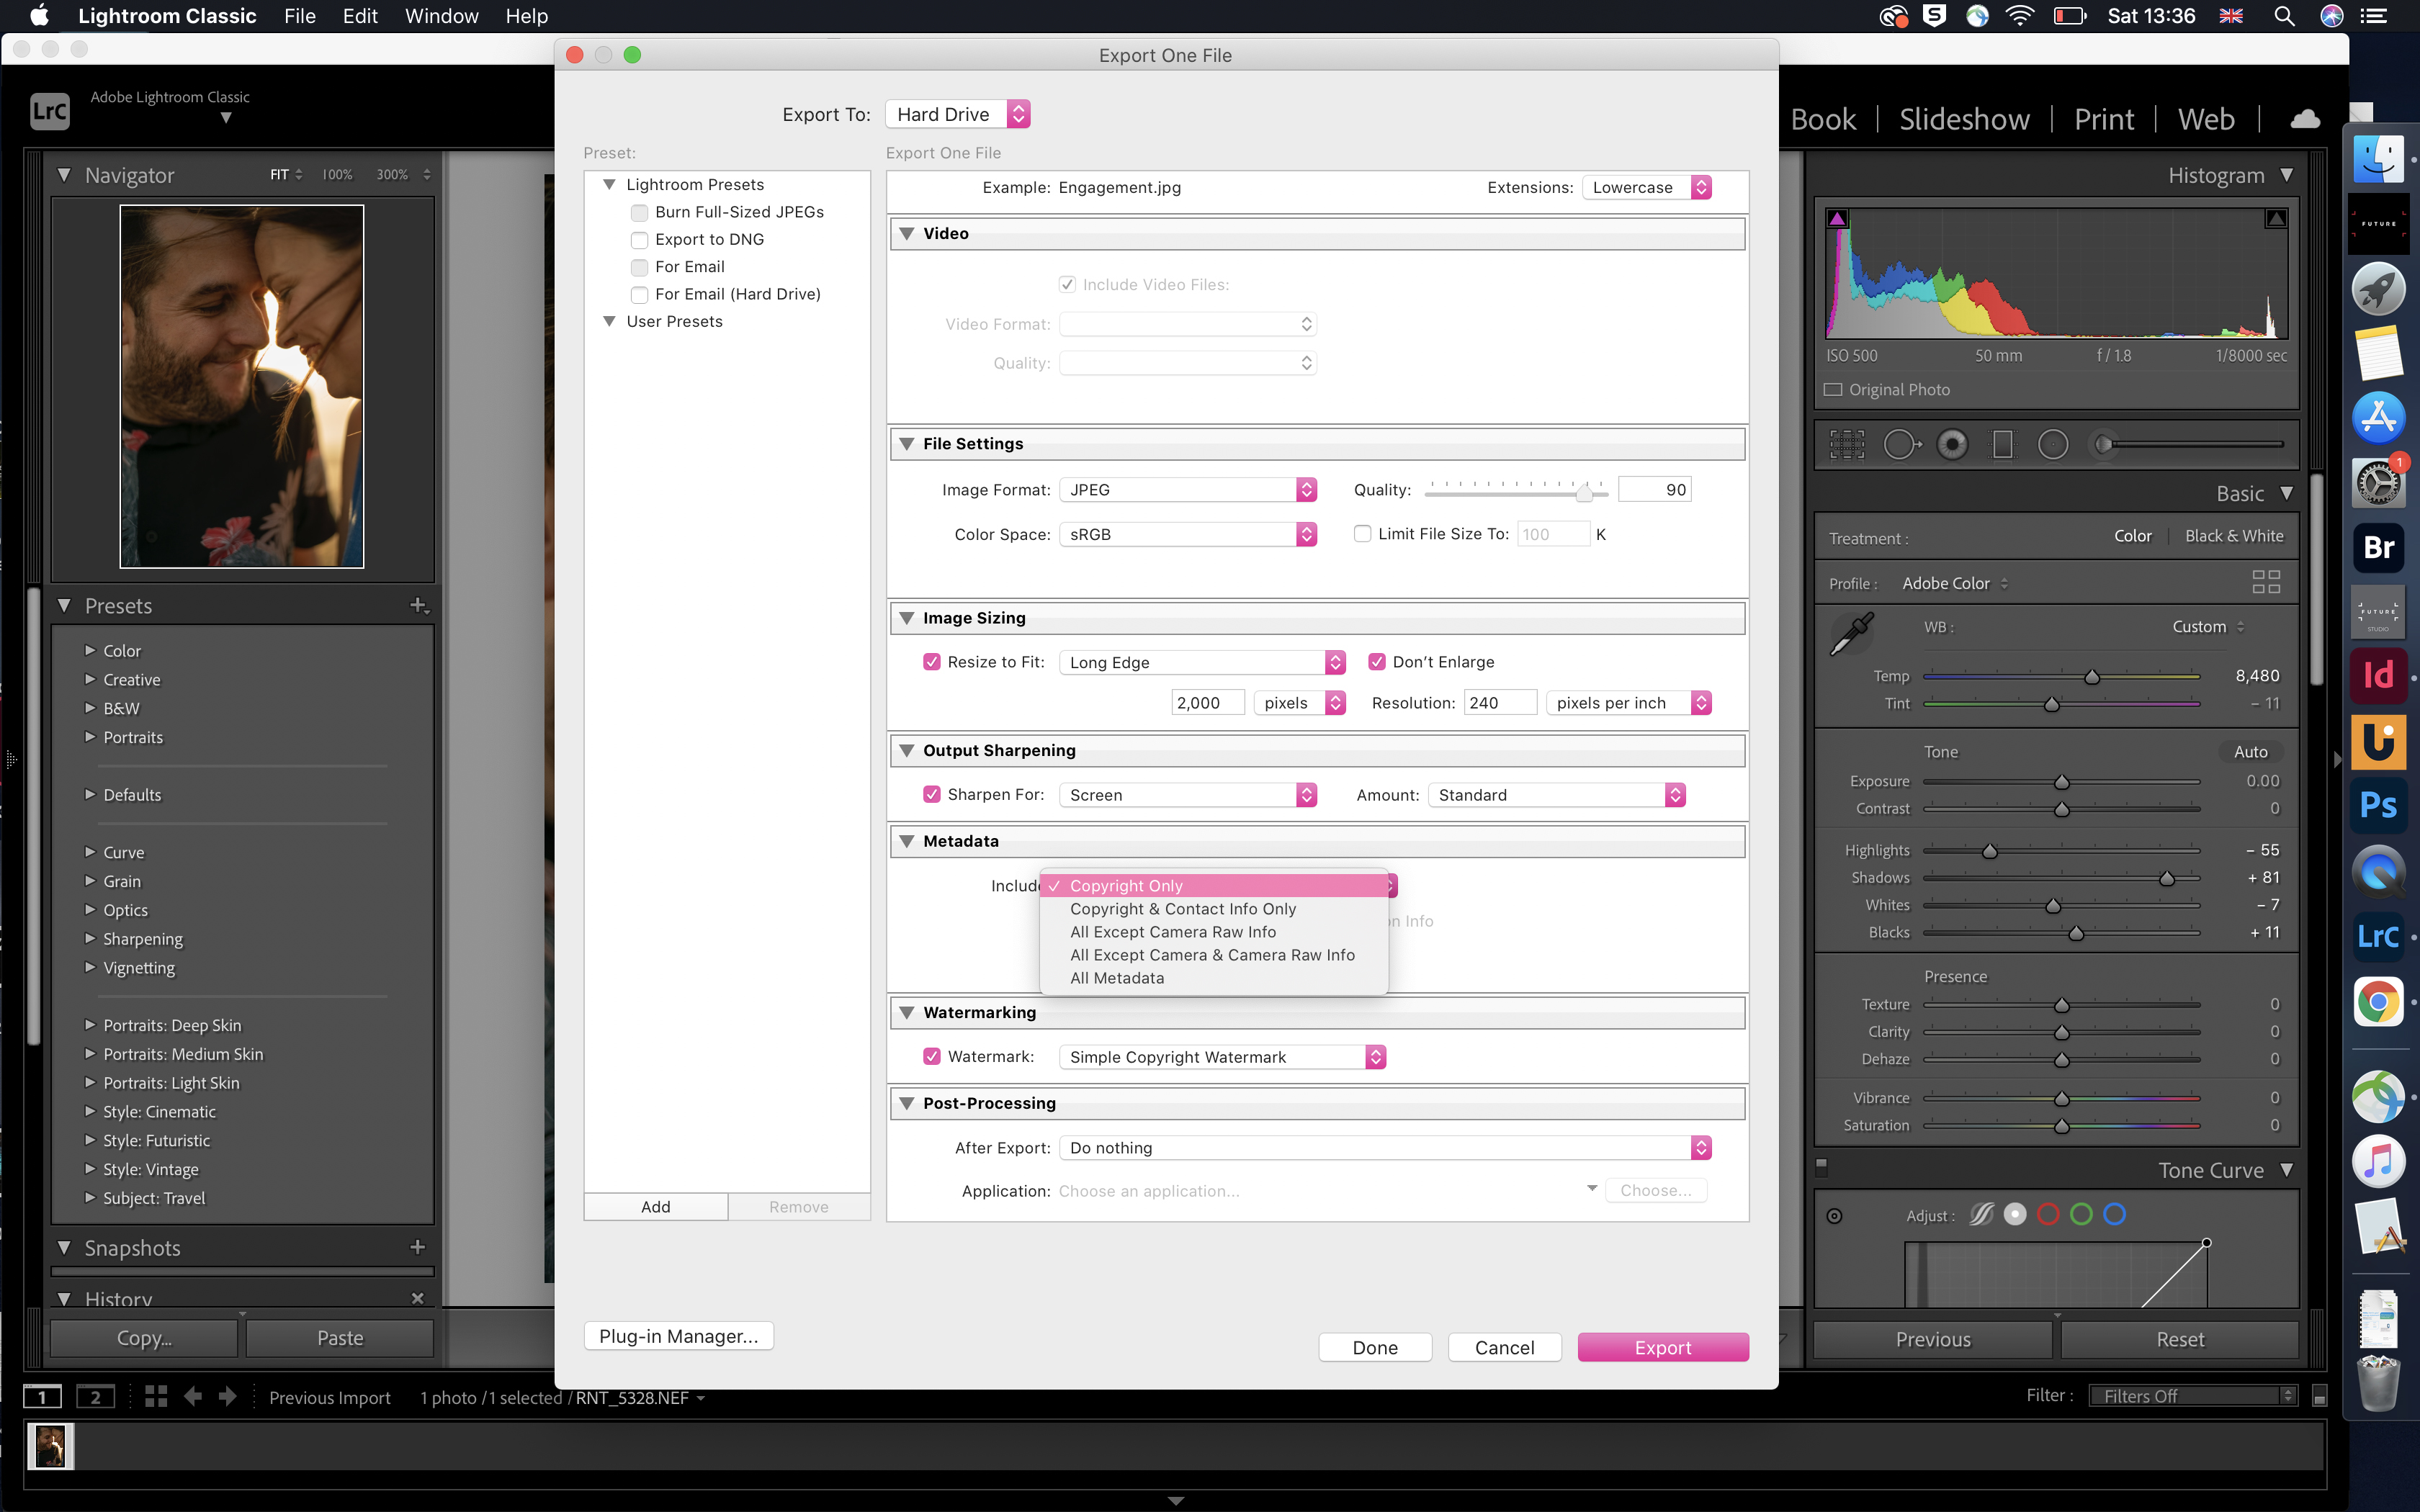
You can decide how much info to embed in your images with the Metadata section. You can also add a watermark to prevent any inappropriate usage of your images as well with the Watermarking panel. When you’re done, all that’s left is to click Export!
PhotoPlus: The Canon Magazine is the world's only monthly newsstand title that's 100% devoted to Canon, so you can be sure the magazine is completely relevant to your system.
Read more:
The best photo editing software: image editors for novices through to pros
The best photo-editing laptops: top laptops for photographers
10 best online photography courses – from beginner guides to masterclasses
With over a decade of photographic experience, Louise arms Digital Camera World with a wealth of knowledge on photographic technique and know-how – something at which she is so adept that she's delivered workshops for the likes of ITV and Sue Ryder. Louise also brings years of experience as both a web and print journalist, having served as features editor for Practical Photography magazine and contributing photography tutorials and camera analysis to titles including Digital Camera Magazine and Digital Photographer. Louise currently shoots with the Fujifilm X-T200 and the Nikon D800, capturing self-portraits and still life images, and is DCW's ecommerce editor, meaning that she knows good camera, lens and laptop deals when she sees them.
