How to change Lightroom Classic’s default sharpening and noise settings
Do your raw files look noisy? Lightroom’s defaults can be quite aggressive, so here’s how to fix them – for good
The best camera deals, reviews, product advice, and unmissable photography news, direct to your inbox!
You are now subscribed
Your newsletter sign-up was successful
Our article about Lightroom’s raw processing upset some people. It described Lightroom’s default raw image file settings, which do produce more noise than rivals Capture One and DxO PhotoLab.
A couple of people pointed out (yelled) that you could fix this by changing Lightroom Classic’s sharpening and noise reduction settings – and so you can. Whether this will get you to the same level as Capture One or PhotoLab is a moot point, but it can certainly get you closer.
Lightroom is one of the best photo editing software applications on the market, but it's not without its faults. And who wants to have to edit sharpening and noise reduction settings for every image?
• Lightroom Classic vs Lightroom CC – what's the difference?
So here’s a hack for Lightroom Classic that changes its default processing for your camera to the settings you prefer, then applies that automatically to new images you import. It's also available as a quick fix for ones you’ve already edited.
The technique comes in two parts. The first is making a custom preset, the second is making it the default for that camera.
1. Create a new default Lightroom preset
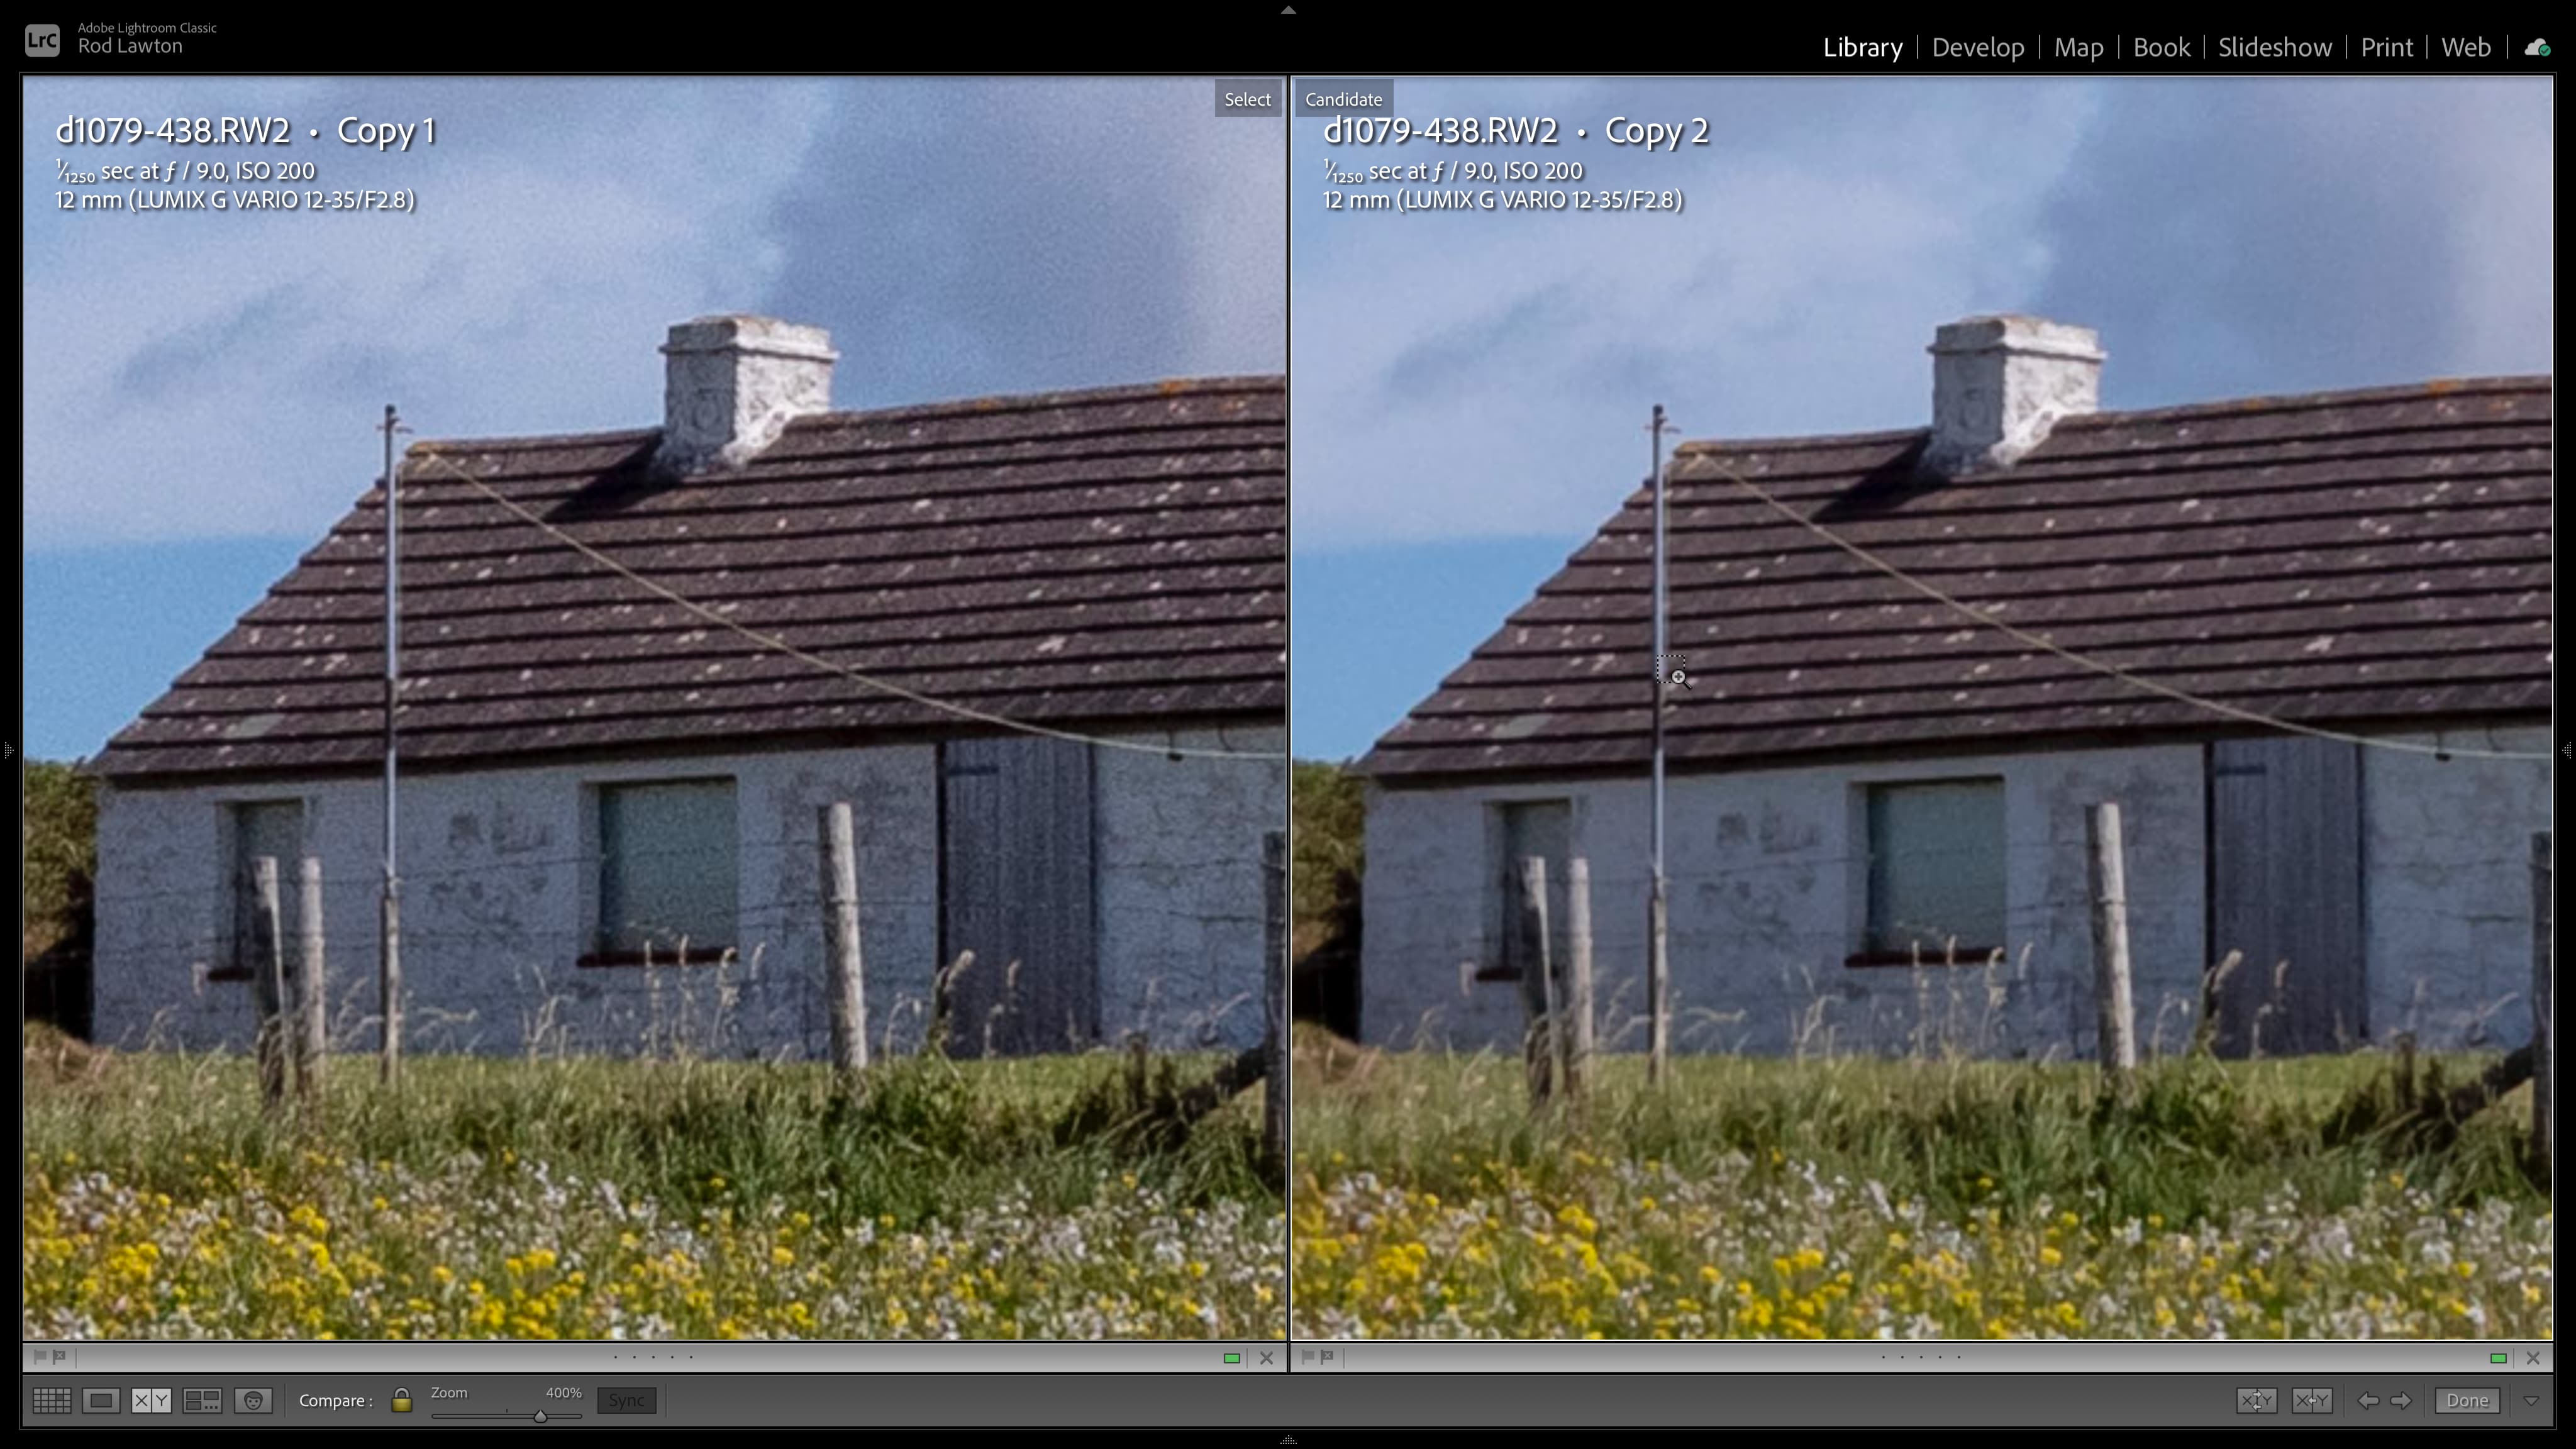
I shoot with a Panasonic Lumix G9 a lot of the time, and Lightroom’s default sharpening for this camera is pretty aggressive. This produces a lot of noise which is difficult to dial out with the noise reduction sliders without being equally aggressive here too, which produces a very obvious ‘processed’ look.
The best camera deals, reviews, product advice, and unmissable photography news, direct to your inbox!
Here are the default settings:
Sharpening
Amount: 40
Radius: 1.0
Detail: 25
Masking: 0
Noise reduction
Luminance: 0
Detail: -
Contrast: -
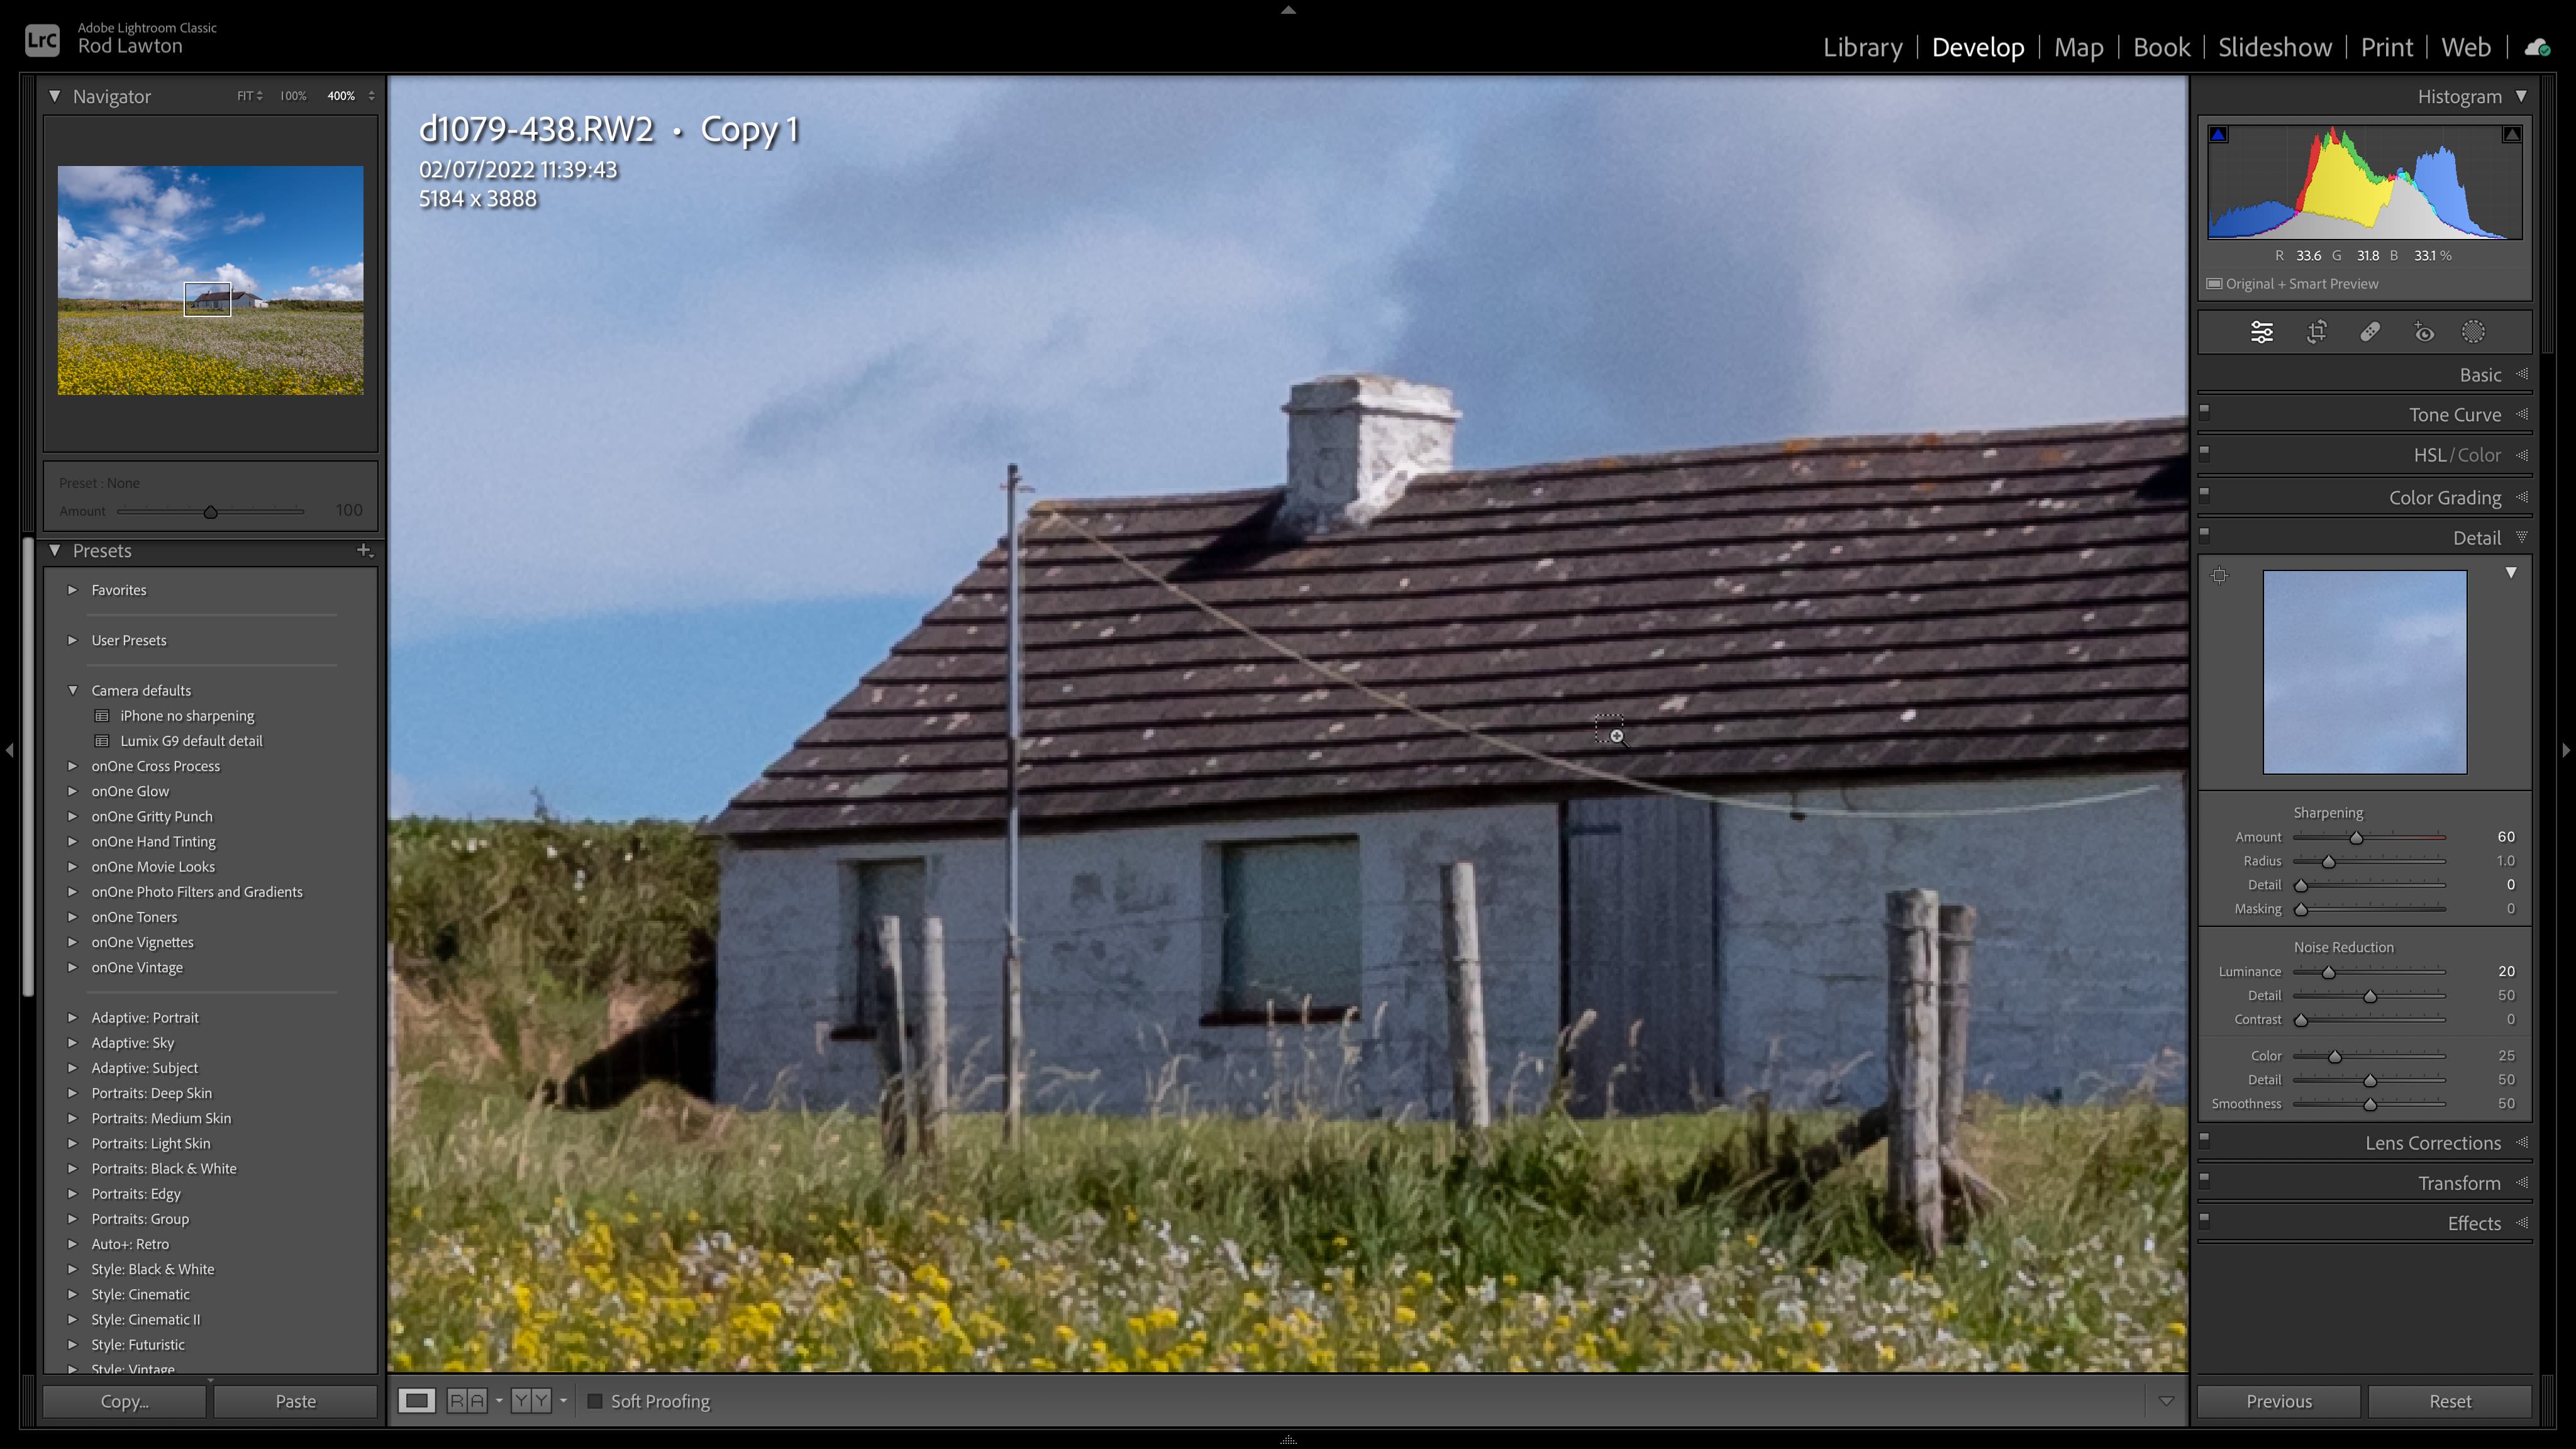
There are countless permutations to play with, but here are some settings which I think give a better default look, with less detail sharpening and hence less noise that needs fixing.
Sharpening
Amount: 60 (yes, more!)
Radius: 1.0
Detail: 0 (this is where the noise was coming from)
Masking: 0
Noise reduction
Luminance: 20
Detail: 50
Contrast: 0
That done, I need to save it as a preset, making sure the preset includes ONLY the sharpening and noise reduction settings and no others. I’ll call it ‘Lumix G9 default detail’.
2. Set this as the default for that camera
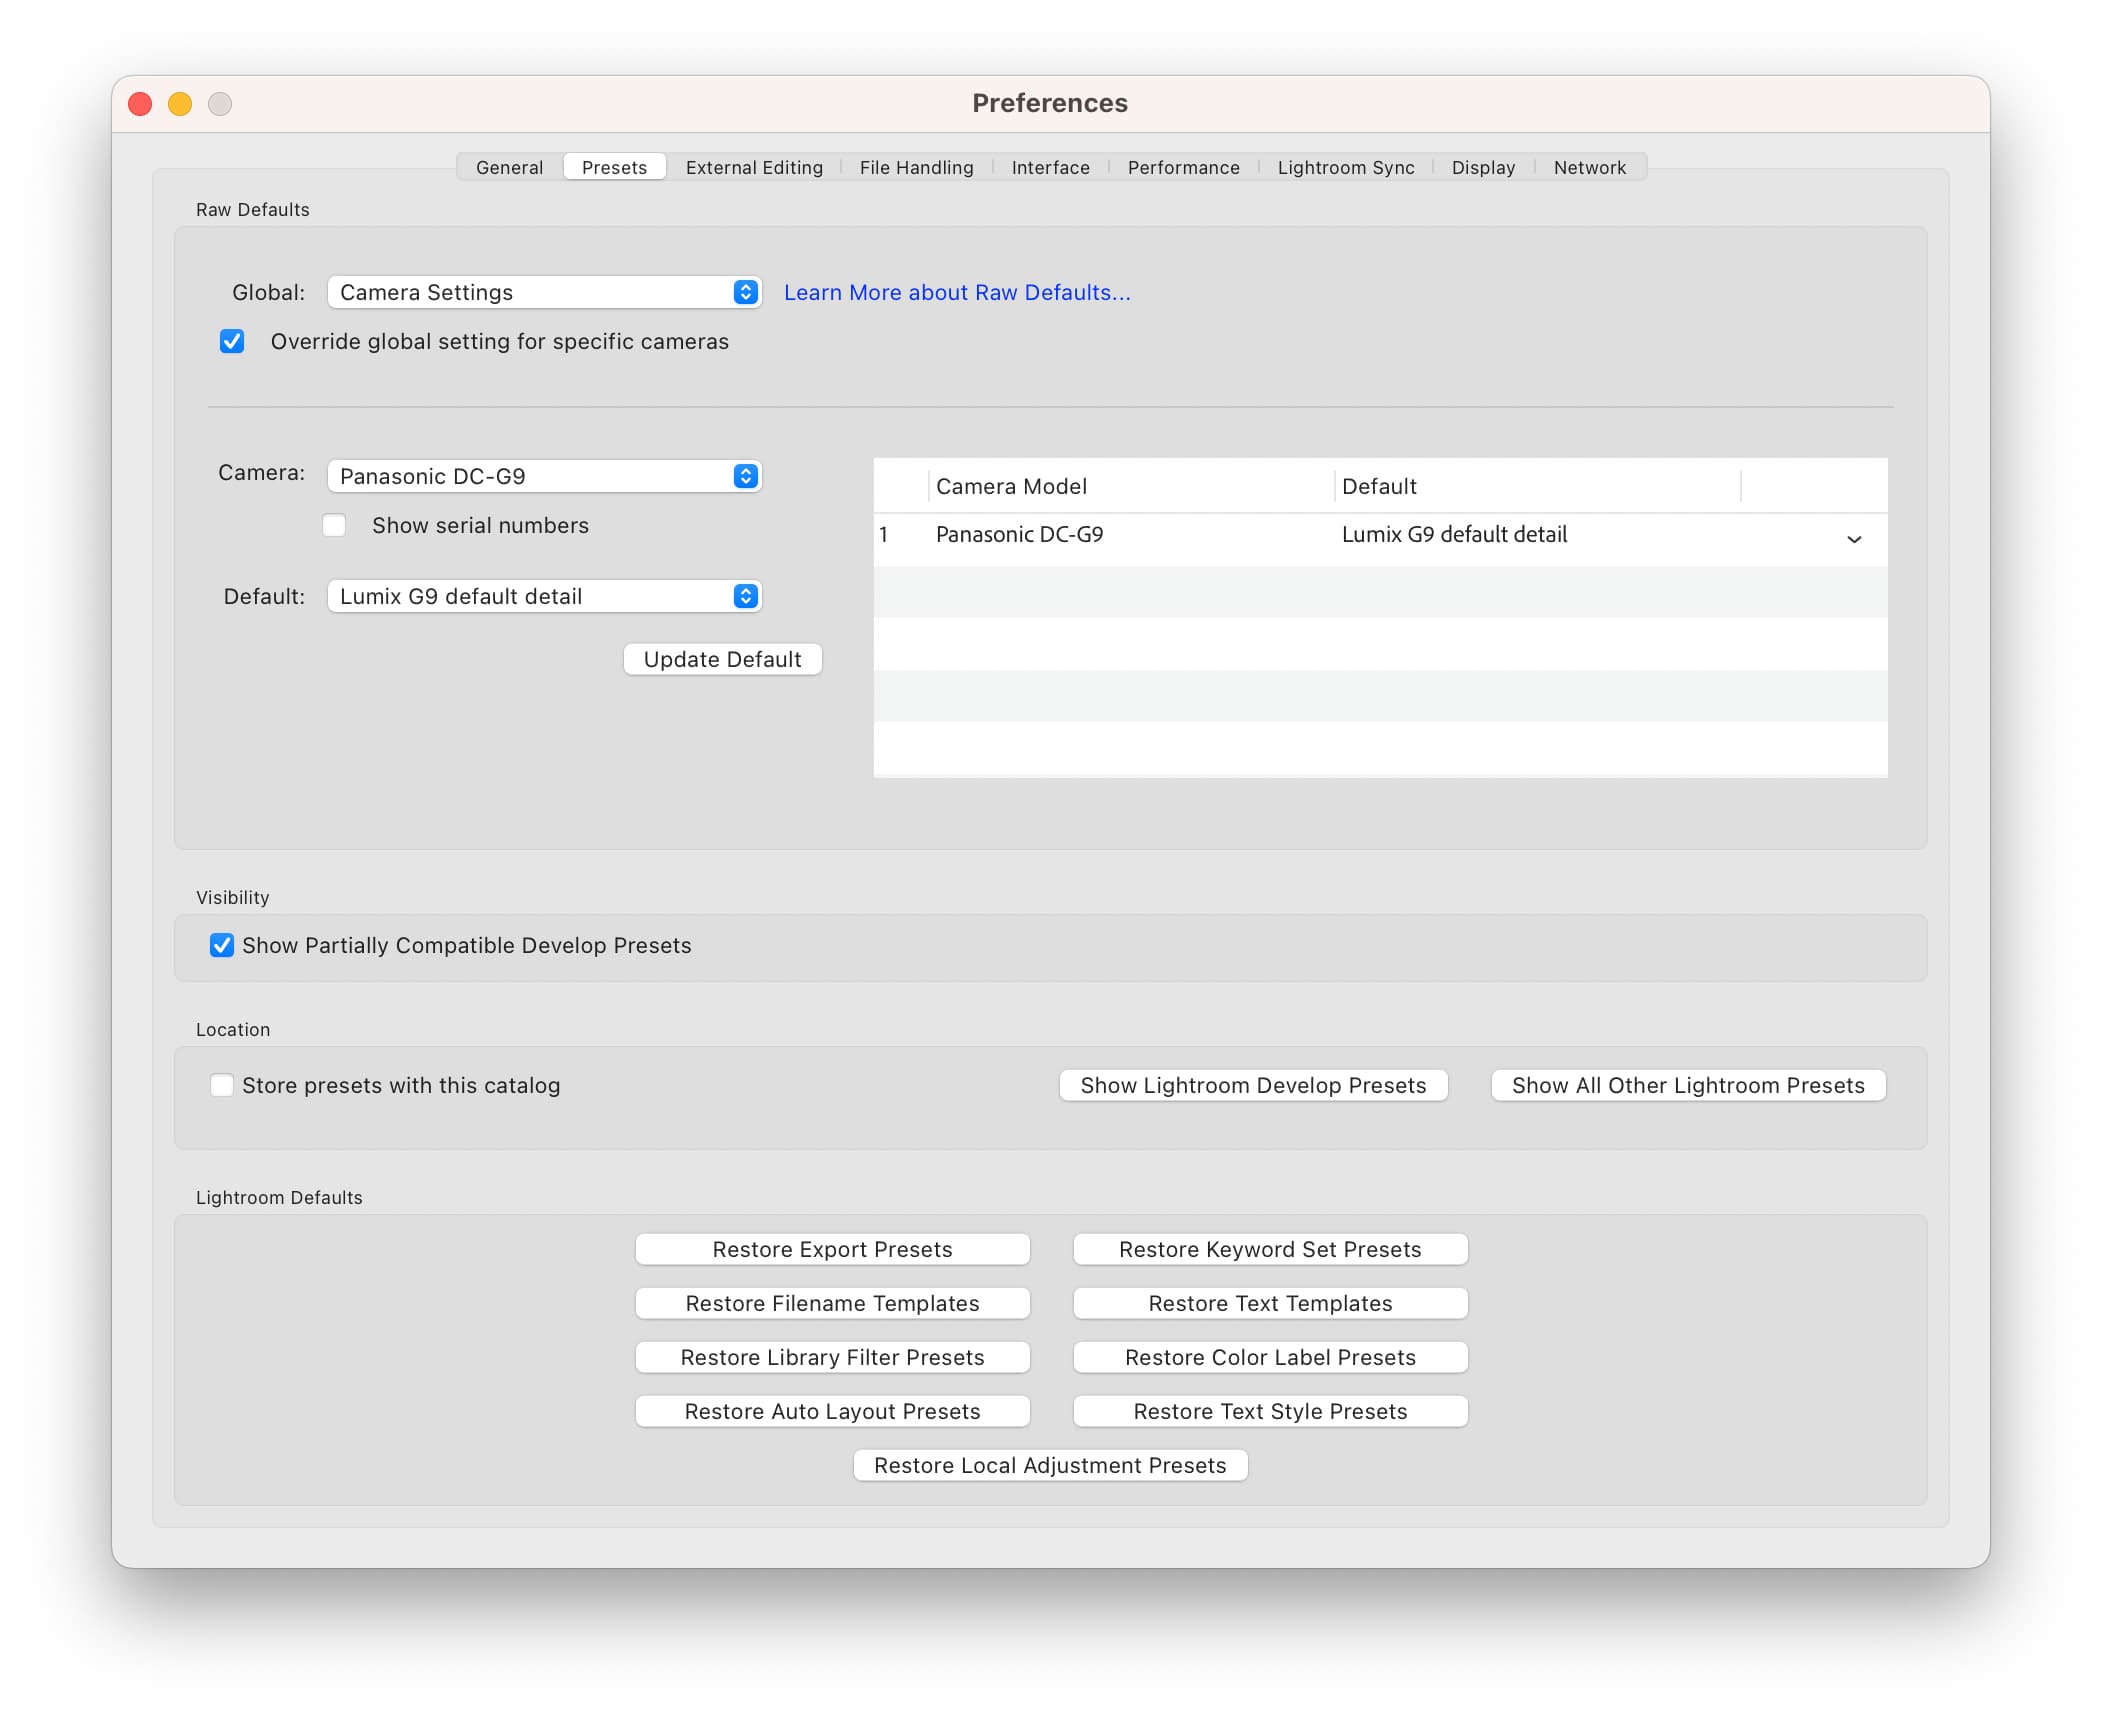
For this you need to (1) open the Lightroom preferences and (2) select the Presets tab. Now (3) open the ‘Camera’ drop down and select your camera. It make take a few moments for this to populate, but if you’ve just been working on an image from that camera it should show it automatically.
The ‘Default’ menu underneath will initially show ‘Adobe Default’, but you need to (4) open this, select ‘Preset’ instead and (5) select your new preset from the pop-up menu which appears. Now (6) click the ‘Update Default’ button to add your new default to the list on the right.
How do Lightroom defaults work?
Any new Raw image you import from that camera will now have your preset’s sharpening and noise reduction settings applied. These will also be among your presets in Develop mode and, because the preset only includes sharpening and noise reduction settings, it won’t override any of your other edits for images you've already imported and worked on.
This method can’t take into account different ISO settings and noise reduction needs, and any preset will be a compromise. But if you have been finding your camera’s images look disappointingly noisy, it might be Lightroom’s fault, not your camera’s – and this is a way to fix it, or at least give yourself a much better starting point.
Love using Lightroom? Learn how to save hours of editing time with speedy presets and tame bright skies with the graduated filters.
Rod is an independent photography journalist and editor, and a long-standing Digital Camera World contributor, having previously worked as DCW's Group Reviews editor. Before that he has been technique editor on N-Photo, Head of Testing for the photography division and Camera Channel editor on TechRadar, as well as contributing to many other publications. He has been writing about photography technique, photo editing and digital cameras since they first appeared, and before that began his career writing about film photography. He has used and reviewed practically every interchangeable lens camera launched in the past 20 years, from entry-level DSLRs to medium format cameras, together with lenses, tripods, gimbals, light meters, camera bags and more. Rod has his own camera gear blog at fotovolo.com but also writes about photo-editing applications and techniques at lifeafterphotoshop.com
