Get creative with flower composites and layer blending skills in Affinity Photo
James Paterson gets creative with flower composites and layer blending skills in Affinity Photo... and it’s far easier than it looks
Compositing is one of the most creative techniques in image editing, and it’s easier than you might think. All it takes is a few simple layer skills. Affinity Photo 2 offers a host of useful compositing tools to get you started, from clever selection features that let you isolate and cut out objects, to intuitive masking and transforming tools that let you position each element with ease and blend everything together into a cohesive whole.
In this project, we’ll explore these tools and features while creating a great flower portrait composite. We begin by cutting out our subject so that we can place flowers in front and behind the figure. Once done, we can copy in a range of flower images, using selections and masks to remove their backgrounds and then placing them to fit around the subject. This involves one of the most powerful selection tools in Affinity Photo – the Refine command. It allows us to make incredibly precise selections by seeking out and improving edges for us.
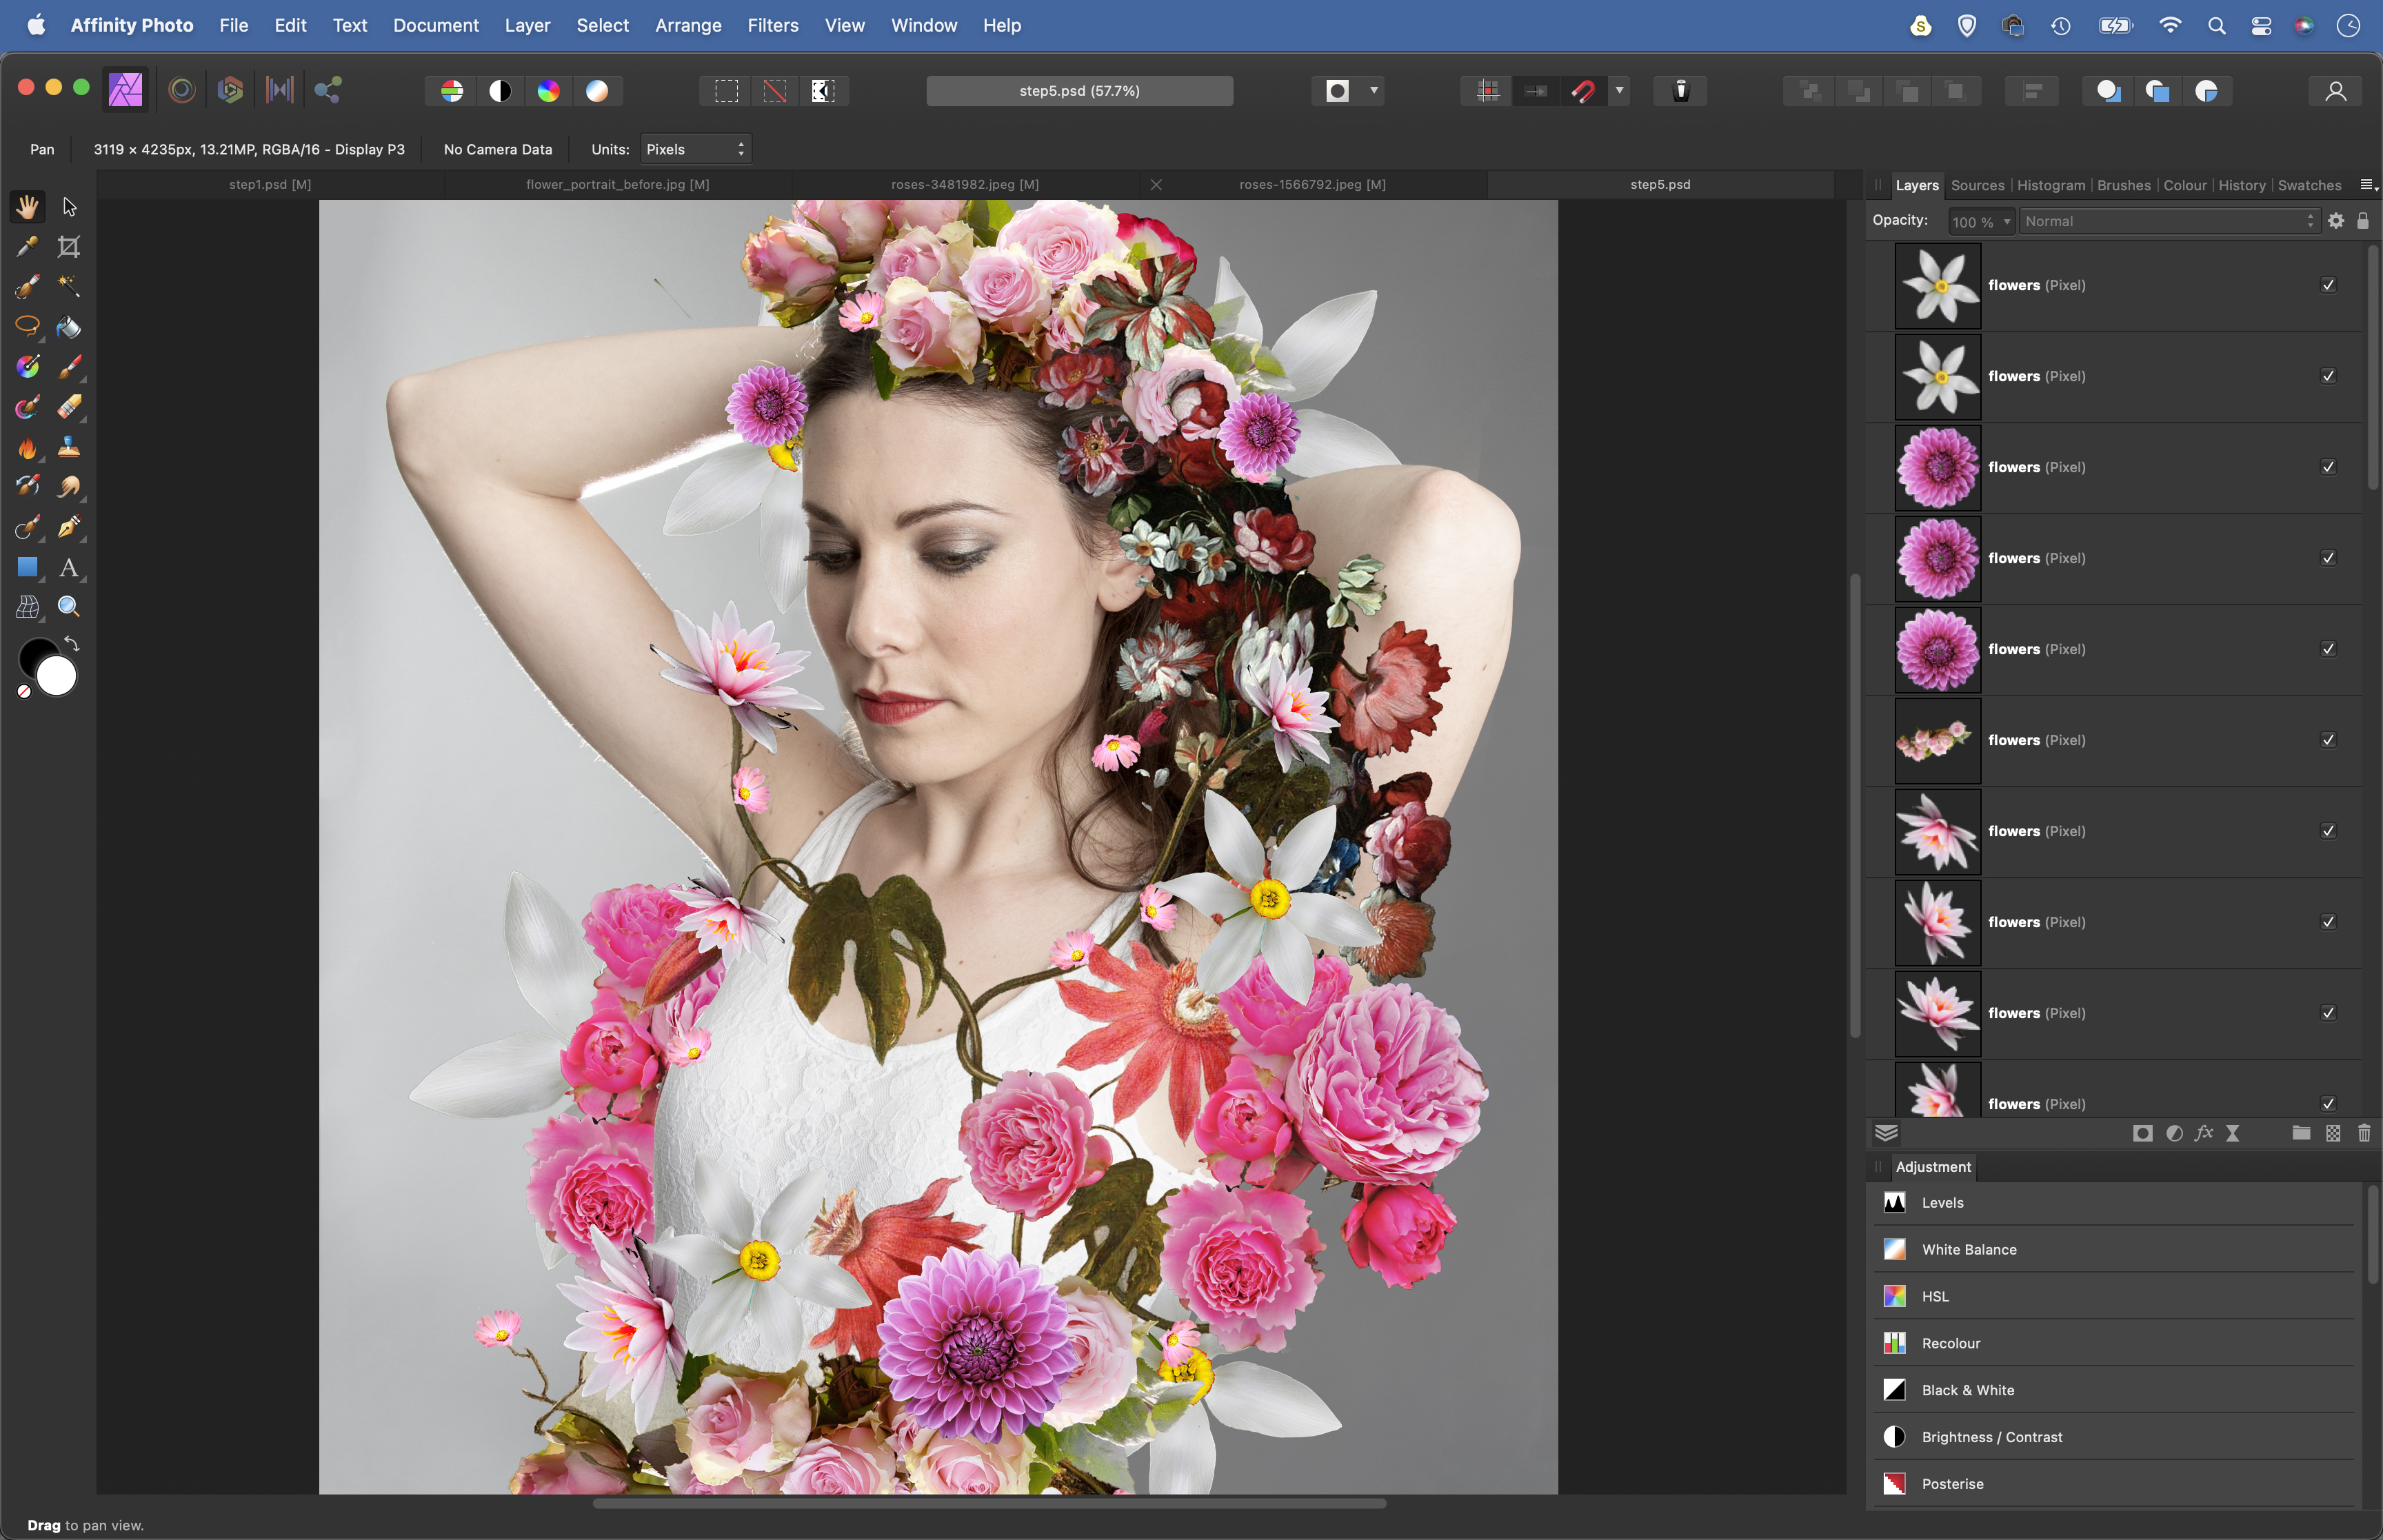
We’ve supplied a portrait for you to use (download here), but why not shoot your own? All you need to do is photograph a person against a plain wall. You can also take some flower photos if you like or – as we have done – make use of free downloadable flower images from sites like Pixabay and WikiCommons. After combining the flowers with the portrait, we can use a few simple tricks to help everything come together, from blur filters to creative color shifts.
1. Select the person
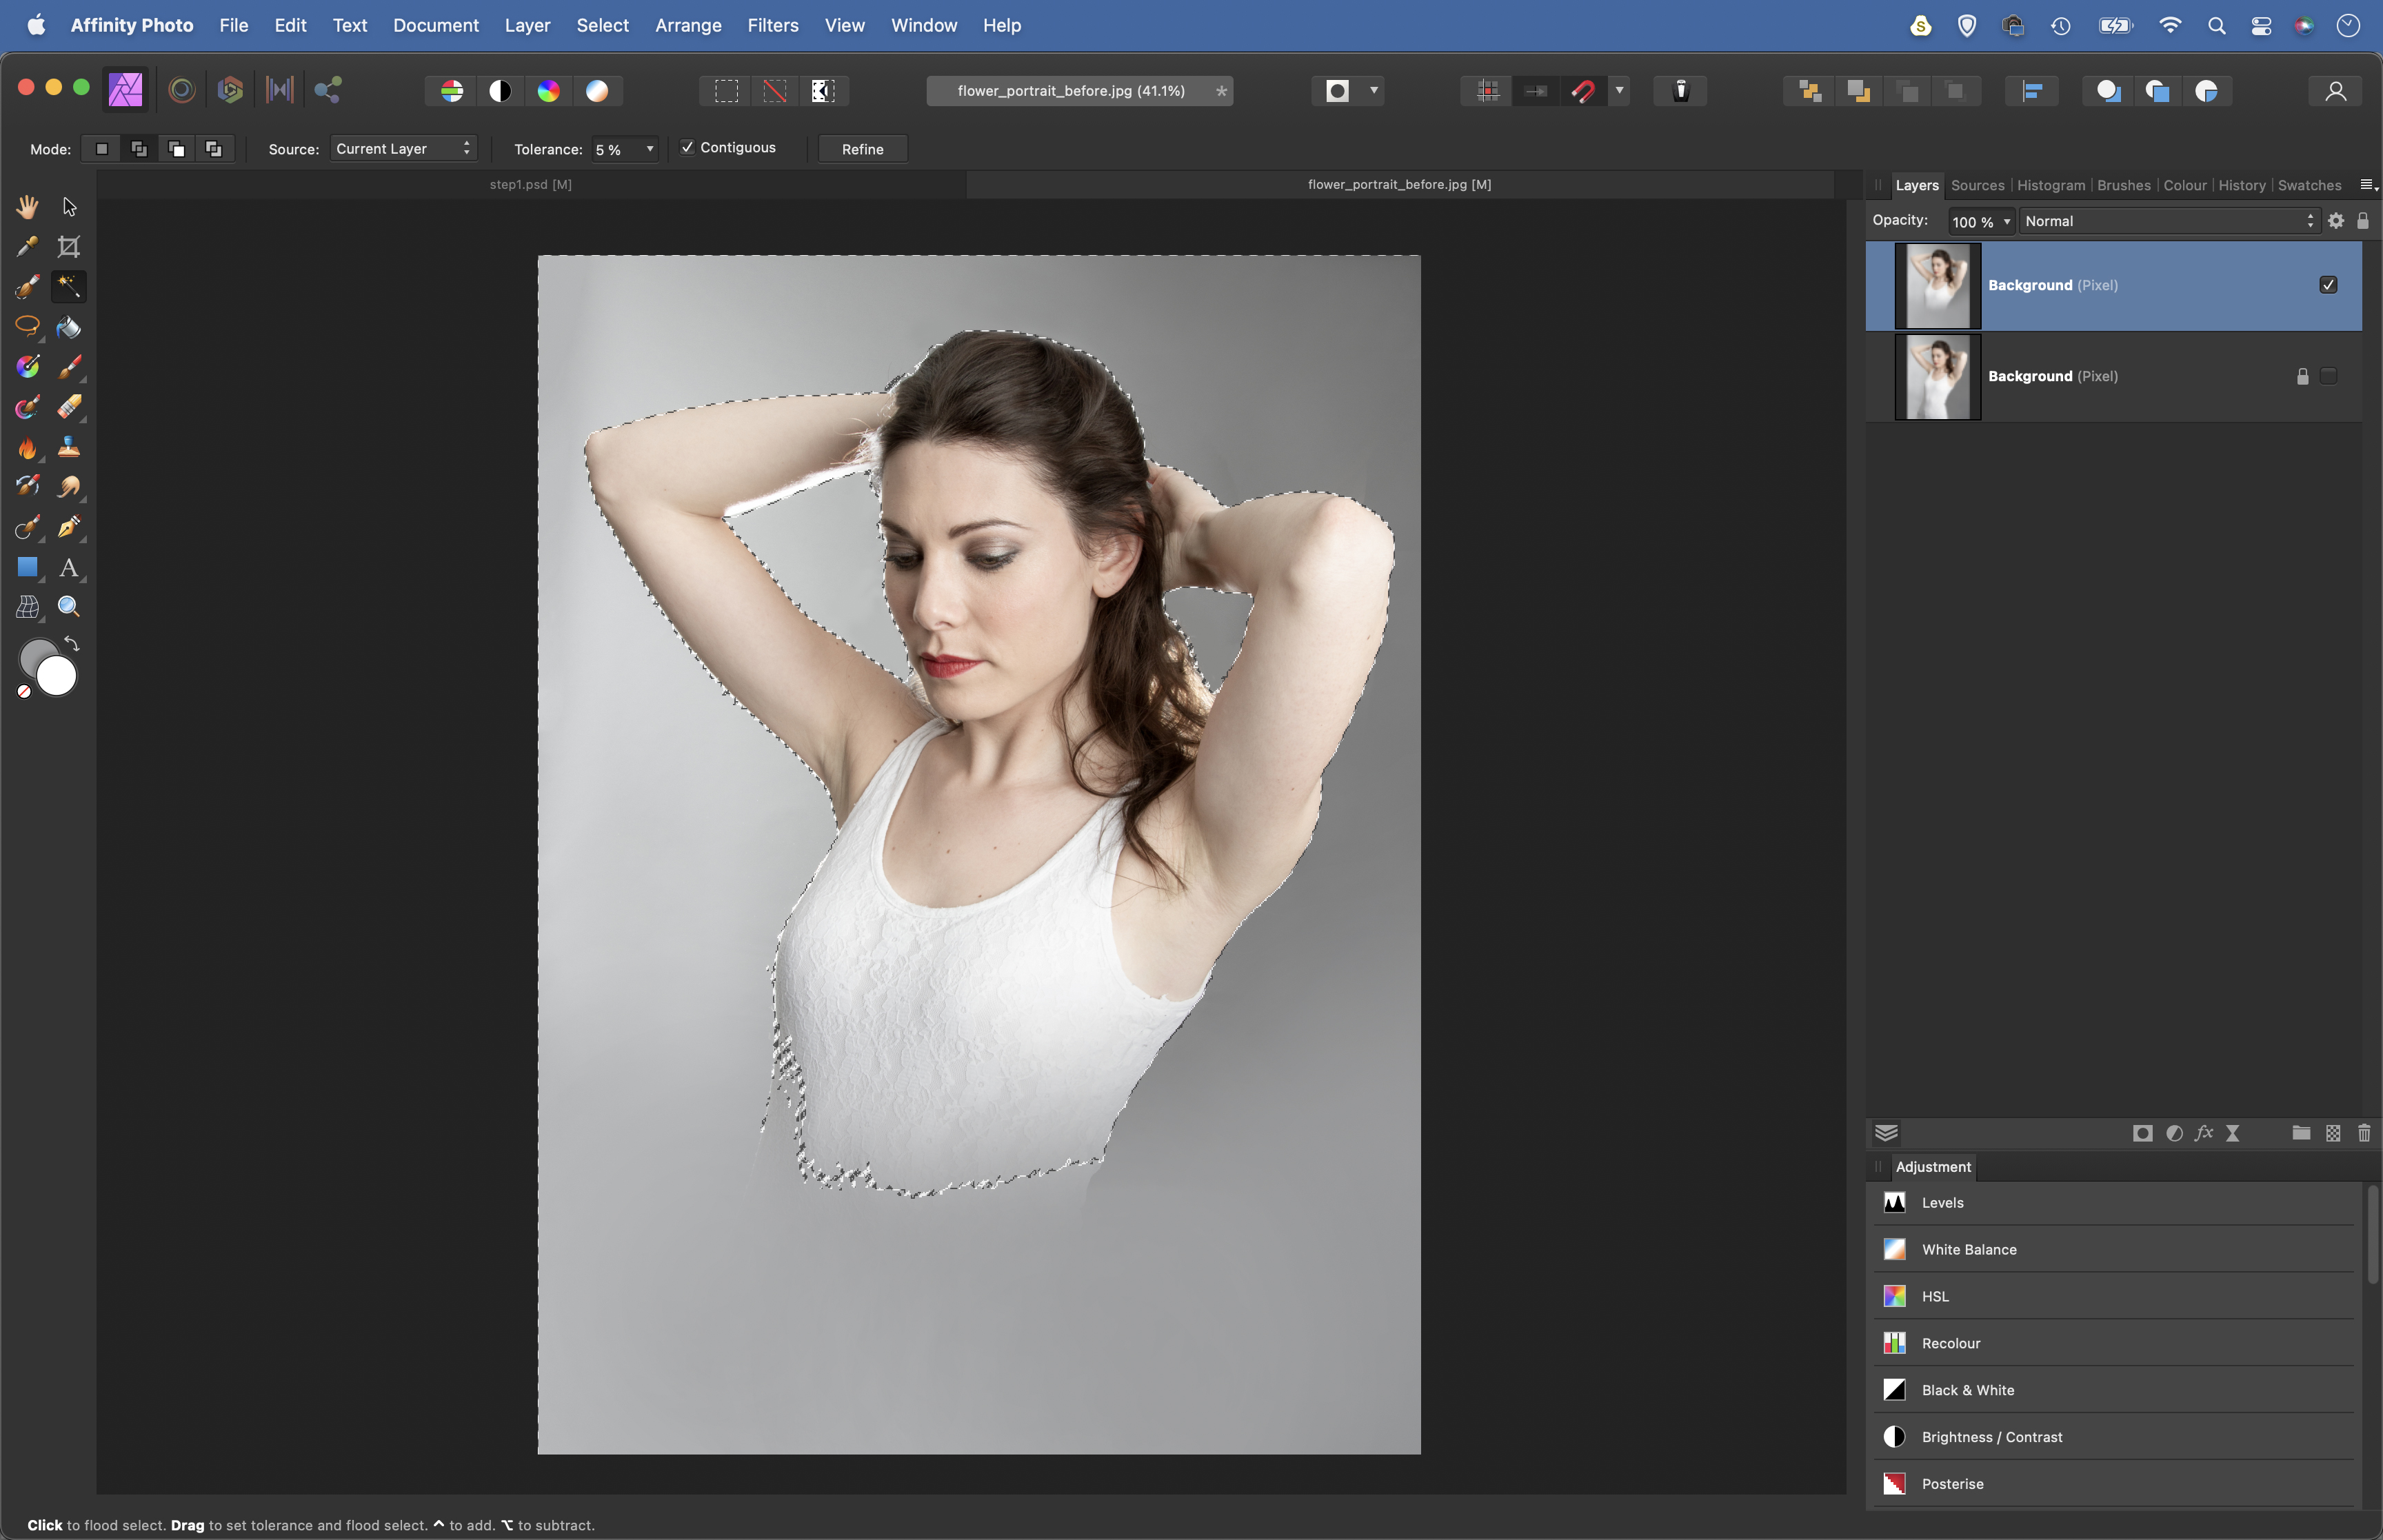
Open the portrait, and hit Cmd/Ctrl+J to copy layer. Grab the Brush tool, hold Alt to sample background grey colour, paint over the bottom of the figure. Grab the Flood Select tool. Check Contiguous and enable Add icon top left. Set Tolerance to 5. Click backdrop.
2. Improve the cut out
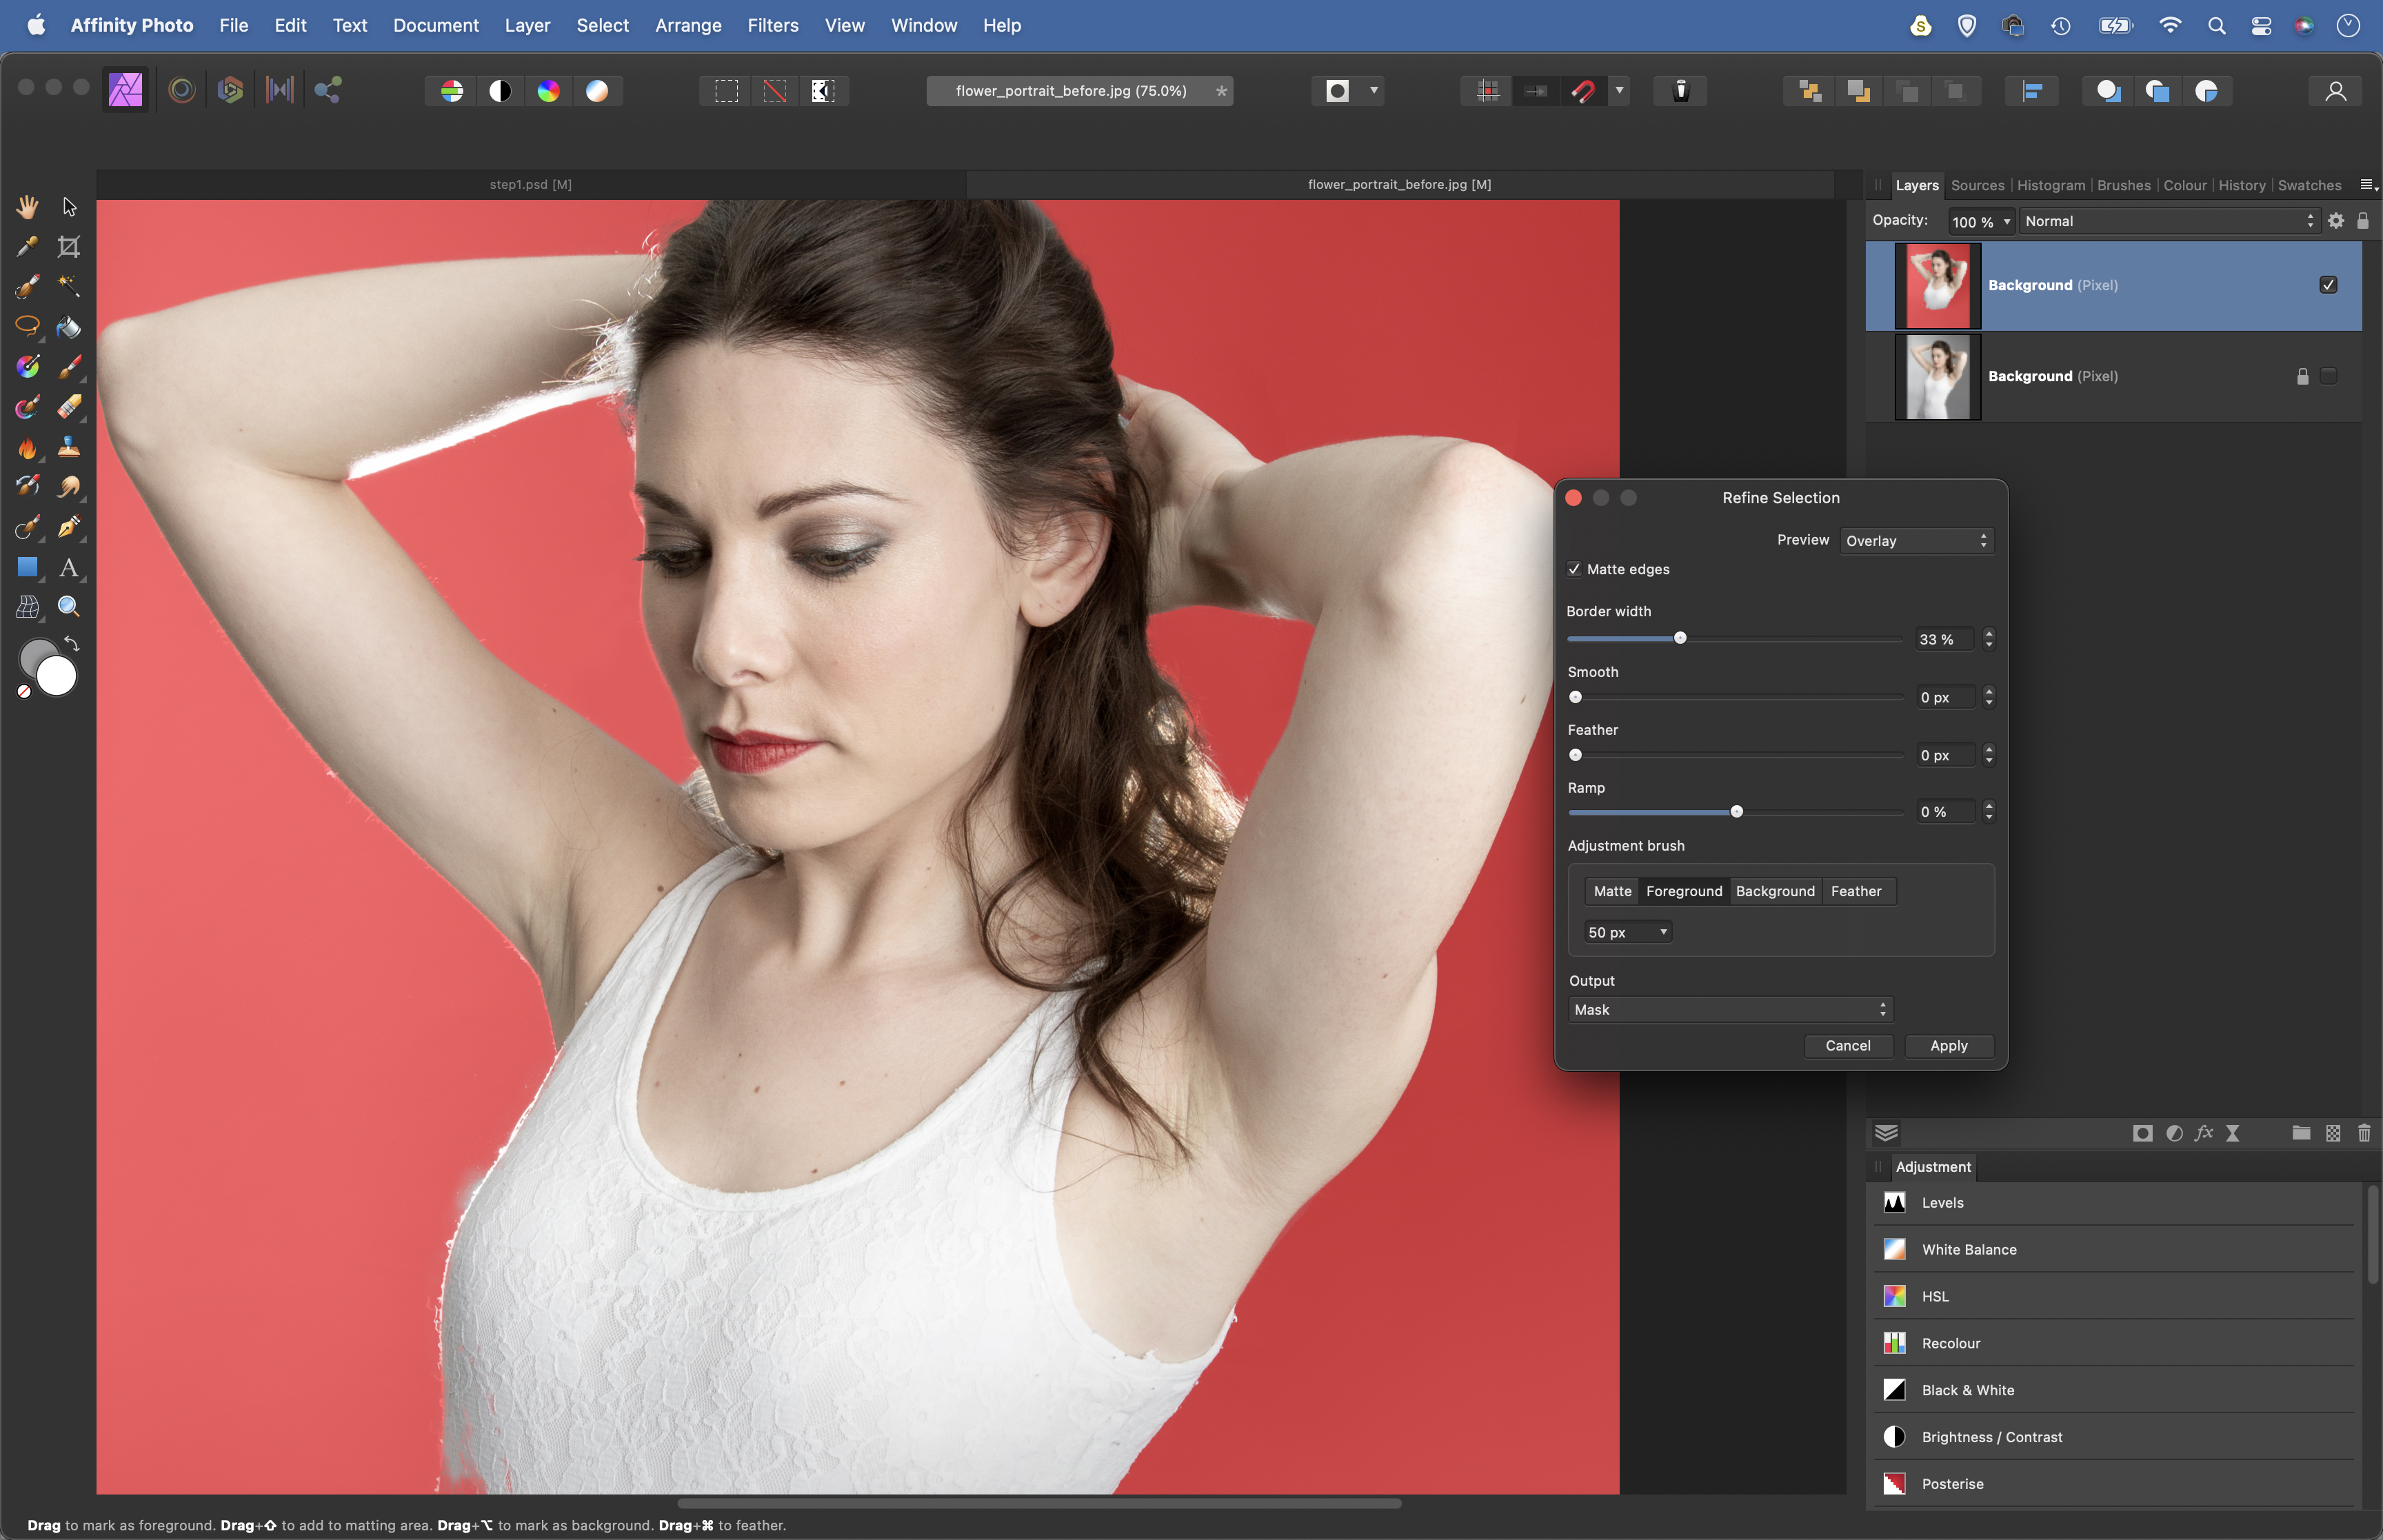
Choose Select > Invert Pixel Selection so that the figure is selected. Next go to Select > Refine Edges. Increase Border Width slider to expand refinement, paint over messy edges with the Matte brush for better results. Set Output: New Layer with Mask and Apply.
3. Select the flowers
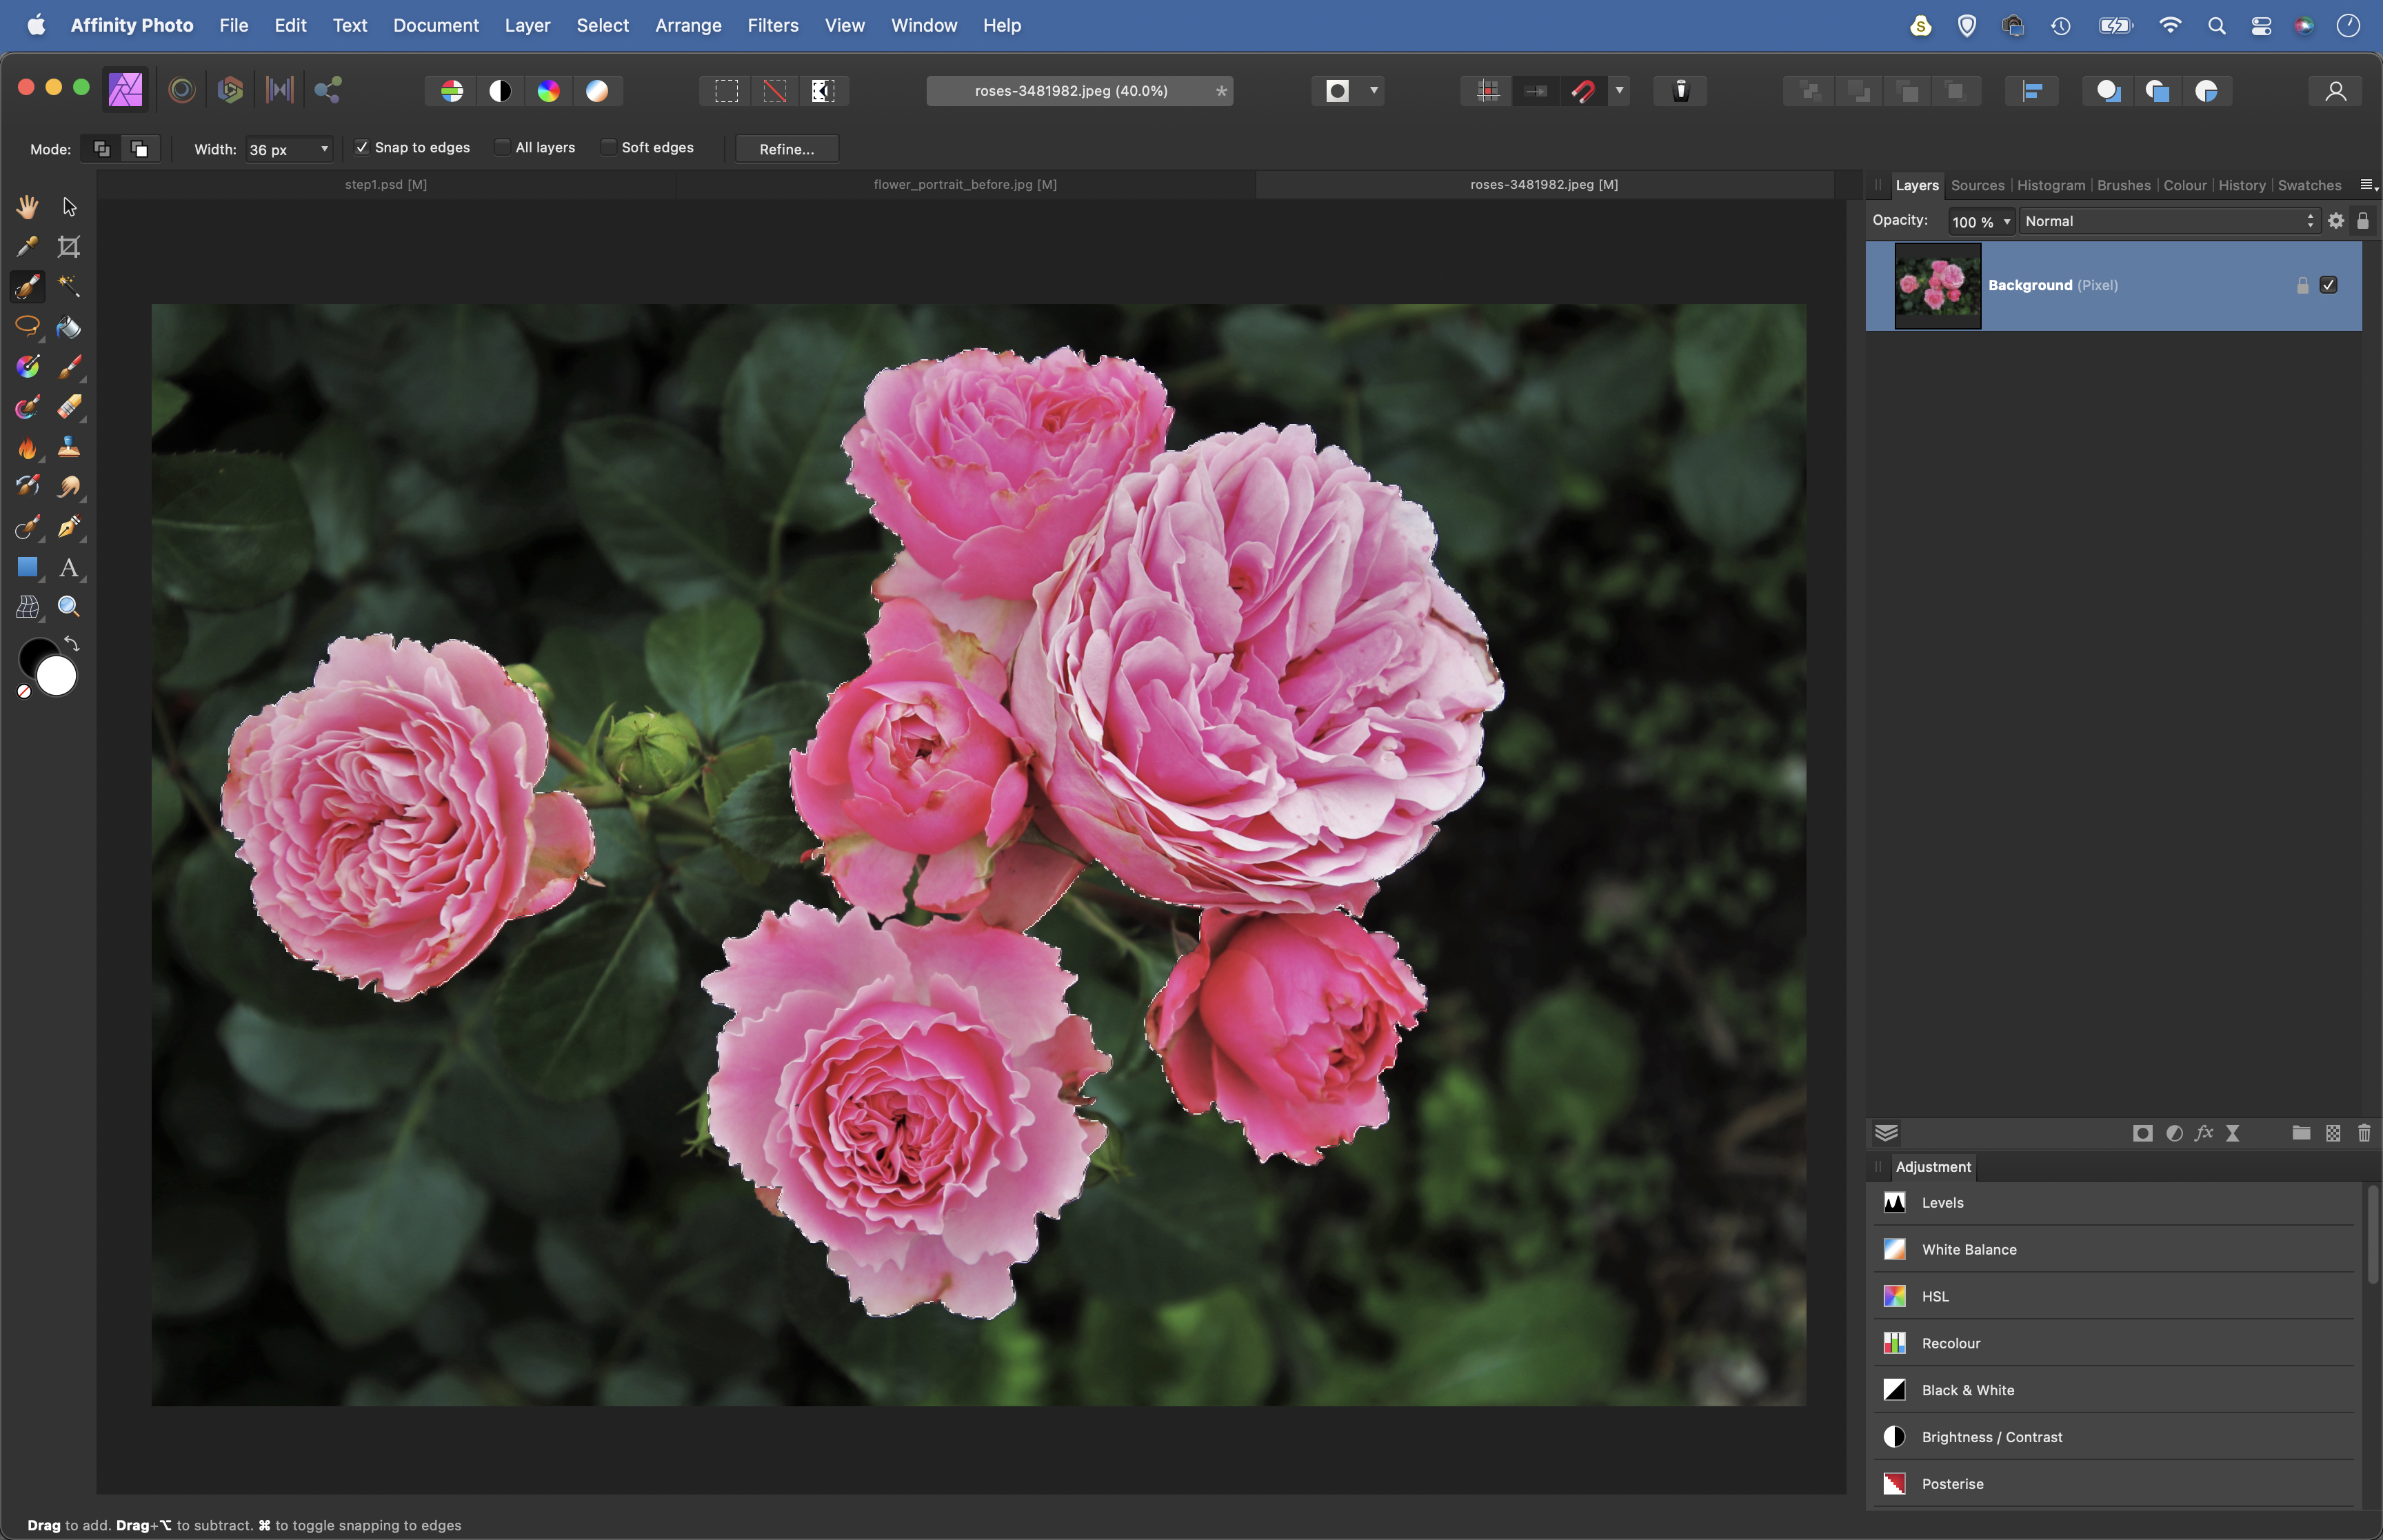
Open a flower image (we downloaded free images from Pixabay.com – search for 3481982, 1566792, 1510707) then grab the Selection Brush. Check Snap to Edges in the options, then paint over the flowers to select (hold Alt and paint to subtract if it goes wrong).
4. Position the flowers
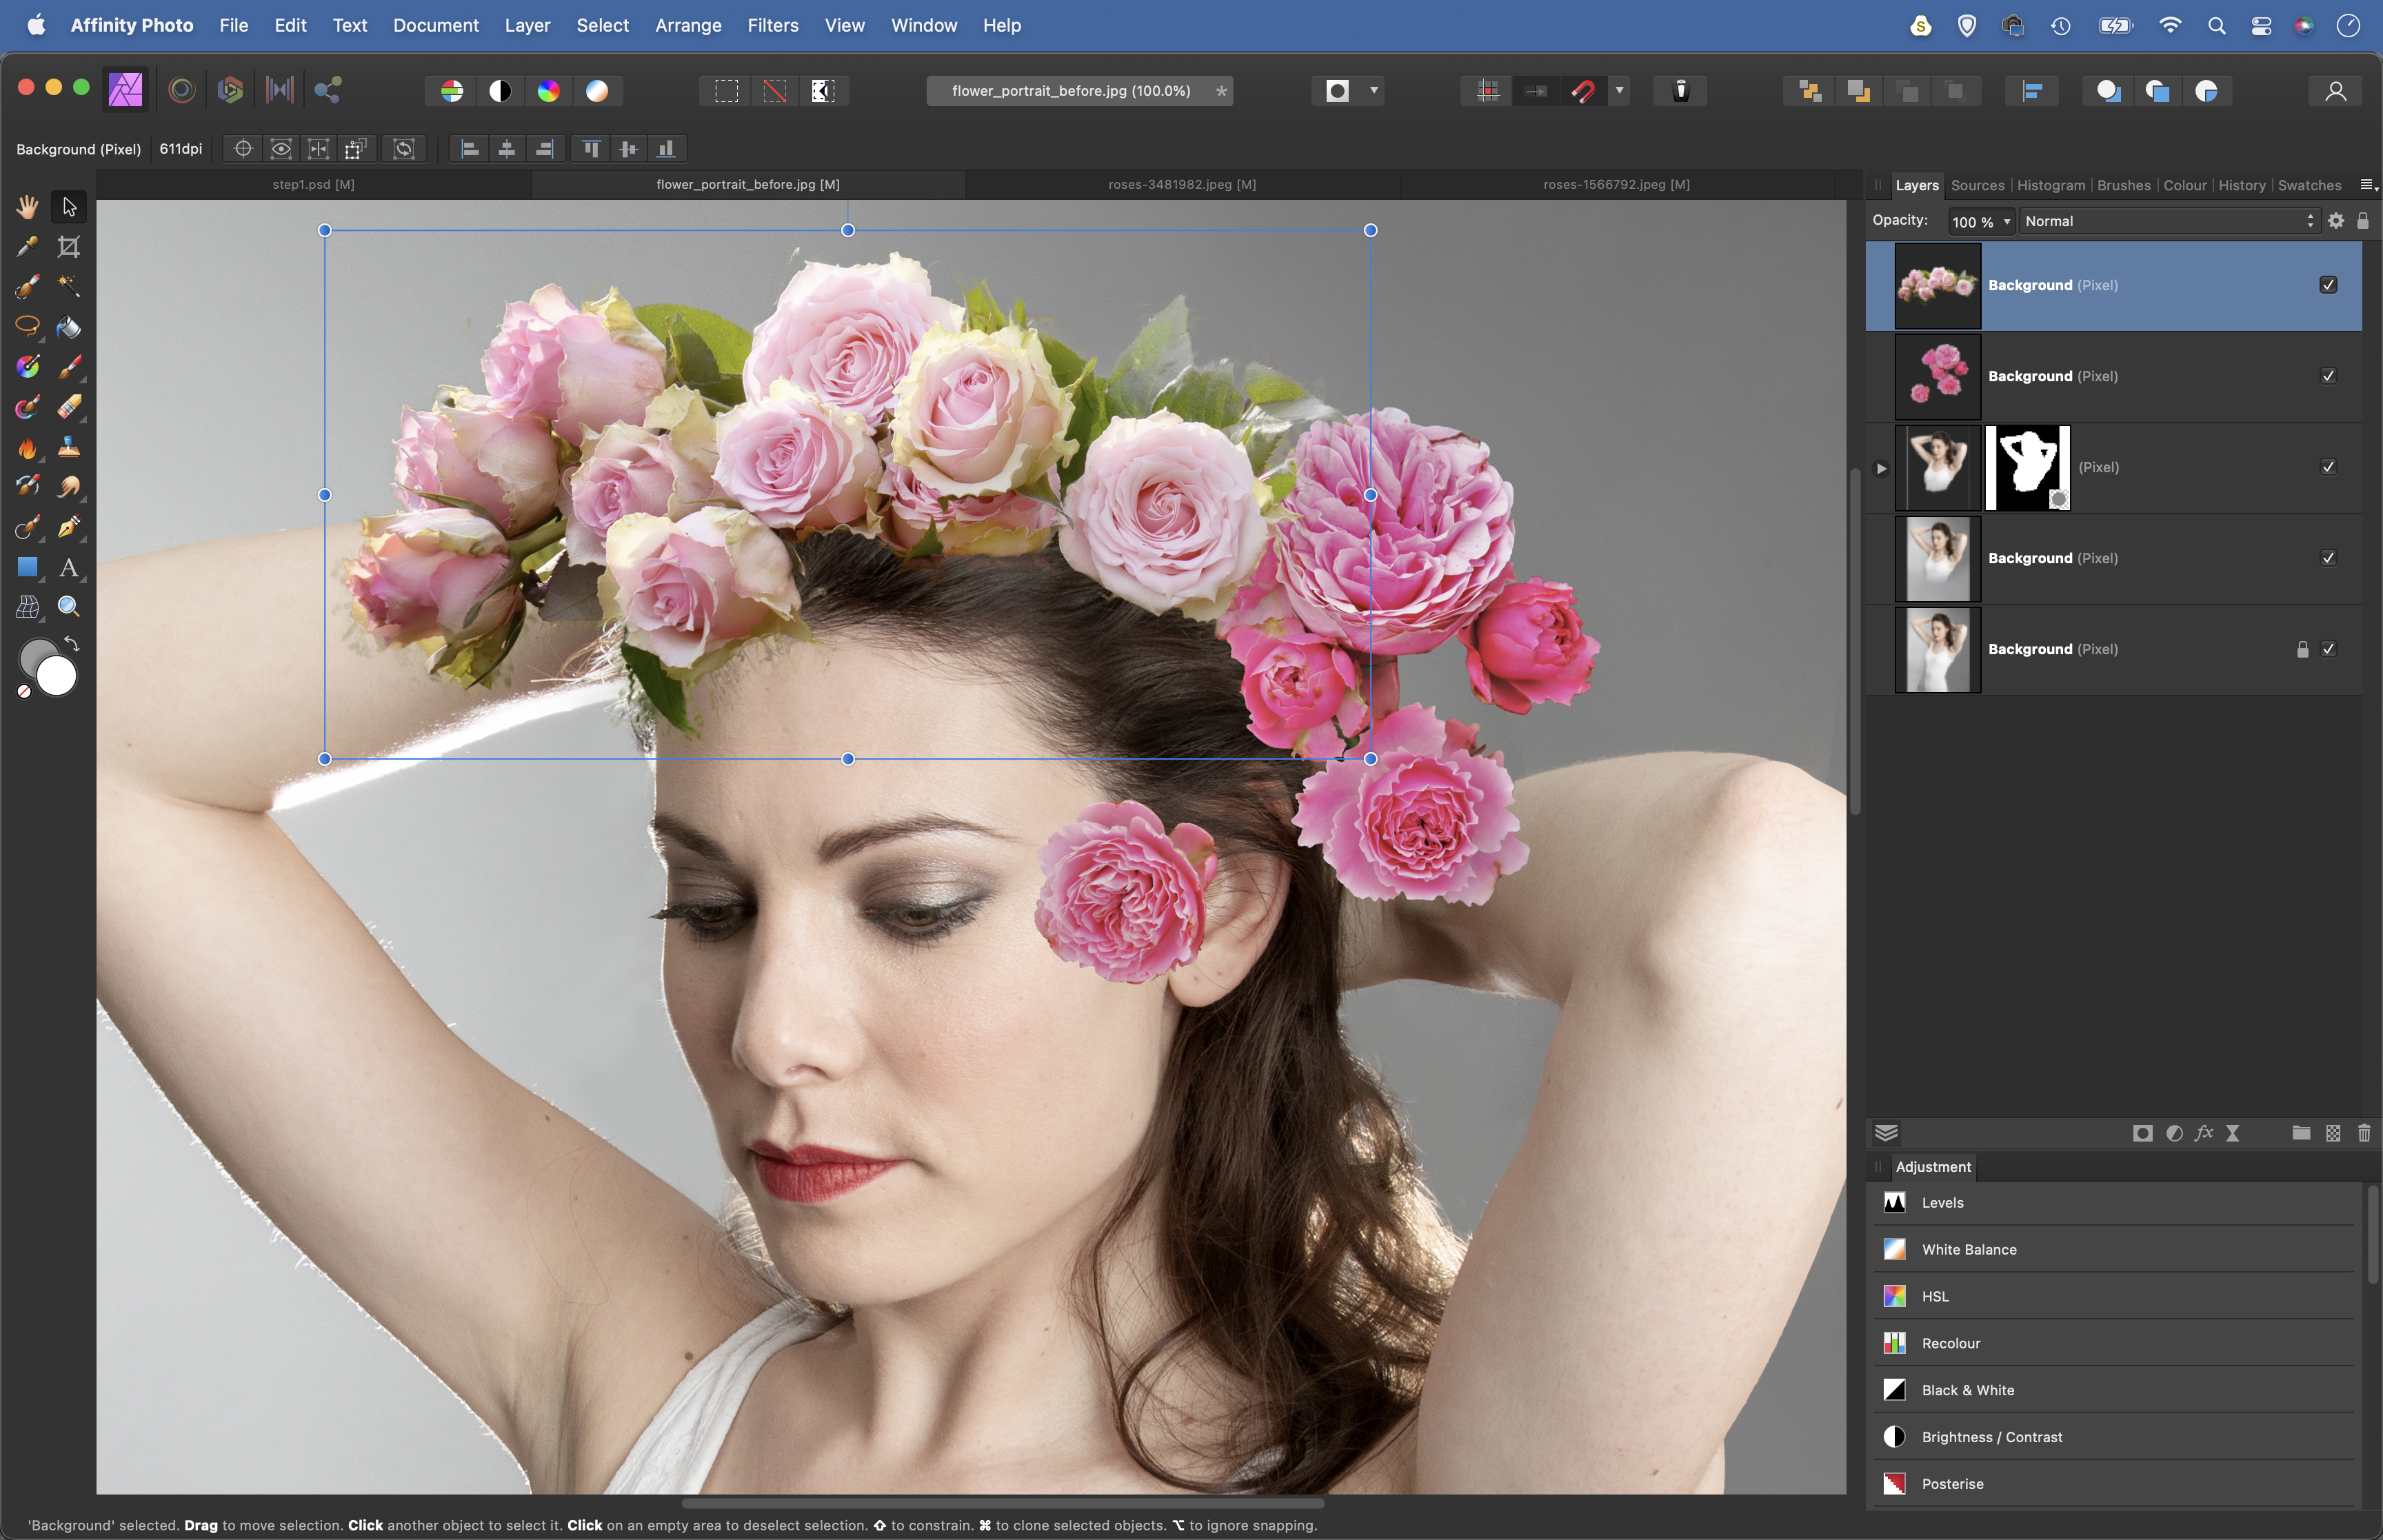
Hit Cmd/Ctrl+C to copy the flowers, then go to the portrait and Cmd/Ctrl+V to paste. Use the Move tool to resize, rotate and position flowers. To hide areas, add a mask and paint black. Next open another flower image and repeat to select and copy them in.
The best camera deals, reviews, product advice, and unmissable photography news, direct to your inbox!
5. Build it up
Continue copying in flower images to build up the effect. Drag some of them behind the cut out portrait layer so that they appear behind the figure, and place others in front. You can also copy and re-use the same flower layers in different places.
6. Change the colors
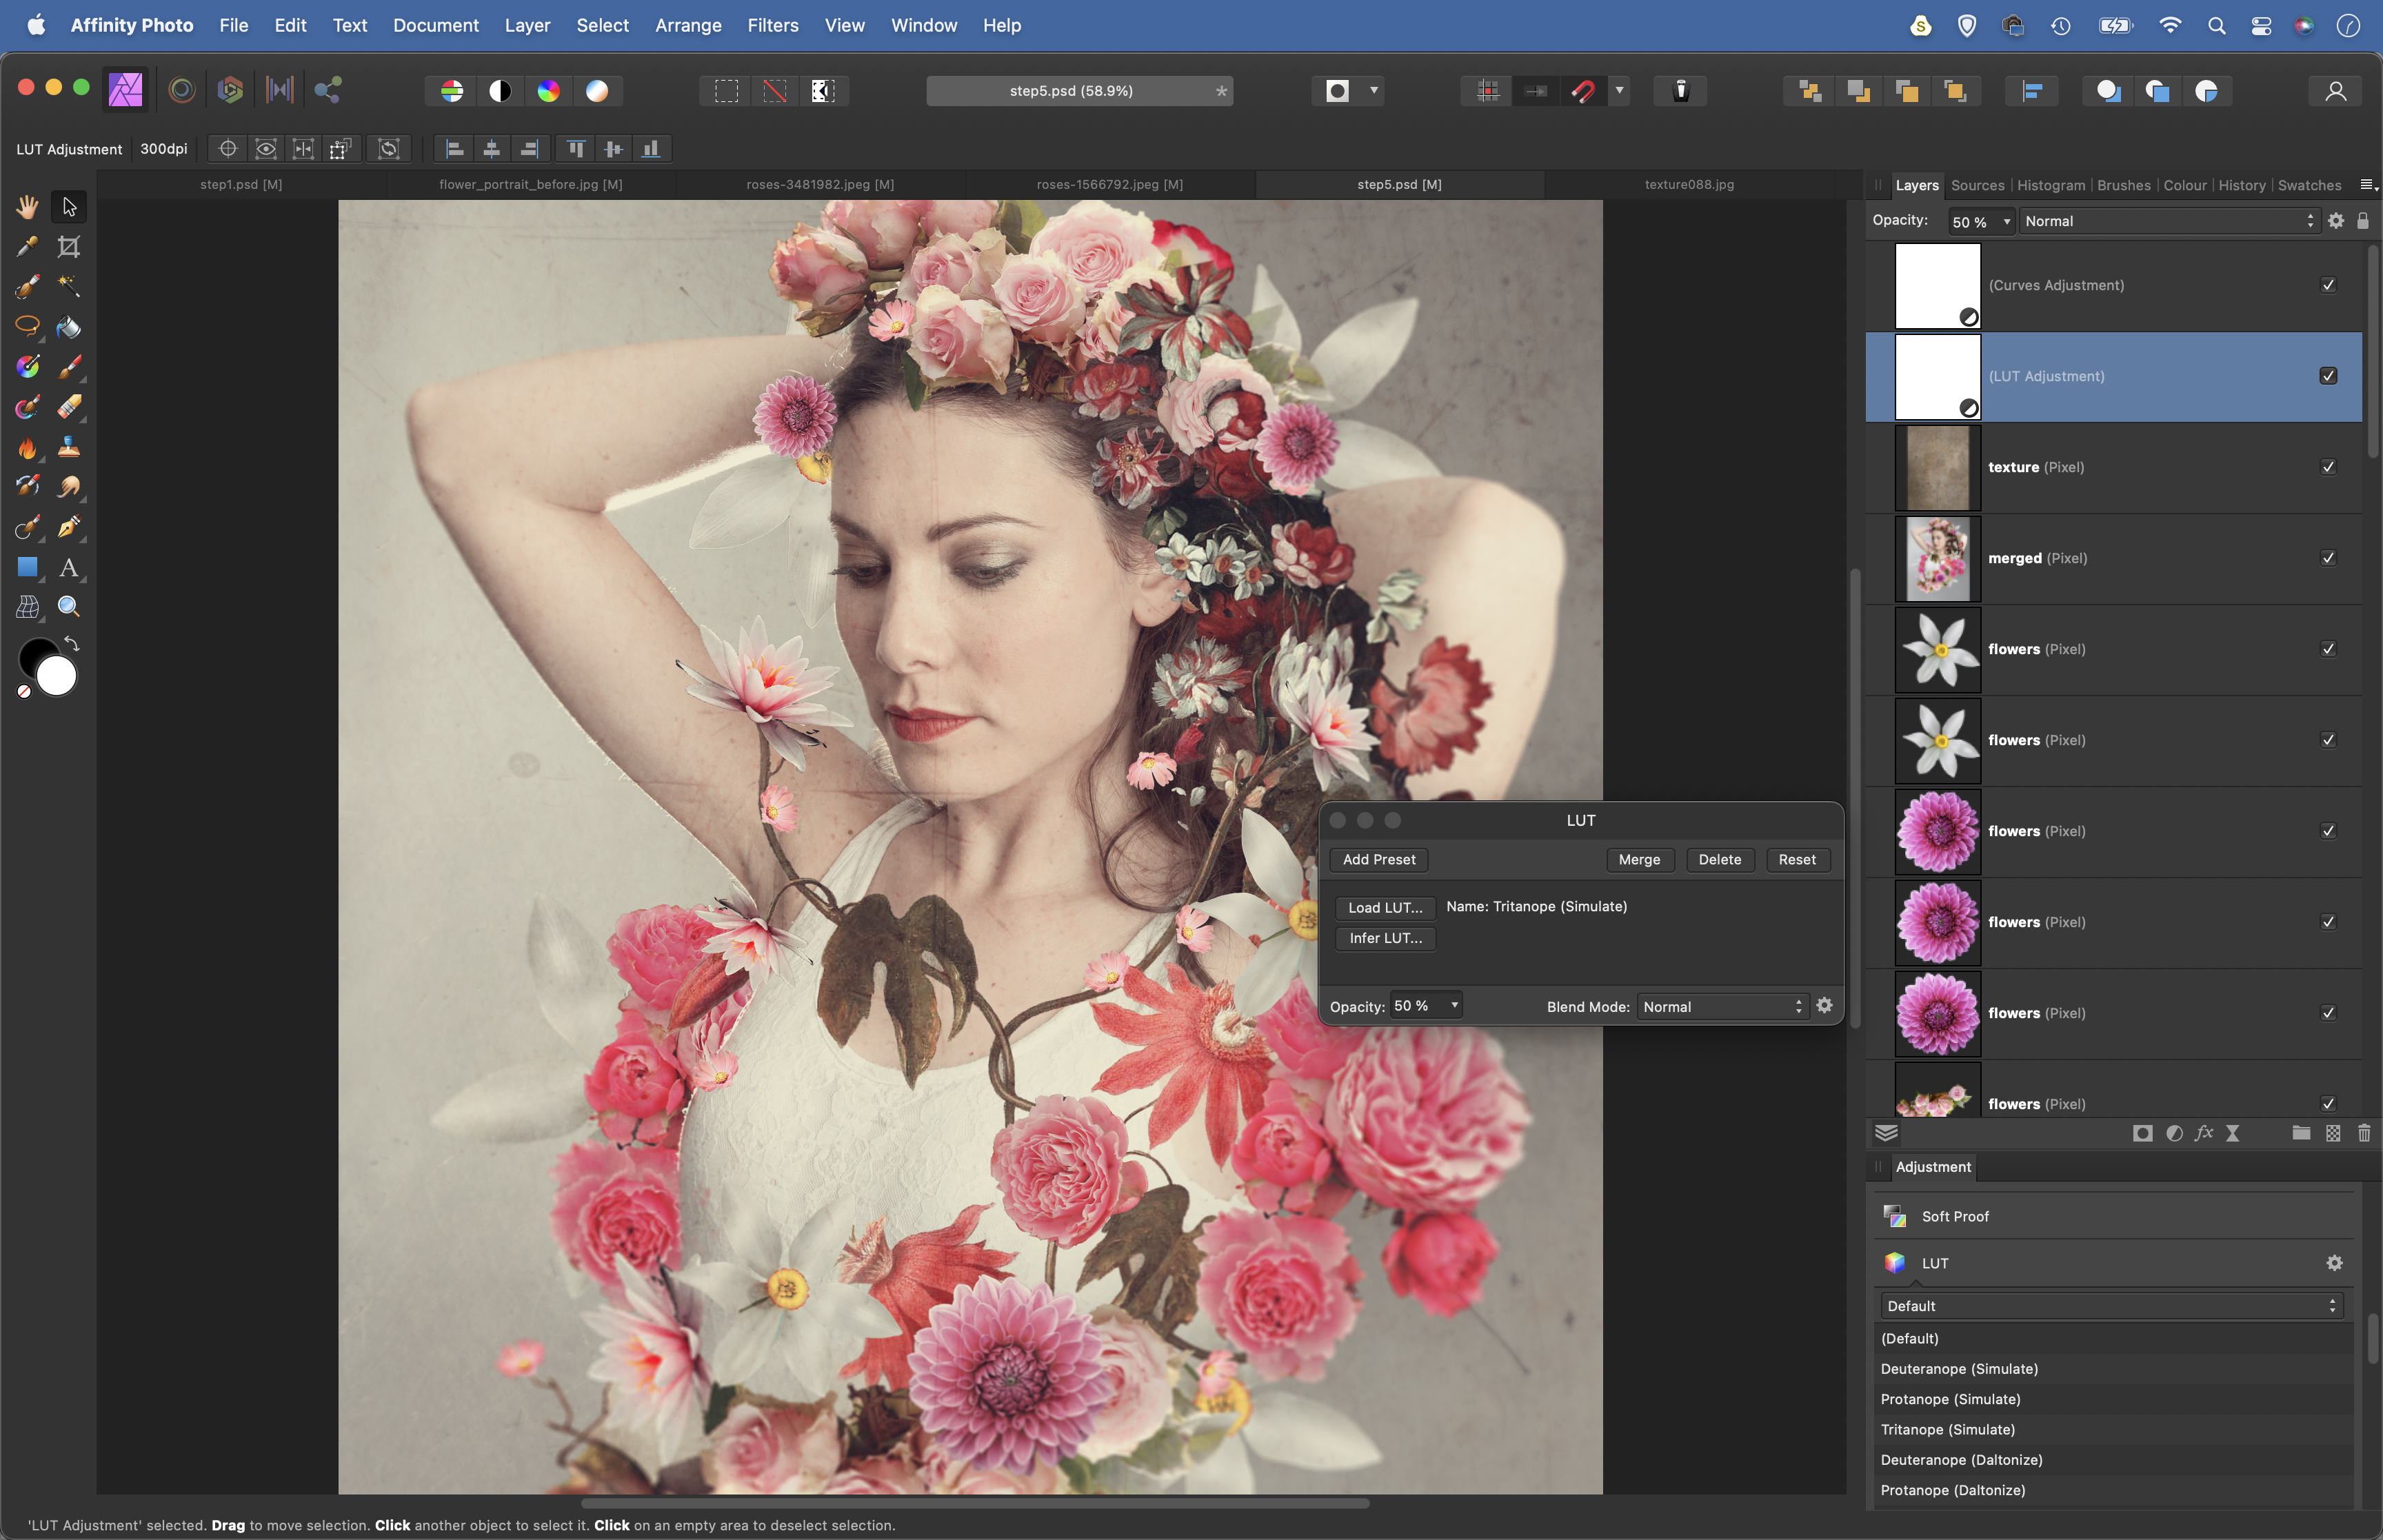
Merge a copy of all layers with Cmd/Ctrl+Shift+Alt+E, then go to Filter > Blur > Depth of Field Blur. Set Mode Elliptical and blur edges. Copy texture image and change Blend Mode to Overlay. Add LUT Adjustment, choose Tritanope effect and lower layer opacity.
• See more of our Affinity Photo tutorials
PhotoPlus: The Canon Magazine is the world's only monthly newsstand title that's 100% devoted to Canon, so you can be sure the magazine is completely relevant to your system.
If you enjoyed this tutorial but want a bit more power from your laptop, why not look at the best photo-editing laptops? If you're really keen to improve your skills further then online photography courses could be the way to go.
The lead technique writer on Digital Camera Magazine, PhotoPlus: The Canon Magazine and N-Photo: The Nikon Magazine, James is a fantastic general practice photographer with an enviable array of skills across every genre of photography.
Whether it's flash photography techniques like stroboscopic portraits, astrophotography projects like photographing the Northern Lights, or turning sound into art by making paint dance on a set of speakers, James' tutorials and projects are as creative as they are enjoyable.
He's also a wizard at the dark arts of Photoshop, Lightroom and Affinity Photo, and is capable of some genuine black magic in the digital darkroom, making him one of the leading authorities on photo editing software and techniques.
