Watch video: Create a fantastic time-stacked landscape photograph
The beautiful light at sunrise and sunset makes it one of the most photogenic periods to shoot in. A single photograph can be impressive, but I’m going to show you how to take a whole series of images that capture the whole range of tones. From warm gold to brilliant pinks and blues in the blue hour, we’ll show you how to combine them in Photoshop to create an epic time-stack image.
• Read more: Best camera for landscape photography
We’re essentially going to shoot a time-lapse sequence, firing the camera at regular intervals. Then we’ll merge them into a single image with Photoshop. This process is called a time-stack, as we’re going to stack all our different exposures together.
You could also create a time-lapse movie with the images when you’re done, too, or pick out the image with the perfect lighting to work on a single image in a more traditional manner.
Shooting on a day when it’s partially cloudy is essential, as the clouds pick up the fantastic range of colors in the sky as the sun rises or sets.
You’ll need to use the interval shooting mode on your camera, or an intervalometer on a remote shutter release, or manually fire the shutter at regular intervals, so you get constant spacing between the clouds in your landscape.
The best camera deals, reviews, product advice, and unmissable photography news, direct to your inbox!
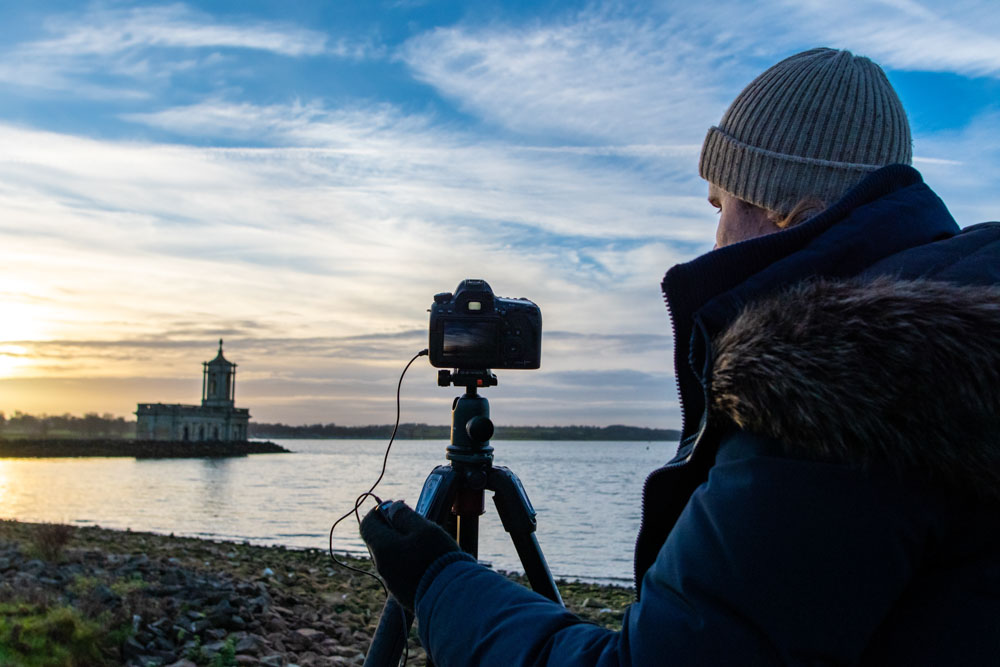
Be sure to set up and get shooting well before sunrise or sunset, so you can capture the whole range of tones as they change from gold to blue or vice versa. Here’s how to do it…
01 Set up on a tripod and compose your shot
Frame and compose your shot on a tripod and lock off the composition, then focus on your focal point and switch to manual focus to lock the focus off too.
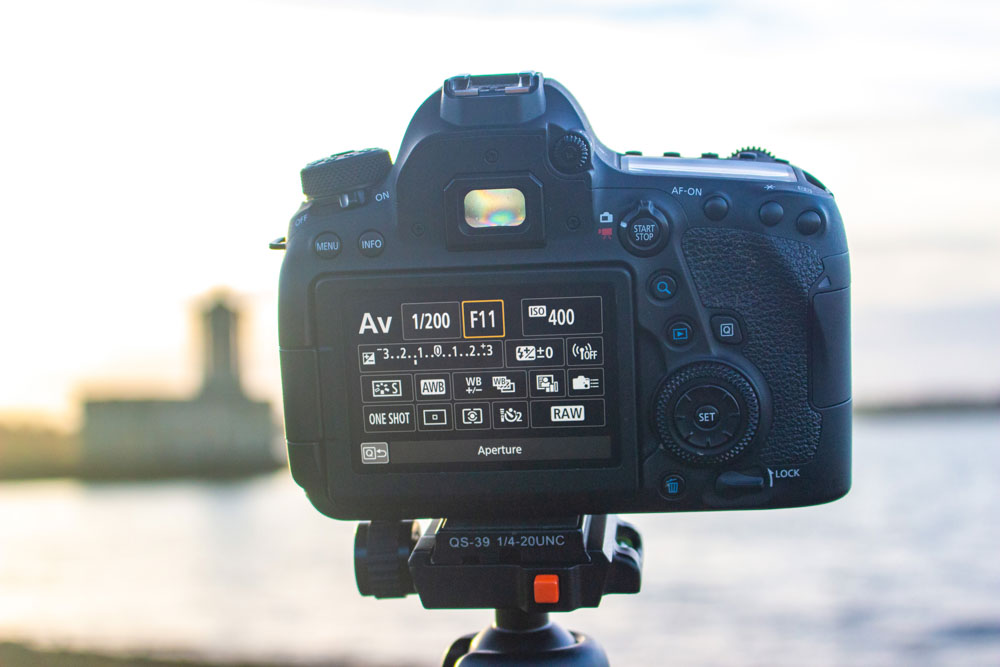
Go into Aperture Priority (Av) mode and choose an aperture of f/11 for decent depth of field and sharpness, as well as an ISO of 400, as you don’t want your shutter speeds to become too long when the light levels dip. Set the Metering mode to Evaluative, so light levels are assessed across the whole frame to work out a decent exposure. Set the image quality to Raw, so you have more data to work with when editing your images back home.
02 Switch on your interval timer
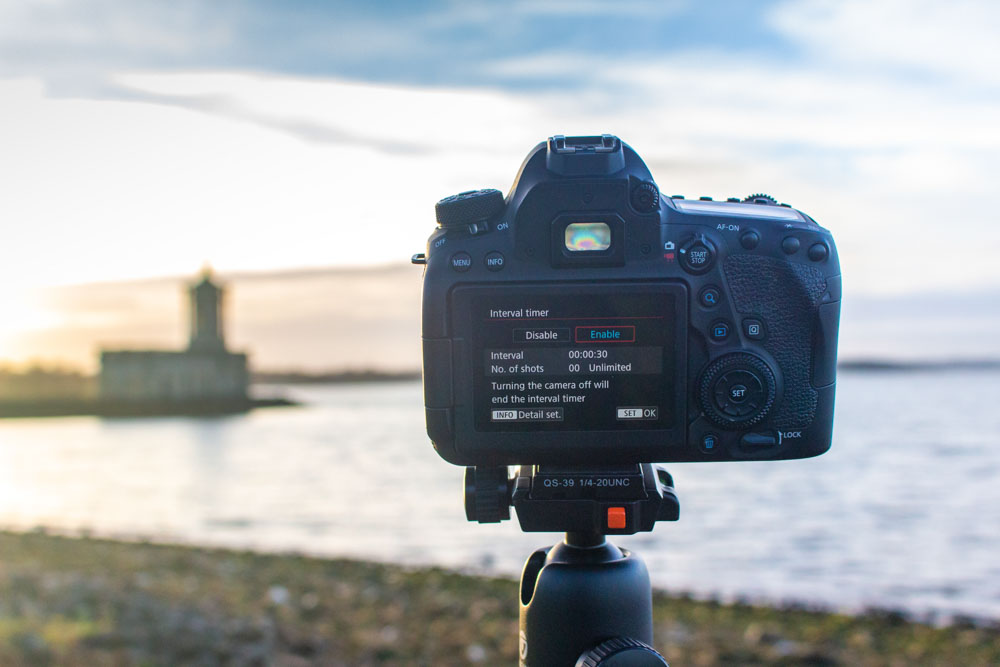
If your camera has it, go into the menu, find the Interval Timer and choose Enable, which will let you set up your camera to automatically take a shot after a set amount of time.
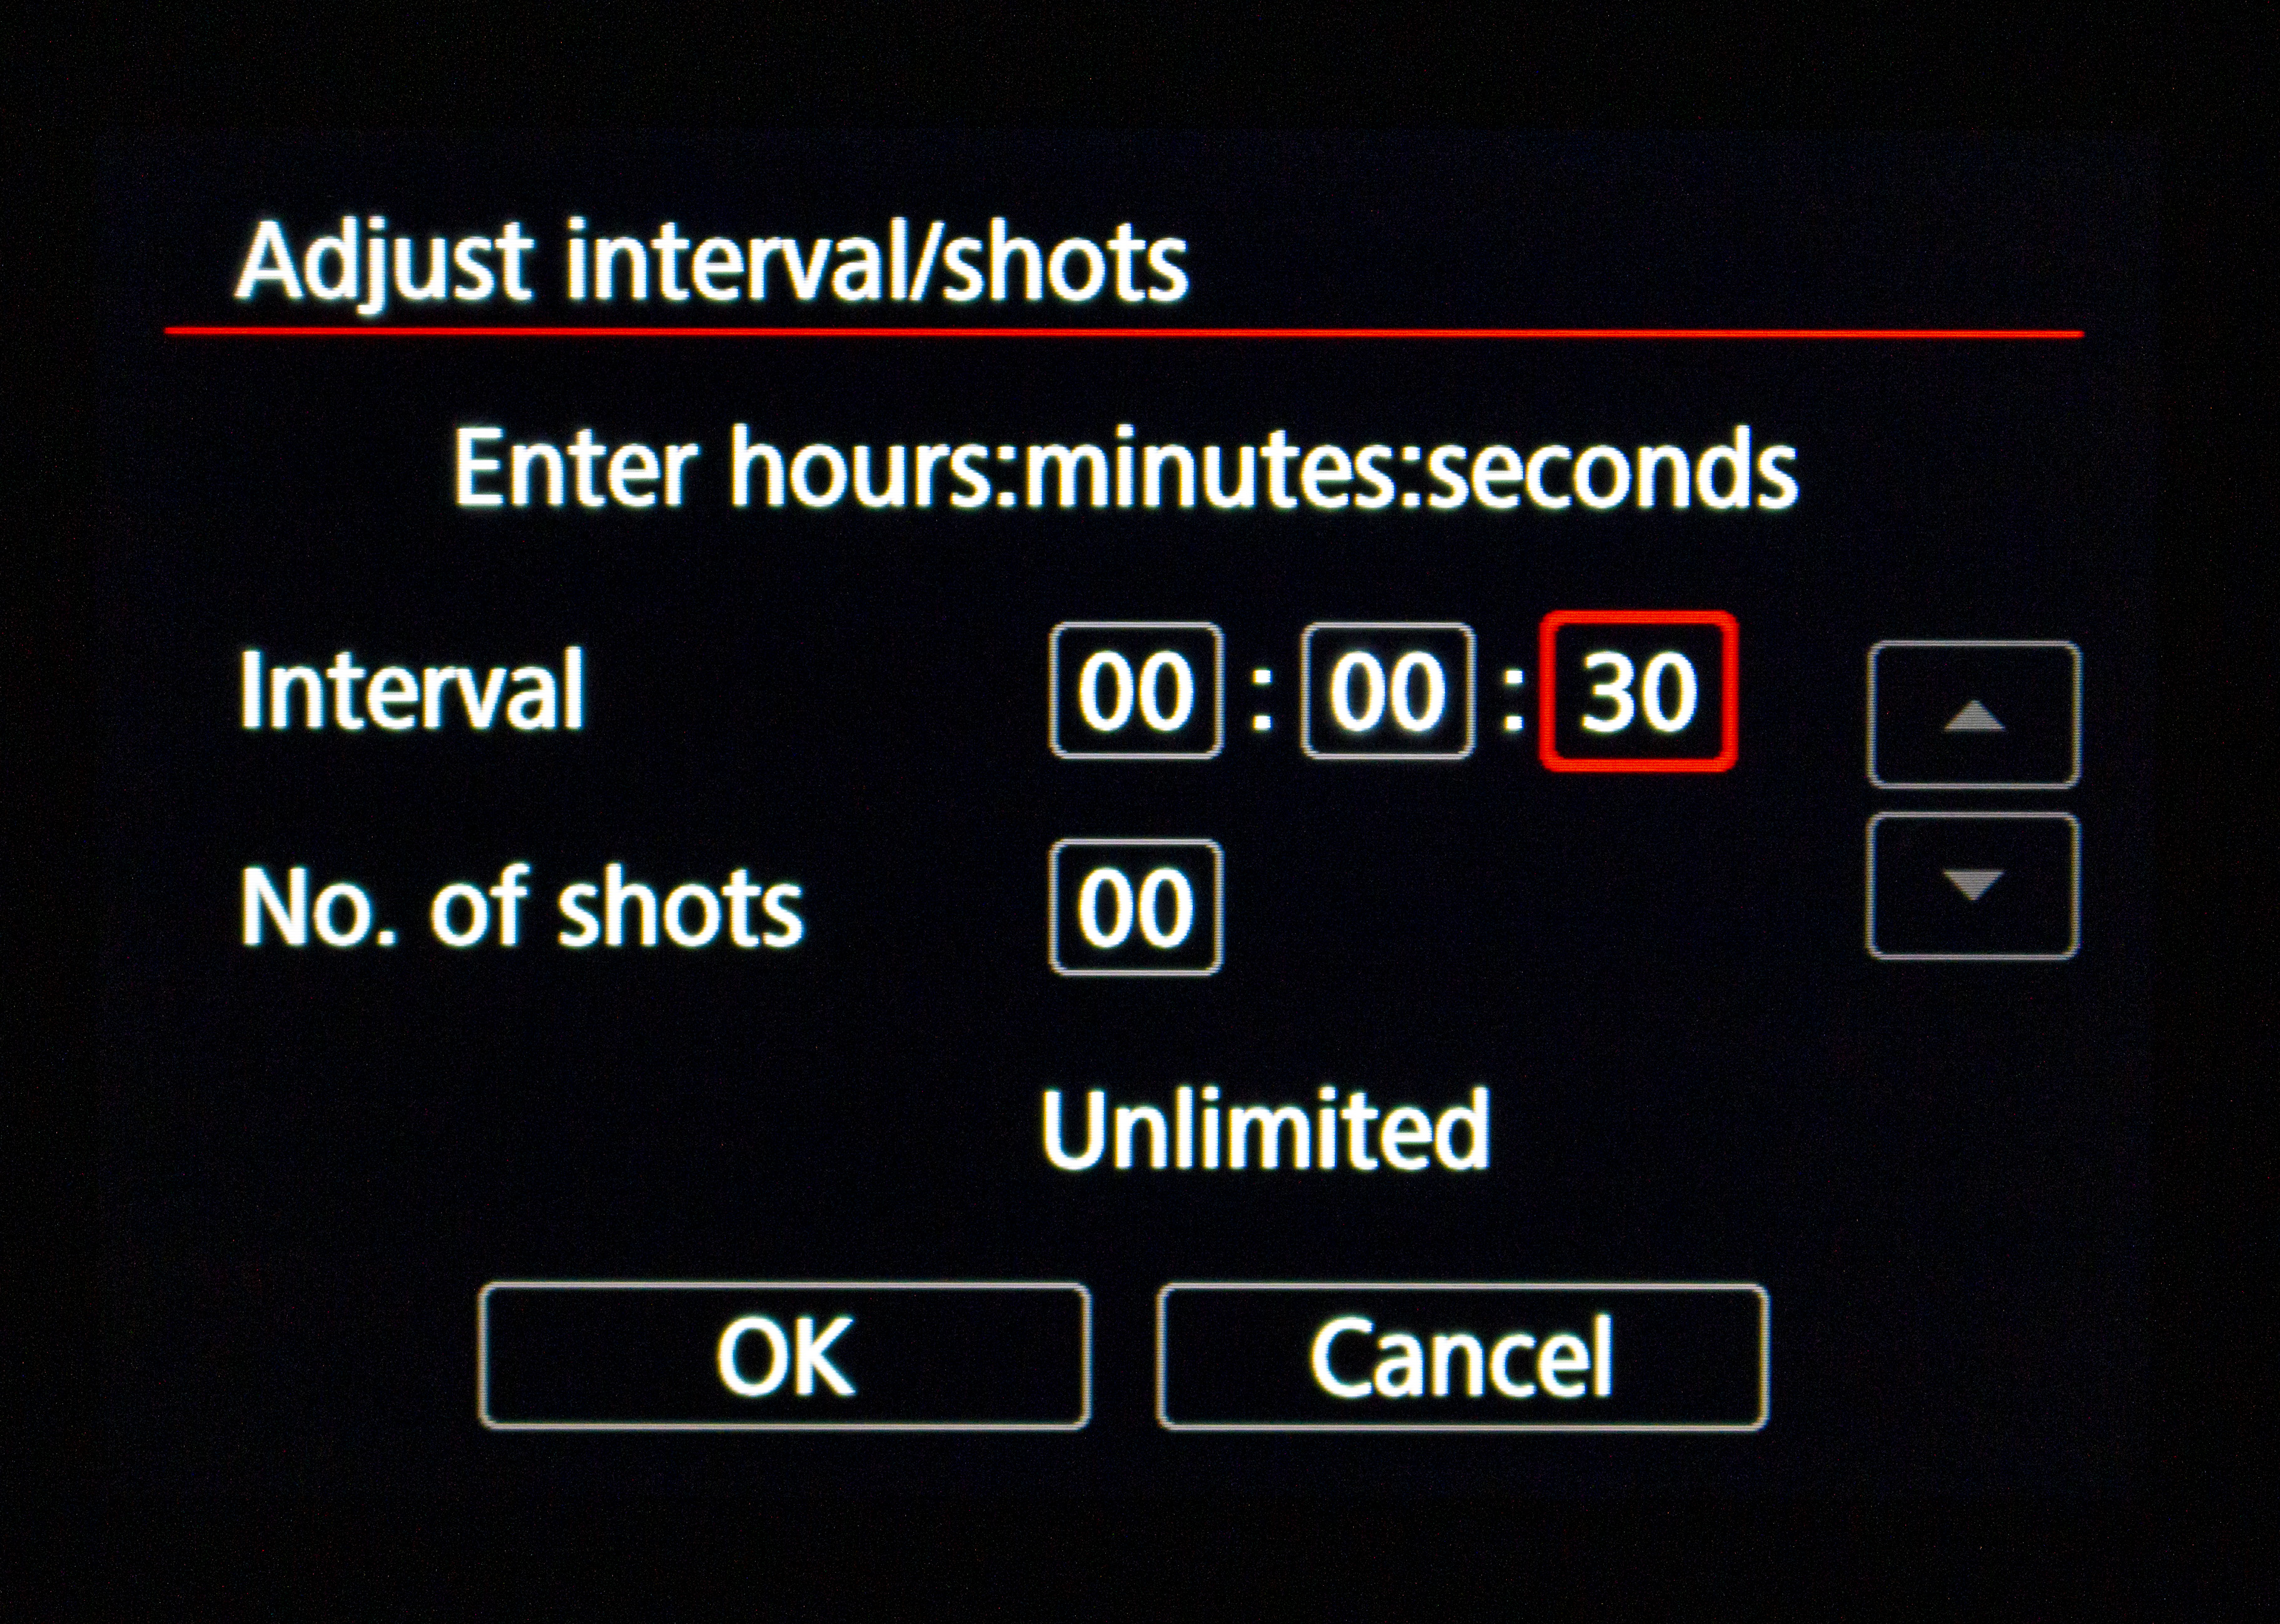
We pressed the Info button to tweak the Interval amount and number of shots. We settled on an interval of every 30 secs and an unlimited number of pictures as we can simply turn the camera off when we're finished to stop the interval shooting.
Now, press the shutter and shoot for a decent amount of time before sunrise or sunset and let it continue for up to an hour after too, making sure you capture a full range of tones.
03 Edit your Raw files
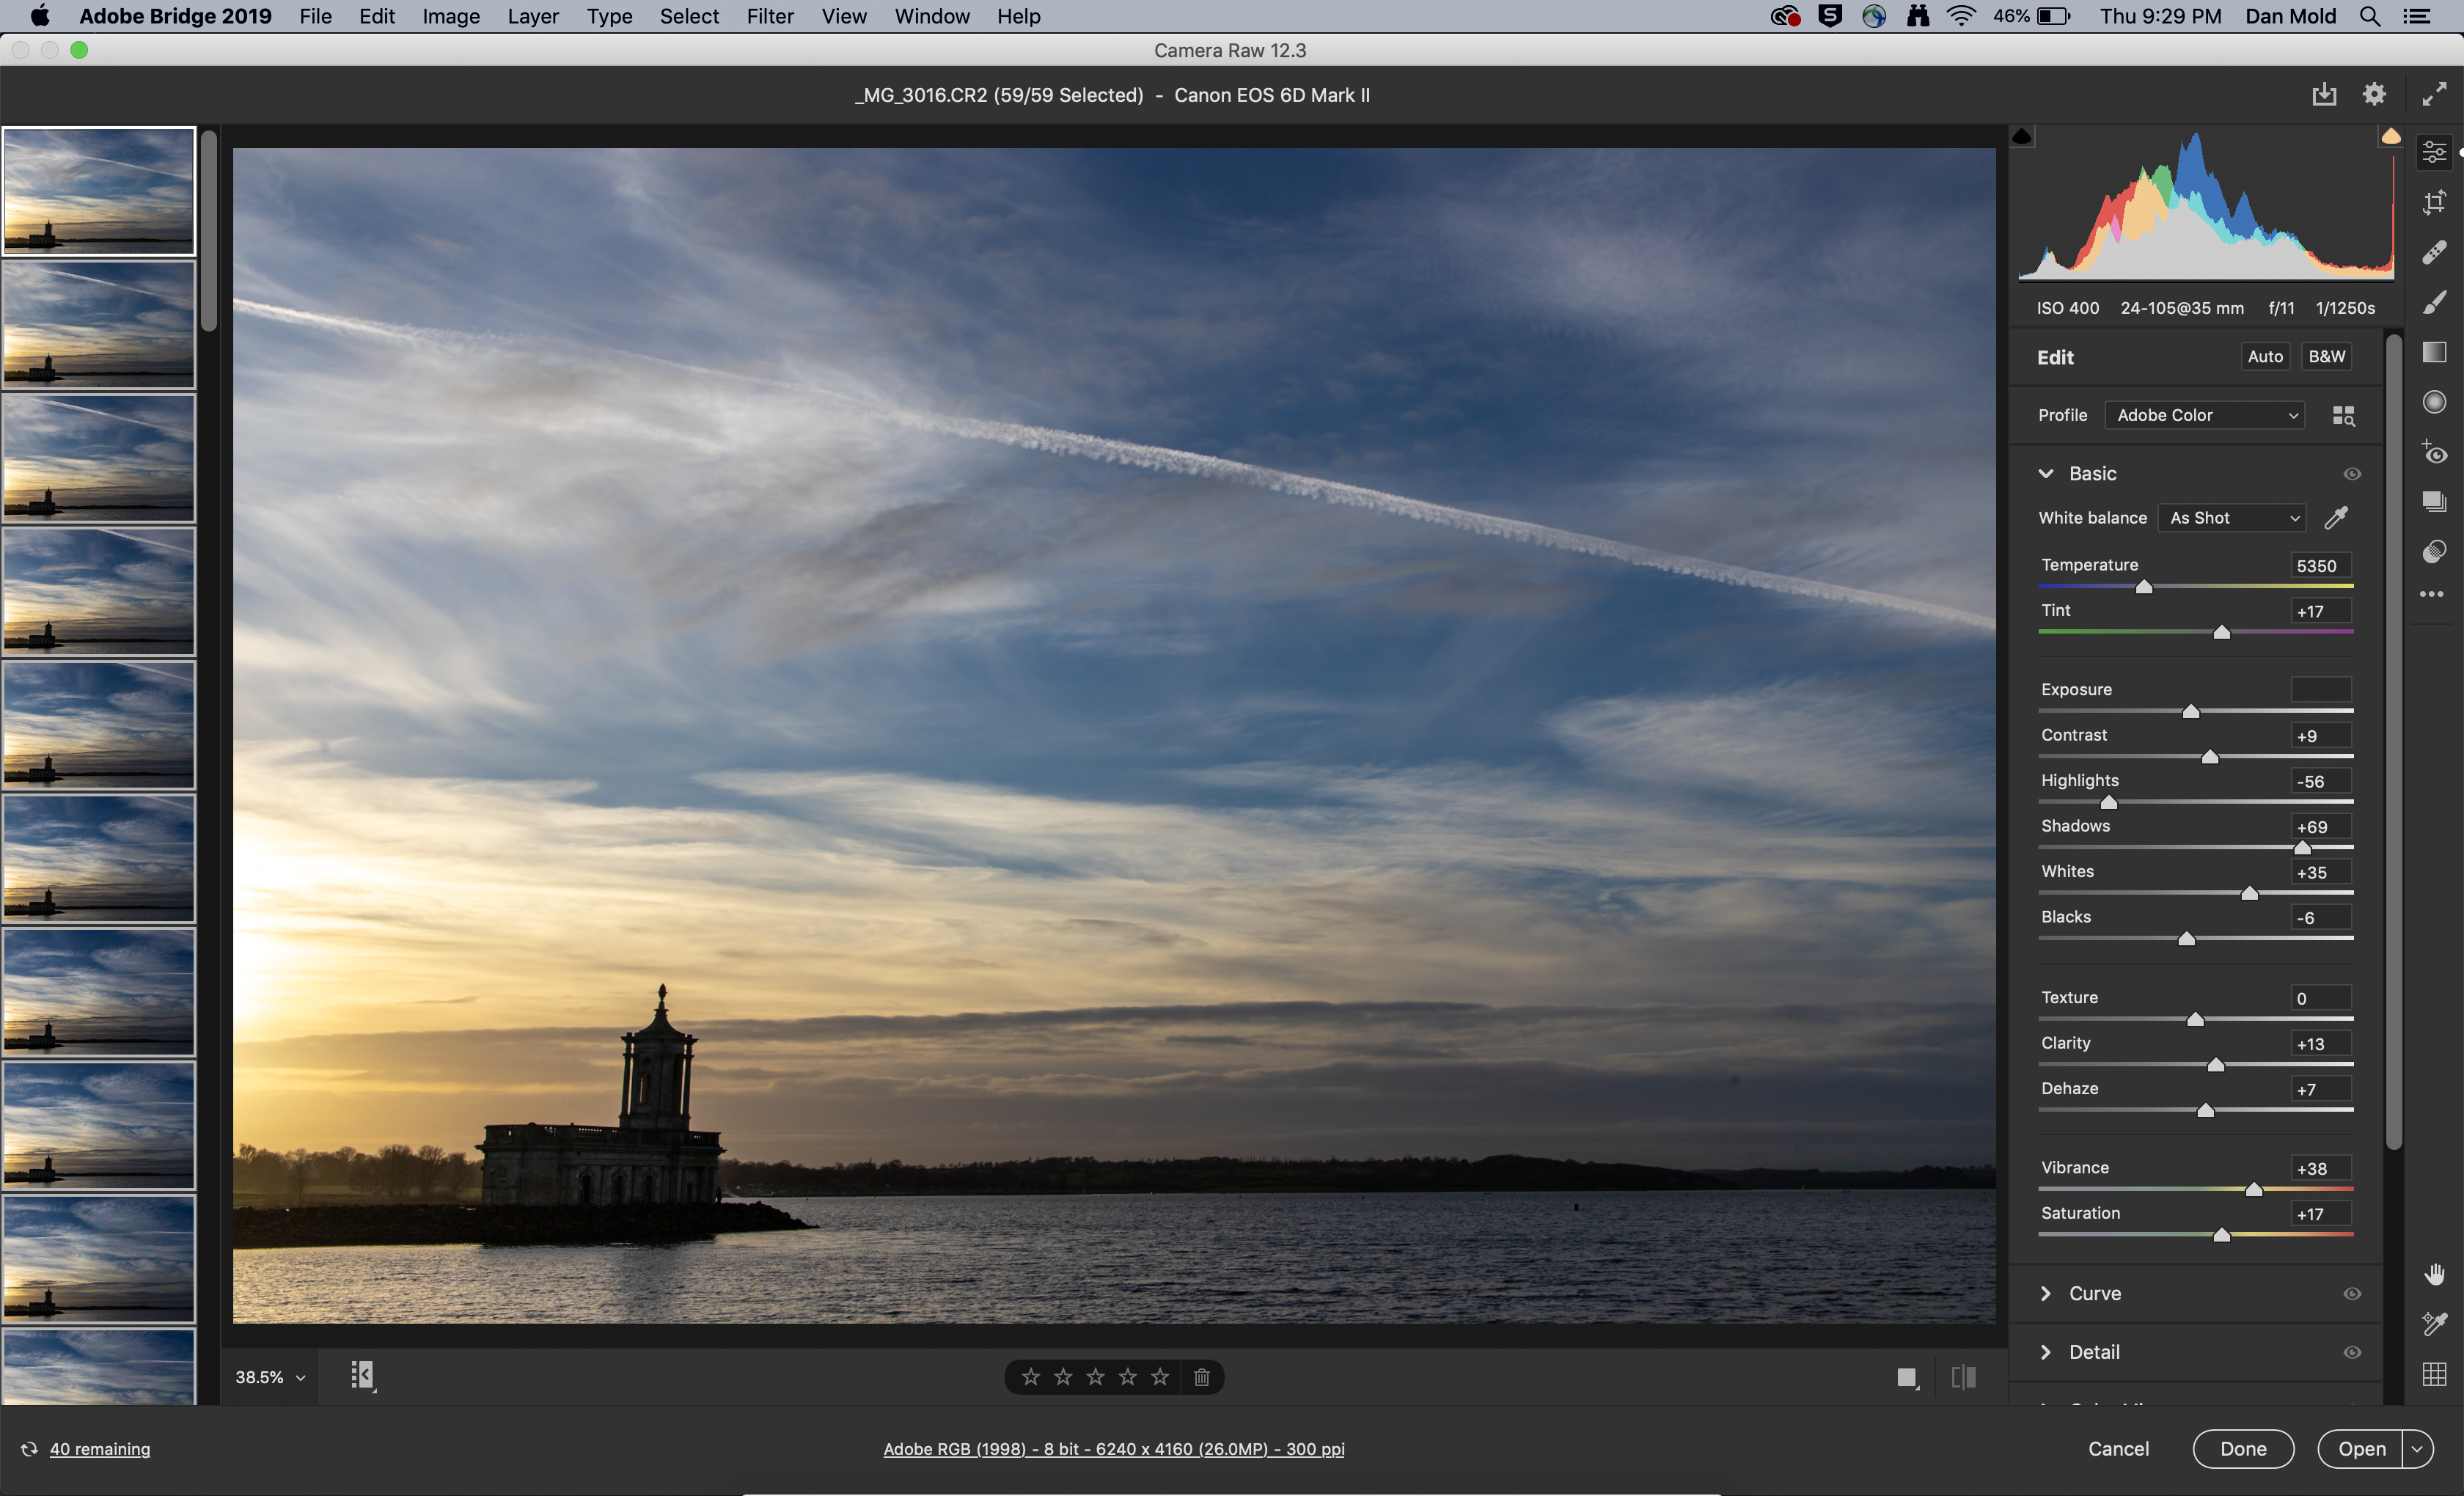
You now should have lots of different exposures all evenly spaced out and any editing you do needs to be consist across all of them. Select them all in Adobe Bridge, right-click on them and choose open in Adobe Camera Raw.
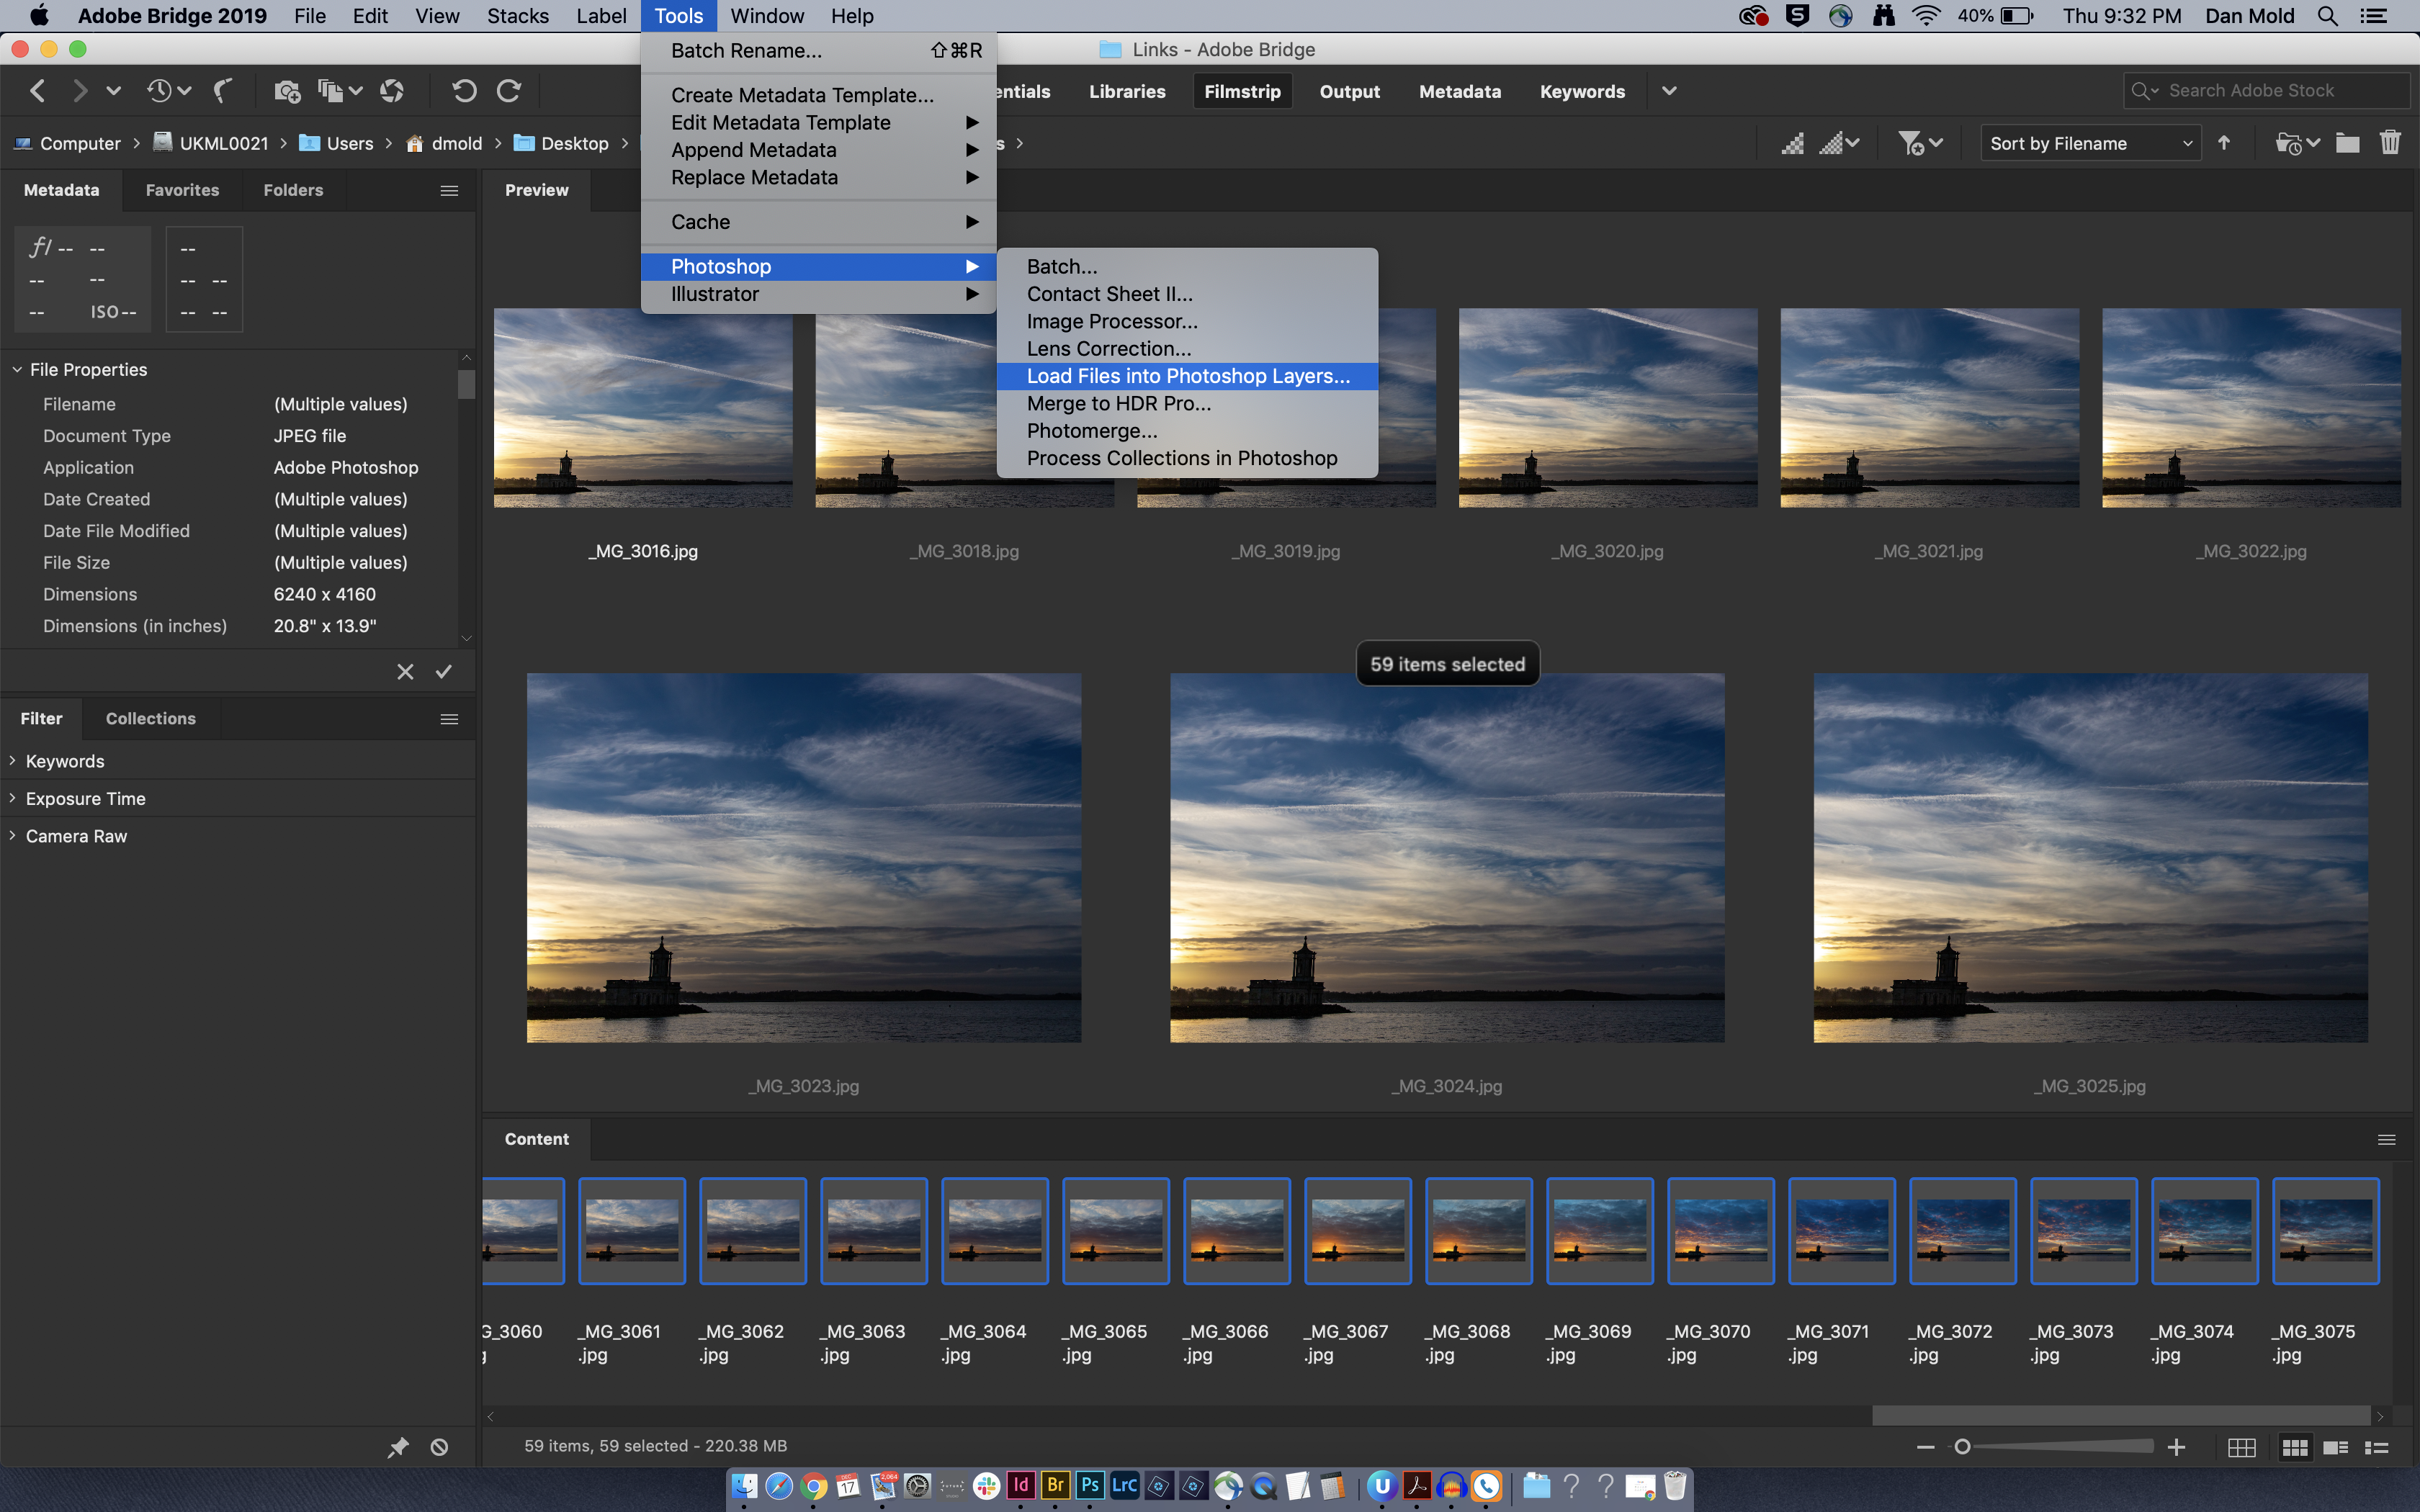
Now hit Ctrl/Cmd + A to select them all and make all of your adjustments to the exposure, colors and sharpness etc. When your Raws are ready, right-click on the image thumbnails and choose Save Image. Then set the file Format to JPEG and set the Destination to a New Location, create a new folder on your desktop for them and hit Done. Back in Bridge select all of your exported JPEGs and go to Tools > Photoshop > Load files into Photoshop Layers.
04 Stack up your shots in Photoshop
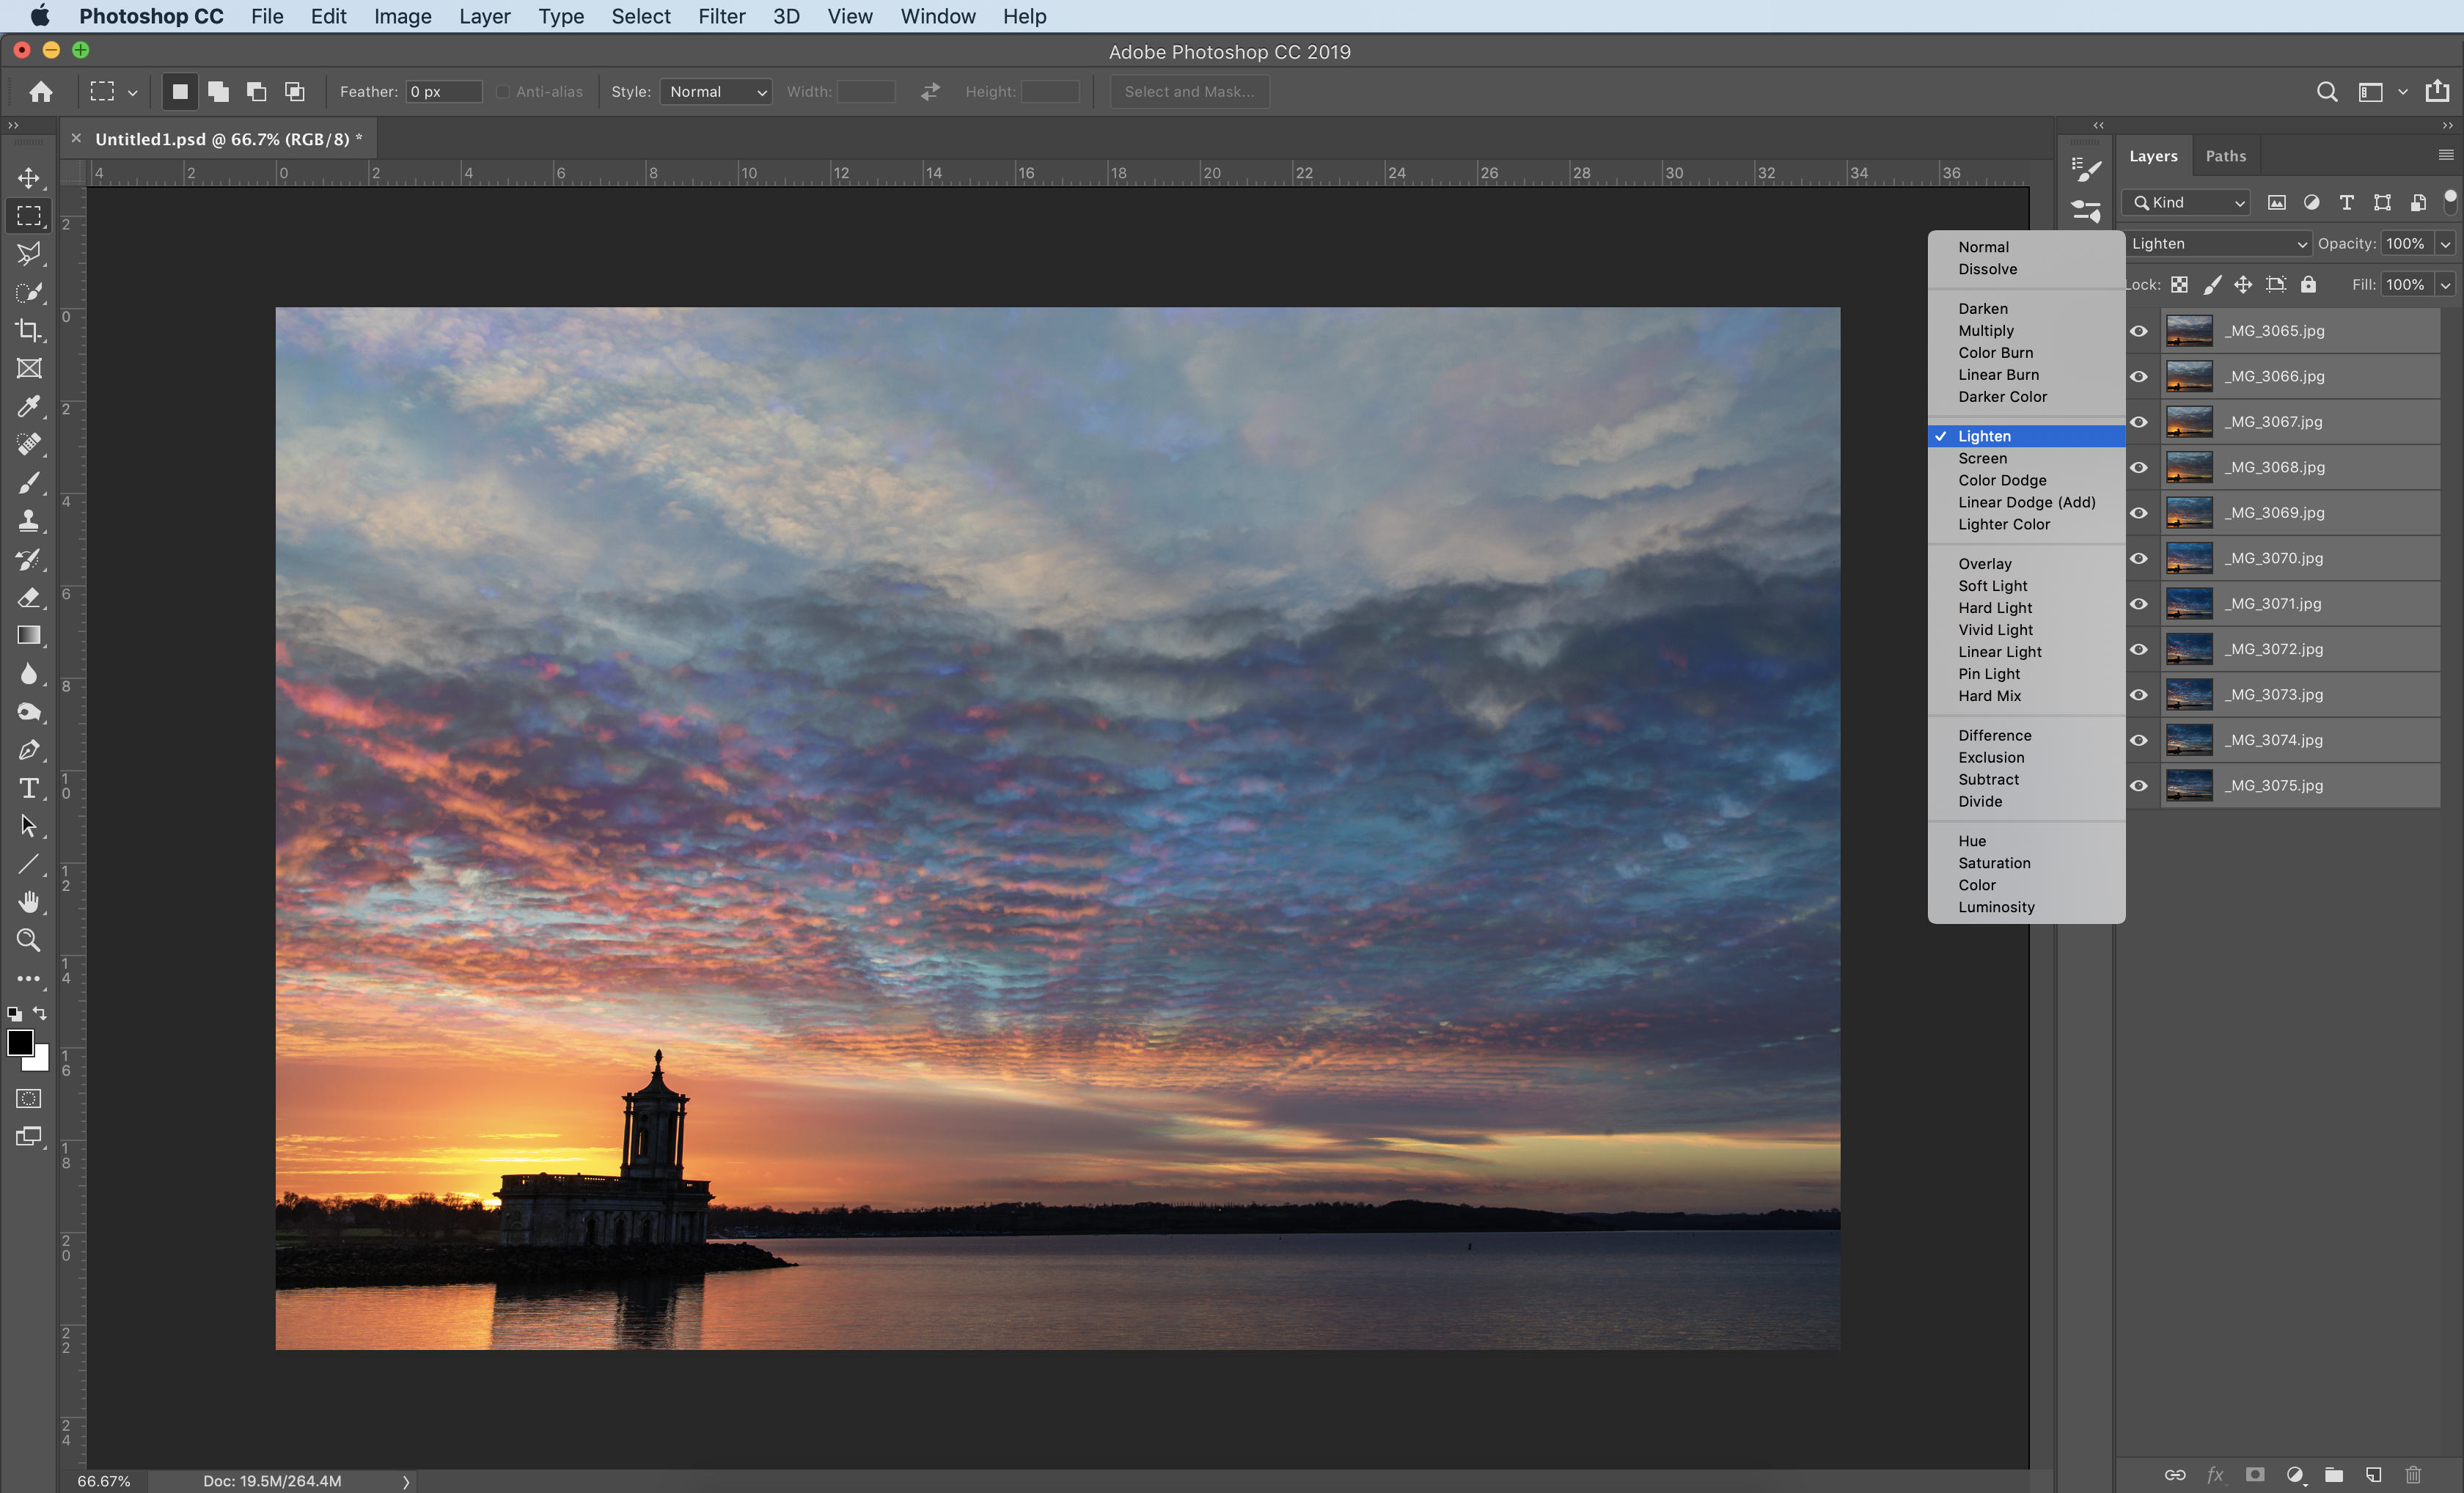
In Photoshop you need to be able to see the Layers panel to see your exposures which are now neatly stacked into individual layers. Go to Window > Layers to activate your layers panel if you can’t see it. In the Layers panel click on the very top layer, then hold Shift, scroll down to the very bottom layer and click it to select all of your layers. Now click on the Blending Mode (a drop-down box that by default will be set to Normal) and change this to Lighten.
You’ll now see the brilliant ‘stack’ effect come to life. You can fine-tune it by turning individual layers off using the eye icon next to each layer and using Curves to tweak the brightness. Go to Layer > Flatten Image when you’re done to merge them down into a more manageable single layer.
PhotoPlus: The Canon Magazine is the world's only monthly newsstand title that's 100% devoted to Canon, so you can be sure the magazine is completely relevant to your system.
Read more:
The best tripods for photographers
The best pan and tilt heads for tripods
The best travel tripods

In addition to being a freelance photographer and filmmaker, Dan is a bona fide expert on all things Canon and Adobe. Not only is he an Adobe-certified Photoshop guru, he's spent over 10 years writing for specialist magazines including stints as the Deputy Editor for PhotoPlus: The Canon Magazine, Technical Editor for Practical Photography and Photoshop Editor on Digital Photo.
