Craft a fantastical composite and learn key skills along the way in Photoshop CC
James Paterson shows you how to craft a fantastical composite and get to grips with key compositing skills in Photoshop CC
Watch video: Make magical composites in Photoshop
Composites are one of the things that Photoshop does better than any other image editor. With a few simple selection and layer skills you can combine a wide array of photos into one magical scene like this.
We’ve used several free downloadable images from pixabay.com to create our fantasy composite. If you want to follow the technique in full then download the start images here.
You can work with the images we used (see the box), or learn the techniques then apply them to your own selection of images. Perhaps you could start by shooting your own ‘base’ image then overlaying objects taken from downloaded images.
When searching for images to combine, keep in mind that some will fit together better than others. There are two important factors to look at. The first is lighting. If one image is lit with strong sunlight coming from the right side, while the other is shot on a cloudy day then there’s a mismatch in the lighting that may be tricky to overcome. The second factor is the backdrop behind the object, person or animal that you intend to cut out. If the backdrop is plain and uncluttered then the cut will be easier, but keep in mind the colour of the backdrop too. If it’s bright then it will be hard to drop the object onto a dark image, and vice-versa. So look for objects with a similar background colour to the base image in your composite.
01 Select the roof
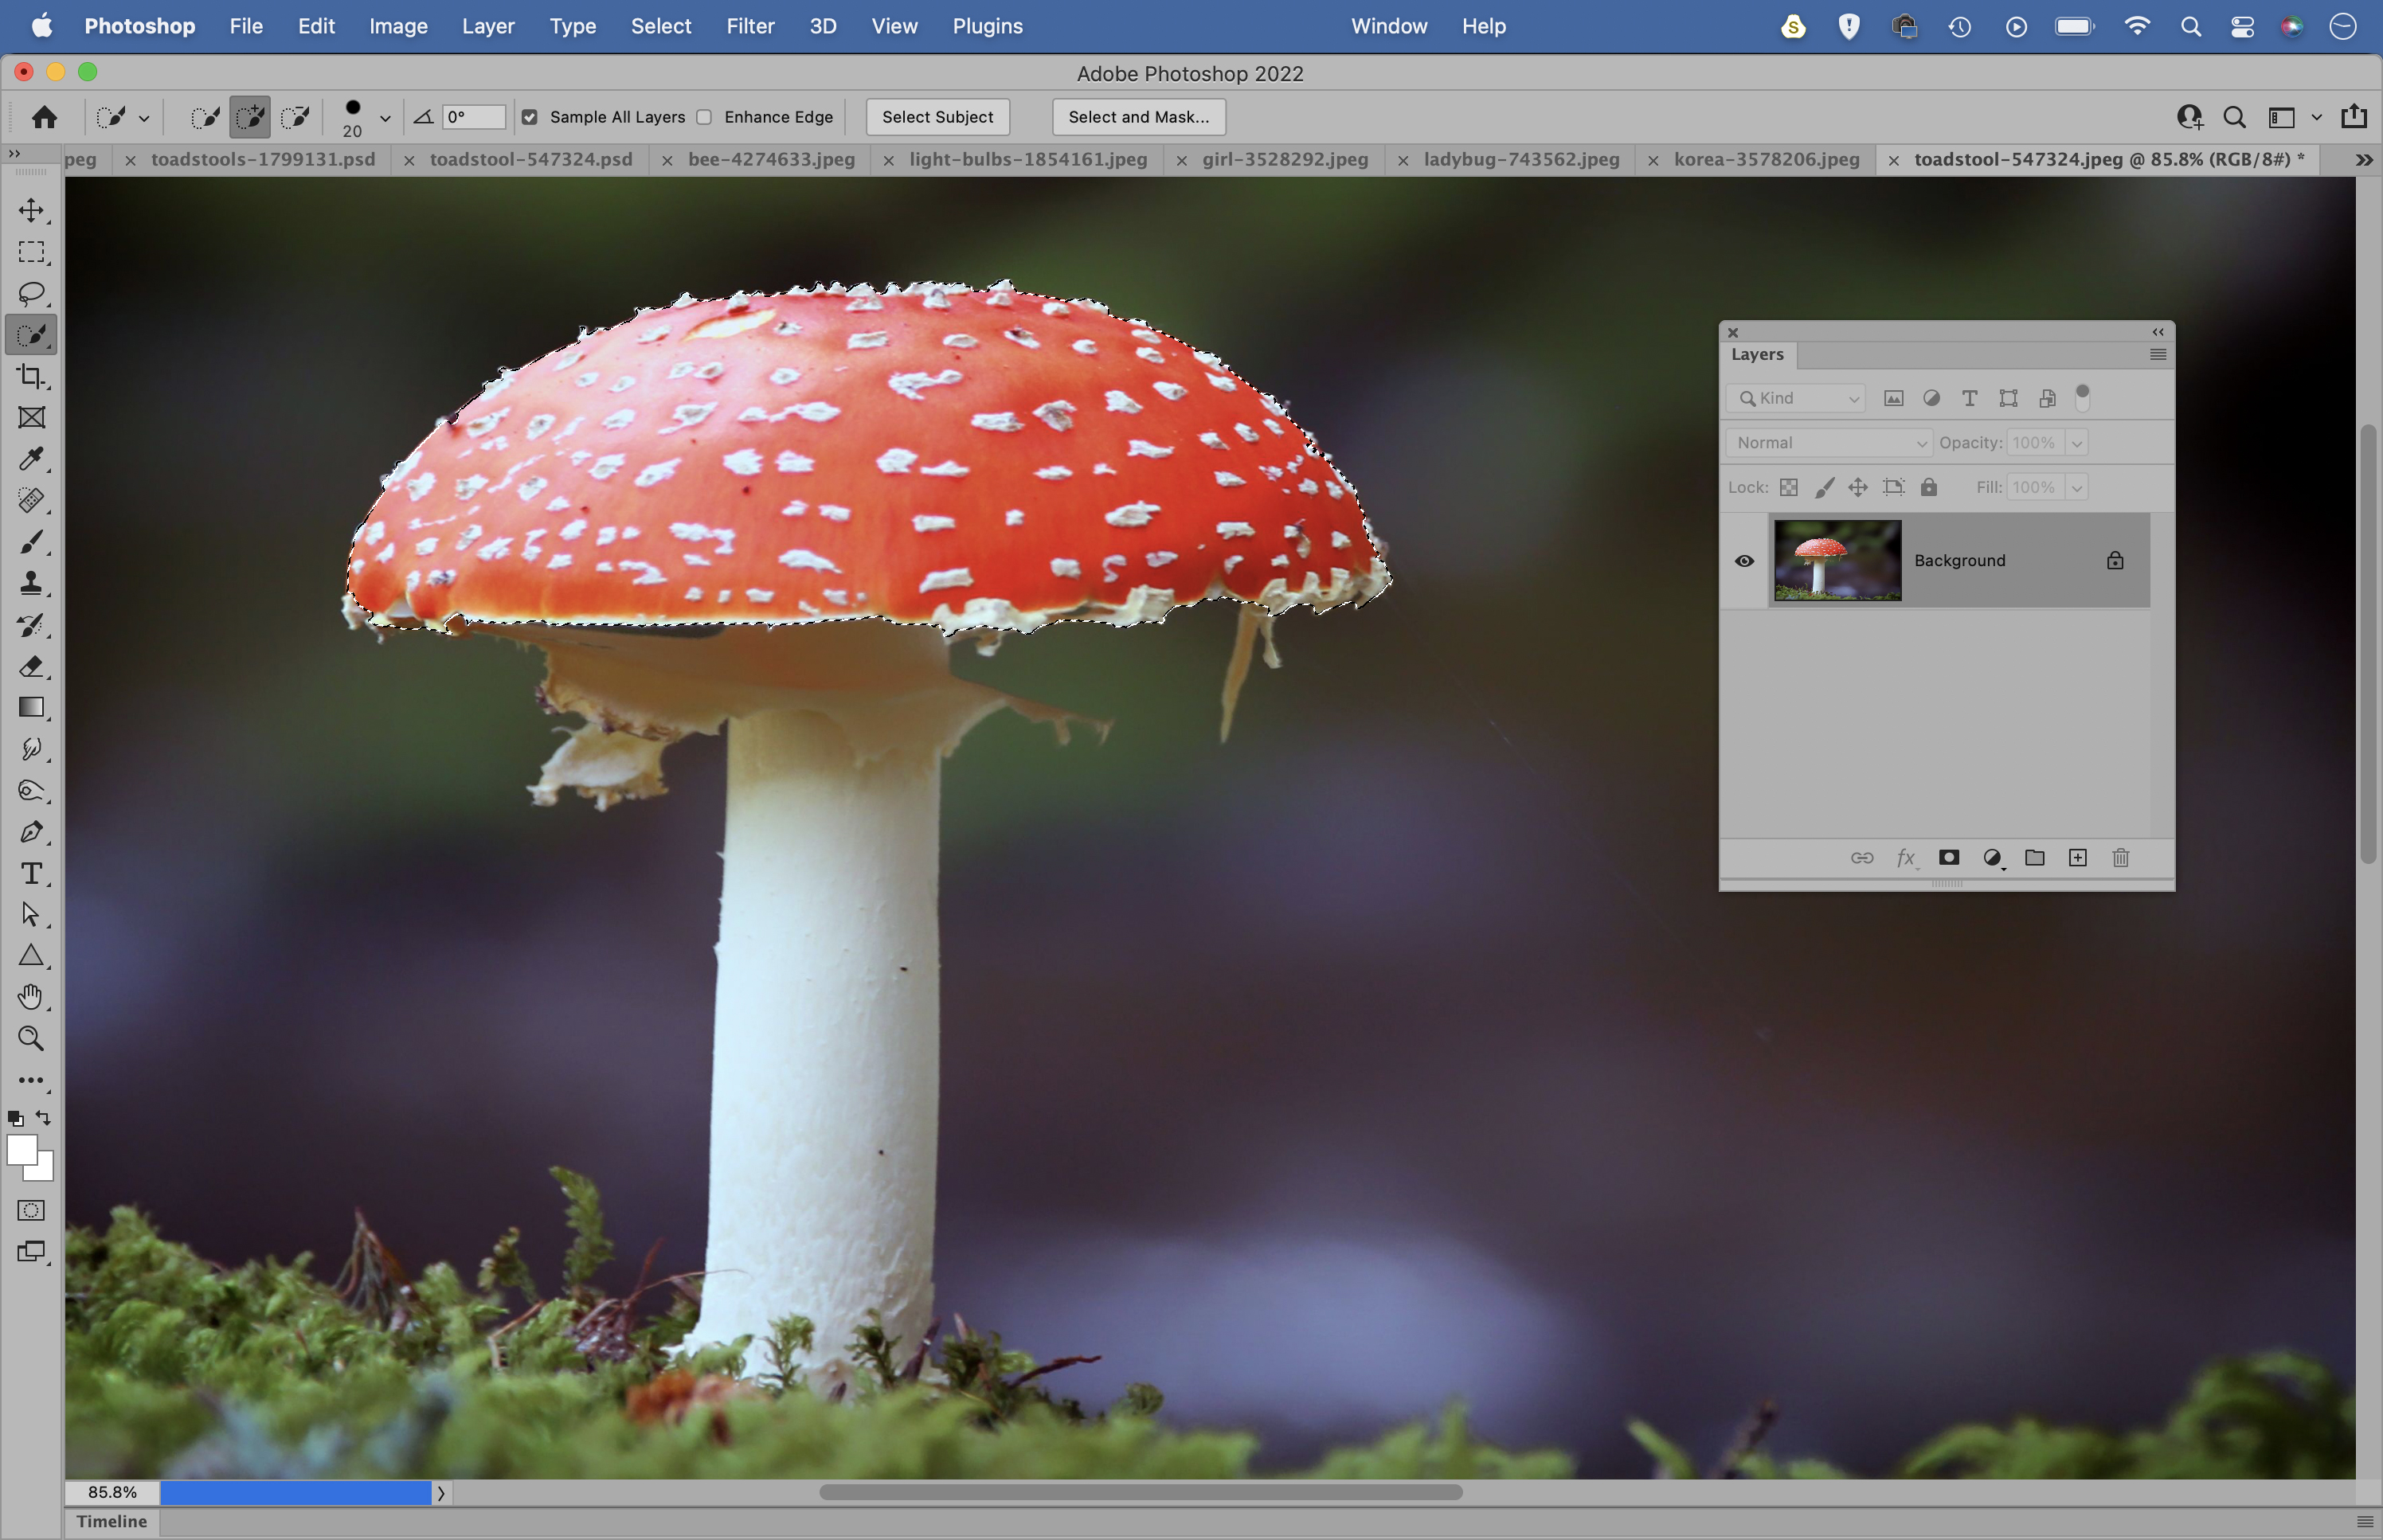
Open the images (download here) and go to the toadstool. Grab the Quick Selection tool and paint over the top of the toadstool to select it, then click ‘Select and Mask.’ Increase the Radius to improve the selection edge, set Output: Selection and hit OK.
02 Drop in the building
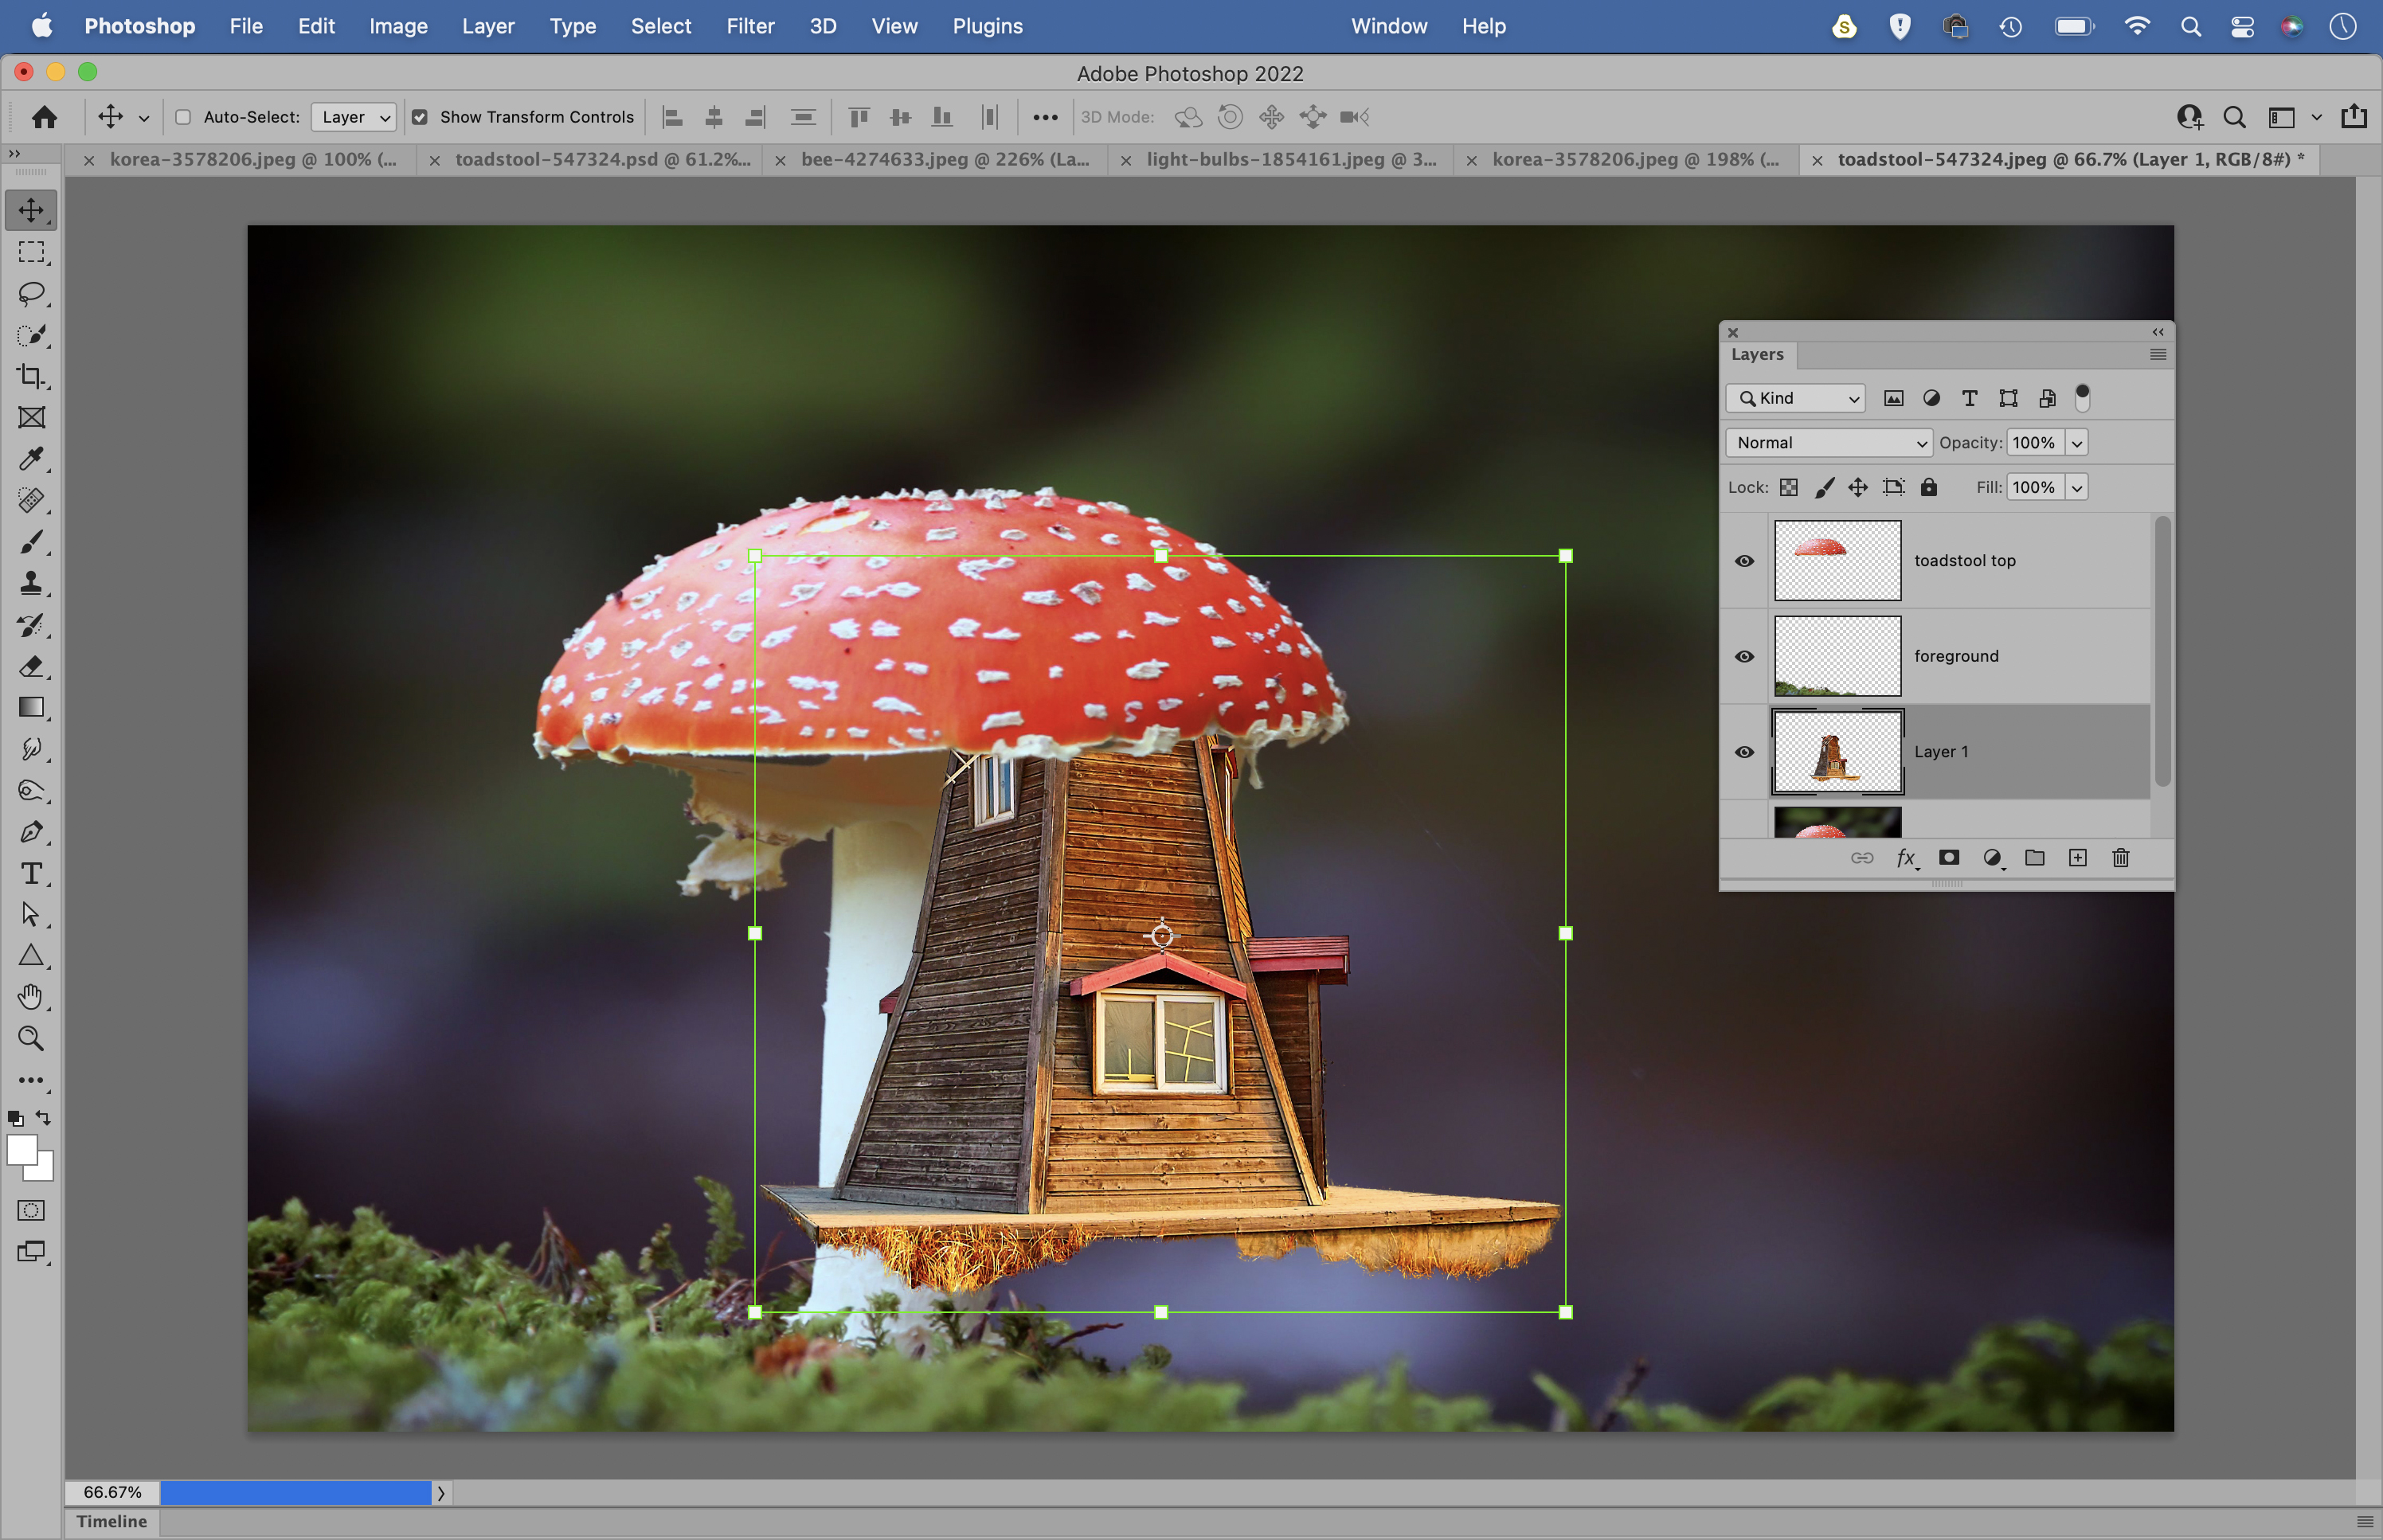
Press Cmd/Ctrl+J to copy the selection to a new layer. Next, repeat the process to select the foreground moss and copy to a new layer. Next, go to the windmill. Select the windmill, then copy and paste into the toadstool image. Drag the layer above the background layer.
03 Position the elements
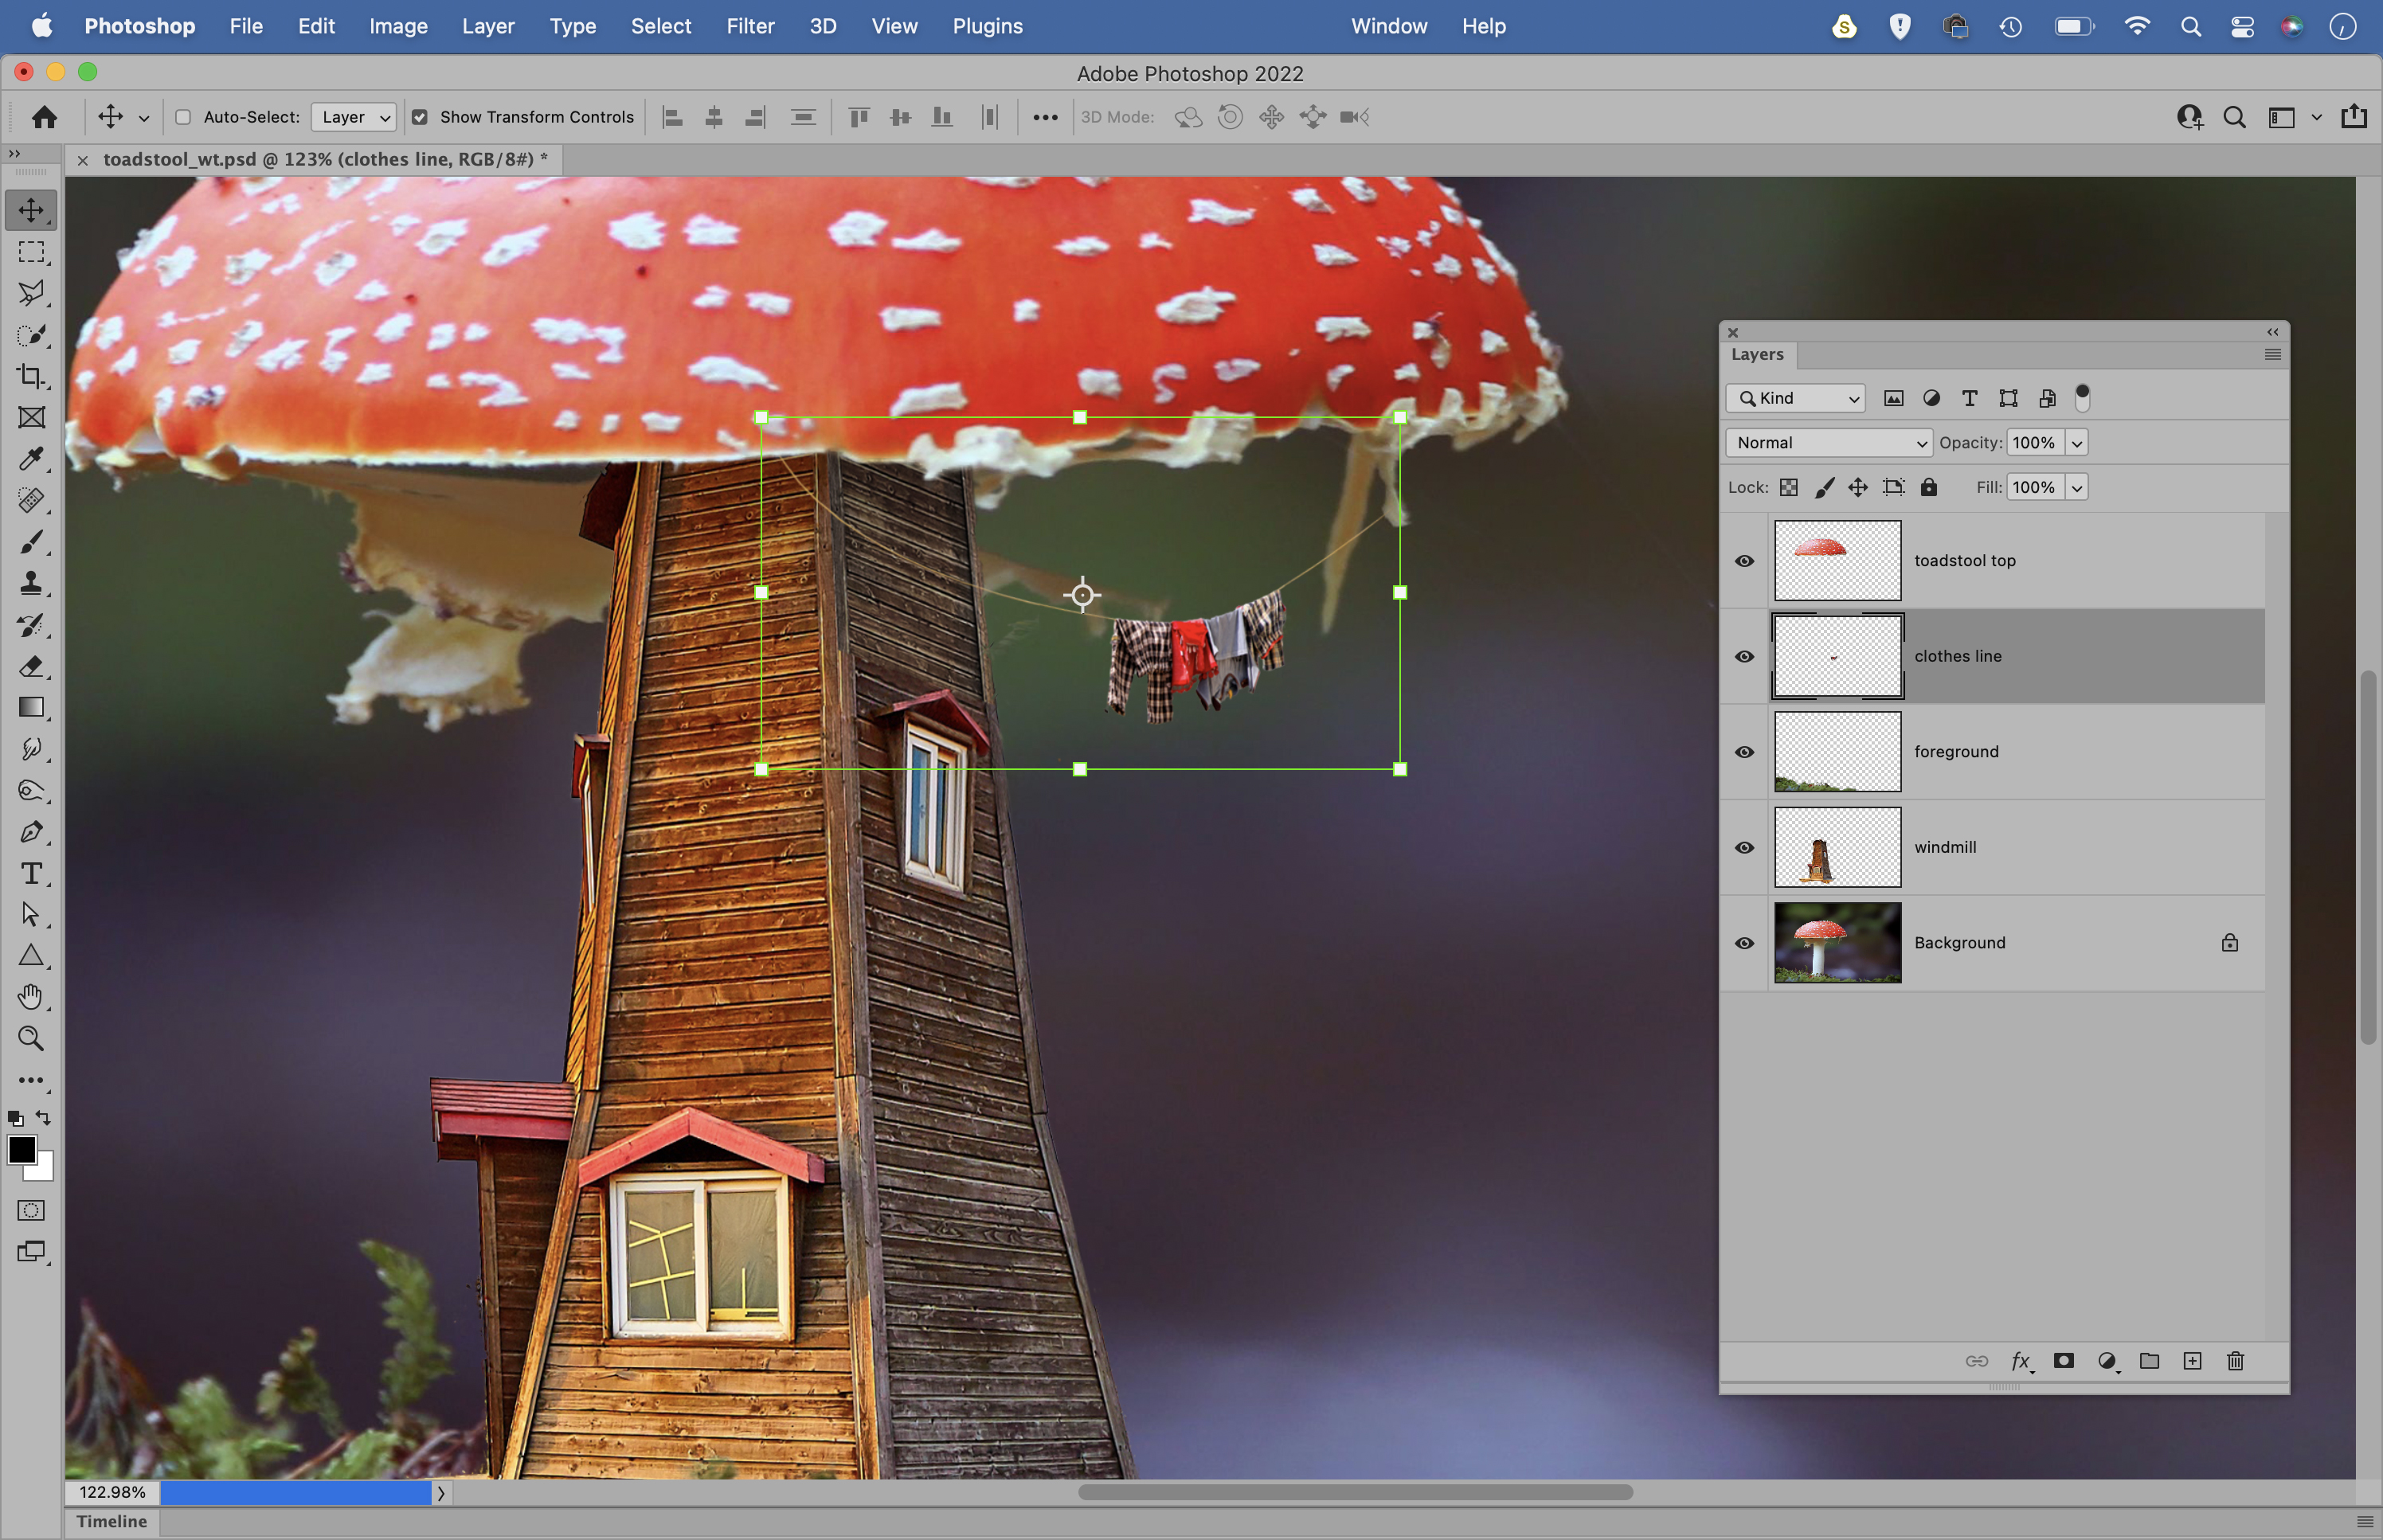
Hit Cmd/Ctrl+T to transform the windmill. Right-click and ‘flip horizontal’, then resize and rotate it to fit with the toadstool. Use the Clone tool to tidy any unwanted details. Go to the clothes line shot, select the clothes, copy them in and position them.
The best camera deals, reviews, product advice, and unmissable photography news, direct to your inbox!
04 Paint a shadow
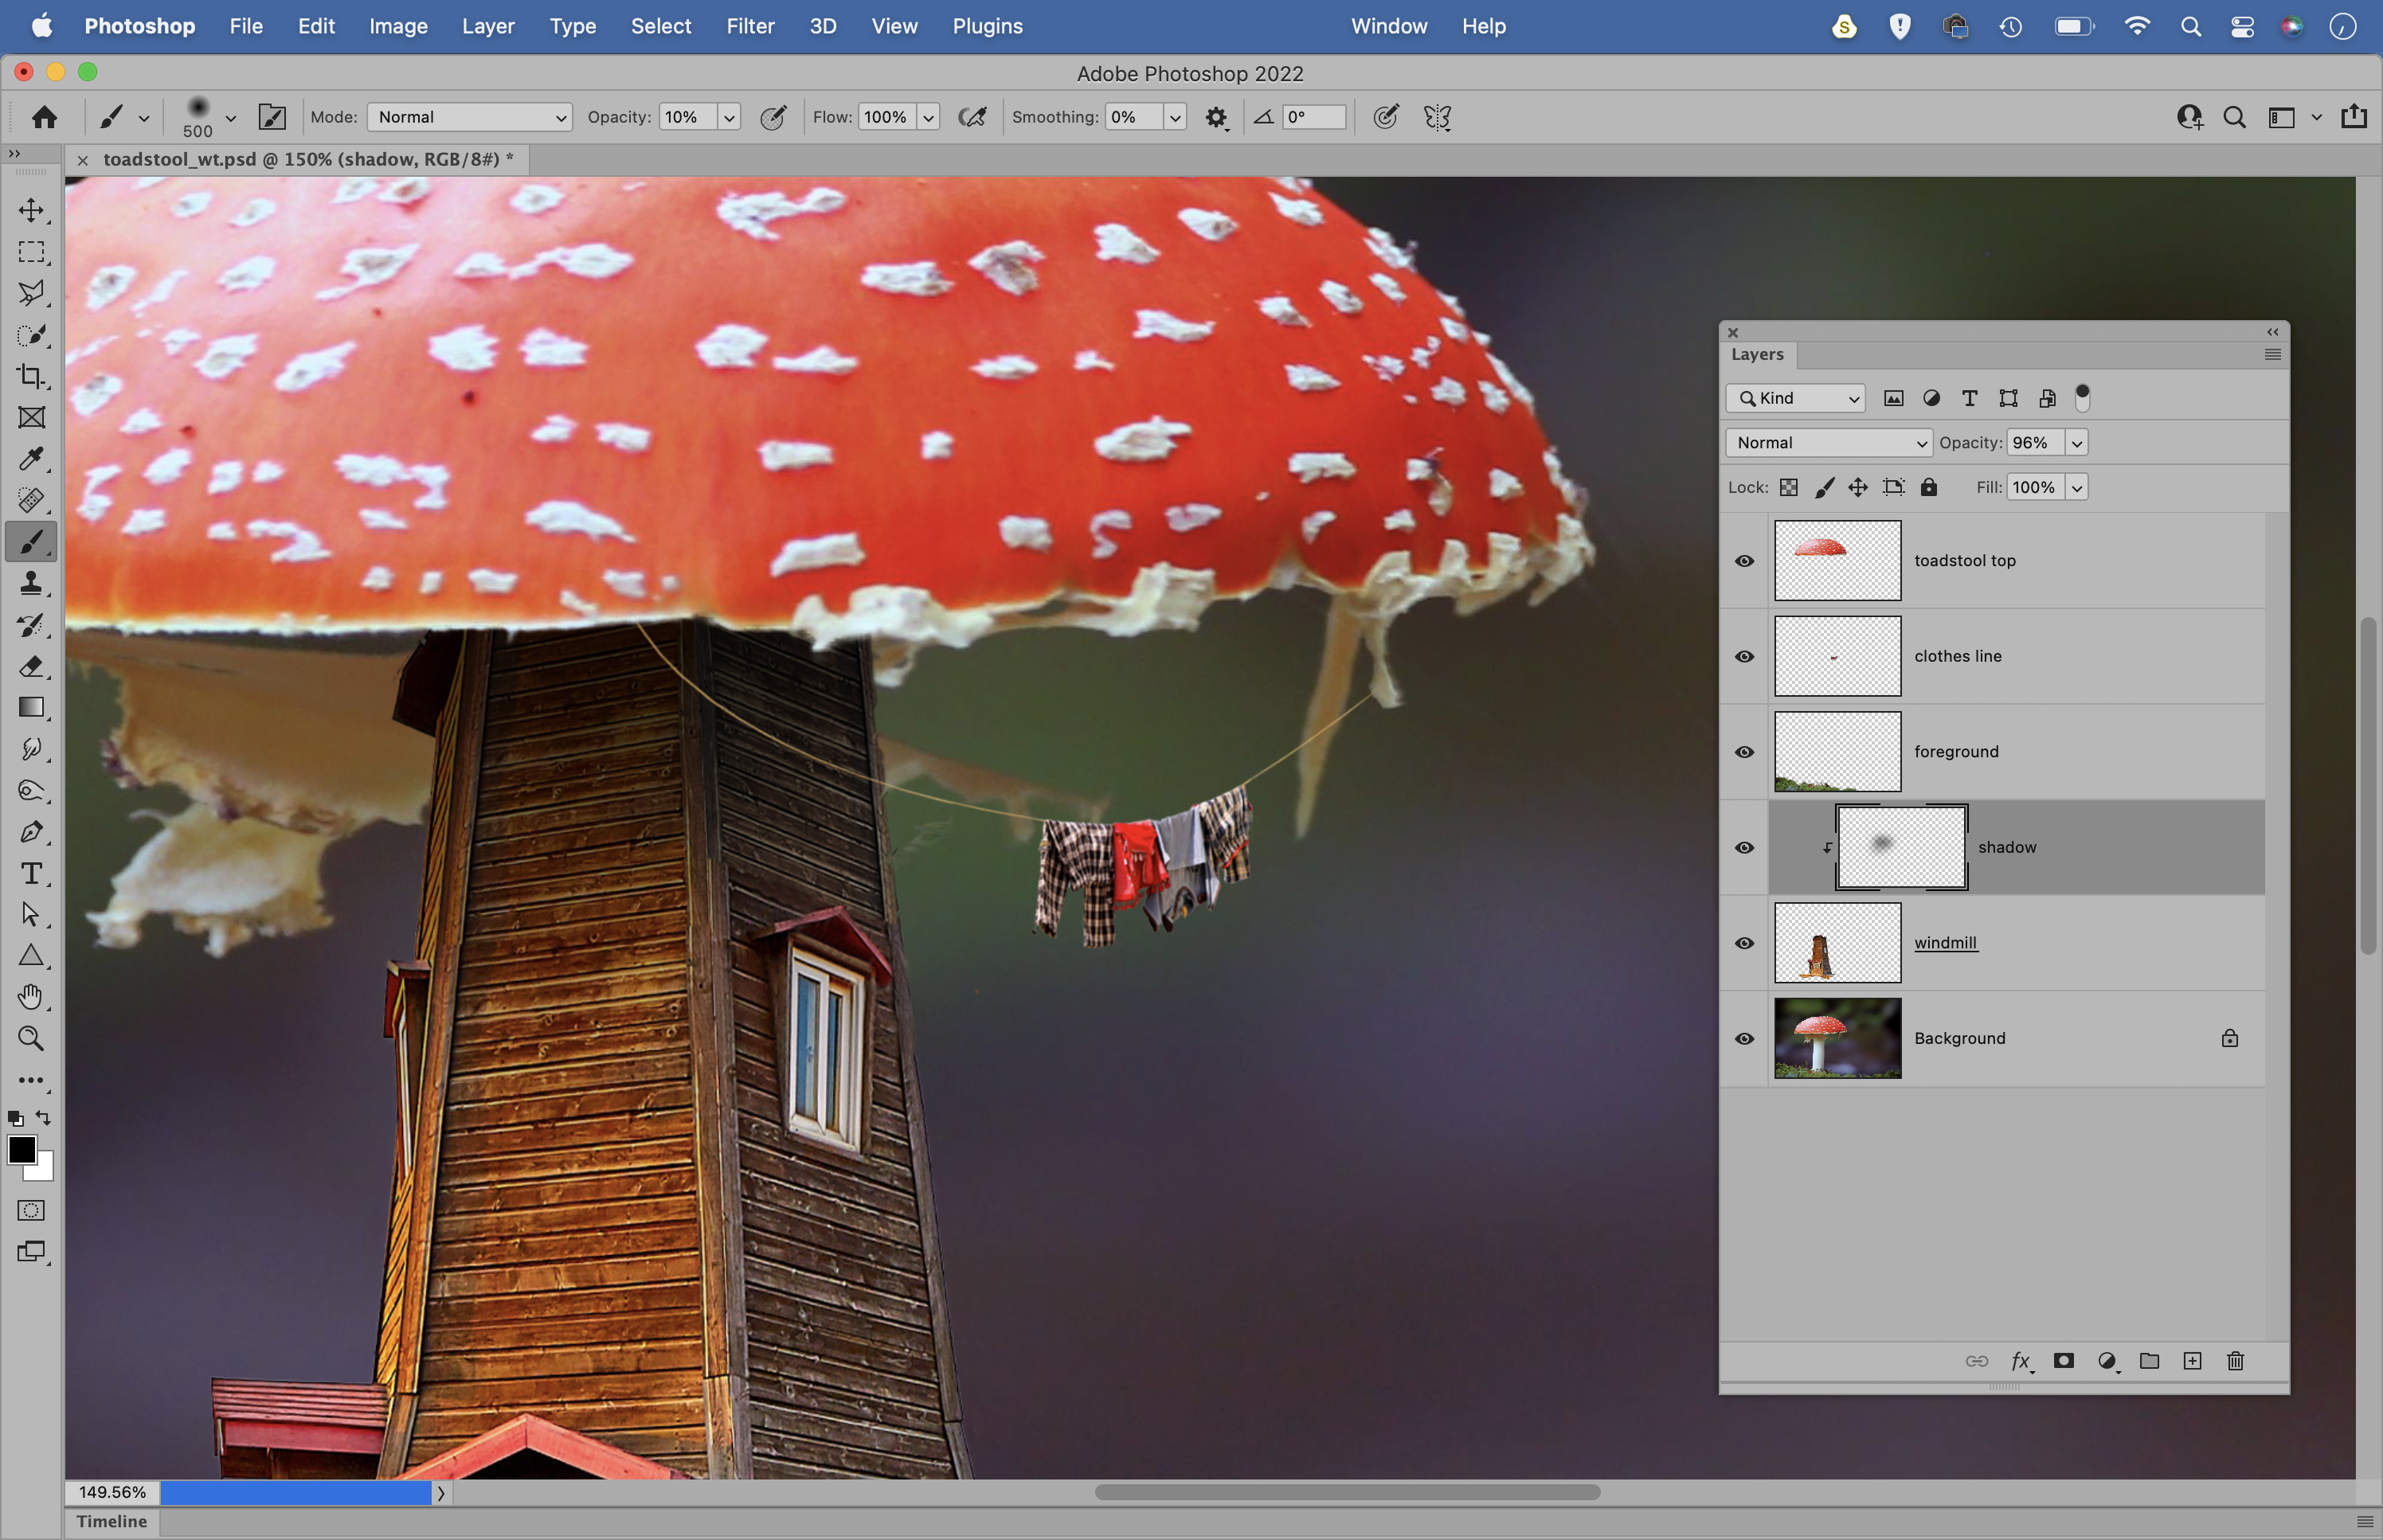
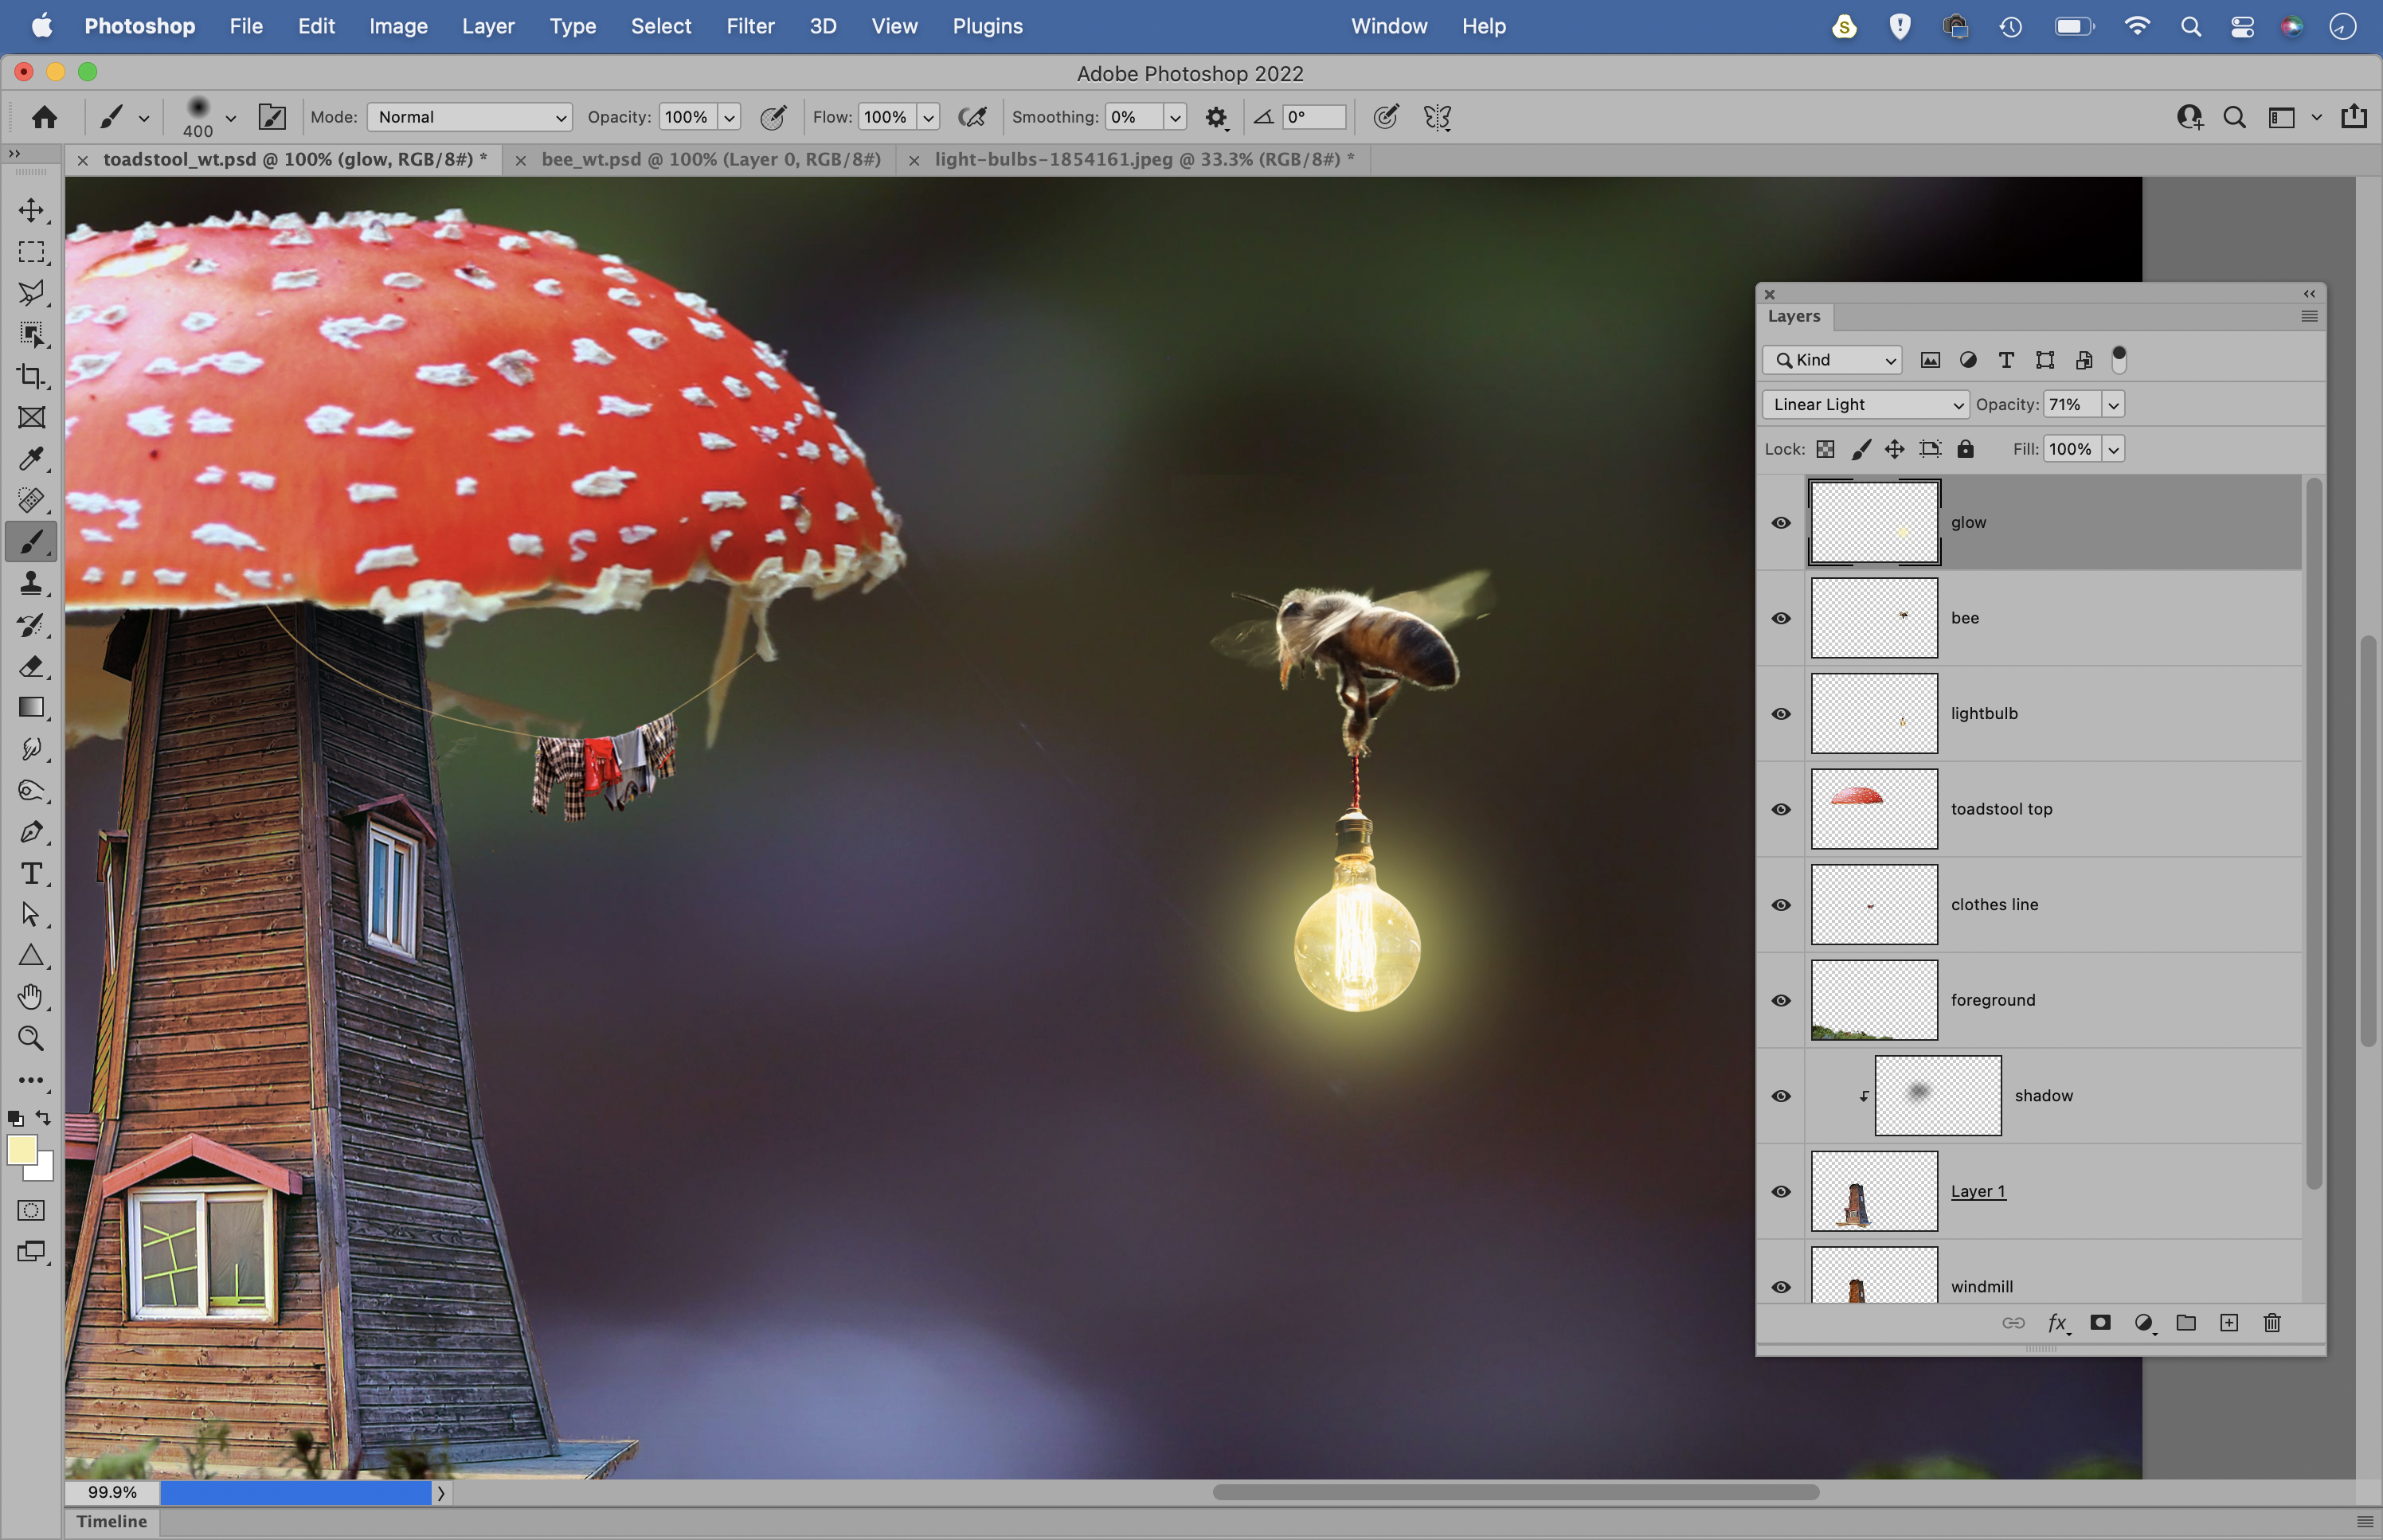
Add a new layer above the windmill, right-click it and ‘Create Clipping Mask’, grab the brush tool, hit 1 for 10% opacity and D, then X for black. Paint to make a shadow where the top meets the toadstool. Highlight the windmill layer and go to Filter>Neural Filters.
05 Add the bee
Enable the Harmonisation Neural filter, target the background layer and adjust the settings until colours ‘harmonise.’ Copy in the bee, then the light bulb and position them. Make a new layer, set the blend mode to Linear Light, paint the bulb yellow to make it glow.
06 Blend smoke and lights
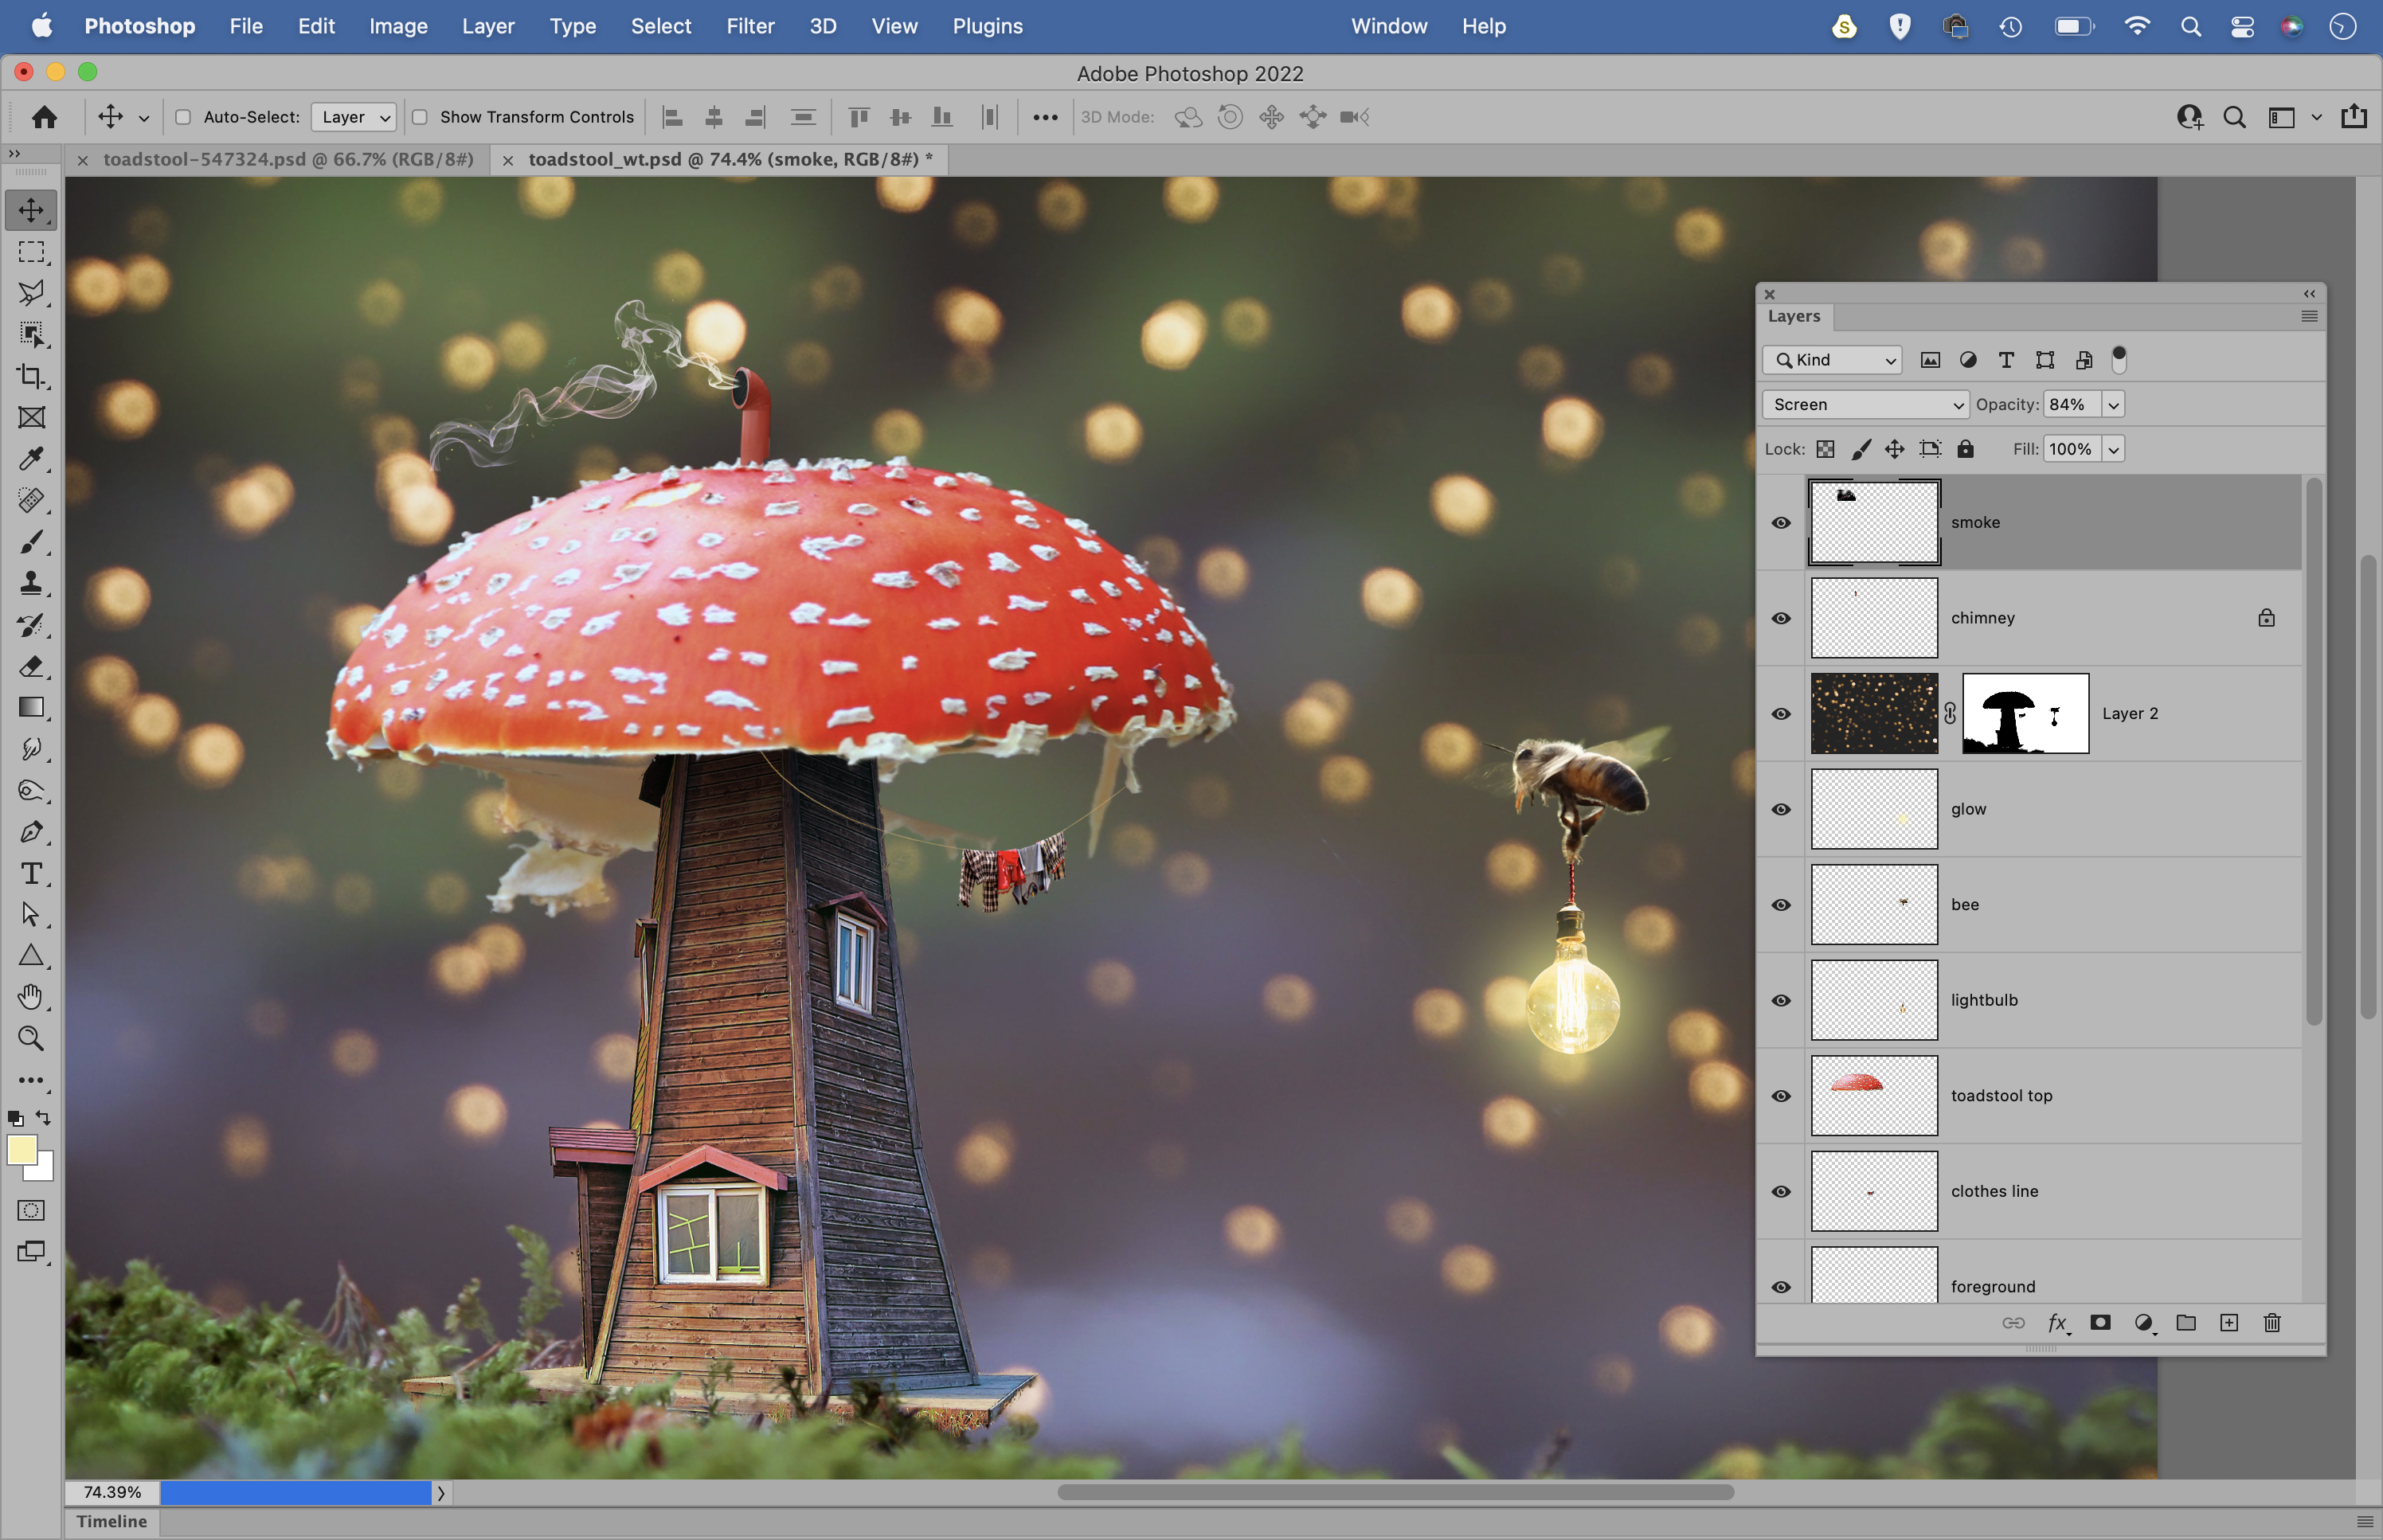
Copy in the sparkles image, position on top of everything then change the blend mode to Screen. Add a layer mask and paint black to hide parts of the glowing lights. Next, bring in the chimney, then copy in the smoke and change the blend mode to Screen.
PhotoPlus: The Canon Magazine is the world's only monthly newsstand title that's 100% devoted to Canon, so you can be sure the magazine is completely relevant to your system.
Read more:
• Best photo-editing laptops
• Best photo editing software
• Best online photography courses
The lead technique writer on Digital Camera Magazine, PhotoPlus: The Canon Magazine and N-Photo: The Nikon Magazine, James is a fantastic general practice photographer with an enviable array of skills across every genre of photography.
Whether it's flash photography techniques like stroboscopic portraits, astrophotography projects like photographing the Northern Lights, or turning sound into art by making paint dance on a set of speakers, James' tutorials and projects are as creative as they are enjoyable.
He's also a wizard at the dark arts of Photoshop, Lightroom and Affinity Photo, and is capable of some genuine black magic in the digital darkroom, making him one of the leading authorities on photo editing software and techniques.
