Blend images together for beautifully balanced exposures in Affinity Photo
Employ exposure blending skills in Affinity Photo for superbly balanced landscape images
Watch video: Blend images for balanced exposures in Affinity Photo
When it comes to landscape photography, sometimes a single exposure simply isn’t enough. In high-contrast scenes the difference in brightness between land and sky can make it near-impossible to capture fine detail in one frame, which could mean sacrificing shadow detail to preserve the highlights, or capturing shadow detail while blowing the sky.
It’s often a problem encountered at sunset, as when shooting towards the brightest and most vibrant part of the sky and the land in front can appear almost black. Thankfully, by varying our exposure across a couple of frames (taken using a tripod to keep them in alignment) we can capture the optimum amount of detail and then blend our photographs afterwards.
Here we’ll show you how to blend your exposures in Affinity Photo for enhanced landscape photos. Exposure blending is similar in principle to HDR photography in that the aim is to expand our dynamic range beyond the limits of our camera. But HDR is a blanket approach to the problem. With exposure blending we can control exactly which parts of each image to use in our composite image. As such, we have ultimate control over the final results.
The technique is done by using a combination of layers and masks in Affinity Photo. We can paint the masks, or use selection tools to help us out by isolating areas of the frame. As well as combining exposures these fundamental image-editing tools can be used for a huge array of other tasks, from practical jobs like focus stacking to creative montages and composites.
01 Copy and paste
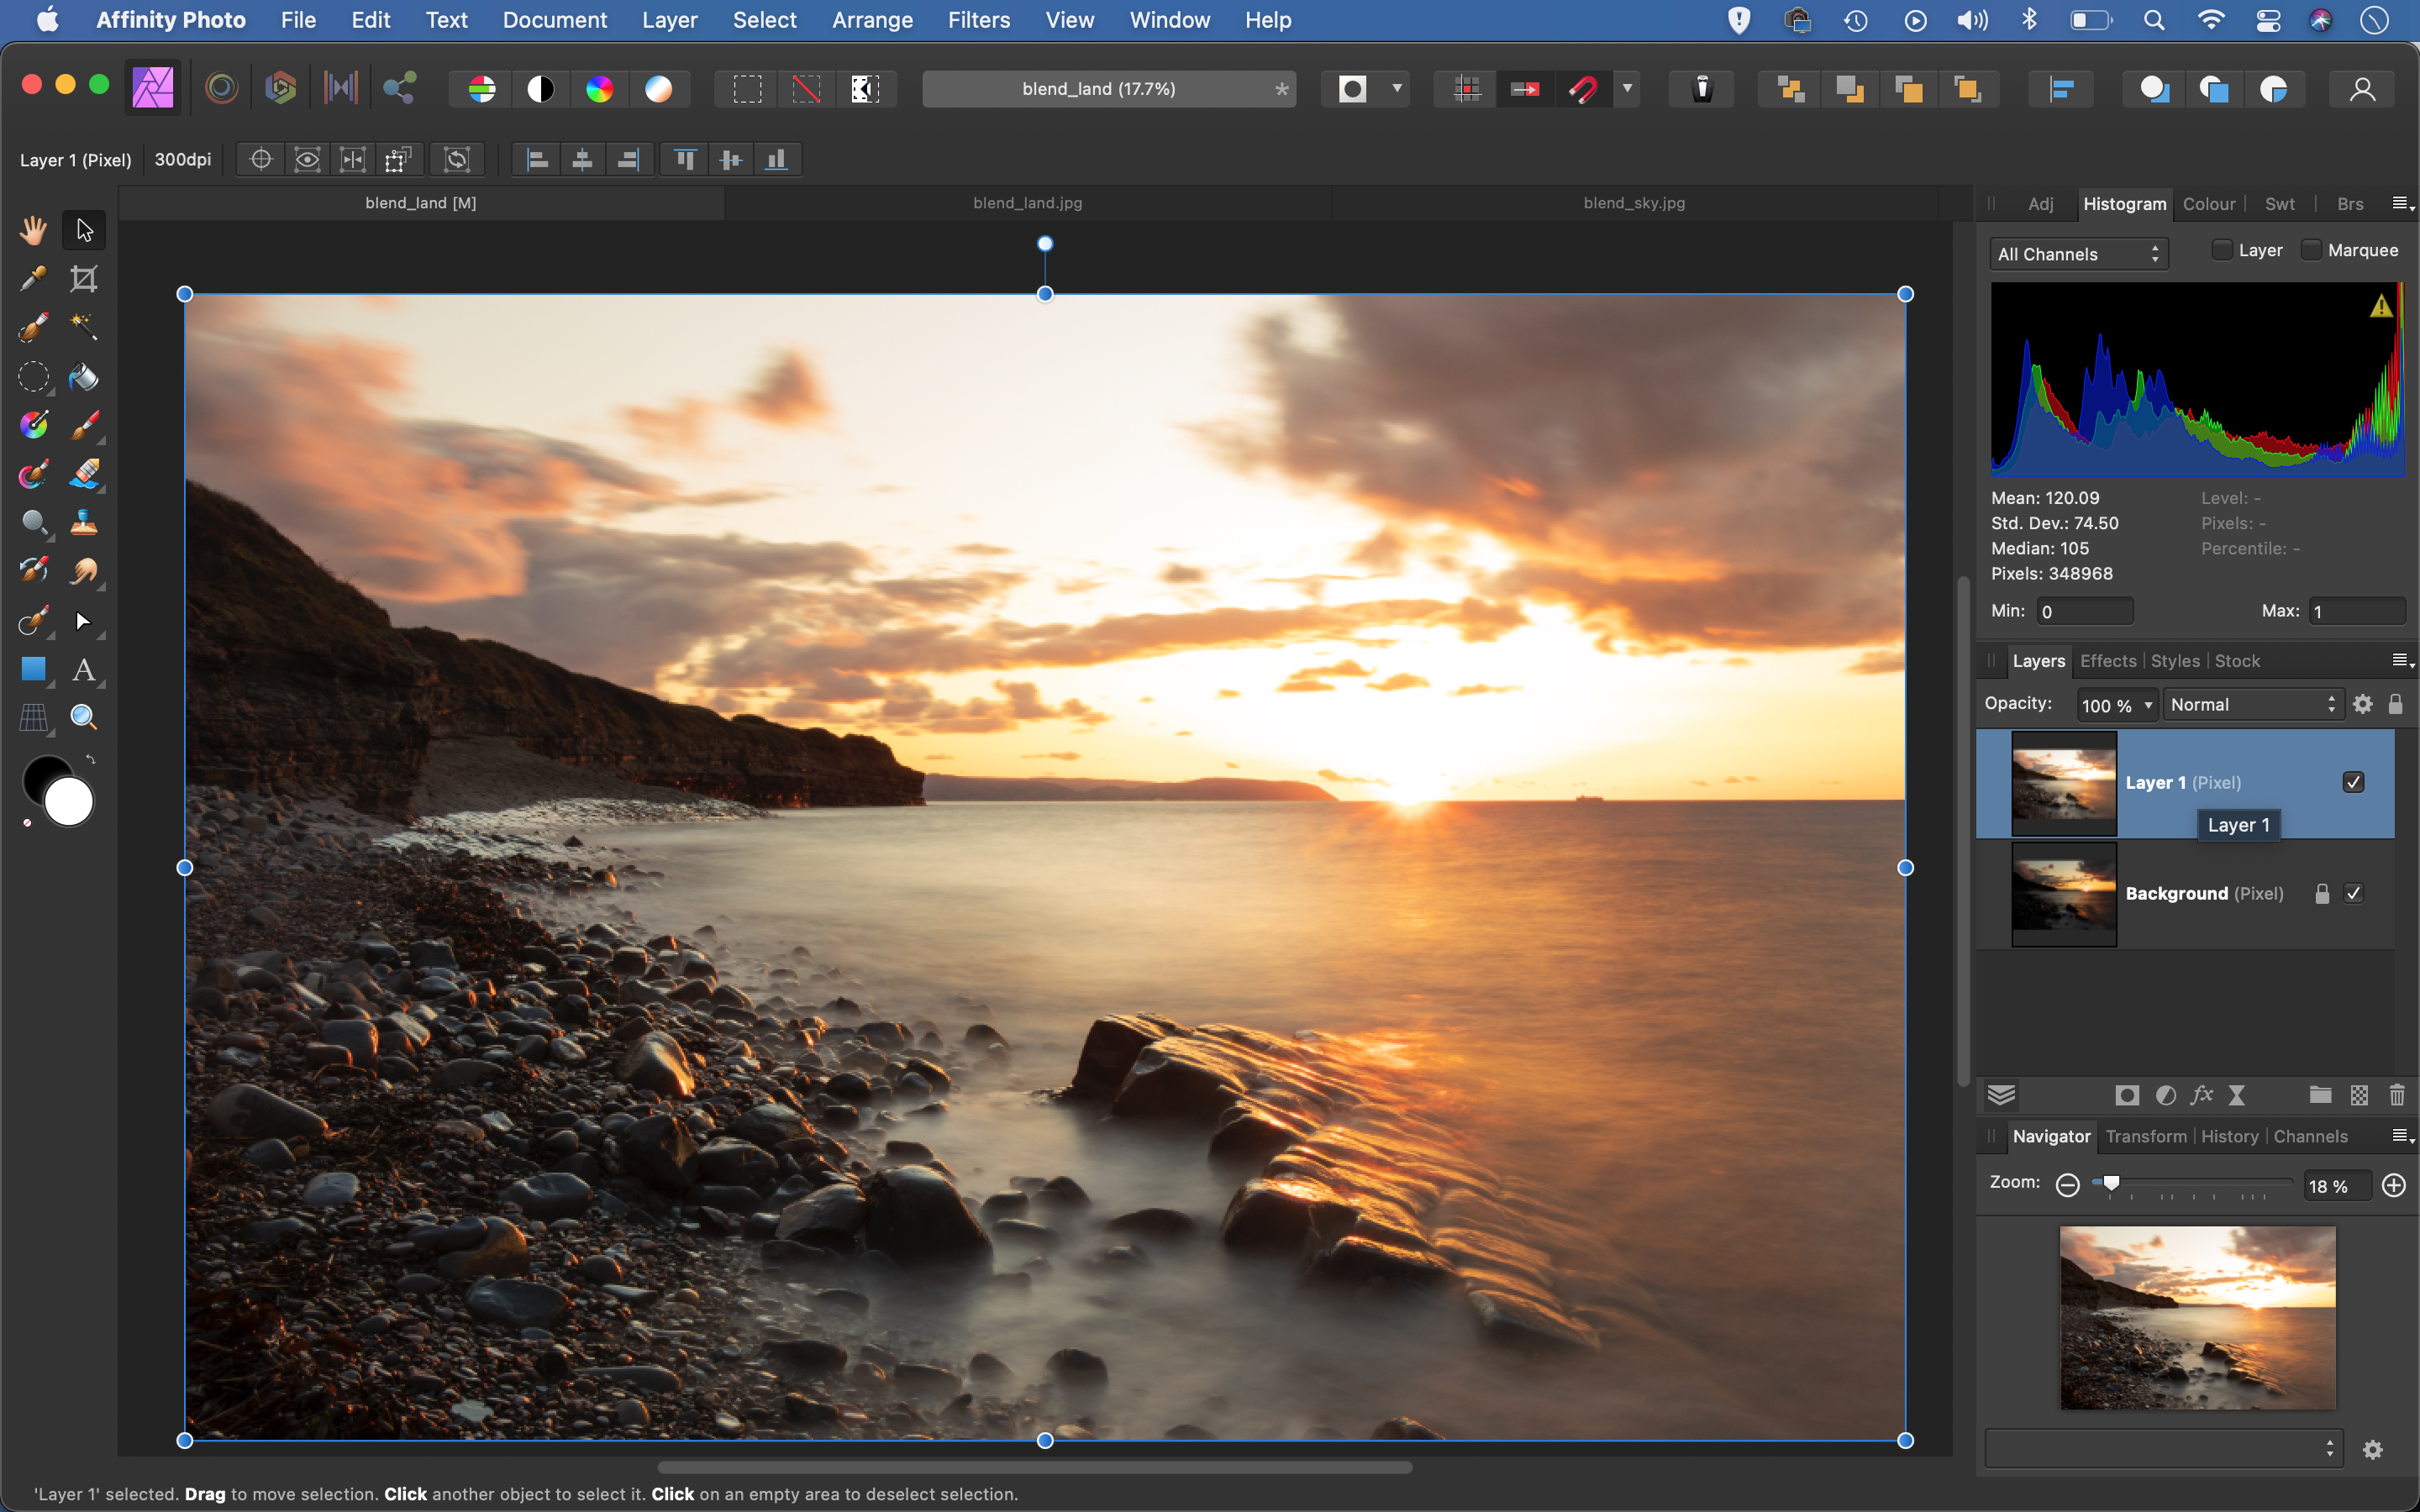
Open the two images into Affinity Photo here (if they’re Raw files begin by processing them to enhance either land or sky), then go to the Photo Persona. Go to the lighter image, press Cmd/Ctrl + A then Cmd/Ctrl + C to copy it. Switch to the other image and hit Cmd/Ctrl + V to paste the frame over.
02 Check the alignment
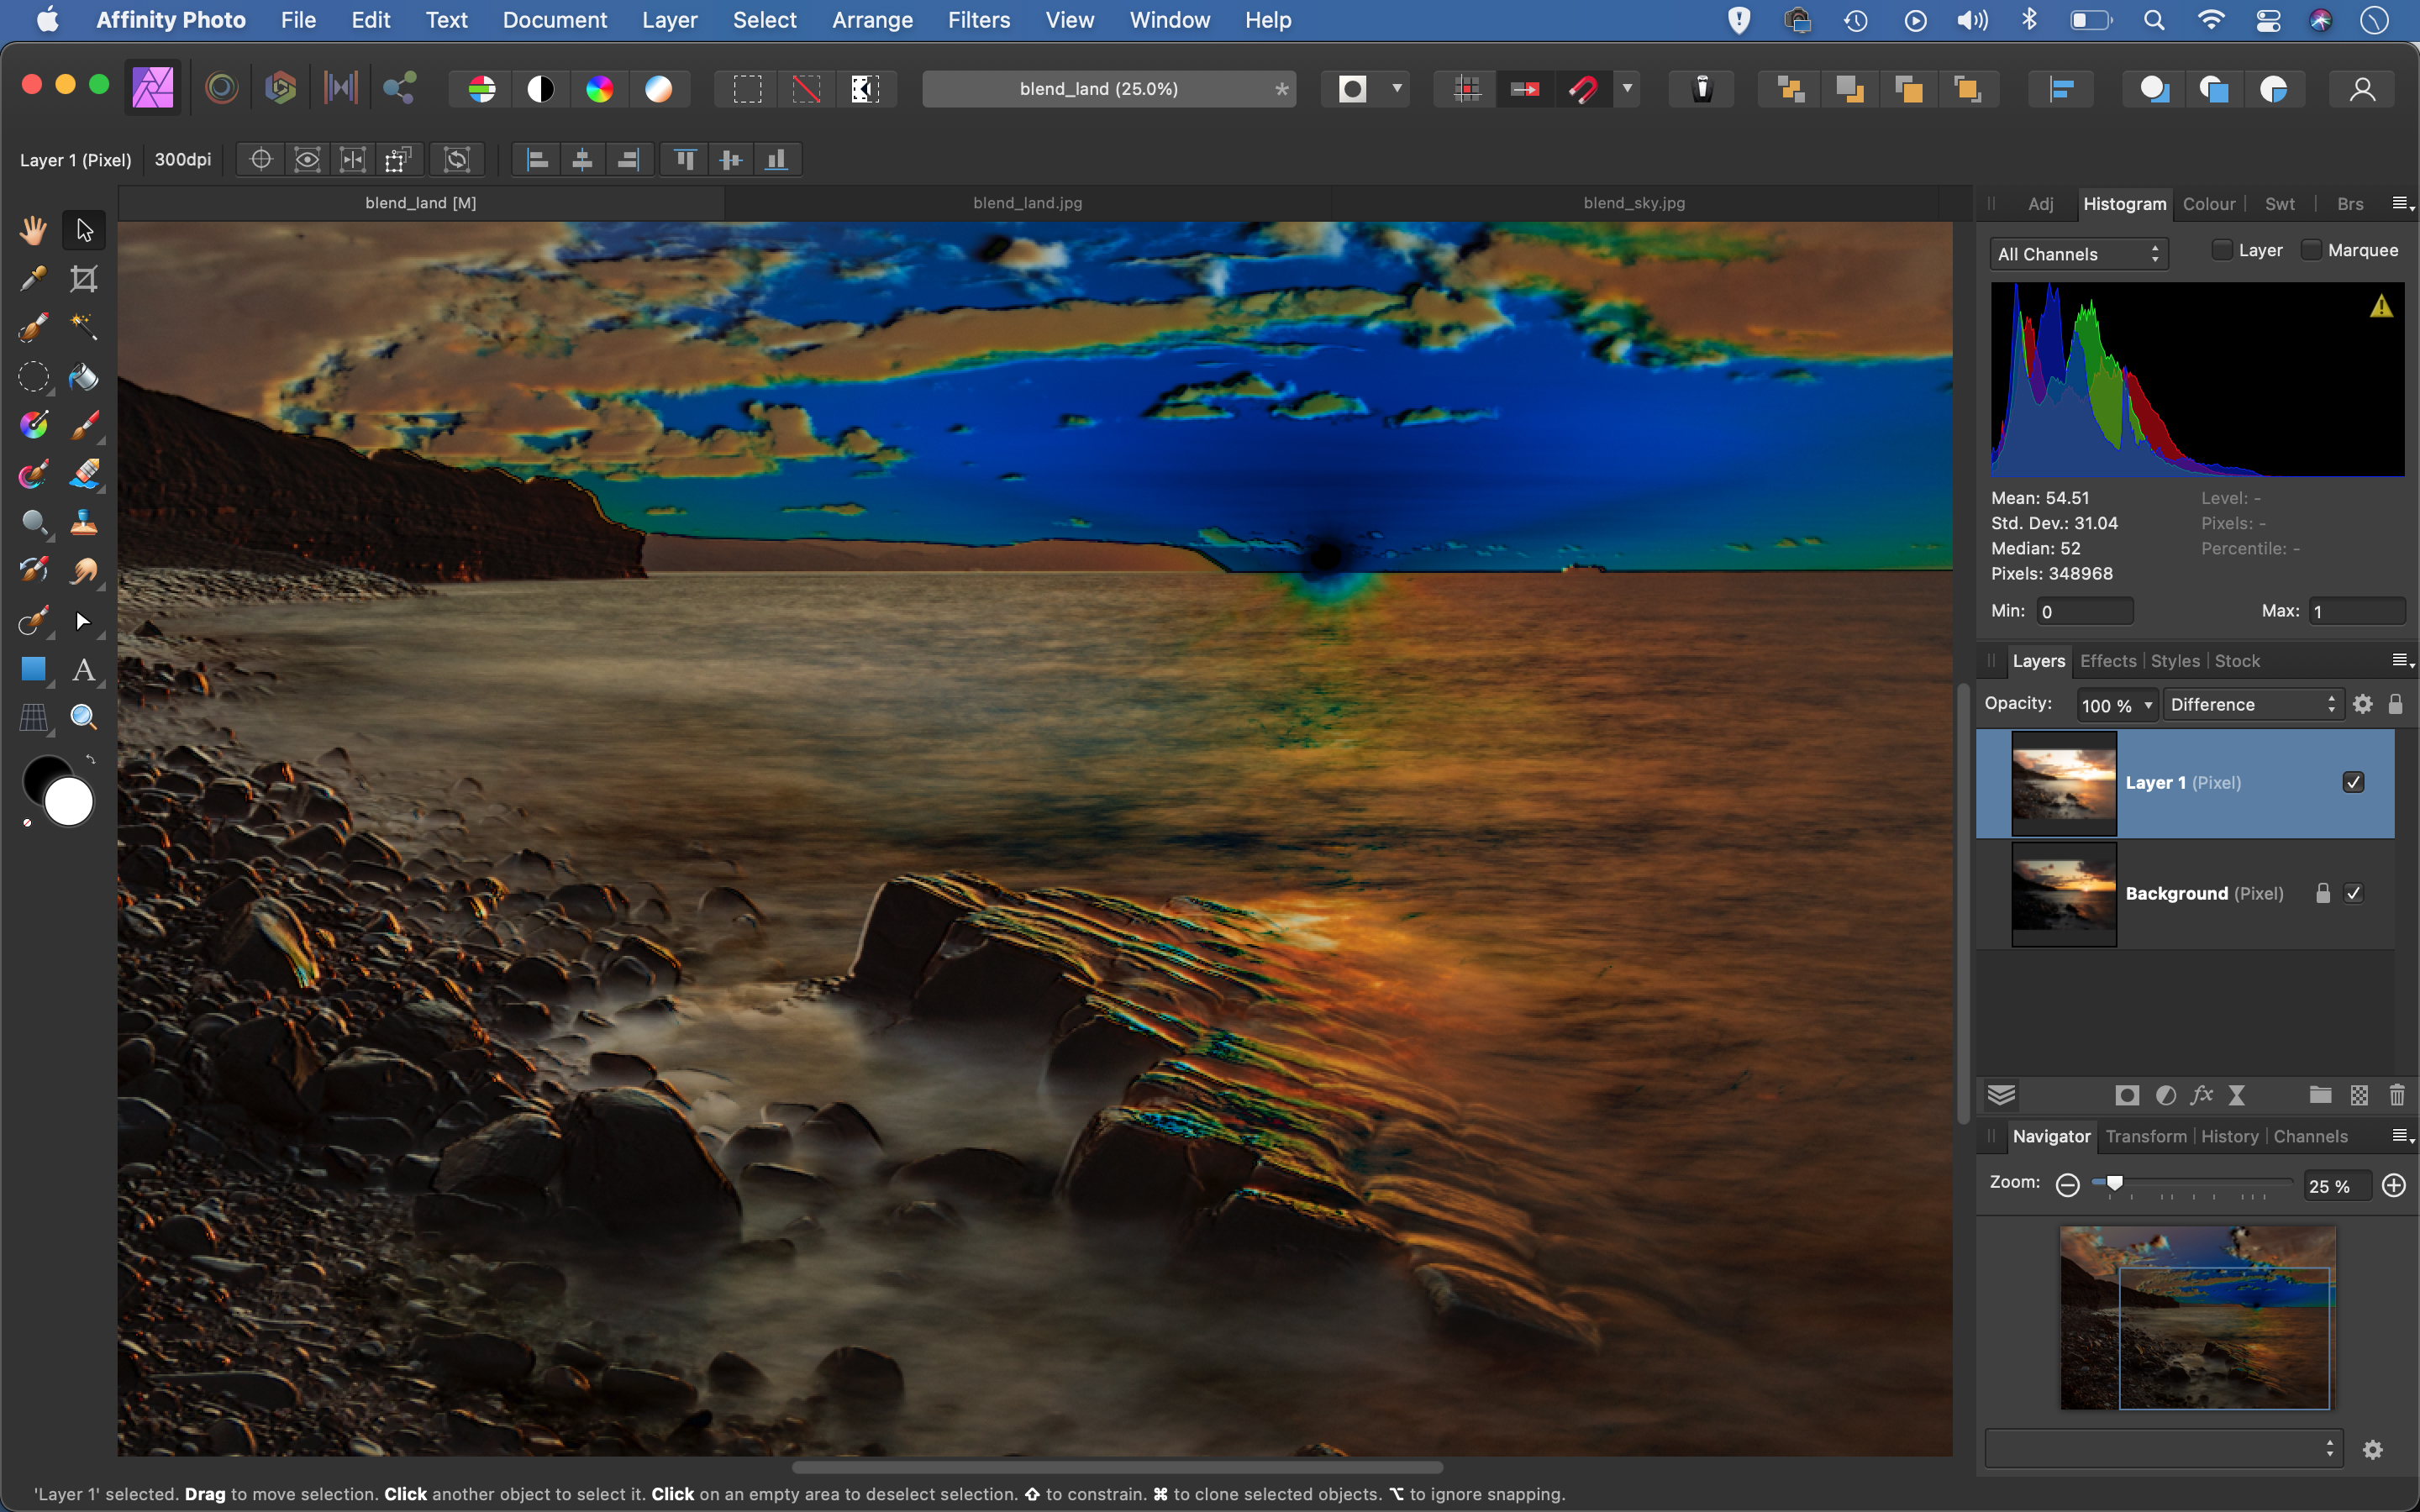
We can use a blend mode to check that our frames line up perfectly. Go to the Layers panel, click the Blend Mode dropdown at the top and choose Difference. This makes it easier to see misalignment. Grab the Move tool then use the arrow keys to nudge the layer one way or another until it looks right.
The best camera deals, reviews, product advice, and unmissable photography news, direct to your inbox!
03 Select the sky
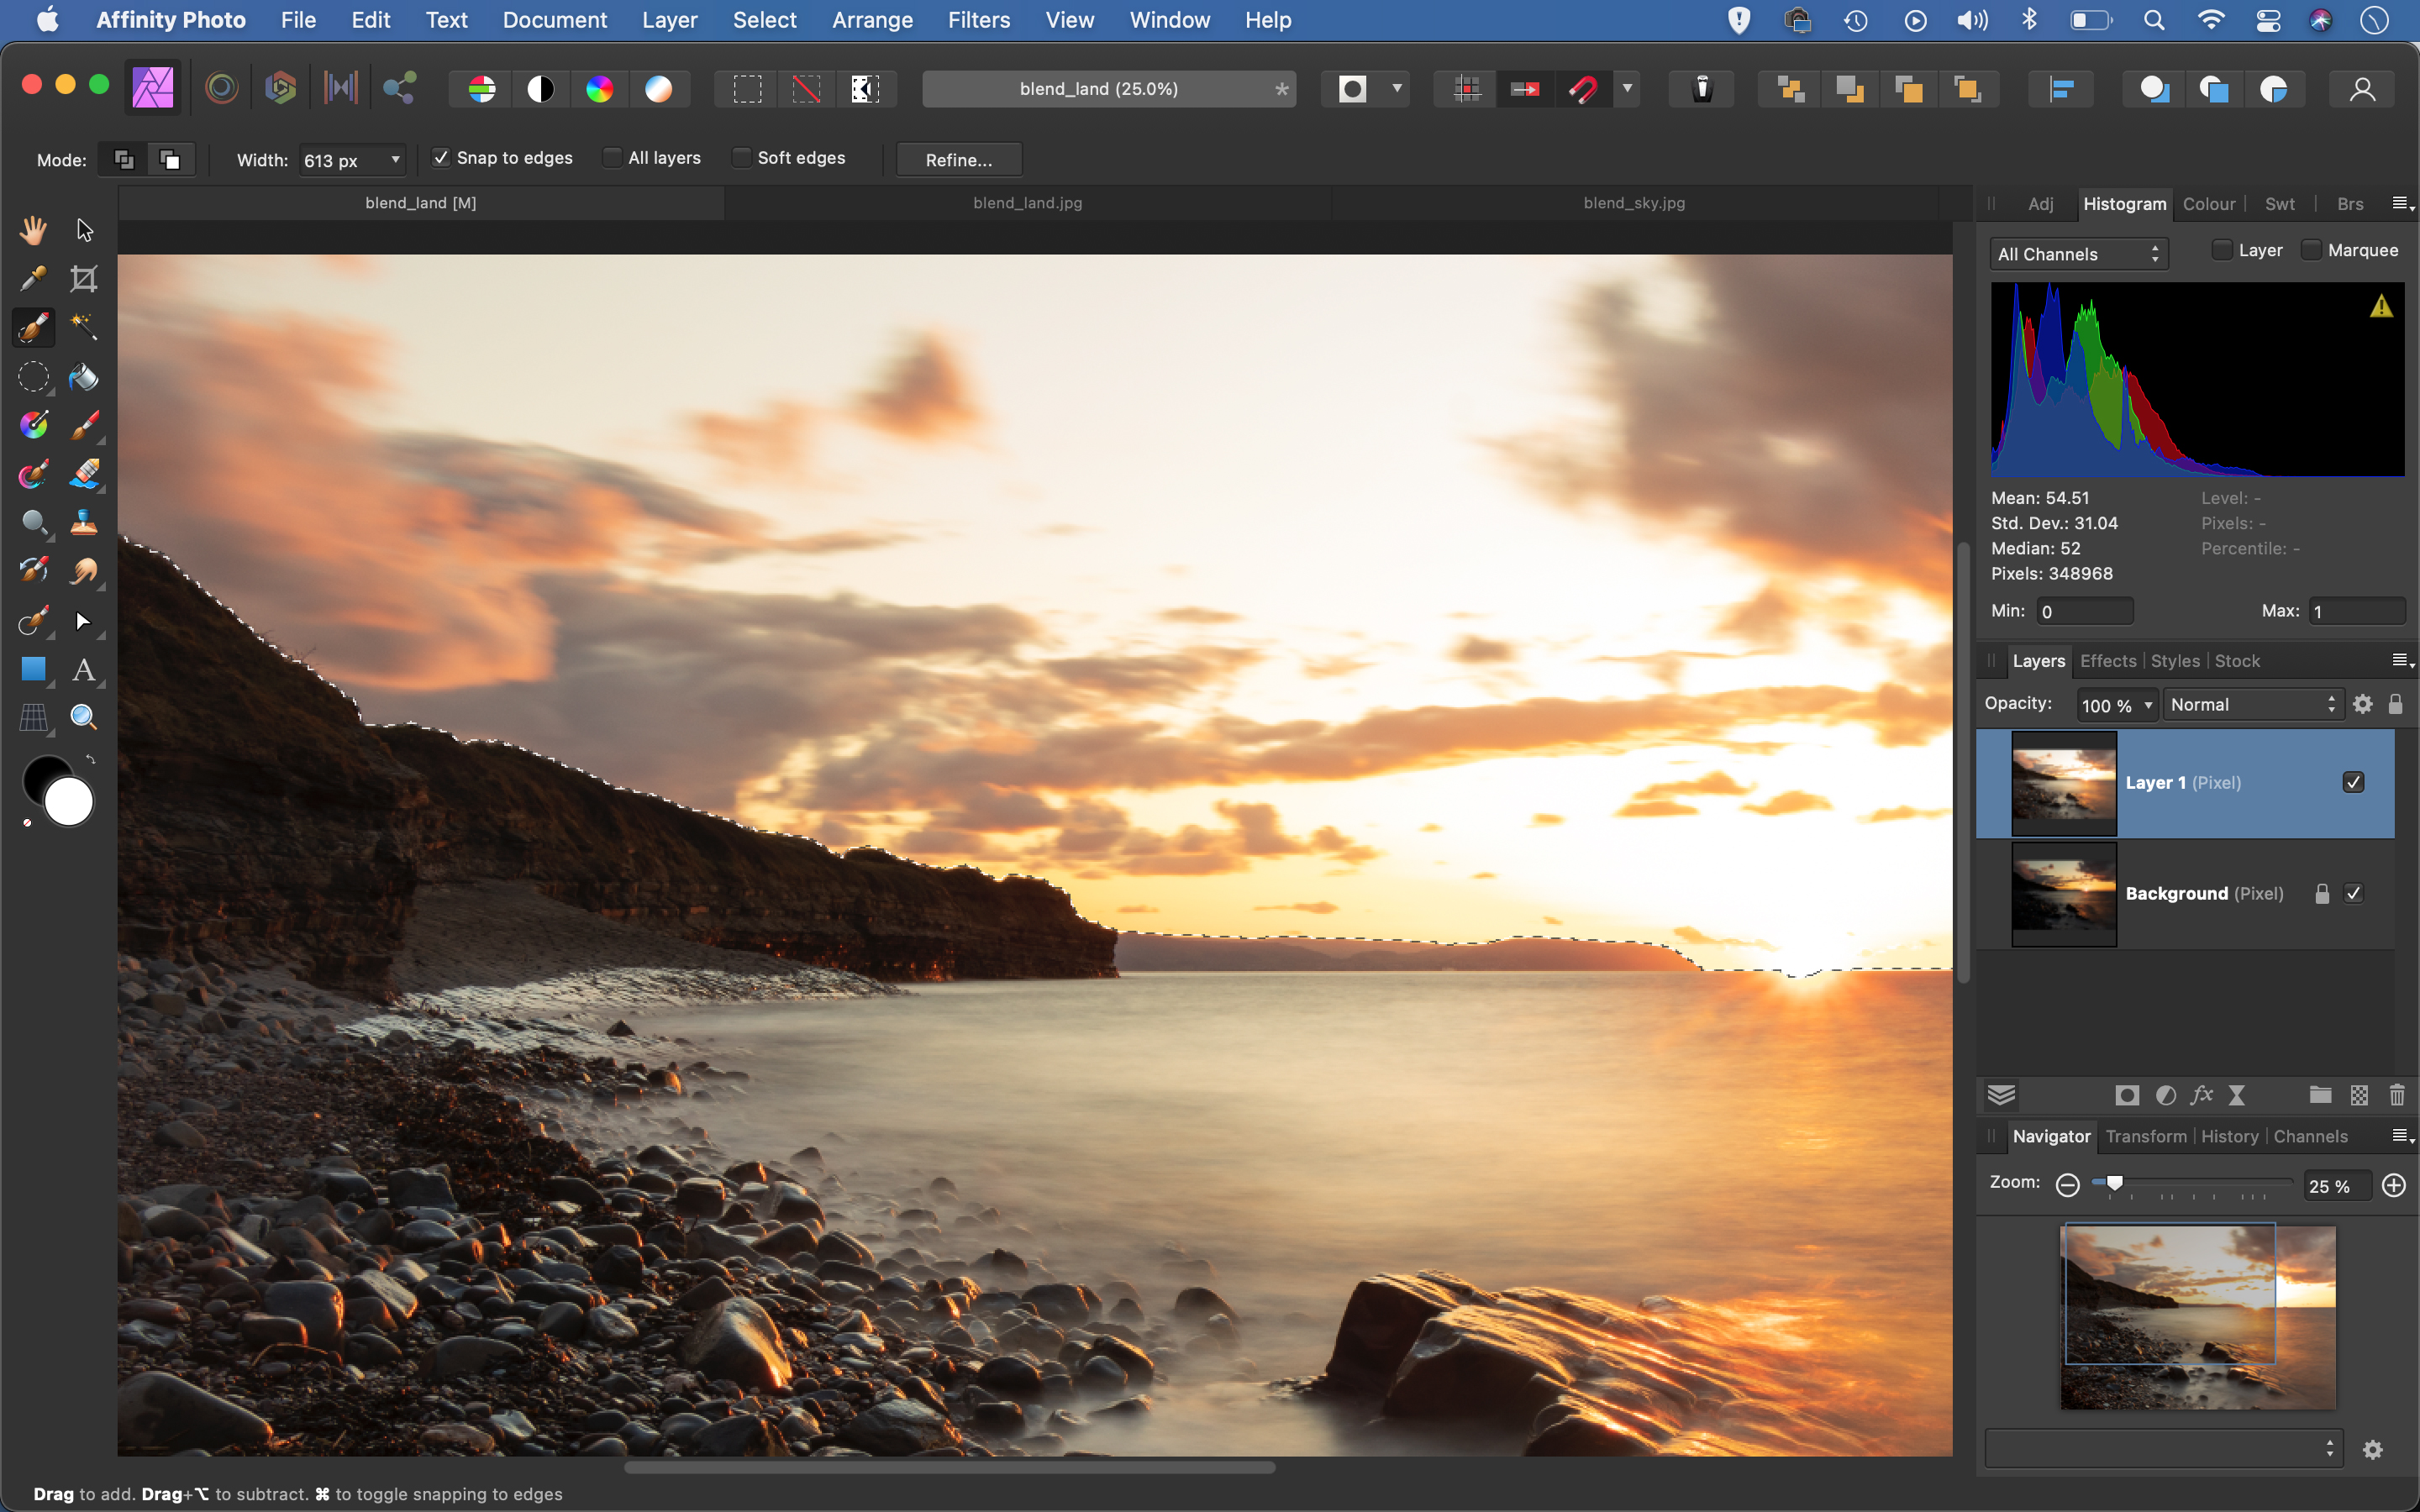
Set the blend mode back to normal. Next, grab the Selection Brush from the toolbar and check ‘Snap to Edges’ in the tool options at the top. Paint over the sky with the tool to select the area. If the tool picks up the wrong detail, hold Alt and paint to subtract from the initial selection.
04 Improve the selection
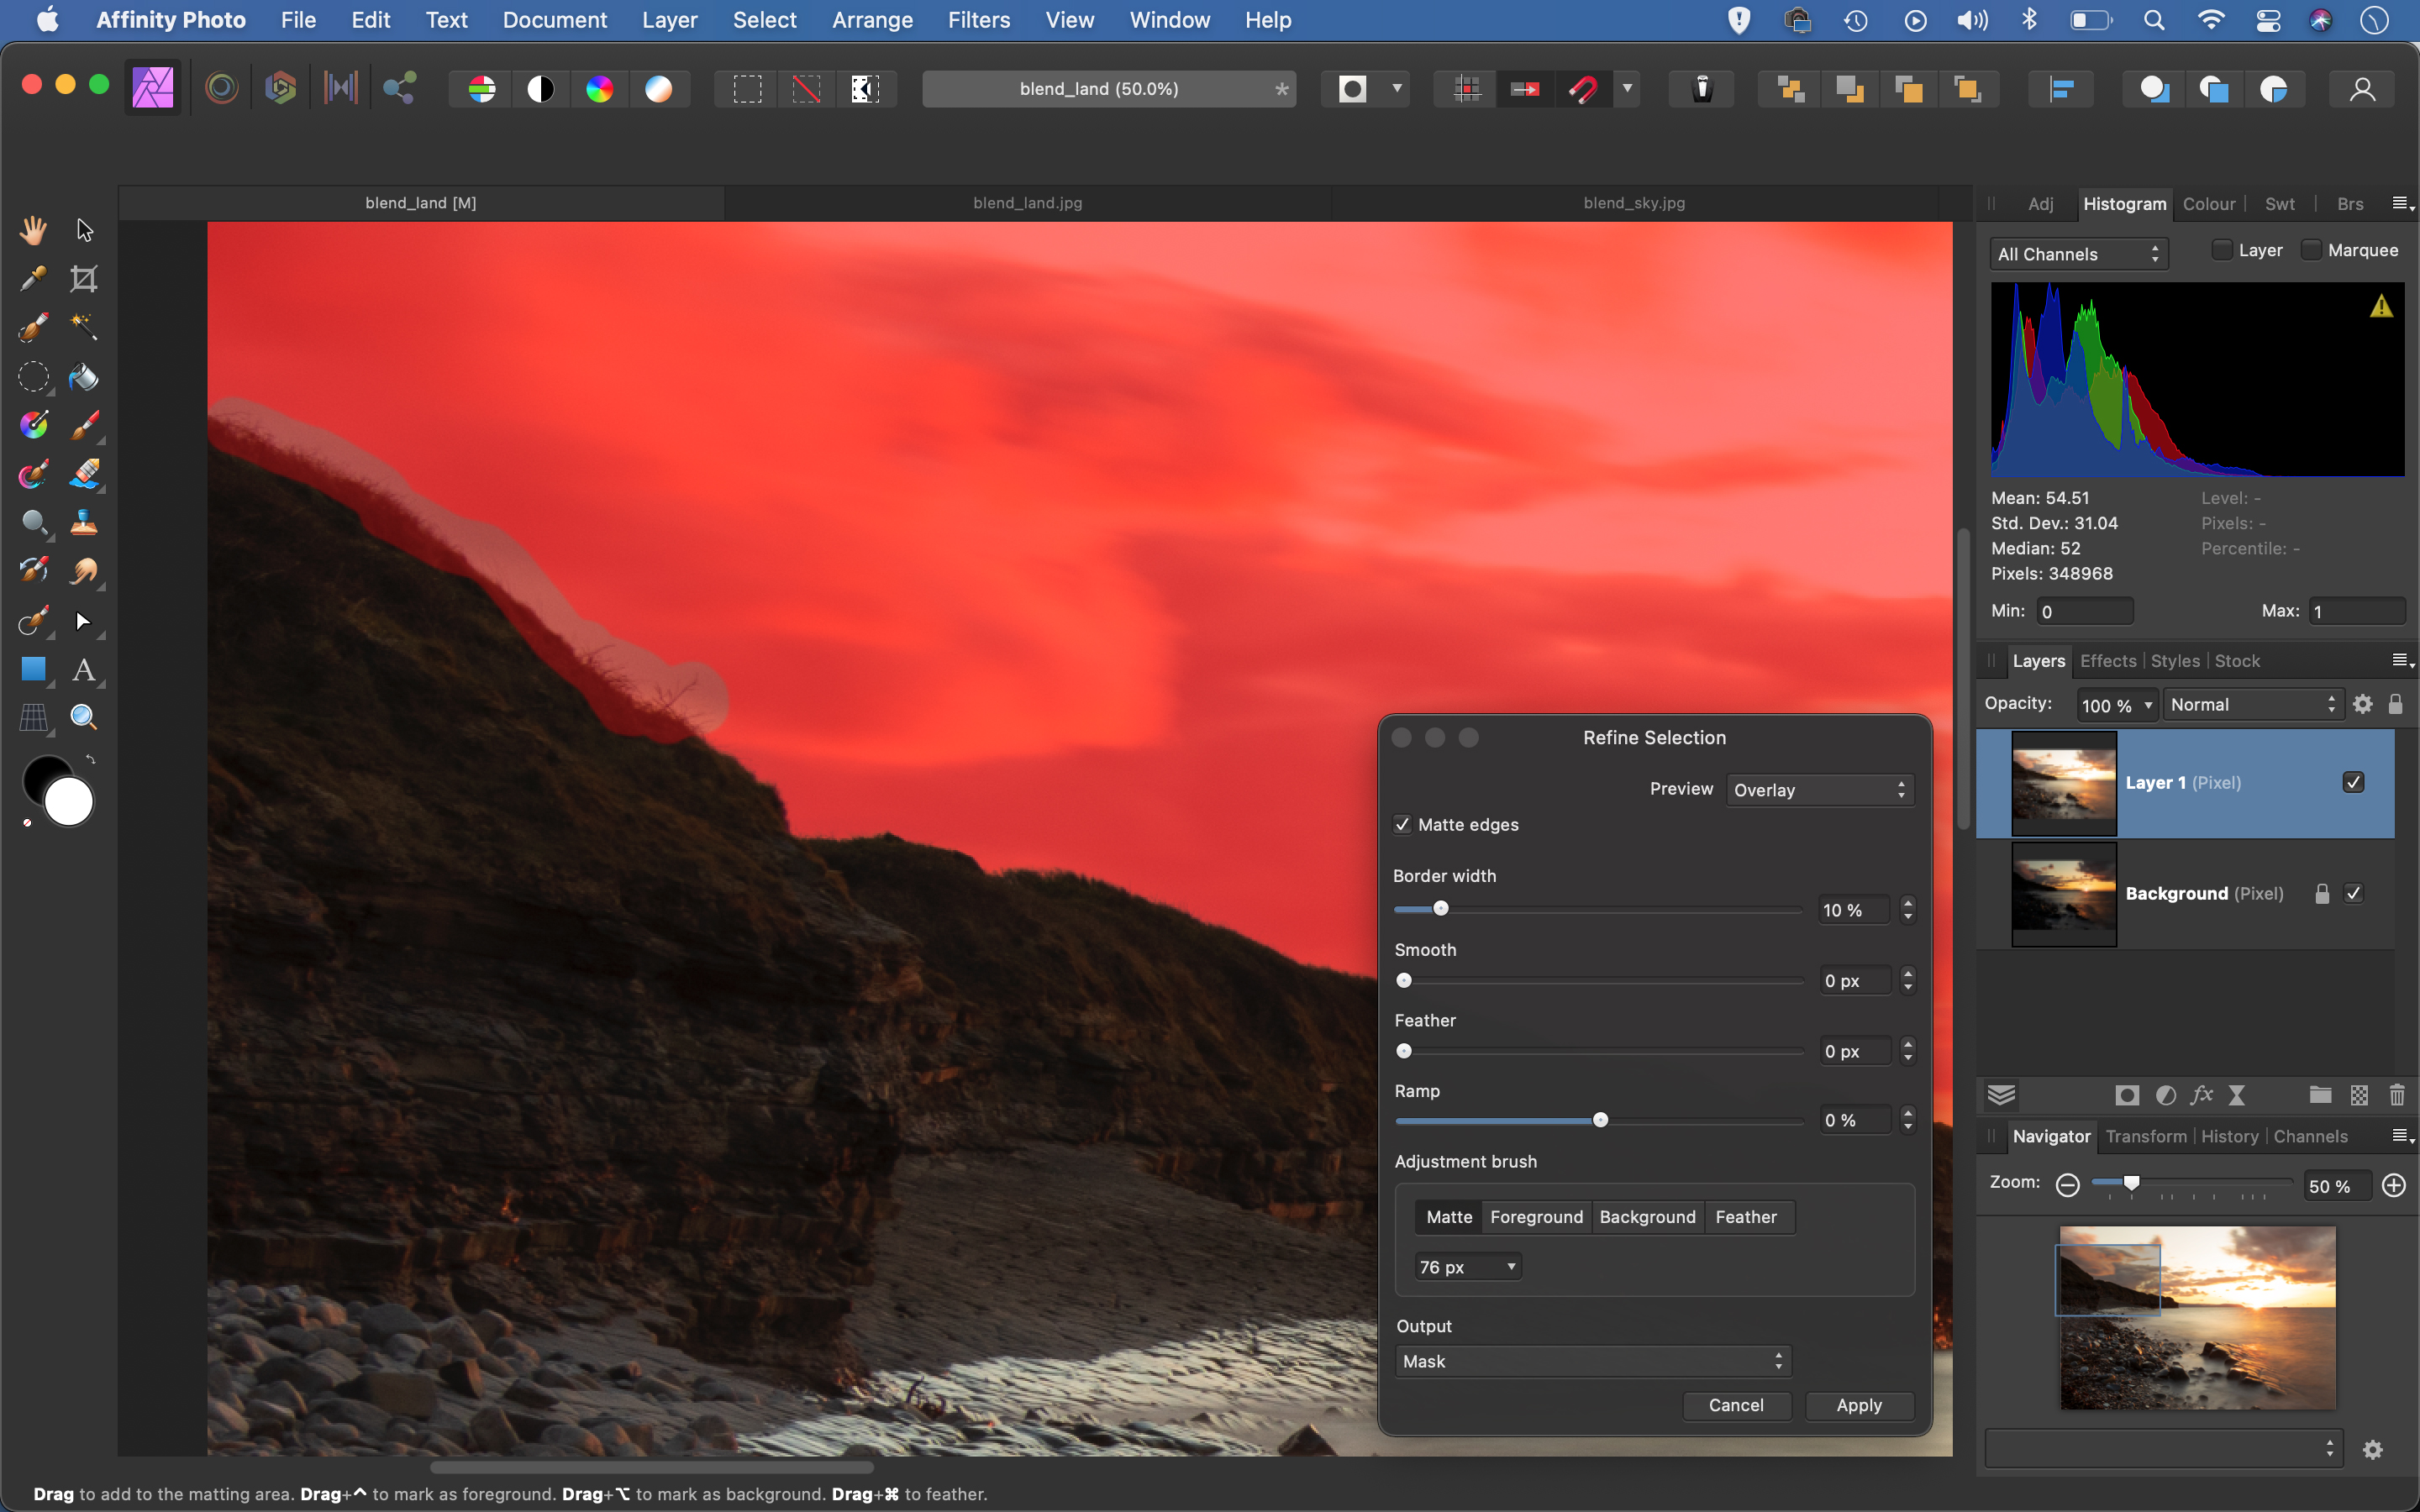
Go to Select > Invert Pixel Selection so the land is selected. Hit the Refine button at the top. Increase the Border Width slider to expand the refinement along the selection edge, then paint with the Matte brush over any tricky areas, like trees or foliage. Once done, set the Output to Mask and hit Apply.
05 Perfect the horizon
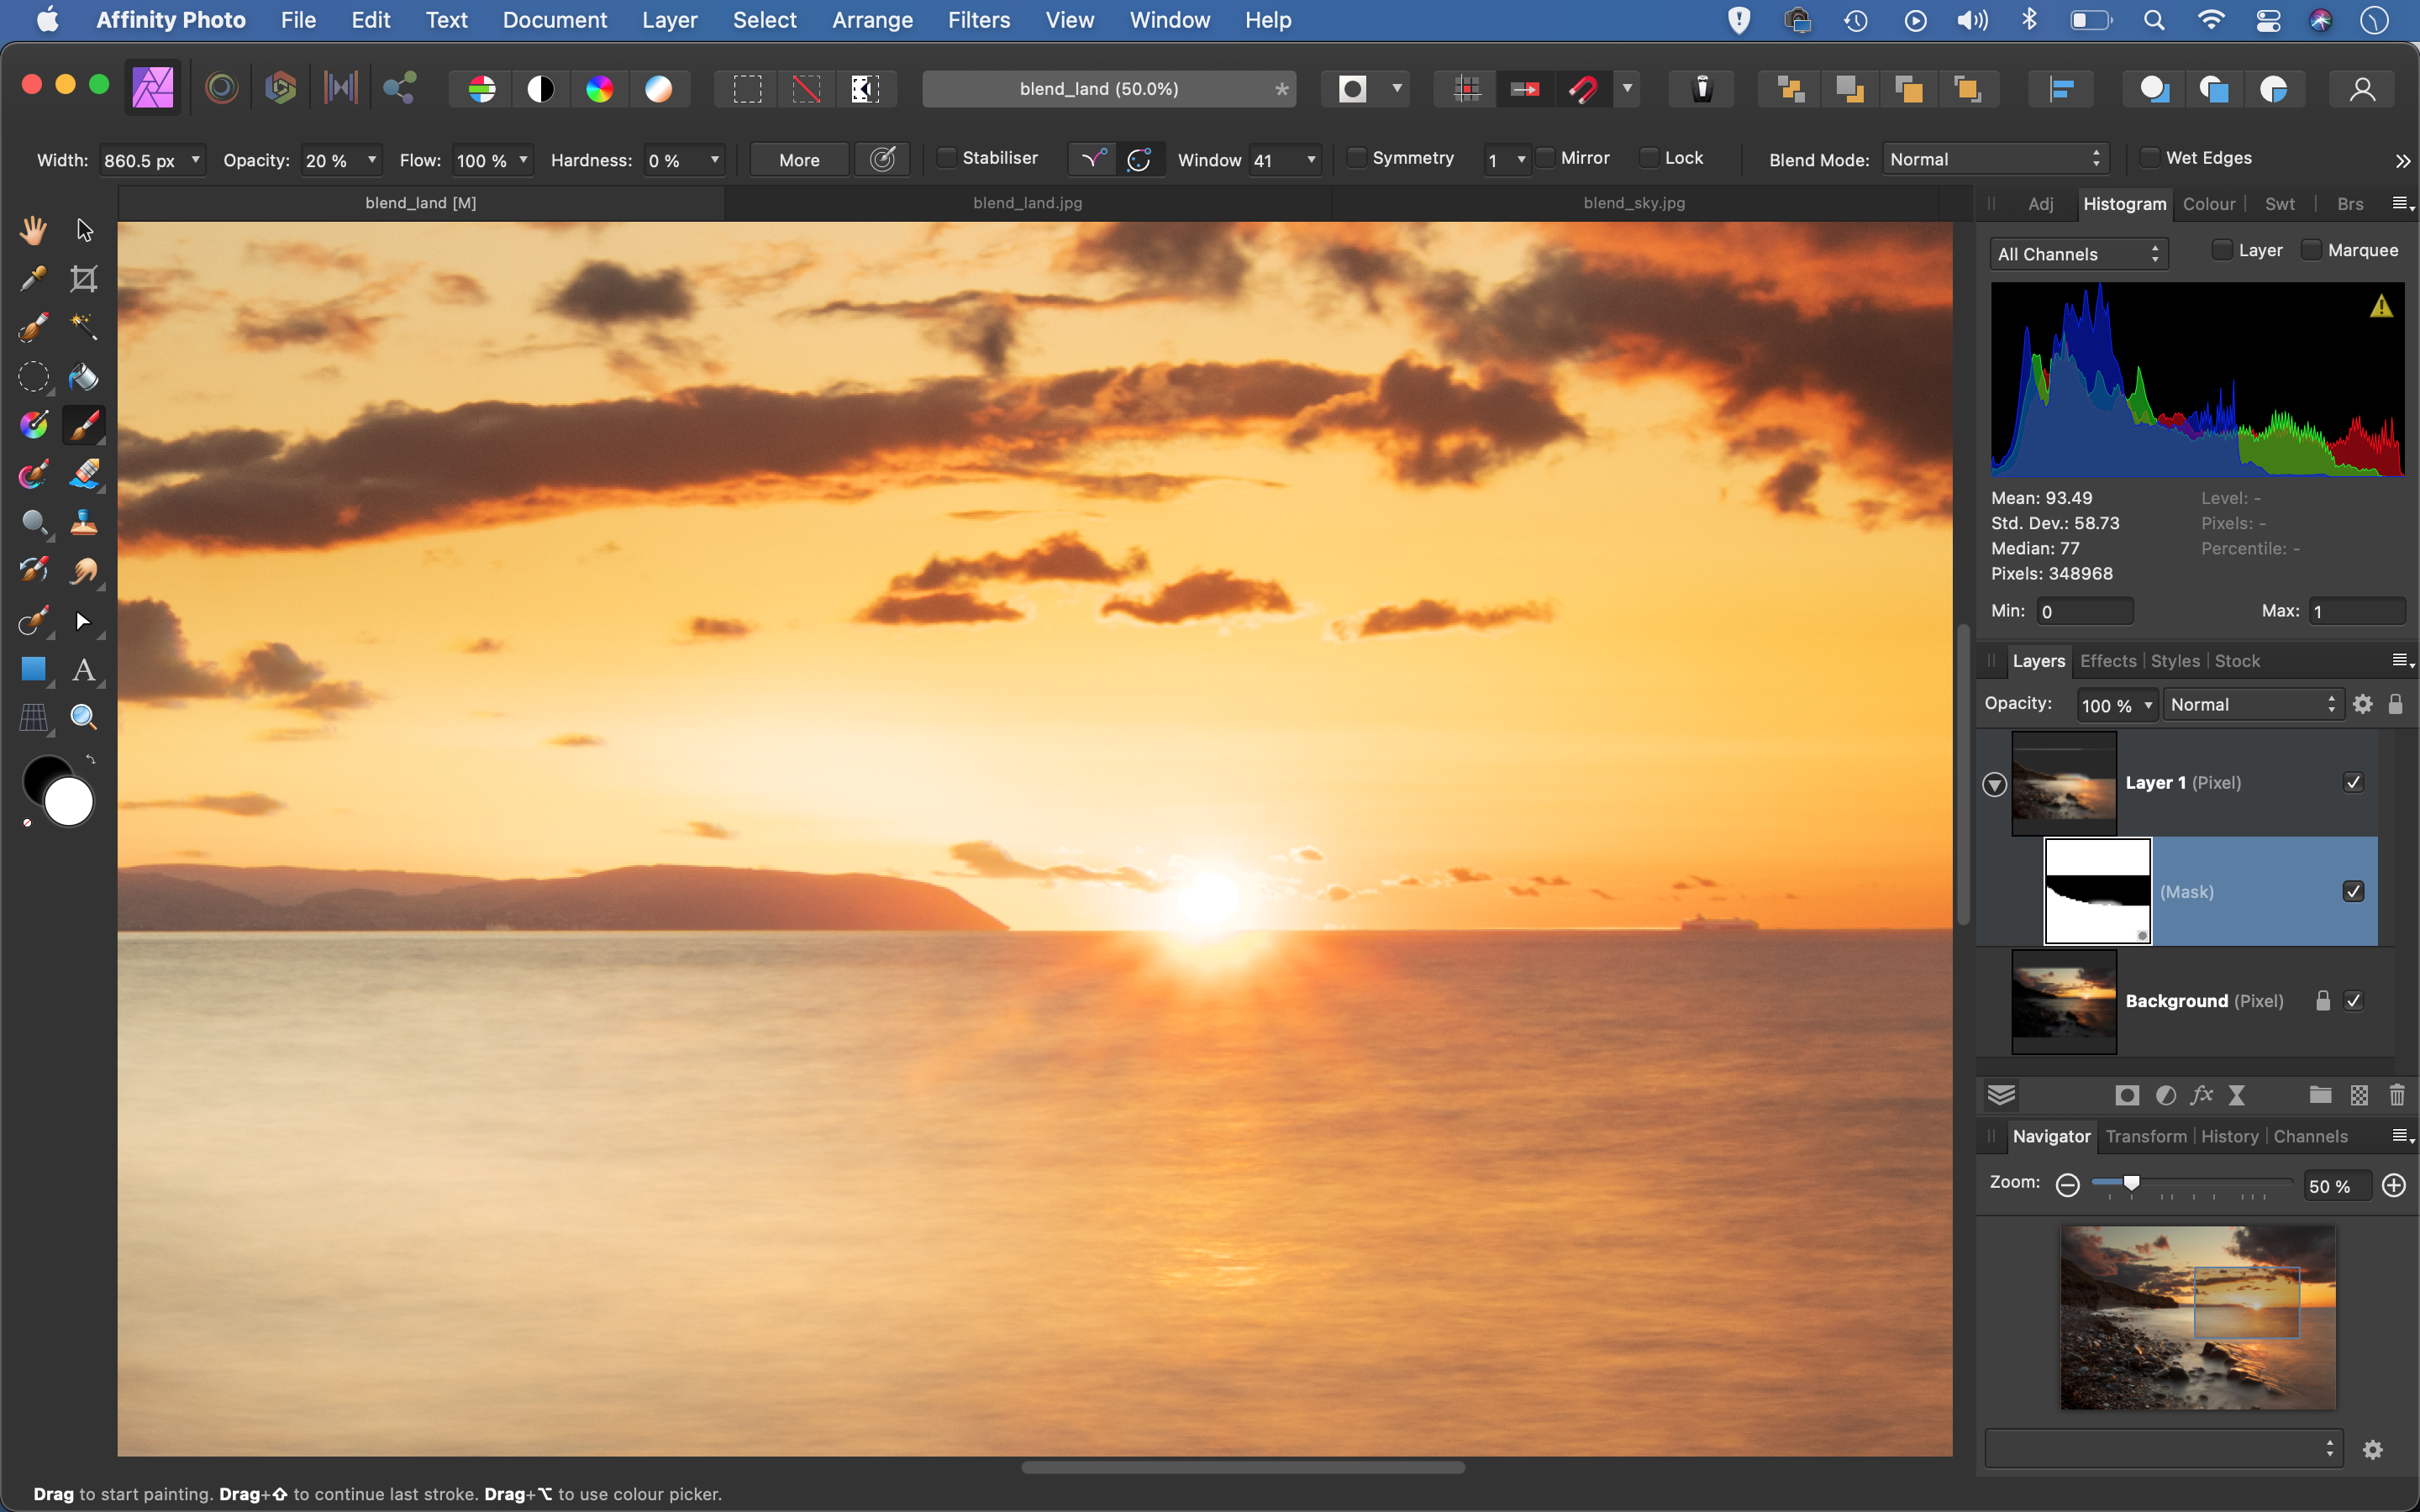
The transition between land and sky will initially be too abrupt, so we can fine-tune the mask. Highlight the mask thumbnail on the layer then grab the Brush tool. Set brush Hardness 0% and Opacity 20%, then paint with white to gently reveal more bright sky along the horizon, or black to hide the brighter sky.
06 Tweak the tones
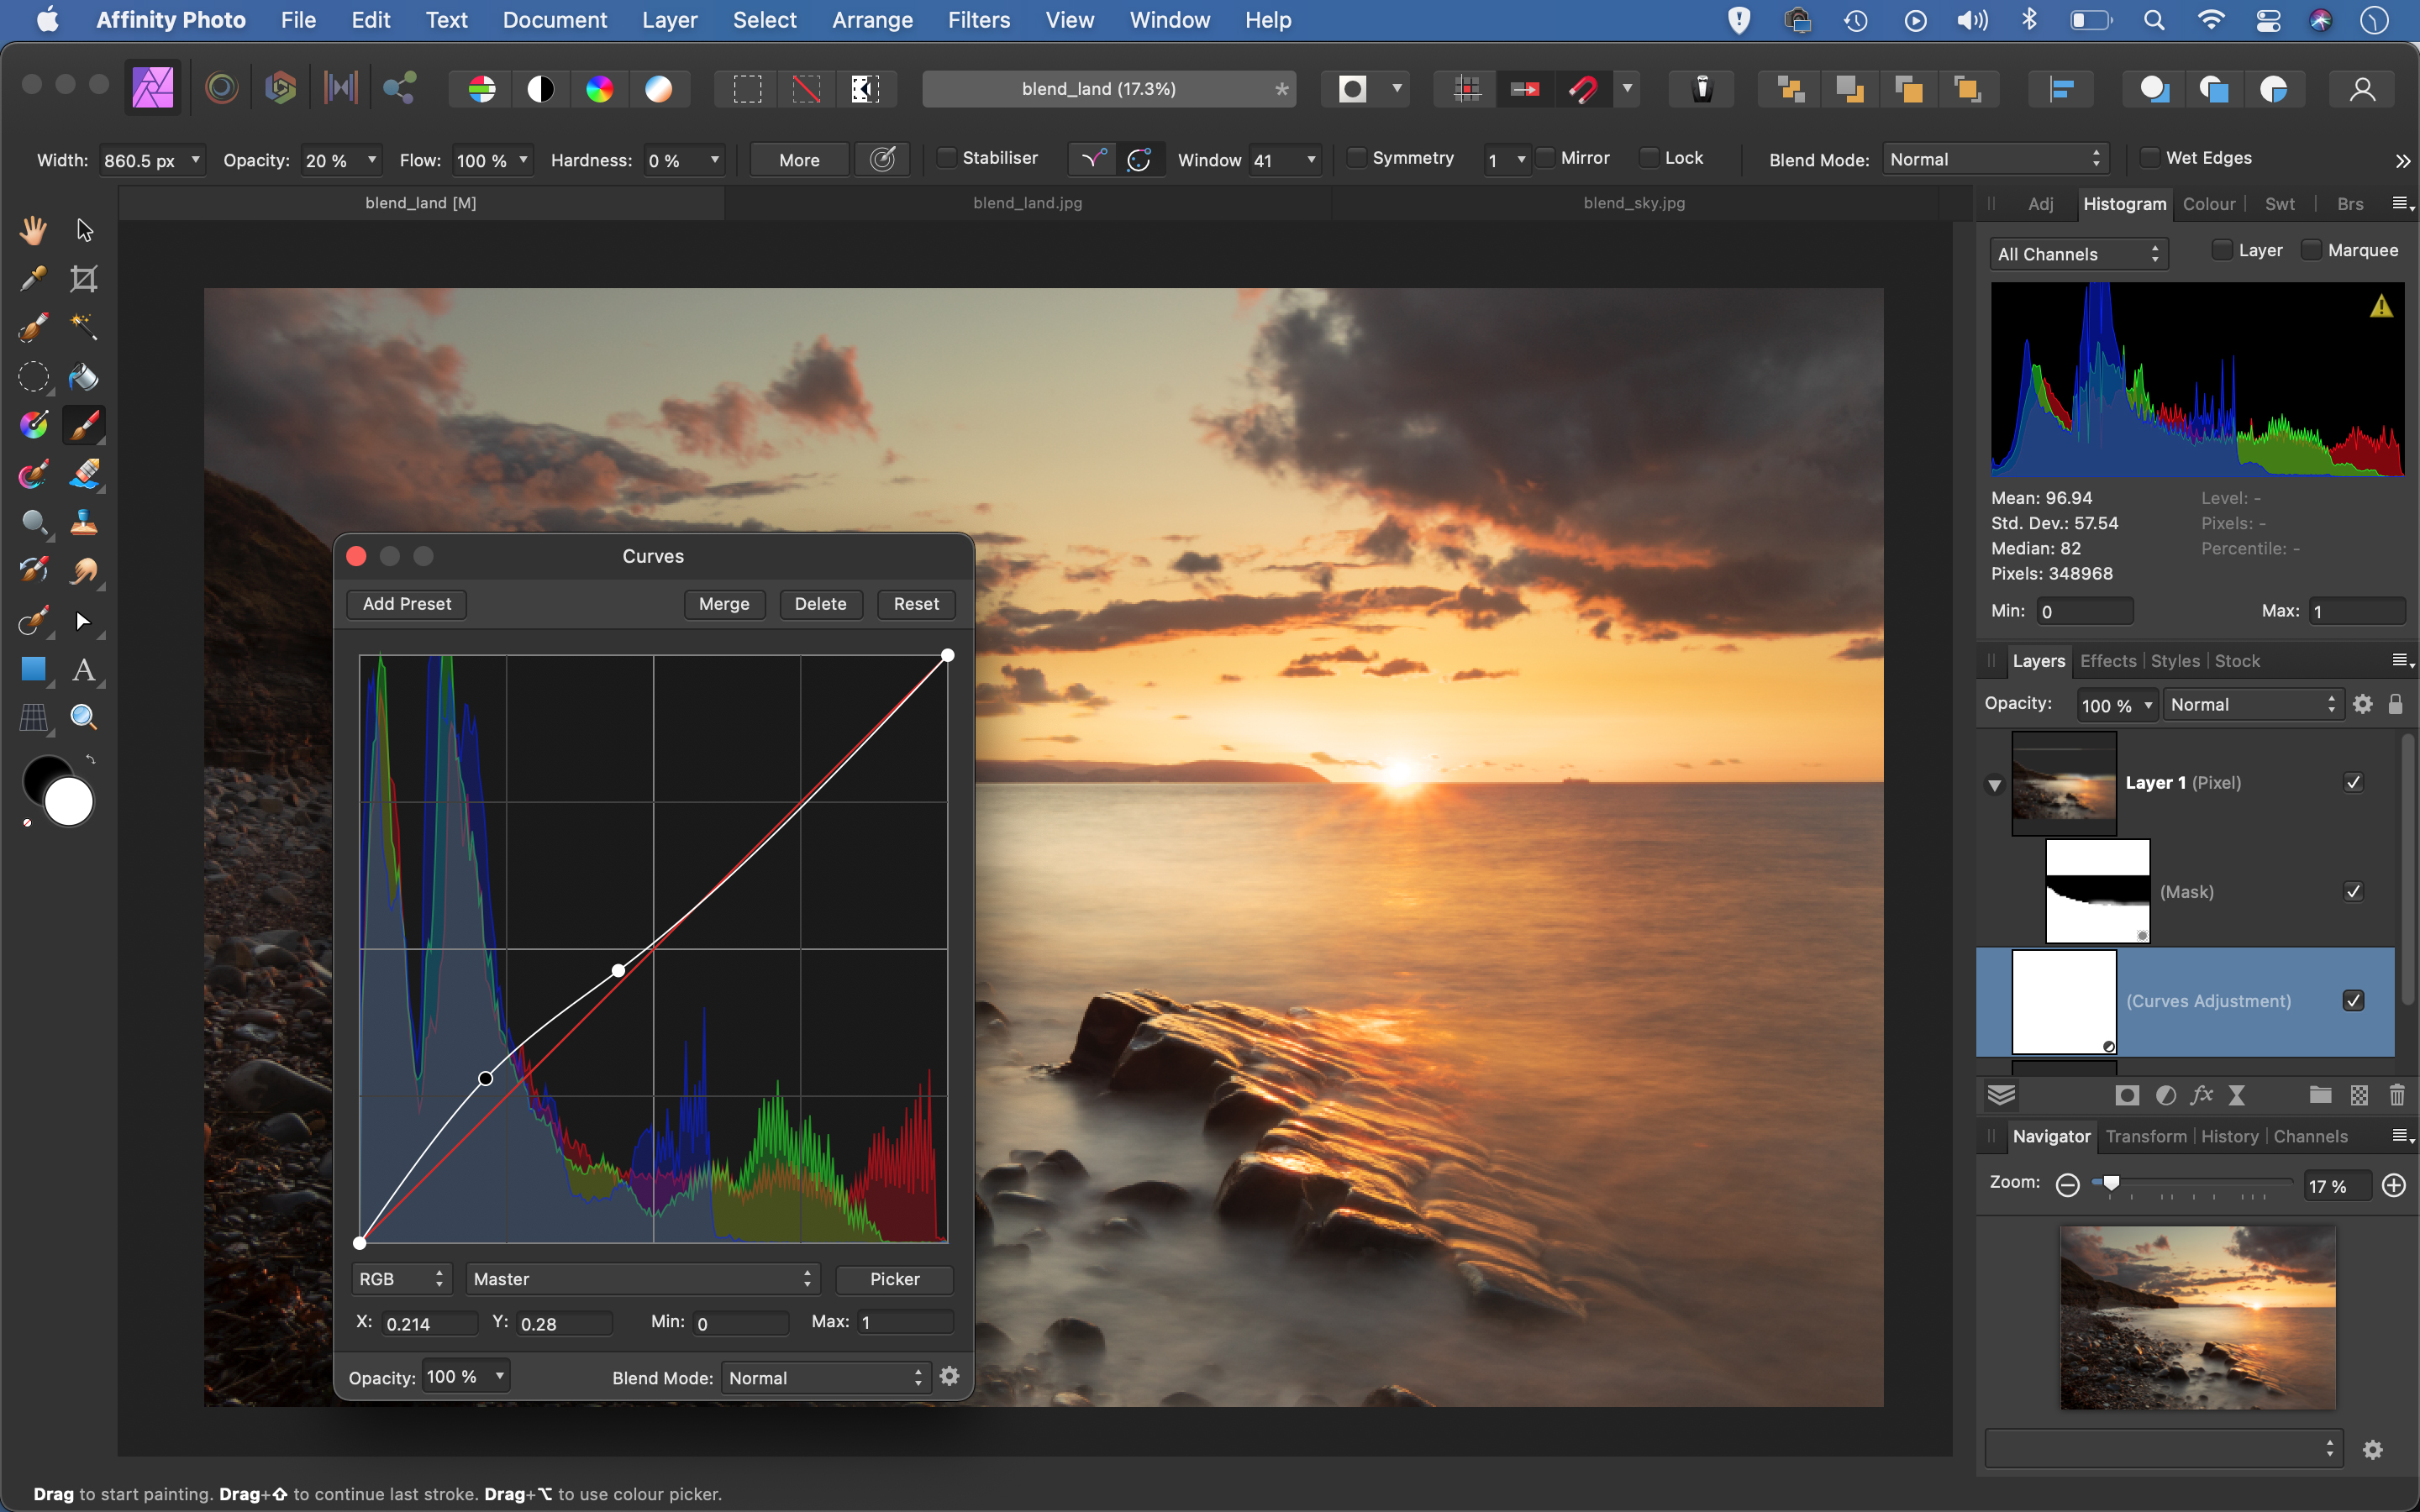
Now that our shots are combined we can see the clouds in the sky look a little too dark, but we can lift them with an Adjustment Layer. Highlight the bottom layer, then click the Adjustment icon and choose Curves. Drag up on the bottom part of the line to lift the shadows, then pin back the rest of the line as shown.
PhotoPlus: The Canon Magazine is the world's only monthly newsstand title that's 100% devoted to Canon, so you can be sure the magazine is completely relevant to your system.
Read more:
What is HDR photography?
The best photo editing software: image editors for novices through to pros
The best photo-editing laptops: top laptops for photographers
10 best online photography courses – from beginner guides to masterclasses
The lead technique writer on Digital Camera Magazine, PhotoPlus: The Canon Magazine and N-Photo: The Nikon Magazine, James is a fantastic general practice photographer with an enviable array of skills across every genre of photography.
Whether it's flash photography techniques like stroboscopic portraits, astrophotography projects like photographing the Northern Lights, or turning sound into art by making paint dance on a set of speakers, James' tutorials and projects are as creative as they are enjoyable.
He's also a wizard at the dark arts of Photoshop, Lightroom and Affinity Photo, and is capable of some genuine black magic in the digital darkroom, making him one of the leading authorities on photo editing software and techniques.
