The best camera deals, reviews, product advice, and unmissable photography news, direct to your inbox!
You are now subscribed
Your newsletter sign-up was successful
Wildlife photography is tough, requiring commitment, patience, research, skill and a good dose of luck. Despite the trials and tribulations, though, it's undoubtedly one of the most rewarding genres photography has to offer.
There's no better feeling than when you finally manage to capture an incredible majestic animal, looking in the right direction when the light is just perfect and you've got your camera settings honed in. We caught up with professional wildlife photographer Sean Weekly to get his advice when starting out.
• These are the best lenses for wildlife photography
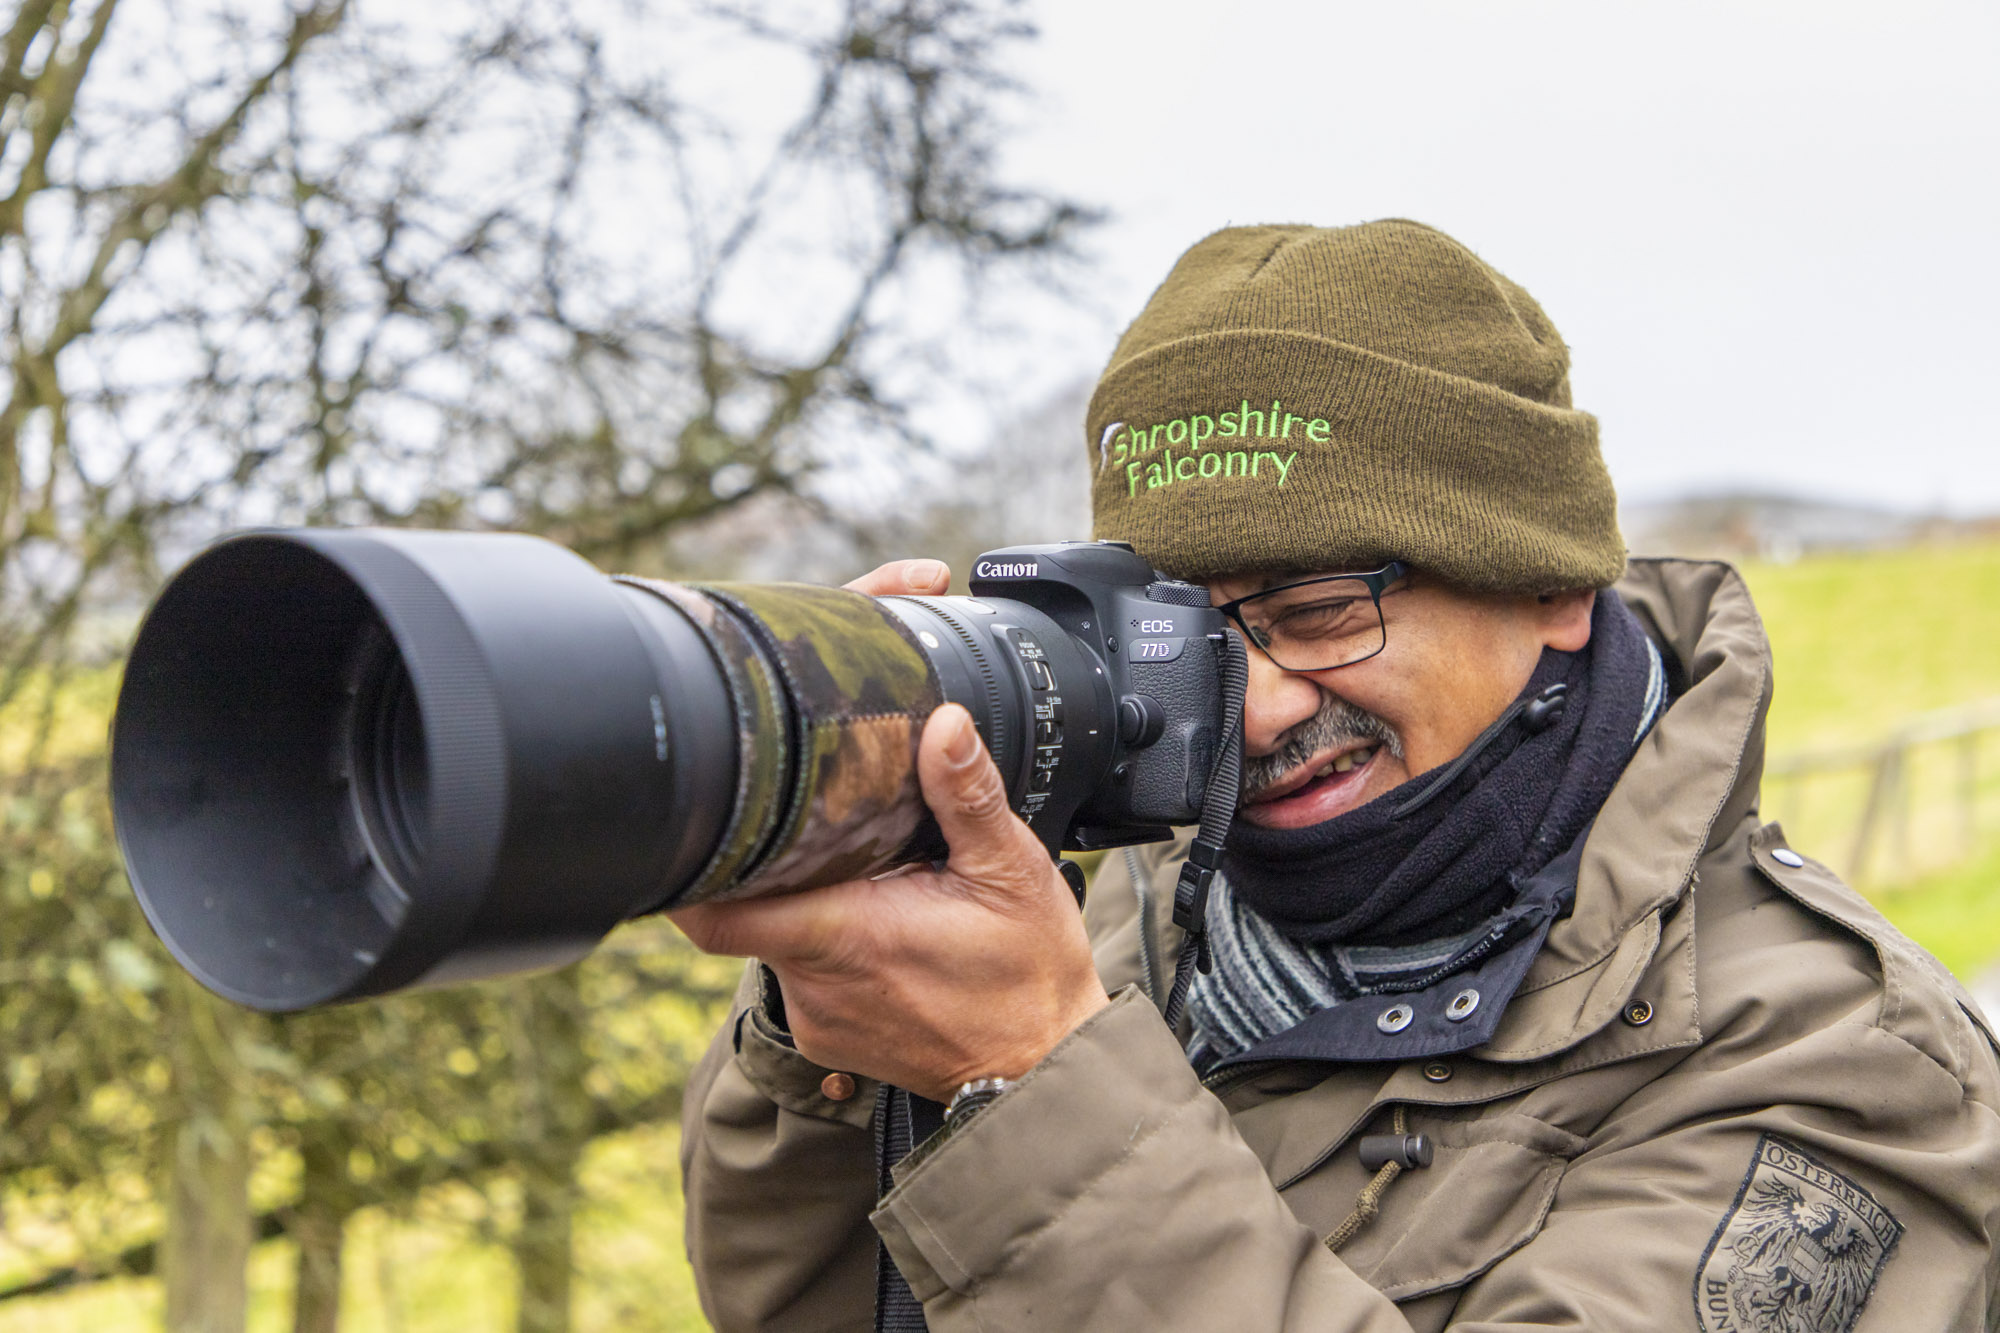
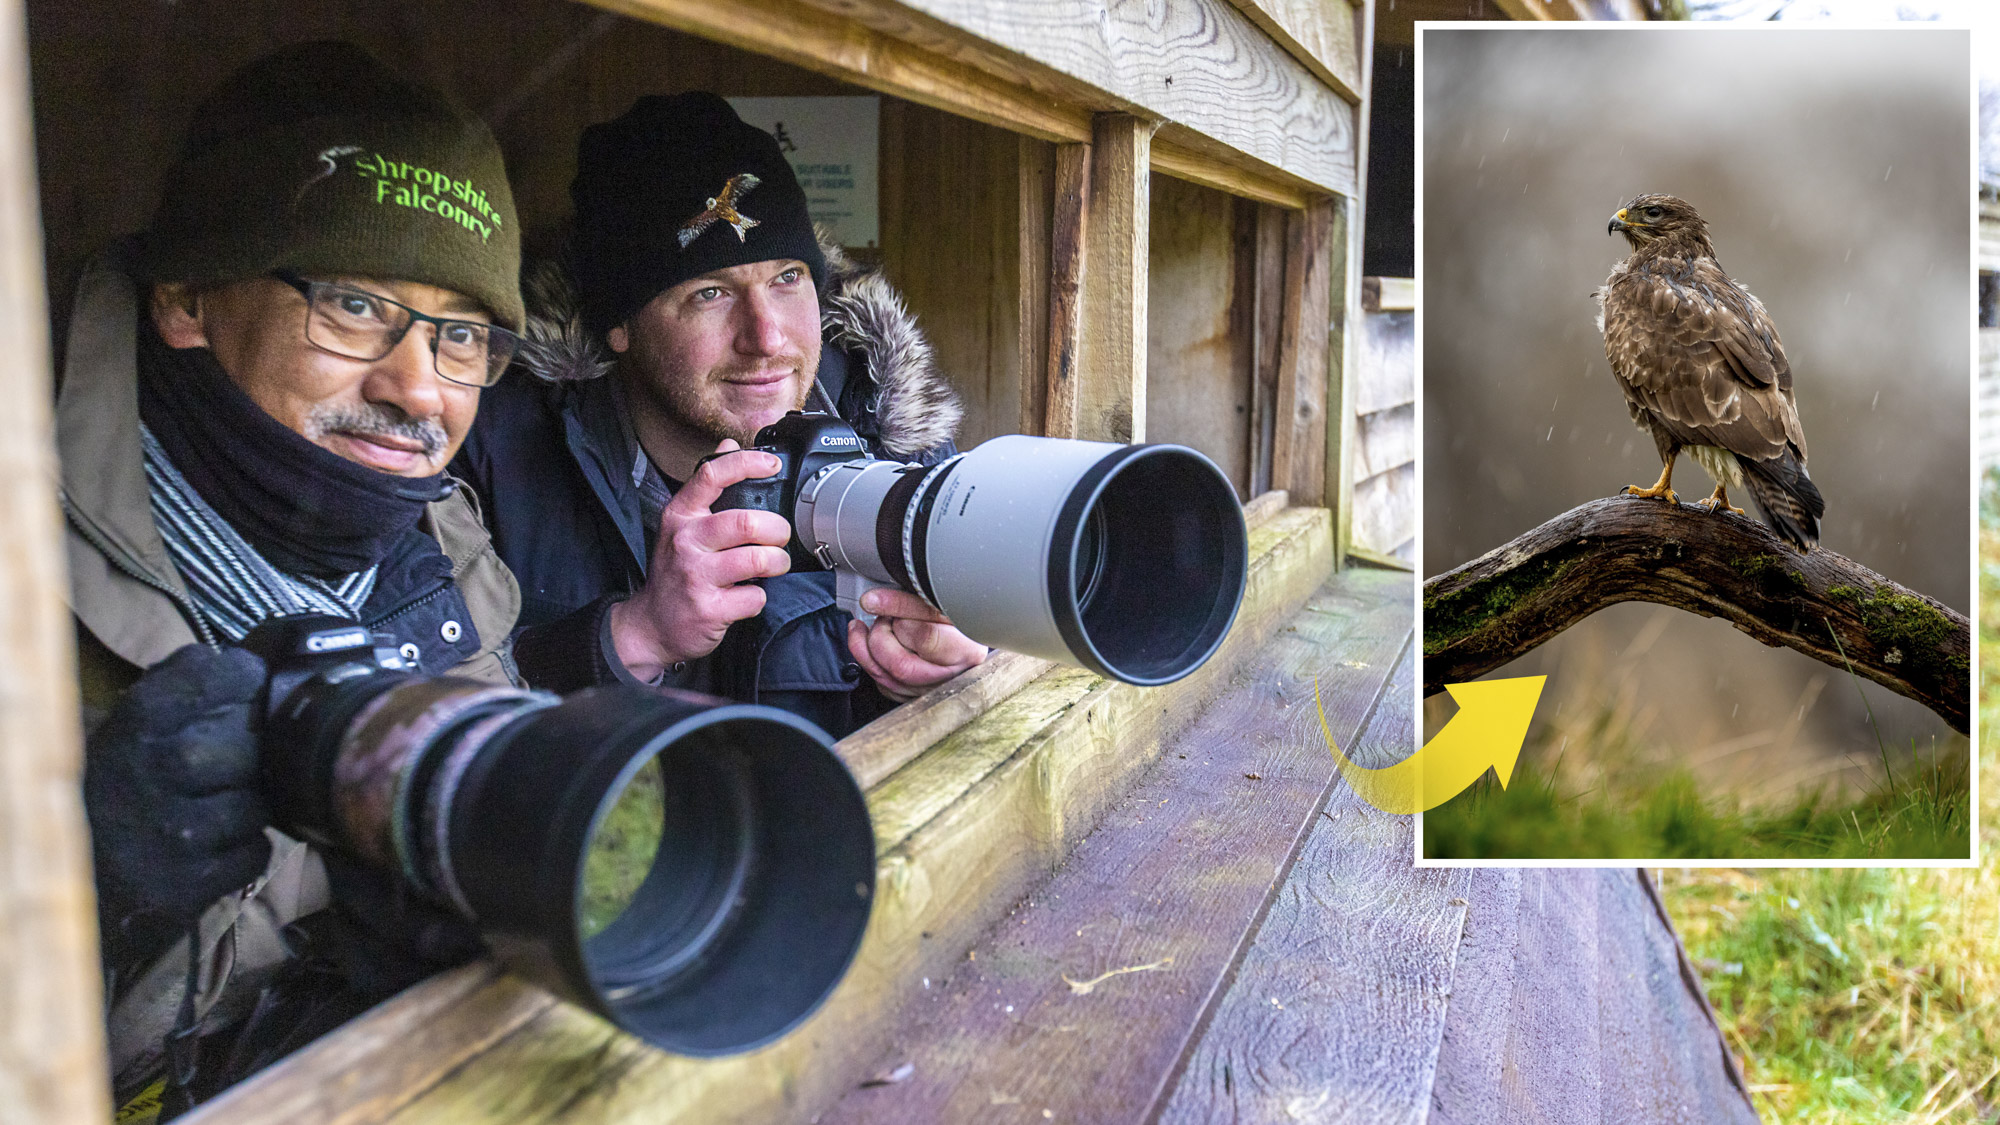
We teamed Sean with reader of PhotoPlus: The Canon Magazine, Raju Misra, for a masterclass in birds of prey photography at his ground-level hide from which he runs workshops at Gigrin Farm. From the hide they'd be able to practice taking pictures of Red Kites and Buzzards with ease. Up to 600 Red Kites can be seen on a good day at their daily feeding time.
Sean lives in rural mid-Wales working as a professional wildlife photographer and a guide for Wildlife Worldwide travel company, leading numerous photography trips. On top of that, he also runs photography workshops and 1-2-1 sessions.
Here, you'll find Sean's top 10 tips for wildlife photography, along with some of the images that Raju was able to take by applying them to his own photography.
You can find out more about Sean's work on Instagram and to book a place at his Red Kite and Buzzard Ground Level Photography Hide be sure to visit his website.
The best camera deals, reviews, product advice, and unmissable photography news, direct to your inbox!
01 Watch the background
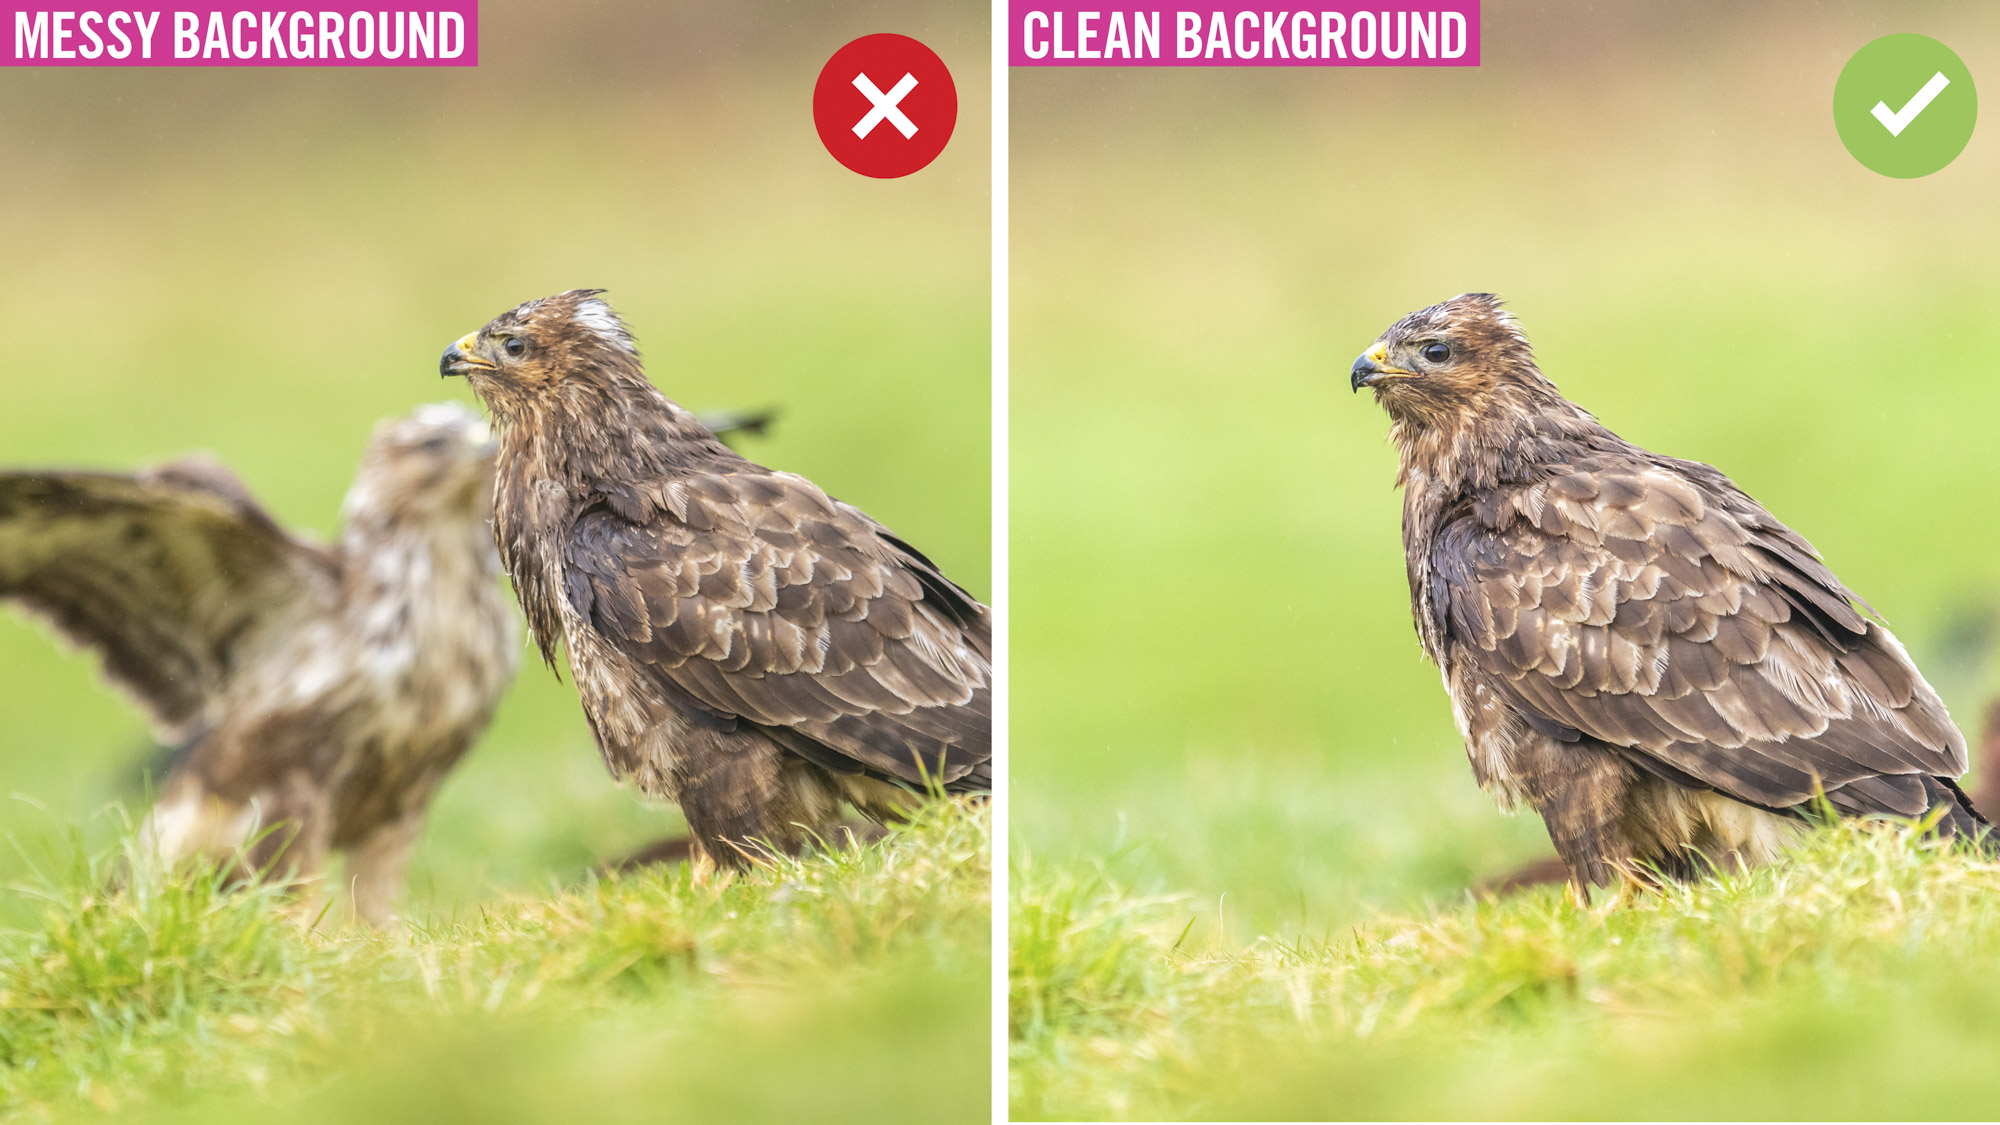
Pay particular attention to your background, as this can have a huge impact on your wildlife portraits. Opening your aperture wide to a value such as f/4, or even f/2.8, will help blur the background with a shallow depth of field. You’ll also want to watch out for other distractions, though, like the additional birds in our bad example here, as this pulls the eye away from our subject. Raju waited for the moment when the bird was on its own, giving his image a much cleaner background and more impact.
02 Use a mini tripod
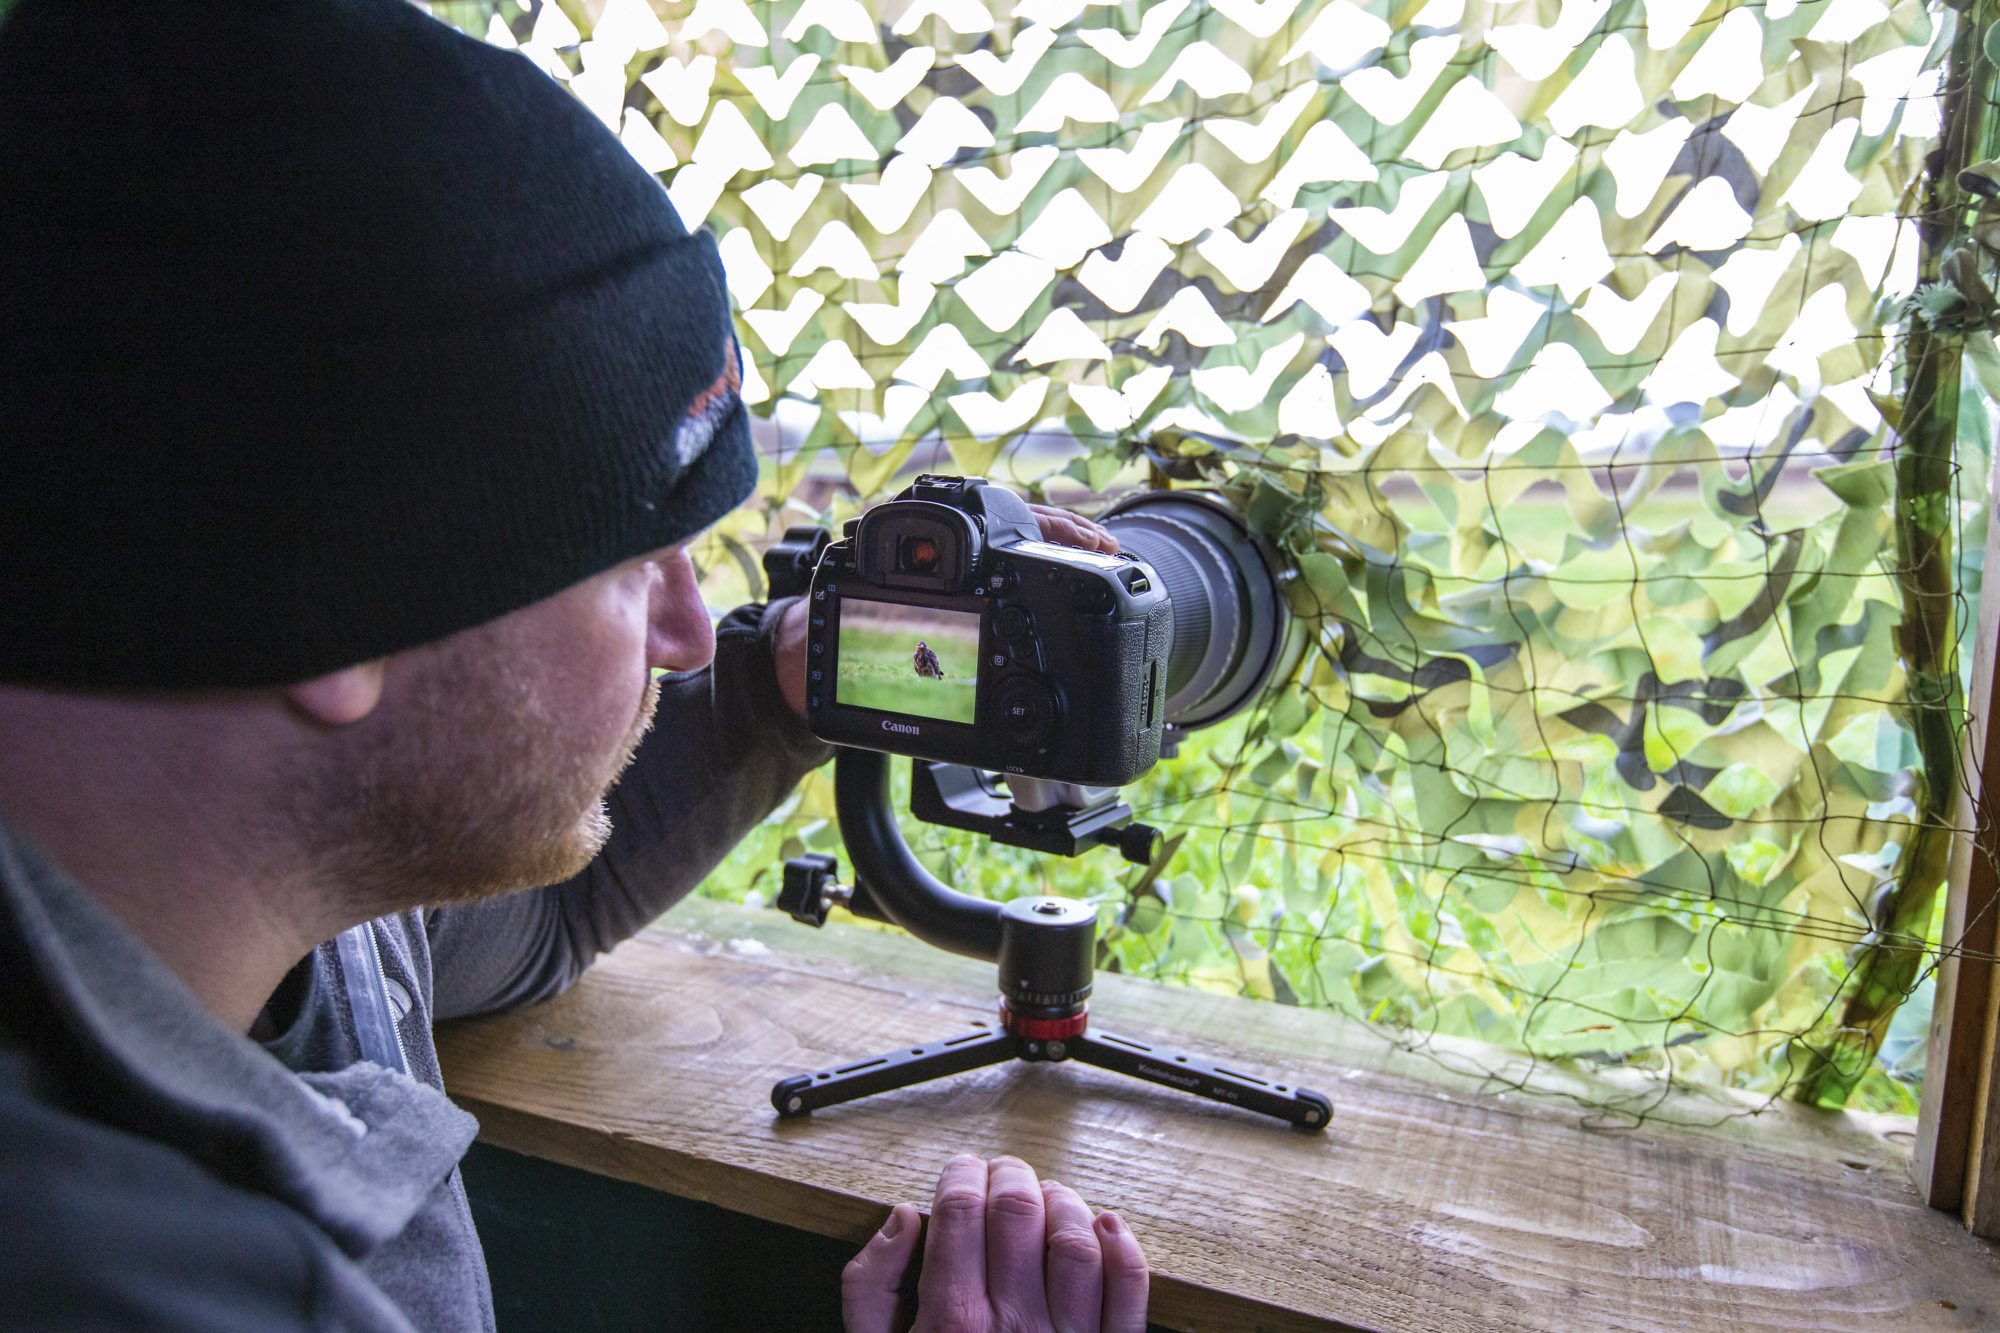
For low-level shots from his hide Sean often mounts his camera and lens to a Koolehaoda MT-01 mini tripod with a Neewer Professional gimbal head attached. This helps take all of the weight of his camera and lens and makes it easy to pan and tilt to track birds as they move. It’s also a very portable and compact setup making it great to take with him on shoots out in the wild.
03 Activate your fastest burst mode
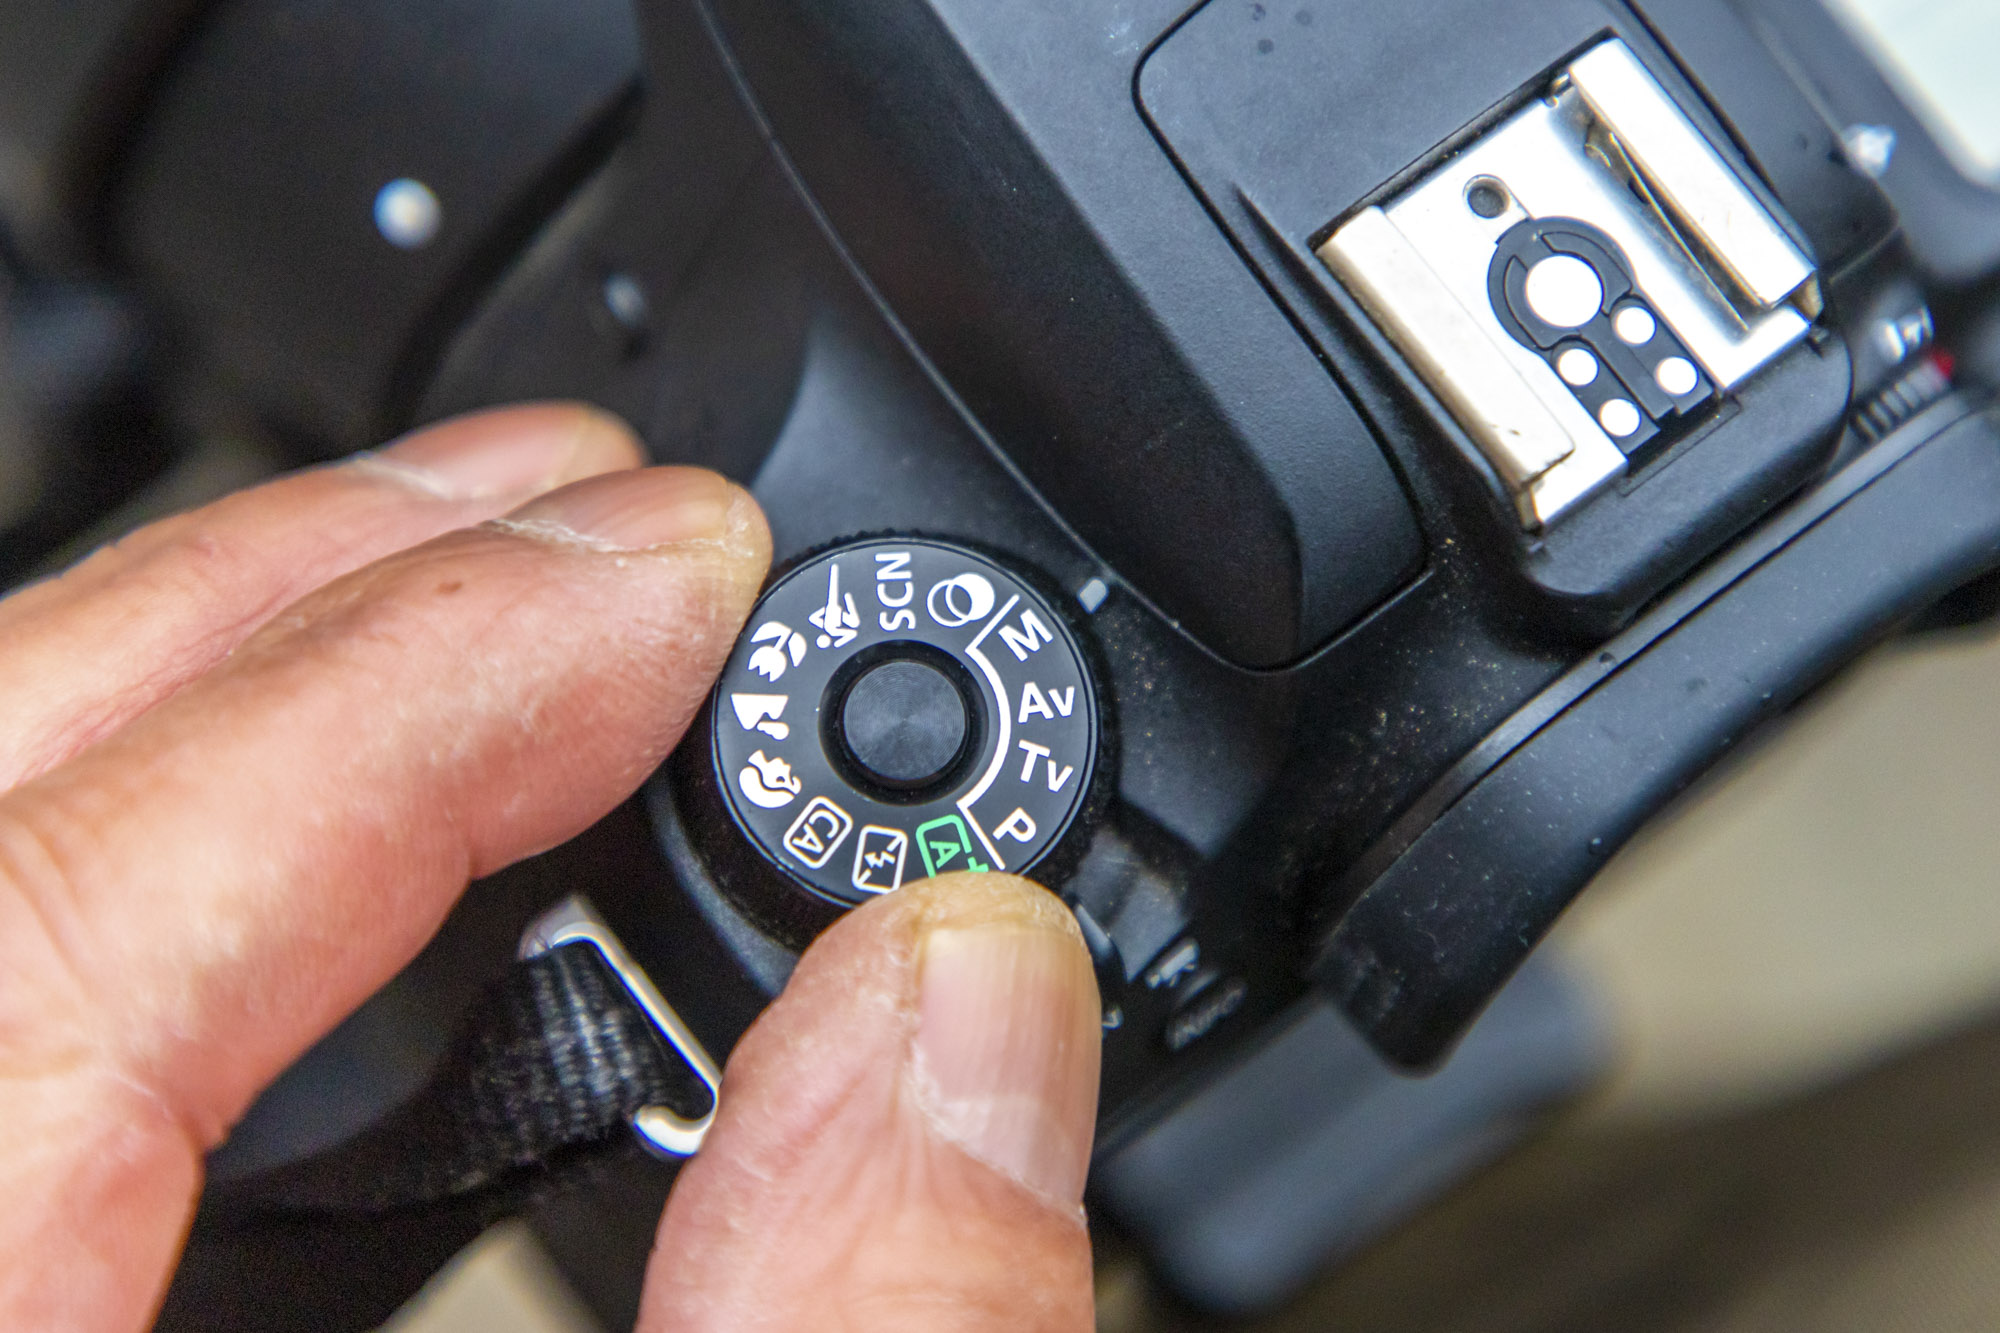
Sean recommends the High Speed Continuous mode so that you can take advantage of the maximum burst rate your Canon camera has available, such as 7fps on his Canon EOS 5D Mark IV, or 20fps on a camera like the Canon EOS R5. He says that the Red Kites and Buzzards at his hide are accustomed to the sound of camera shutters, but if you’re shooting a particularly timid species it’d be worth switching over to a silent shooting or quiet mode if your camera has one.
04 Go into manual mode
Raju mostly shoots in the semi-automatic Shutter Priority mode, so Sean was keen to bring him out of his comfort zone and get him shooting in the manual mode where he’d be able to take more control of his camera settings. This is where you can independently set the three exposure parameters: shutter speed, aperture and ISO value. Sean also set Raju’s camera to shoot raw, he did this because raw files capture more detail and exposure information, making it much easier to adjust the exposure, white balance and more when editing images later.
05 Short telephoto zoom
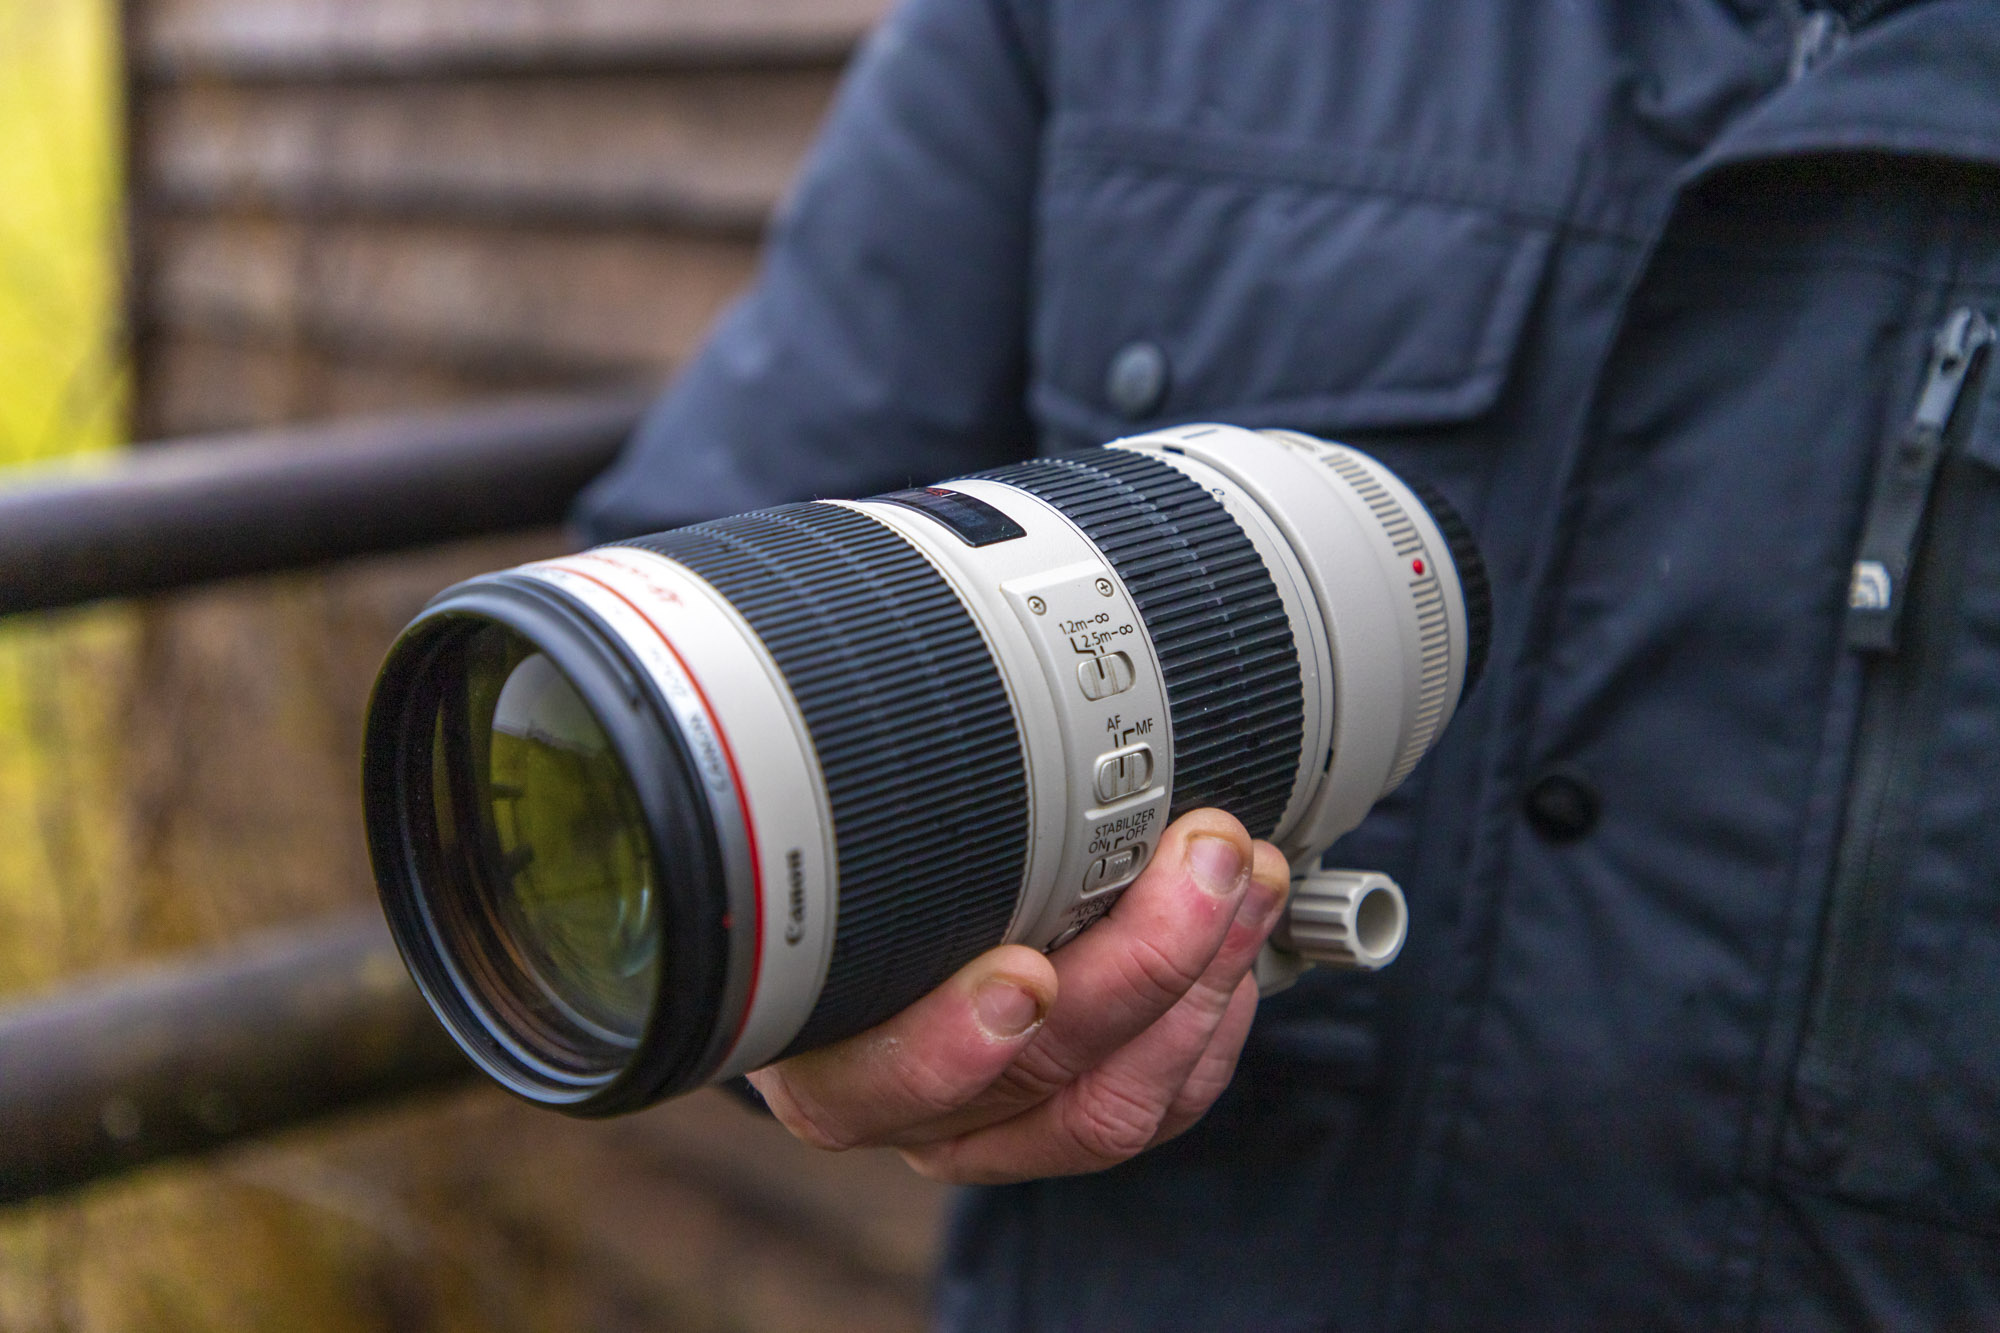
These lenses are much lighter and portable than a big 300mm prime lens, yet they’re still exceptionally sharp and versatile. The zoom range on a Canon 70-200mm f/2.8L IS USM Mark III is a bit wider than lenses like a 300mm or 400mm prime, so they’re handy for environmental shots where you want to include more of the surrounding habitat.
06 Cropped sensor cameras
Interchangeable lens cameras from Canon, Nikon, Sony and Pentax come in two sensor sizes: full-frame and the smaller APS-C, like Raju’s Canon EOS 77D. Cameras with an APS-C sensor can be preferable for wildlife photography because their reduced size gives them have a crop factor, which multiplies the focal length and makes them images more ‘zoomed in’, so it’s easier to get frame-filling shots of faraway subjects. Raju's APS-C camera has a crop factor of 1.6x, which means that a 400mm lens will have an effective focal length of 640mm.
07 Go black-and-white
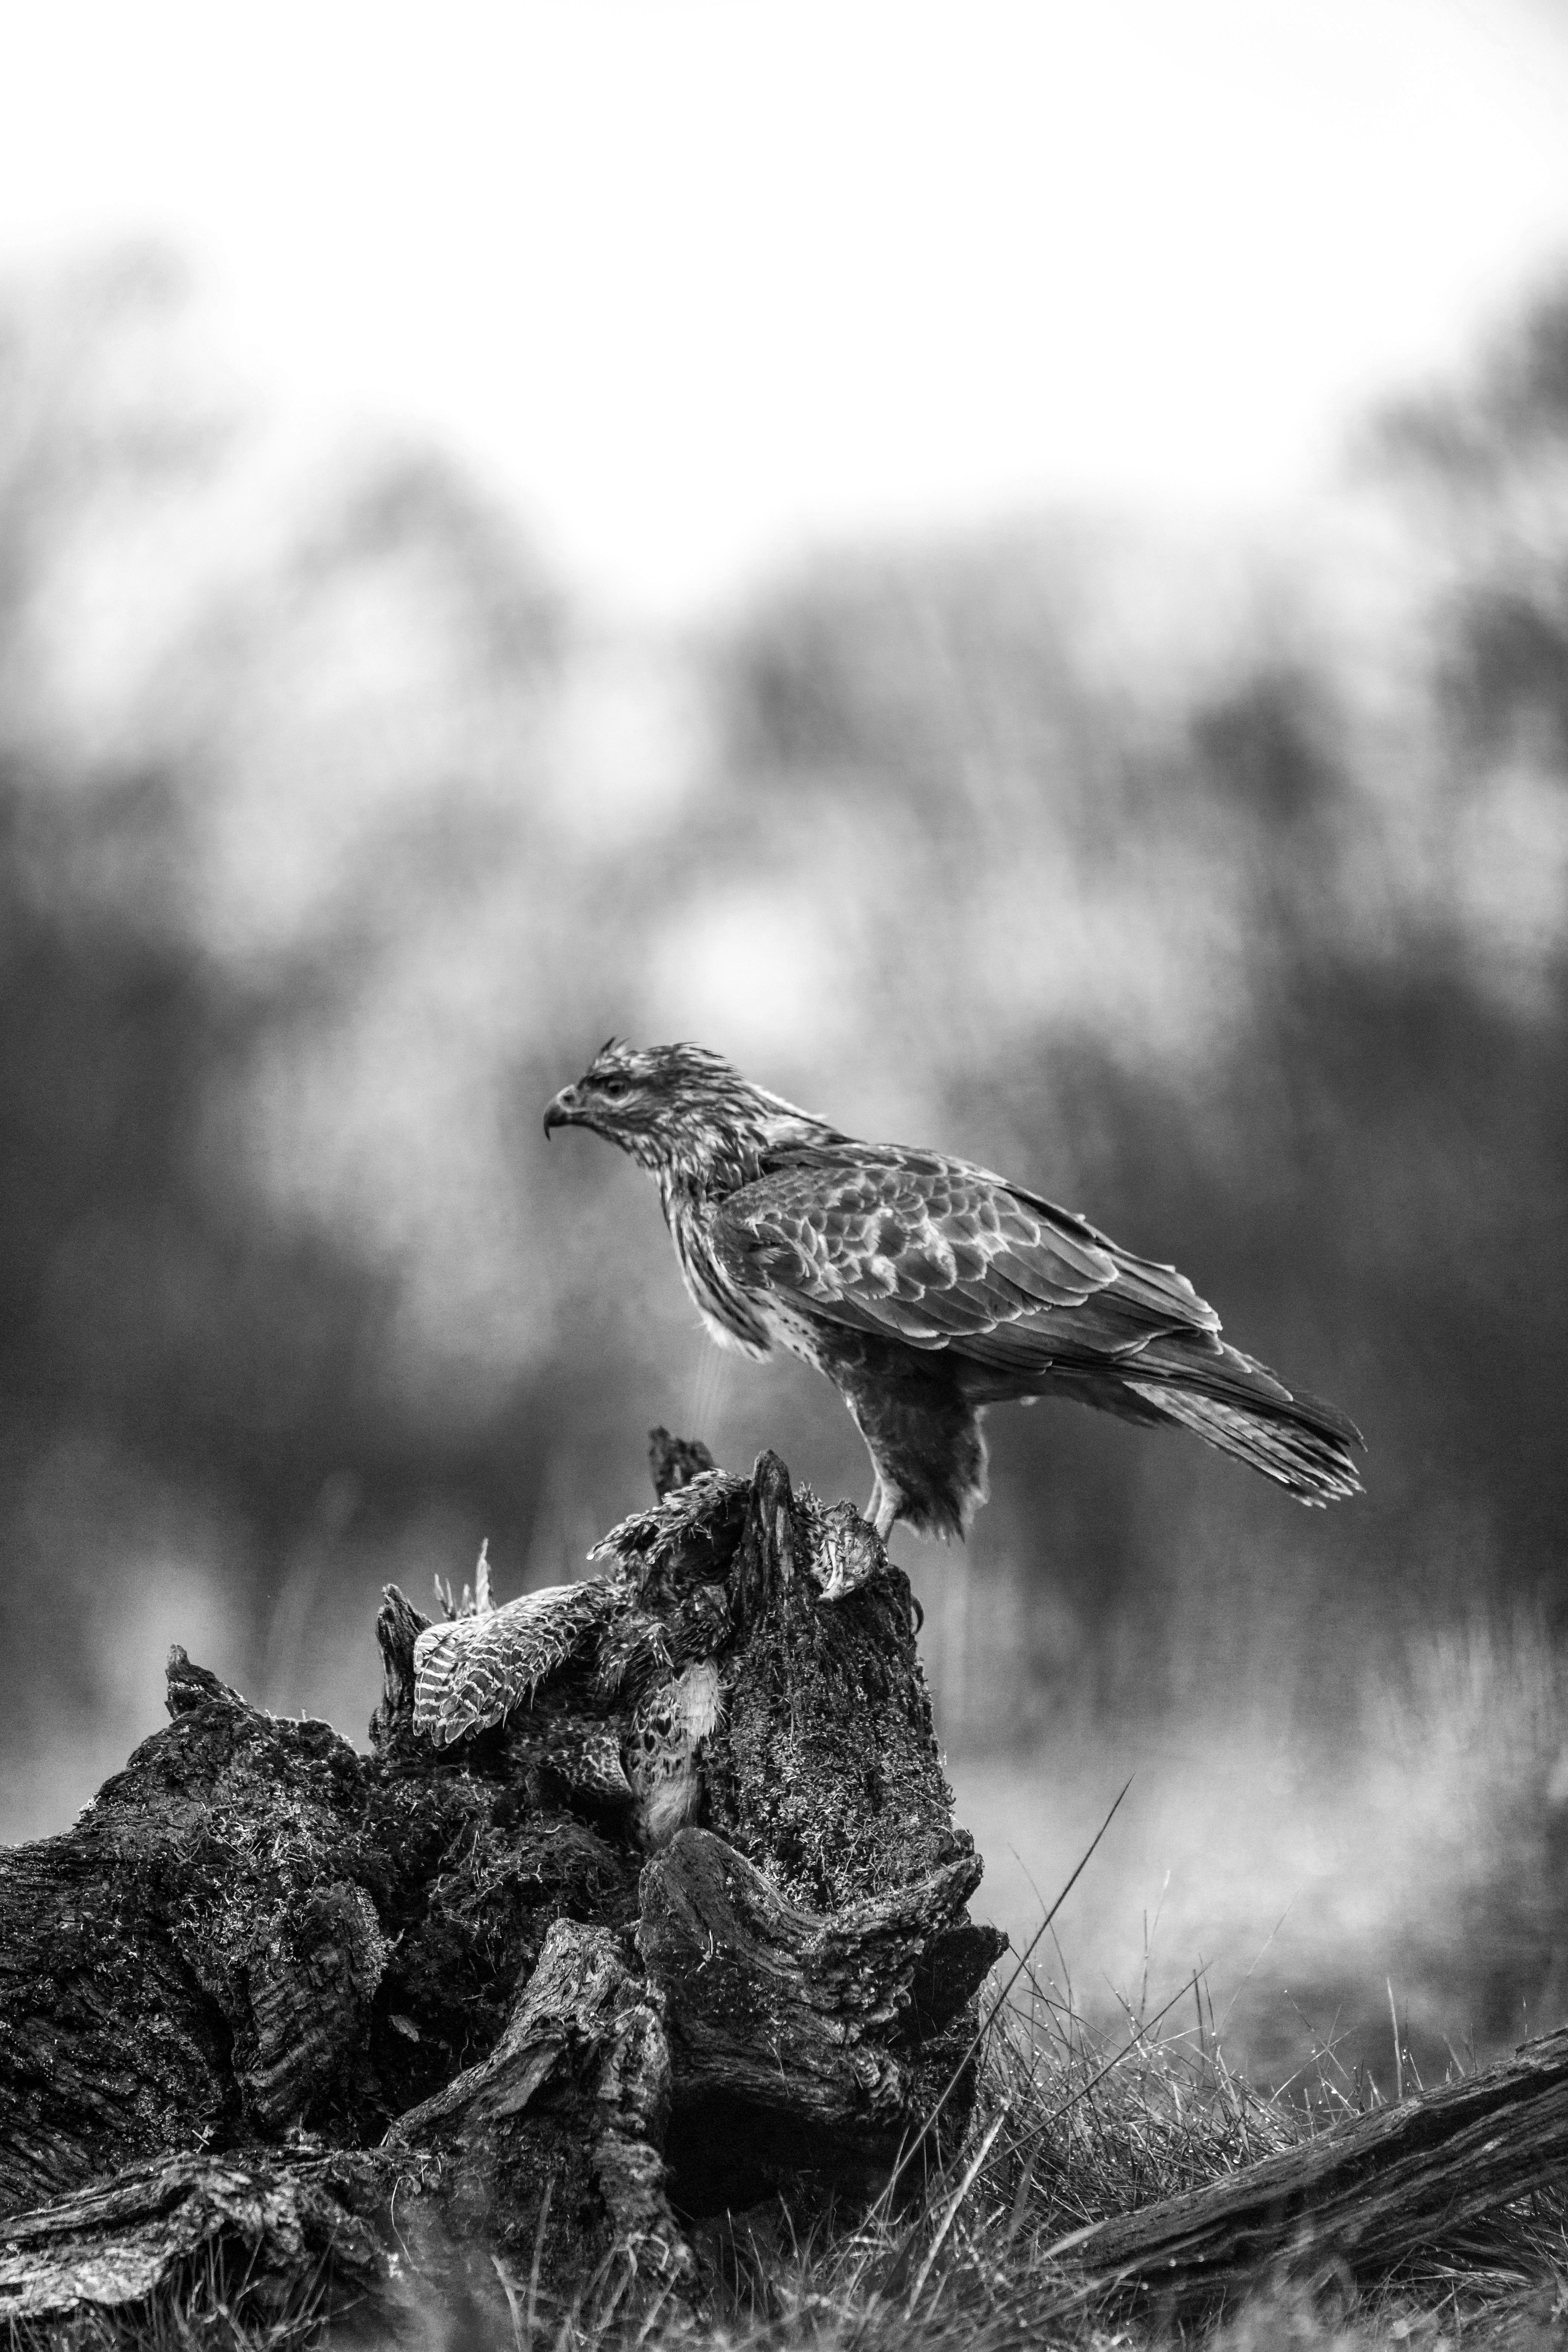
Bird portraits lend themselves fantastically to mono treatments, especially if your color images are lacking due to shooting on an overcast day like we did. A black-and-white conversion in Photoshop removes problematic colors, and focus more on light, tone, shape and contrast. You can really boost contrast and sharpness with a mono treatment, too, helping your shots look razor sharp even if they’re slightly softer than you may like.
08 Use different image stabilization modes
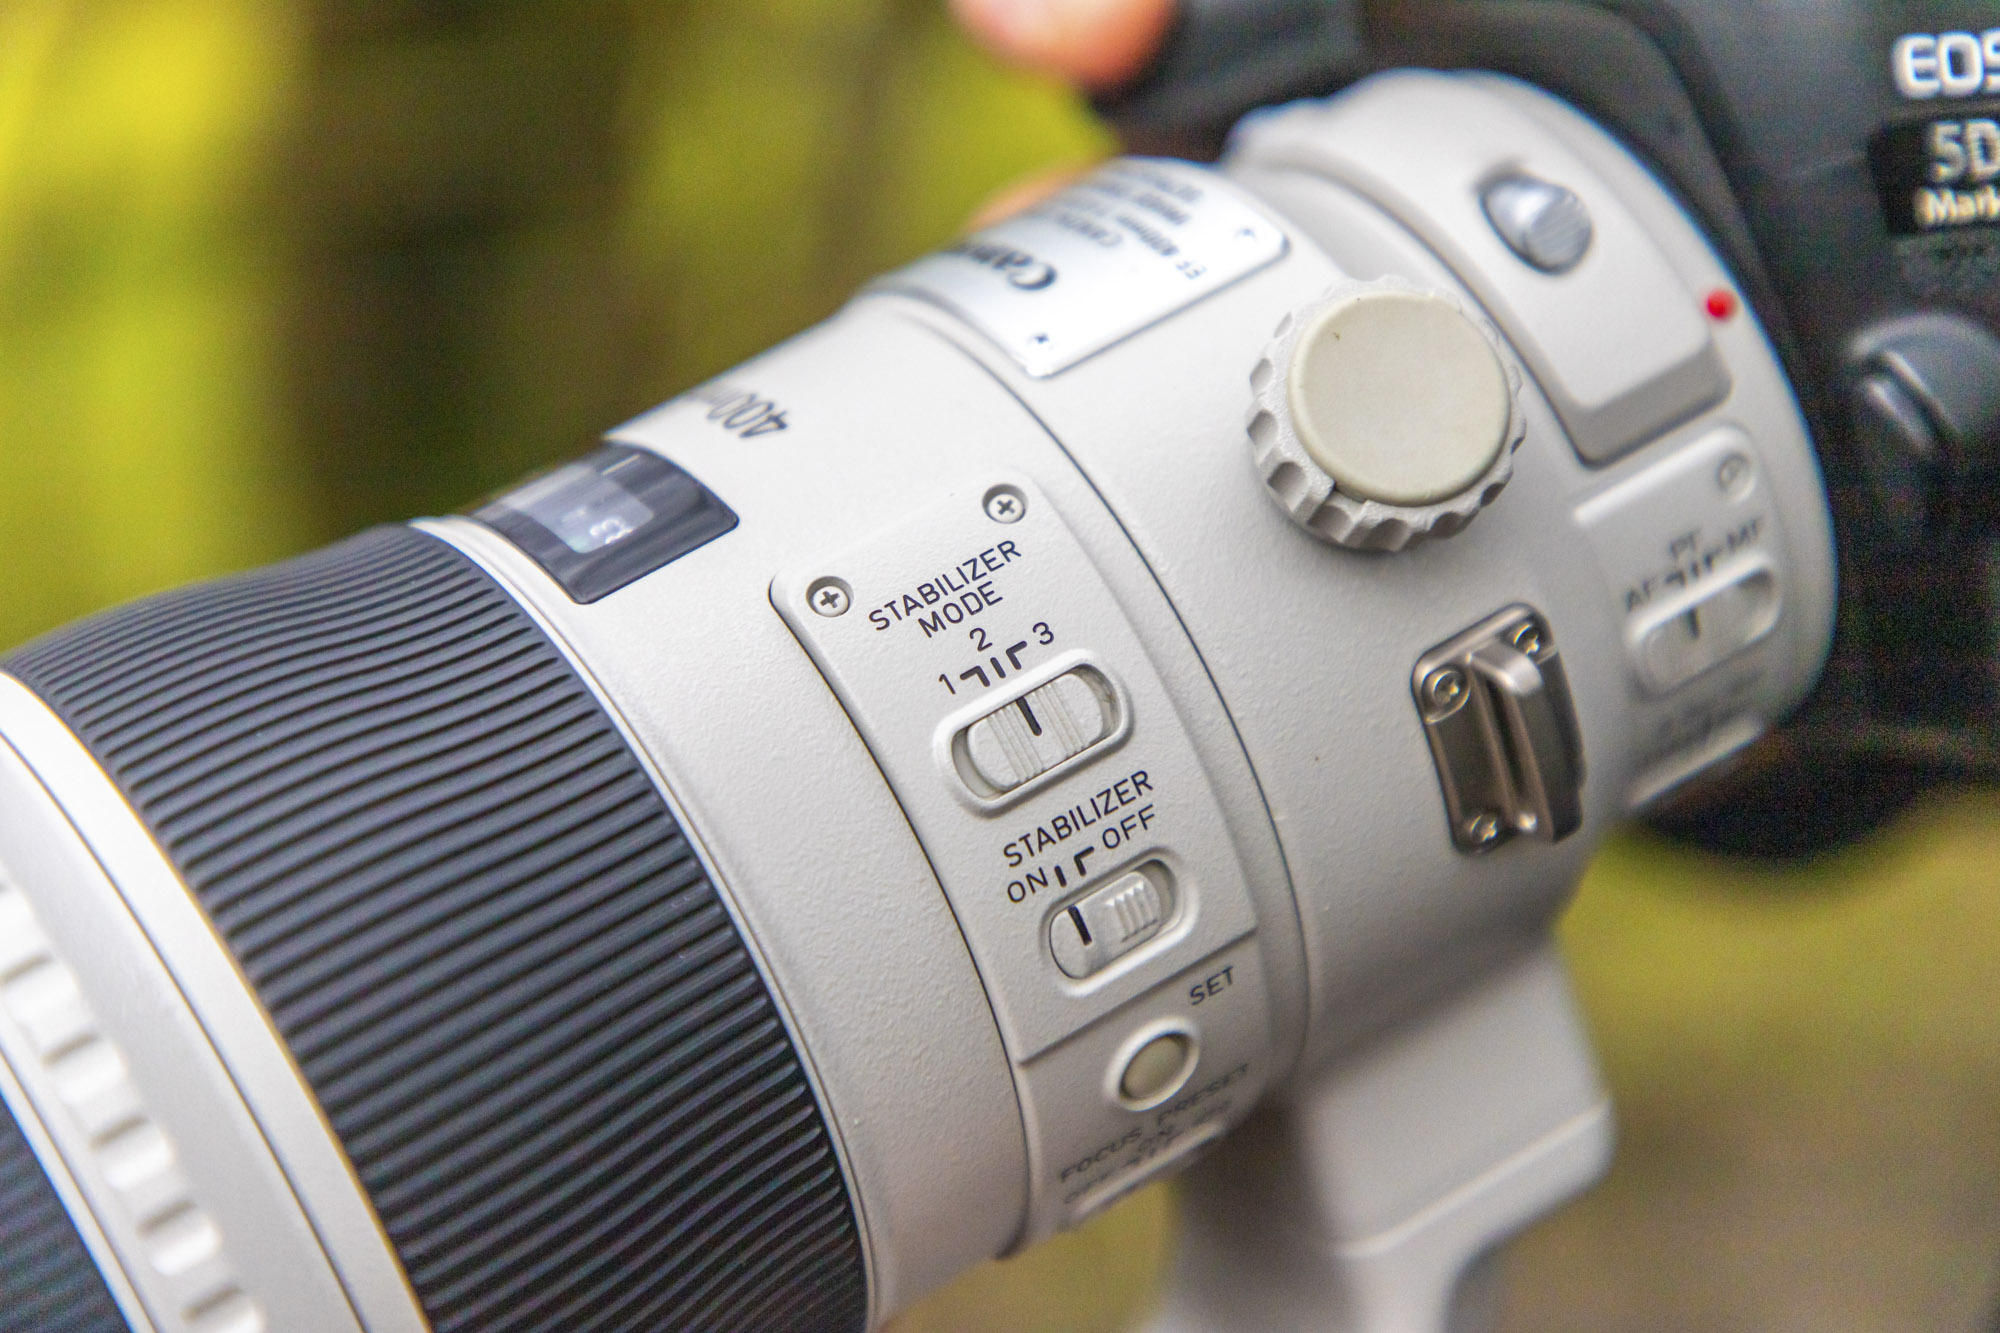
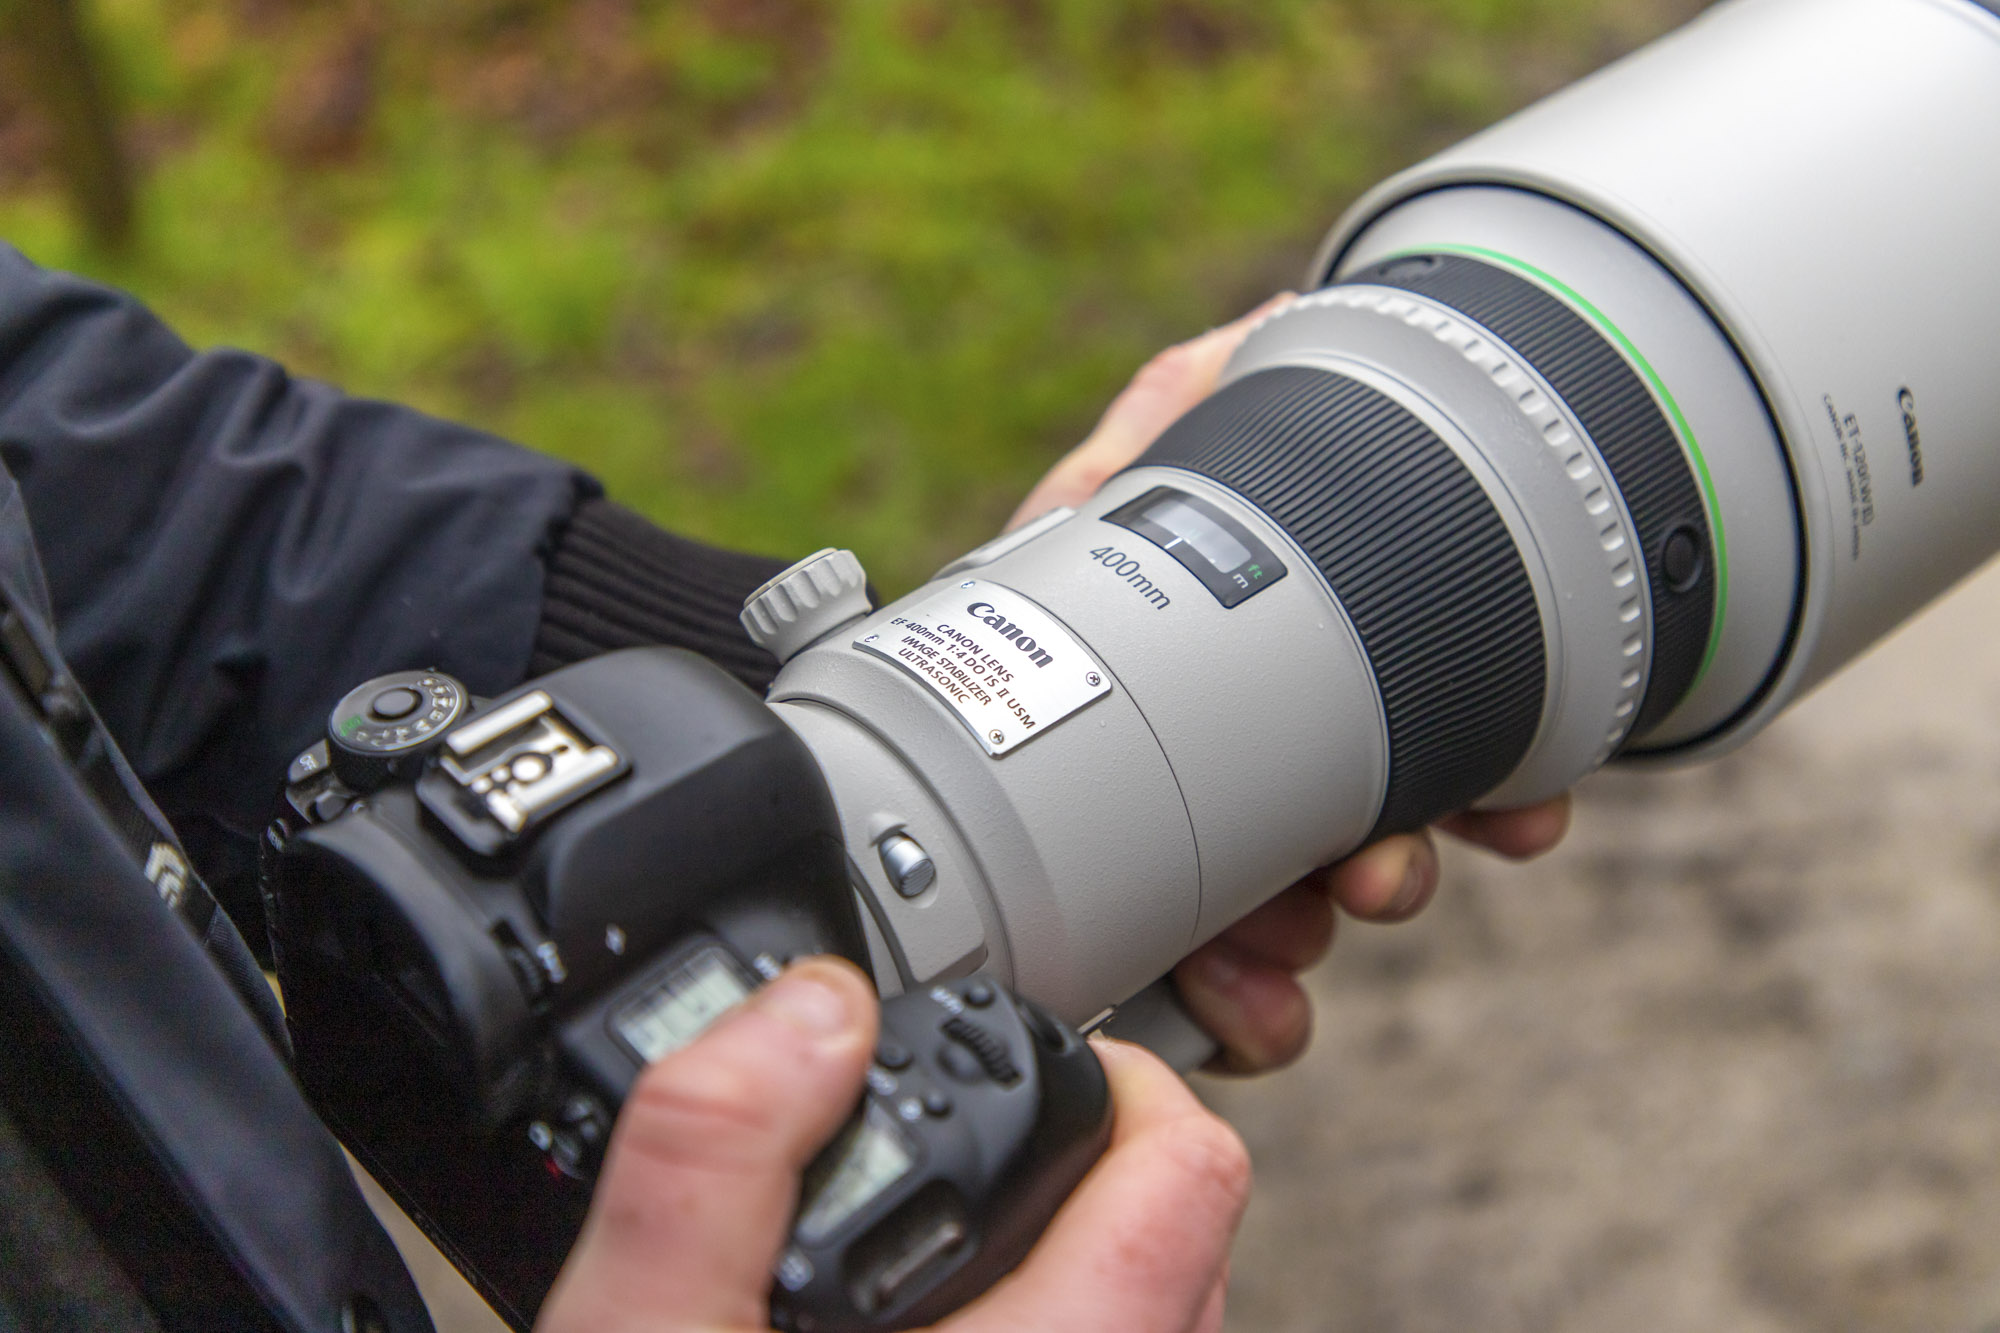
Some lenses have multiple image stabilization modes. On the Canon EF 400mm f/4 DO IS II USM, IS Mode 1 corrects handheld movement on all axis, while Mode 2 only corrects for movement on the vertical axis so that it doesn’t interfere with the movement when panning shots horizontally. Mode 3 corrects for pitch and yaw, like Mode 1, but only engages when the shutter button is fully depressed to avoid any lag in the viewfinder.
09 AI Servo AF mode
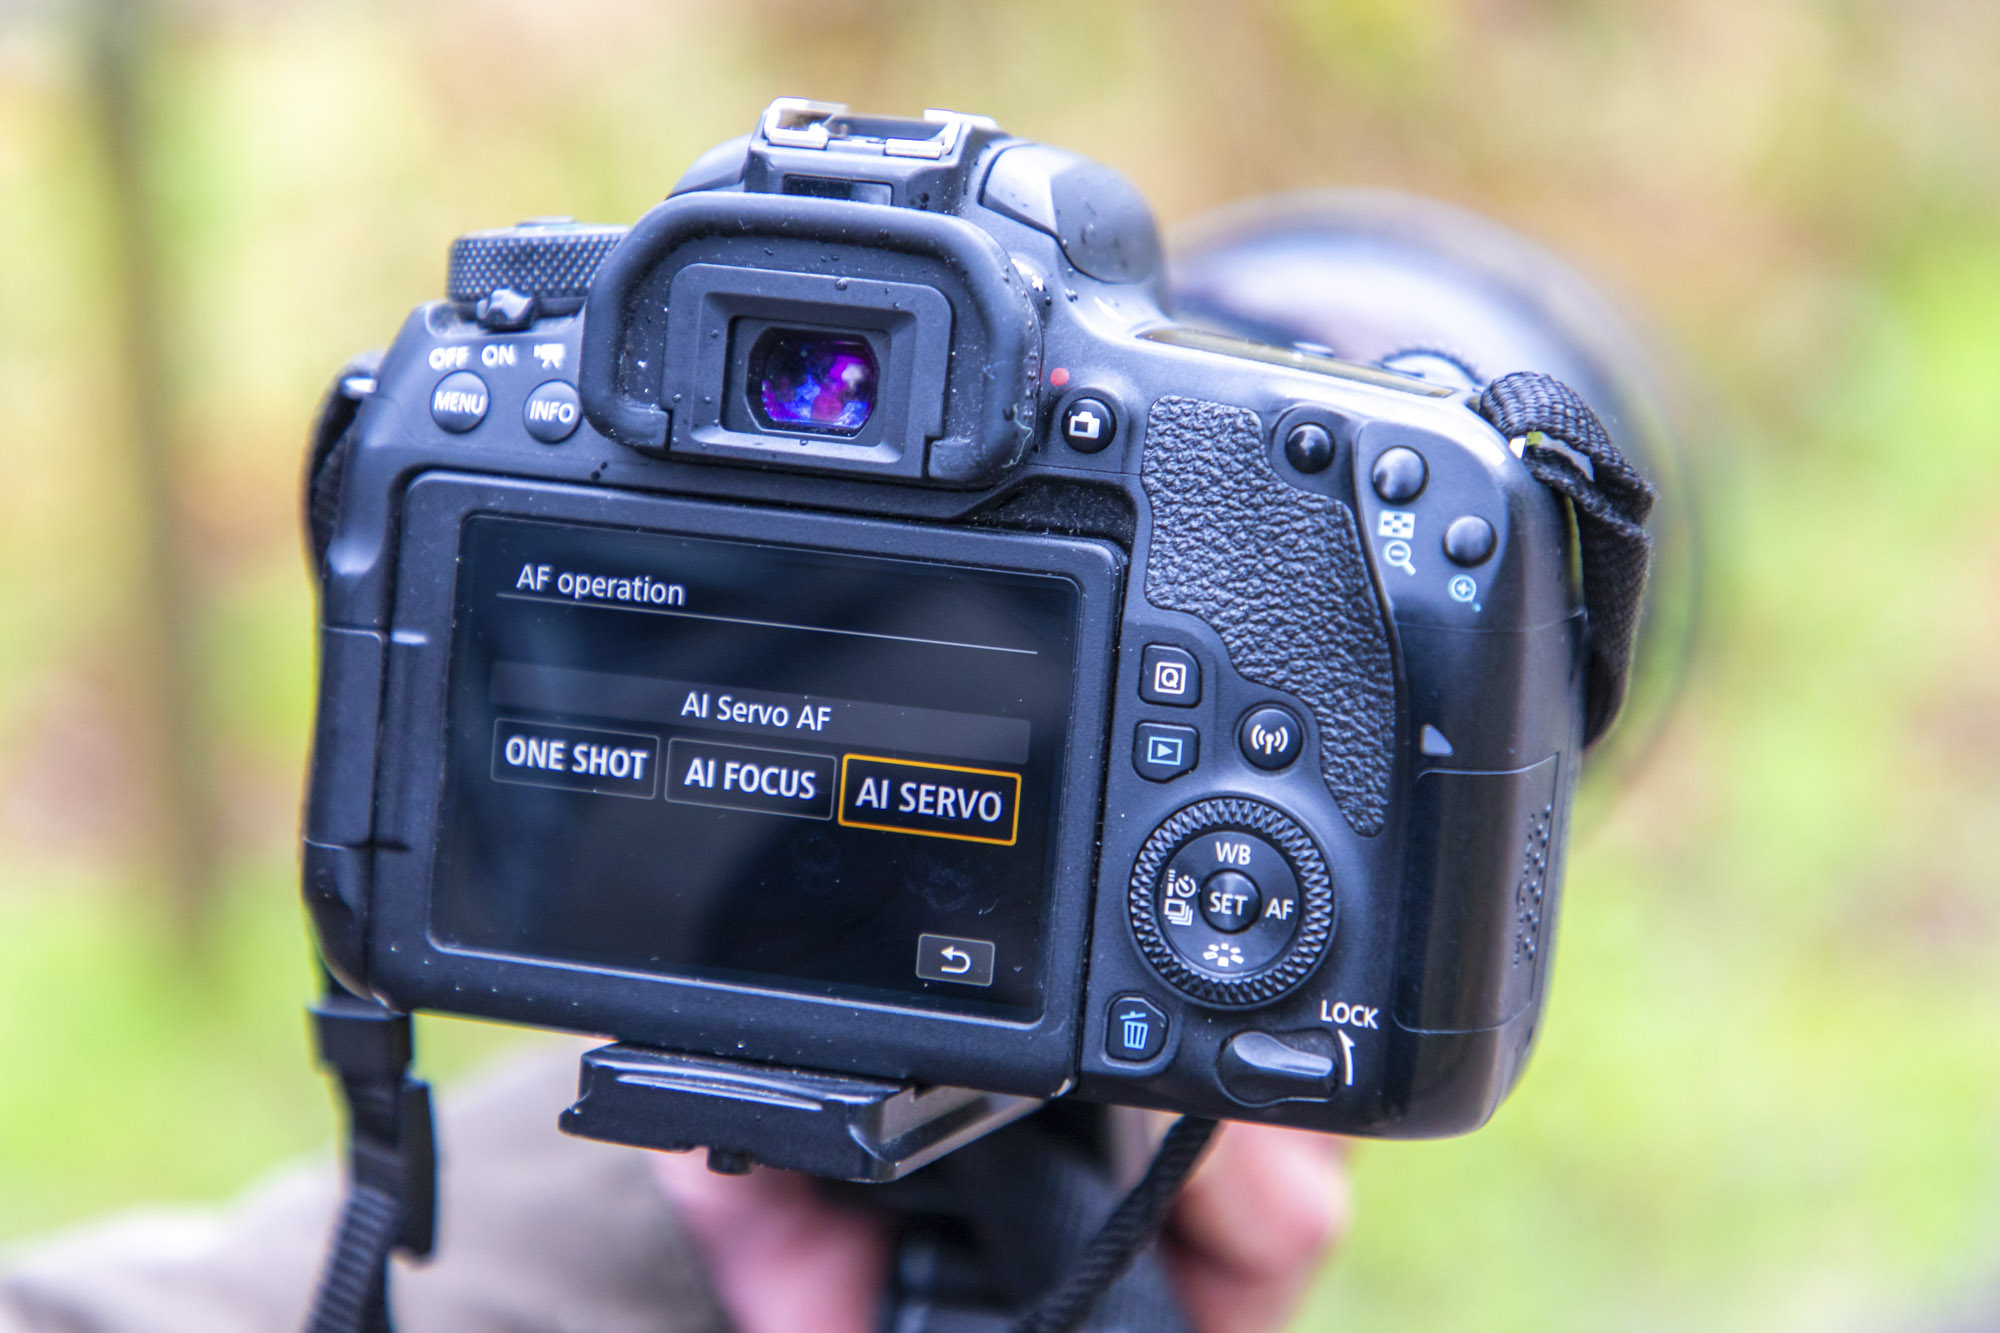
Sean uses the AI Servo AF mode for bird photos, which will continually refocus as long as the shutter button (or back button) is half-pressed. He’ll then use a single AF point in the centre of the viewfinder to track the birds. This ensures that the focus continually readjusts to make sure the bird is in sharp focus, even if it moves.
10 Super telephoto prime
Sean has a Canon 300mm f/2.8L IS USM lens Mark II and Canon EF 400mm f/4 DO IS II USM prime telephoto optics. These are razor sharp and incredibly fast to focus. He usually shoots at f/2.8, or f/4, for a creamy-soft bokeh and super-shallow depth of field that has become part of his style. As with top Canon glass, Sean can attach his teleconverters to them without knocking the image quality too much.
PhotoPlus: The Canon Magazine is the world's only monthly newsstand title that's 100% devoted to Canon, so you can be sure the magazine is completely relevant to your system.
Read more:
Best lens for portraits
Best camera for portraits
Photography tips
Canon EOS R5 review

In addition to being a freelance photographer and filmmaker, Dan is a bona fide expert on all things Canon and Adobe. Not only is he an Adobe-certified Photoshop guru, he's spent over 10 years writing for specialist magazines including stints as the Deputy Editor for PhotoPlus: The Canon Magazine, Technical Editor for Practical Photography and Photoshop Editor on Digital Photo.
