Take a seriously alternative approach to flower photography with a leaf blower!
James Paterson shows you how to capture interesting blurred blooms with an unconventional approach...
The best camera deals, reviews, product advice, and unmissable photography news, direct to your inbox!
You are now subscribed
Your newsletter sign-up was successful
Watch video: Blurred blooms
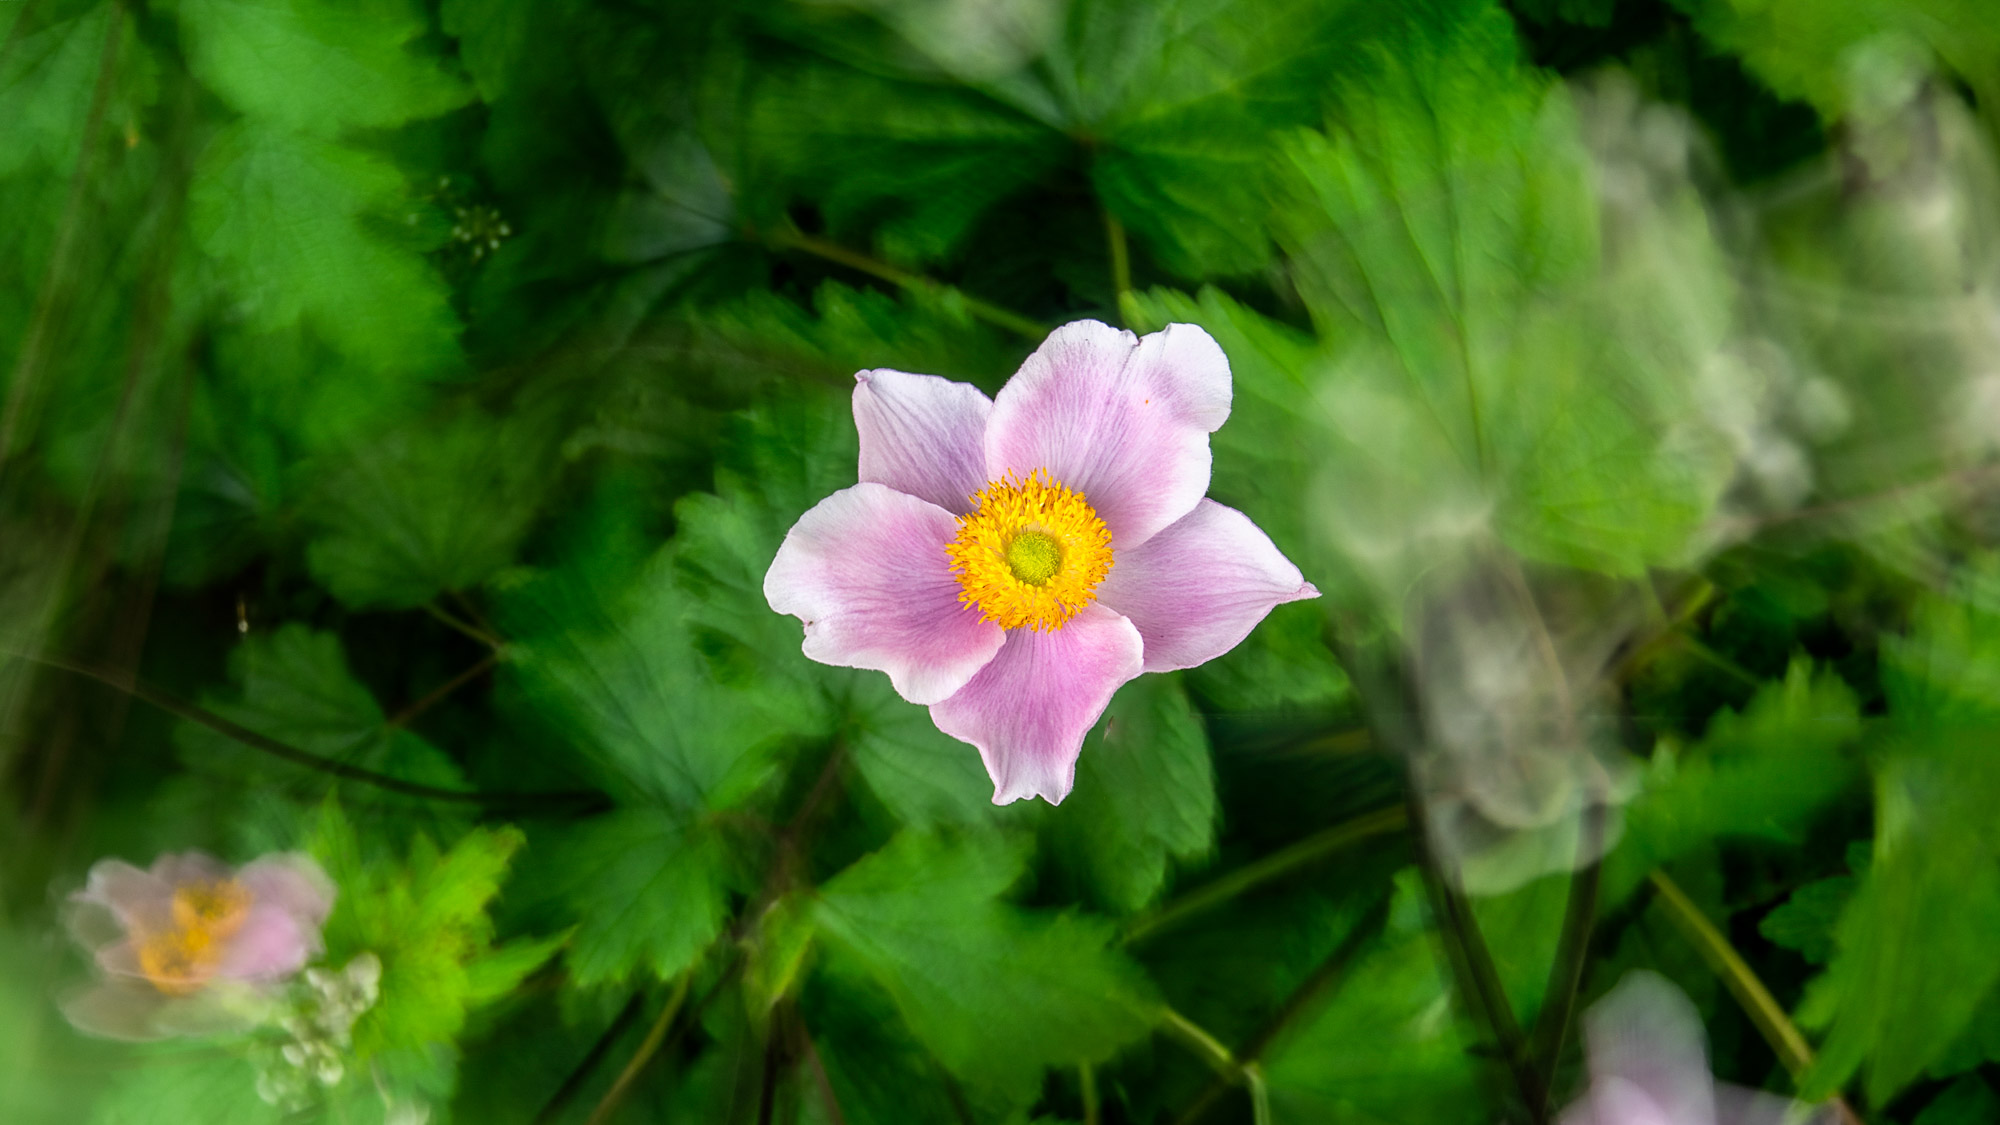
The typical approach to flower photography is to use a long lens or macro lens and blur out the backdrop with a shallow depth of field, so that the focus is on the subject. But why not take a different approach to background blur? In this project, the aim is to blur the backdrop with motion.
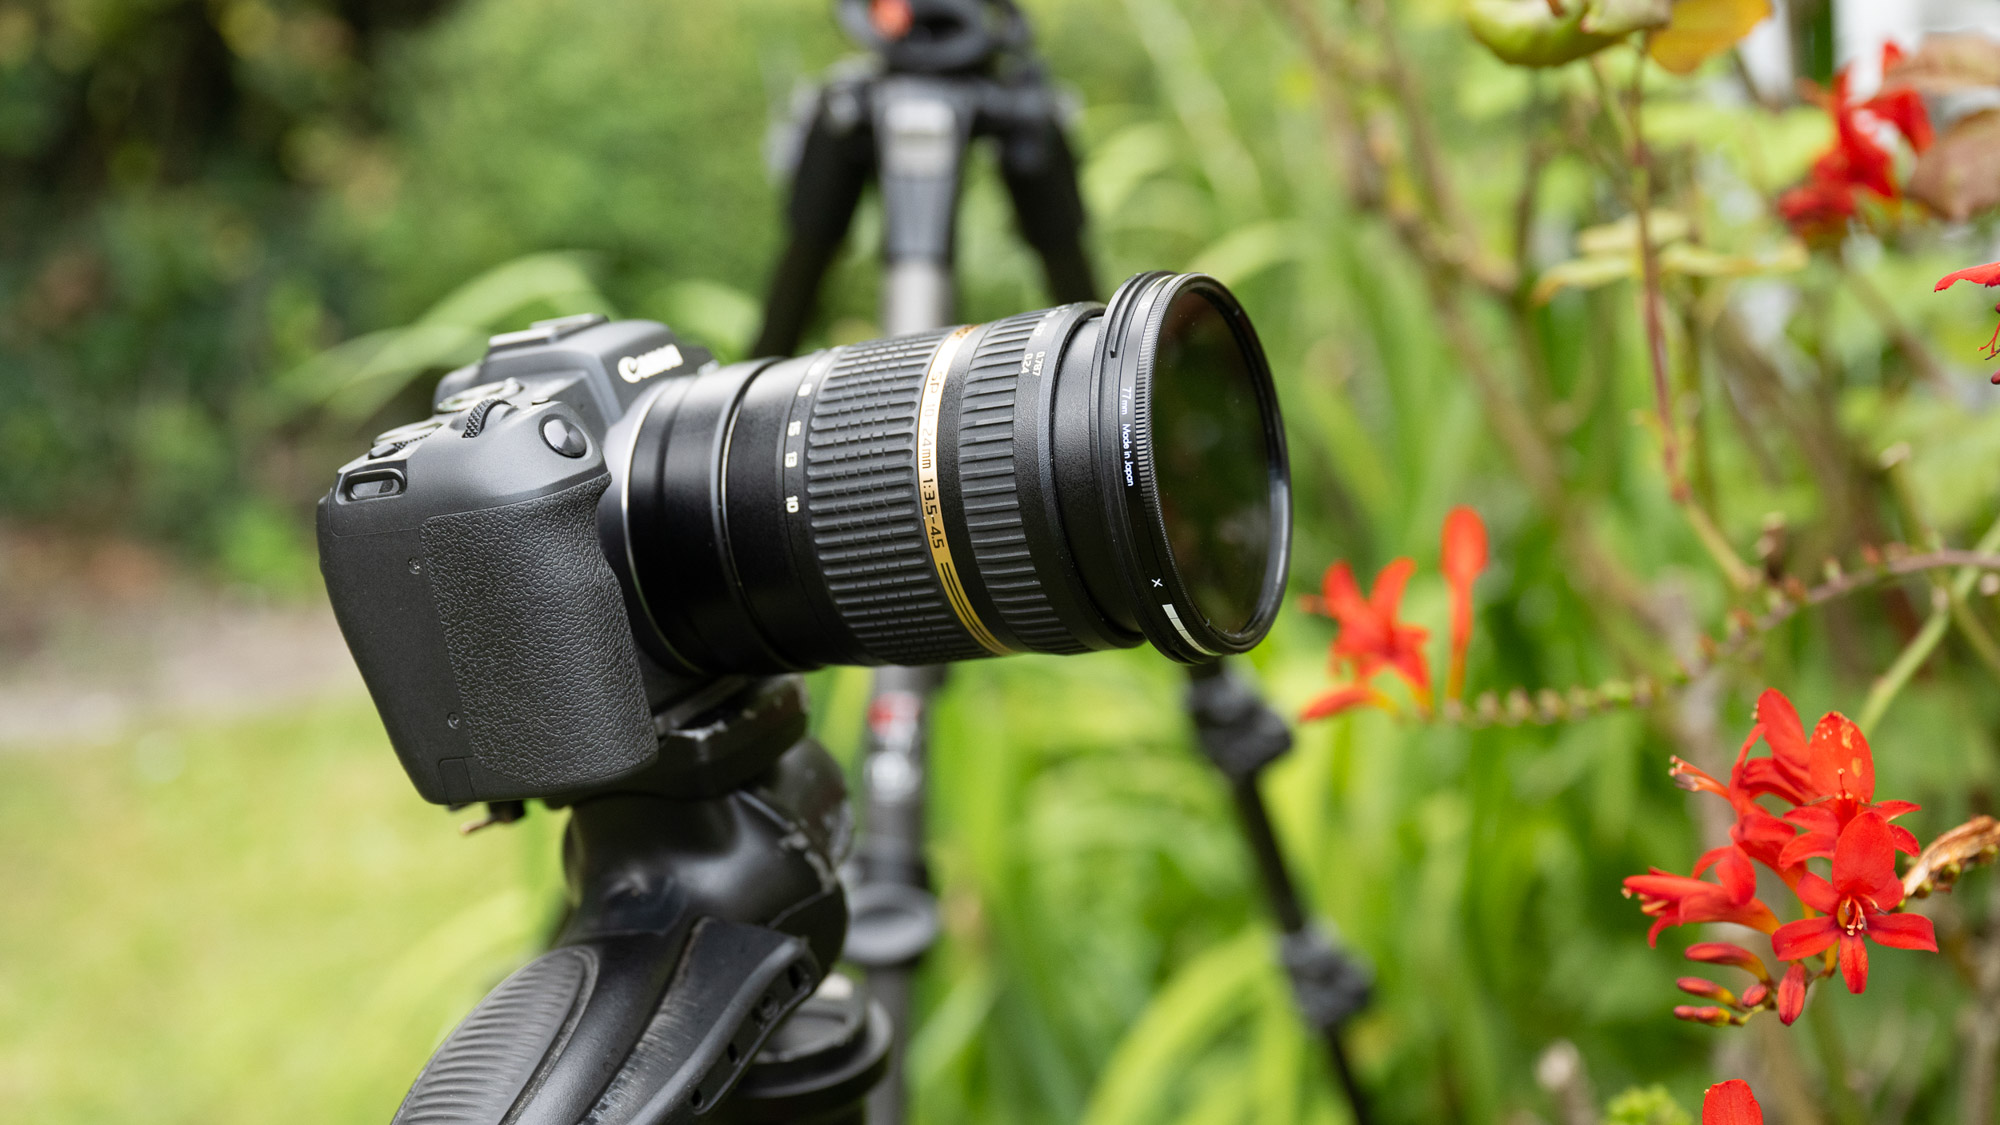
To achieve this, there are two key factors. First, we need to get set up for a long exposure: so all of the usual long exposure tricks apply, like use of a tripod and neutral density filter. Secondly, we need to work out a way to keep some parts of the scene still, while the others are in motion. This is where our secret weapon comes in: a leaf blower.
We can use the leaf blower to direct a gust of wind in the places where the scene needs it, creating movement in the plants and flowers that – coupled with our long exposure – results in a distinctive blur. Alongside this, to keep a single bloom perfectly sharp, we can fashion a clamp to secure it in place. This way, we get a lovely combination of blurry and sharp detail. It’s a fun technique to try, as you never know quite how the blurred areas will turn out.
What’s more, because the camera is locked on a tripod, we can shoot a sequence then combine the best parts from each later. Give it a go, for beautifully blurry blooms.
1. Shoot lots of frames
With everything set up, it’s worth shooting plenty of frames. This way, you have the freedom to combine several frames later if necessary and choose the best areas of blur from each. We turned on the Self-timer mode to capture several frames at a time so we could shoot in chunks while directing the leaf blower.
2. Blur different areas
The leaf blower lets us direct the blur on different parts of the backdrop with ease. So we can shoot the scene bit by bit, blurring areas over several frames then choosing the best from each later on. You might find that distant details require a stronger gust than close up details to emphasise the blur.
The best camera deals, reviews, product advice, and unmissable photography news, direct to your inbox!
3. Shoot an 'empty' frame
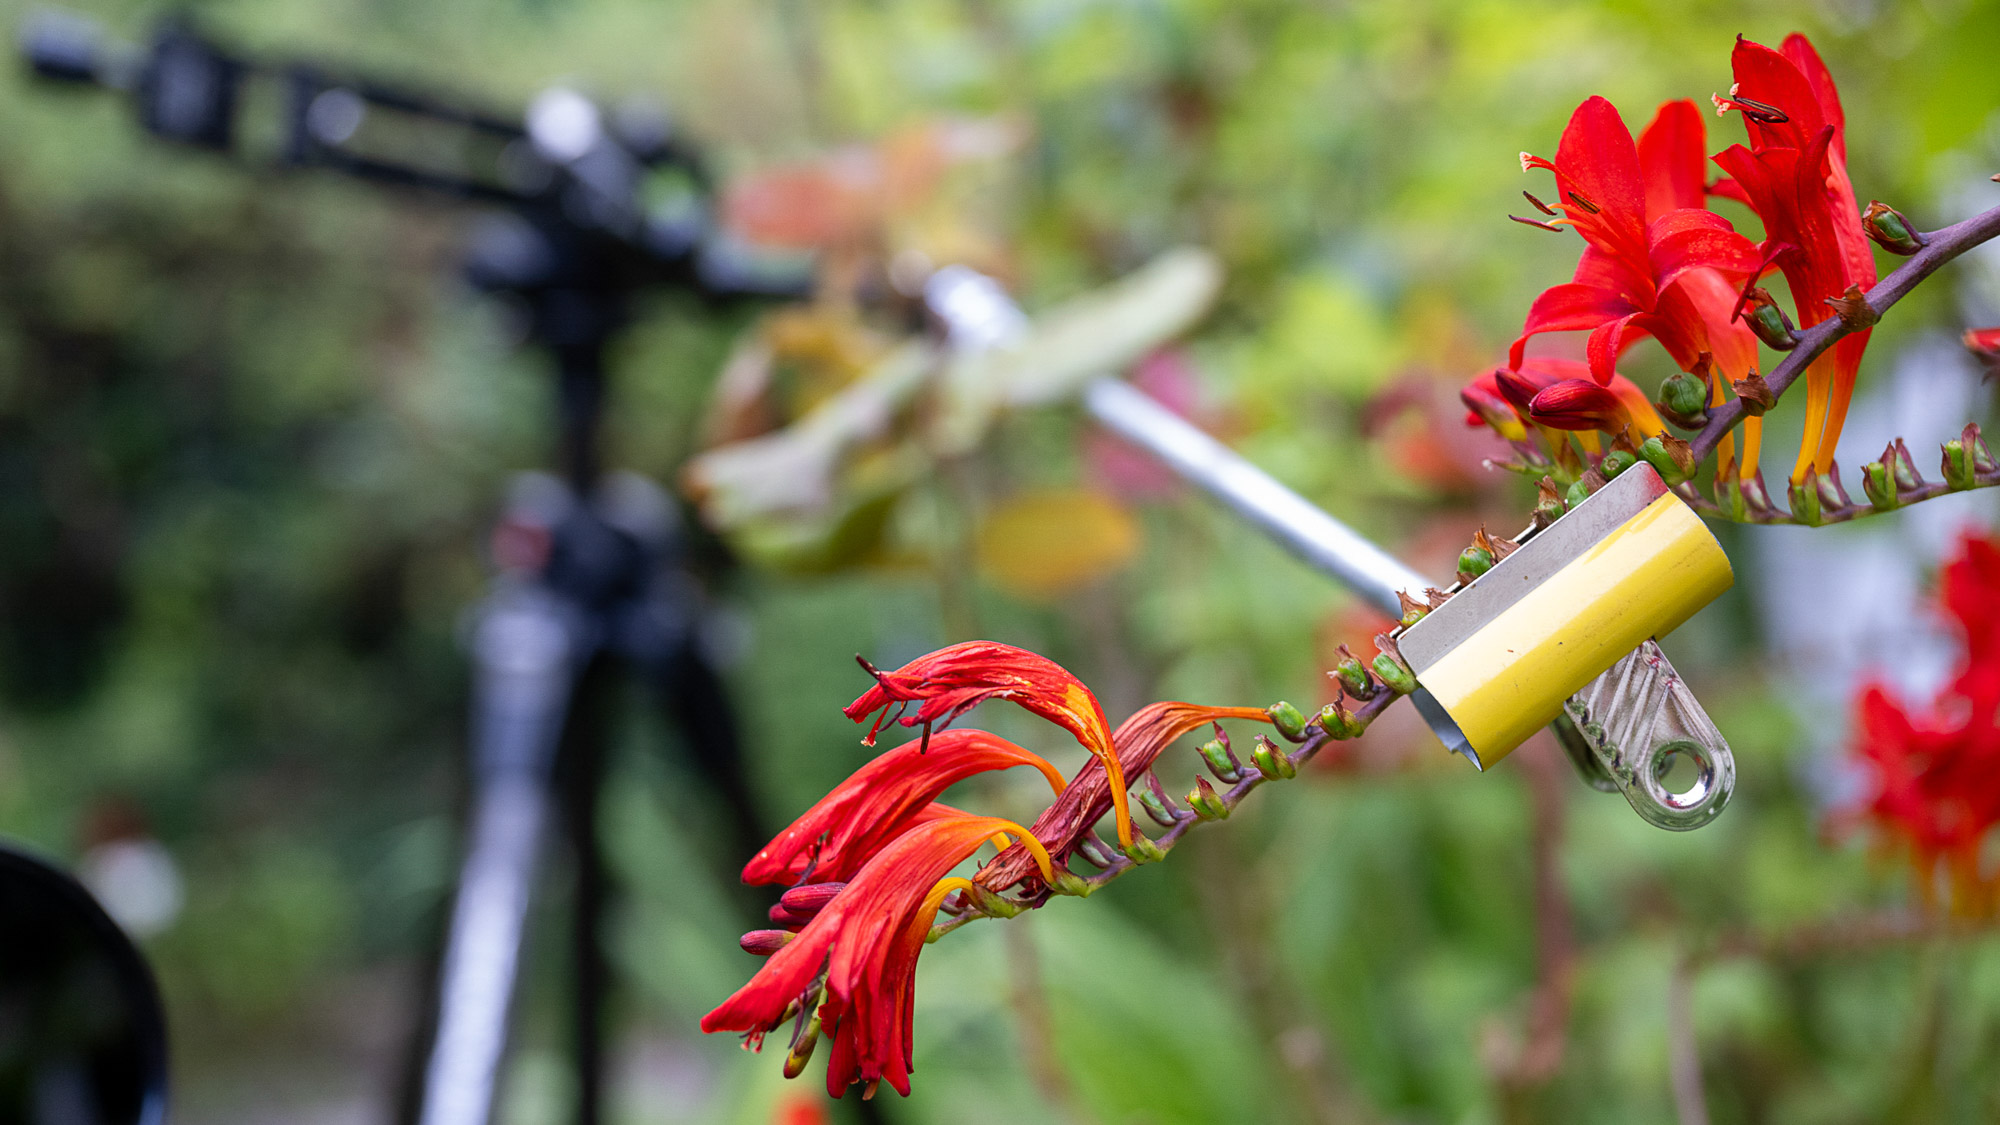
Once you’re done blowing, it’s worth removing the clamp and taking an extra frame, as you might find that you can use this to fill in the details obscured by the clamp later on. It’s also a good idea to shoot a frame of the scene with everything still, just in case you need to blend any sharp parts in later on.
4. Open into layers
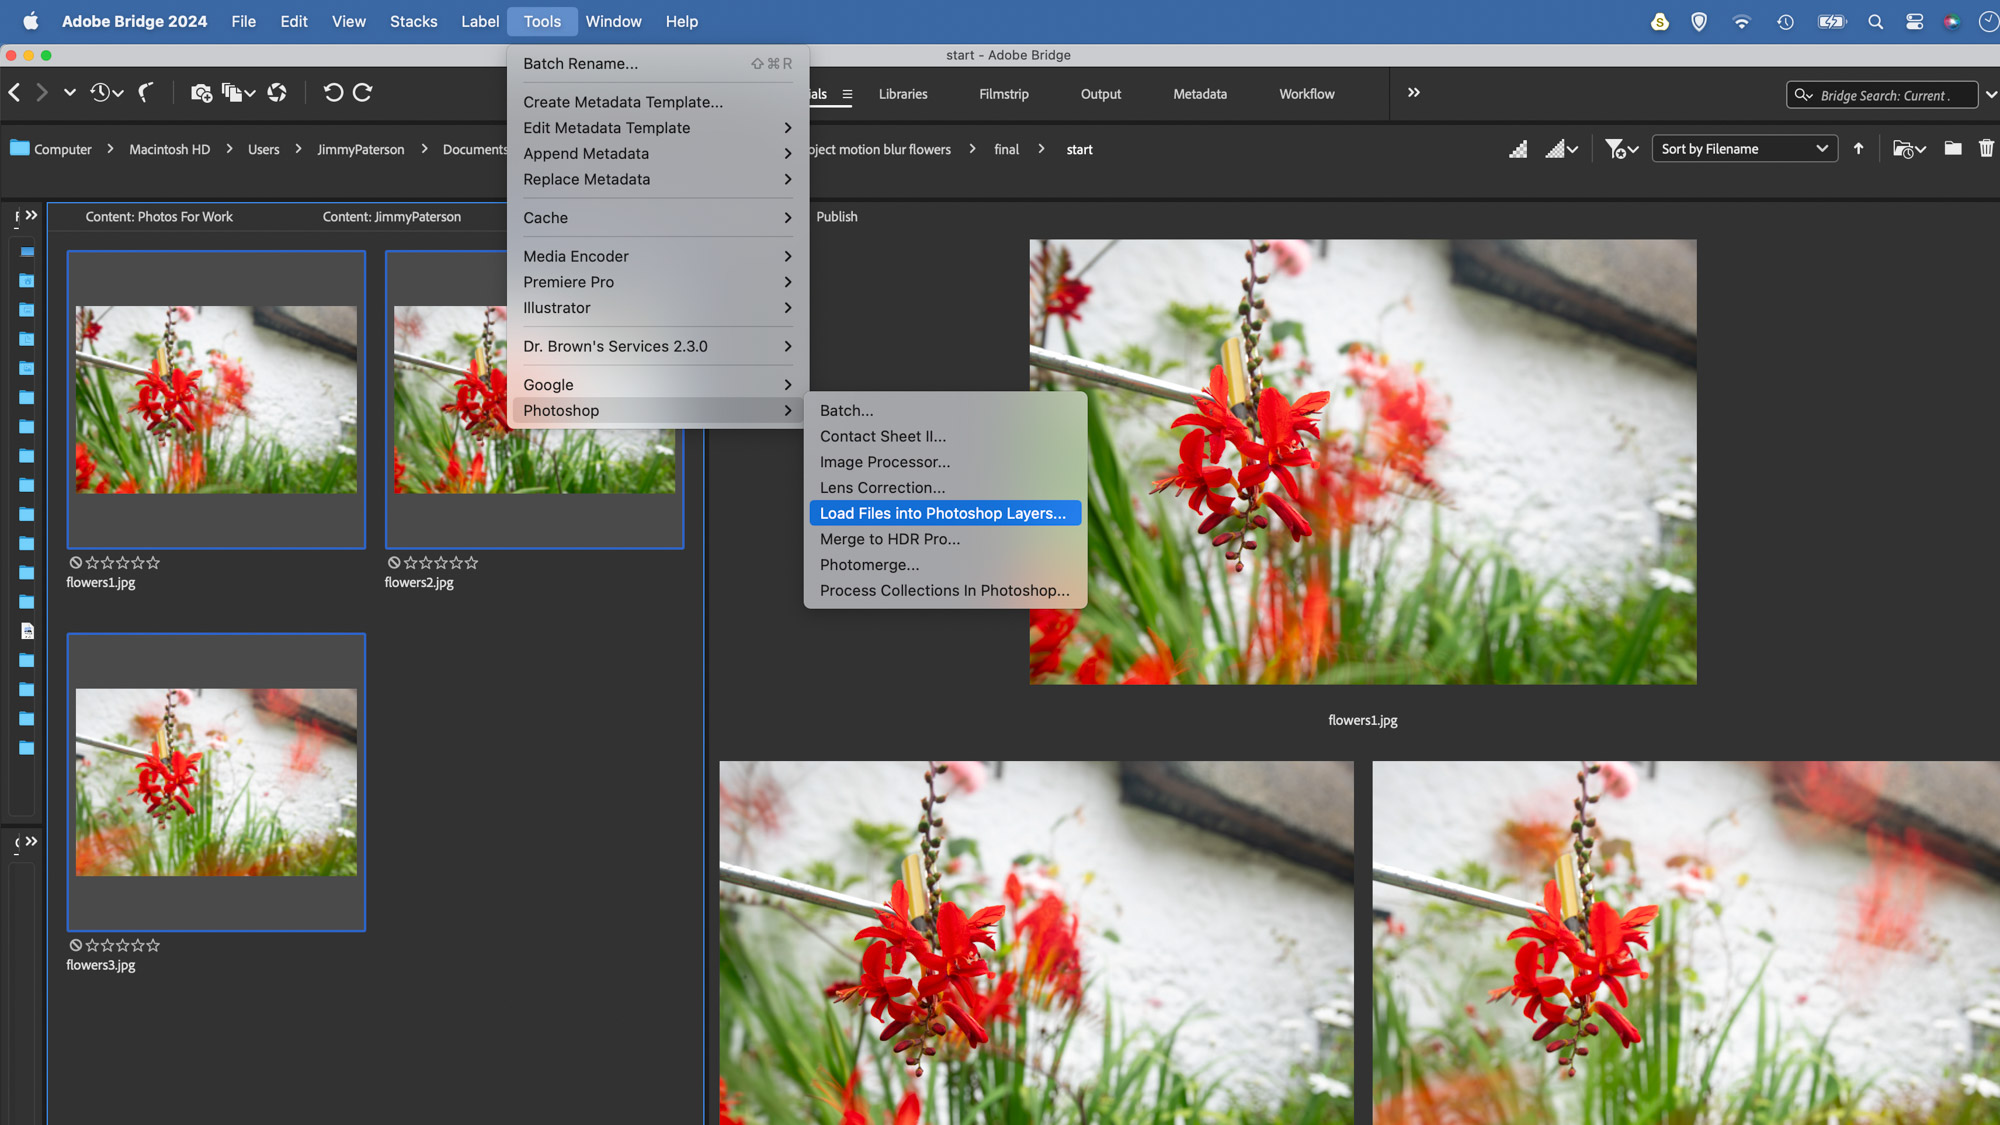
You might find that you nail the effect in a single fame, but if you do need to blend the best parts from several frames, this can easily be achieved in Photoshop CC. Begin in Adobe Camera Raw, select the images you want to use then go to Tools>Photoshop>Load Files into Photoshop Layers.
5. Blend with a mask
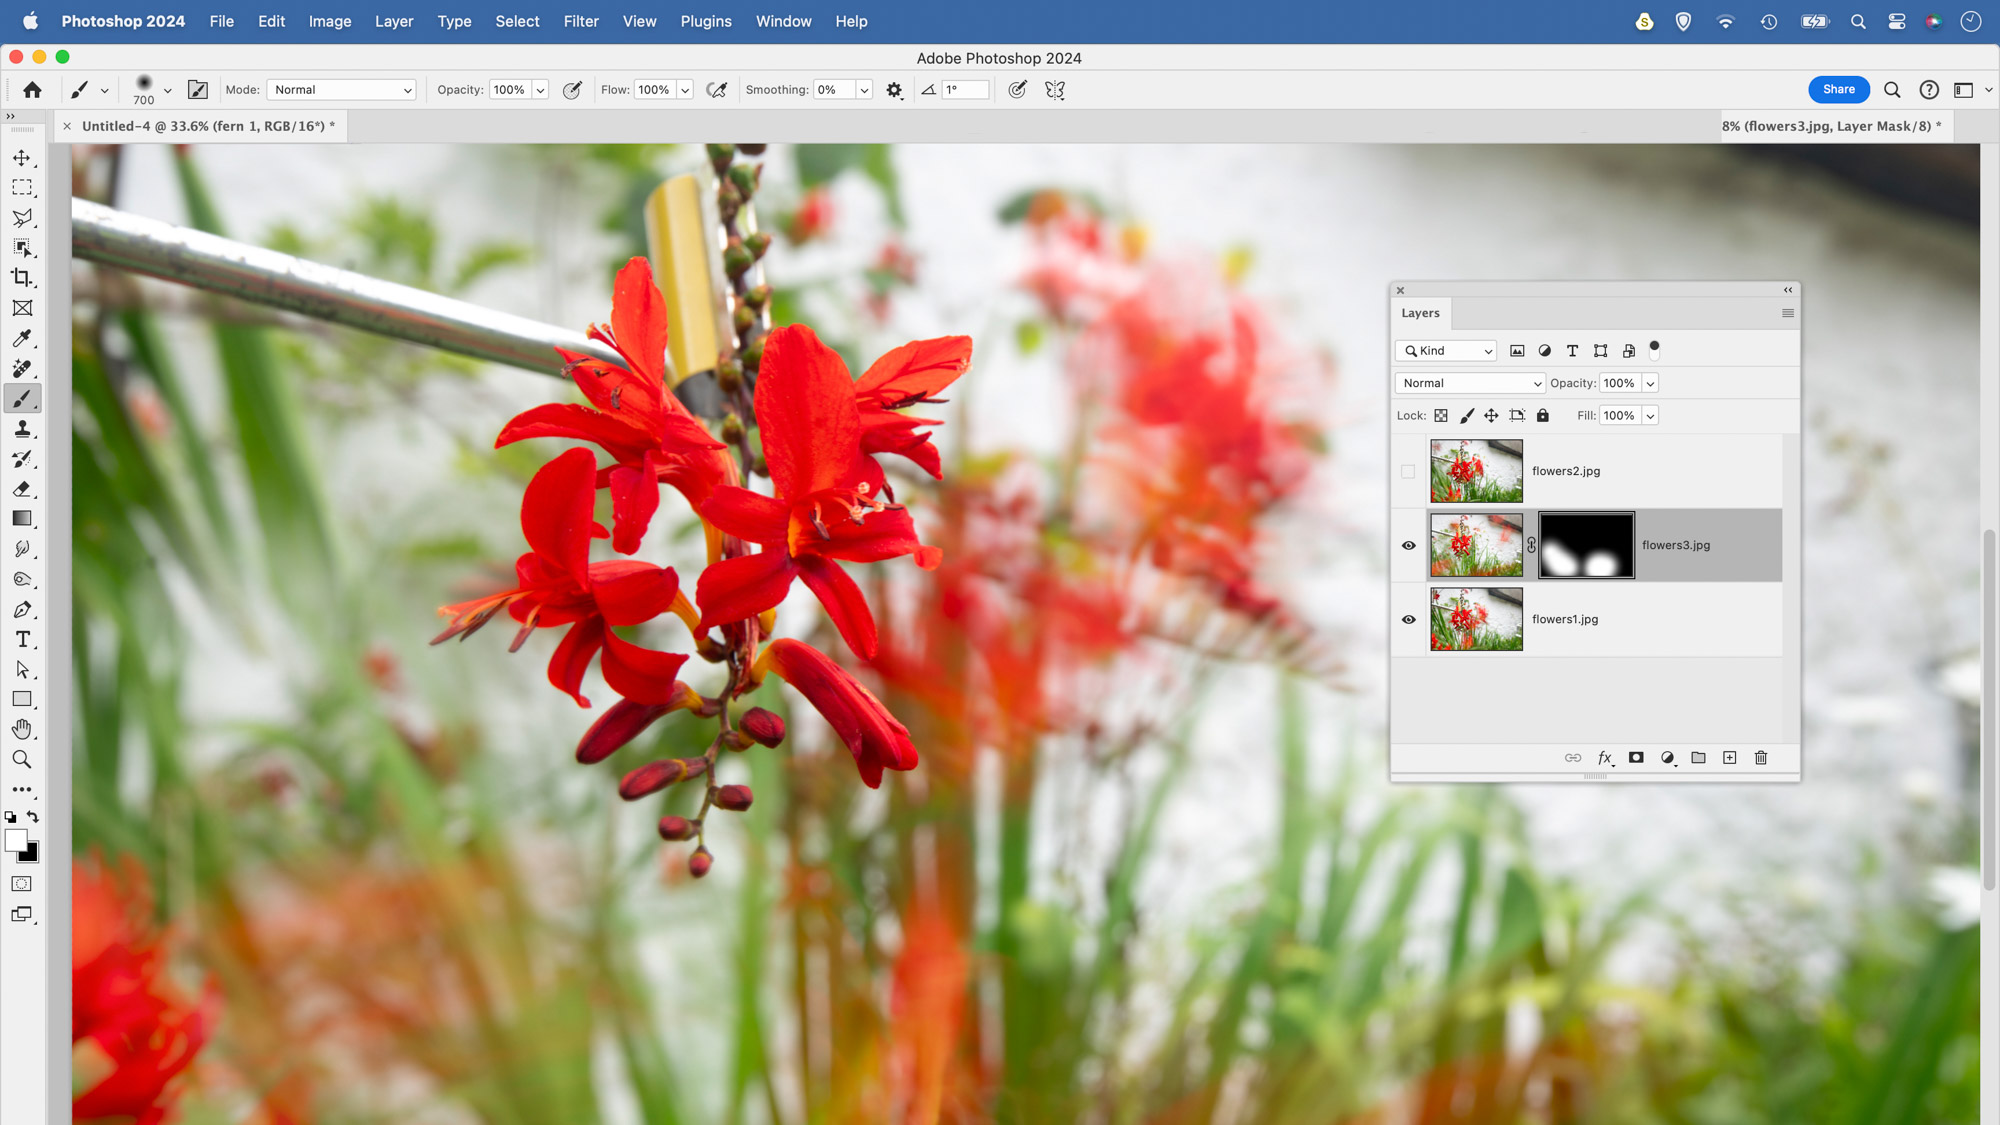
Once open, identify the strongest image and drag this layer to the bottom of the stack. Click the eye icon to hide all the layers above it. Reveal the layer above and assess which areas you want to blend. Hold Alt and click the Layer Mask icon to hide the layer, then paint it white to reveal the area you like.
6. Remove the clamp
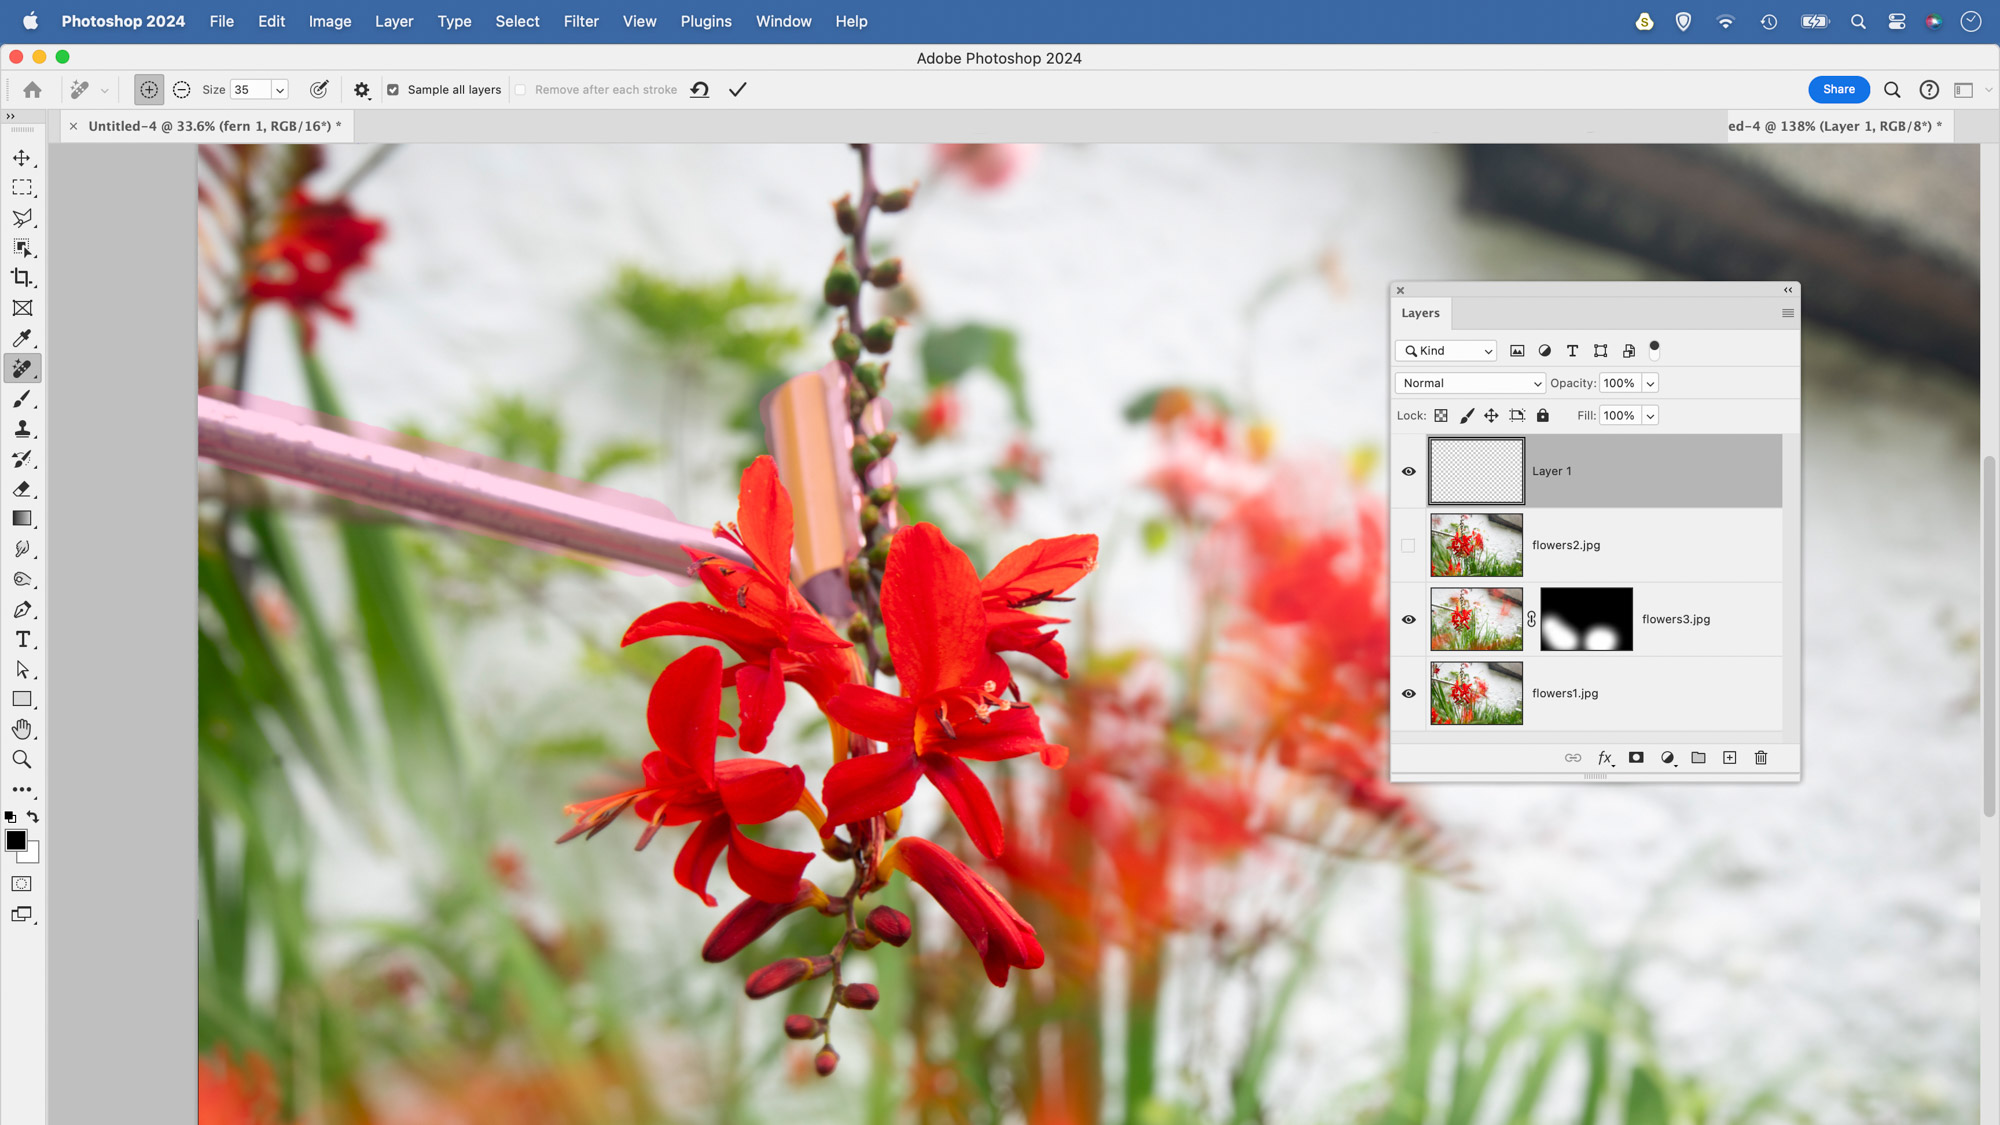
Repeat the masking technique for the remaining layers. Finally, open the image where you removed the clamp, copy it in and blend it with the rest using another mask. Or try using the Photoshop Remove tool. Simply make a new layer, paint over the clamp then hit Apply and Photoshop to let AI fill in the area.
7. People and traffic
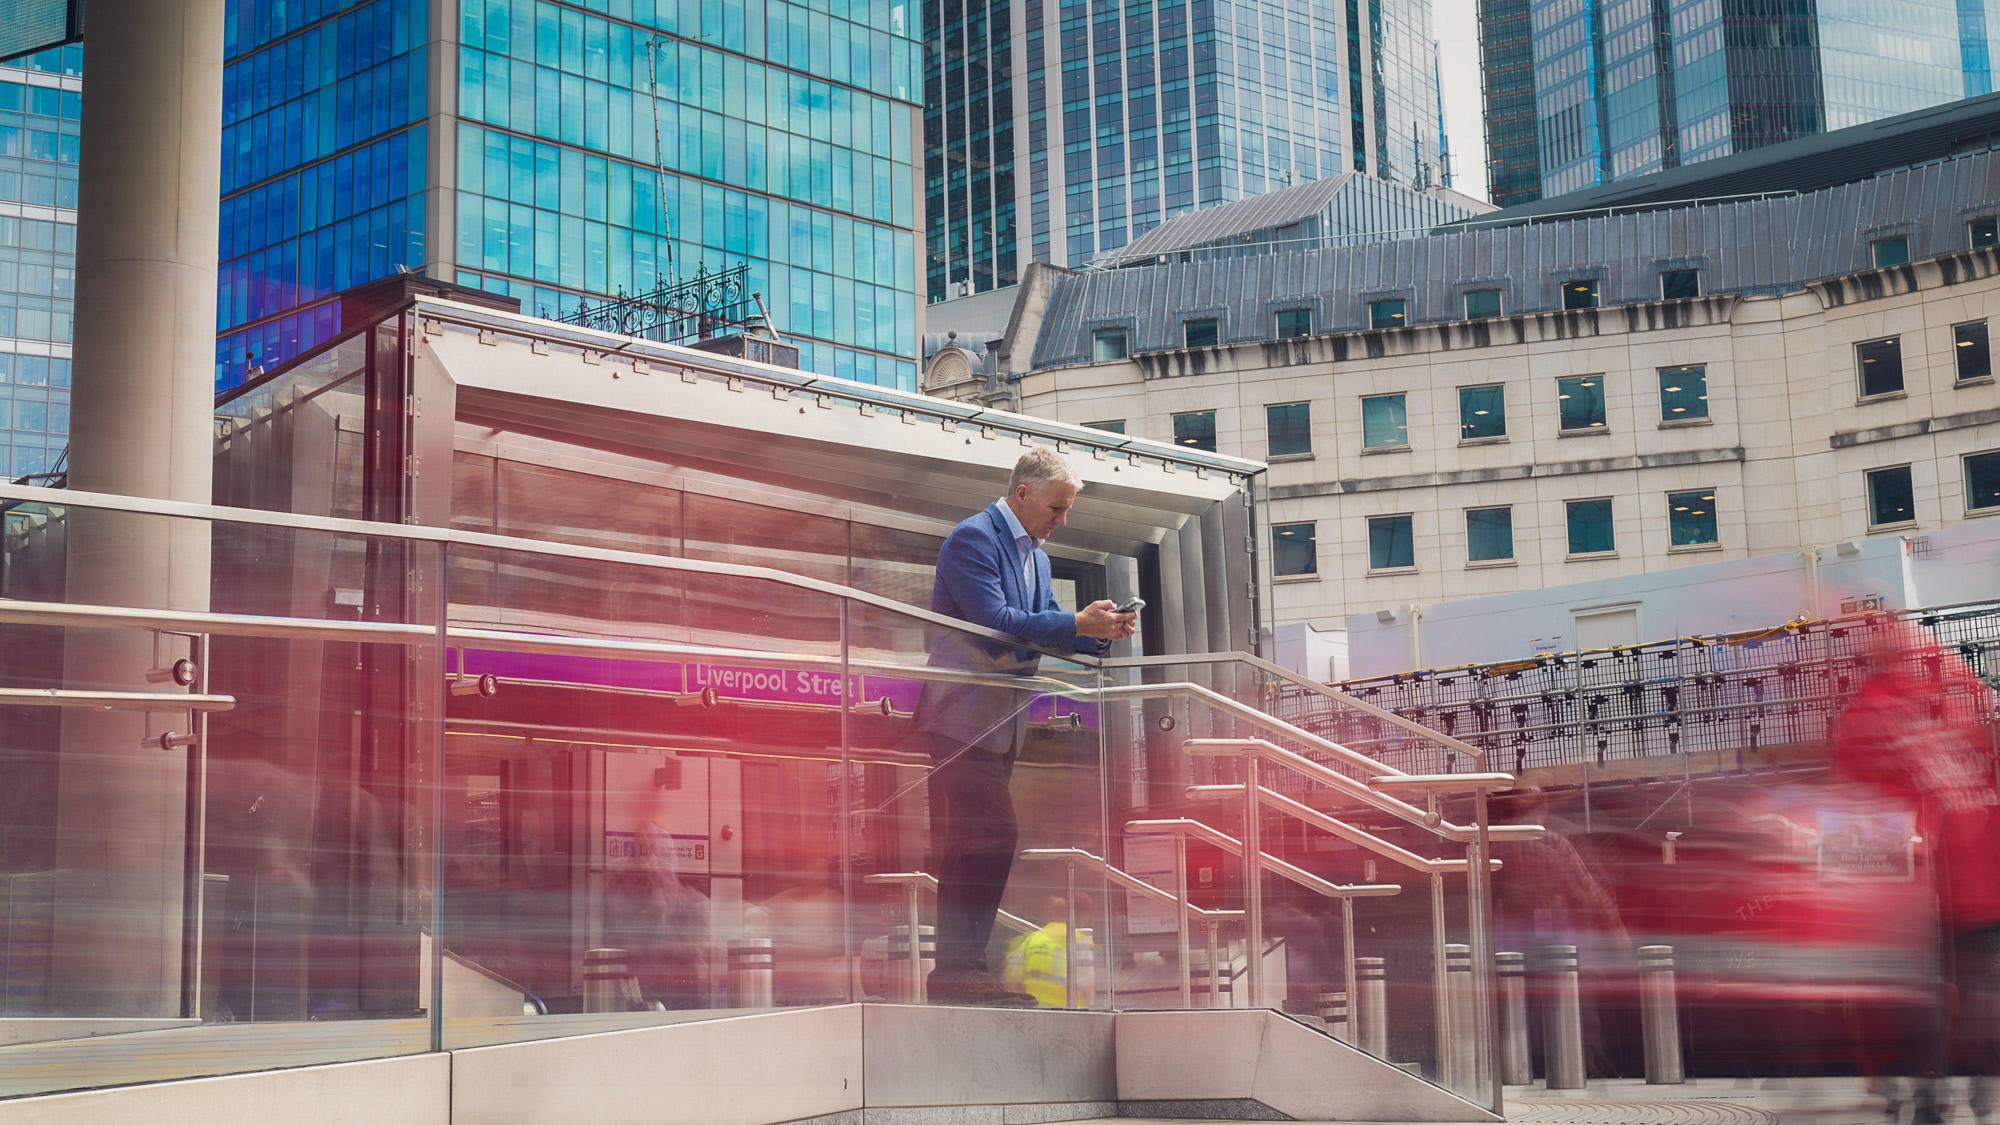
Look for ways to capture motion blur with sharp subjects. A shutter speed of 2 secs blurs the London traffic here while the stationary man in the centre foreground stays relatively sharp. A tripod is by no means essential, as Image Stabilisation in modern Canons means you can get away with handholding for up to a second.
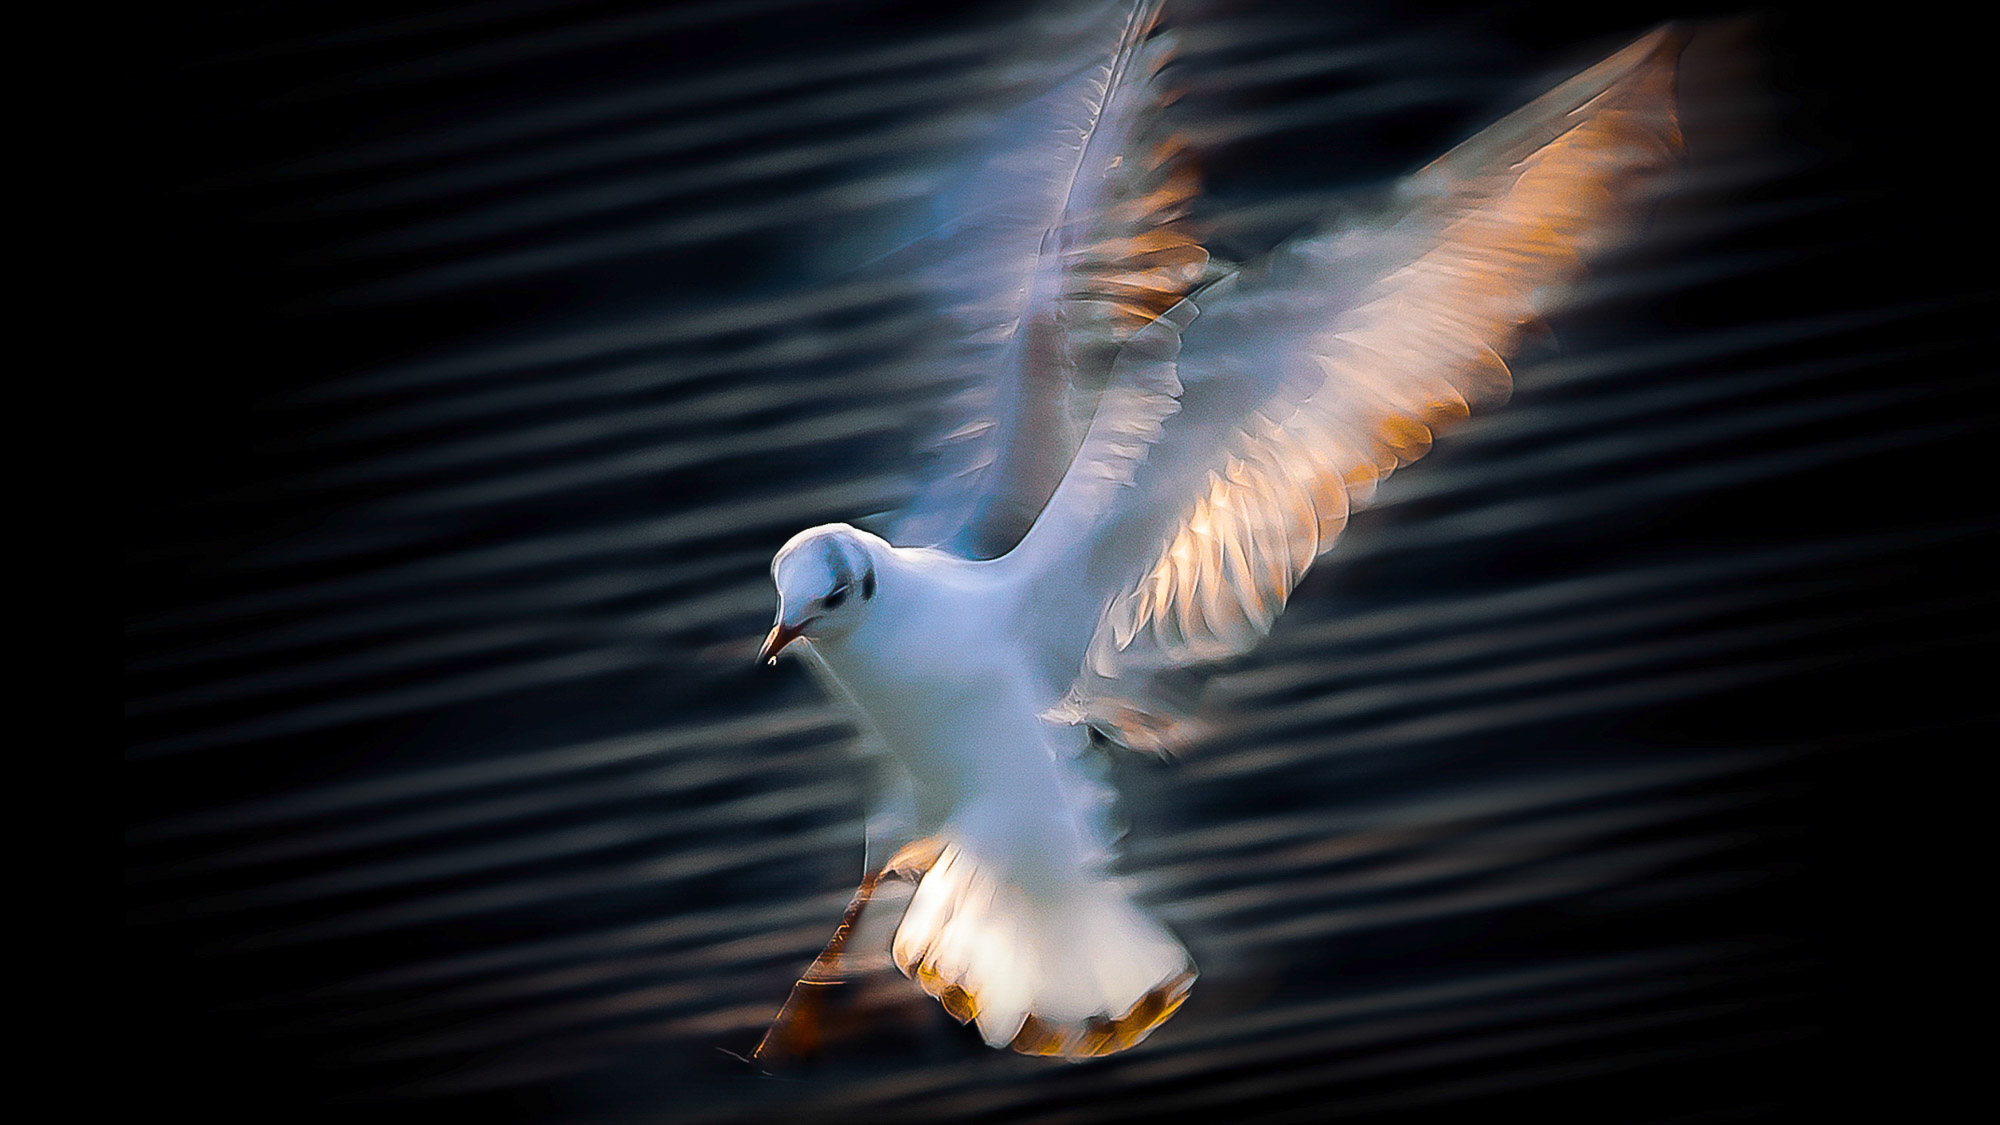
8. Bird's wings
Sometimes even if the whole subject is moving, there are parts that will be moving faster than others, like a bird’s wings. If we’re careful with our shutter speed, we can capture the slower moving areas relatively sharply, while the faster moving areas become nicely blurred. Here a shutter speed of 1/25 sec works.
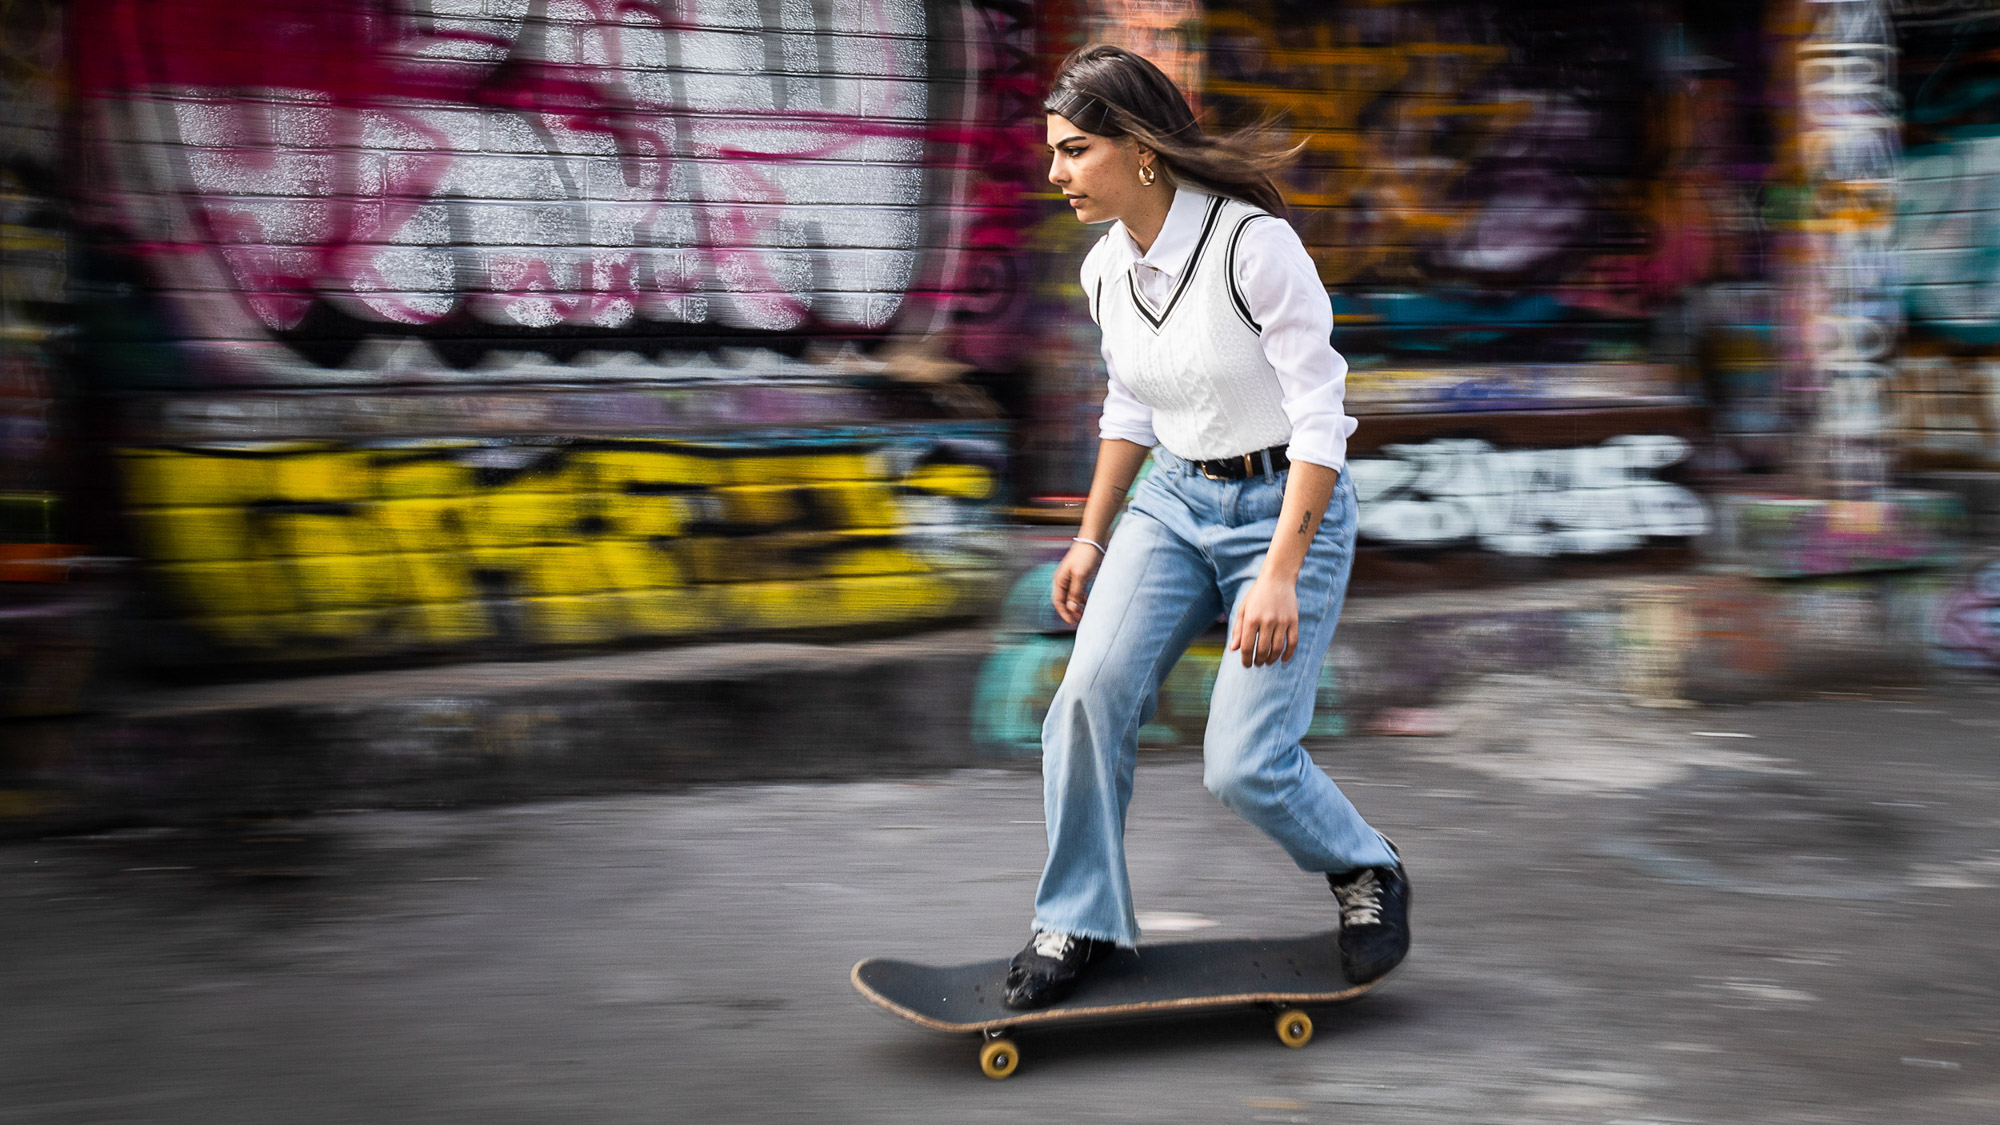
9. Panning blur
Try panning with the motion of a subject moving through the frame. Use a panning tripod head and move the camera to keep the subject in the centre. You’ll need a relatively slow shutter speed and – with luck – the subject will come out sharp while the backdrop is blurry. Here a shutter speed of 1/30 sec works for us.
If you're serious about landscapes, take a look at the best lenses for landscapes along with the best cameras for low light.
The lead technique writer on Digital Camera Magazine, PhotoPlus: The Canon Magazine and N-Photo: The Nikon Magazine, James is a fantastic general practice photographer with an enviable array of skills across every genre of photography.
Whether it's flash photography techniques like stroboscopic portraits, astrophotography projects like photographing the Northern Lights, or turning sound into art by making paint dance on a set of speakers, James' tutorials and projects are as creative as they are enjoyable.
He's also a wizard at the dark arts of Photoshop, Lightroom and Affinity Photo, and is capable of some genuine black magic in the digital darkroom, making him one of the leading authorities on photo editing software and techniques.
You must confirm your public display name before commenting
Please logout and then login again, you will then be prompted to enter your display name.
