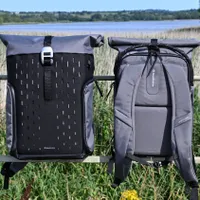




Digital Camera World Verdict
I really like that the Peak Design Everyday Backpack isn’t just for camera kit. Take out some or all of the dividers and it works every bit as well as a quality backpack for daily essentials, or a mix of camera kit plus personal items, a drone or anything else you want to take along for a grand day out. I also like the extensive use of magnetic closures and that access through both sides means that you can get at your gear while still wearing the backpack on either of the two shoulder straps. However, I miss not being able to reveal the whole inside, as there’s no full front or rear access.
Reasons to buy
- +
Quick, easy adaptability
- +
Side and top access
- +
20L and 30L options
- +
Neat and tidy magnetic closures
- +
Quality materials and build
Reasons to avoid
- -
Not fully waterproof
- -
No waist strap included
- -
No full front or back access
Why you can trust Digital Camera World Our expert reviewers spend hours testing and comparing products and services so you can choose the best for you. Find out how we test.
Based in California, Peak Design has that sun-soaked West Coast vibe and laid-back lifestyle. The company was founded in 2010 on the self-proclaimed principle of ‘building happy and meaningful lives for the people that work there’. The intention is that the feelgood factor spills over in equal measure to the people who buy and use their products.
Those products include camera bags and backpacks like the minimalist Peak Design Travel Backpack 20L and the versatile Peak Design Travel Backpack 2-in-1. There’s also an innovative and highly acclaimed range of Peak Design Slide camera straps and I’ll freely admit to absolutely loving my Peak Design Pro Tripod. The bigger picture, or at least the full product catalog, also includes general travel luggage, outdoor gear, phone cases, wallets and gadget mounts for cars and motorcycles.

The Peak Design Everyday Backpack that I’m reviewing here is available in 20 liter and 30 liter options, and aims to be among the best camera backpacks on the market. I chose the smaller one, which is nevertheless large enough to stash a lot of camera gear, or none at all if you remove the dividers, or you can mix and match, giving some space to photo kit while also packing your daily essentials. Both backpacks are expandable, thanks to a clever MagLatch upper section.
For other everyday tech, the 20L has internal sleeves for a13-inch tablet and 15-inch laptop (16-inch MacBook Pro), while the 30L combines the same tablet size accommodation with a larger 16-inch laptop sleeve. Colorway options include black, charcoal, ocean, kelp, coyote, eclipse for the 20L, while the 30L omits ‘eclipse’ from the range.

Peak Design Everyday Backpack: Specifications
| Row 0 - Cell 0 | Everyday Backpack 20L |
Everyday Backpack 30L |
Capacity |
17-20 liters |
22-30 liters |
External size max (WxDxH) |
30x21x46-56cm |
33x27x49-59cm |
Internal size max (WxDxH) |
28x18x41-51cm |
31x23x46-56cm |
Backpack type |
Full / daily, expandable |
Full / daily, expandable |
Camera access |
Top + both sides |
Top + both sides |
Laptop compartment |
15-inch + 13-inch tablet |
16-inch + 13-inch tablet |
Tripod attachment |
Yes |
Yes |
Chest / Waist strap |
Chest + optional waist |
Chest + optional waist |
Baggage trolley sleeve |
Yes |
Yes |
Rain-proof cover |
No |
No |
Weight |
2kg / 4.4lb |
2.1kg / 4.65lb |
Peak Design Everyday Backpack: Price
Top-quality camera backpacks don’t come cheap but I feel that the Peak Design Everyday Backpacks are very good value for money. They’re made from top-notch textiles and hardware, choc full of smart design flourishes and clever tricks, and are both Climate Neutral and Fair Trade certified. With all that in mind, I think the price of $279 / £249 / AU$529 for the 20L edition is extremely reasonable, and the larger 30L is only slightly pricier at $299 / £269 / AU$569.
Peak Design Everyday Backpack: Design & Handling
In two words, I’d describe the design as neat and tidy. There are hidden magnetic closures pretty much all over the place, including magnets that stick the shoulder straps to the backpack when you’re carrying it by one of the grab handles. That avoids them dangling around all and potentially getting hooked up on one of life’s obstacles. The shoulder straps themselves are fairly slim yet comfort-padded, and have stylish good looks to match the rest of the backpack.

The shoulder straps are compatible with the Peak Design Capture Clip system. This enables you to quickly and easily attach or remove your camera from one of the shoulder straps instead of having to stow it away in your bag every time you want to stash it for a few moments. Another nice touch is the axial mounting points that attach the top of the shoulder straps to the bag. These enable full and easy movement to ensure the most comfortable fit throughout a generous range of adjustment. The breathable section of the backpack that rests against your back is similarly comfortable, as well as acting as a baggage trolley pass-through sleeve.

Equally neat and tidy is the sternum strap. If you don’t feel the need to use it, you can clip both ends of it to one of the shoulder straps, or unclip it altogether and stash it in one of the pockets. It’s quick and easy to fit when you want it, and again has a generous range of adjustment for a good fit. Apart from anything else, the sternum strap avoids the risk or one or both of the straps slipping off your shoulders while you’re moving around. However, the backpack doesn’t come with a waist strap, although Peak Design offers one to buy separately as an optional extra.

Although I generally prefer a backpack to a shoulder bag for carrying camera kit, especially if there are more than a couple of lenses and other accessories in tow, I do often find it more convenient to pick up the backpack with one hand and move it around, instead of wearing it. I’m therefore glad that this one features a full-width grab handle up top, ideal for the purpose.

Given that access to the main compartment is through either side of the backpack, rather than through the front or rear, I’m also pleased that there are additional grab handles on both sides.

A smart little extra is that the bag comes complete with an ‘anchor key tether’. It’s looped around one of the side grab handles by default and drops into a side pocket, but you can reposition it as you see fit. The design will be instantly familiar if you’re accustomed to Peak Design Slide camera straps, as it features the same quick-release system.

There’s more magnetic attraction up top. The front opening to the top of the main compartment has a ‘MagLatch’ closure. This enables quick and virtually silent access, without the fuss and noise of using a zipper. It’s really neat: a small tug on the metal handle opens it, and the same motion locks it shut again.

Open the MagLatch and the first thing you’ll notice is a rack of four connection strips underneath, on the outer front surface of the backpack. Arranged like a ladder, these enable immediate, fuss-free expandability, so you can select the optimum closing height to accommodate whatever you’ve put inside.

The floor of the top section of the main compartment revealed by the MagLatch is adjustable on Velcro strips, and there are additional organizer pockets on both sides and at the front. Again, these have magnetic closures for secure but easily accessible storage.

There’s a separate zipper at the top of the bag but this is positioned towards the rear and gives access to the dedicated laptop and tablet sleeves. In fact there’s more to it than that, as the rear opening also gives access to additional organizer pockets as well as to the dual protective sleeves for a tablet of up to 13-inch size, plus a laptop, up to 15-inch for the 20L backpack and up to 16-inch for the 30L.

As I’ve touched on, access to the main compartment is via both sides of the backpack, each having a full-length zipper. There’s a neat security feature in that you can thread the zipper pulls through the bottom attachment loops of the bag, so nobody will be able to undo them without you knowing about it, while you’re wearing the bag. Once opened, you’ll have access to one side of the bag, as shown below.

Not missing a trick, the designers have also included a pair of pockets on the insides of the full-length side flaps, both left and right. When opened, the flaps therefore not only give access to the main compartment, but also feature an upper pocket with a magnetic clasp and a lower pocket with a zipper closure.

One thing that’s entirely conventional, on the surface at least, is that the backpack has adjustable dividers with Velcro strips. Again, though, there’s more to it than initially meets the eye, as the ‘origami-inspired’ dividers have fold lines and a dual wall in their top and bottom sections, or at each side, depending on which way you look at it. The net result is that you can flex and fold the dividers to create the requisite shapes for shelf-style and pass-through dividers, adapting them to various bits of kit of different sizes.

On the outside, there are more stretchy pockets for accommodating items ‘outside the box’, as it were. There’s a pair of these pockets, one on each side, for the likes of a drink bottle, a scrunchy waterproof jacket, or whatever else you want to stash. Yet again, the external pockets have magnetic closures to keep them shut when empty, or when smaller items are stowed in them. Small holes at the bottom of the external pockets enable liquid to drain out if the going gets wet.

In addition to the two side pockets, there’s an extra pocket built into the lower part of the front of the bag. And yet again, it has a magnetic closure. It’s worth noting that the backpack’s shell is made from high-quality 400D double poly-coated DWR-impregnated nylon canvas, and is 100% recycled post-consumer material. However, it’s not completely waterproof. I’d have liked to see a completely rainproof slipover cover supplied in the bottom front pocket, but that’s not featured. On the plus side, the bottom panel of the backpack does include a 900D waterproof liner, which stops moisture from getting in if you stand the backpack on wet ground.

To extend the carrying capacity of the backpack, there are multiple loop attachment points above, below, and in between. Some of these are at the top rear and bottom rear of the backpack; others are inside the side pockets and at each side of the bottom front pocket.

An ideal use for the loop attachment points is to fasten a tripod or maybe a big telephoto lens in its soft case or pouch to the outside of the backpack. With that in mind, Cord Hook external carry straps are supplied with the backpack: two long ones and two short ones, to cover different needs. They’re stowed inside the external side and front pockets, fastened to the respective internal attachment points, and ready for use.

Peak Design Everyday Backpack: Performance
I’m mostly delighted with the performance of this backpack. Access to my camera and mounted lens is quick, easy, and soundless through the top opening of the main compartment, thanks to the clever MagLatch closure. I also like that this top section is so easily adjustable in terms of height, to accommodate different sizes of camera body and attached lens. That’s not the only option, however, as you could stow your camera further down in the main compartment if you prefer.

The full-length zippers enable access to either the left- or right-hand side of the main compartment. A further bonus of this is that you can slip one carrying strap off your shoulder, swivel the bag around on the other shoulder, and get access to the full length of the main compartment without having to take the bag off your body and lay it down on the ground. That’s particularly good news if you’re on mucky or muddy ground.

I do like the dual-side access, but my joy’s not complete. The fly in the ointment, as far as I’m concerned, is that there’s no full access to the entire main compartment through the front or the back of the backpack. The problem I found was that if I configured the FlexFold dividers so that smaller lenses could be ranked on either side of the backpack, as shown above, you can only get at them from that respective side.
If you’re chopping and changing between different lenses, you might lose track of which lens is on which side of the backpack. It can then become a little frustrating if you’ve shuffled the bag around and opened a side flap, only to find that the lens or accessory you want is actually on the other side and that you can’t access it. You then have to flip the bag over and go through the process all over again. Ultimately, it can be a test of your short-term memory as you play the game of ‘which side did I put it in?’.

Back on the plus side, it’s certainly easy to remember where your laptop and tablet are stowed. And they’re stowed in fine style with separate, adjustable sleeves within the rear compartment of the backpack, which has its own zippered closure.

I love to take my Peak Design Pro Tripod along for the ride, and being a tall chap, I’ve got the ‘Tall’ version of this excellent carbon kit. Even so, it’s dead easy to strap it securely to the bottom of the bag, or onto one or other of the sides, using the Cord Hook straps provided, and choosing between the numerous loop attachment points.
Peak Design Everyday Backpack: Verdict
I feel that the Peak Design Everyday Backpack is more than just a camera backpack, because it is. Don’t get me wrong, the FlexFold dividers are endlessly adjustable to accommodate all manner of cameras, lenses, and photographic accessories with a custom fit. But I love that it only takes a few seconds to remove all three dividers and convert the bag into an ‘everyday’ backpack for daily life, with or without a camera in tow. The Climate Neutral and Fair Trade certifications add an extra feel-good factor.
If I’m using a backpack for everyday living, robustness and long-lasting quality become paramount. I’m glad that the backpack has a tough yet luxurious look and feel to it, with a 400D double poly-coated DWR-impregnated nylon canvas shell made from 100% recycled post-consumer material. Hardware is made from anodized aluminum and glass-reinforced nylon, and there are tough ‘super-durable UltraZips with abrasion-resistant UHMPE thread’. On top (or rather bottom) of that, the backpack sits on a 900D waterproof bottom liner. The main shell doesn’t claim to be entirely rain-proof, but I took the backpack on a few trips with heavy showers along the way and water didn’t seep through to the inside.
I’m a fan of the many magnets that keep the straps neat and tidy when not in use, rather than dangling around all over the place, and are used for many and varied closures. The MagLatch top opening is wonderfully quick, easy, and virtually silent in operation, while also enabling a good range of height-adjustable expansion. My only gripe is that while full-length openings on both sides offer good access to kit, there’s no front or rear access to the whole main compartment at once. That can be frustrating if you can’t remember which side of the backpack you’ve stashed any particular item that you need in a hurry. Apart from that, these backpacks are absolutely excellent. The only tough choices are which size and color to go for.
Features ★★★★★ |
Clever features include the MagLatch top-opening, FlexFold dividers, a variety of magnetic closures and height-adjustable expandability. |
Design ★★★★½ |
The design focuses on quick and easy adaptability, between a dedicated camera backpack, general daily backpack, or split camera/daypack. The quality of materials and construction are excellent, although the shell isn’t fully rain-proof and no slip-over cover is supplied. |
Performance ★★★★½ |
Performance is thoroughly excellent in almost every respect, except that there’s no full front or rear access to the whole of the main compartment. You therefore have to remember which side you’ve stashed items like lenses and accessories. |
Value ★★★★½ |
Considering the features, design and performance, as well as the Climate Neutral and Fair Trade certifications, both of the 20L and 30L backpacks are very good value for money. |

Alternatives