



Digital Camera World Verdict
The SmallRig Professional Outdoor Backpack 25L puts me in mind of my Great-aunt Piffy. She was a methodical and organized woman whose favorite (and often repeated) saying was ‘a place for everything and everything in its place’. Benjamin Franklin was also a fan, and it seems that SmallRig has taken the proverb to heart when designing this backpack. There are hidden and not-so-hidden compartments for all sorts of bits and pieces, photographic and otherwise, even including three separate cases of various sizes that fit into or onto the backpack. The upshot is that you can keep all of the items in your camera kit in their own dedicated places, so long as you can remember where they all are. And that can actually be quite a challenge!
Reasons to buy
- +
Adaptable, modular design
- +
Multiple access points
- +
Comfortable harness
- +
3 accessory cases included
- +
Quality materials and build
Reasons to avoid
- -
Bulky for a 25L backpack
- -
Heavy even when empty
- -
Maybe too many pockets!
Why you can trust Digital Camera World Our expert reviewers spend hours testing and comparing products and services so you can choose the best for you. Find out how we test.
The first time I encountered SmallRig was when I bought its add-on hand grip for my Nikon Z fc a few years ago, which also serves as an L-bracket and Arca-Swiss compatible QR plate. It transforms the handling of this otherwise slippery camera and I’ve been so impressed that I’ve never removed it. Nikon was evidently also enamored, to the extent that when they launched the full-frame Z f, the accompanying SmallRig hand grip was bundled as a free extra with the camera.
Apart from hand grips, the Chinese company SmallRig has been making a growing range of gadgets since 2013, specializing in camera supports and stabilizers, smartphone accessories, lighting and control systems, and mobile power solutions. I’ve also been impressed by its SmallRig Camera Desk Mount and innovative SmallRig x Potato Jet TRIBEX Hydraulic Carbon Fiber Tripod Kit.
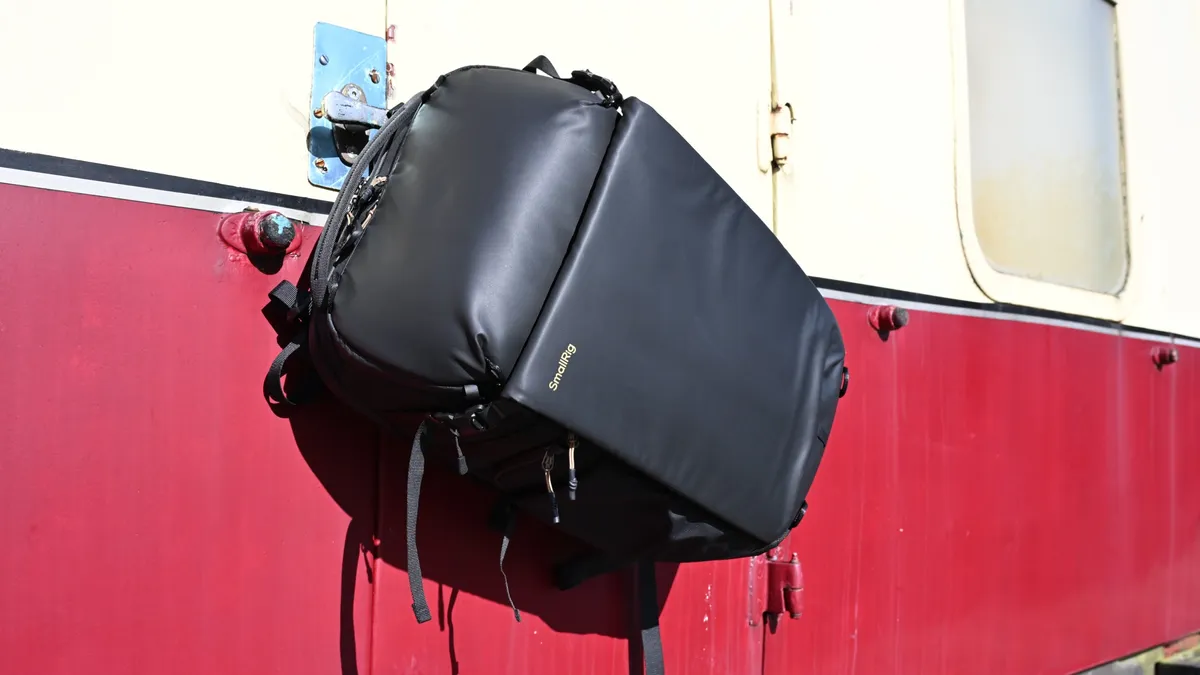
The SmallRig Professional Outdoor Backpack 25L that I’m reviewing here currently seems to have a bit of an identity crisis. I’ve also seen it advertised as the SmallRig Outra 25 Outdoor Camera Bag 25L Backpack with Modular Pouches and Comfortable Harness (on SmallRig’s official website, no less). Whichever moniker it goes by, it’s designed to be a rugged and extensively customizable backpack for the great outdoors, suited to enthusiast and professional photographers and content creators. In short, it aims to be one of the best camera backpacks that money can buy. I’ll come back to the ‘money’ bit in a moment, after going through the specs.
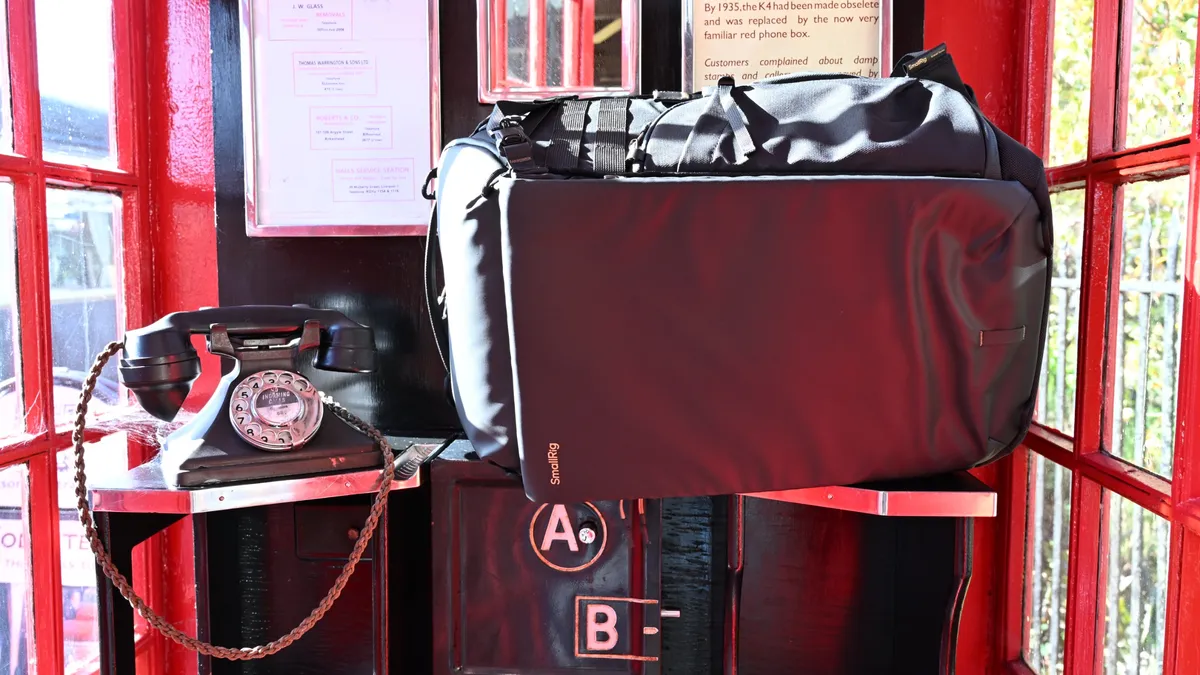
SmallRig Professional Outdoor Backpack 25L: Specifications
Capacity |
25 liters |
External size max (WxDxH) |
32x22x50cm |
Internal size max (WxDxH) |
30x20x47cm |
Backpack type |
Modular |
Camera access |
Top + Side |
Laptop compartment |
16-inch |
Tripod attachment |
Yes |
Chest / Waist strap |
Chest + waist |
Baggage trolley sleeve |
Yes |
Rain-proof cover |
Yes |
Weight |
3.8kg / 8.4lb |
SmallRig Professional Outdoor Backpack 25L: Price
Typical of kit from SmallRig and other Chinese photographic manufacturers, the SmallRig Professional Outdoor Backpack 25L looks like good value for money at $199 / £180 / AU$295. Sure, it’s not cheap and costs around the same as some other dedicated camera backpacks on the market. However, the quality of materials and all the neat little extras that you get with this backpack (including three standalone gadget cases) mean that you’re getting a good deal.
SmallRig Professional Outdoor Backpack 25L: Design & Handling
At first sight, the SmallRig Professional Outdoor Backpack 25L looks big and bulky for a backpack of its ‘medium’ 25-liter capacity. First impressions are proven correct when you pick it up because at 3.8kg / 8.4lb, it’s relatively heavy for a 25L backpack, even when empty. The flipside is that the SmallRig is robust and very well padded, and packs a lot of neat extras that add to its overall size and weight. Quality materials and parts include Cordura (well known to outdoor adventurers and to me as a motorcyclist) and YKK zippers.
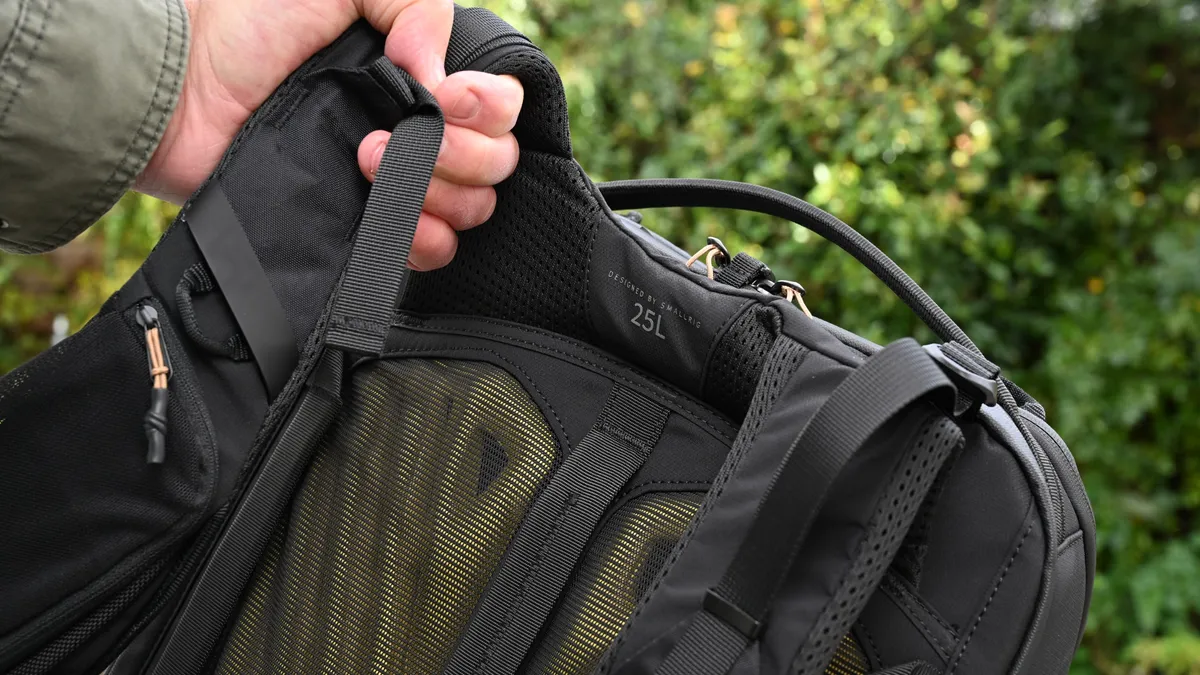
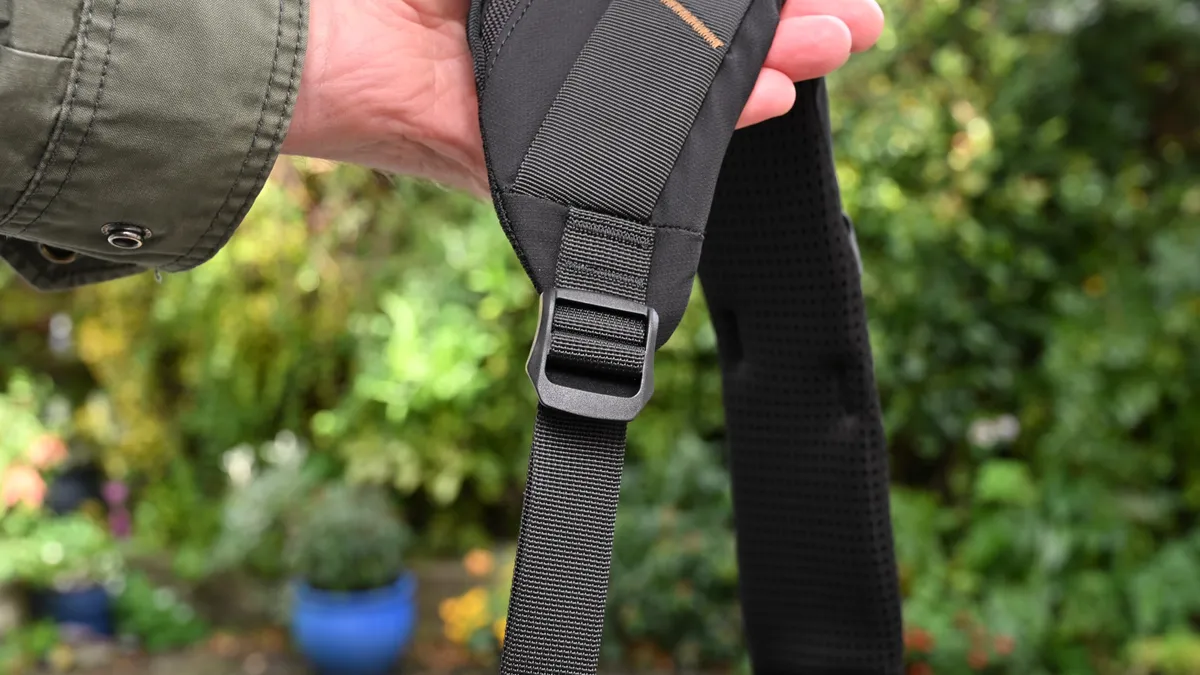
Considering that the SmallRig is a backpack, it seems logical to start with how you wear it. Unlike the relatively basic strap arrangements of many camera backpacks, this one has a fully adjustable harness. In fact, it adjusts here, there, and everywhere, starting at the top with an extending upper section that has adjustable straps, as shown in the image above, enabling you to customize how the pack sits on your shoulders. In the image below, you’ll see the adjusters at the bottom of the shoulder straps, which set their overall length.
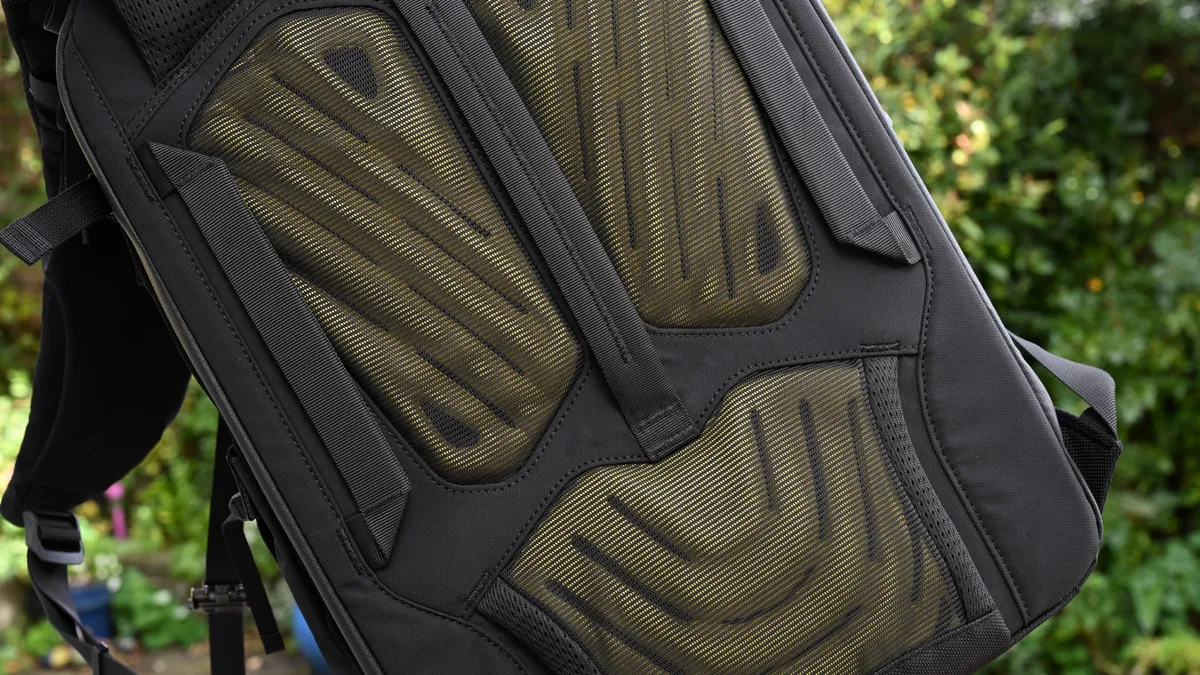
A common theme throughout the design of this backpack is that there are pockets and pouches in pretty much every place it’s conceivable to put them. This includes a mesh pocket on the front of one of the shoulder straps. Pull the shoulder straps to the side, and you fully reveal the deeply padded and well-ventilated cushioning that adds comfort for your upper and lower back. There are also three rear straps that serve as grab handles, as well as teaming up to form a baggage trolley pass-through.
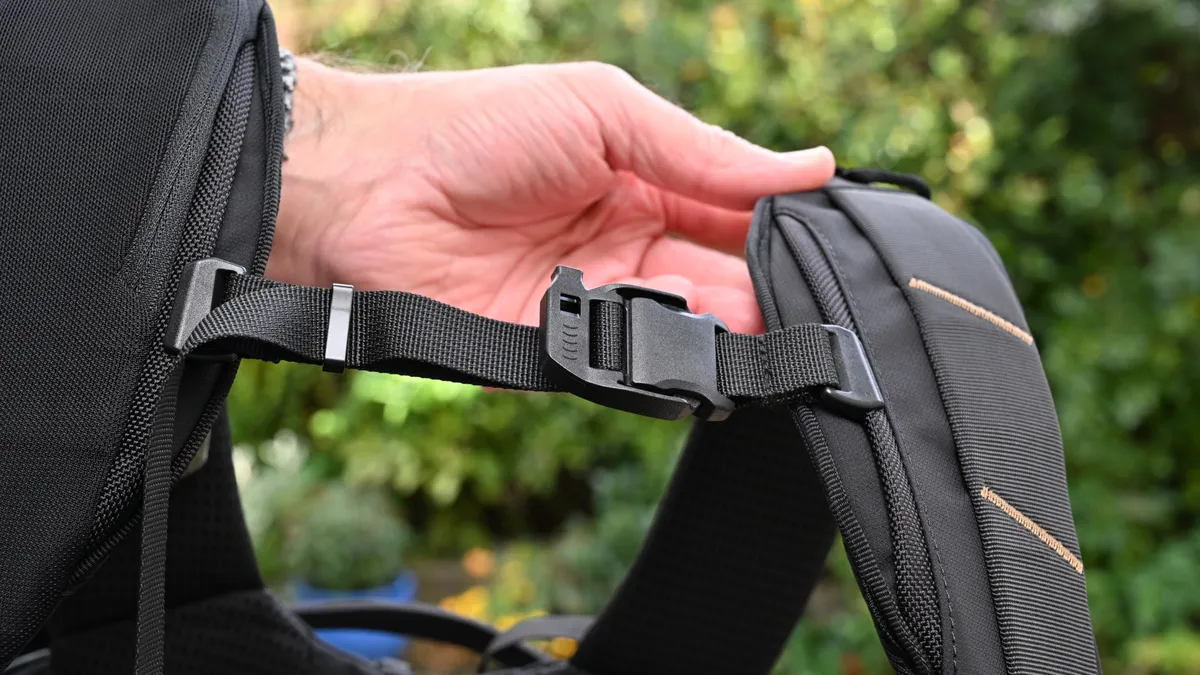
Adding further security and comfort to the fit, the backpack features a sternum strap that can slide up and down the shoulder strap and has its own fastening clip and length-adjustment clasp. Suffice it to say that the sternum strap is fully adjustable and works well to avoid the risk of the main straps slipping off your shoulders.
A pair of shoulder straps plus a sternum strap isn’t always enough to keep a backpack in place, especially if loaded with heavy kit, when you’re negotiating tricky terrain or climbing over obstacles. With this in mind, a similarly comfortable and well-padded waist strap is supplied with the bag. I like that it’s fully removable, so you don’t have to attach this additional bulky and space-hungry element of the bag unless you really need to. Conversely, you can detach the waist strap and use it on its own, taking advantage of yet another zippered pouch and optionally attaching one of the three supplied cases to it for quick access to items of your kit, which you can do with the waist strap attached to or detached from the backpack.

With so much emphasis being given in the design to how you wear the backpack, it’s good that there are also a generous number of grab handles. After all, it’s often a lot more convenient to simply grab a bag and move it around than to put it on and take it off every time. As well as the grab handles around the back, there’s a full-width grab handle up top.

There are two straps with magnetic clasps, one on each side of the upper section of the backpack. The lengths of these straps are individually adjustable, so you can use them to tether items to the side of the backpack.

Undoing both of the side straps gives access to the roll-top front pocket, which is pretty cavernous despite folding flat to the front of the bag. It also features a magnetic closure in addition to the roll-top and has internal organizer pockets. With a 4-liter capacity, the front pocket is designed to be able to carry an assembled stabilizer or similarly large item.

Moving down the left-hand side of the bag, there’s another large zippered opening. This one doesn’t give access to the main compartment, but it does feature an organizer section with yet more pouches and zippered pockets for small items, including a color-coded section for blank and full memory cards.

Just behind the left-hand pocket, there’s a specialized selfie stick holder with a flip-over cover that has a magnetic closure. Inserting a selfie stick into the holder enables you to extend the stick above your head and shoot when you’re on the move, while wearing the backpack as normal.

Moving from left to right, the side pocket on this side of the bag looks just like the one on the left from the outside, and has the same expandable outer carrier for the likes of drinks bottles. However, open the zipper, and you’ll find a flap with a different organizer layout. It’s a better fit for spare camera batteries or other items of a similar size.

A more fundamental difference is that the right-hand-side pocket has an internal flap that hinges out to give side access to the main compartment in which you’re likely to store your camera, lenses, and other main bits of kit.

As well as offering an additional access point to your camera, lenses, or other accessories, an advantage of the side-pocket access is that you can retrieve items from the backpack by swiveling around on one shoulder, instead of fully taking it off and lying it down on the ground. To finish off the side pocket collection, there’s a further pair of tall, slim pockets, one on each side of the backpack towards the front. Again, these have their own zippers for gaining access.

Up on top, there’s guess what? Yes, it’s yet another zippered access point. This one enables you to get into the top of the main compartment. Off the shelf, the backpack comes with one of the dividers acting as a floor, making the top section a separate space in its own right, complete with the largest of the additional cases fitted to its floor. However, you can reconfigure the divider to change the height of this area, or remove it altogether.

The top zipper not only gives access to the top pocket or the top area of the main compartment, depending on how you configure the dividers, but also to the dedicated laptop compartment. This is large enough to accommodate a 16-inch laptop and comes with a Velcro securing strap.

The largest of the lift-out cases that’s supplied in the bottom of the top pocket is just under 12 inches wide. It has securing straps with poppers, MOLLE loops, and Velcro strips to enable a wide range of attachment options, along with a Velcro closure. Furthermore, it has yet another selection of five organizer pockets on the inside, in addition to its main compartment.

Full access to the main camera compartment of the backpack is through the rear. That’s my personal preference because, if you need to lay the bag down on mucky ground to get at your gear, you’re not laying it on the surface that you’ll then need to wear against your back. I also like that you don’t have to fold the shoulder straps forward, out of the way, before you can undo the main zipper, which I feel is a failing of some other backpacks that have a rear-access design. Even then, the SmallRig goes one better by featuring an internal baffle panel that runs the height of the main compartment and attaches top and bottom by Velcro. This hinges outwards to enable access, while also reducing the risk of items moving from their designated positions when the bag is closed.

The main compartment itself has three main lateral dividers. These attach to the outer shell via durable loops and Velcro strips. You can use one, two, or all three of them to best fit your kit. Alternatively, you can remove all of the main dividers and use the backpack for general-purpose duty, such is the modular nature of the design.

Opening the main rear panel of the backpack also gives access to the laptop sleeve, as shown below. The upshot is that if you need to grab some of your camera gear as well as your laptop, you don’t need to open both the top and rear zippers.

To customize the main compartment and make it a tailored fit for your kit, the backpack is supplied with six smaller, folding dividers, each with Velcro attachment strips. They’re nicely padded and easy to move around to accommodate whatever you want to stash.

You might well be able to spot a theme developing at this point, if you’re not already ahead of the game. The additional medium and small cases follow the example set by the largest one. They have attachment straps with poppers, Velcro attachment strips and a Velcro closure plus Molle loops. They also feature multiple internal organizer pockets. Some might say ‘the more the merrier’. Others might wonder just how many separate storage areas, pouches, and pockets you actually need.

Although Cordura is renowned as a very hard-wearing and water-resistant fabric, the backpack nevertheless comes complete with a tailor-made, slip-over rain cover. This folds in on itself, wrapping up small and snug when not required, so it takes up fairly little room in a spare corner of one of the backpack’s many pockets and pouches.

Even though the backpack is voluminous, not everything’s going to fit inside. For large items that could be anything from a tripod to light stands or even a rolled-up picnic blanket, there are four attachment loops up top and another four at the bottom. That’s in addition to the four strips of MOLLE loops at the sides near the top of the bag, and the adjustable side straps. A pair of adjustable straps is supplied with the backpack, with hooks that are specially made to work with the attachment loops.

Yet more add-on attachments are featured, with two pairs of cords that run down the backs and fronts of each side panel. The cords are sewn in so that they form rows of additional loops for latching stuff onto. Alternatively, you could use the loops for securing the backpack to something else while in transit.

SmallRig Professional Outdoor Backpack 25L: Performance
Getting right down to business, the zippered rear panel and its internal baffle, along with the main and supplementary dividers, enable quick access to all your main camera gear. The easy fitment or removal of the dividers, both the main lateral ones and smaller folding ones, enables a tailored fit for kit, as well as enabling you to convert the bag into a general-purpose backpack or a split camera/daypack, adding versatility.

You’ll notice in the image shown above that the top compartment is separated from the main compartment in the standard configuration of the backpack. You can change this and break through between the two compartments, merging them into one if you remove the top lateral divider, which by default also acts as the floor of the top compartment.

As you might remember from earlier, the right hand side pocket also acts as a side entry point to the main camera compartment, as shown above. It makes sense, therefore, to keep items that you want to grab quickly and most frequently ranked down the right hand side of the compartment.

When you need your laptop, it’s nice that you can access its safe and secure sleeve through either the top opening or the main rear opening of the backpack. Either way, an additional Velcro strap adds an extra layer of safety, ensuring that it doesn’t slide out accidentally.
In practice, I found that the magnetic clasps on the side straps, which you can use for tethering a tripod, were rather less secure. The smallest movement of the cord that releases the clasp is all that’s needed to undo the latch, the result being that the tripod can become untethered accidentally while you’re wearing or carrying the backpack. To avoid this potential pitfall, I tend to use the separate adjustable straps in conjunction with their partner attachment loops at the top and/or bottom of the backpack, which provides a much safer and more secure solution.

In general, all areas, compartments, sleeves, pockets, pouches, organizer sections, and the three additional cases work very well. My only problem from a performance standpoint is that there are just so many of them. Sure, it’s nice that ‘there’s a place for everything and everything in its place’. However, with so many pockets, sub-pockets, and sub-sub-pockets on the agenda, I found it easy to lose track of exactly where I’d stowed some of my items, which made it troublesome to locate them.
SmallRig Professional Outdoor Backpack 25L: Verdict
Living up to its outdoor billing, the SmallRig Professional Outdoor Backpack 25L is robust, hard-wearing, and very weather-resistant, based on quality materials and components, including Cordura and YKK zippers, along with a tailored slip-over rain cover. I like its modular design, which enables you to remove some or all of the dividers and switch between use as a dedicated camera backpack, a general daily backpack, or a split camera/daypack. The ‘modular’ approach even stretches to the provision of three smaller cases that you can use inside or outside the bag and a large, padded removable waist strap with its own additional pocket and attachment points.
As a consequence of the many and varied parts, the backpack is quite bulky and heavy, even when empty, although you don’t need to use or carry the additional cases and waist strap if you don’t feel the need for them. Either way, the fully adjustable harness with adjusters at the top and bottom of the shoulder straps, plus the adjustable sternum and waist straps and deeply padded body contact areas, make the backpack very comfortable to wear even when fully loaded, for long periods of time.
My only real problem with this backpack is that it’s just so complicated. I feel it’s actually over-designed and over-engineered. I do appreciate the fact that SmallRig wanted to bring a sense of order to large collections of kit by featuring a myriad of pockets within pockets, to give every little thing its own special place. The idea is that this approach makes items quicker to find and easier to access. However, I actually found that the opposite was often the case. Instead of making everything quicker and easier, it took me longer to find bits and pieces, in what often turned into a game of hide-and-seek and something of a memory test.
Features ★★★★★ |
The SmallRig backpack certainly isn’t short on features, with multiple compartments, many pockets, three separate cases and a detachable waist strap. |
Design ★★★★☆ |
The design aims to make each and every item in your collection quick and easy to find and retrieve, but the sheer number of separate pouches and pockets can be counter-productive. |
Performance ★★★★☆ |
The bag is tough, hardwearing and well suited to an outdoor life. It’s fairly heavy even when empty but comfortable to carry. Locating items when you’re in a hurry can take longer than expected. |
Value ★★★★☆ |
It’s certainly not a cheap backpack but is pretty good value considering its quality and all the various components you get for your money. |

Alternatives