Lightroom series part 23: How to bring back the film look in Lightroom
Apply a series of Lomography-inspired effects to make your images look like you shot them with an old-school film camera
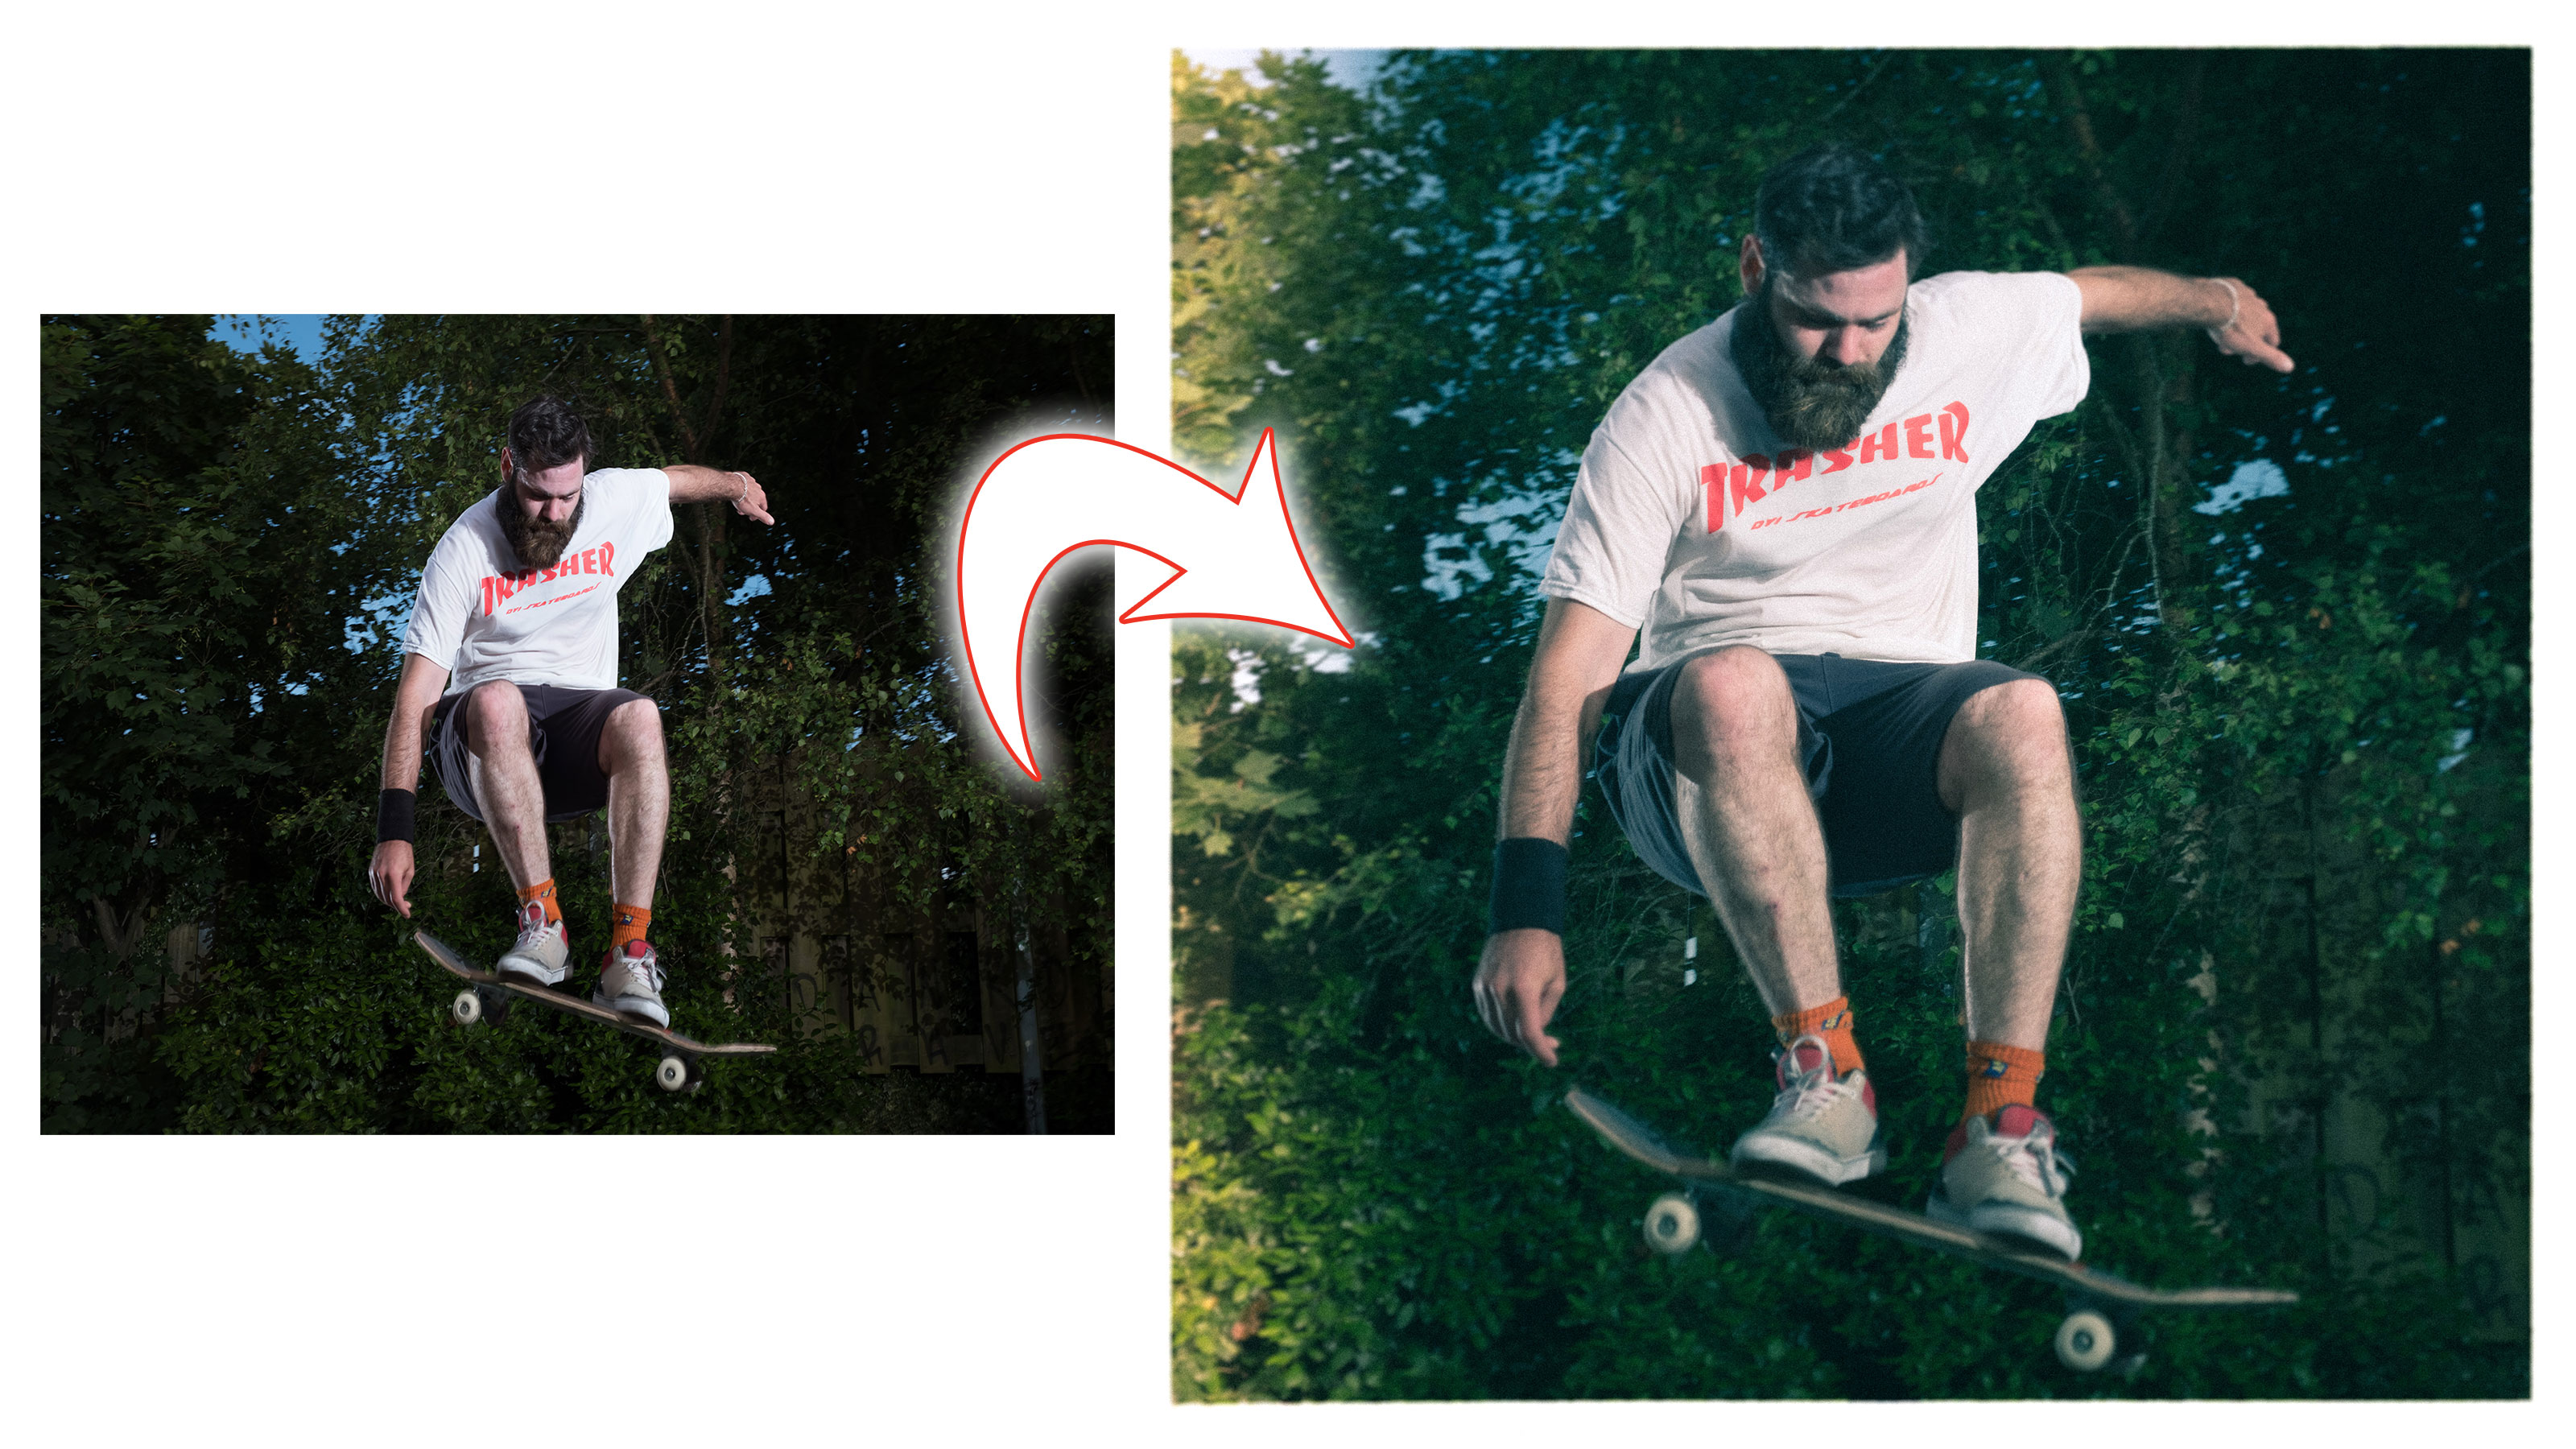
You might call Lomography the anti-digital movement, striving to overcome the clinical capture of modern cameras. Cheap or expired films are part and parcel of the look, as are cameras with defects, allowing light to leak in. Plastic lenses round out the effect. Often the films used are cross-processed for wacky colours. It’s a little unpredictable, and that’s part of the fun.
Welcome to the 23rd instalment of our Lightroom series, first published in Digital Camera magazine (see below for subscription offers).
If you are already a Lightroom user, you could discover some new tricks and processes you haven't tried yet. If you don't use Lightroom, then scroll down to the bottom where you'll discover how to get it and which Adobe Photography Plan is best.
If you’ve no patience for shooting film, you can recreate the look in Lightroom. It won’t be quite so random as the real thing, but you can always make presets with varying looks. Our key ingredients are: faking a plastic lens, adding grain and a light leak, cross-processing our ‘film’, and applying a suitable crop.
• See more Lightroom tutorials
1. Crop first
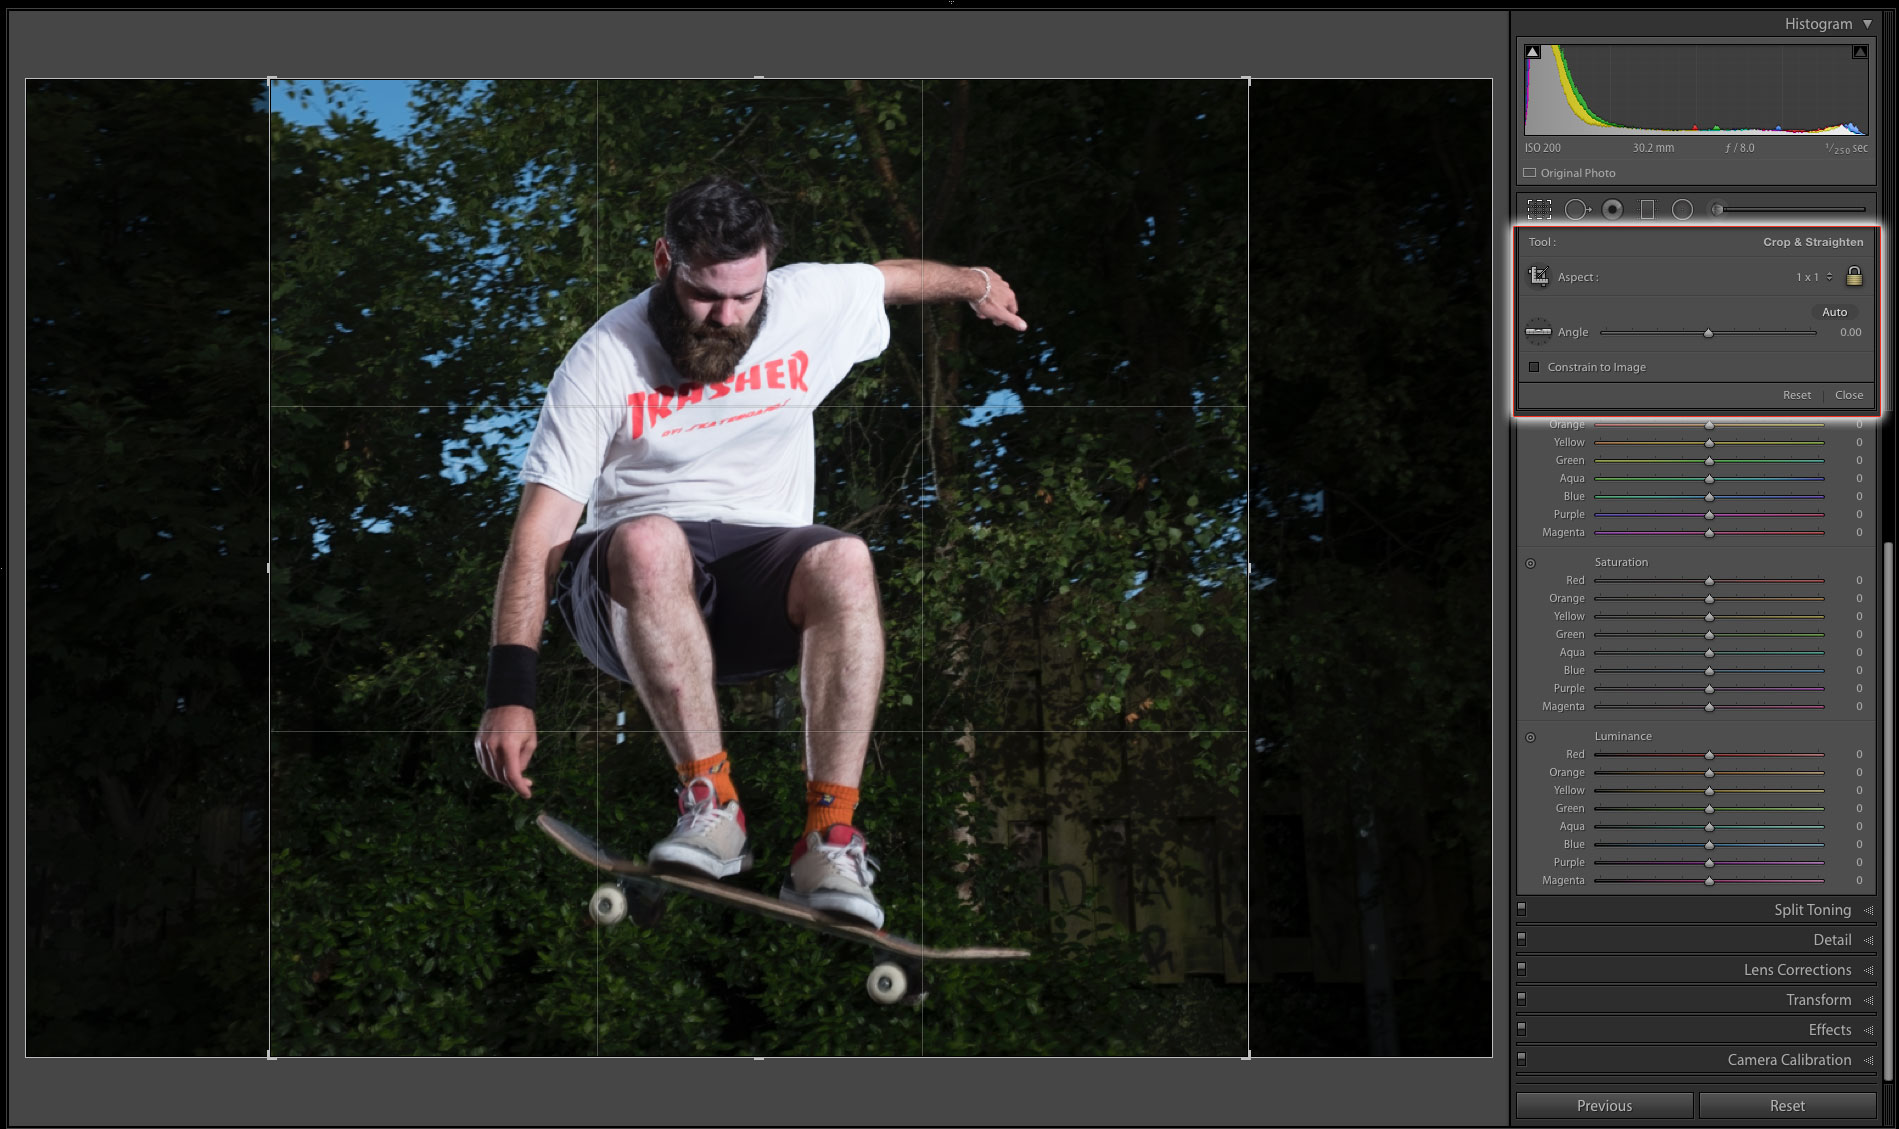
You need to set your crop before faking your plastic lens. Press R to open the Crop tool. From Aspect, choose 1x1 to emulate the 6x6 square of medium-format cameras like the Holga.
2. The plastic lens look
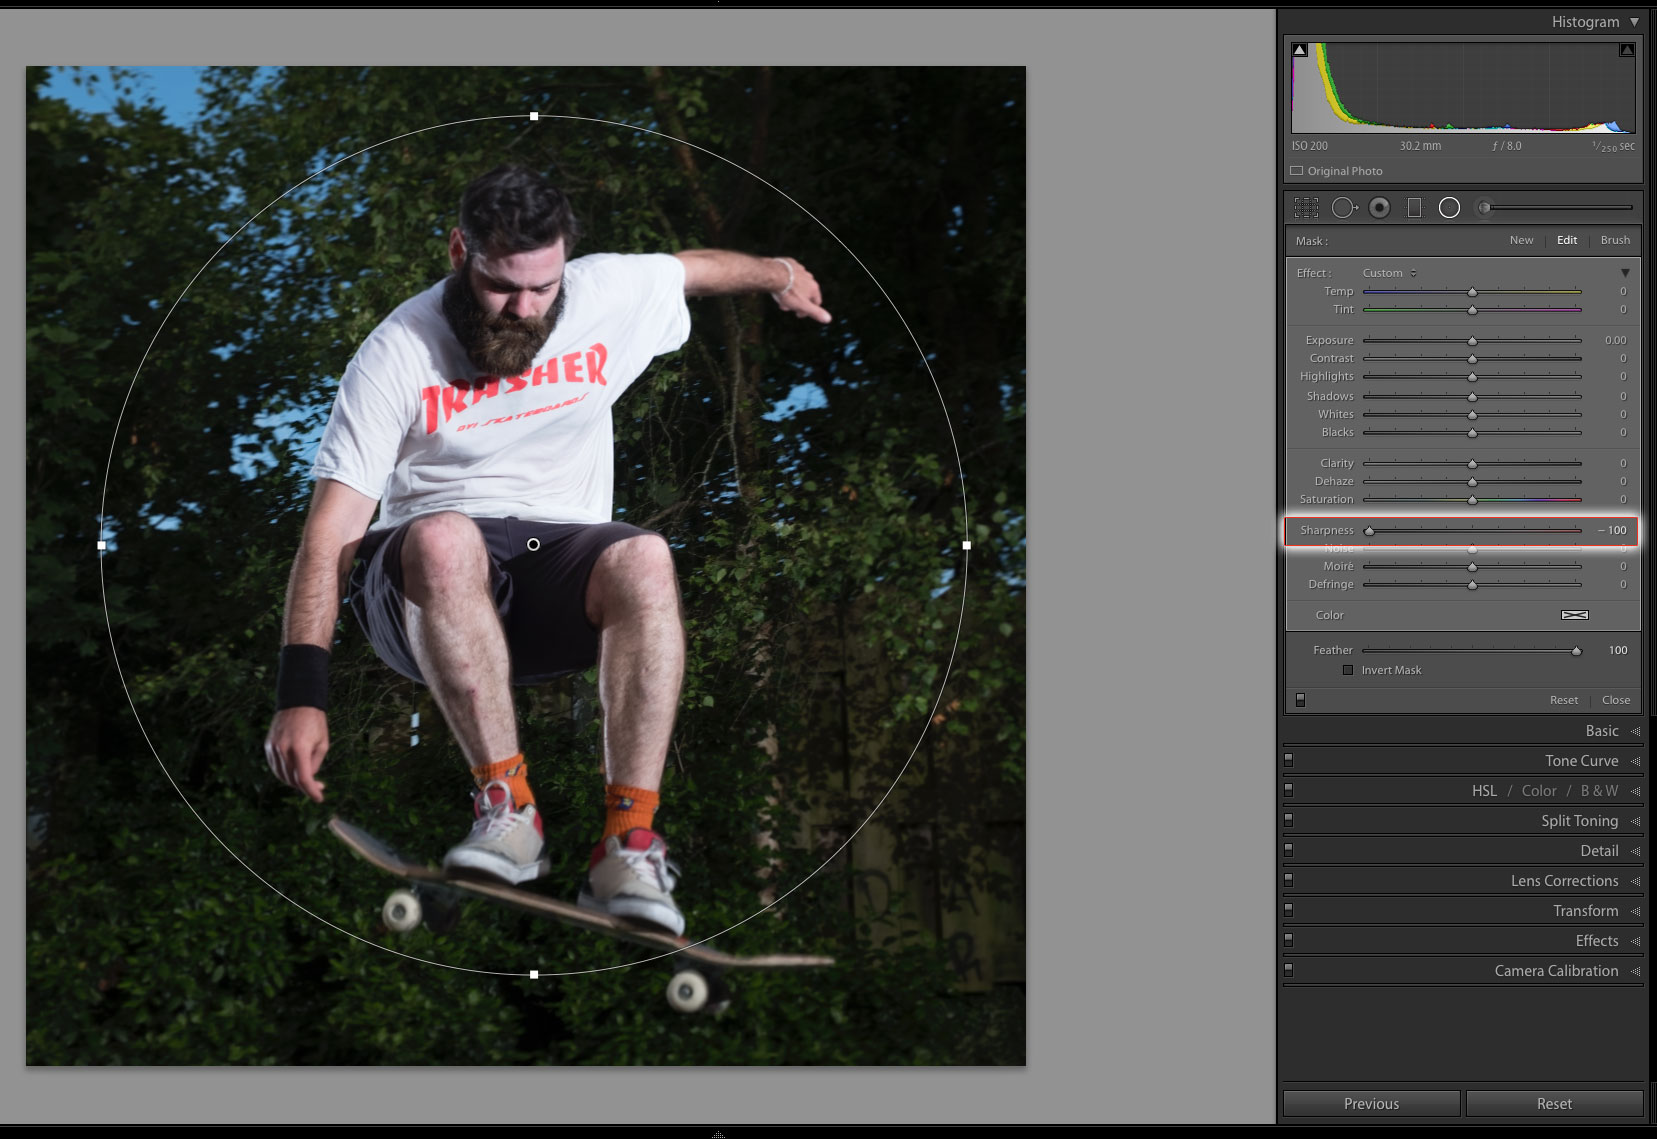
Let’s blur the edges as a plastic lens would. Choose the Radial Filter in the toolstrip near Crop. Drag out the filter in a circle. Make sure Invert Mask is off and set Sharpness to -100 and Feather to 100.
The best camera deals, reviews, product advice, and unmissable photography news, direct to your inbox!
3. Darker edges (vignetting)
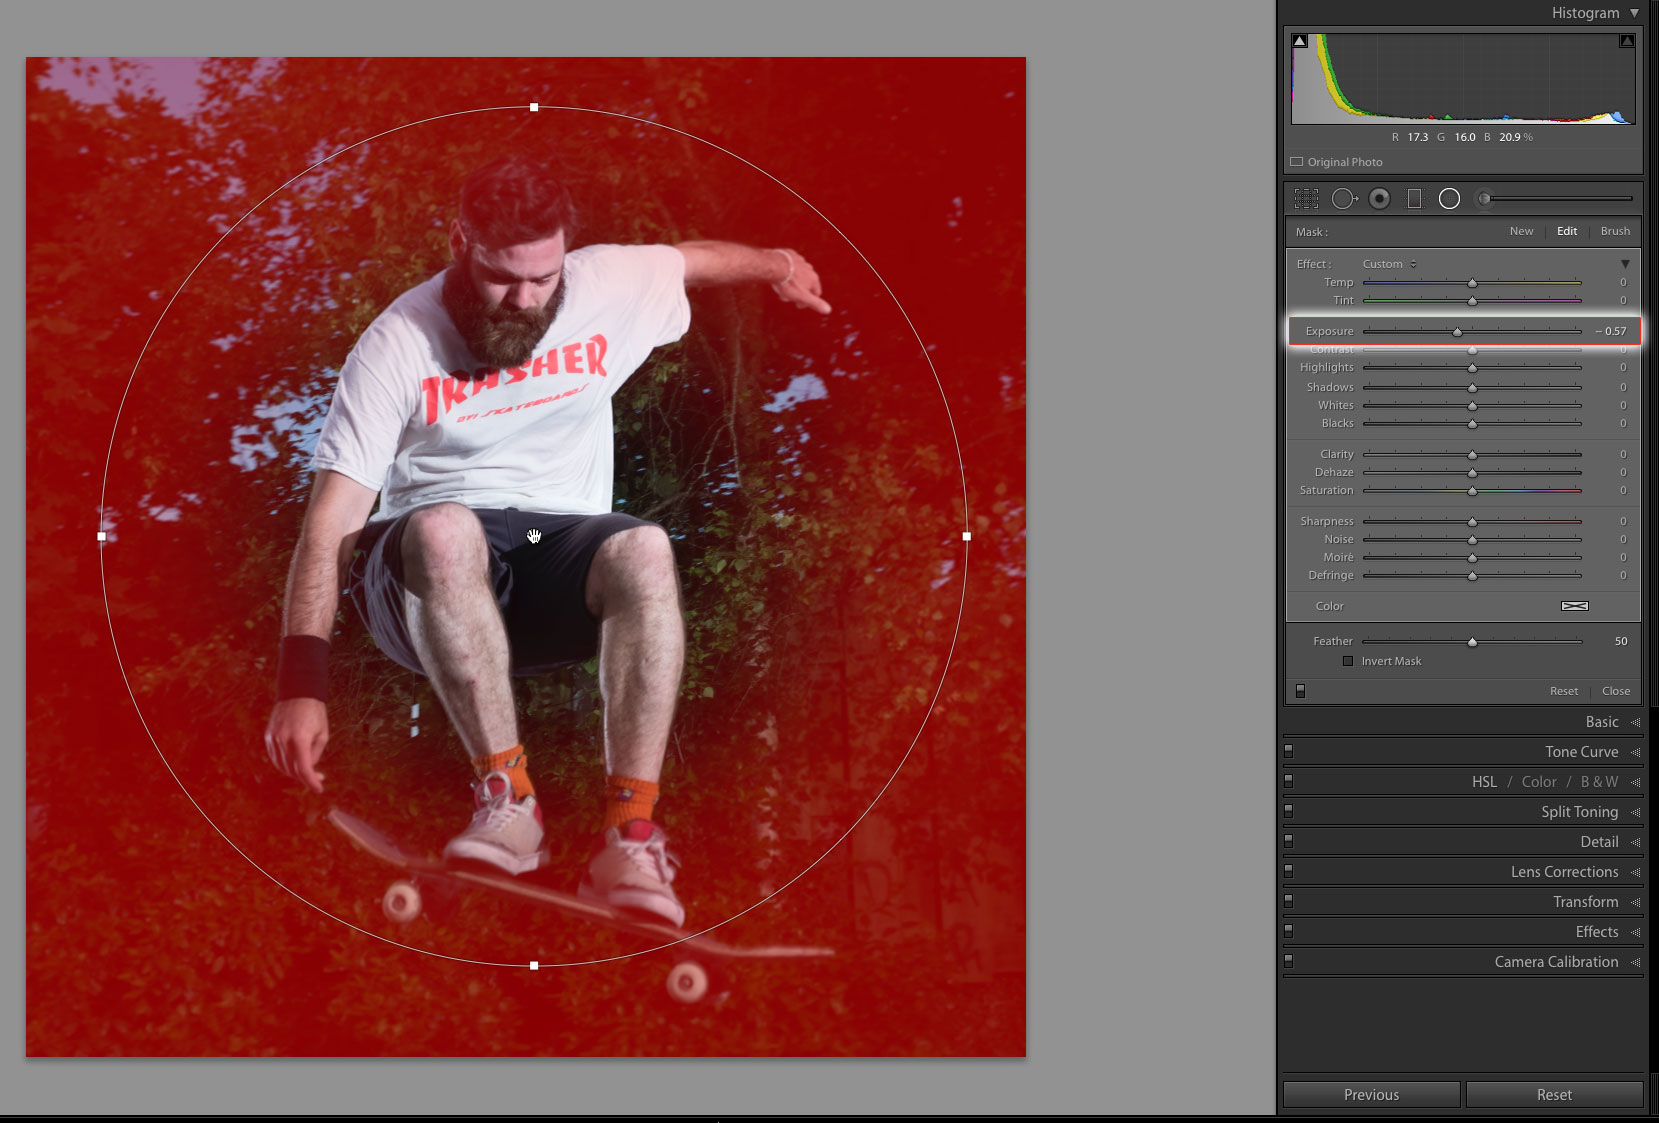
Cheap lenses also darken or 'vignette' the edges of the photo. To keep the controls separate, right-click on the pin and choose Duplicate. Reset Sharpness to 0. Bring Exposure down to darken the edges (-0.57 here). Reduce Feather to 50. To see the areas affected, wave the cursor over the pin.
4. Add a light leak
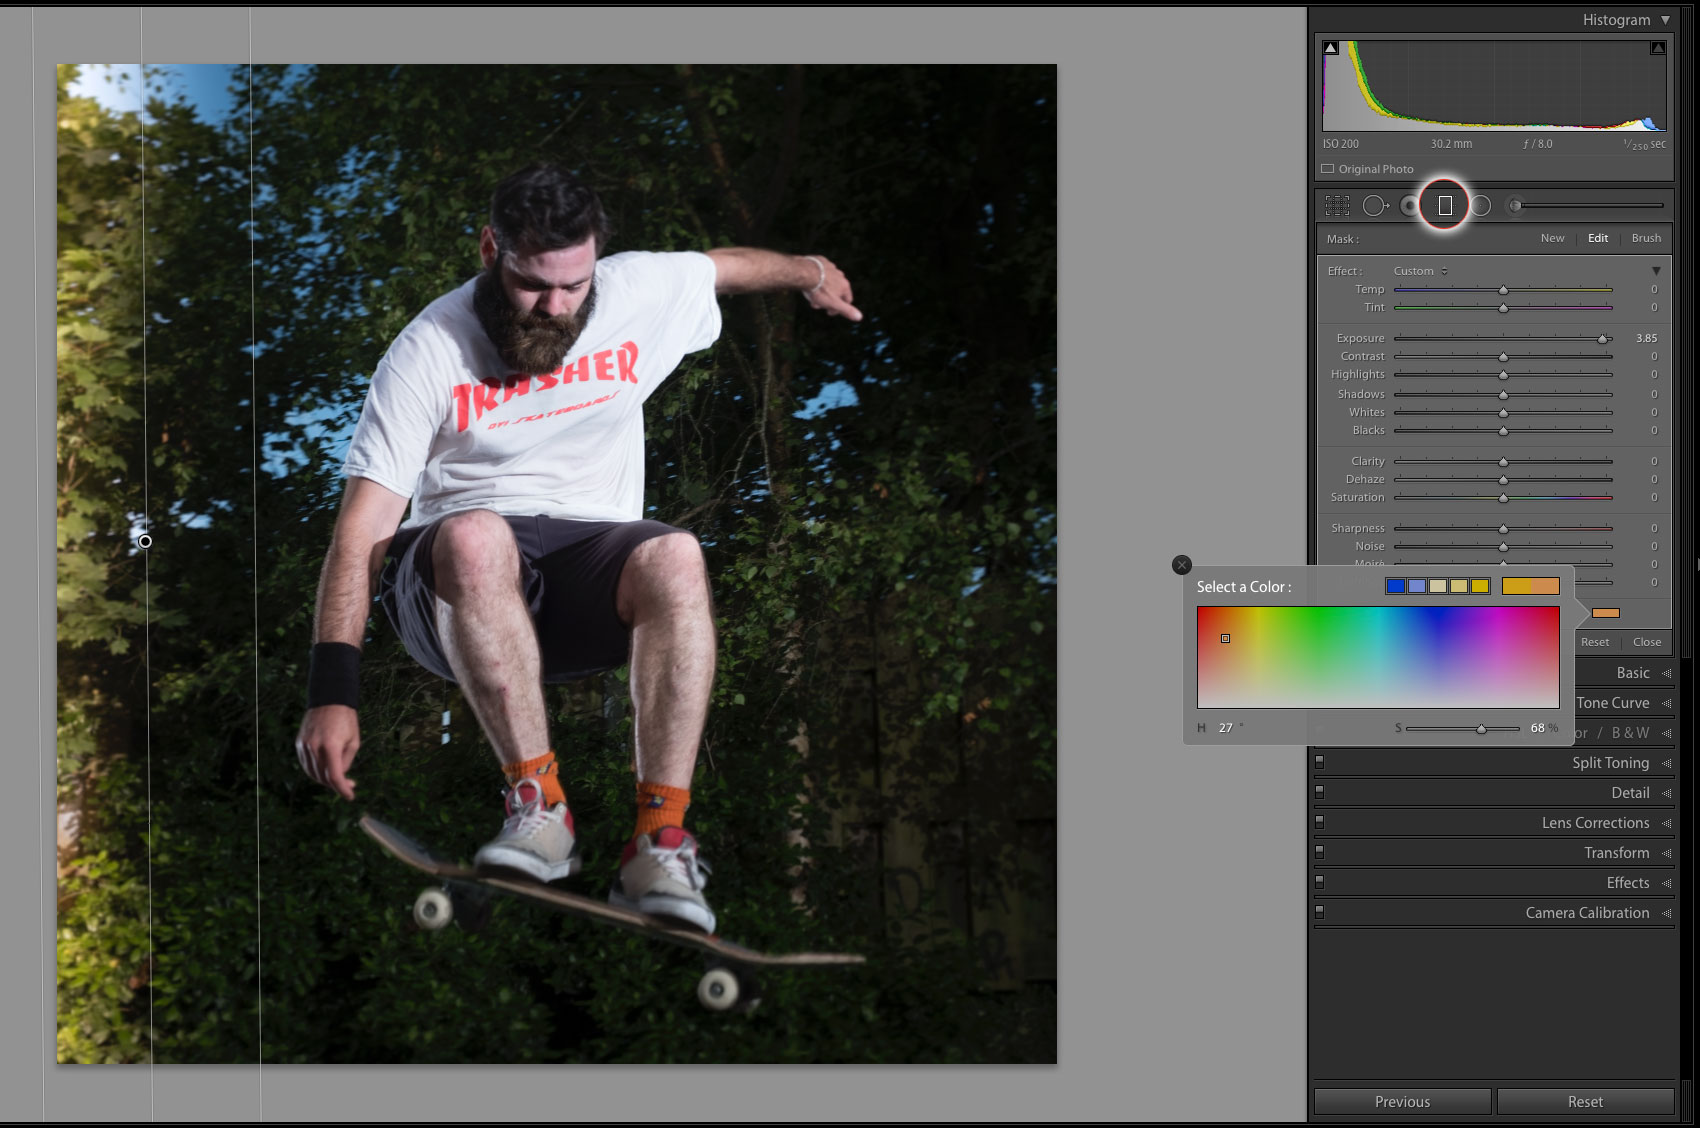
Add the sort of light leak you might get from a battered old camera by selecting the Graduated Filter (press M to select). Set Exposure to between 3 and 4 stops. Change Color to an orange. Drag the Graduated Filter in from one side to create a light leak.
5. Grain and tone
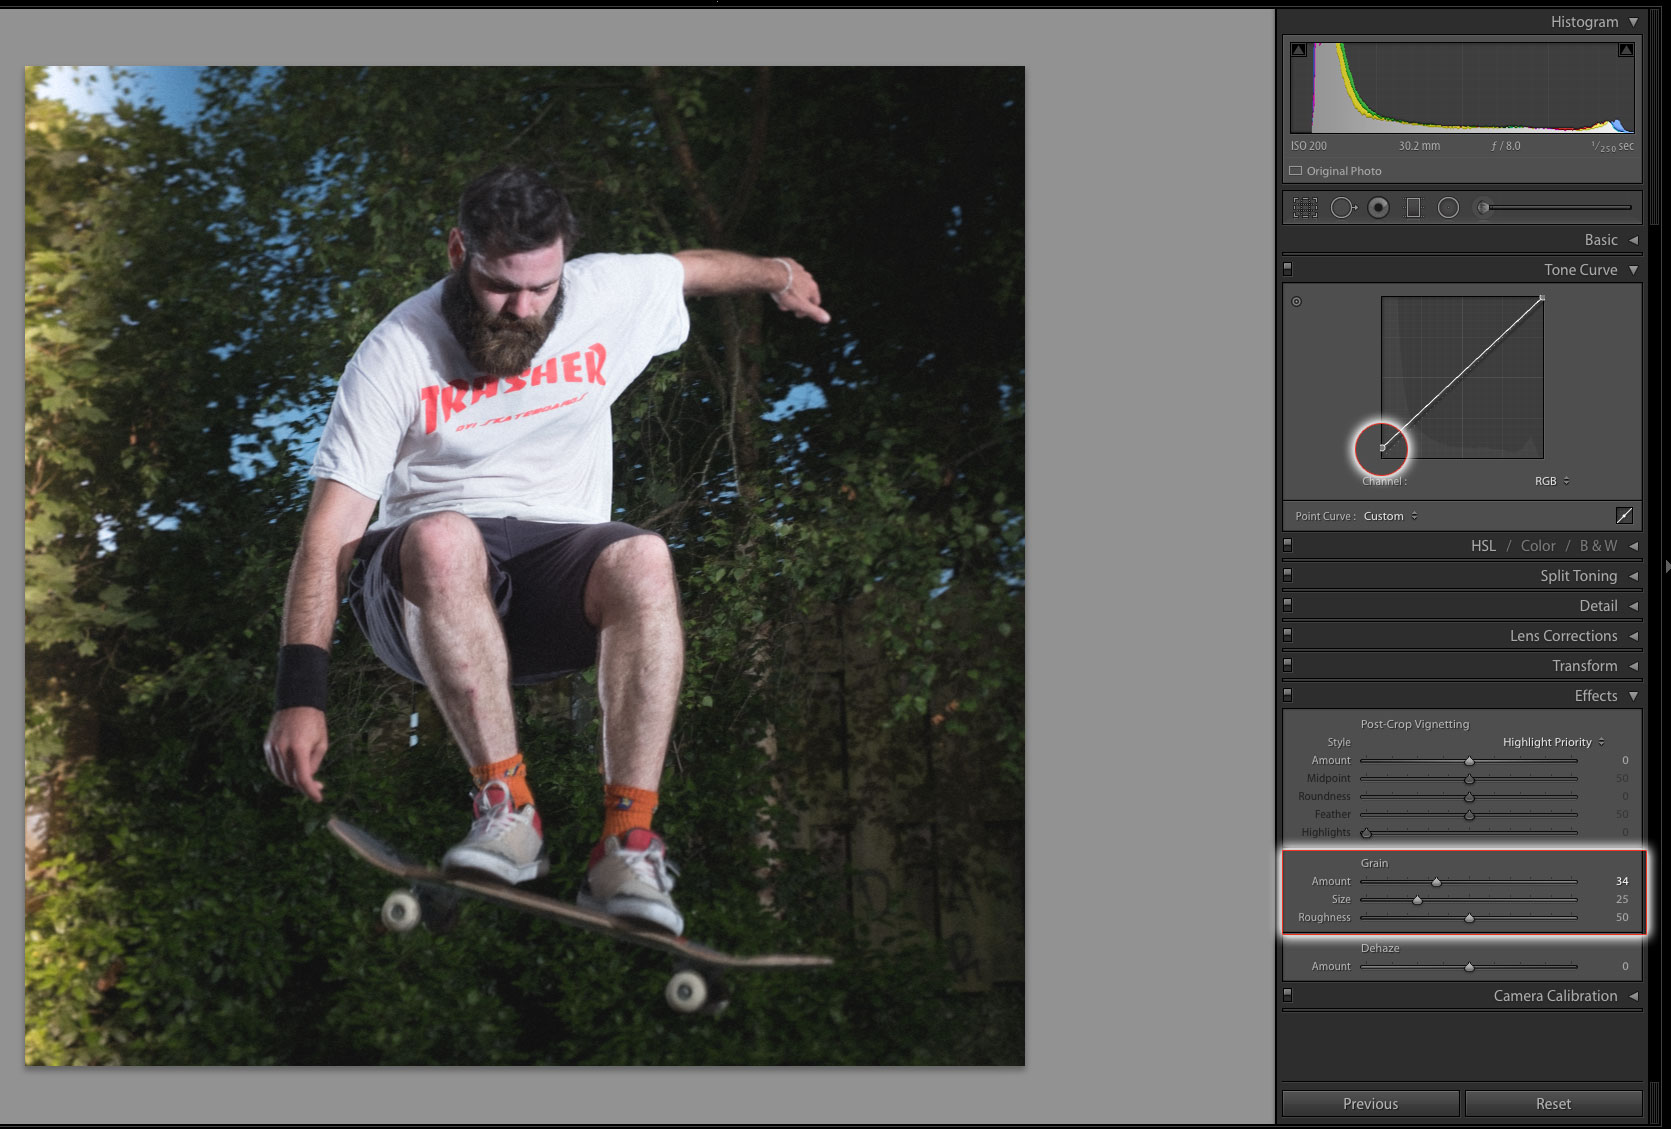
In Effects, set Amount to 35 in Grain. Next in Tone Curve, in the Point Curve mode (the little icon in the bottom-right), drag up the left point to wash out the shadows in the shot.
6. Add a color shift
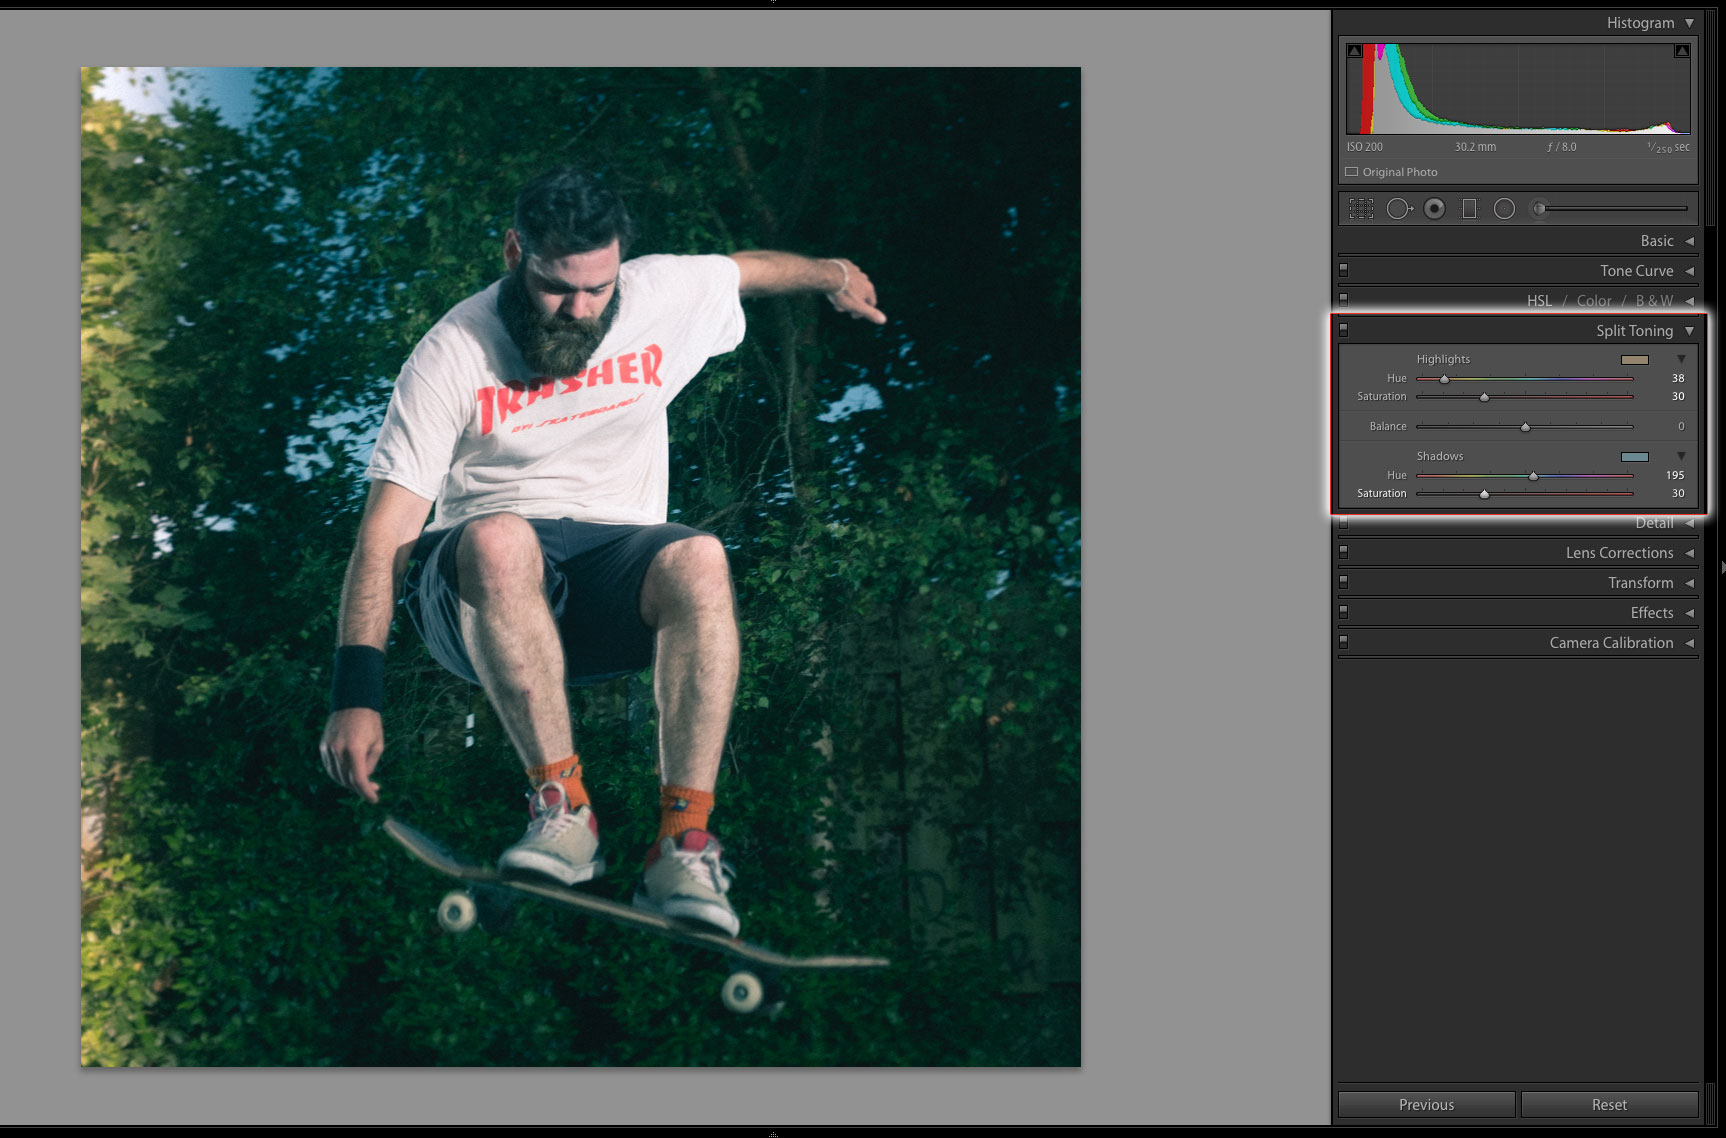
Your final task is to modify the colour. Go to the Split Toning panel. For Highlights, set Hue to around 35-40, with a Saturation of 30. For Shadows, try going for around 195 for a green-blue tint. Again, set Saturation to around 30 to get the popular cross-processed look.
Expert tip: Add instant-picture borders
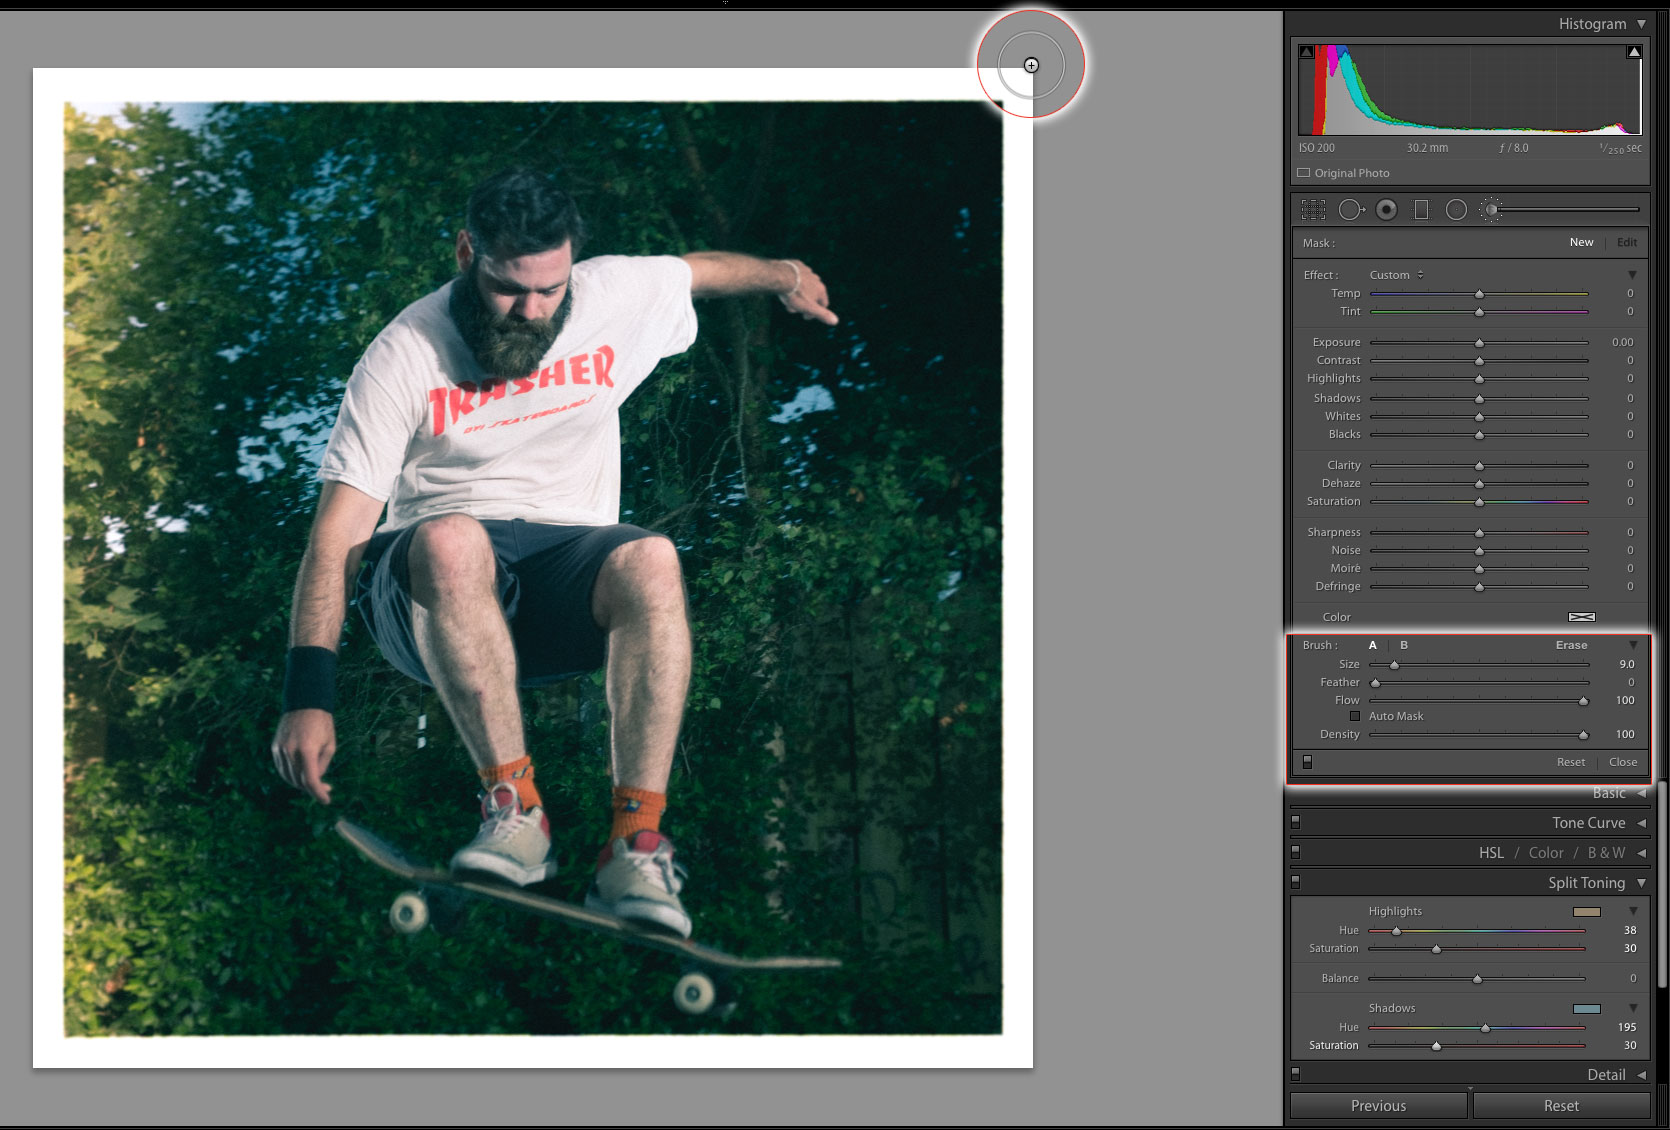
To really fake the Lomo look, you could add a border. You wouldn’t really expect to do this in Lightroom – that’s what Photoshop is for – but there is a trick you can use. Go to the Brush tool and set a small hard brush (Feather of 0). Set Exposure to +4. Notice there’s a + in the middle of the tool. Line this up with the top-left corner. Hold the Shift key and drag straight down. The Shift key keeps the line straight. Aiming the + at the corner means you get a consistent-sized border. Repeat for all four sides. Now right-click on the pin for the brush and choose Duplicate. Repeat this until the border is completely white. You may need to tweak your light leak with the new border.
About Digital Camera magazine
This tutorial originally appeared in Digital Camera Magazine, the monthly newsstand magazine for all photographers. Why not subscribe to a print edition, and have the magazine delivered direct to your door every month?
Alternatively, we have a number of different digital options available, including:
• Apple app (for iPad or iPhone)
• Zinio app (multi-platform app for desktop or smartphone)
• PocketMags (multi-platform app ideal for Android devices)
• Readly (all-you-can-eat digital magazine subscription service)
If you wanted a printed version of any of our most recent issues we have a selection of back issues to choose from in our online store.
How to get Adobe Lightroom
Adobe Lightroom is available in two versions: the regular Adobe Lightroom Classic CC designed for desktop users, which is what we cover in this series, and a new cloud-based Adobe Lightroom CC, which stores your files online and offers a similar but reduced set of features. For regular desktop users we recommend Adobe Lightroom Classic CC.
Adobe offers three subscription based Photography Plans which you can click on below. We recommend either the regular Photography Plan, or the Photography Plan (1TB) which costs more but comes with 1TB online storage in case you decide to go with Lightroom CC.
For this set of tutorials and for anyone who likes to work on a single main computer, we recommend the regular Creative Cloud Photography Plan. This is the cheapest way to get started AND it comes with Photoshop CC too.
Read more:
• This is the best photo-editing software today
• These are the best laptops for photographers right now
• We help you choose the best desktop computers for photo editing
Sean McCormack is a commercial, and editorial photographer, book author, and regular contributor to Digital Camera magazine based in Galway, Ireland. He has extensive experience with Lightroom, dating back to its original beta version, and has tried out just about every plugin and preset available. His latest book is Essential Development 3: 25 Tips for Lightroom Classic’s Develop Module.
