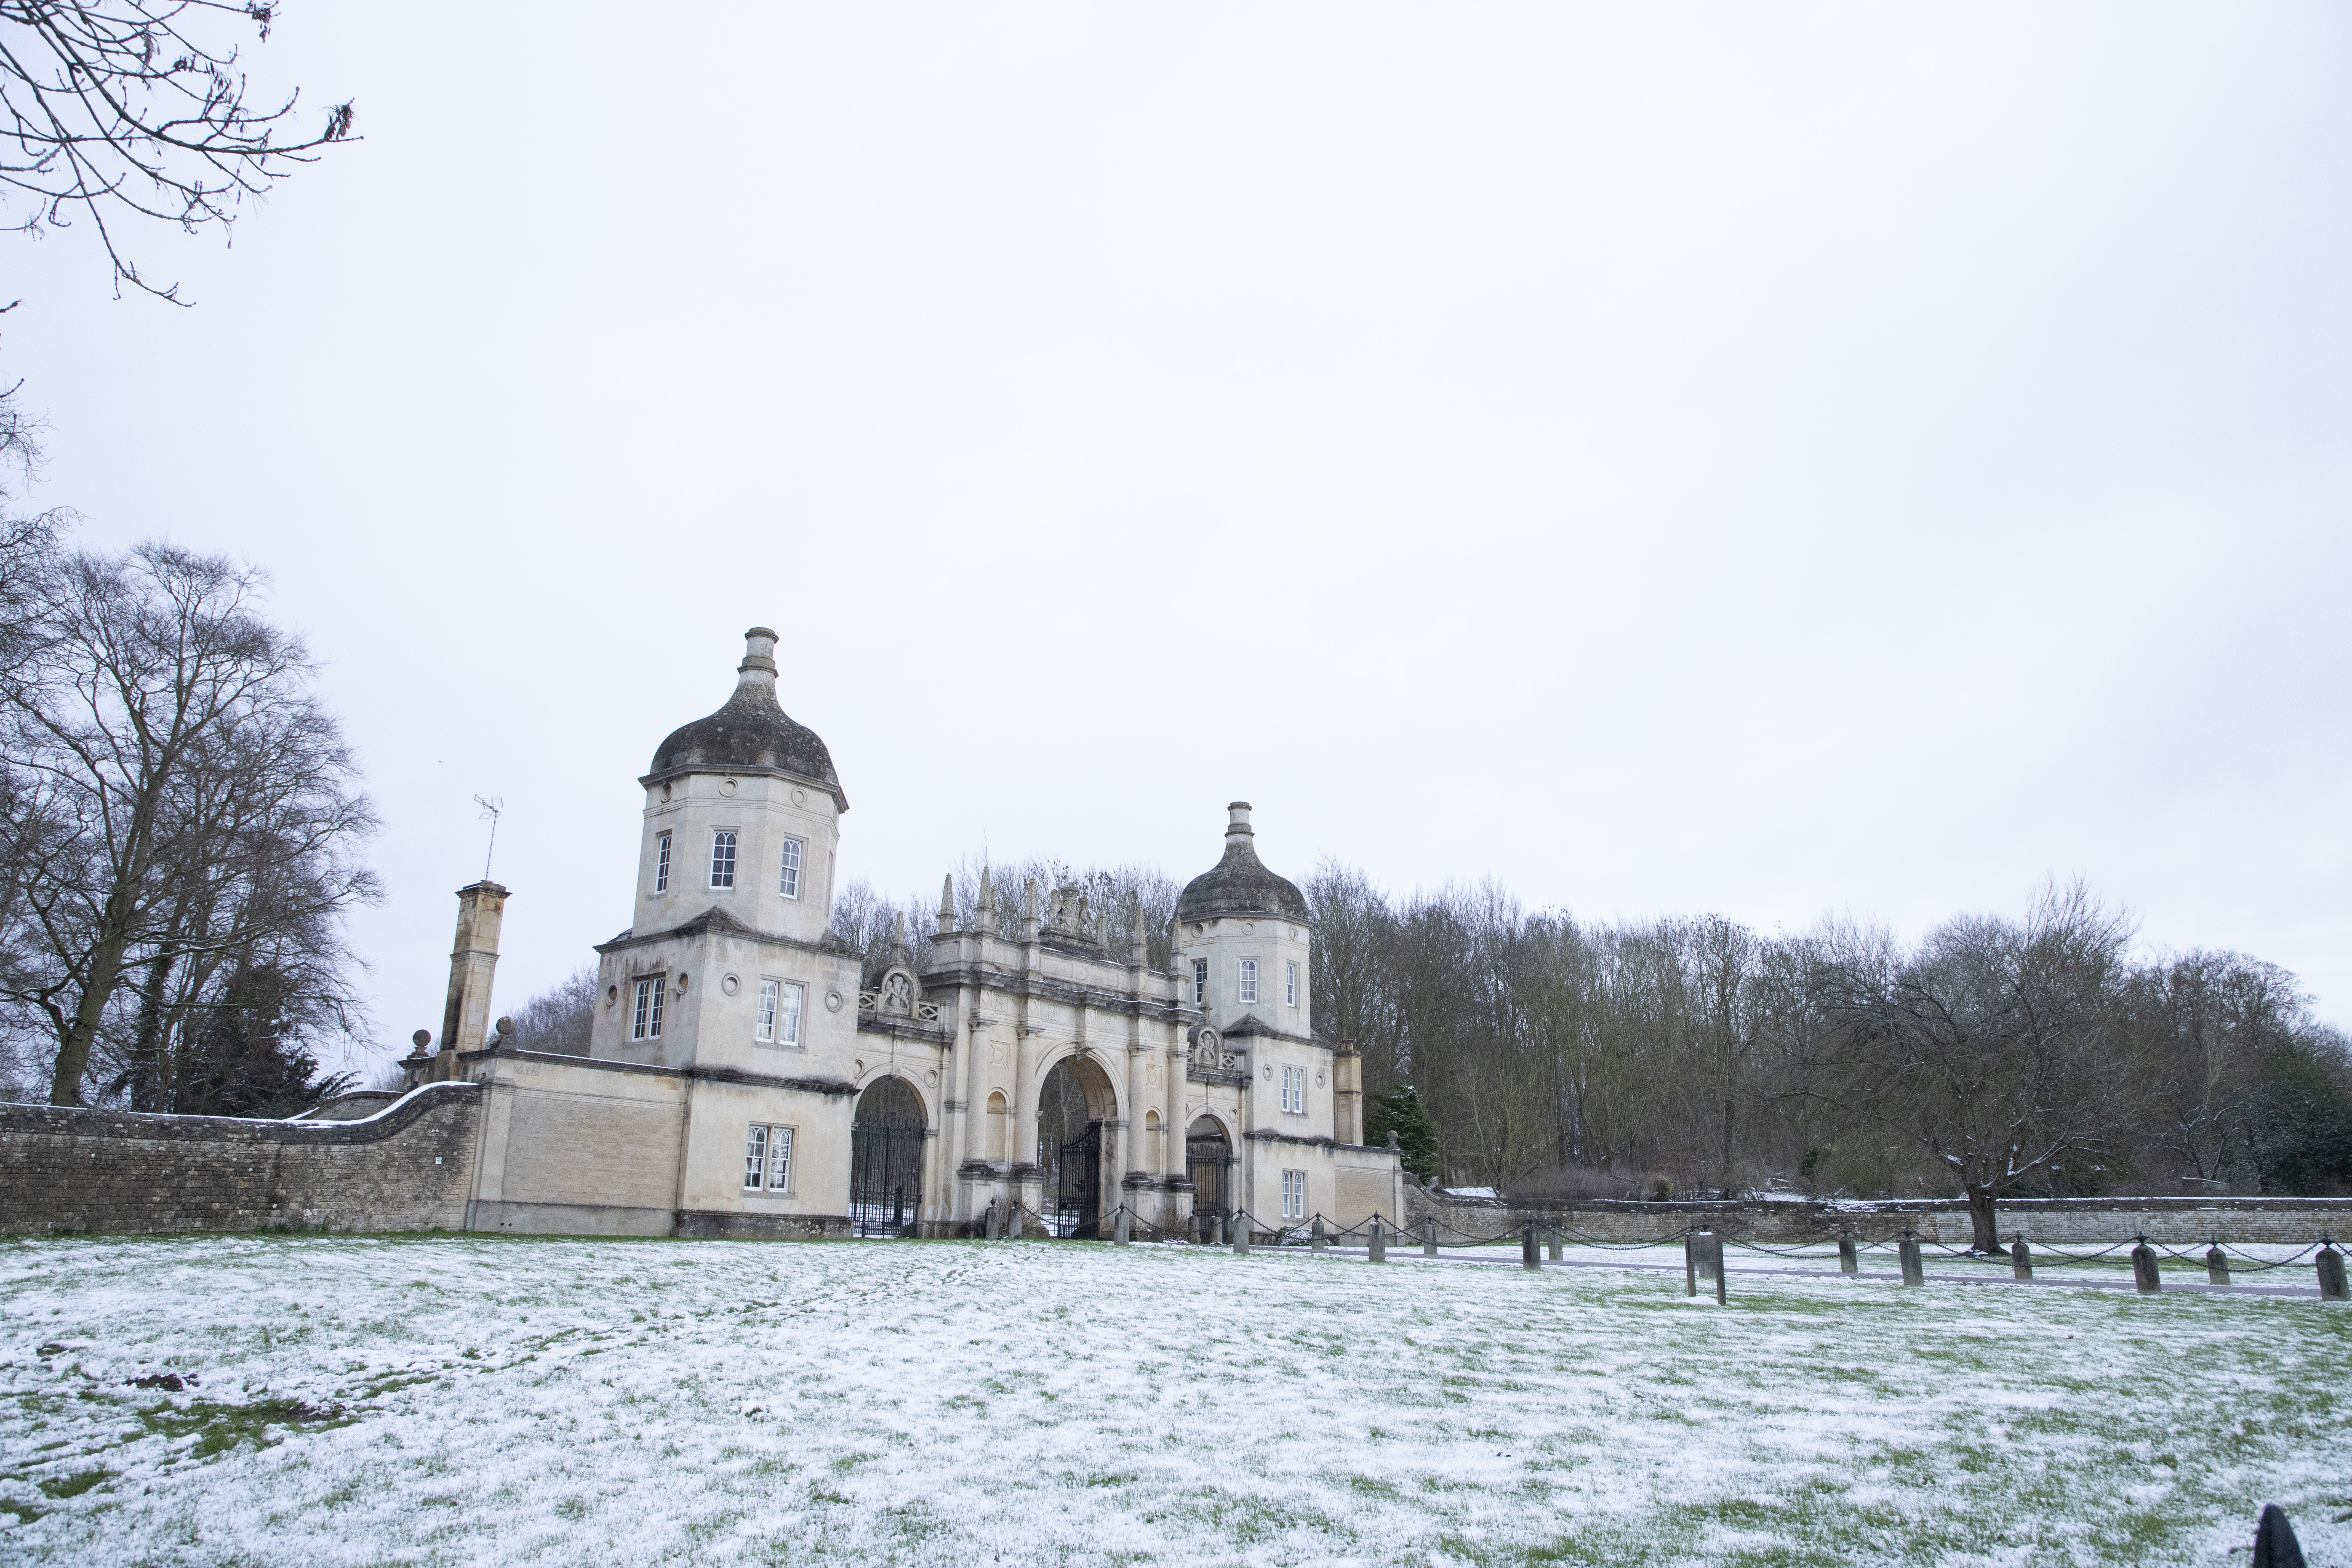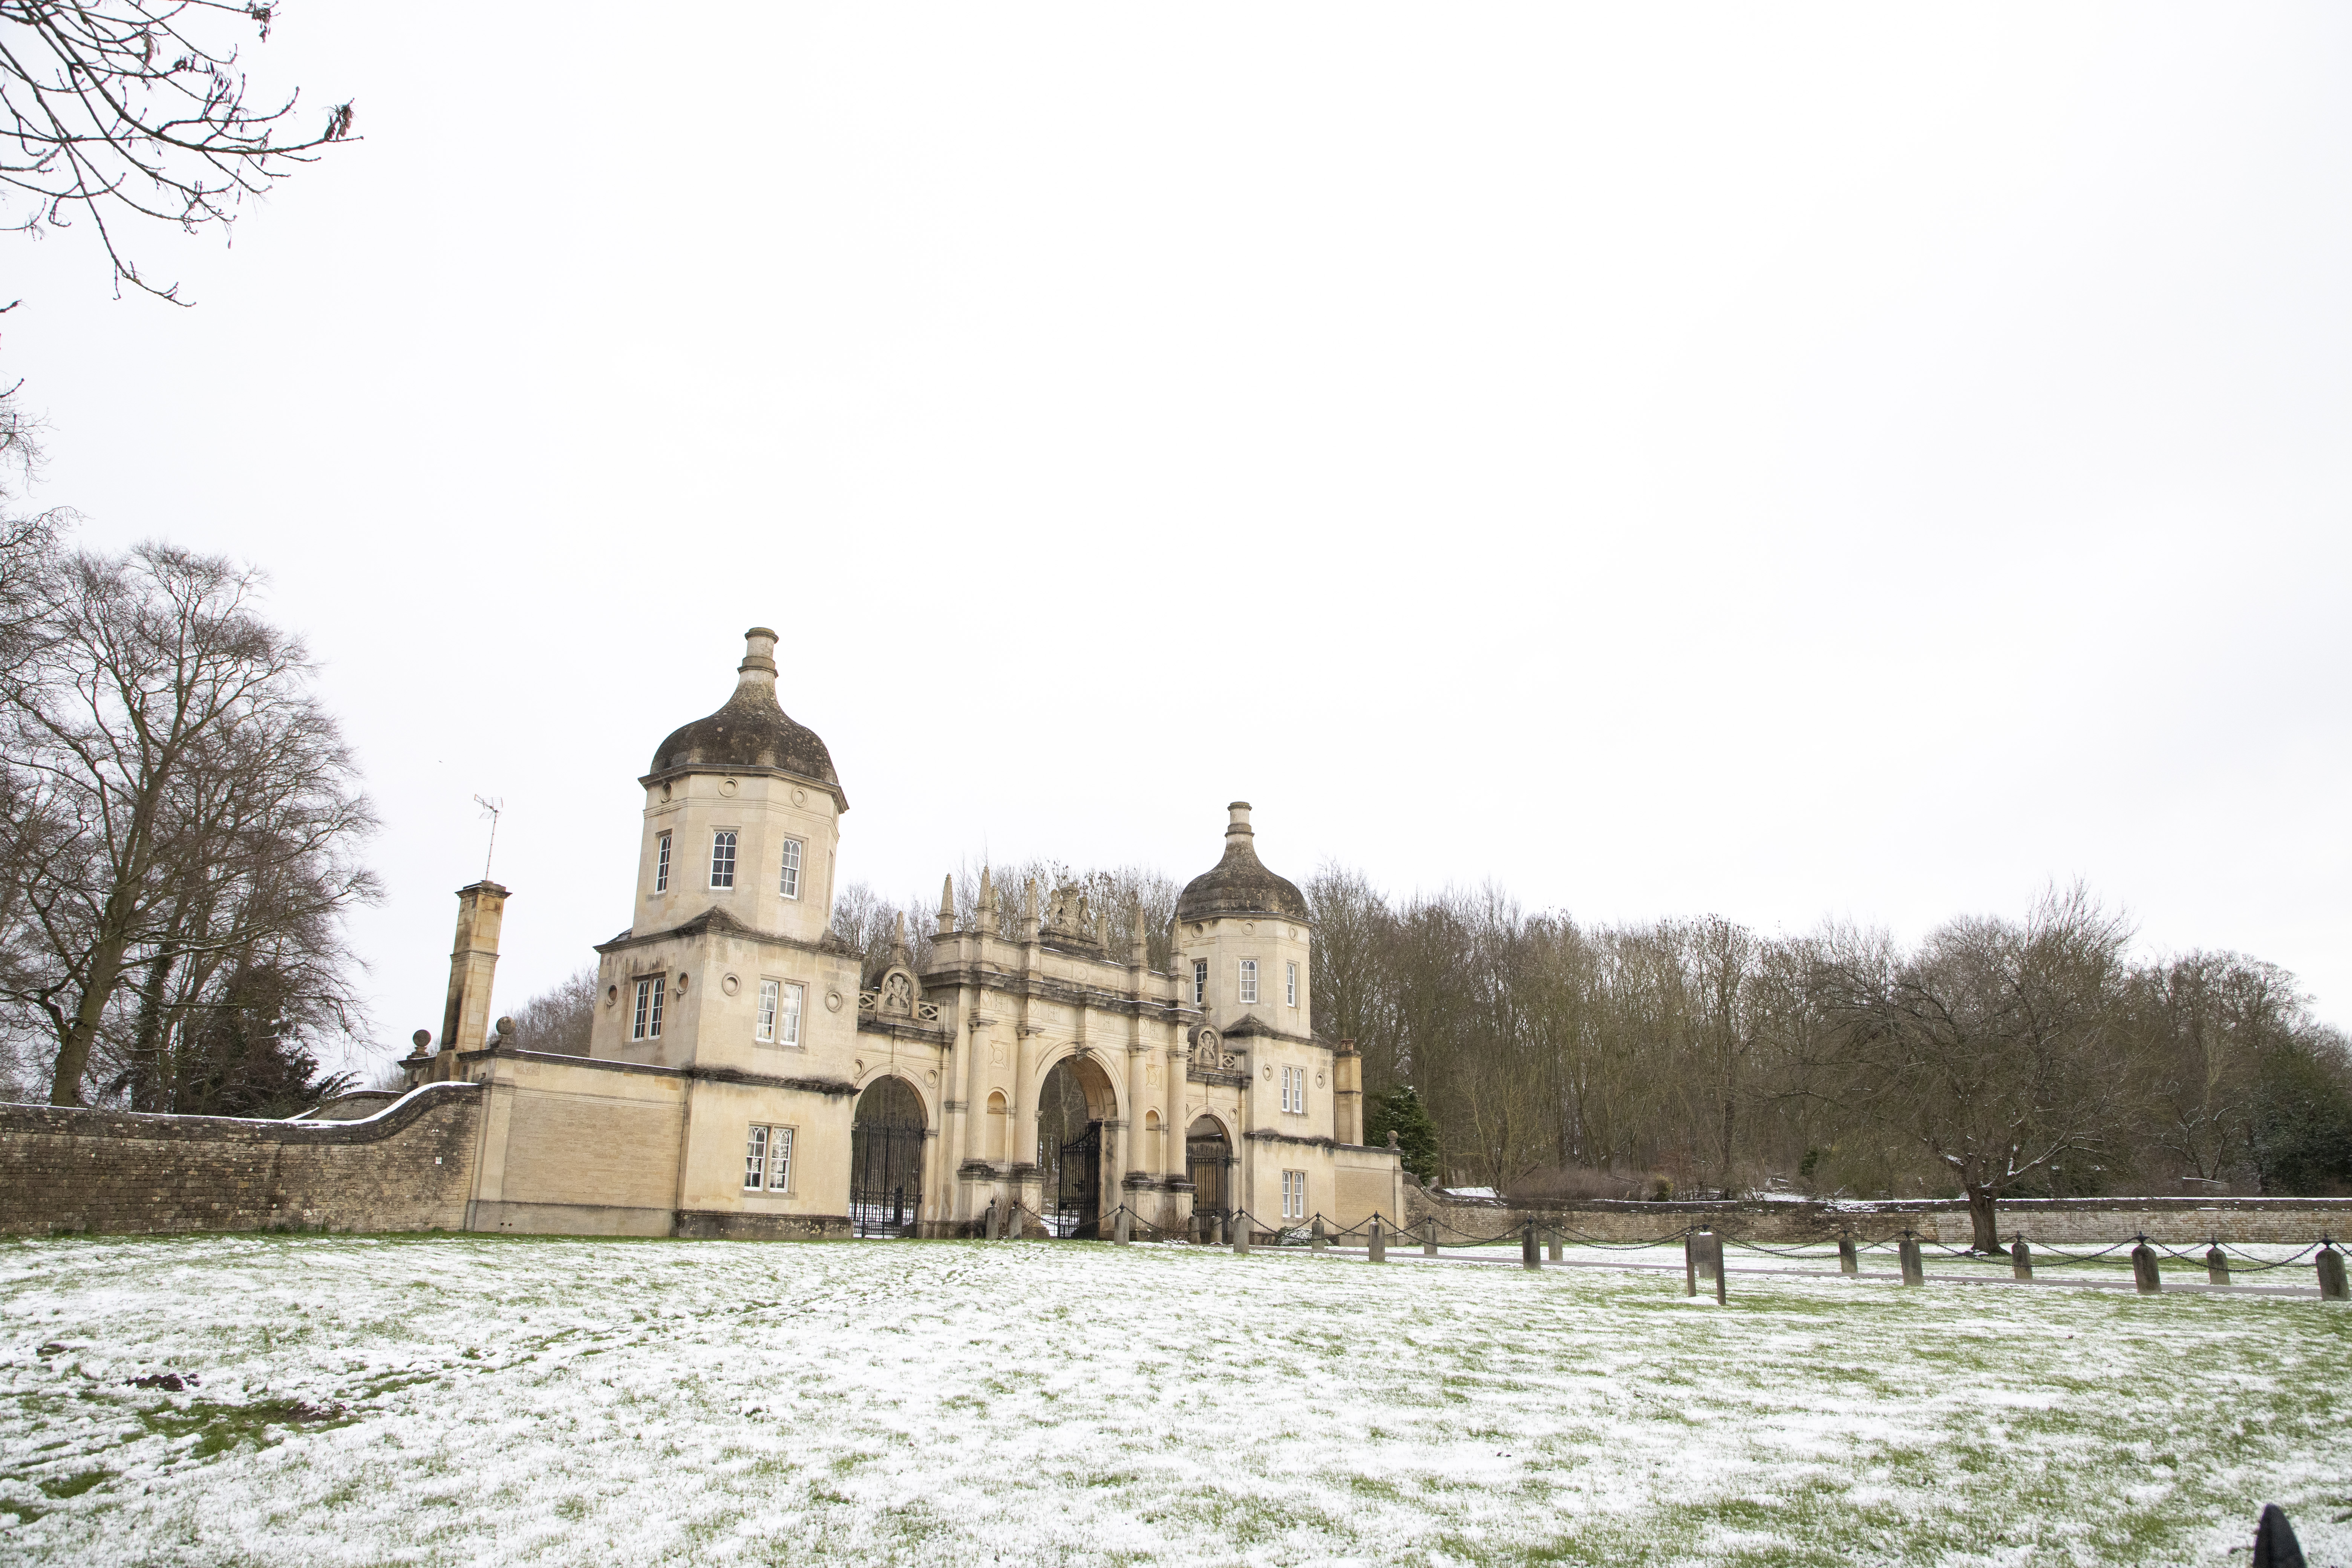
Snow has a magical ability to completely transform a landscape and instantly make them look much more wintry. If, like me, you love shooting landscapes and you've been hit with a flurry of snow recently, you may even have some snowy shots on your hard drive ready to go.
Taking the picture is only half the story when it comes to photographing landscapes, though, as powerful editing software opens up a world of post-processing options. Here I'm going to show you my five top tips to get the most out of your snowy shots when editing them…
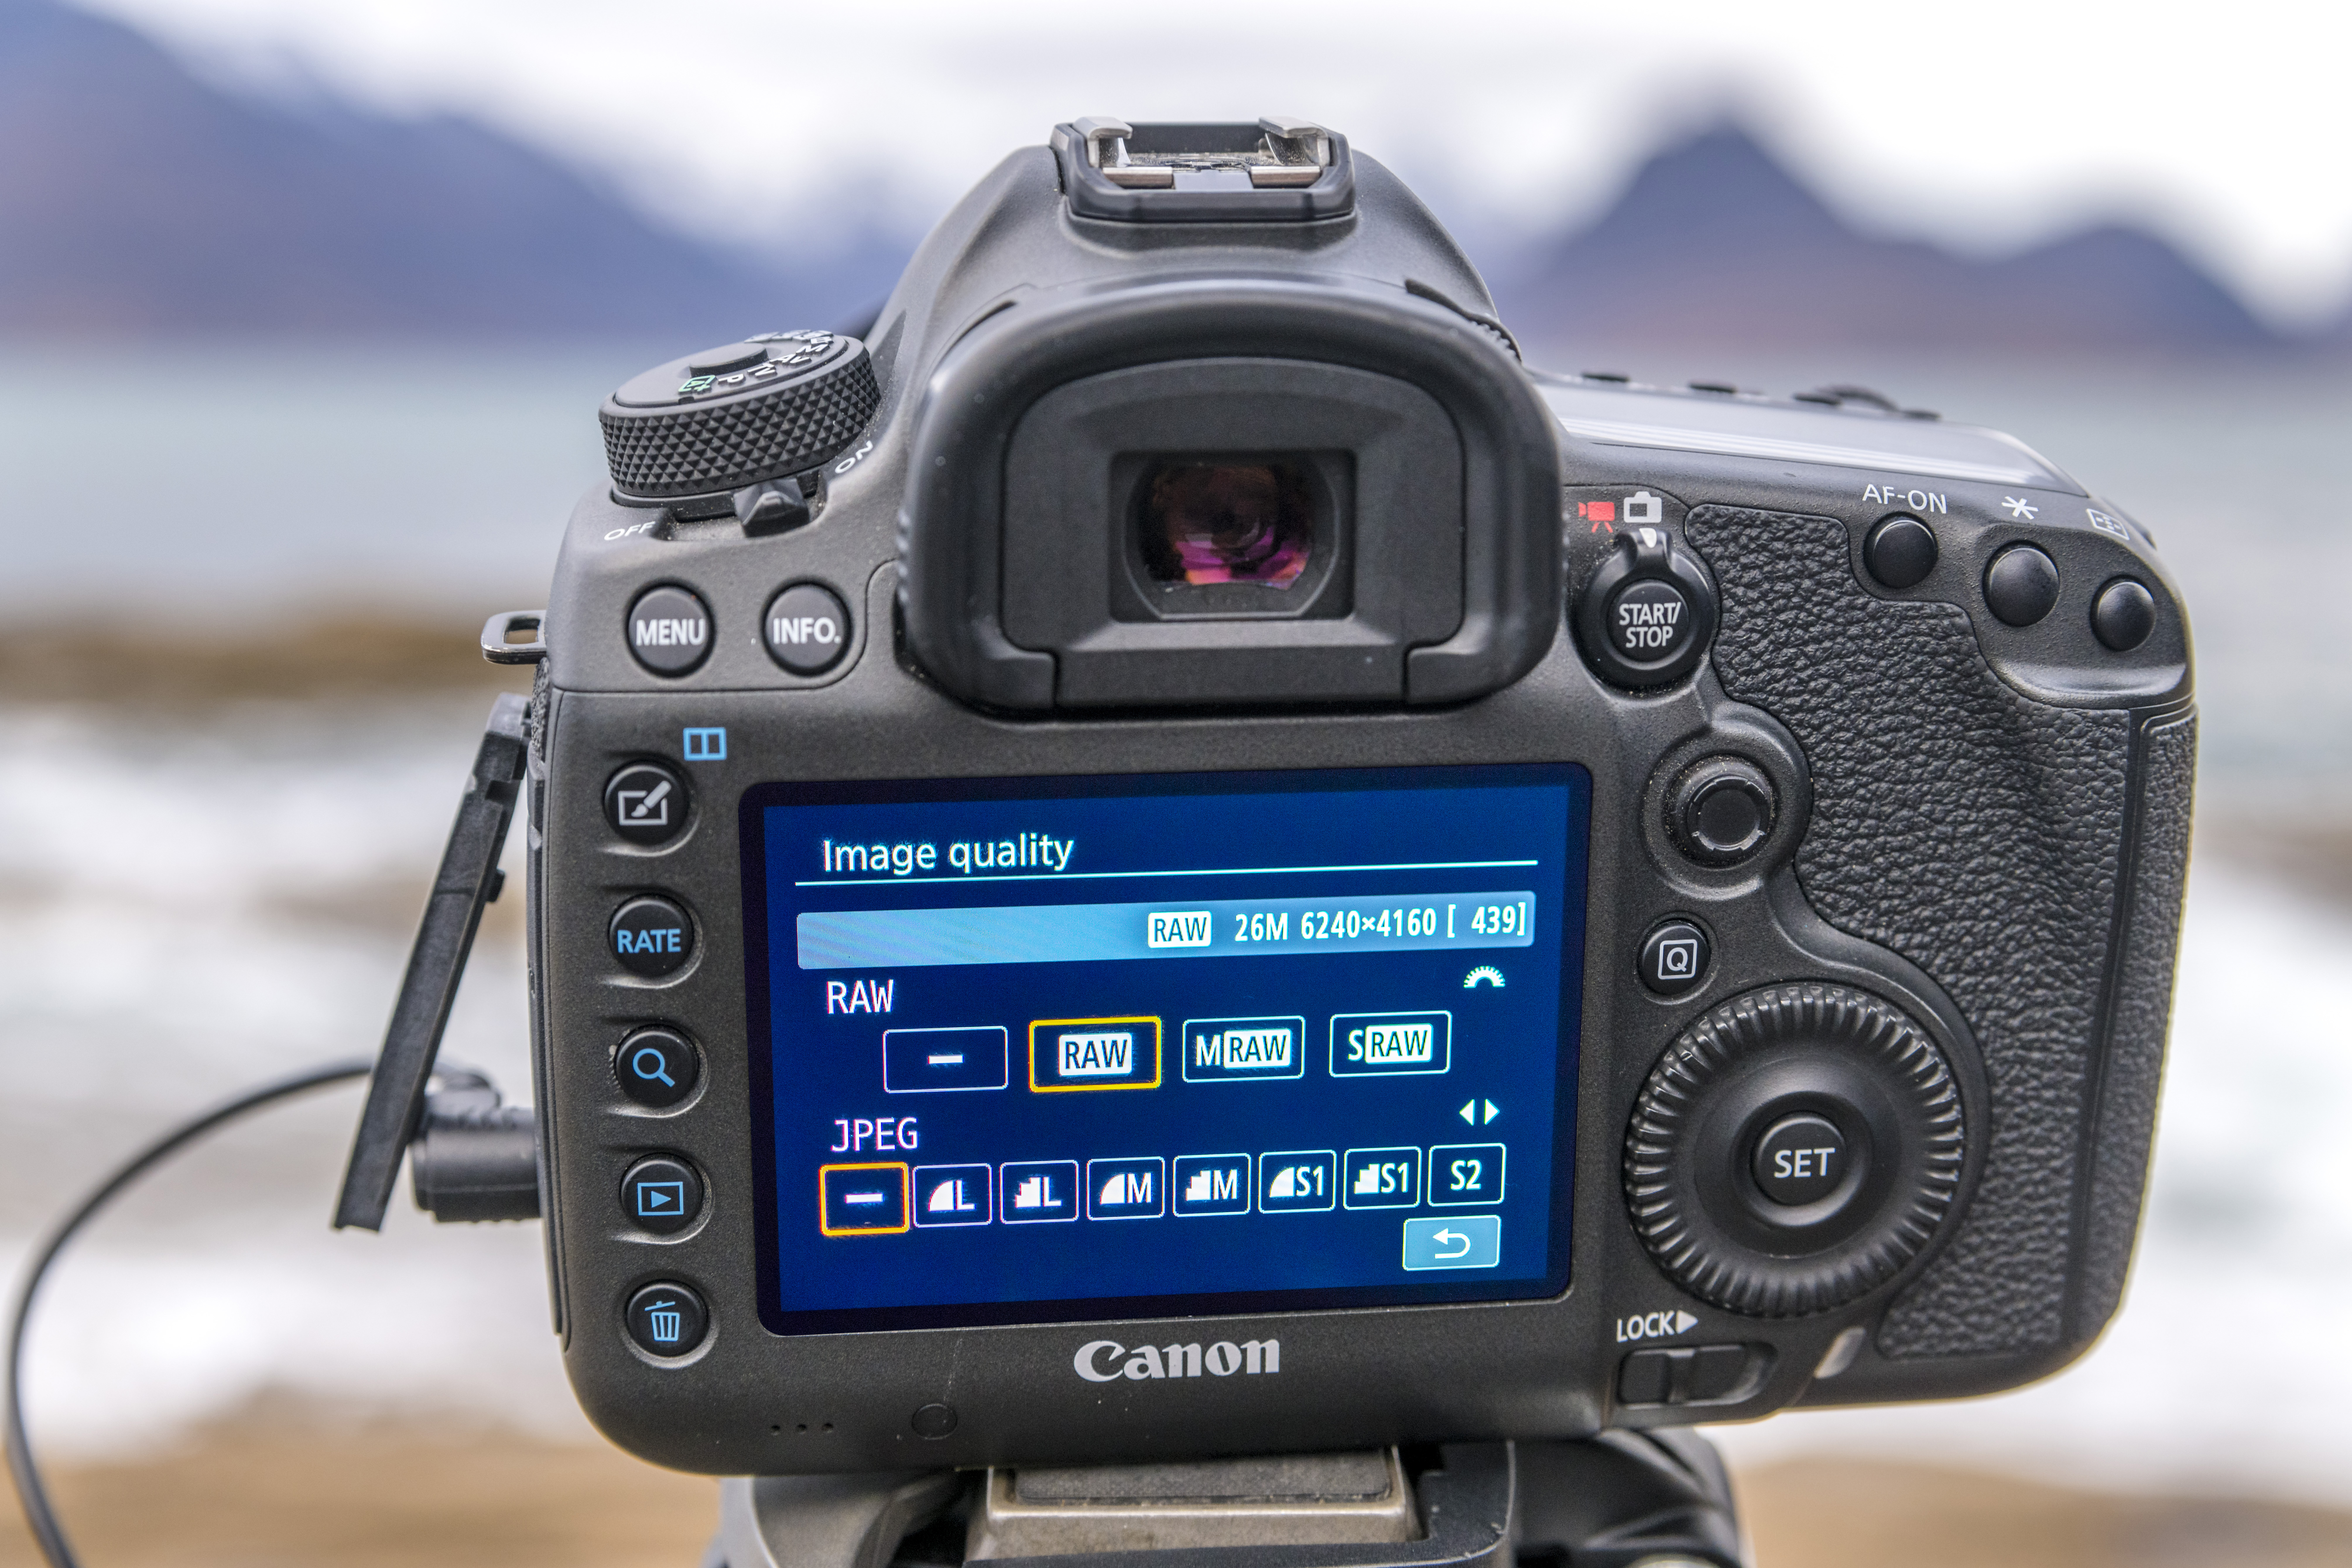
01 Shoot in the Raw format
If you're not shooting in the RAW format on your camera already then now is the perfect time to start! RAW literally means the 'raw' data from the camera, so these files capture much more imaging information and provide you with extra editing options back at your computer.
Article continues belowSnowy scenes in particular benefit from shooting in RAW, as they often require the exposure and white balance to be tweaked – which is much more difficult on compressed JPEGs which bin much of the valuable image data.
If you're still unsure about Raw, most cameras enable you to take both JPEG and RAW files at the same time. So at least this way you can revisit the RAW files at a later date, when you become more confident editing them.
02 Keep your snow white!
Your camera's white balance will have a big impact on your snowy scenes, though many automatic modes can throw the color off and make your snow look overly blue or yellow. Open your RAW file using the Adobe Camera Raw plug-in in Photoshop CC, then use the Temperature slider to tweak the white balance until the snow looks neutral and not overly cool or warm.
03 Brighten snowy areas selectively in Photoshop
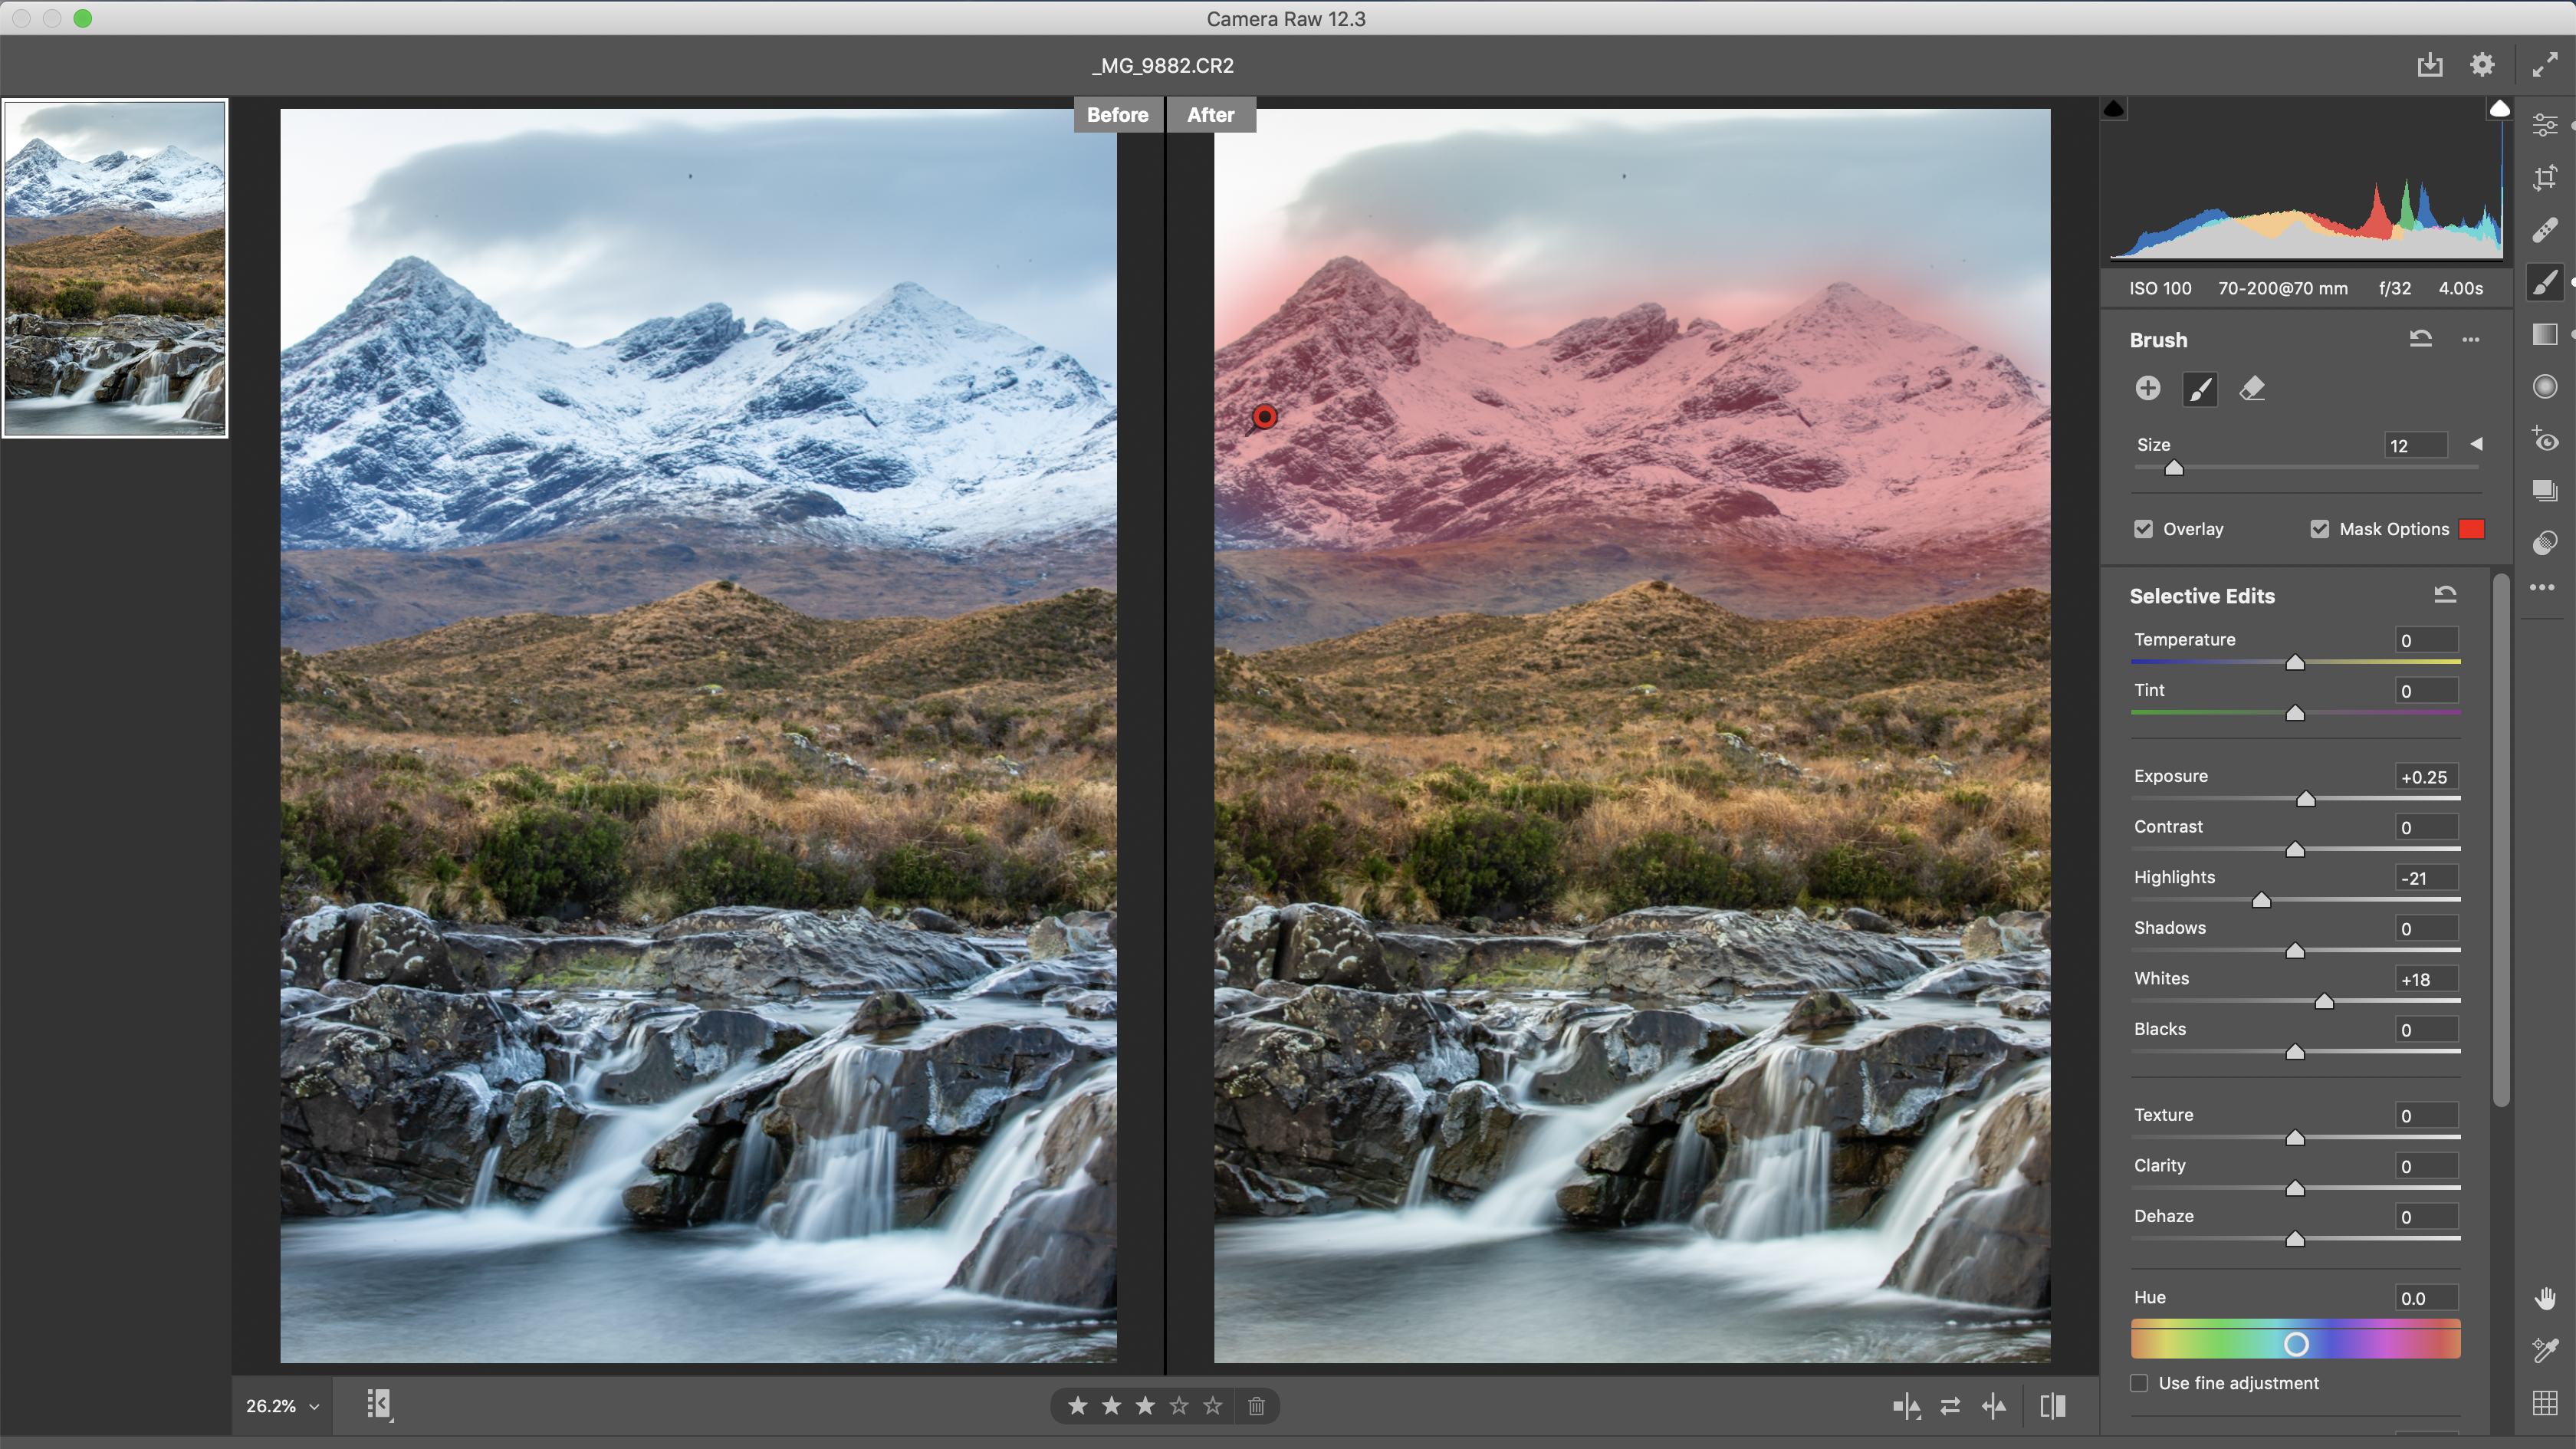
The snow in your image will often require a different editing approach to the rest of your landscape because it's so bright and reflective. While the global adjustments are great, you may have better luck making a selective adjustment on your snow – such as with the Adjustment Brush Tool in Adobe Camera Raw.
Paint over the snowy area you want to tweak and then use the sliders on the right to process it. To get your snow looking bright and punchy, you may want to selectively boost the Exposure and lift the Whites – though pull back the Highlights if you see this area starting to clip to pure white, in order to retain detail.
The best camera deals, reviews, product advice, and unmissable photography news, direct to your inbox!
04 Watch for burnt-out highlights
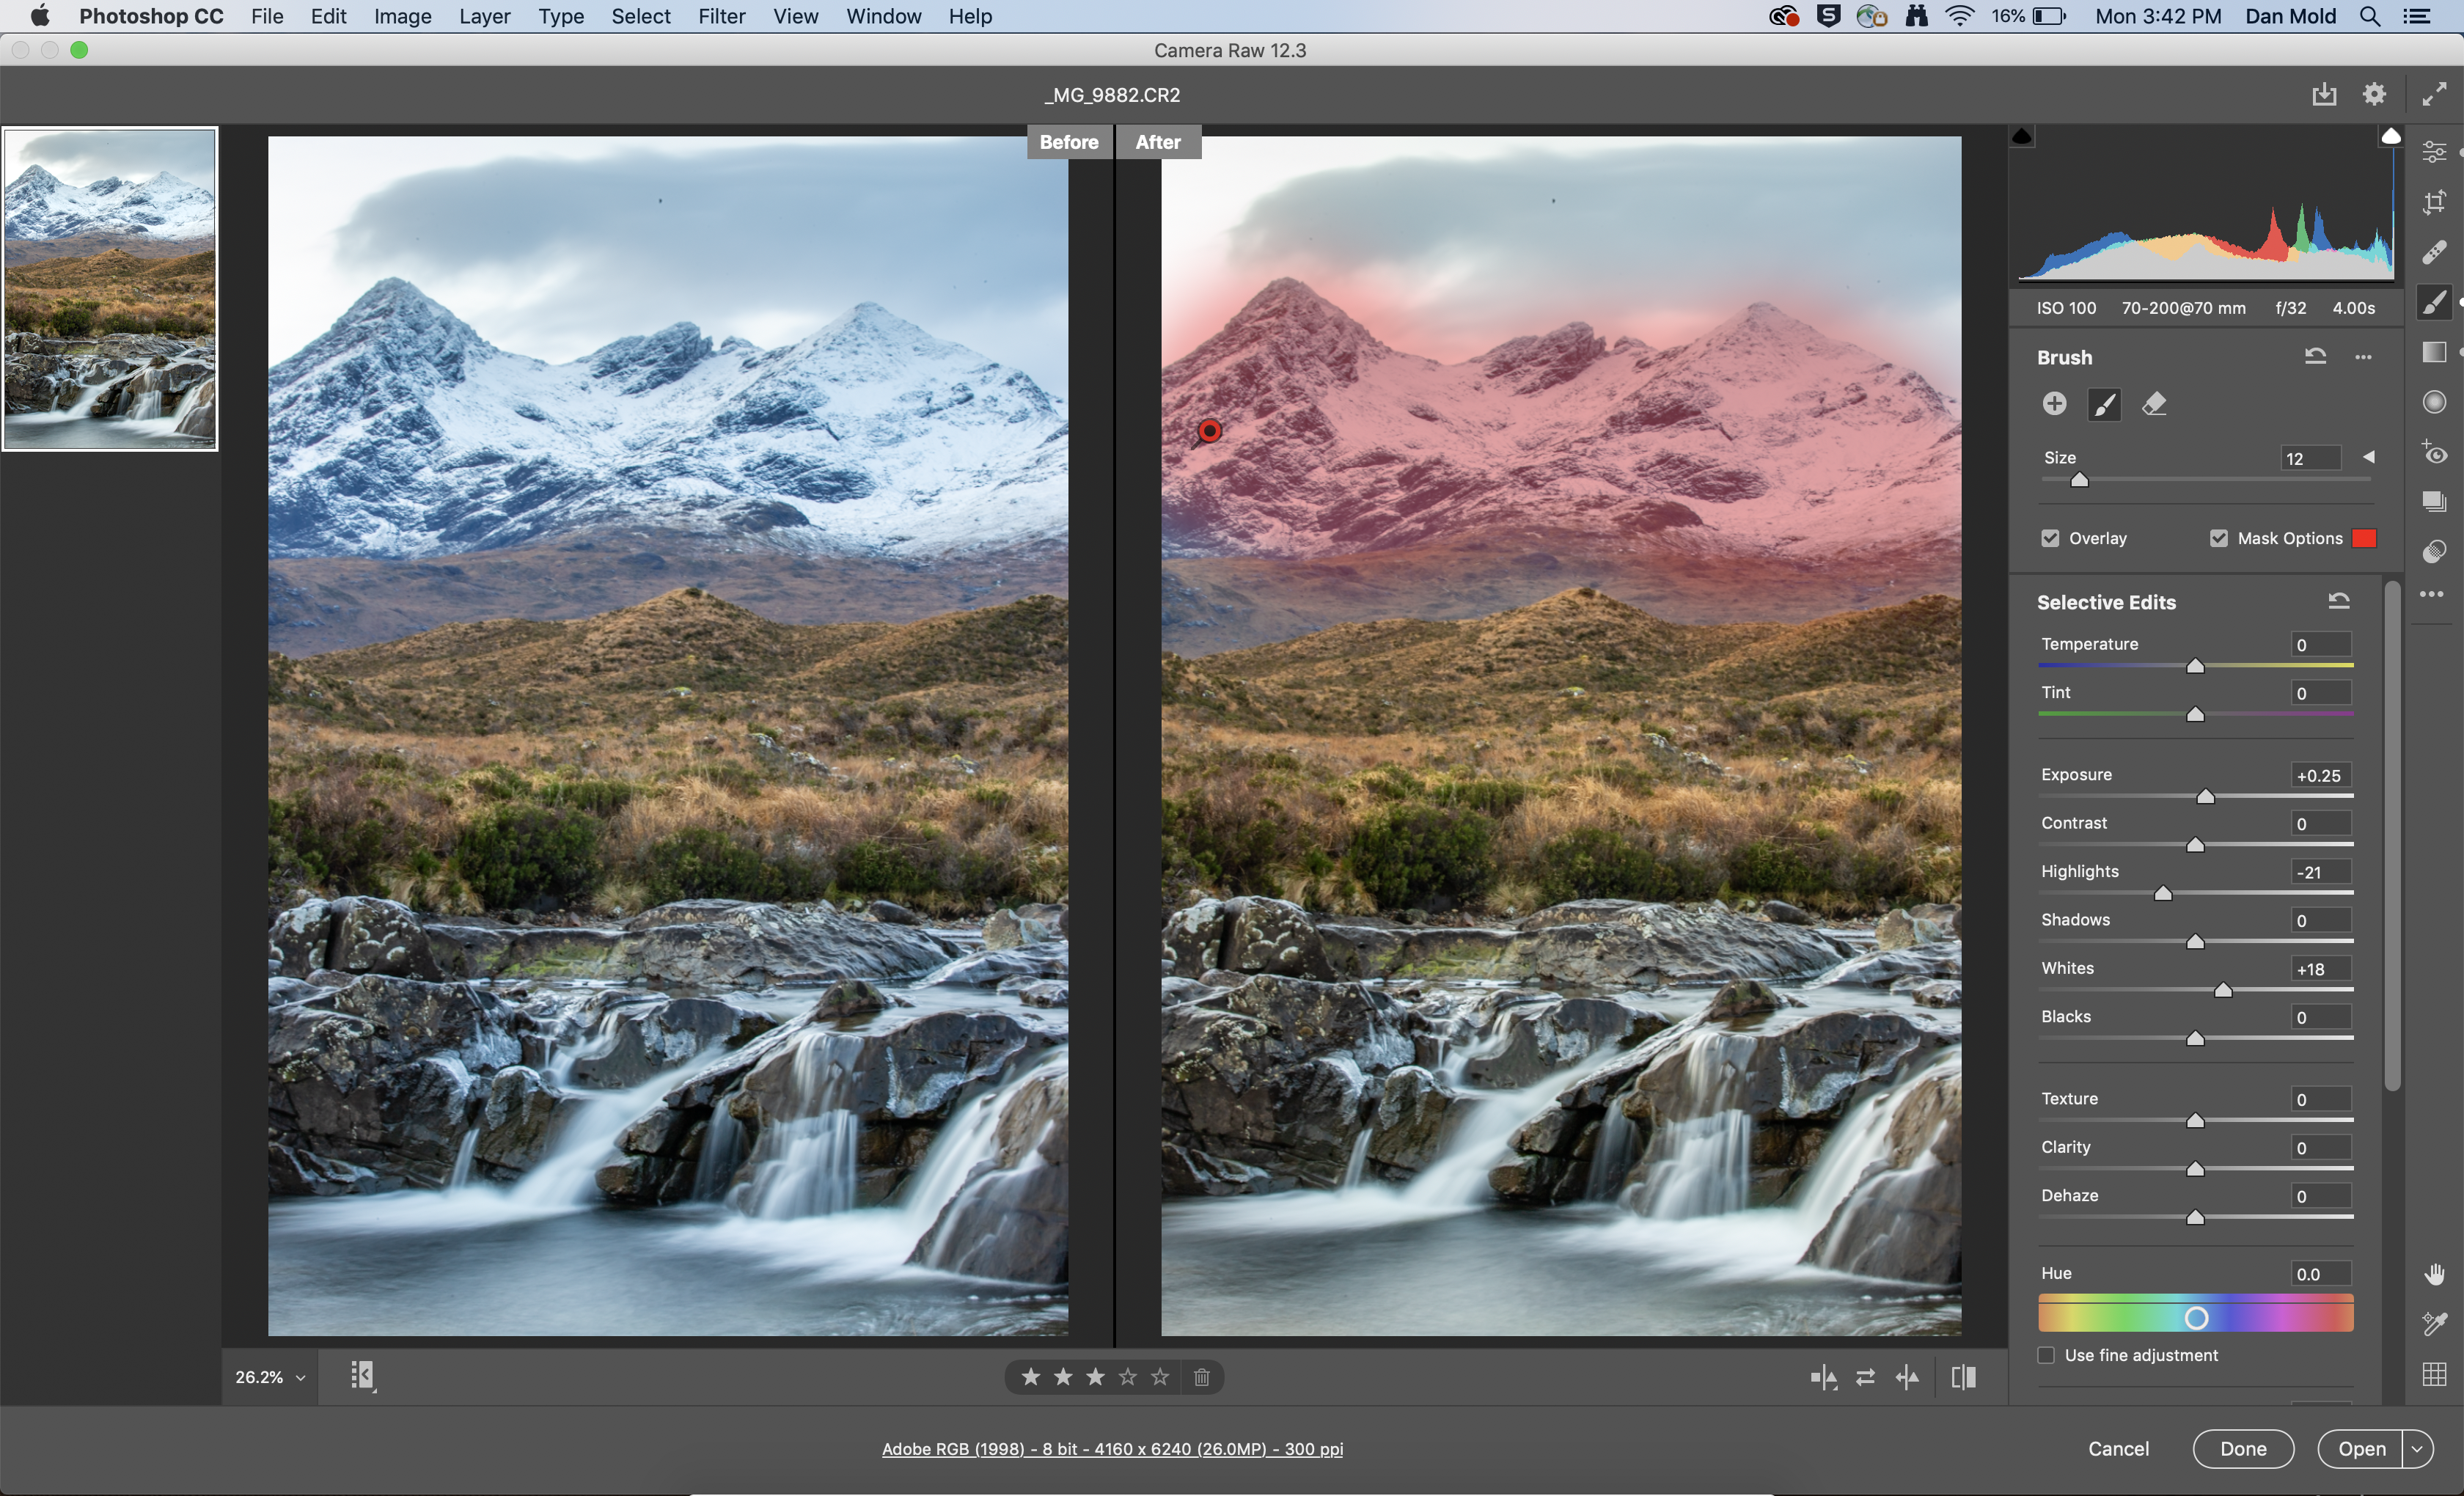
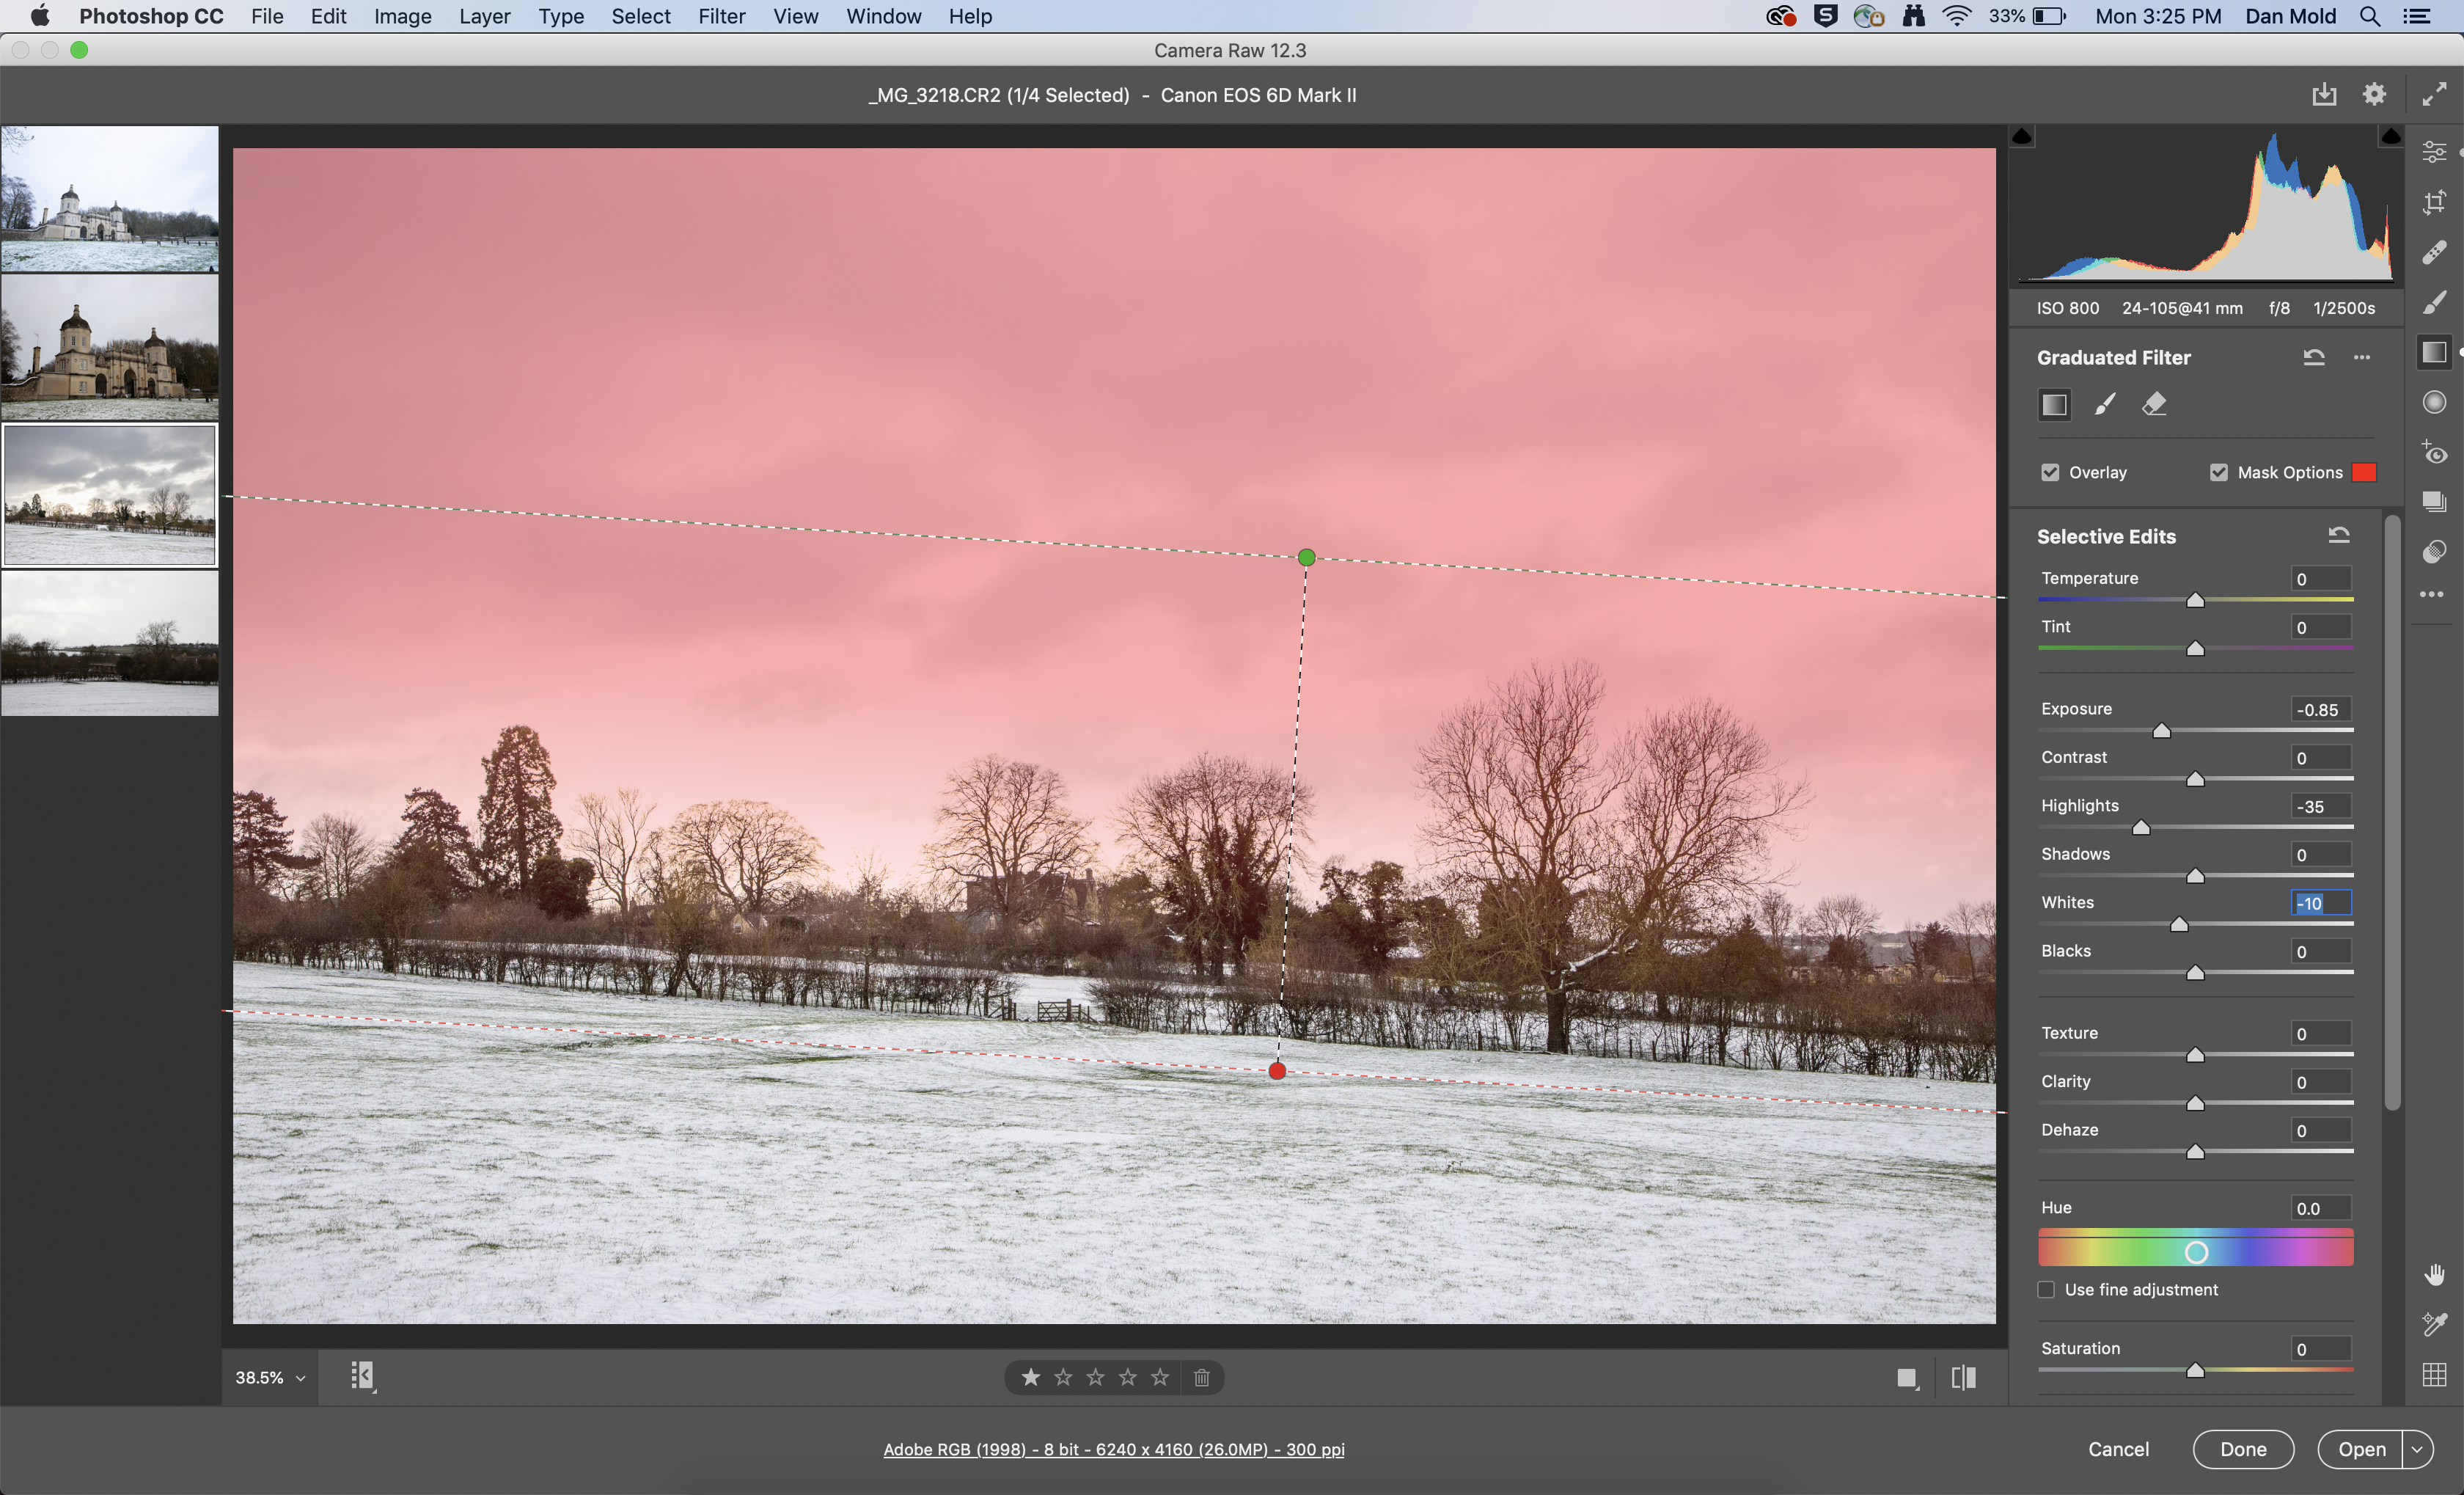
You'll likely want to overexpose your image a little to make sure that the snow looks nice and bright, and not dark and muddy. However, doing this with global adjustments could lead to bright spots in your sky clipping to pure white. To retain highlight detail in your sky, grab the Graduated Filter Tool from the Toolbox and drag your adjustment down from the top of the scene to the horizon.
Use the Mask Options if needed to see which area you are affecting more clearly. We used a red mask in the image here to see exactly how much of the sky area we were working on. Now you can pull back on the Exposure, Highlights and Whites sliders as needed until sufficient detail has been restored in the sky.
05 Fix patchy areas of snow
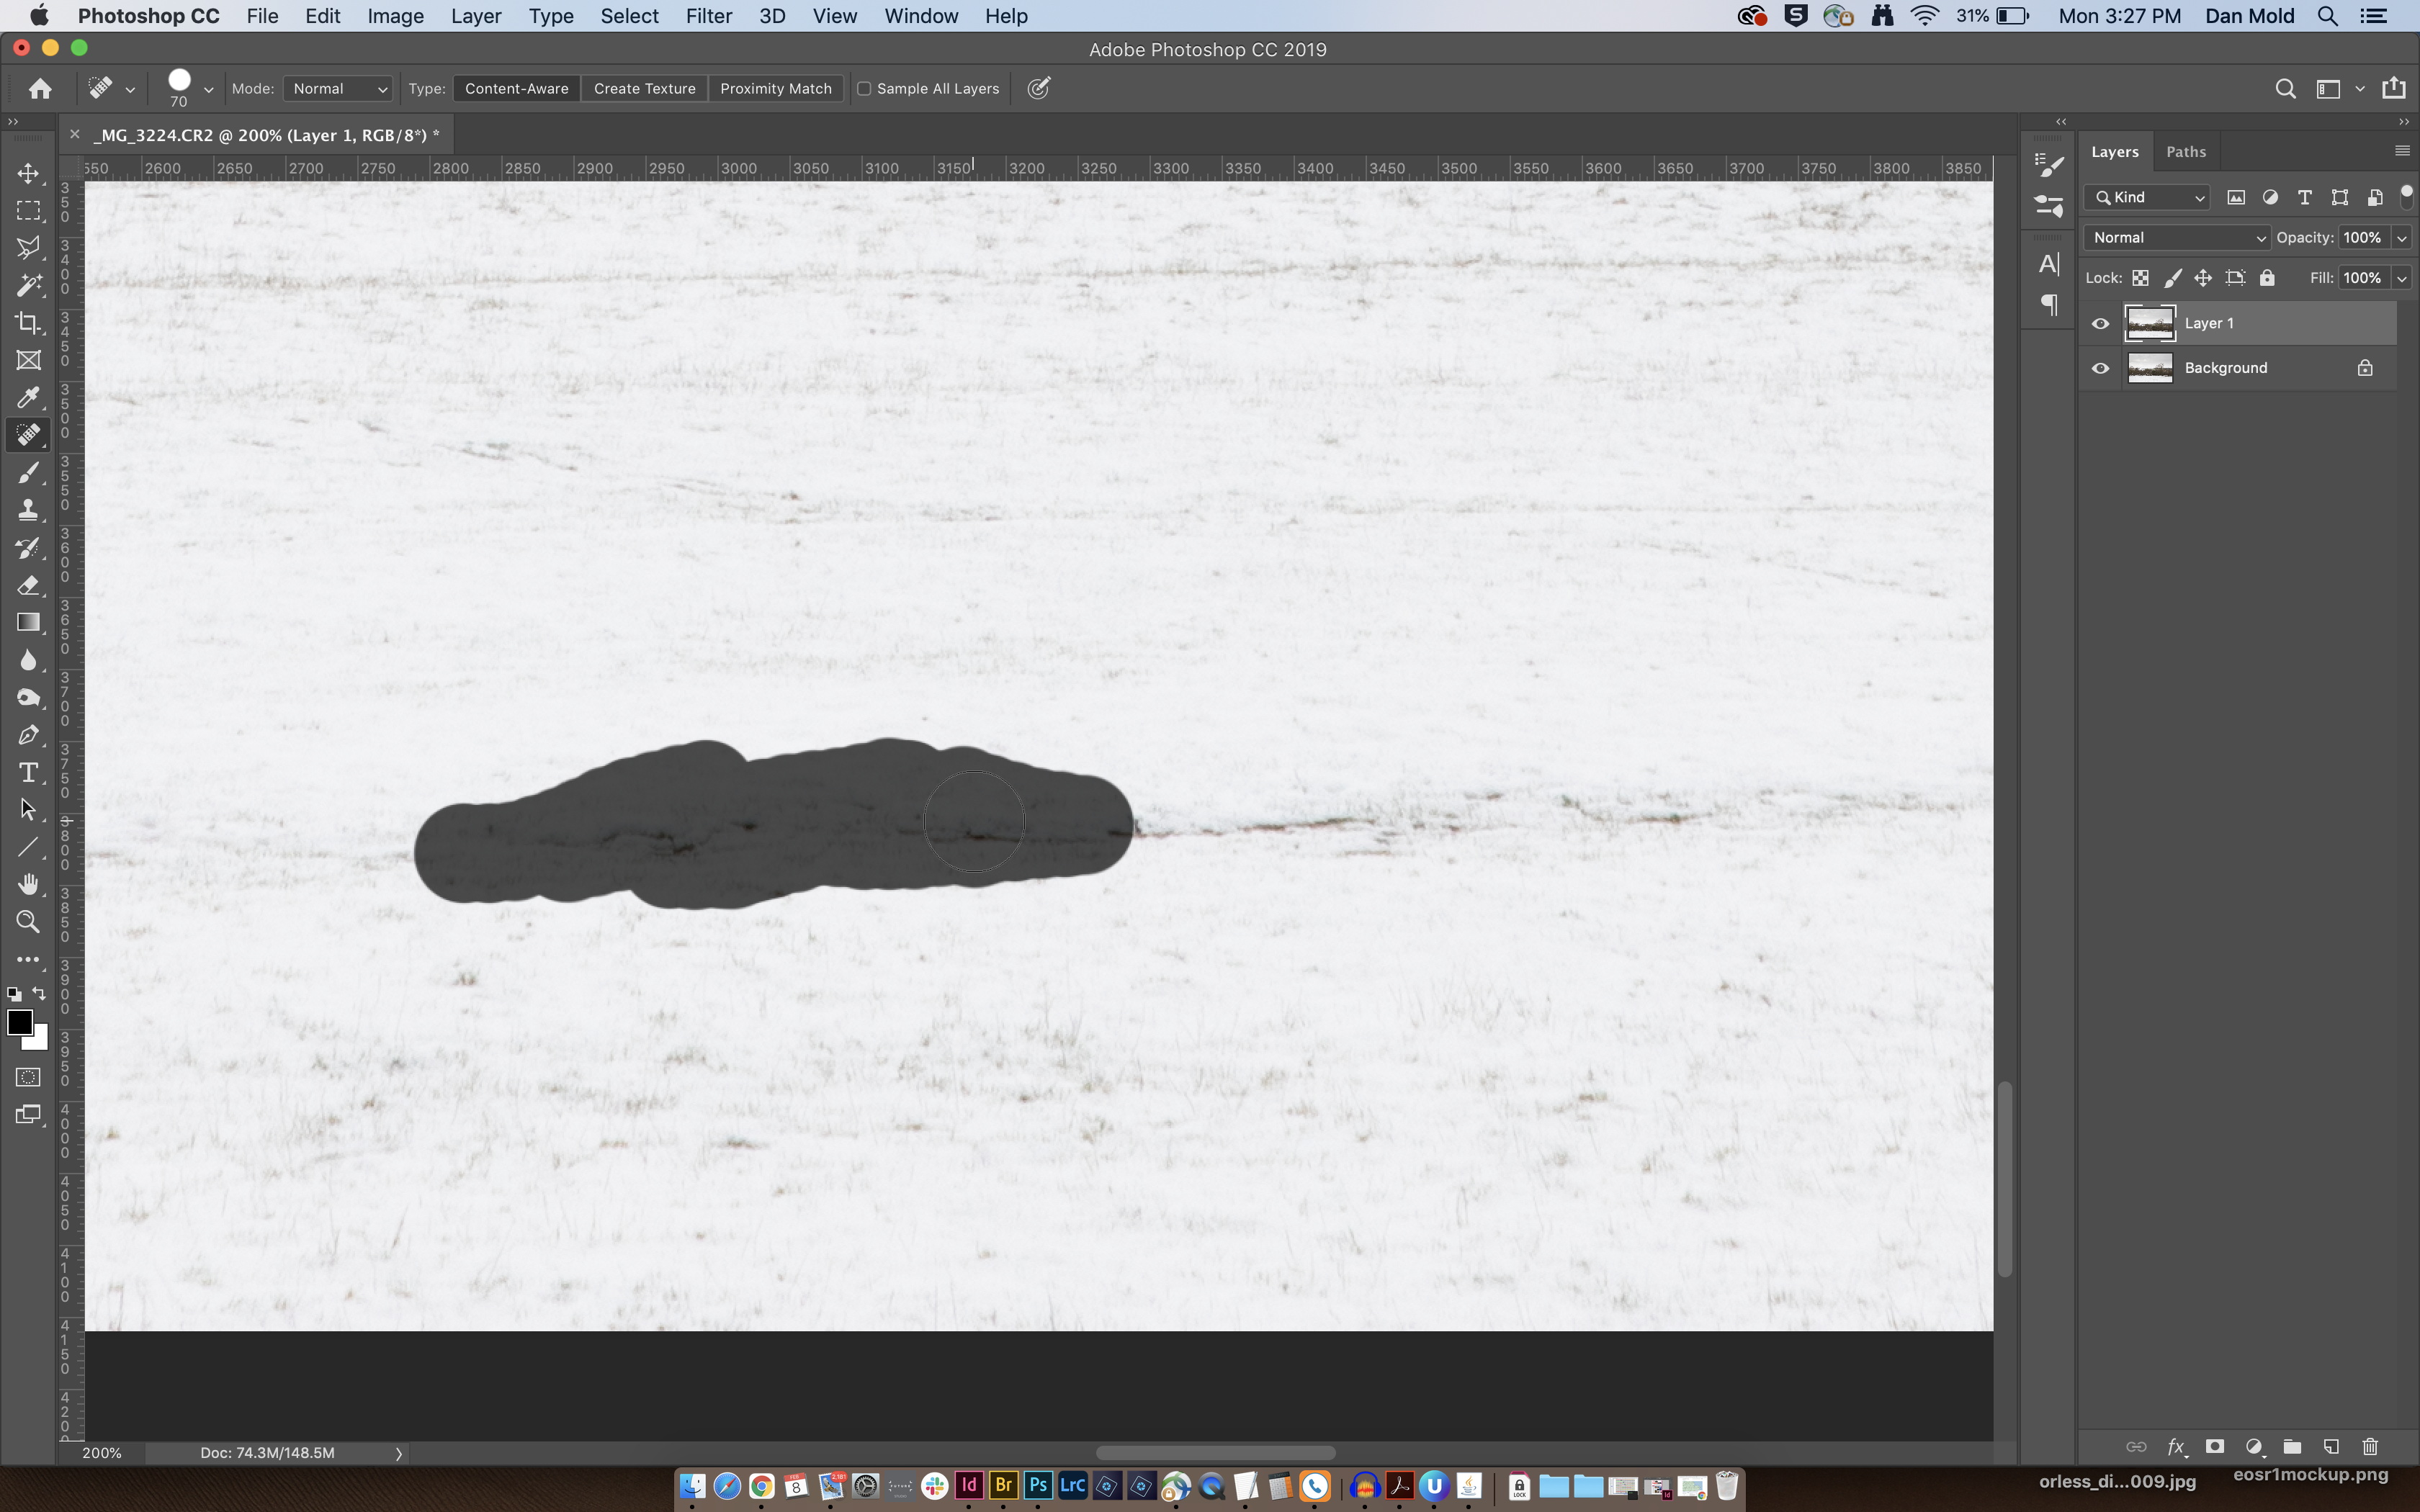
If you find that patchy areas of snow or footprints are pulling the eye away from your focal point, you may want to remove them altogether. The easiest way to do this is to open the image in Photoshop CC and grab the Spot Healing Brush Tool from the Toolbox.
Zoom in tightly on the snow with Ctrl / Cmd + Plus and use the Spacebar to bring up the Hand Tool, so that you can drag your way around the frame. Now use the [ and ] keys to resize the brush, and make sure that it's only slightly larger than the blemish you want to fix. Then run it over any patchy areas to replace them, making your snowy foreground look much cleaner and unspoiled.
PhotoPlus: The Canon Magazine is the world's only monthly newsstand title that's 100% devoted to Canon, so you can be sure the magazine is completely relevant to your system.
Read more:
The best photo editing software: image editors for novices through to pros
The best photo-editing laptops: top laptops for photographers
10 best online photography courses – from beginner guides to masterclasses

In addition to being a freelance photographer and filmmaker, Dan is a bona fide expert on all things Canon and Adobe. Not only is he an Adobe-certified Photoshop guru, he's spent over 10 years writing for specialist magazines including stints as the Deputy Editor for PhotoPlus: The Canon Magazine, Technical Editor for Practical Photography and Photoshop Editor on Digital Photo.
