Repair and retouch your damaged prints in Affinity photo
Restore your old prints and bring them back to life using layer skills in Affinity Photo
The best camera deals, reviews, product advice, and unmissable photography news, direct to your inbox!
You are now subscribed
Your newsletter sign-up was successful
Watch video: Restore damaged prints in Affinity Photo
There’s something deeply rewarding about restoring an old photograph. It’s not just the chance to breathe new life into a damaged print, but also the joy of restoring an image that can be cherished for years to come.
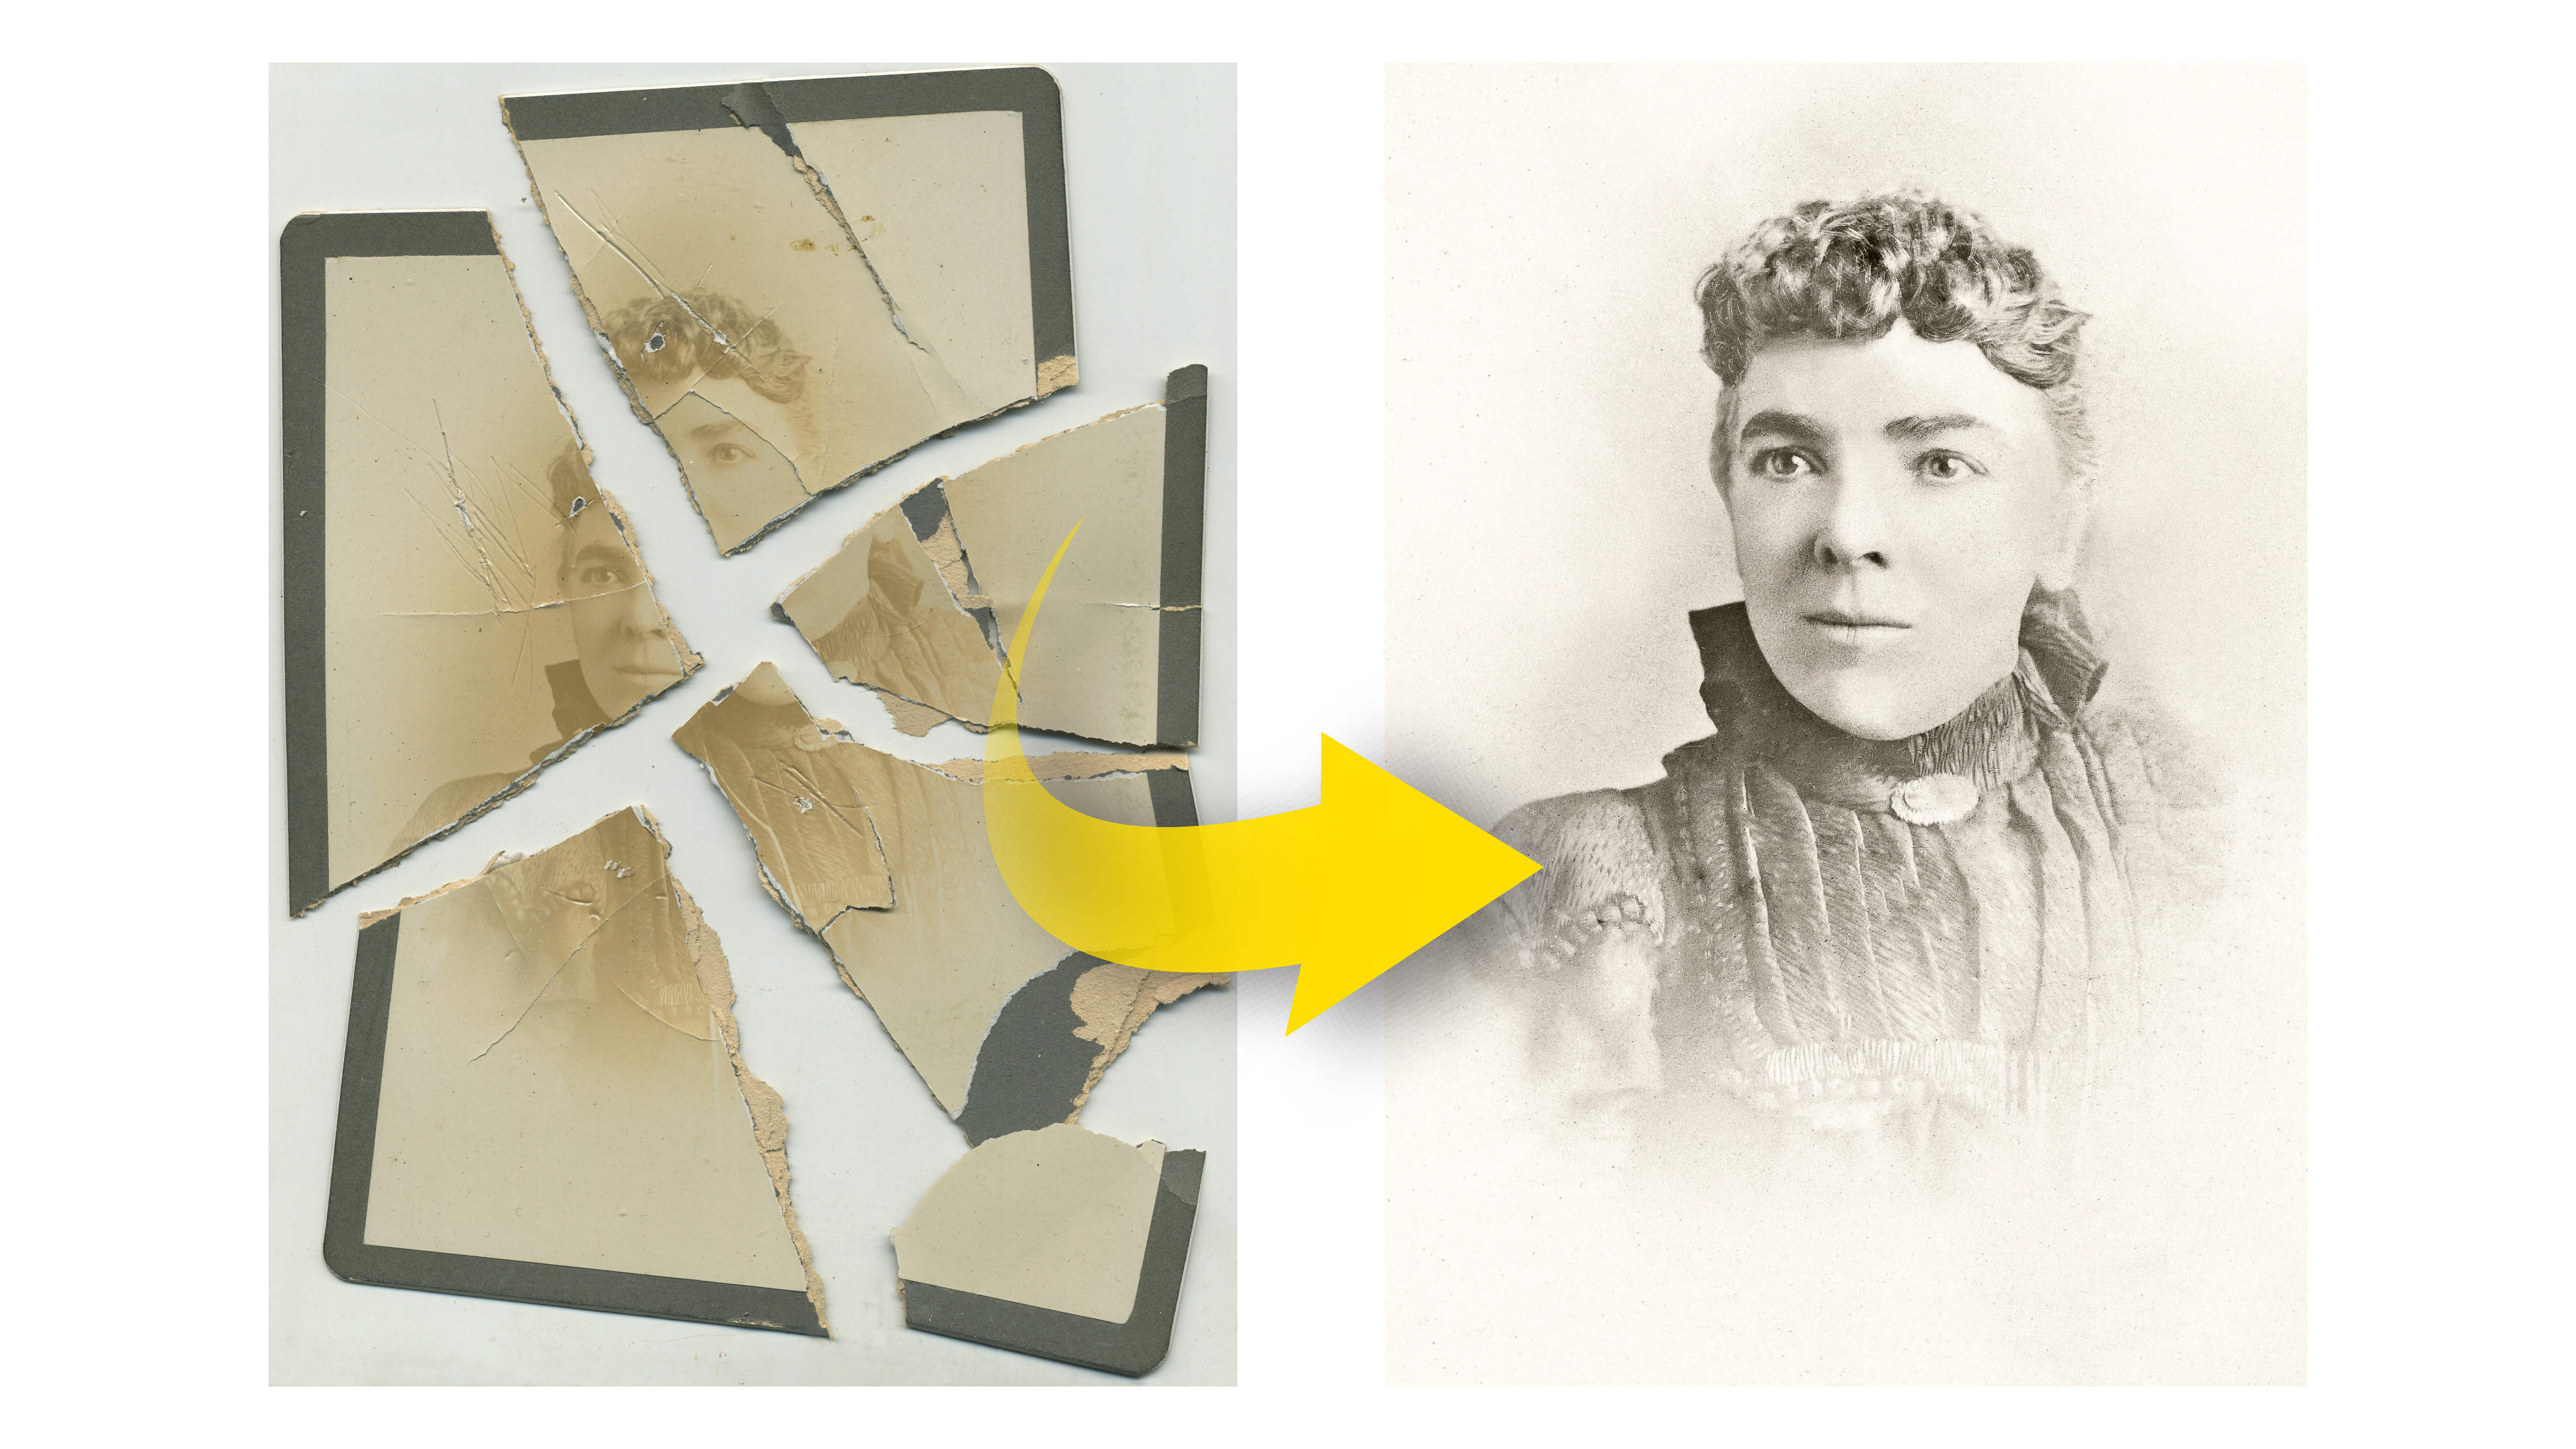
Affinity Photo offers an array of features for restoration work, from retouching tools like Inpainting and Clone, to the excellent Dust and Scratches filter. Most restoration work won’t be as extreme as our very damaged restore_before.jpg image (download here), but even ravaged old prints can be restored to their former glory with a few simple editing skills.
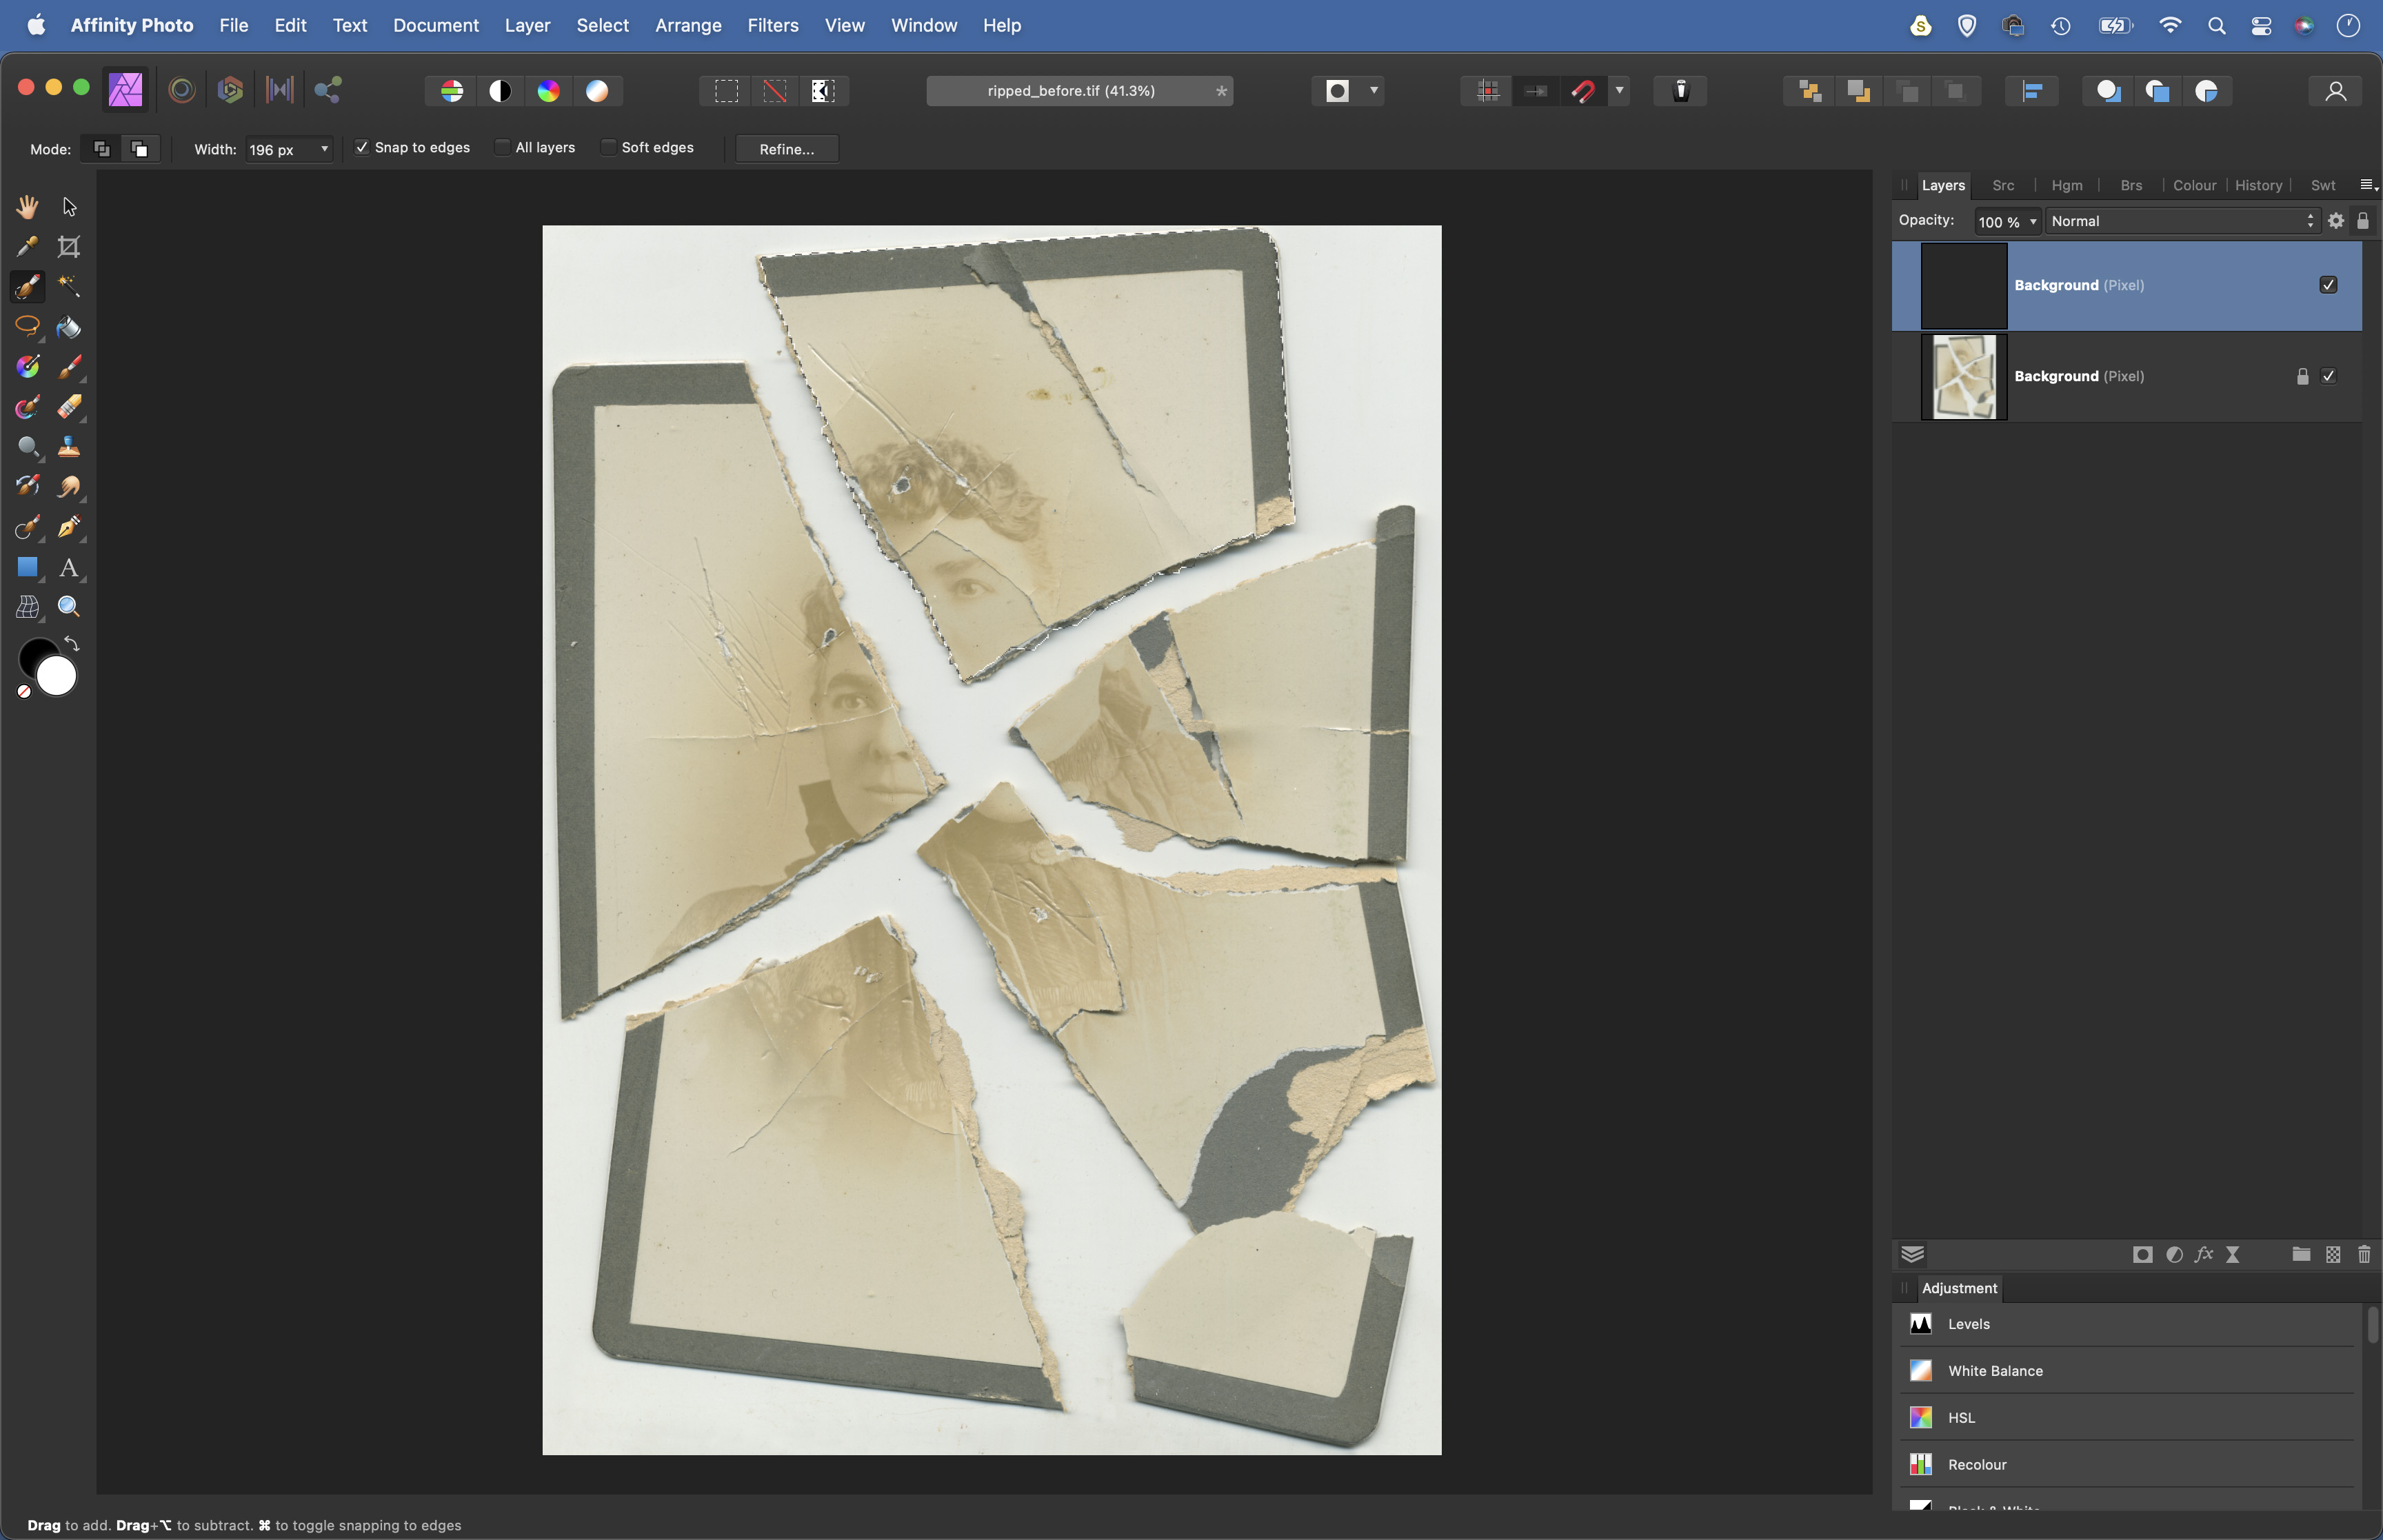
We can begin by selecting the ripped pieces of our image with the Selection Brush, which enables us to easily lock onto the edges of each piece of print. We copy each piece to a separate layer, then simply move them back into position like a jigsaw puzzle. Once our image is roughly pieced back together we can fix the gaps and scratches, then go on to tidy up any other messy parts.
This may take a while to get right, but it’s satisfying work – and it’s gratifying to see the image reconstructed, scratch by scratch. Old photos are often badly faded and soft, but this can be easily improved with tonal tools and Sharpening filters. The High Pass sharpening filter is especially good for old prints, as it enables you to crisp up details without raising the fine grain often found in old photos.
To follow along, download the start image or use one of your own.
1. Select a piece
Open our start image into Affinity Photo then grab the Selection Brush tool from the toolbar. Check ‘Snap to Edges’ in the options then paint over a piece to select it (hold Alt and paint to subtract areas if the tool picks up the wrong area). Hit Cmd/Ctrl + J to copy to a new layer, then Cmd/Ctrl + D to deselect.
The best camera deals, reviews, product advice, and unmissable photography news, direct to your inbox!
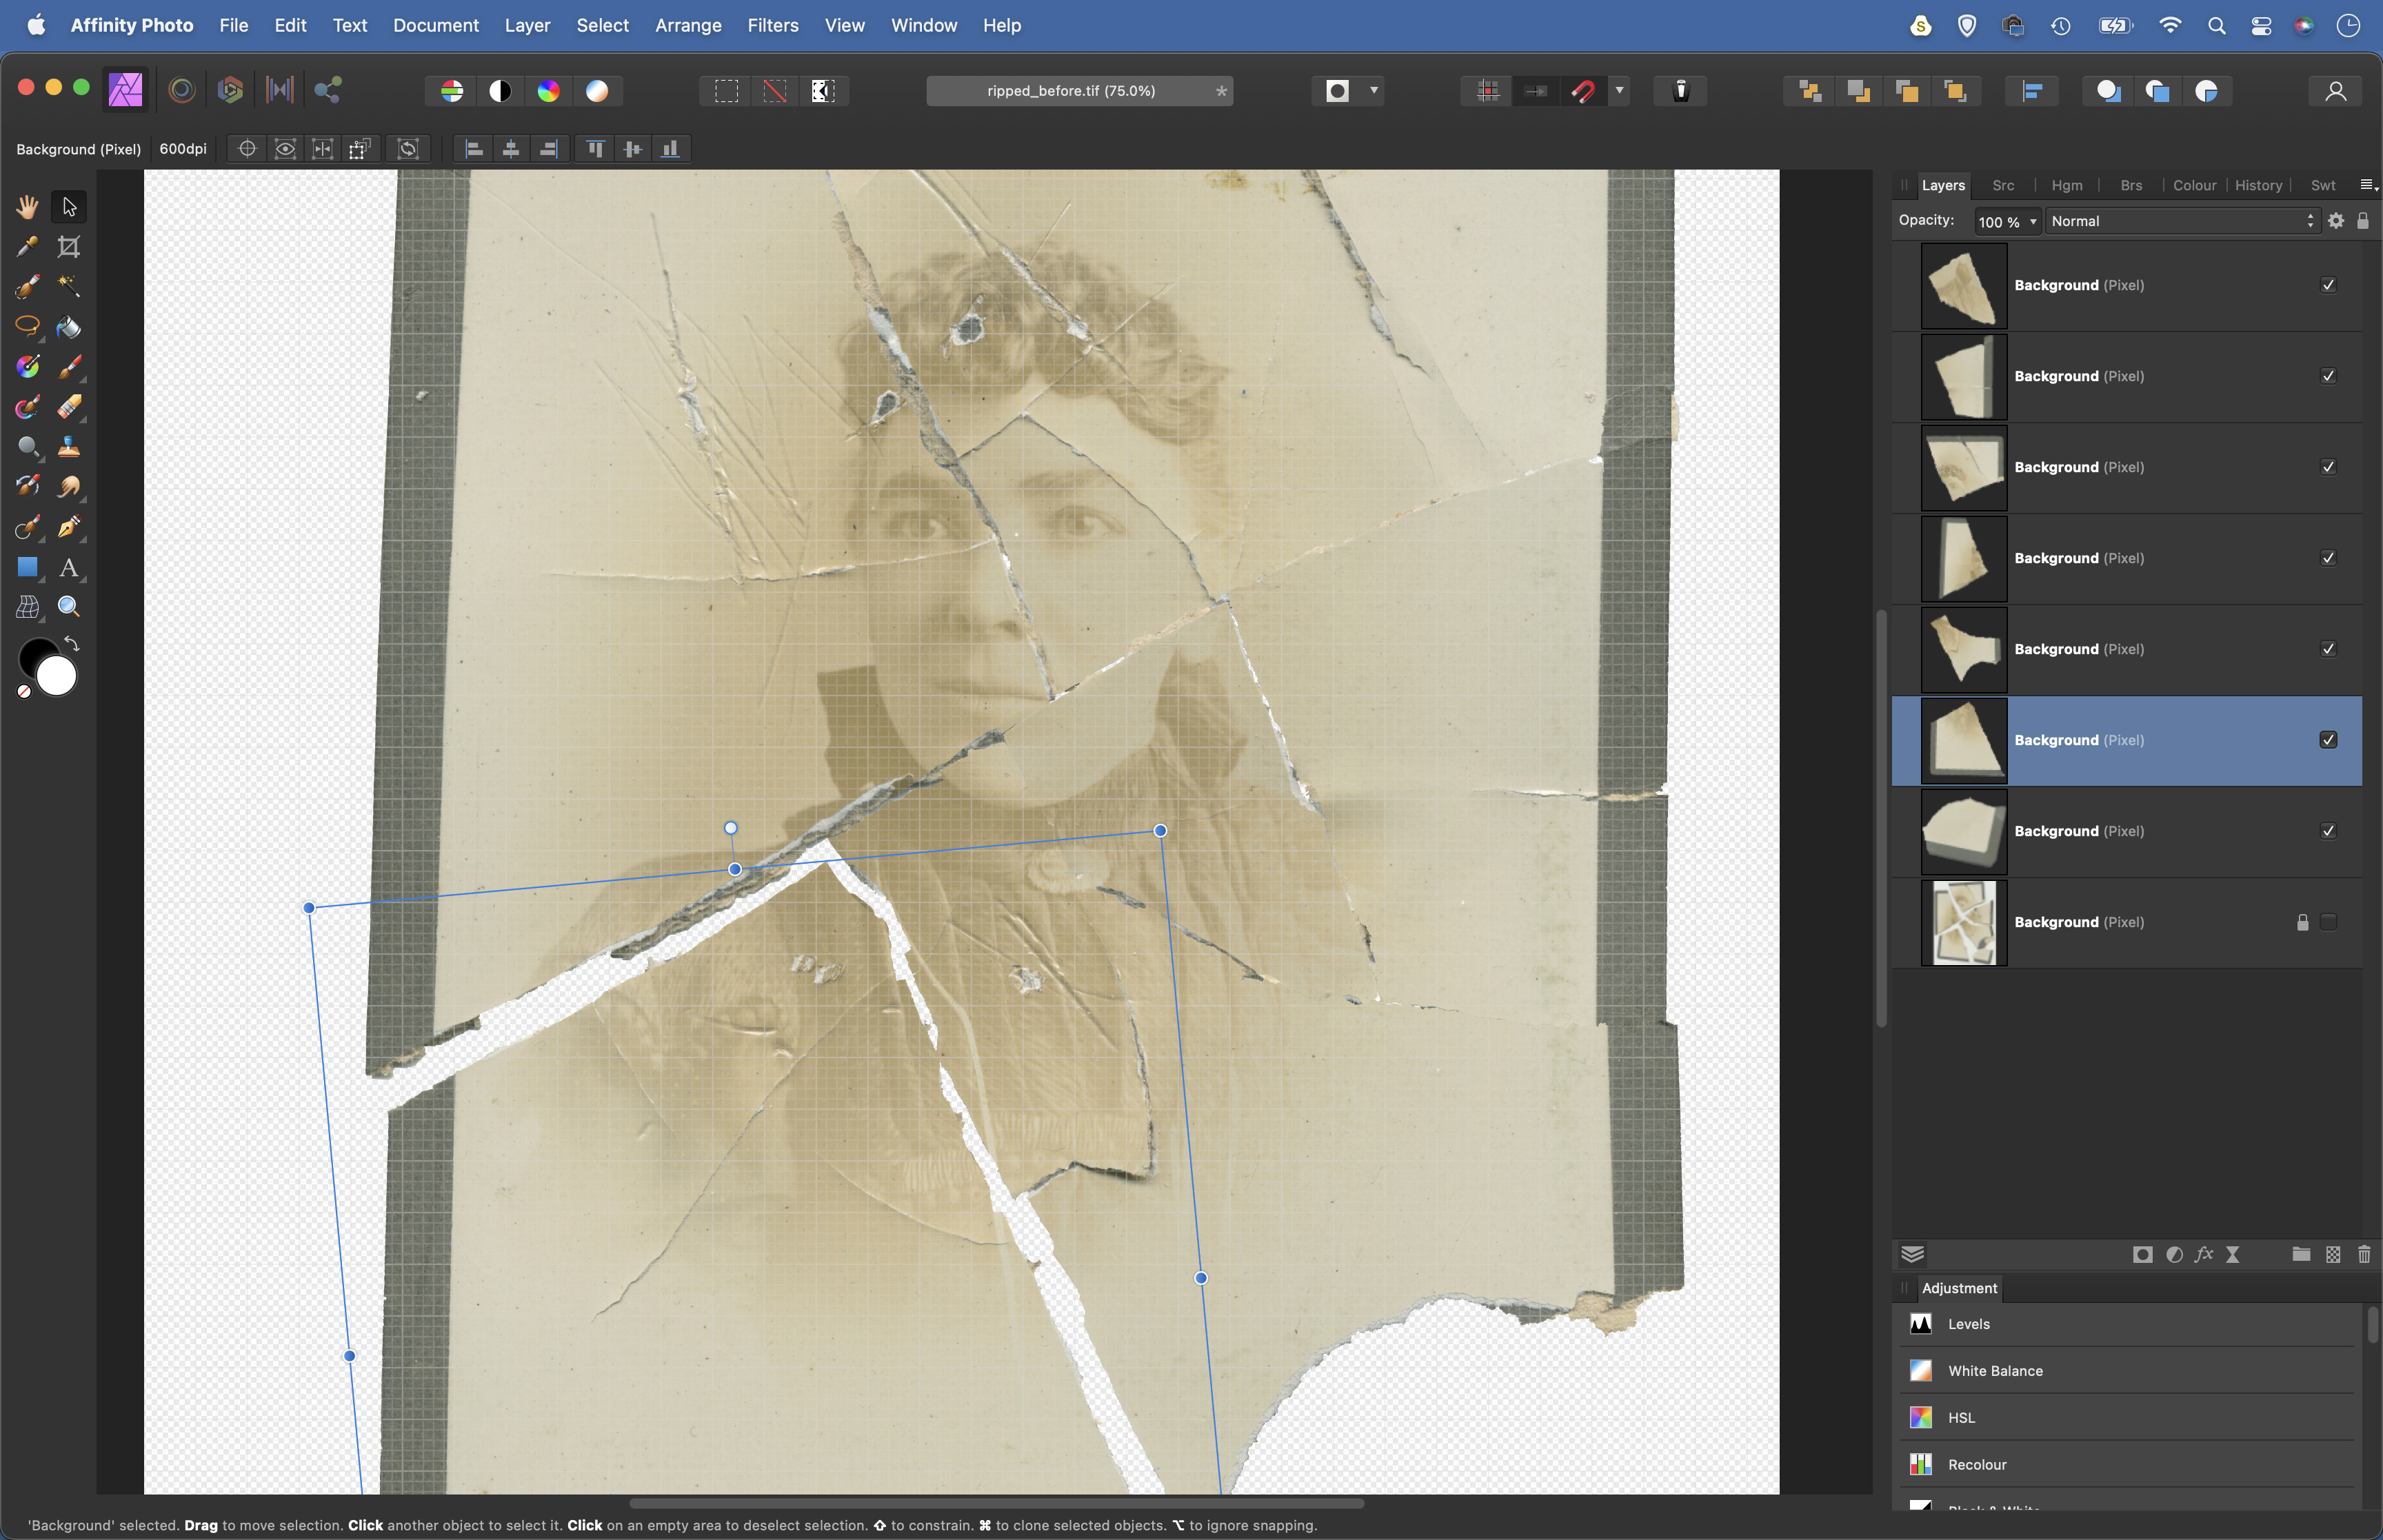
2. Position the pieces
Highlight the background layer and repeat with the Selection Brush to select and copy each piece to its own layer. Next, hide the bottom layer and grab the Move tool. Click on pieces and use the bounding box to rotate and move them into position. Hit Cmd/Ctrl + ’ to turn on the grid to aid in lining things up.
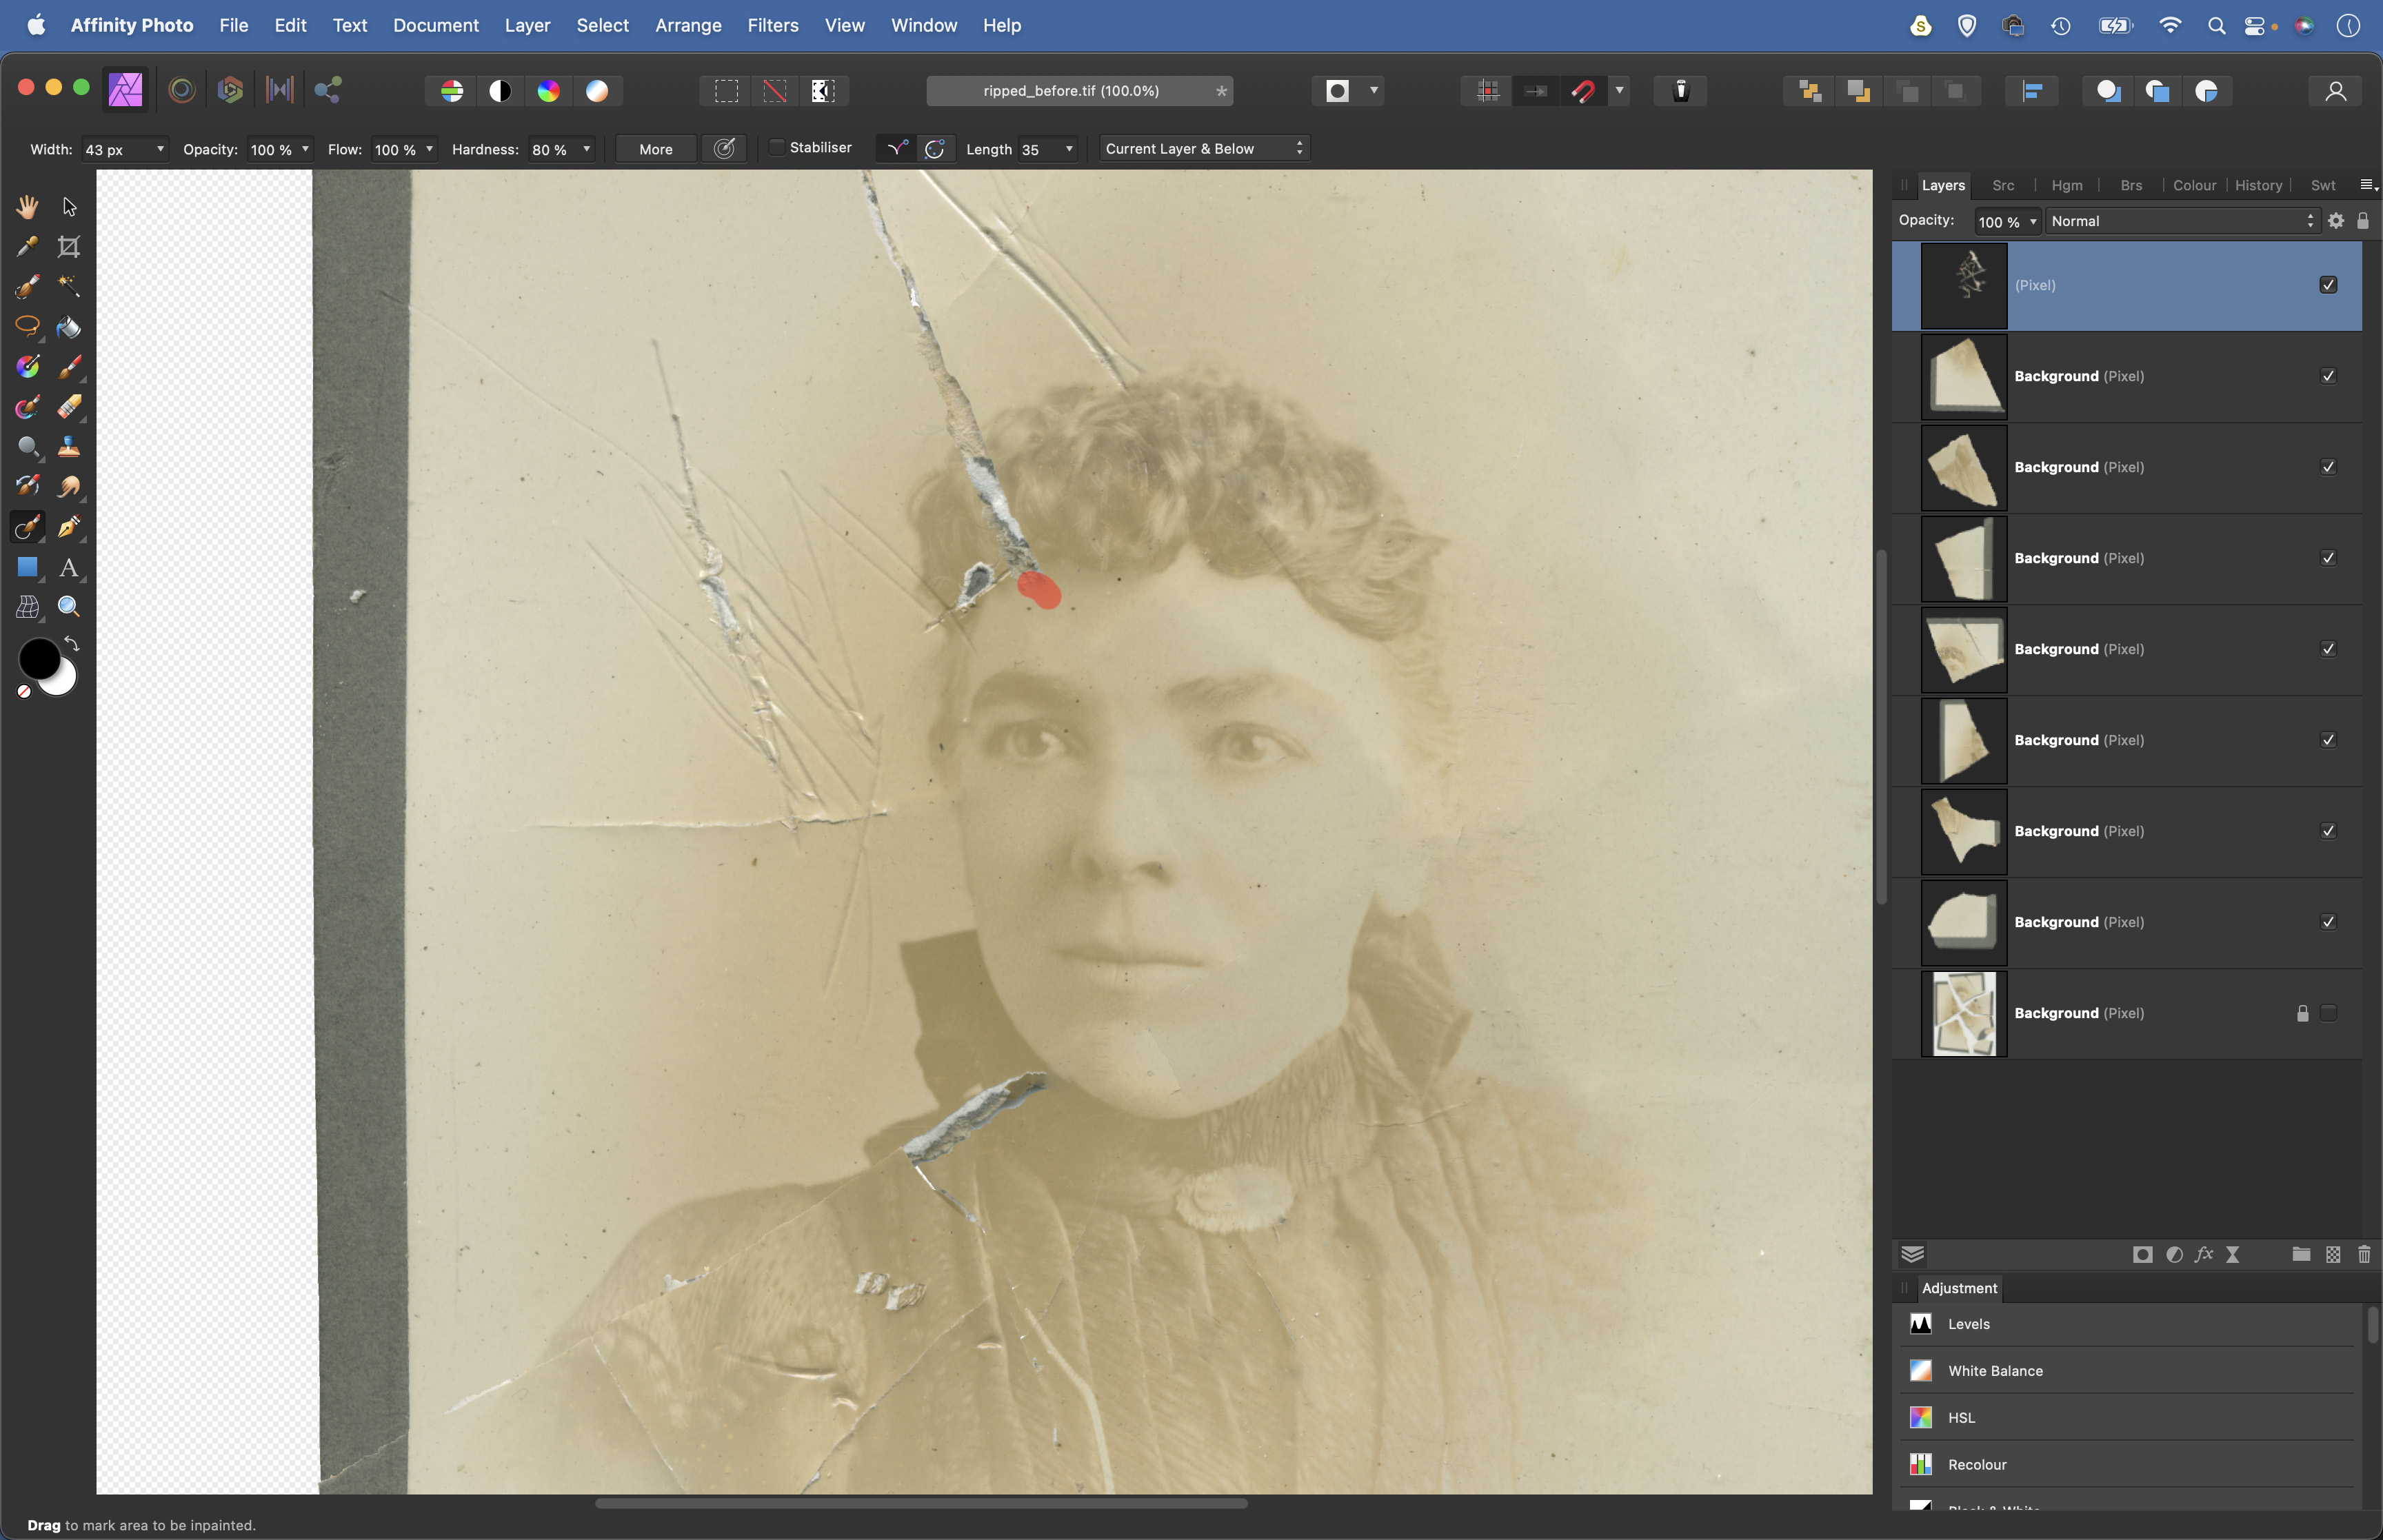
3. Fill the gaps
Make a new layer at the top of the layer stack. Grab the Inpainting tool from the toolbar. Set it to work on ‘Current Layer and Below’ in the tool options, then paint over the gaps, scratches and lines to repair them. You can click on a point, hold Shift and click on another to make a straight line – useful on scratches.
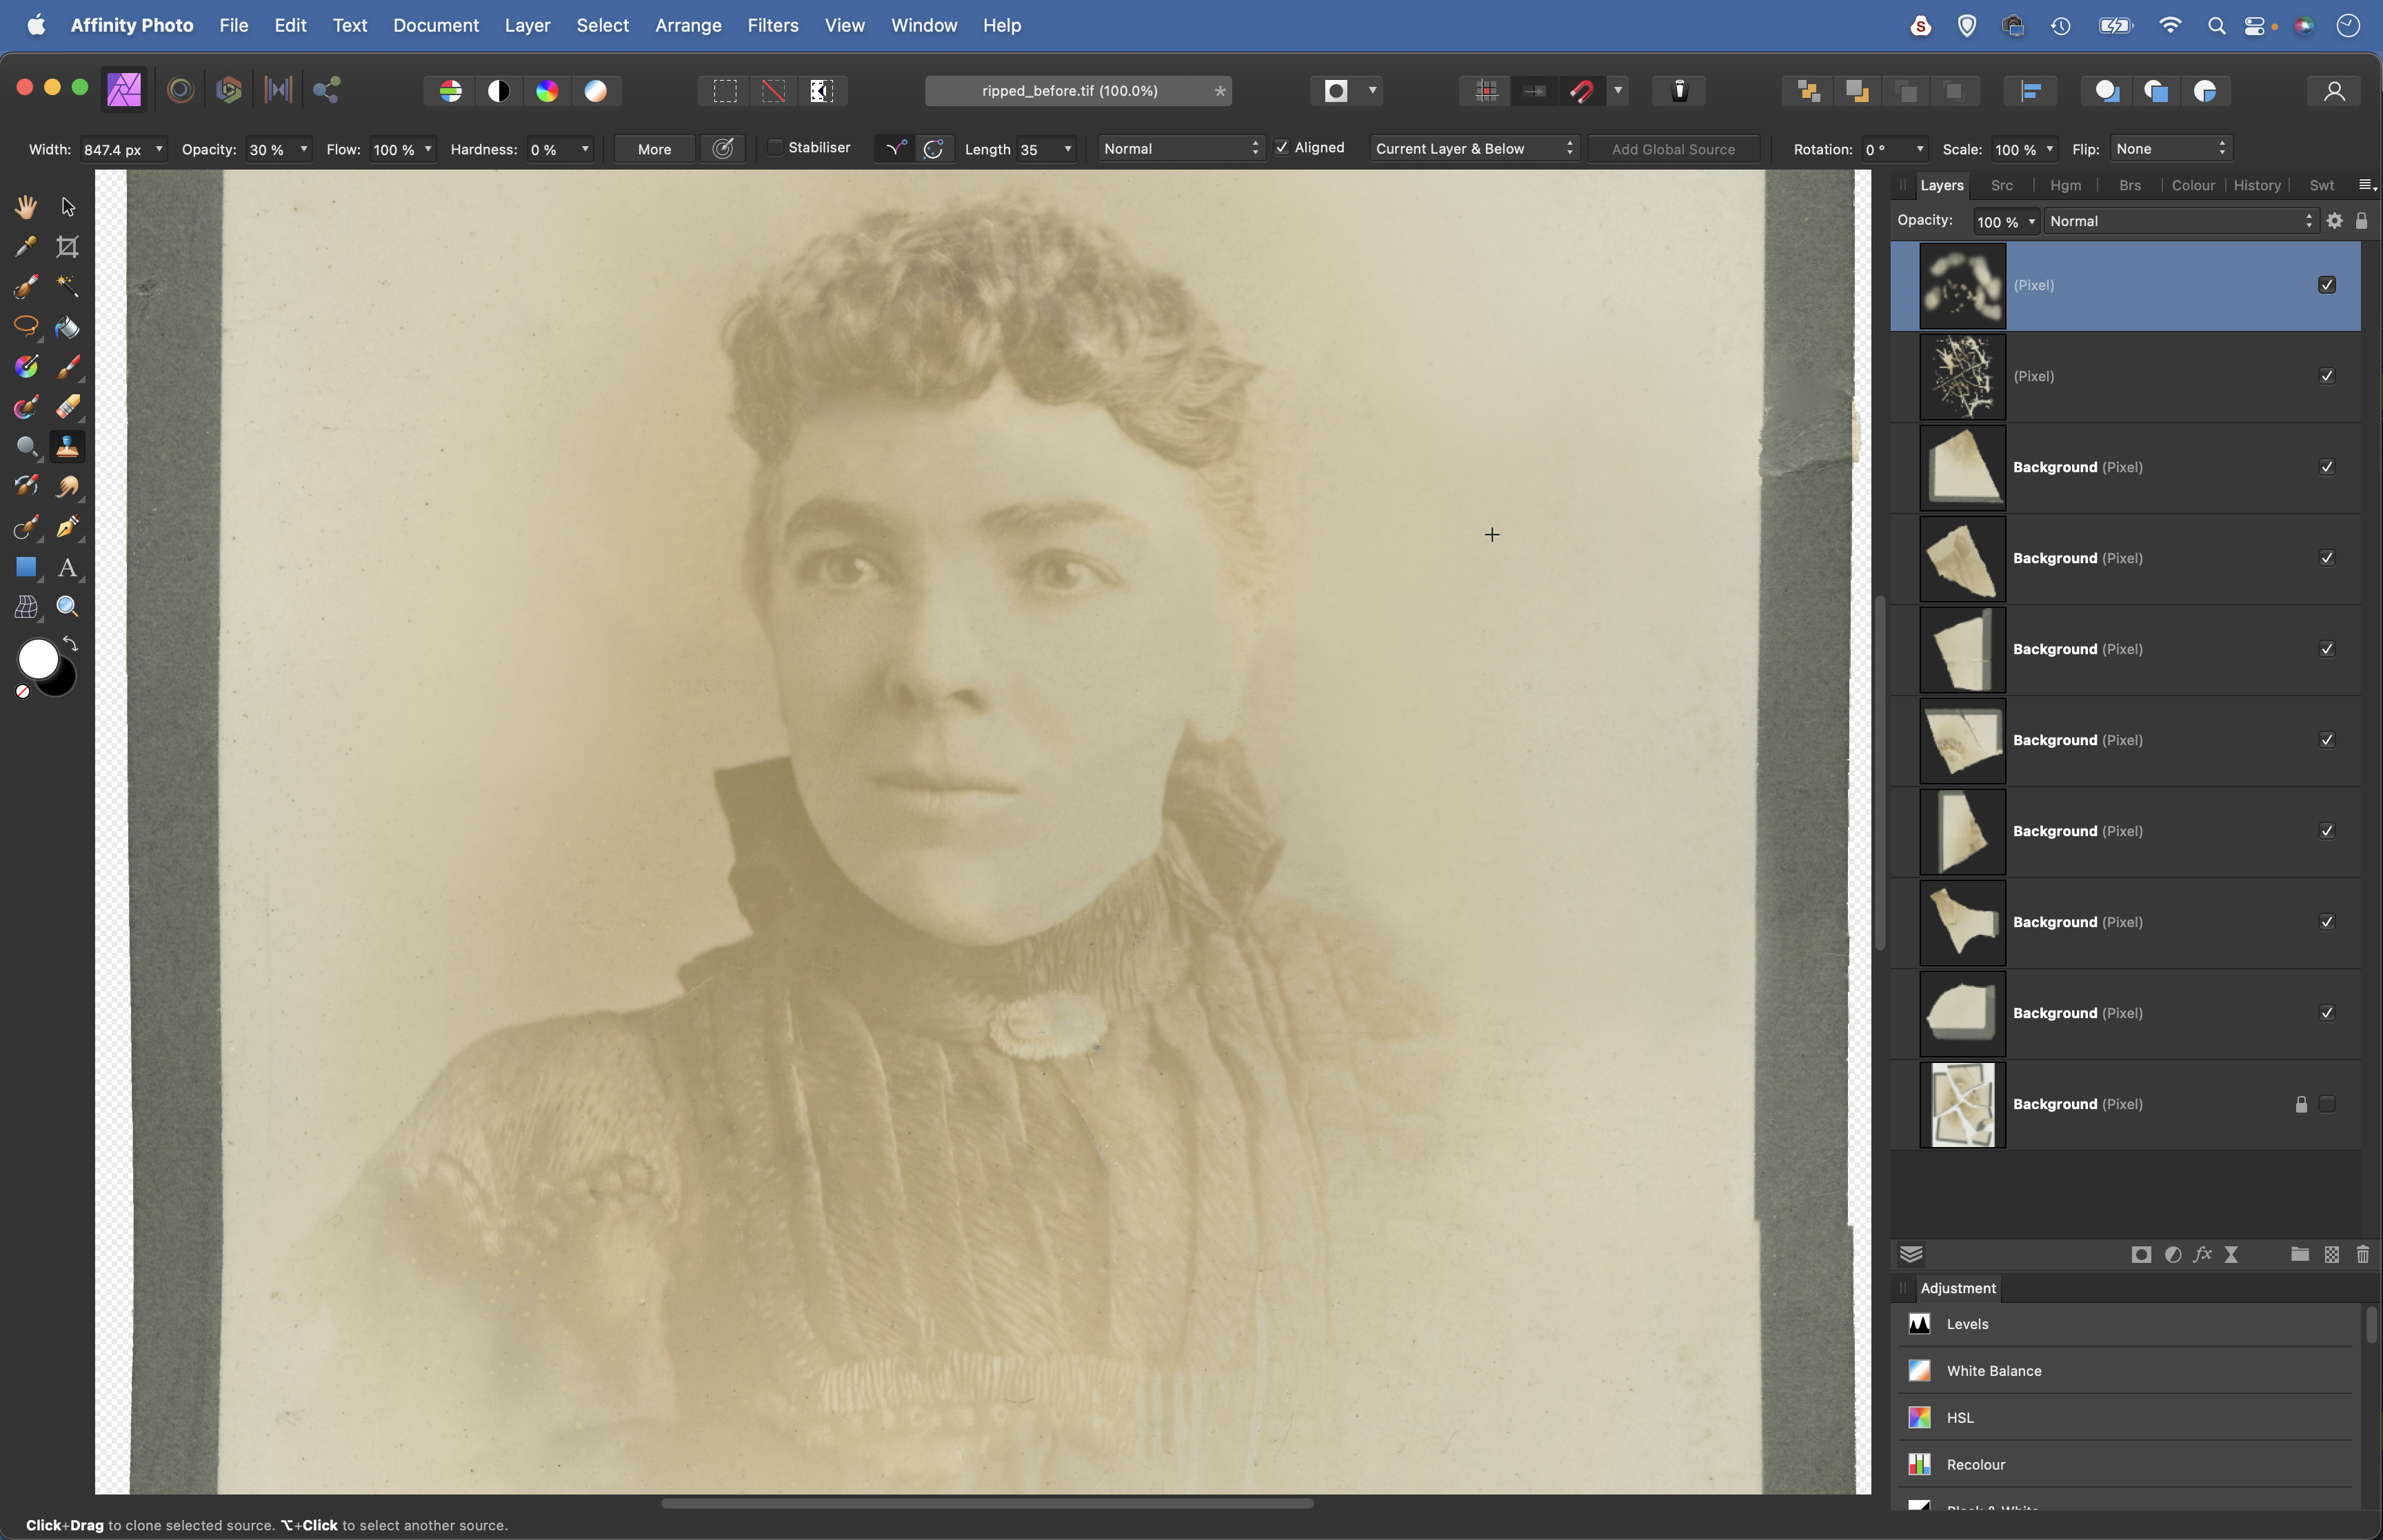
4. Clone rough patches
Grab the Clone tool and hit 3 for 30% opacity. Set it to sample ‘Current and Below’ and make a new layer, then hold Alt to sample a clean part of the print and paint to smooth over any patches of rough tone or color in the image. The low opacity enables you to gradually blend pixels as you clone.
5. Use the Dust filter
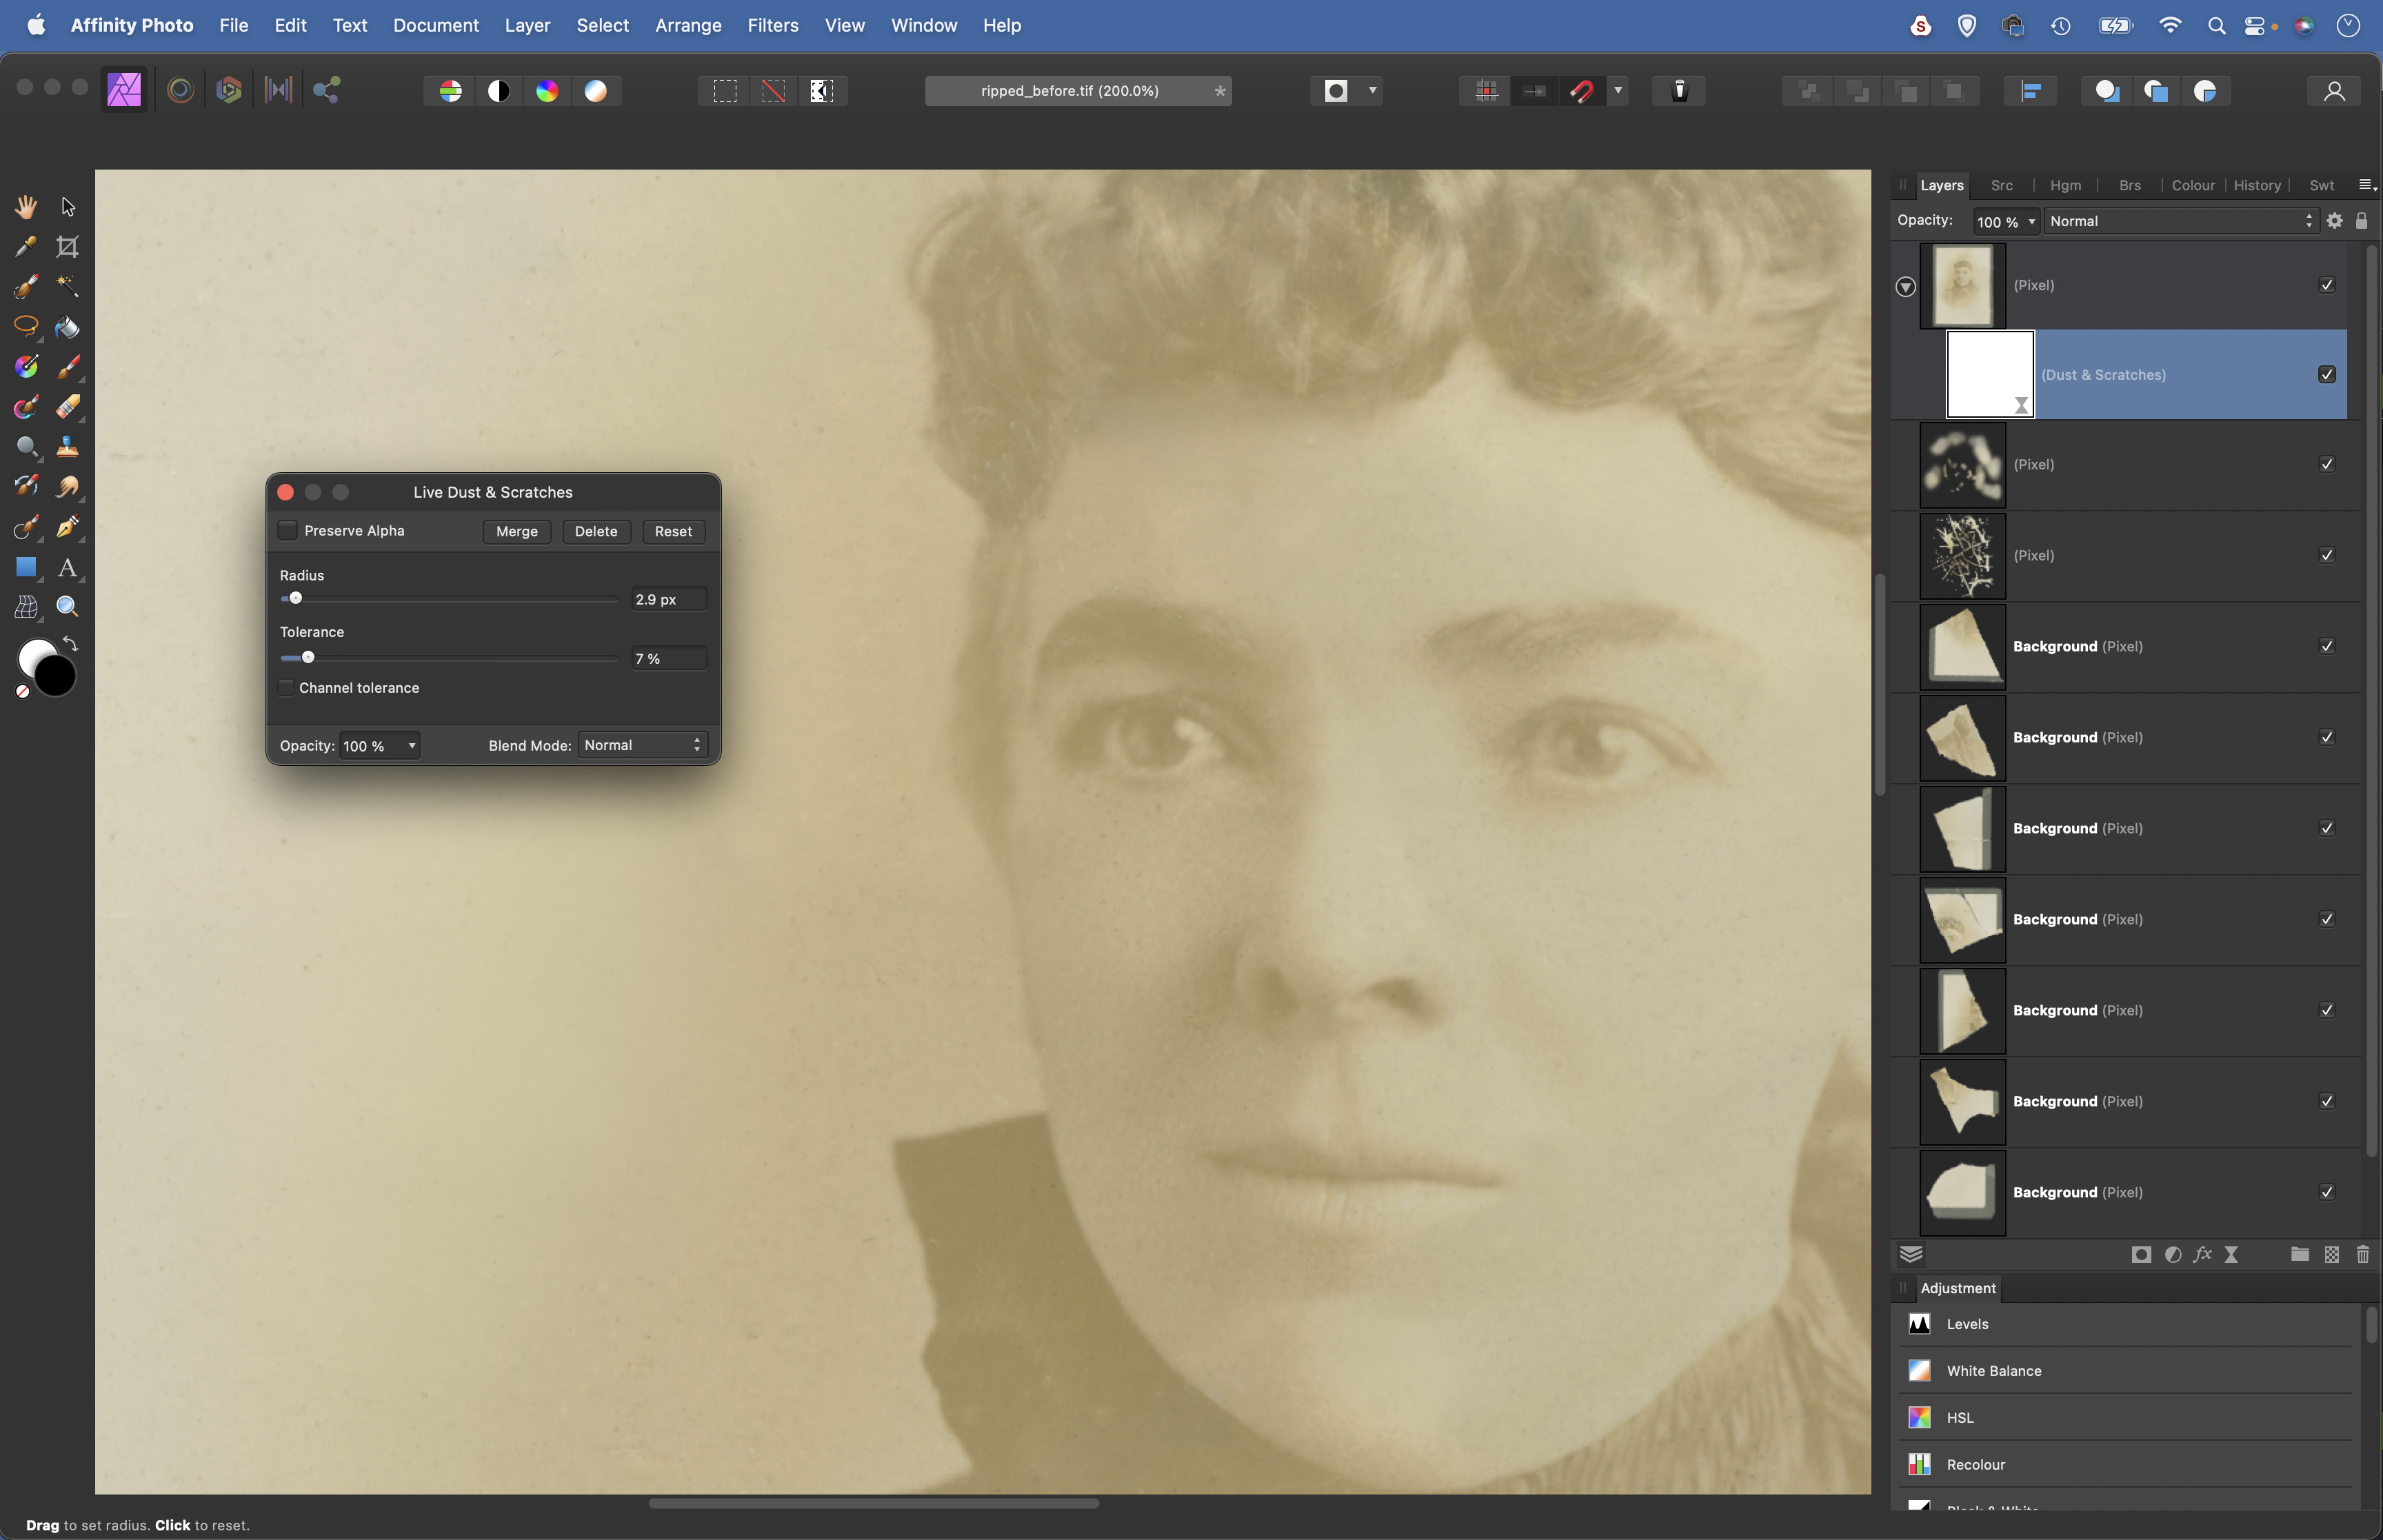
Press Cmd/Ctrl + Shift + Alt + E to merge a copy of all layers into a new layer, then go to Layer > New Live Filter Layer > Noise > Dust and Scratches. Zoom in close, then increase Radius until you see small spots of dust disappear. Increase Tolerance to halfway, then decrease until the dust is reduced.
6. Boost the details
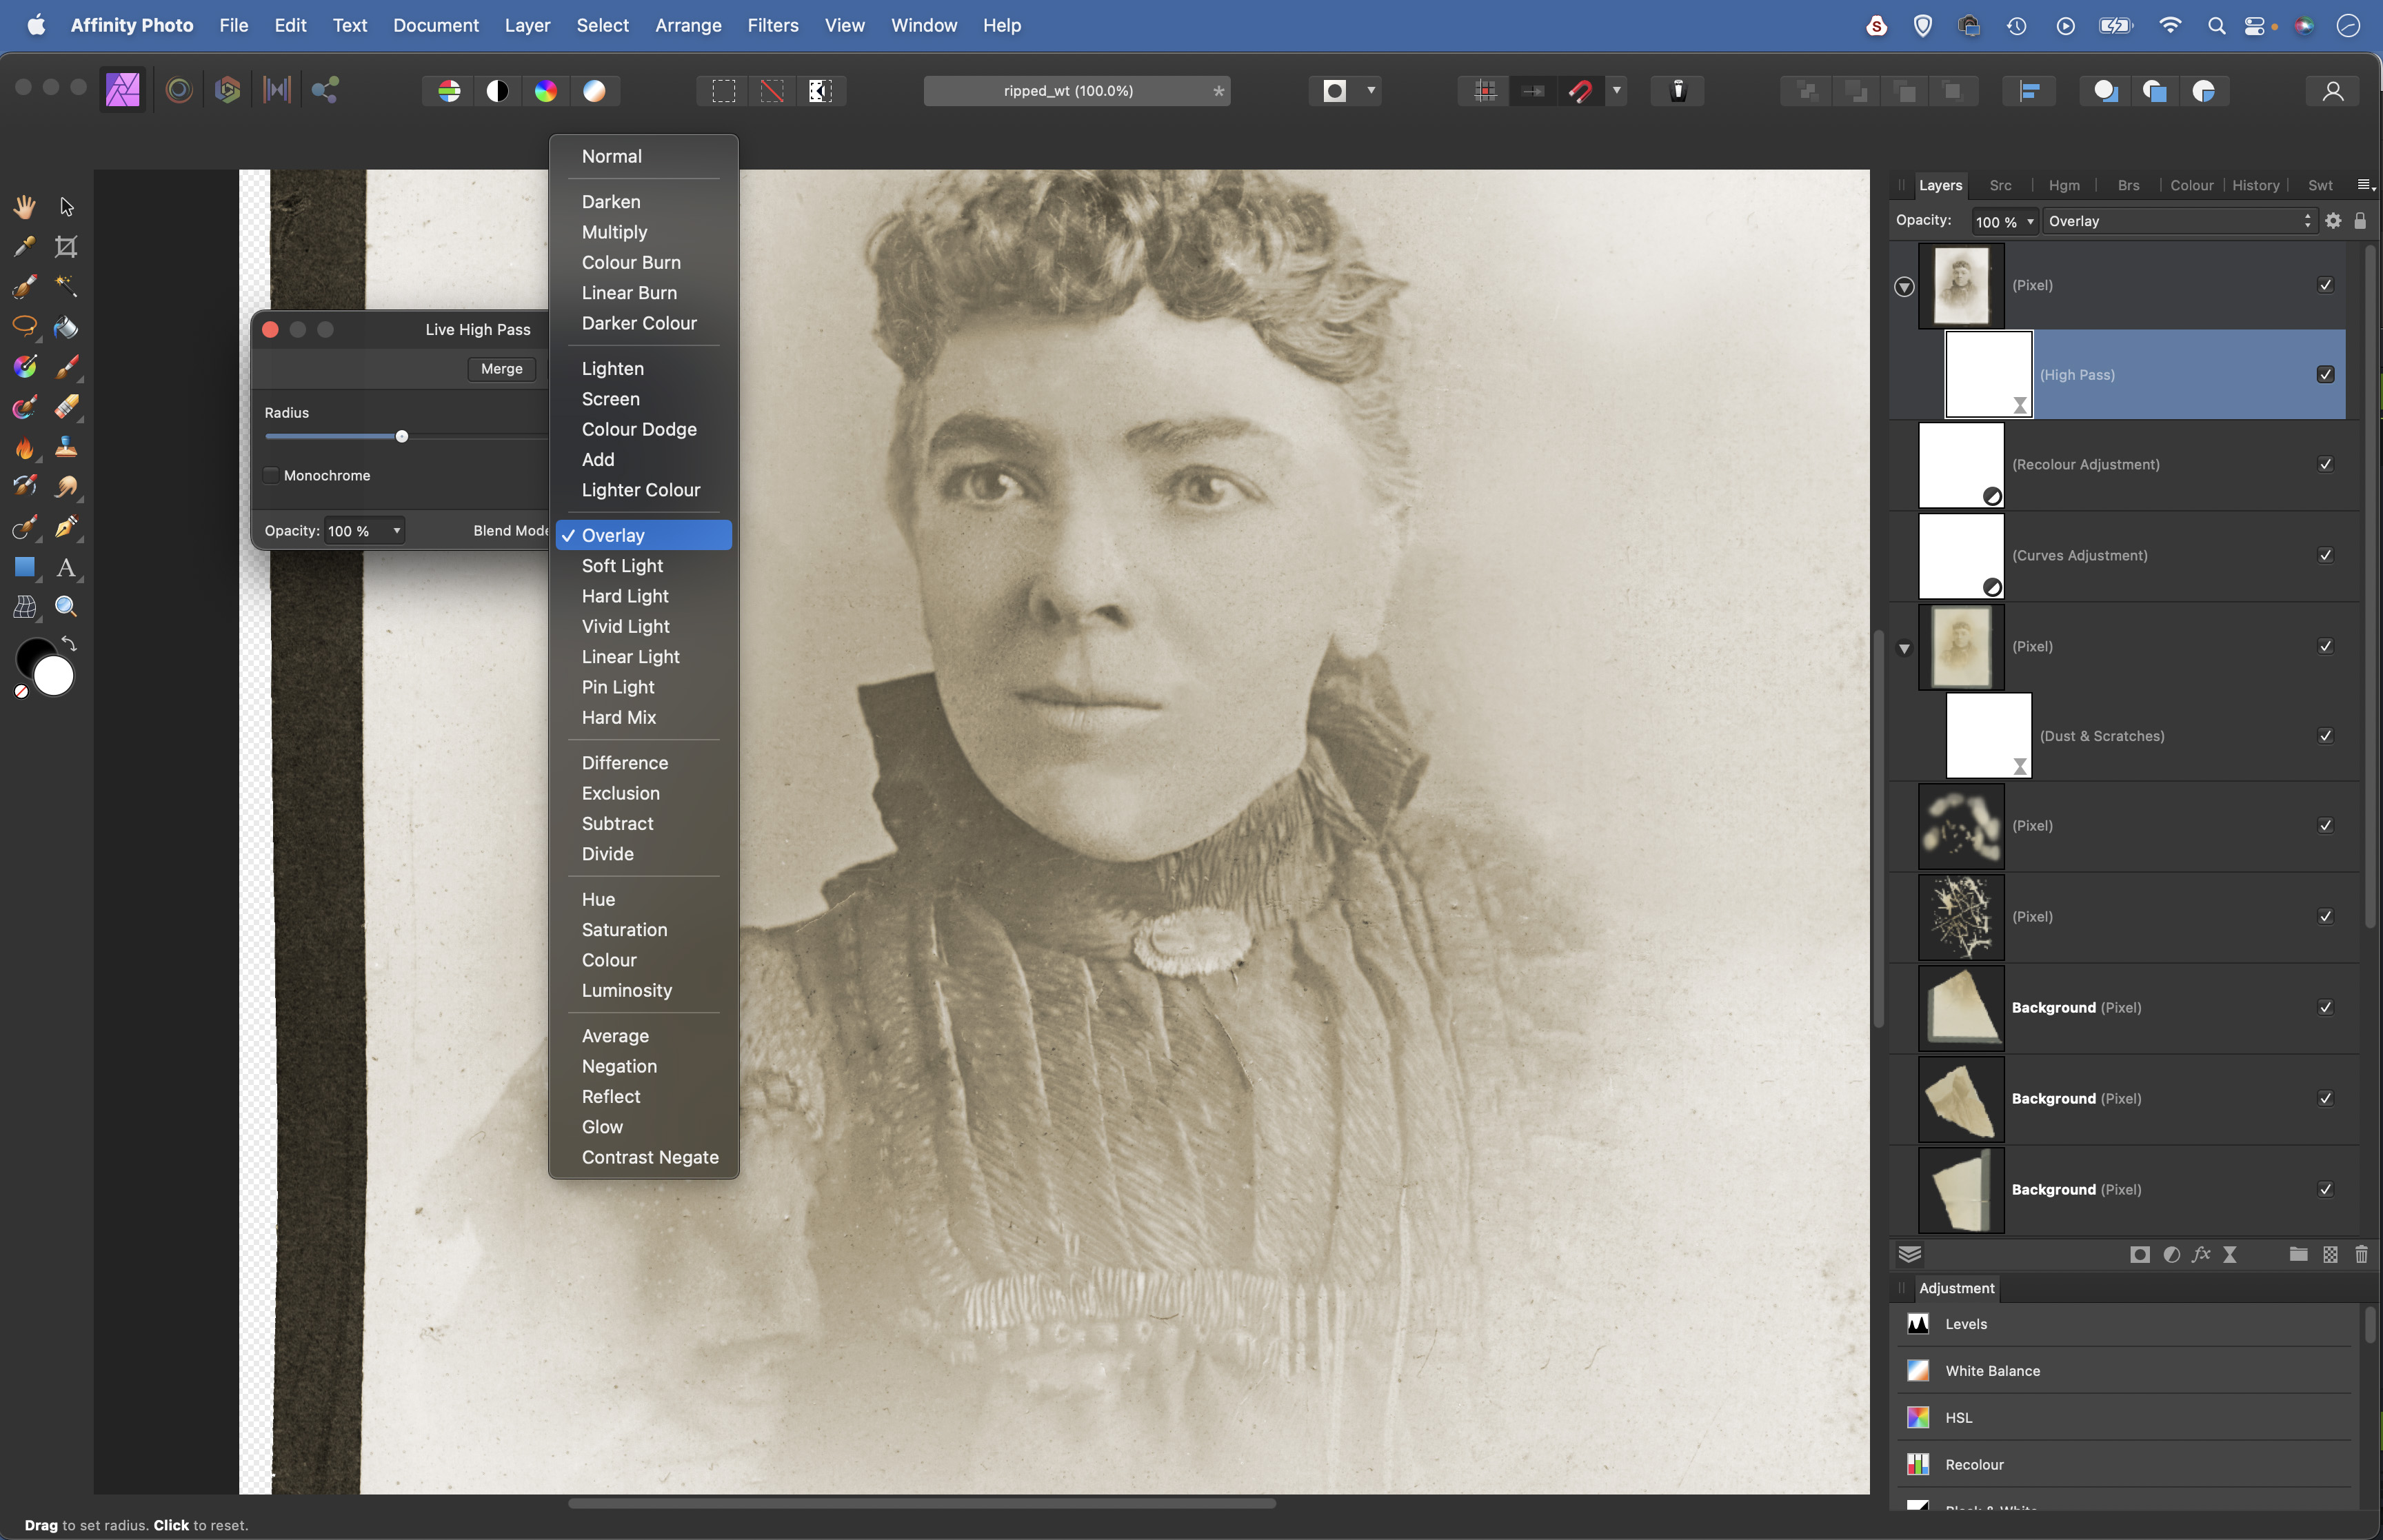
Click the Adjustment icon and choose Curves. Plot an S-shaped curve line to boost contrast. Next add a Recolor adjustment and choose a sepia color. Finally, hit Cmd/Ctrl + Shift + Alt + E again then go to Layer > New Live Filter Layer > Sharpen > High Pass. Set Mode: Overlay then increase Radius to sharpen.
PhotoPlus: The Canon Magazine is the world's only monthly newsstand title that's 100% devoted to Canon, so you can be sure the magazine is completely relevant to your system.
If you enjoyed this tutorial but want a bit more power from your laptop, why not look at the best photo-editing laptops? If you're really keen to improve your skills further than online photography courses could be the way to go.
The lead technique writer on Digital Camera Magazine, PhotoPlus: The Canon Magazine and N-Photo: The Nikon Magazine, James is a fantastic general practice photographer with an enviable array of skills across every genre of photography.
Whether it's flash photography techniques like stroboscopic portraits, astrophotography projects like photographing the Northern Lights, or turning sound into art by making paint dance on a set of speakers, James' tutorials and projects are as creative as they are enjoyable.
He's also a wizard at the dark arts of Photoshop, Lightroom and Affinity Photo, and is capable of some genuine black magic in the digital darkroom, making him one of the leading authorities on photo editing software and techniques.
