Merge two photos in Photoshop CC to create a landscape with a striking focal point
Add a focal point to a shot using masks, blends and a few simple selection and toning tricks in Photoshop CC
Watch video: Add a point of interest in Photoshop CC
One of the most useful ‘rules’ of photography is this – every photograph should have a subject. This holds true whether you’re shooting a portrait or landscape. Even abstract photos work best when they have a point of focus, something to draw the eye to a certain part of the image. Of course, all rules were meant to be broken, but having a subject to draw the eye can often lead to a stronger, more cohesive shot.
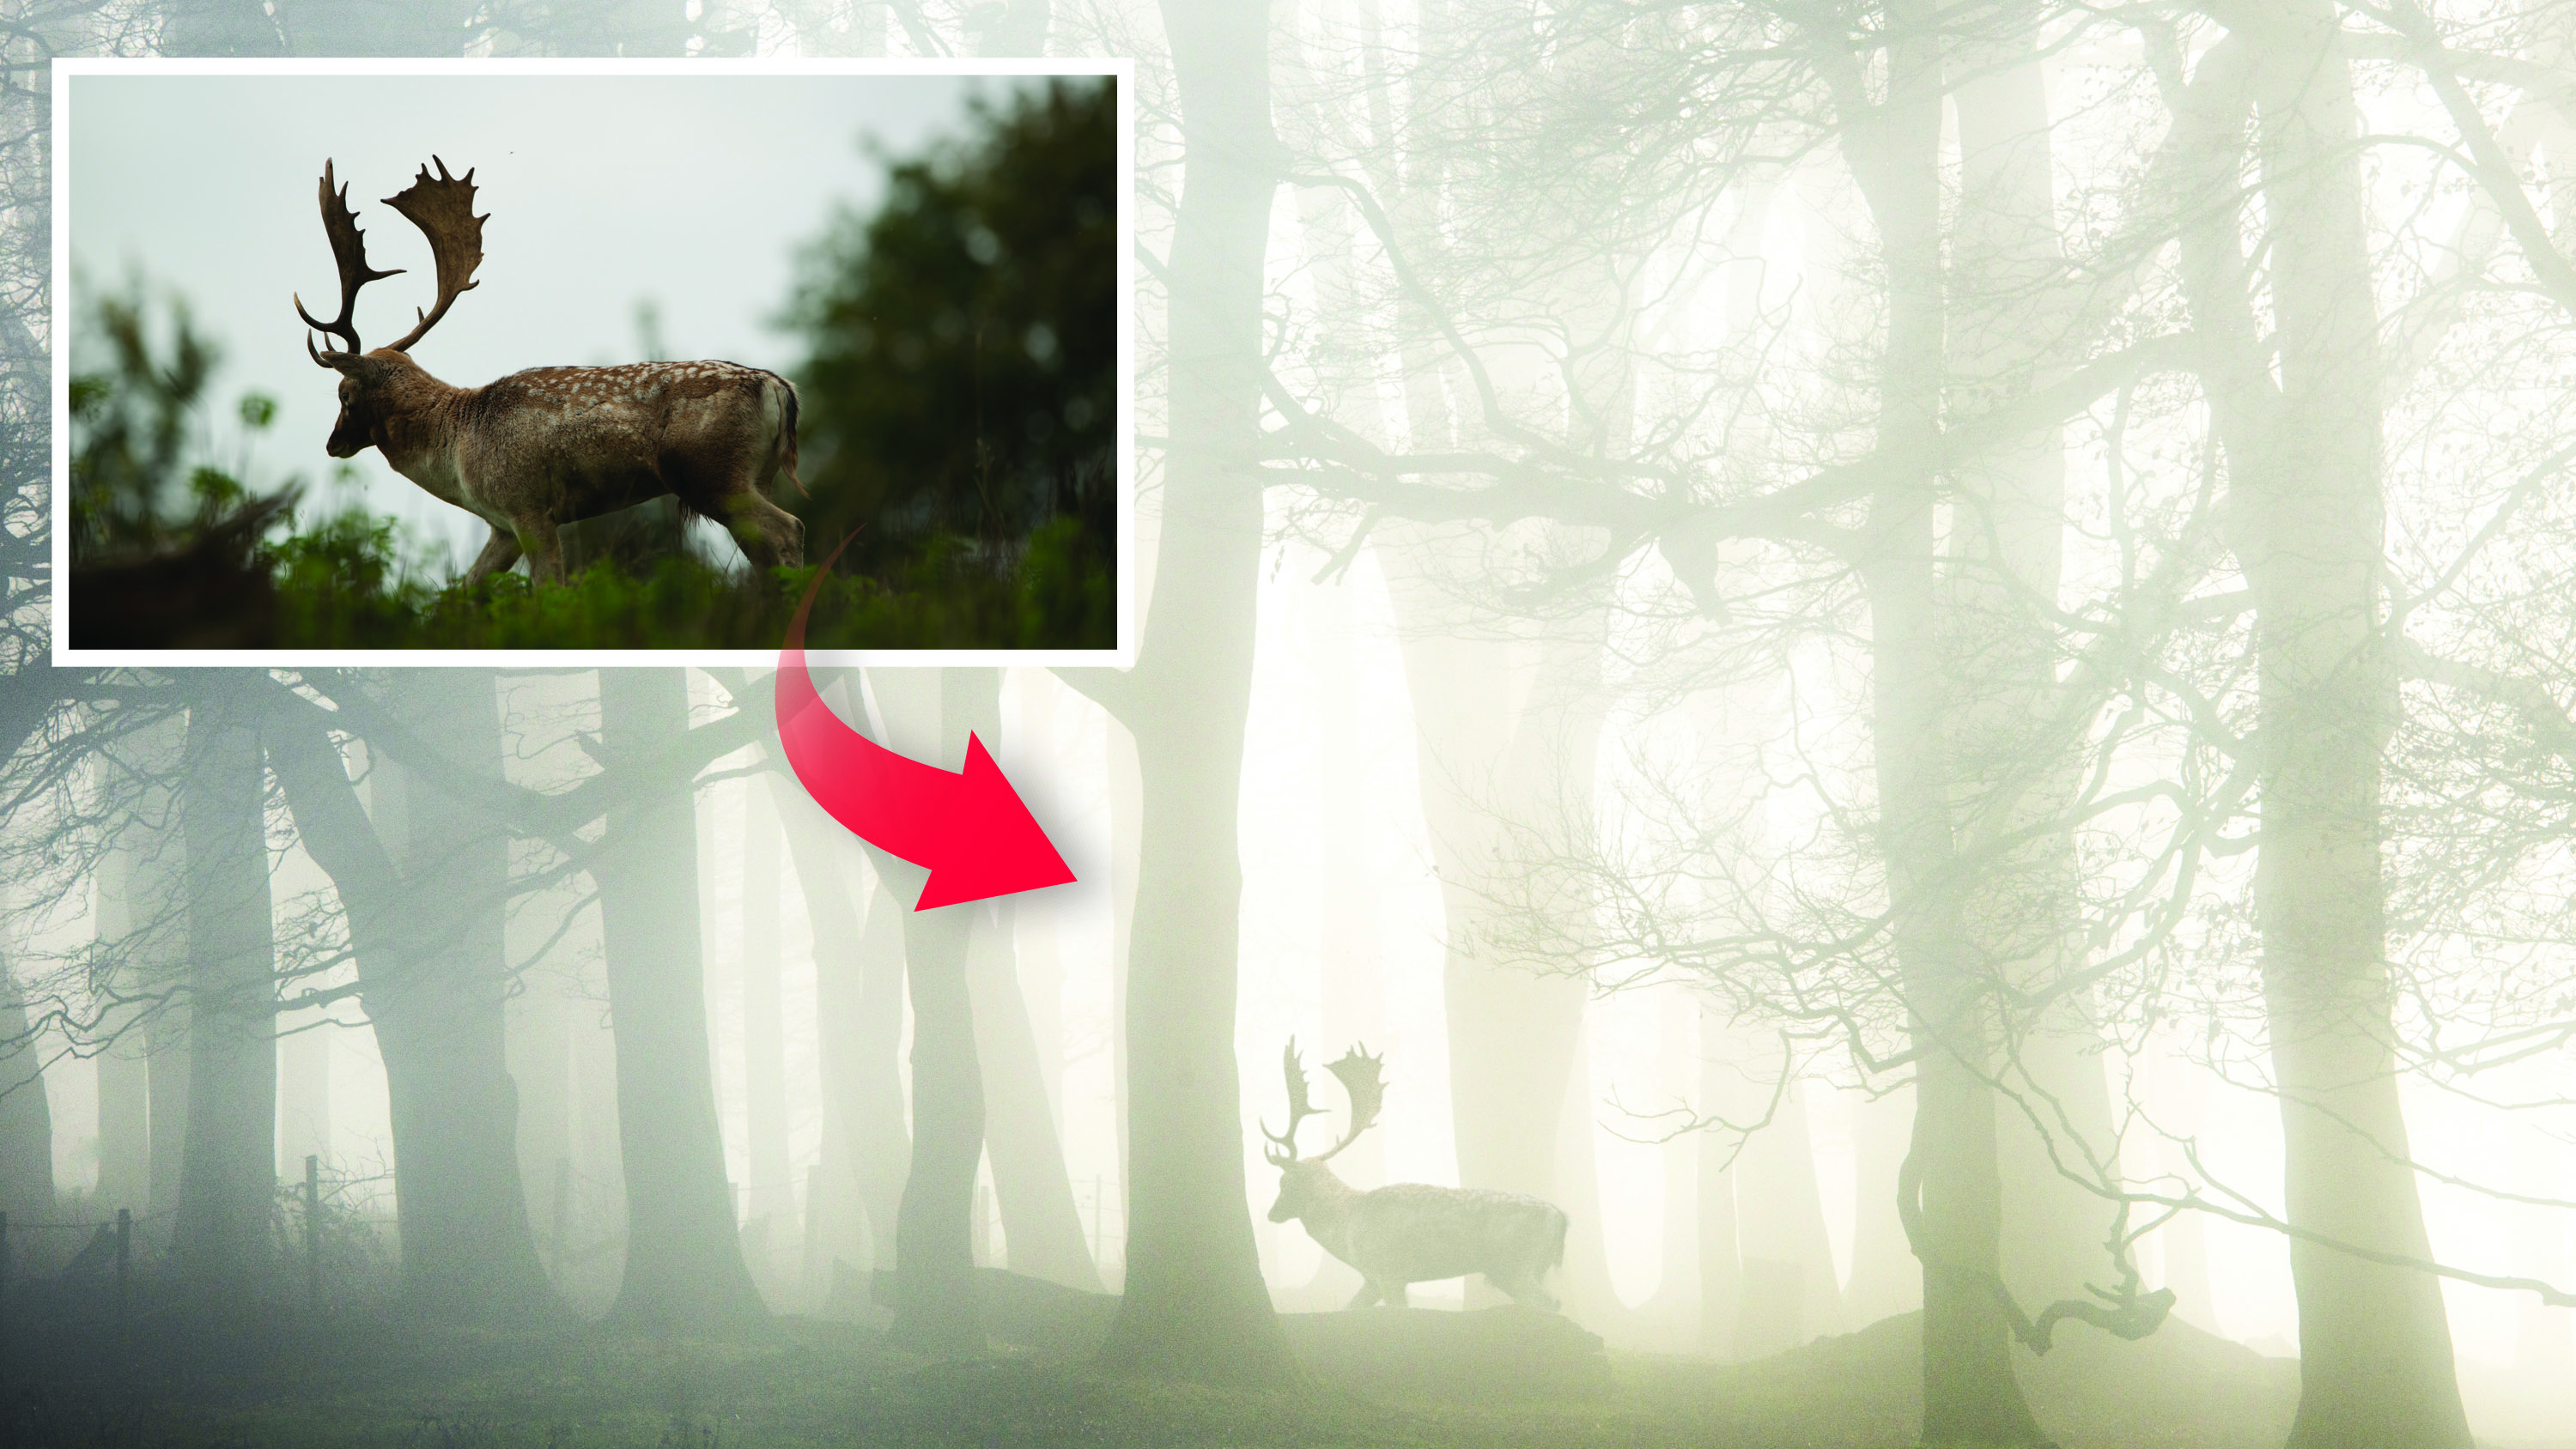
But what if there’s no subject in sight? We’ve surely all come across beautiful scenes or gorgeous moments of light that don’t have a point of interest, but we go ahead and shoot anyway. Like our starting photo here, the resulting image will probably be nice enough, but a bit bland.
• Read more: Best photo editing software
Thankfully we can use simple tools in Photoshop CC to drop in a subject. In this case we’ve added a stag to our misty woodland scene, but you could use the same technique to add all kinds of distant subjects, whether it be an animal, a person or an inanimate object like a tree or rock.
Some may call this cheating – there’s no substitute for being there in the moment (imagine how lovely this moment would have been if the stag was there) but it does demonstrate skill of a different kind – that of combining photos into a realistic whole. The key is in first making a precise cut out then matching the tones in the two photos, which we can do with a neat trick involving Curves...
01 Copy and position
Download the woodland_before01 start image here and open it, then go to File>Place Embedded and choose the 02 image. Go to the Layers Panel and lower the layer opacity, then hit Cmd/Ctrl+T. Hold Shift and drag the corner of the box to resize and then position the stag. Hit enter to apply.
The best camera deals, reviews, product advice, and unmissable photography news, direct to your inbox!
02 Select the stag
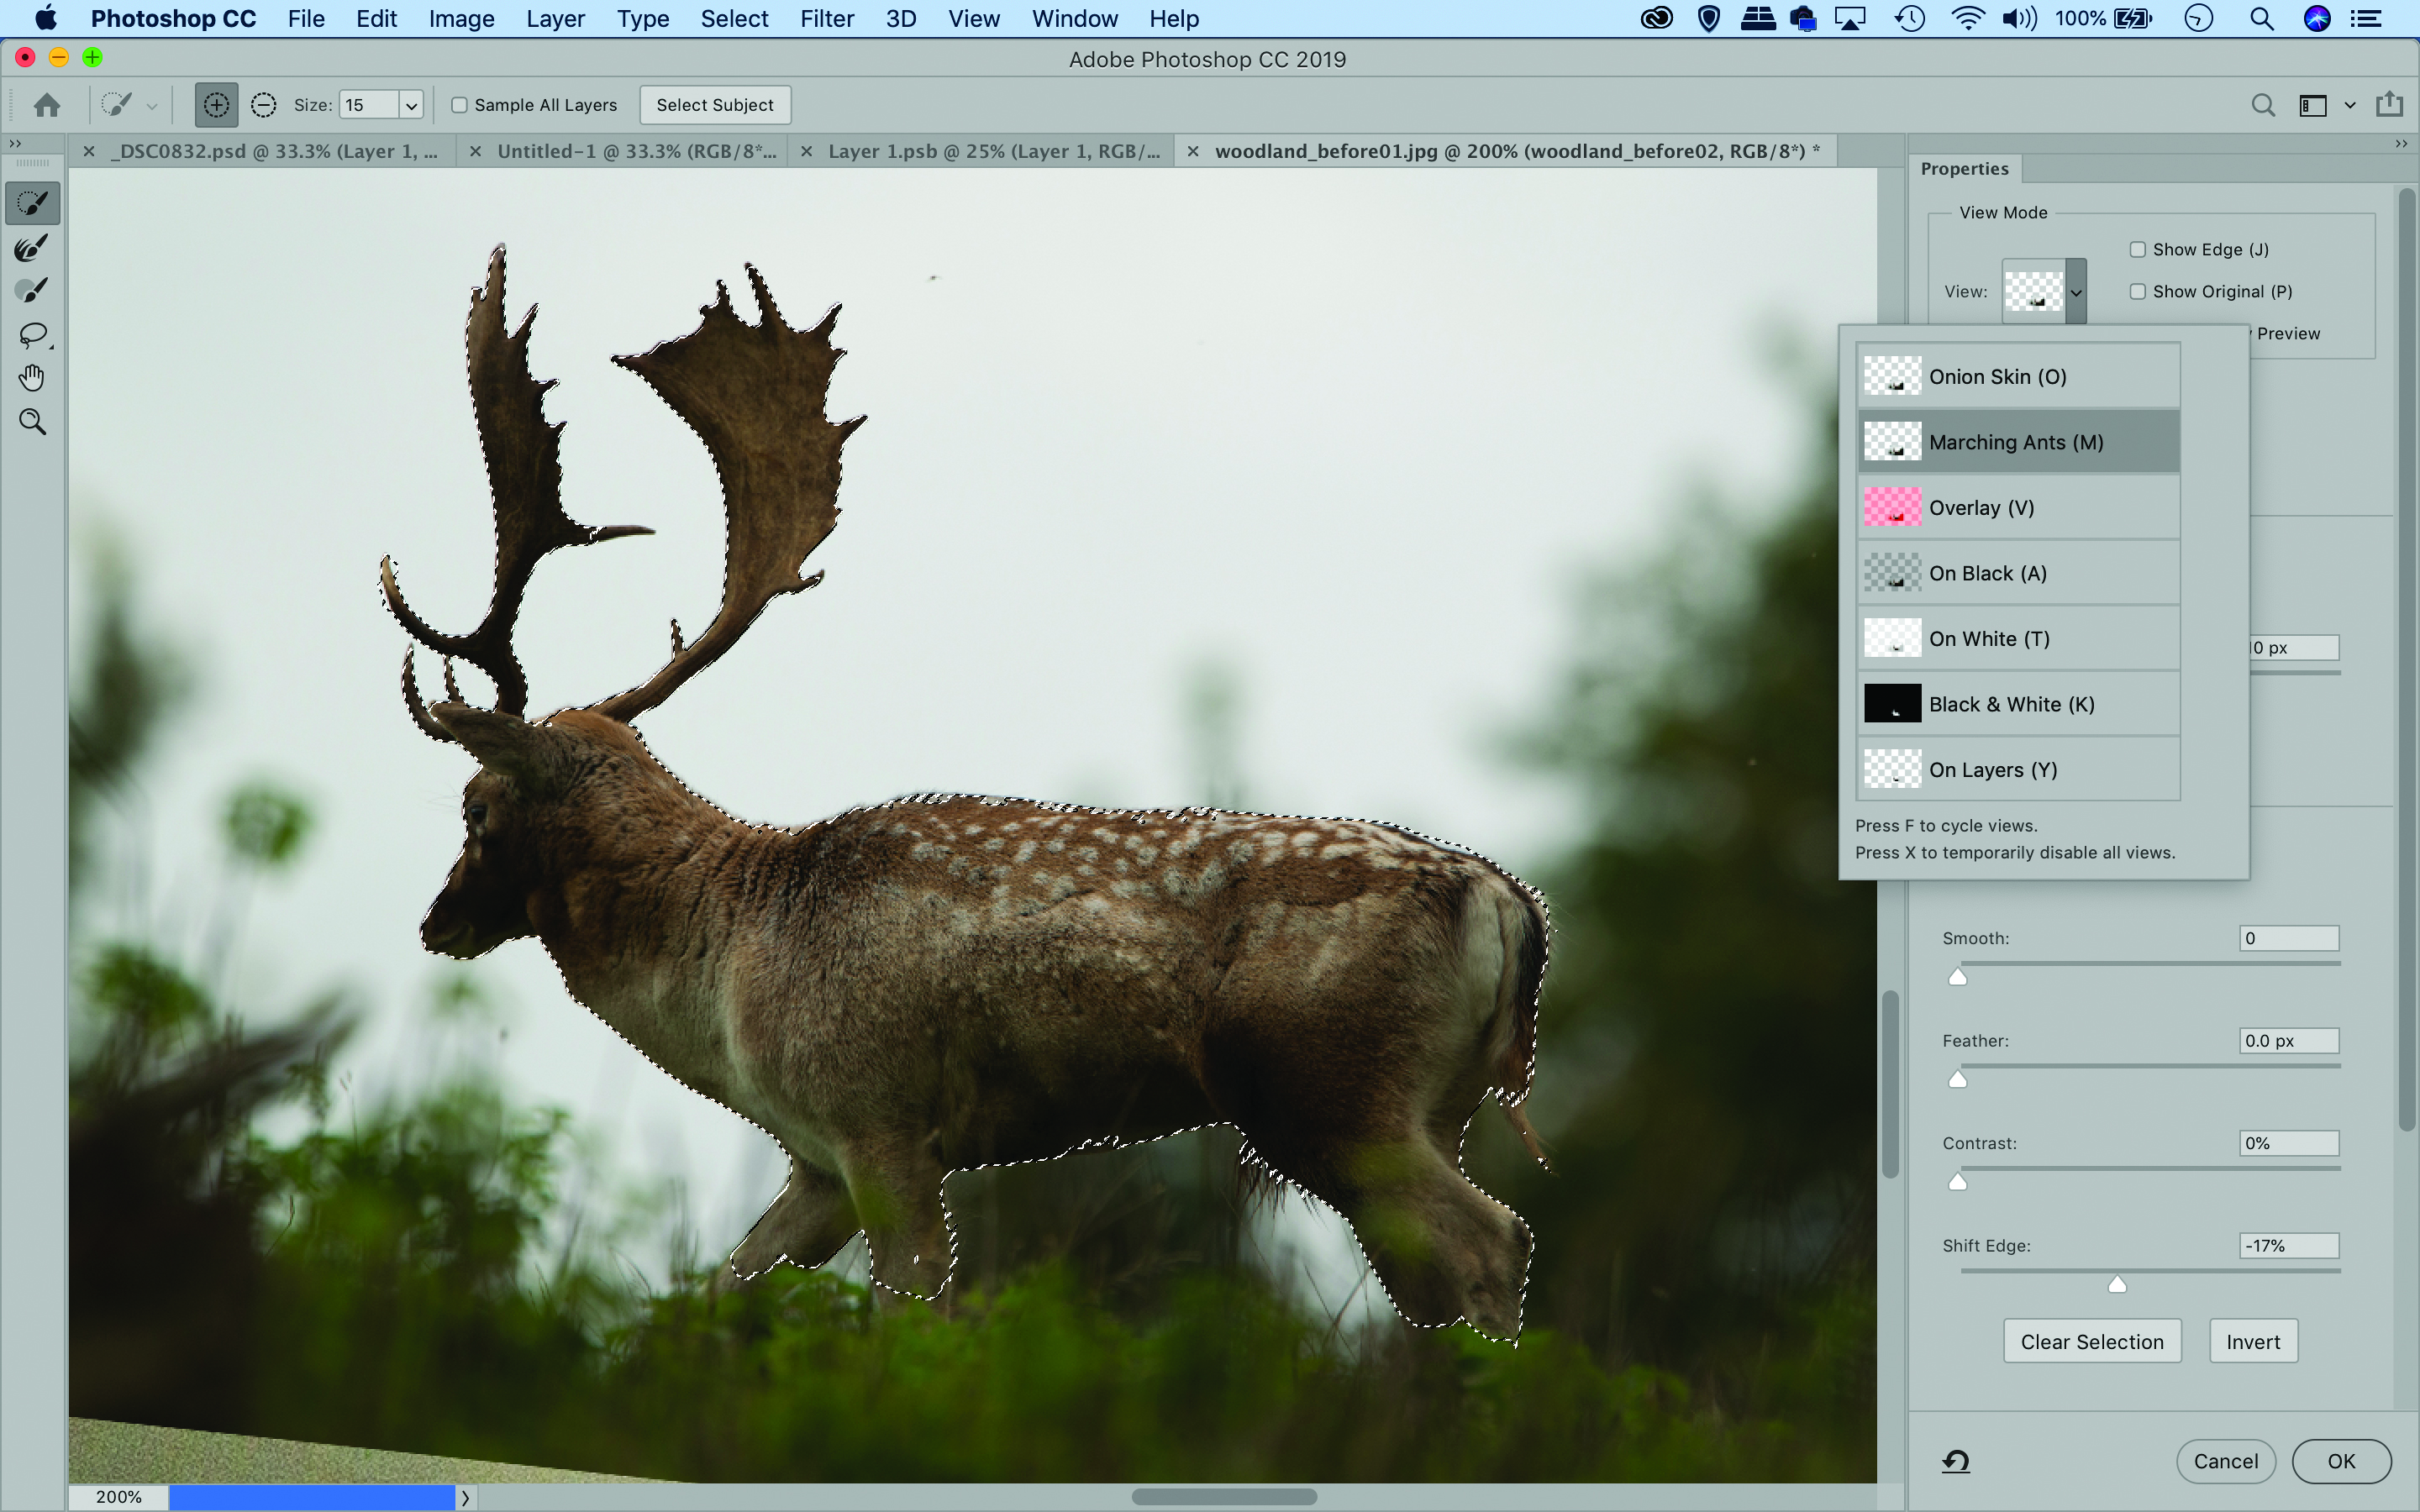
Bring the Layer Opacity back up to 100% then go to Select>Select and Mask. Set View: Marching Ants then grab the Quick Selection tool from the left then paint over the stag to select it. If the selection goes wrong, hold Alt and paint to subtract areas.
03 Improve the cut out
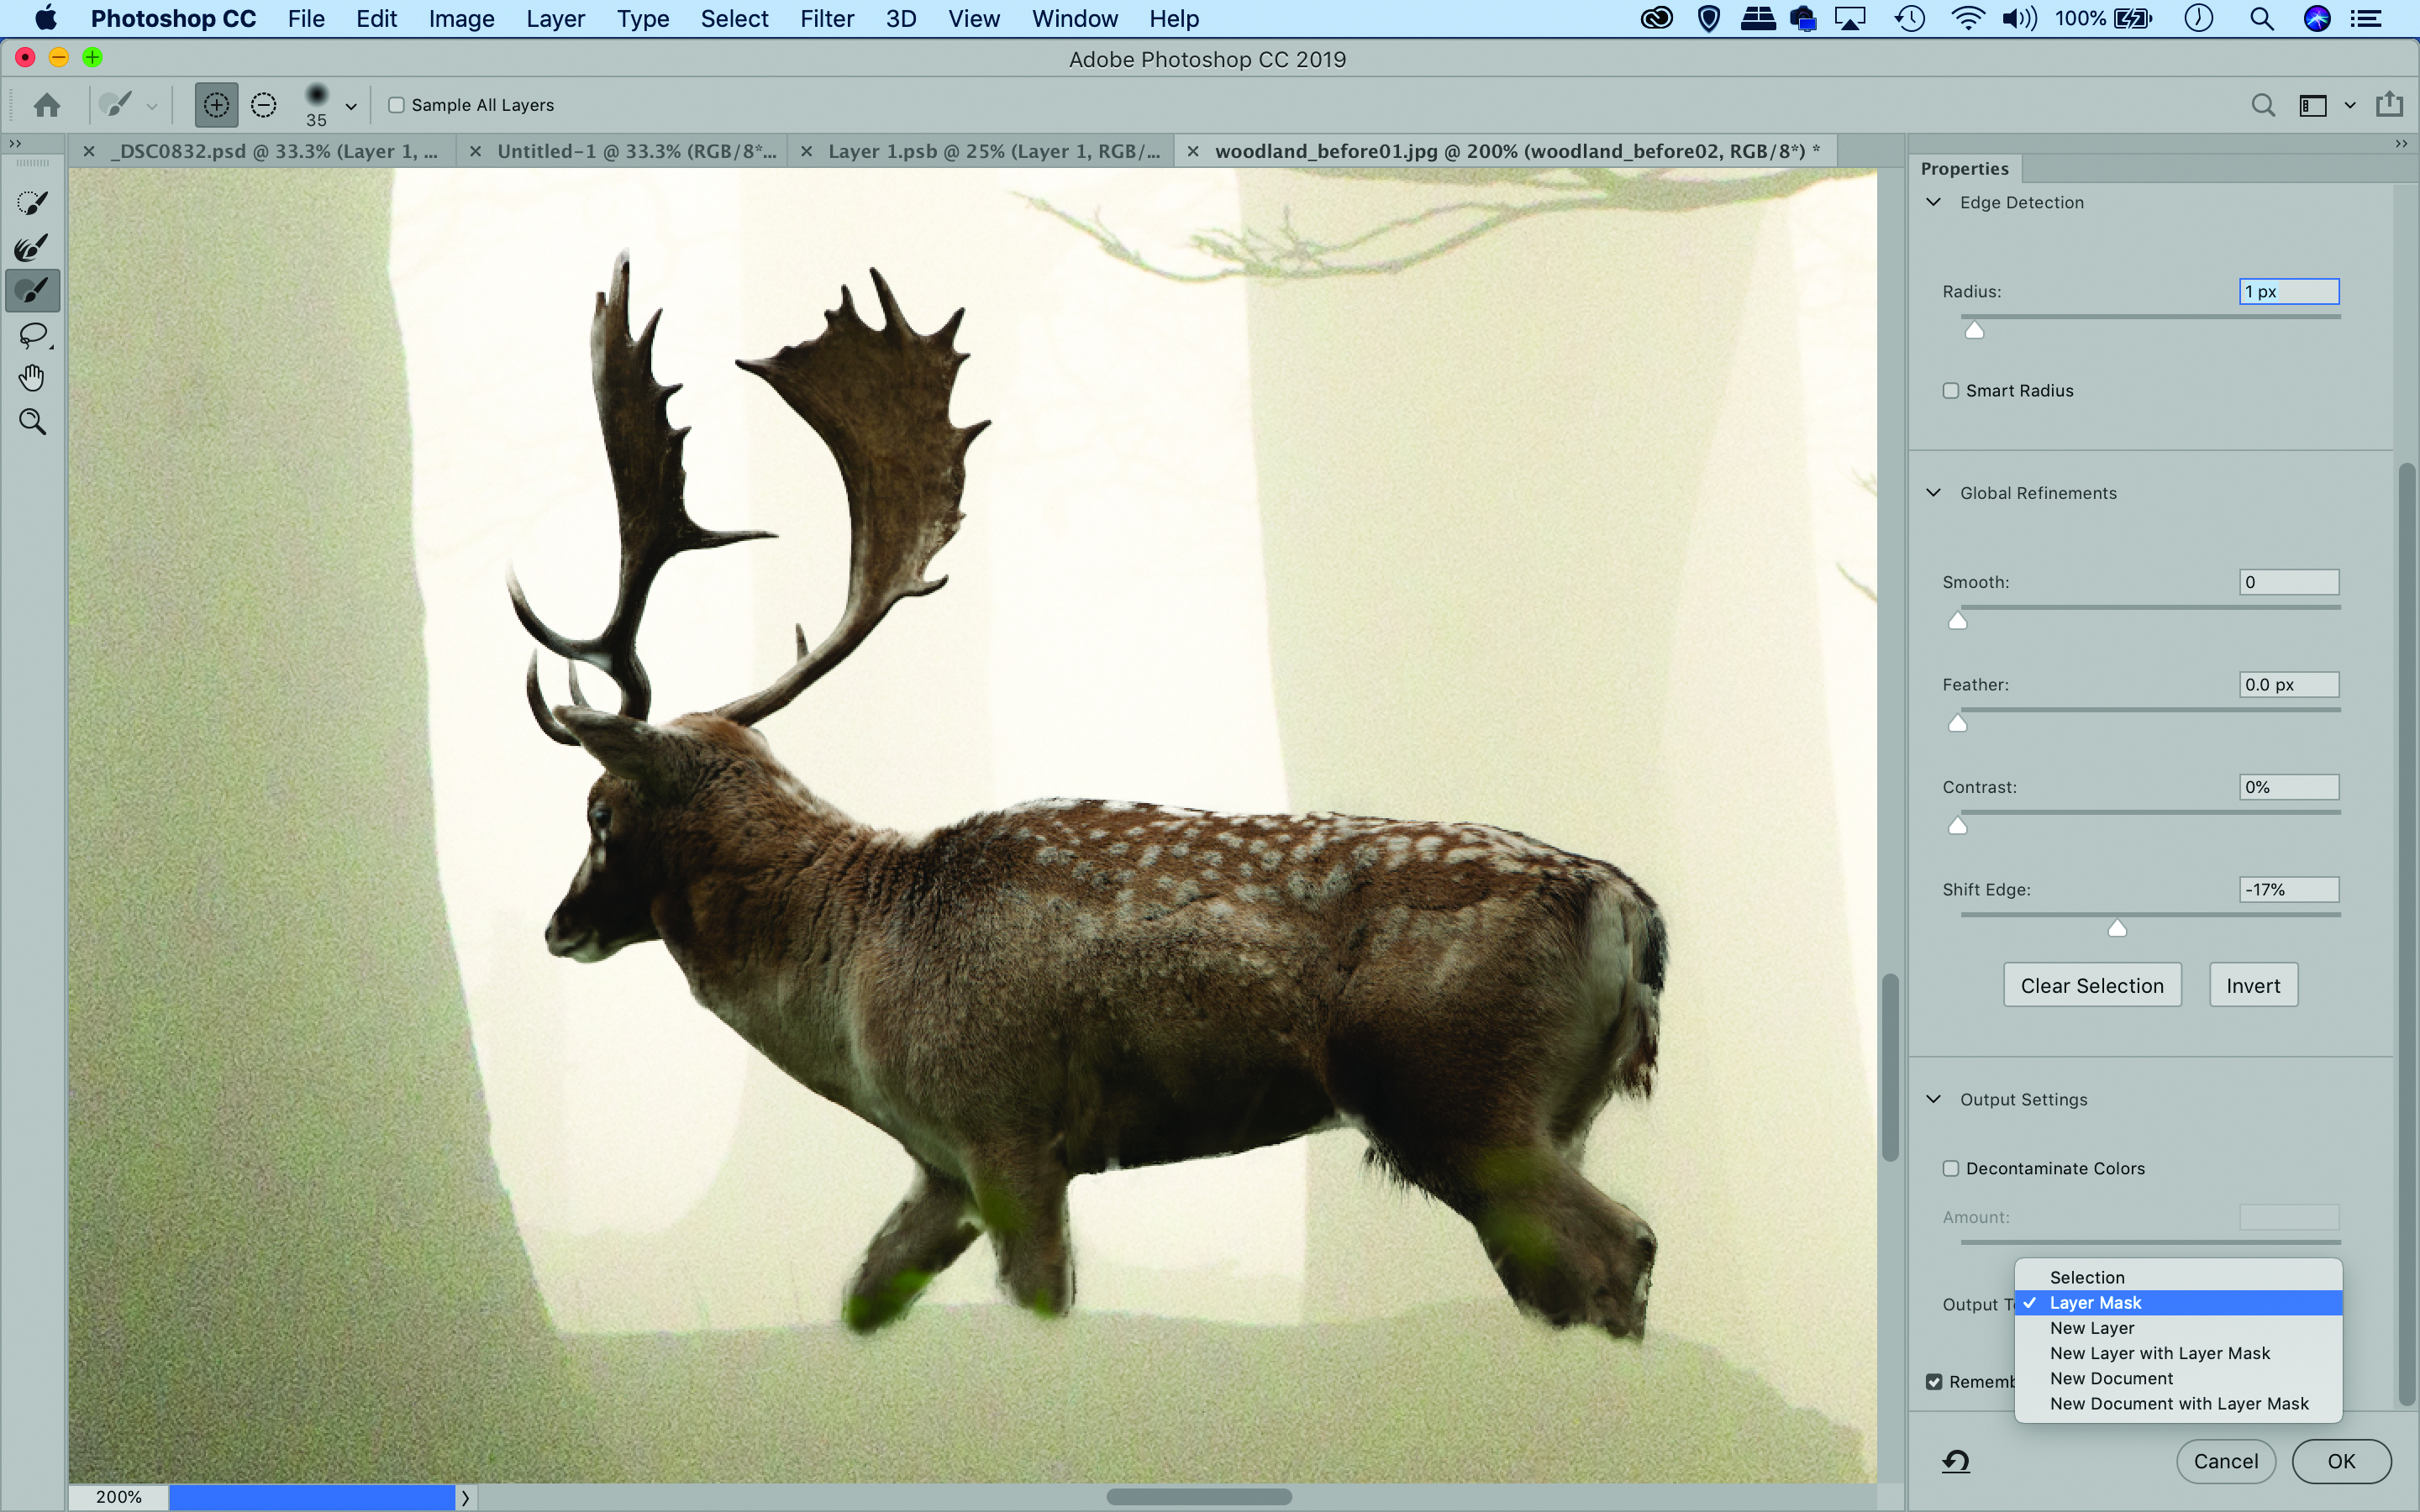
Change View to ‘On Layers’ then increase the Radius slider to improve the selection edge. If the edges need some work, try painting with the Refine Radius Brush, or switch to the Brush tool to go freehand. Next, choose Output to: Layer Mask and hit OK.
04 Match the tones
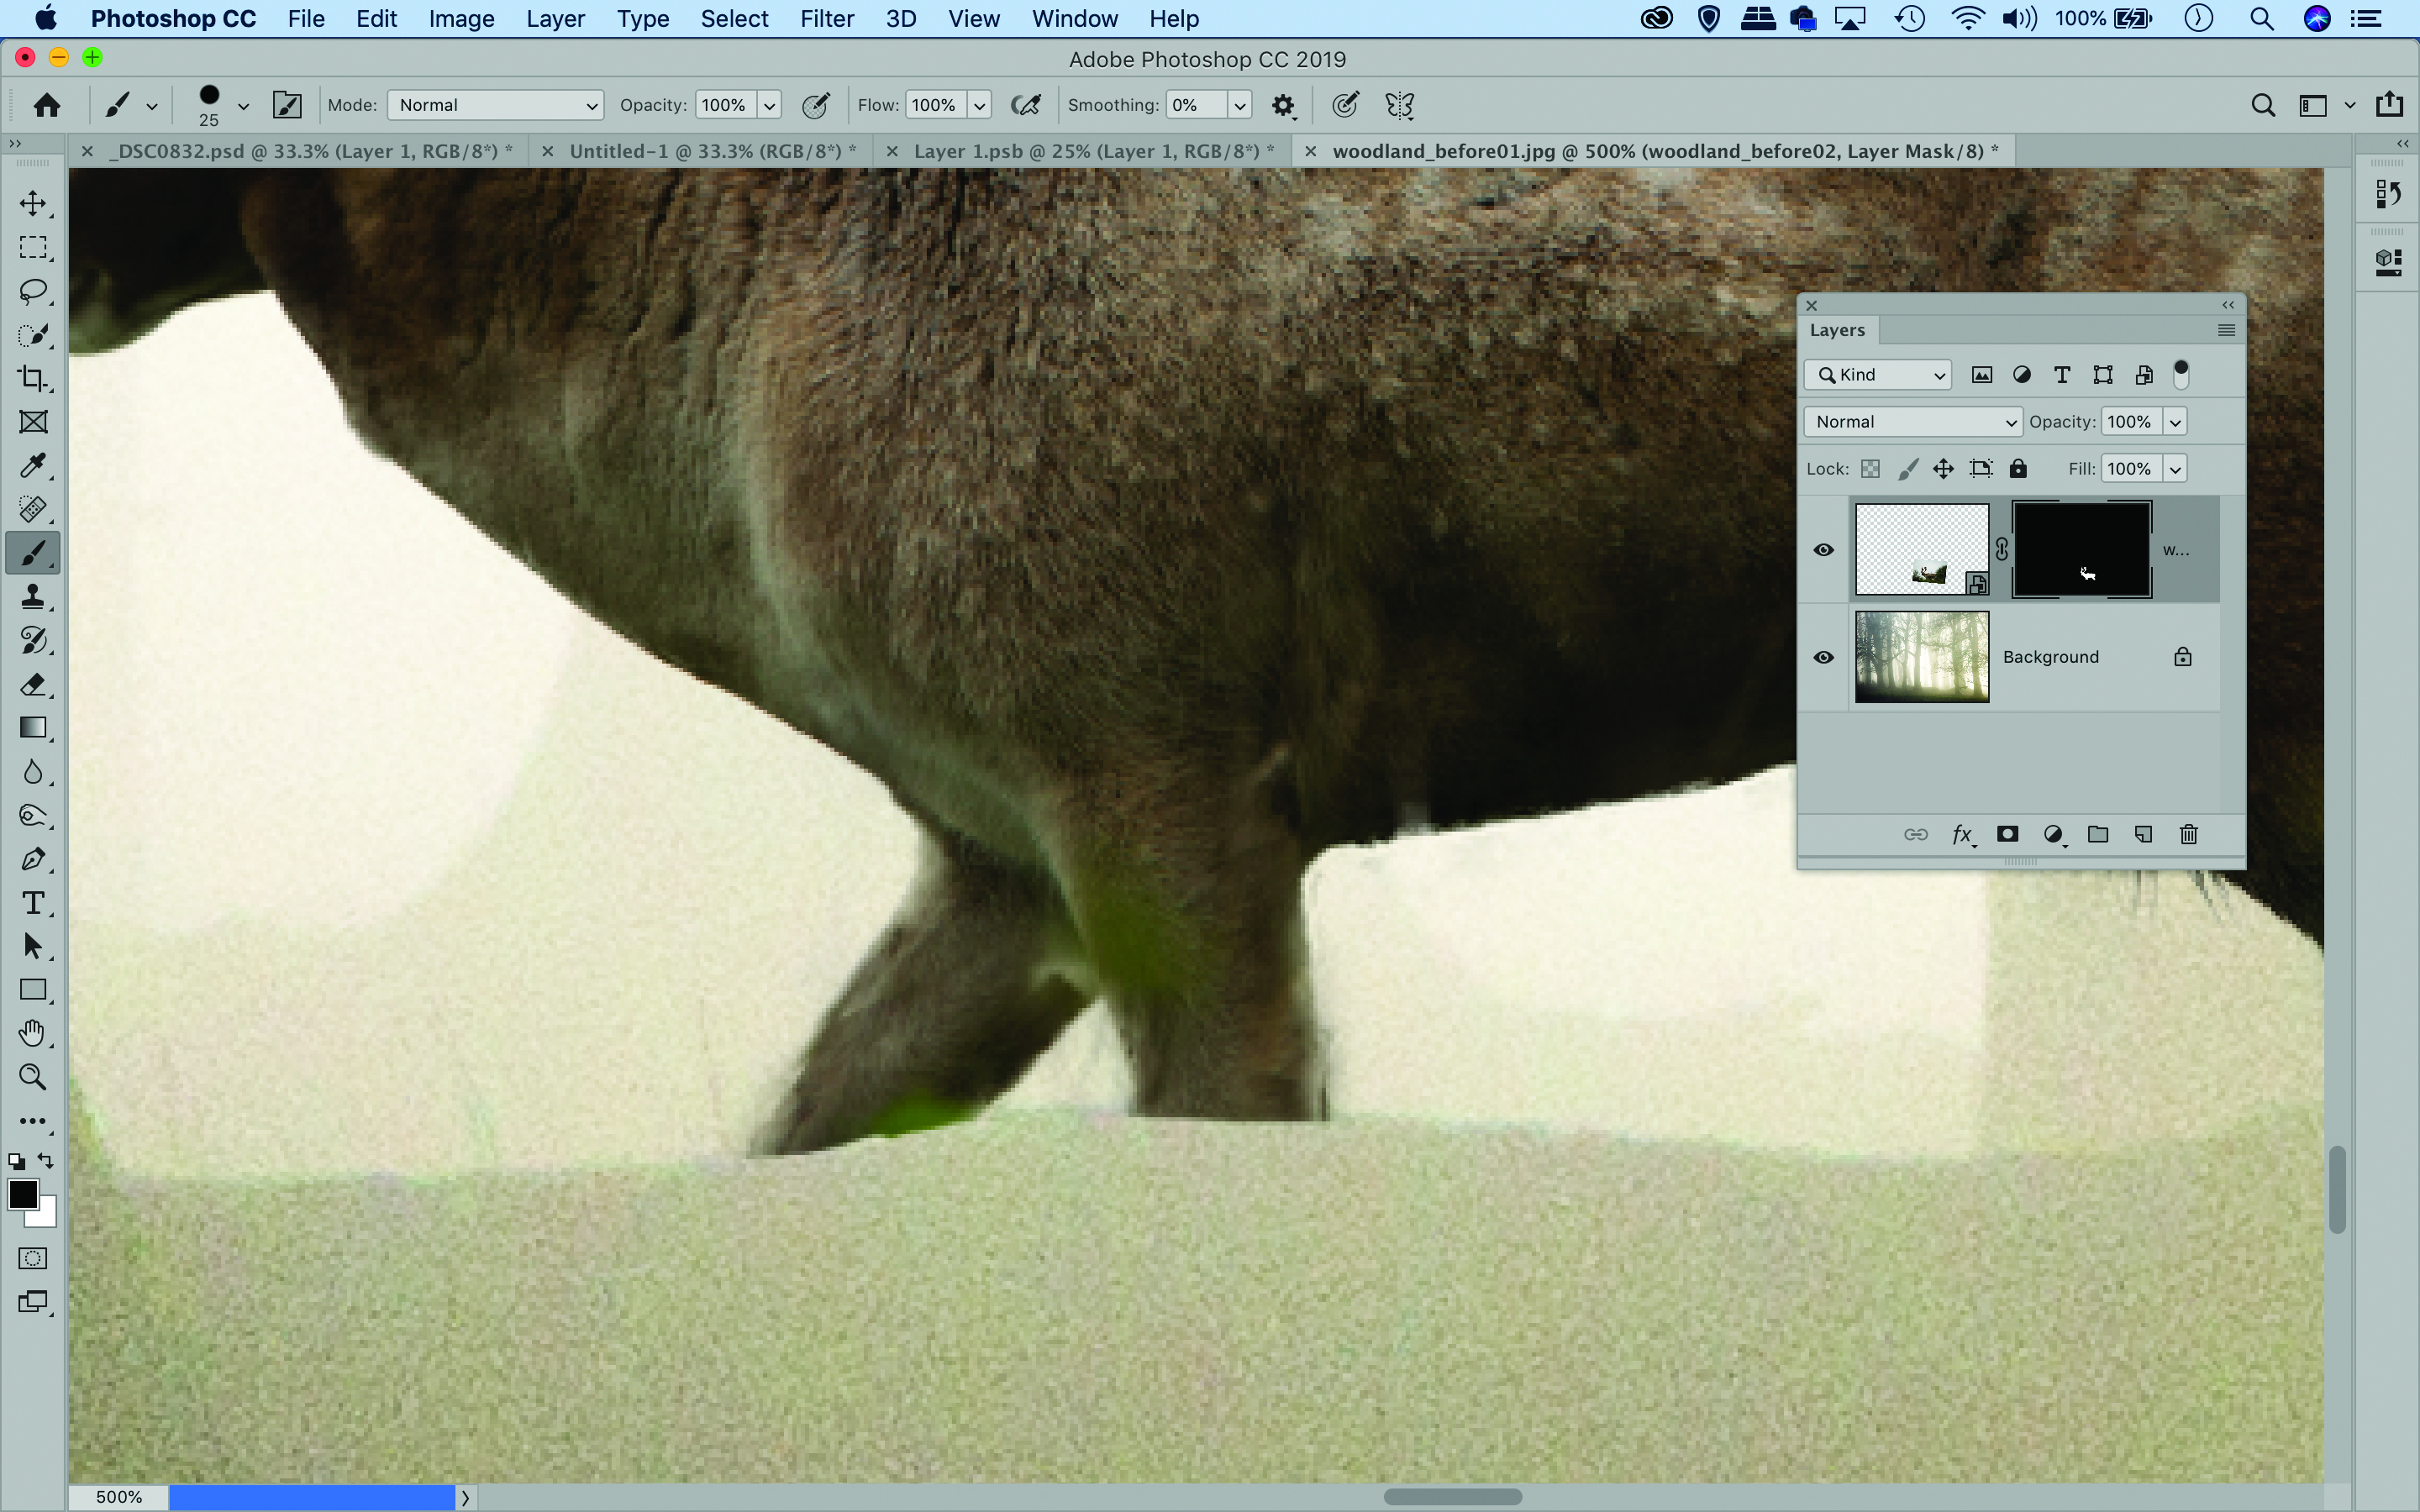
Reposition the stag if necessary then highlight the mask thumbnail in the Layers Panel and paint black over the legs so they appear to go behind the log here. Check the edges of the mask and paint with white or black if you need to fine-tune what is visible or hidden.
05 Tint the shadows
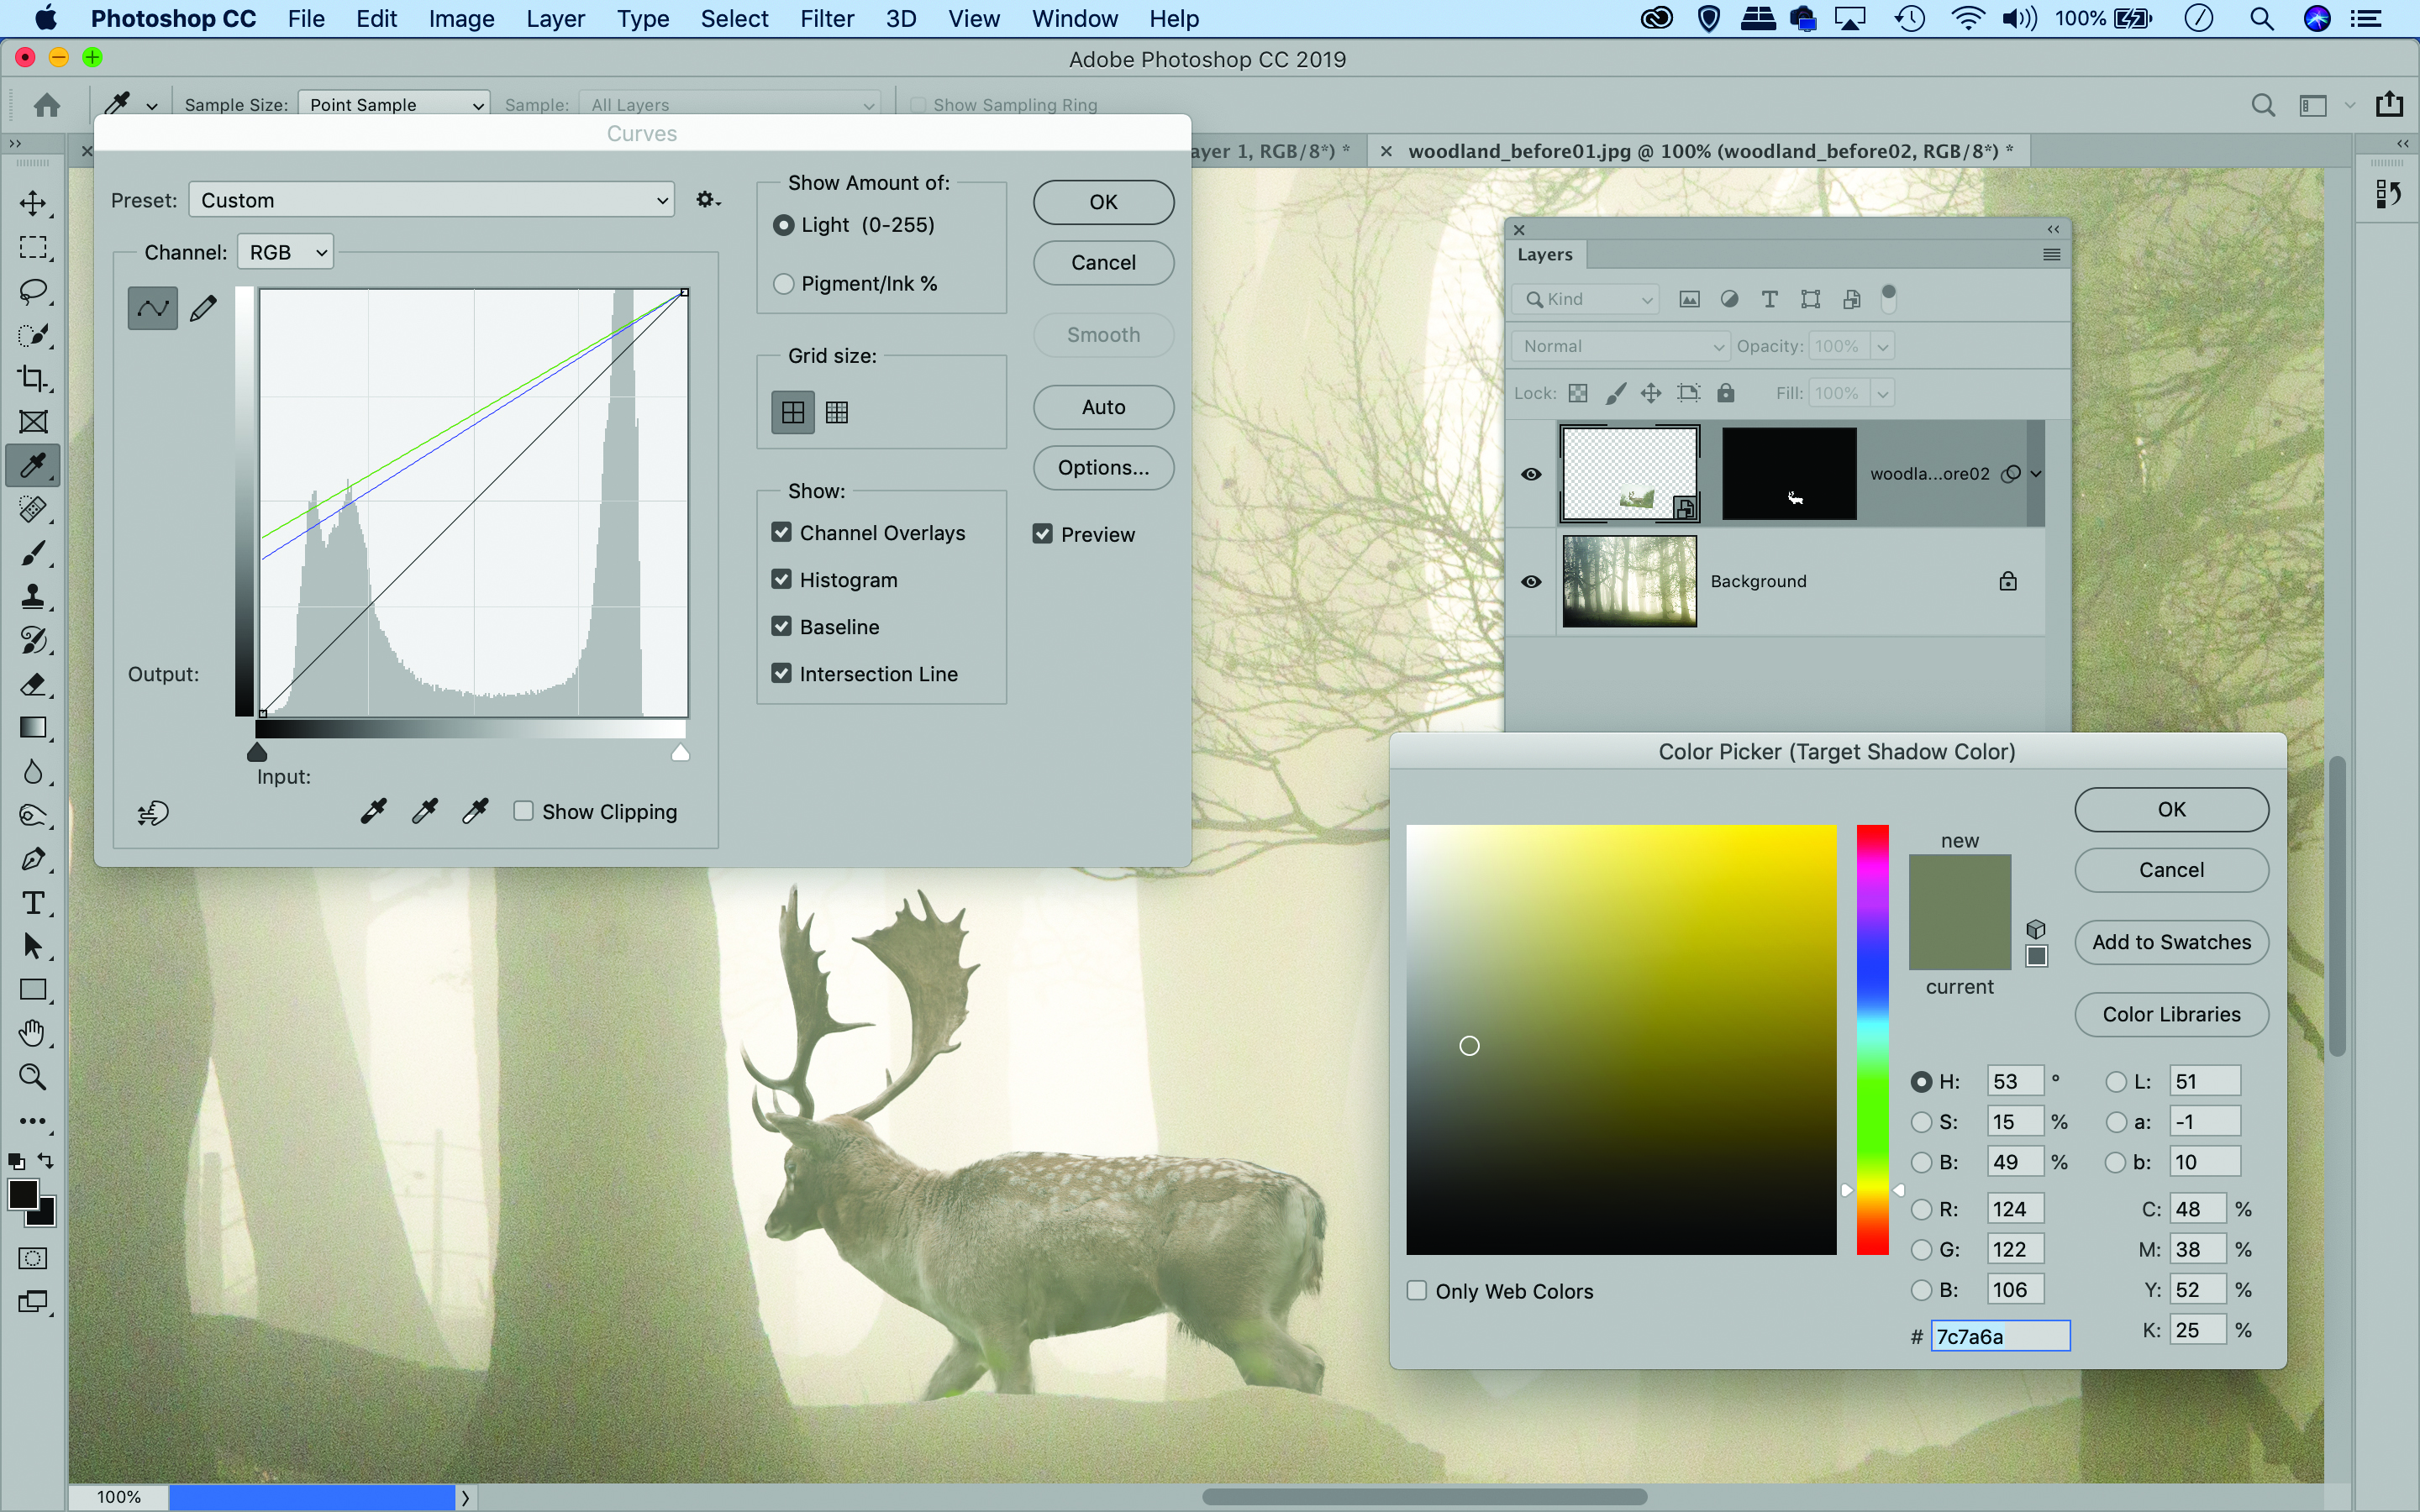
Hit Cmd/Ctrl+M to bring up the Curves box. Double-click the black point eyedropper in the box to open a colour box, then click on a dark tone in the trees near the stag to sample. Hit OK, then click the darkest part of the stag to change the shadow colours. Hit OK.
06 Match the grain
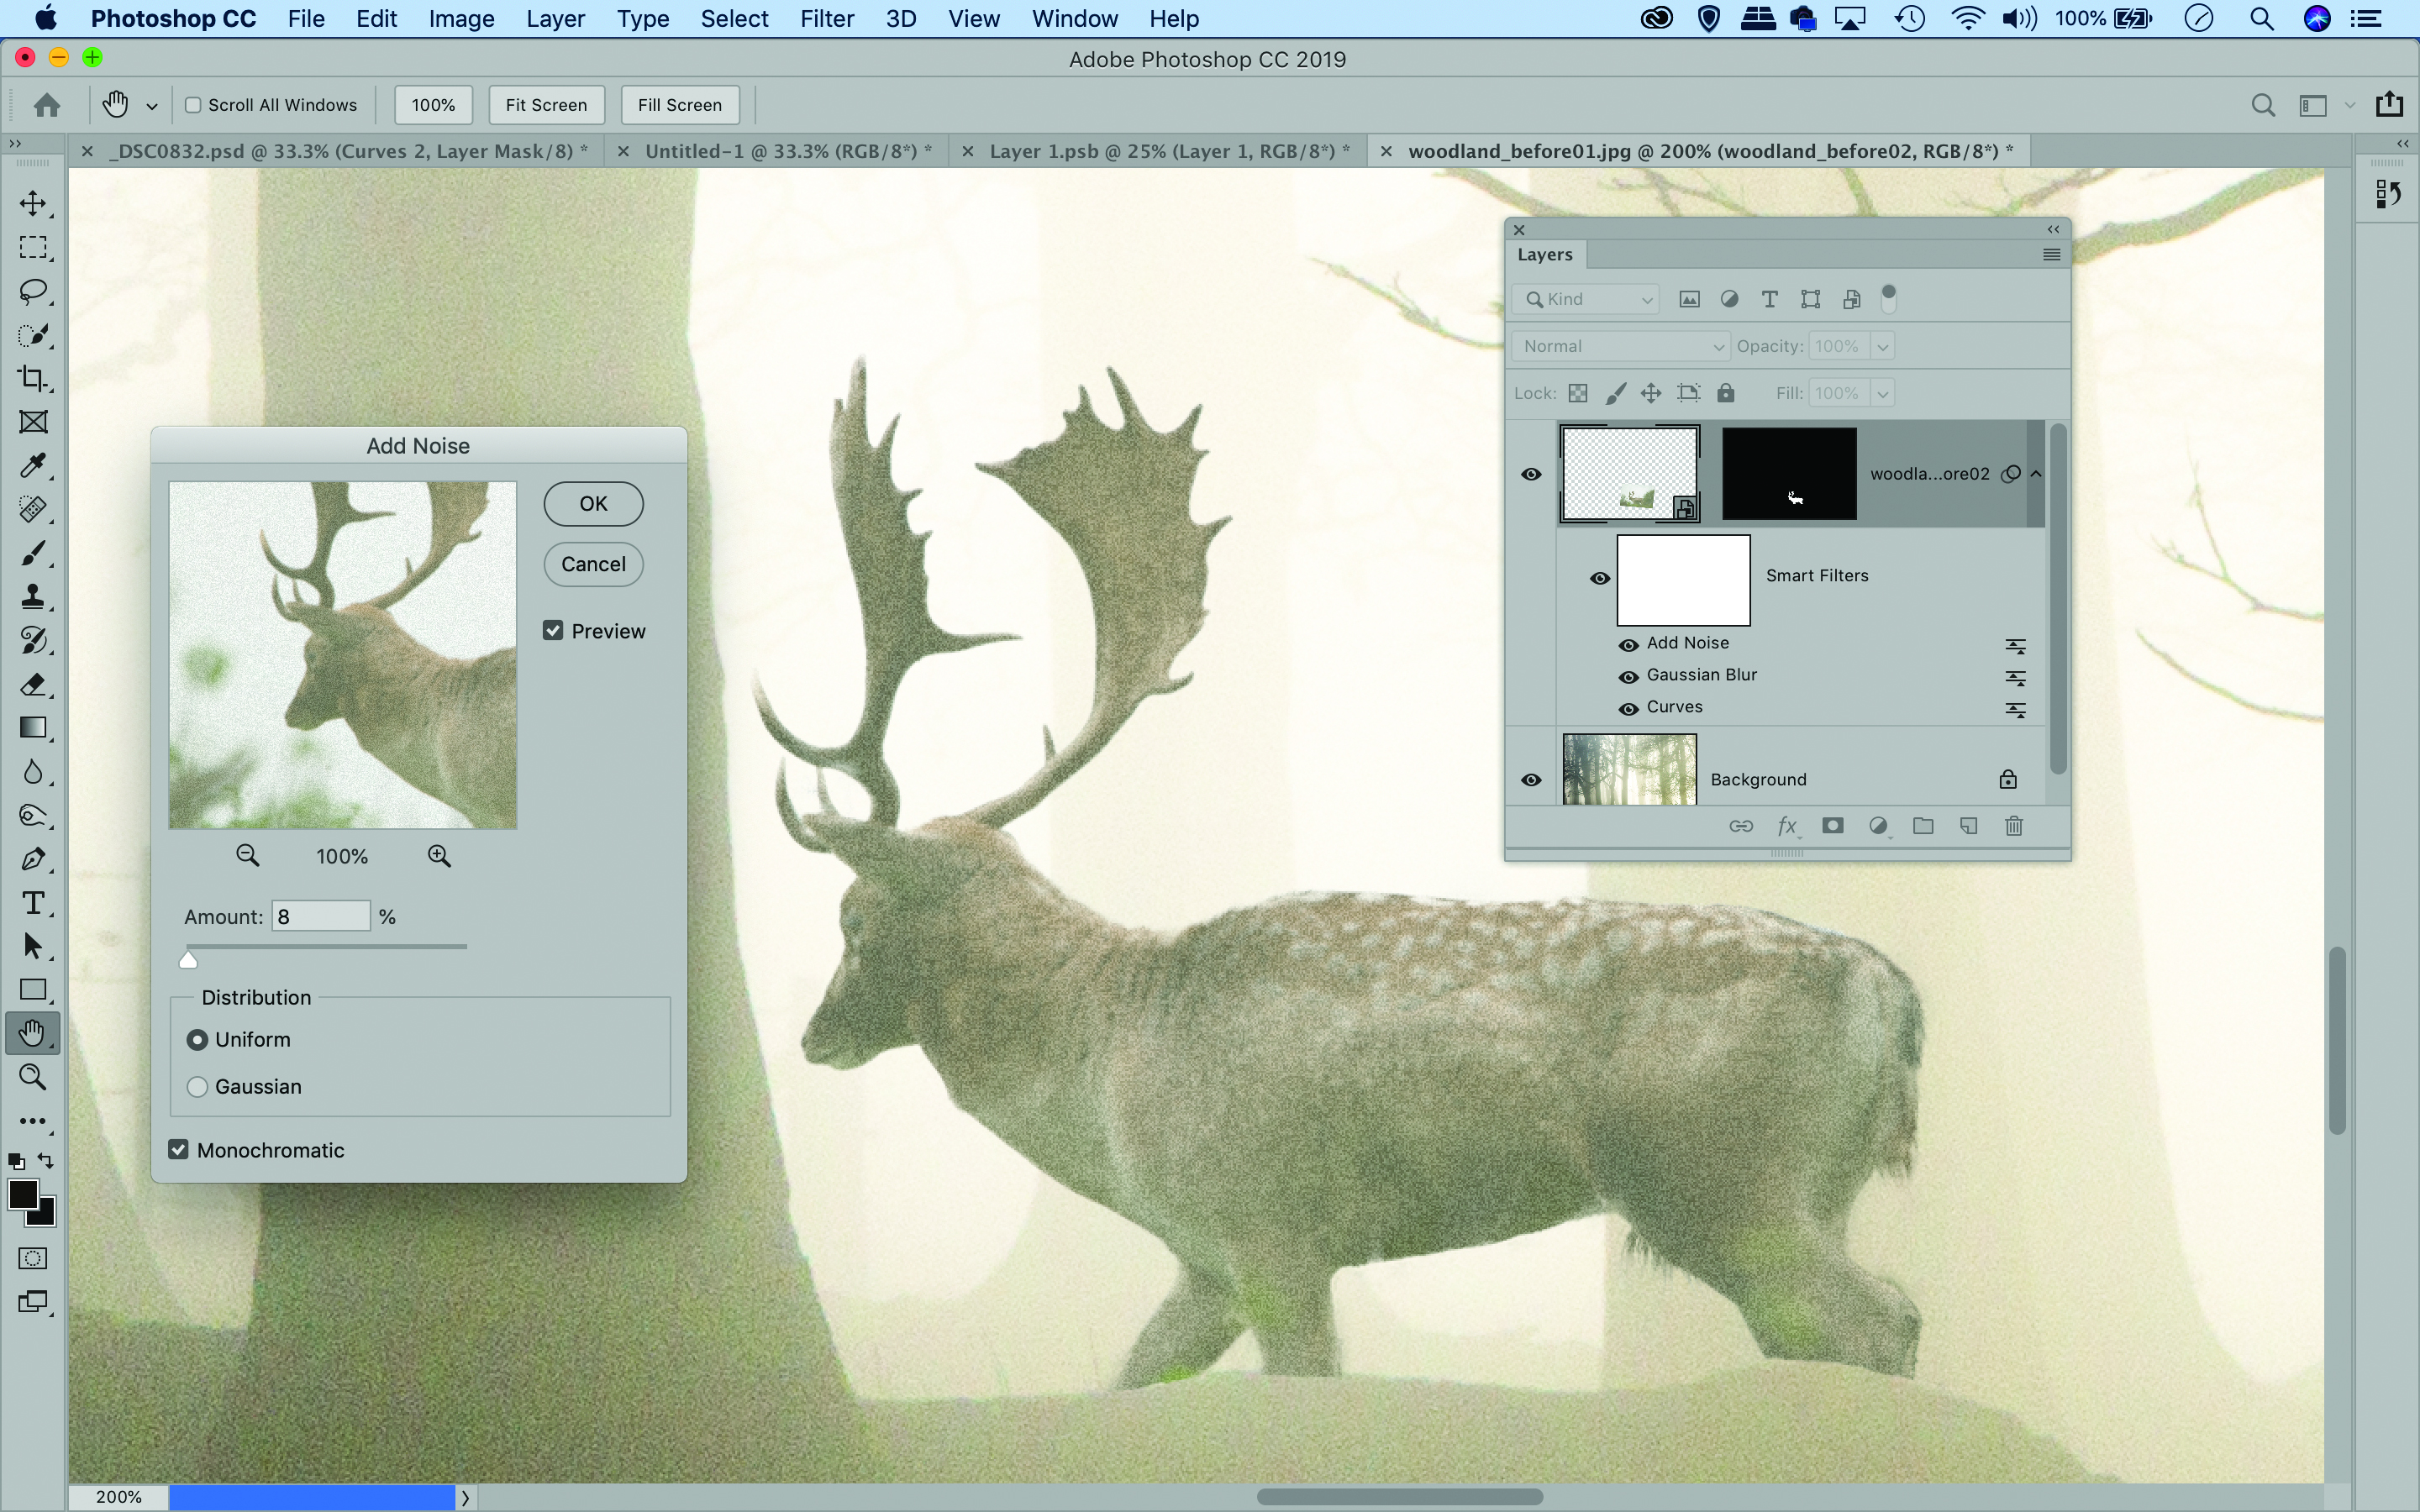
The stag looks too detailed, so go to Filter>Blur>Gaussian Blur, set Amount 1 and hit OK. Next match the noise in the background image. Go to Filter>Noise. Check Monochromatic, set Amount 8 and hit OK. Make any other tonal changes to finish up.
PhotoPlus: The Canon Magazine is the world's only monthly newsstand title that's 100% devoted to Canon, so you can be sure the magazine is completely relevant to your system.
Read more
The best photo editing software: image editors for novices through to pros
The best photo-editing laptops: top laptops for photographers
10 best online photography courses – from beginner guides to masterclasses
The lead technique writer on Digital Camera Magazine, PhotoPlus: The Canon Magazine and N-Photo: The Nikon Magazine, James is a fantastic general practice photographer with an enviable array of skills across every genre of photography.
Whether it's flash photography techniques like stroboscopic portraits, astrophotography projects like photographing the Northern Lights, or turning sound into art by making paint dance on a set of speakers, James' tutorials and projects are as creative as they are enjoyable.
He's also a wizard at the dark arts of Photoshop, Lightroom and Affinity Photo, and is capable of some genuine black magic in the digital darkroom, making him one of the leading authorities on photo editing software and techniques.


