The best camera deals, reviews, product advice, and unmissable photography news, direct to your inbox!
You are now subscribed
Your newsletter sign-up was successful
Watch video: How to sharpen an image in Photoshop Elements
While we don’t have the ability to turn a completely out-of-focus shot into a sharp one, or at least not for the moment anyway, we are able to make a sharp shot look razor-sharp… or turn a slightly soft image into a passable one.
Sharpening is a key part of the editing process, but what you’re actually doing is boosting contrast around hard lines and edges in your shot to raise the perceived level of sharpness. This can be done in various way in Photoshop CC or Photoshop Elements 2020, and we’ll be using the latter for this tutorial.
The steps are identical in both pieces of software. We’ll be using a High Pass layer for the sharpening effect and this gives you the extra control of being able to dial the effect down if it’s too strong. We’ll also use a layer mask, so you’re only sharpening important details, like the eyes of this portrait, and not making noise more prominent.
• Best online photography courses
How to sharpen an image in Photoshop Elements
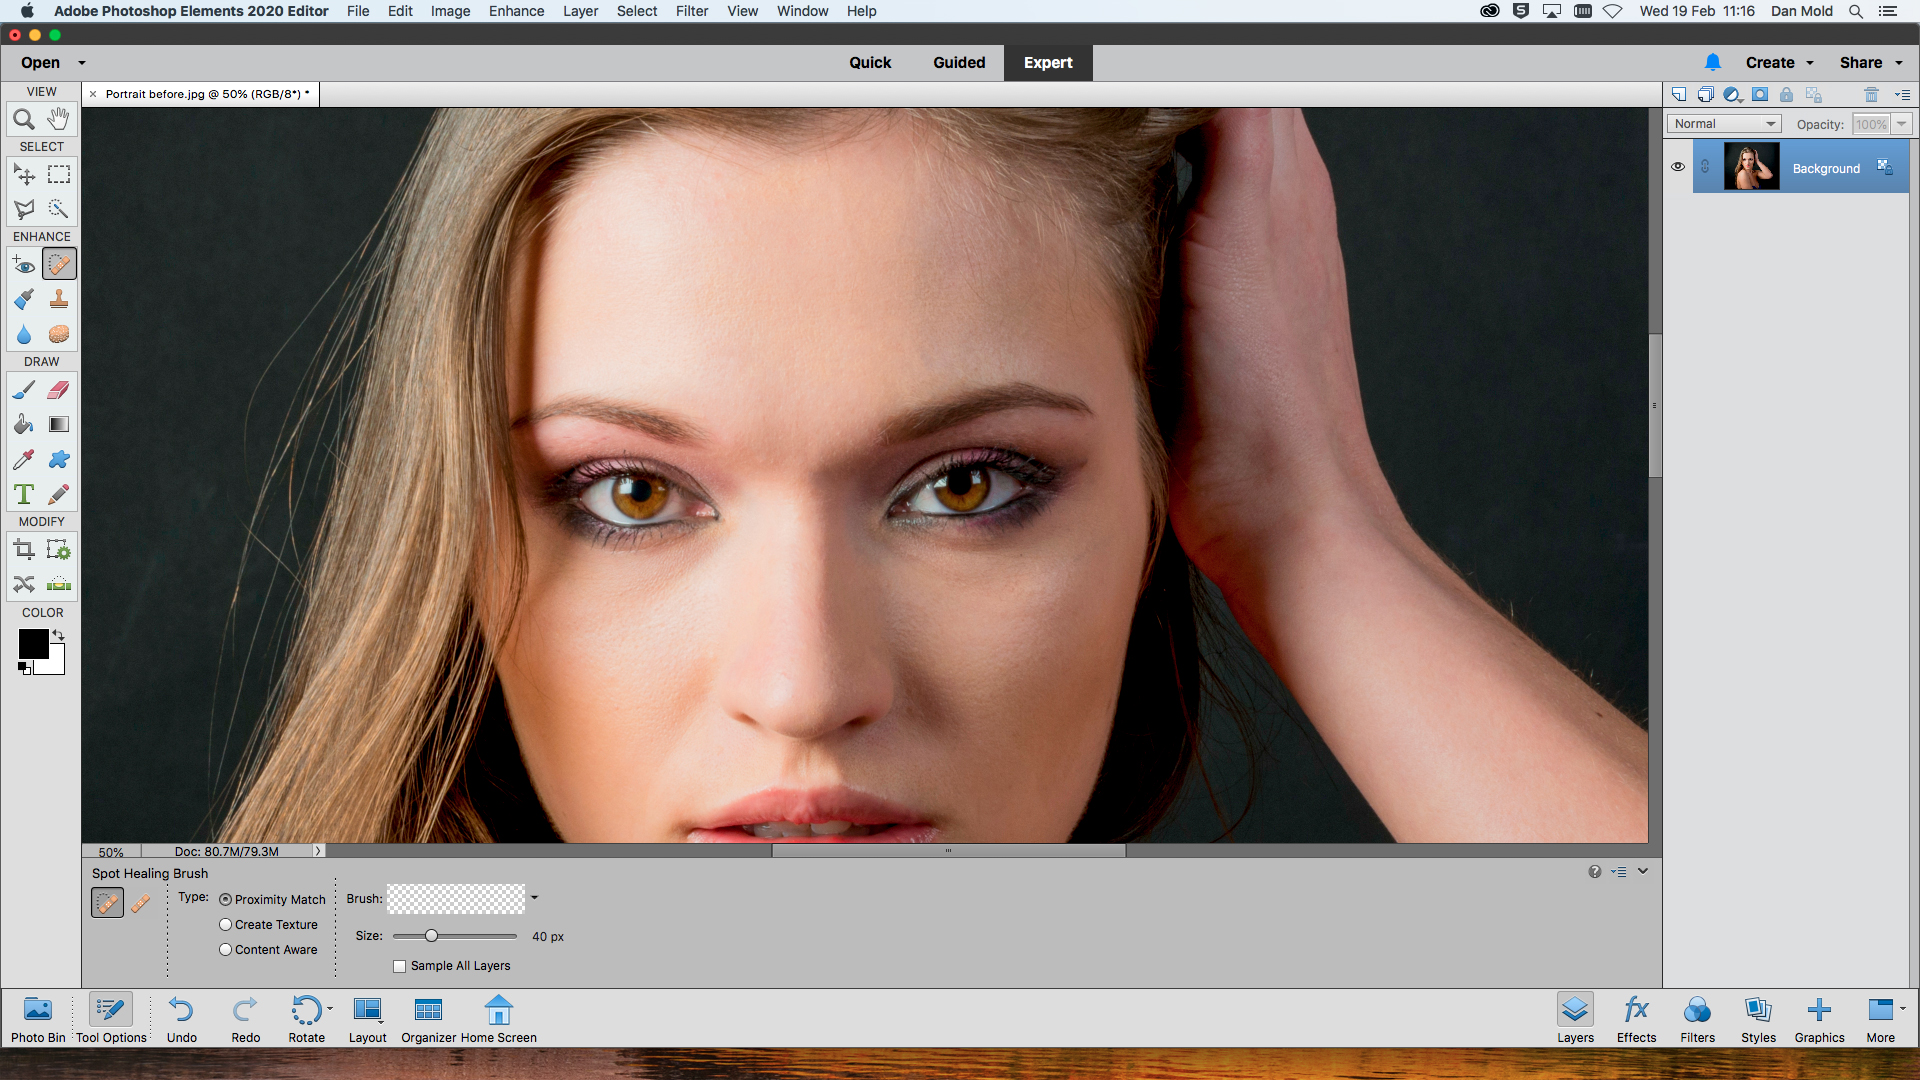
01 Remove imperfections
The first thing to do is to remove any blemishes and imperfections on the skin with the Spot Healing Brush Tool, otherwise these will become more exaggerated when sharpened.
The best camera deals, reviews, product advice, and unmissable photography news, direct to your inbox!
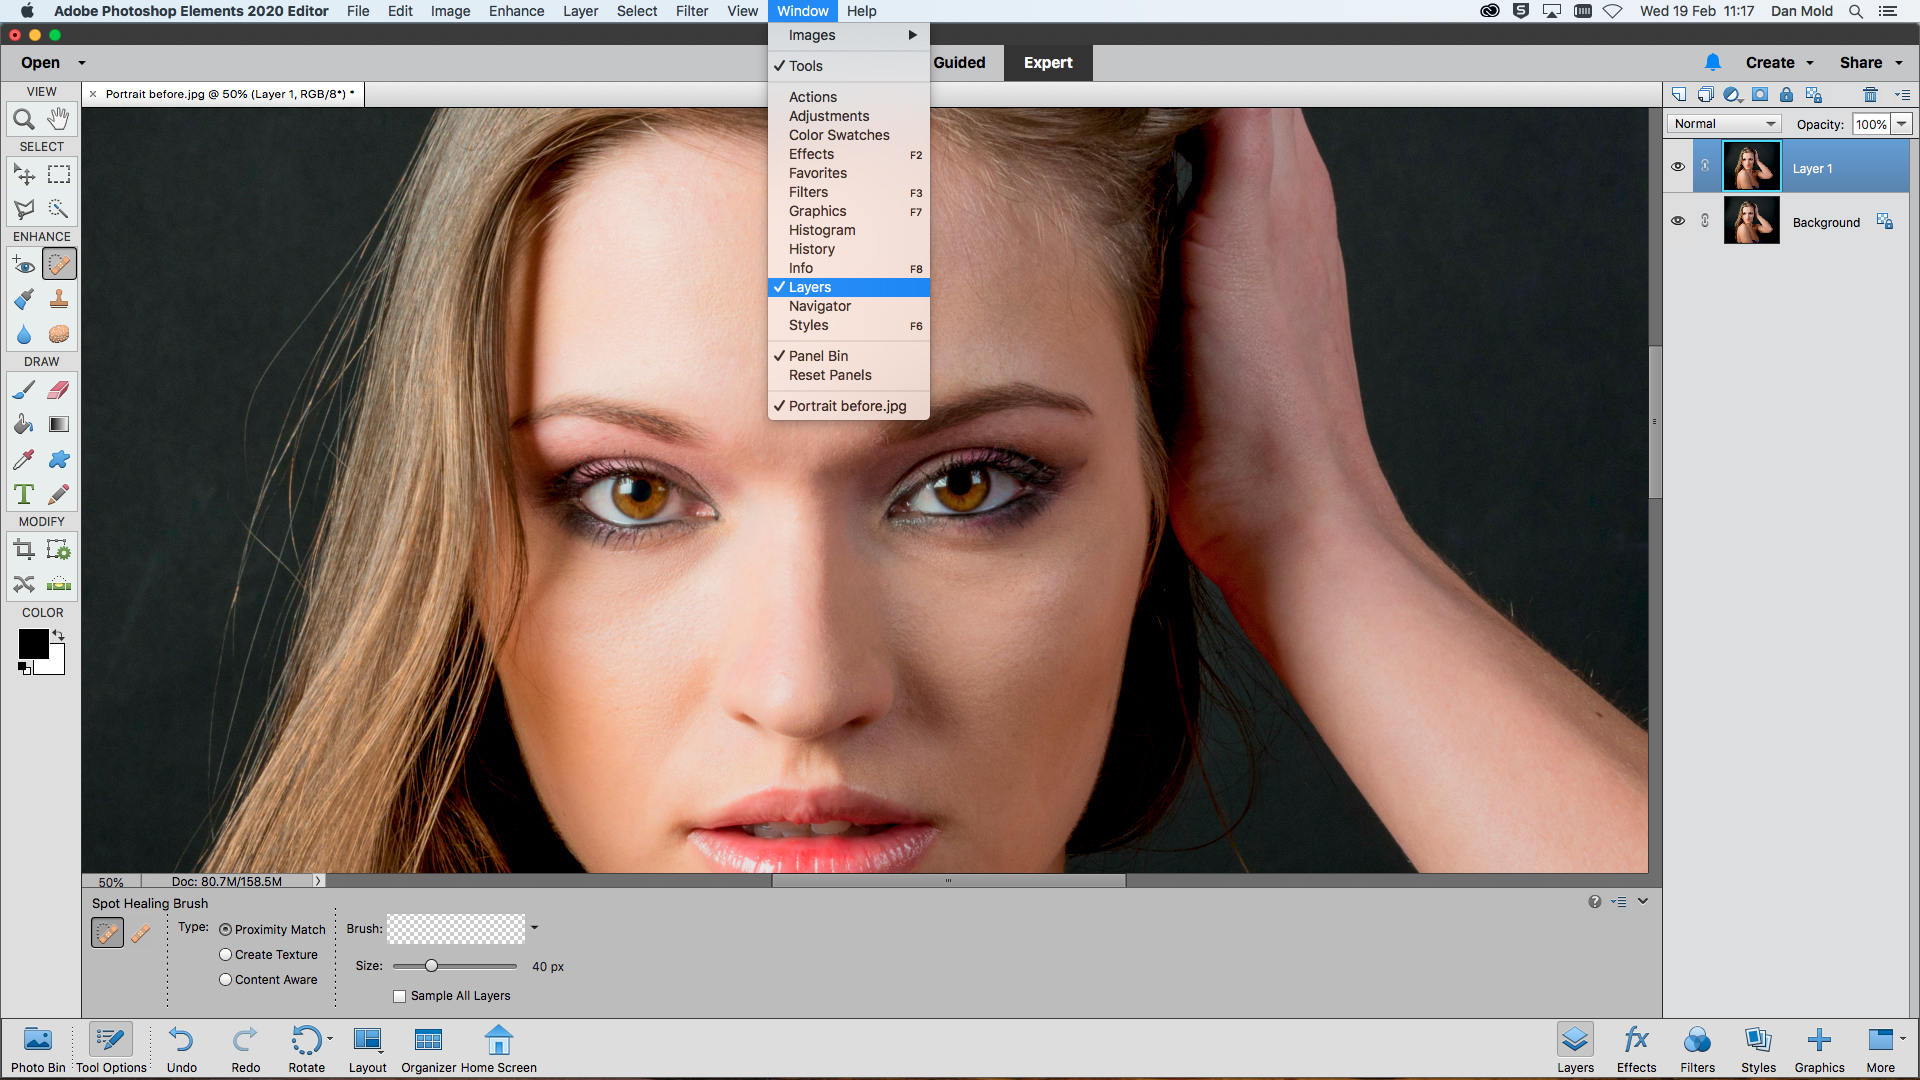
02 Duplicate your layer
Head over to your Layers panel by going to Window > Layers – it’ll appear on the right of the interface. Now, hit Ctrl + J on a PC, or Cmd + J on a Mac, on the keyboard to duplicate the Background Layer.
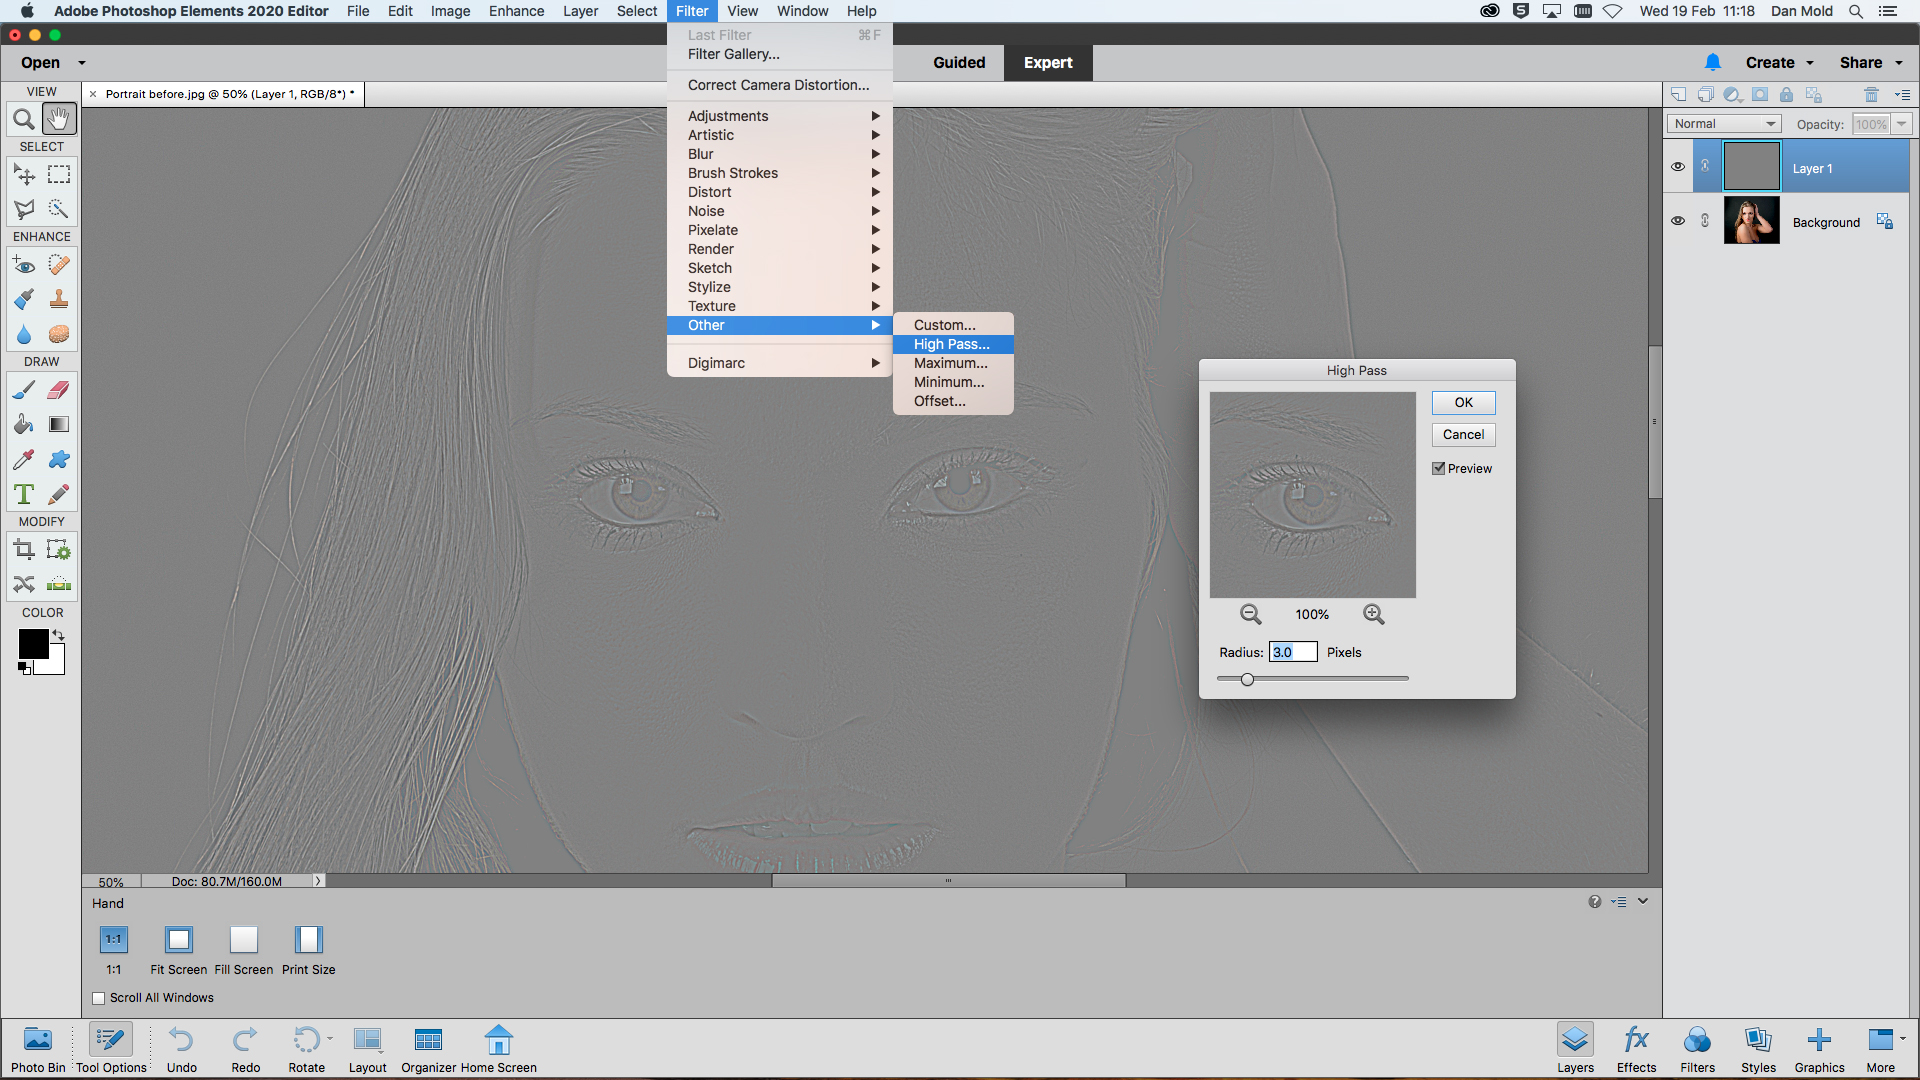
03 Create a high pass layer
Next, head to Filter > Other > High Pass and set the Radius amount in the High Pass dialogue box to a low value, around 3-5px usually works well. Now hit OK to apply your sharpening effect.
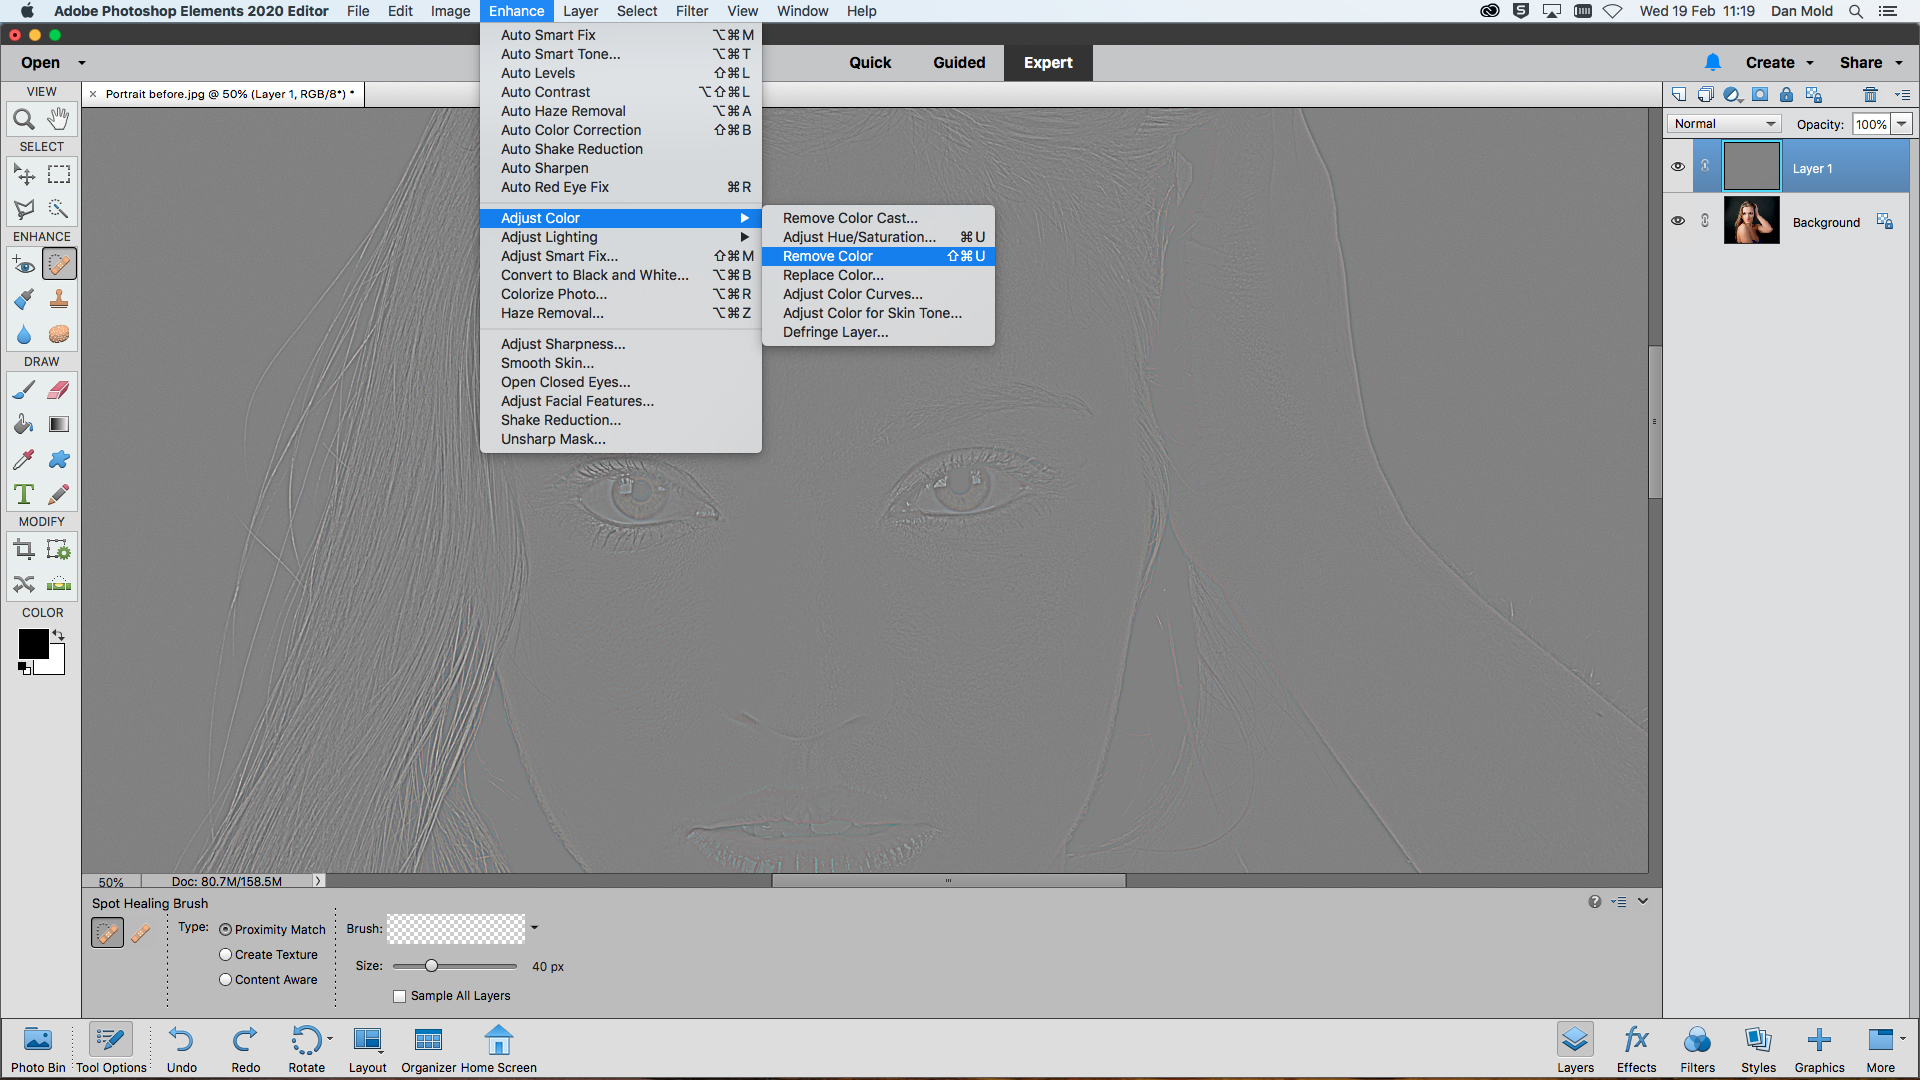
04 Remove the color
Your high pass layer currently has a small amount of color in it, which will distort the colors of your picture when blended. To stop this happening go to Enhance > Adjust Color > Remove Color.
05 Blend it in
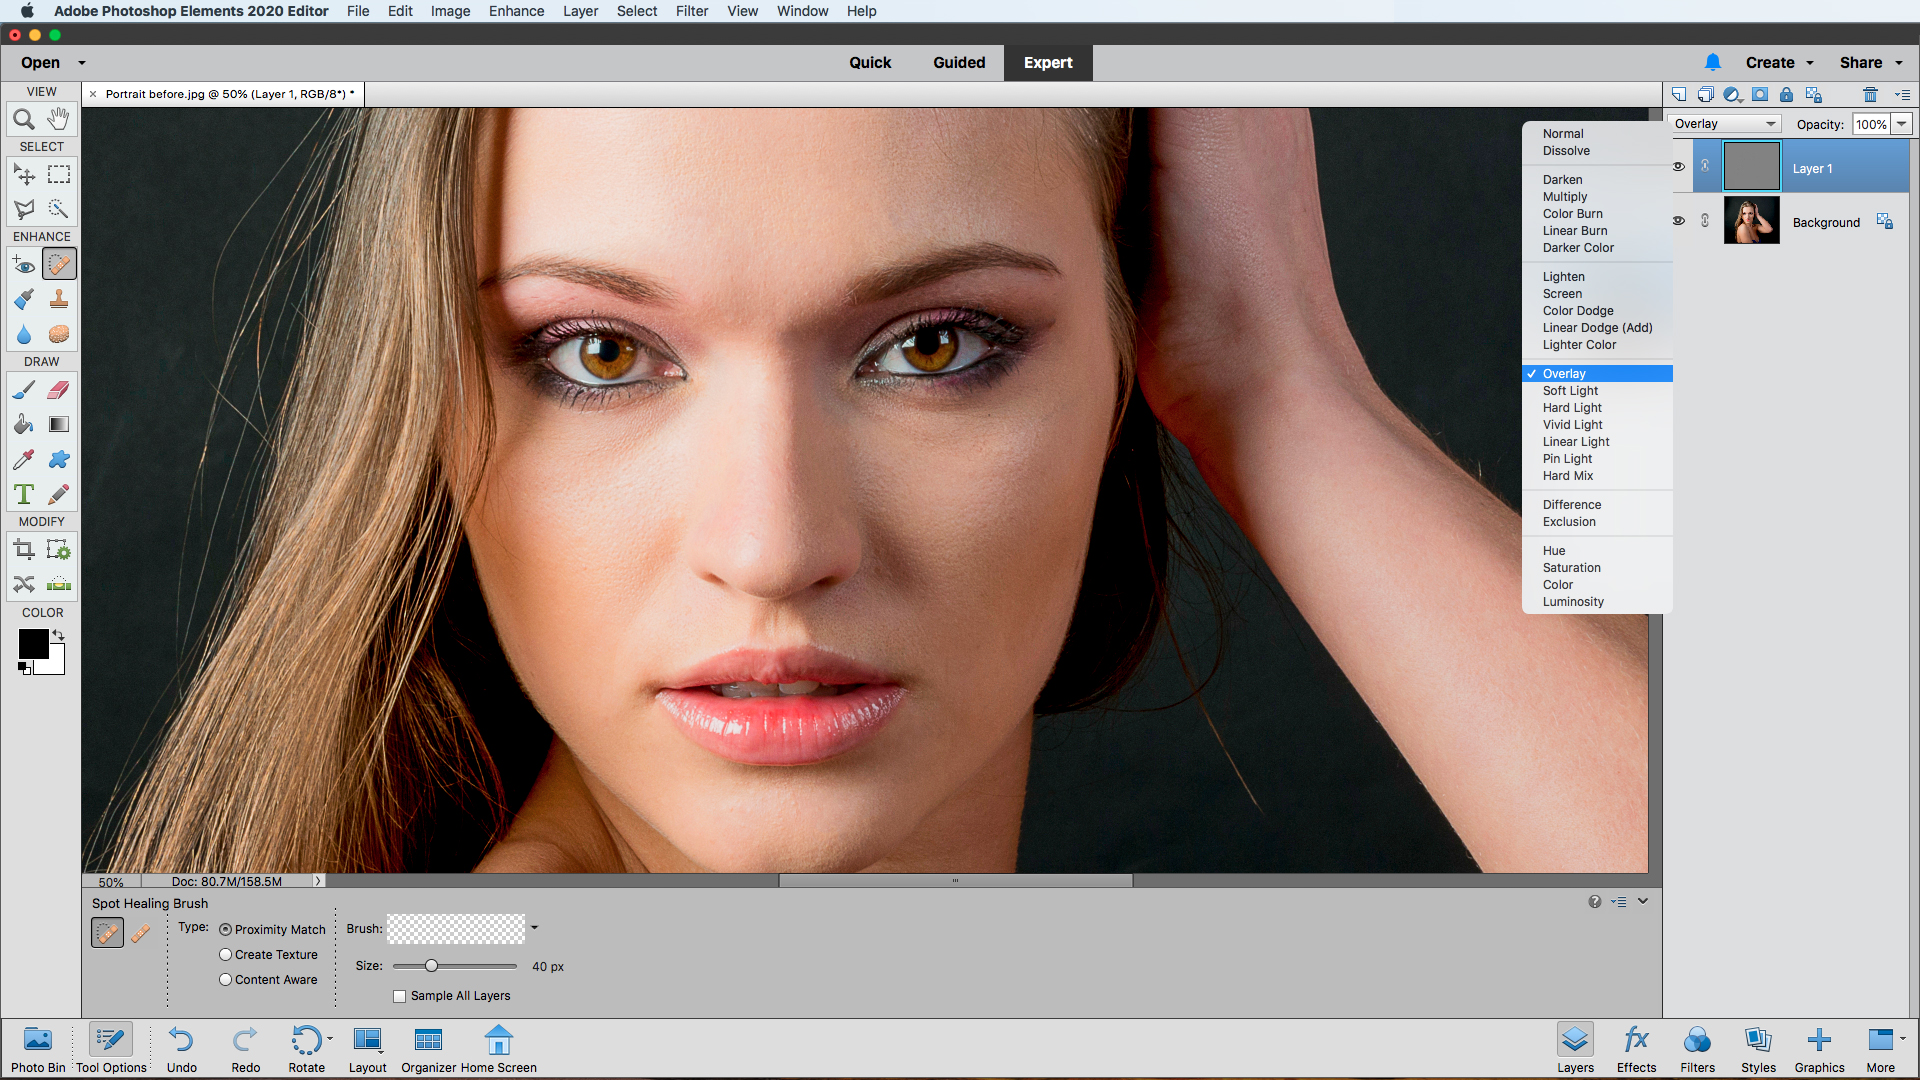
Now it’s time to blend in the high pass layer to sharpen your shot, so head to the Layers panel and click on the drop-down box that says Normal, this is your Blending Mode, and change it to Overlay.
06 Mask it off
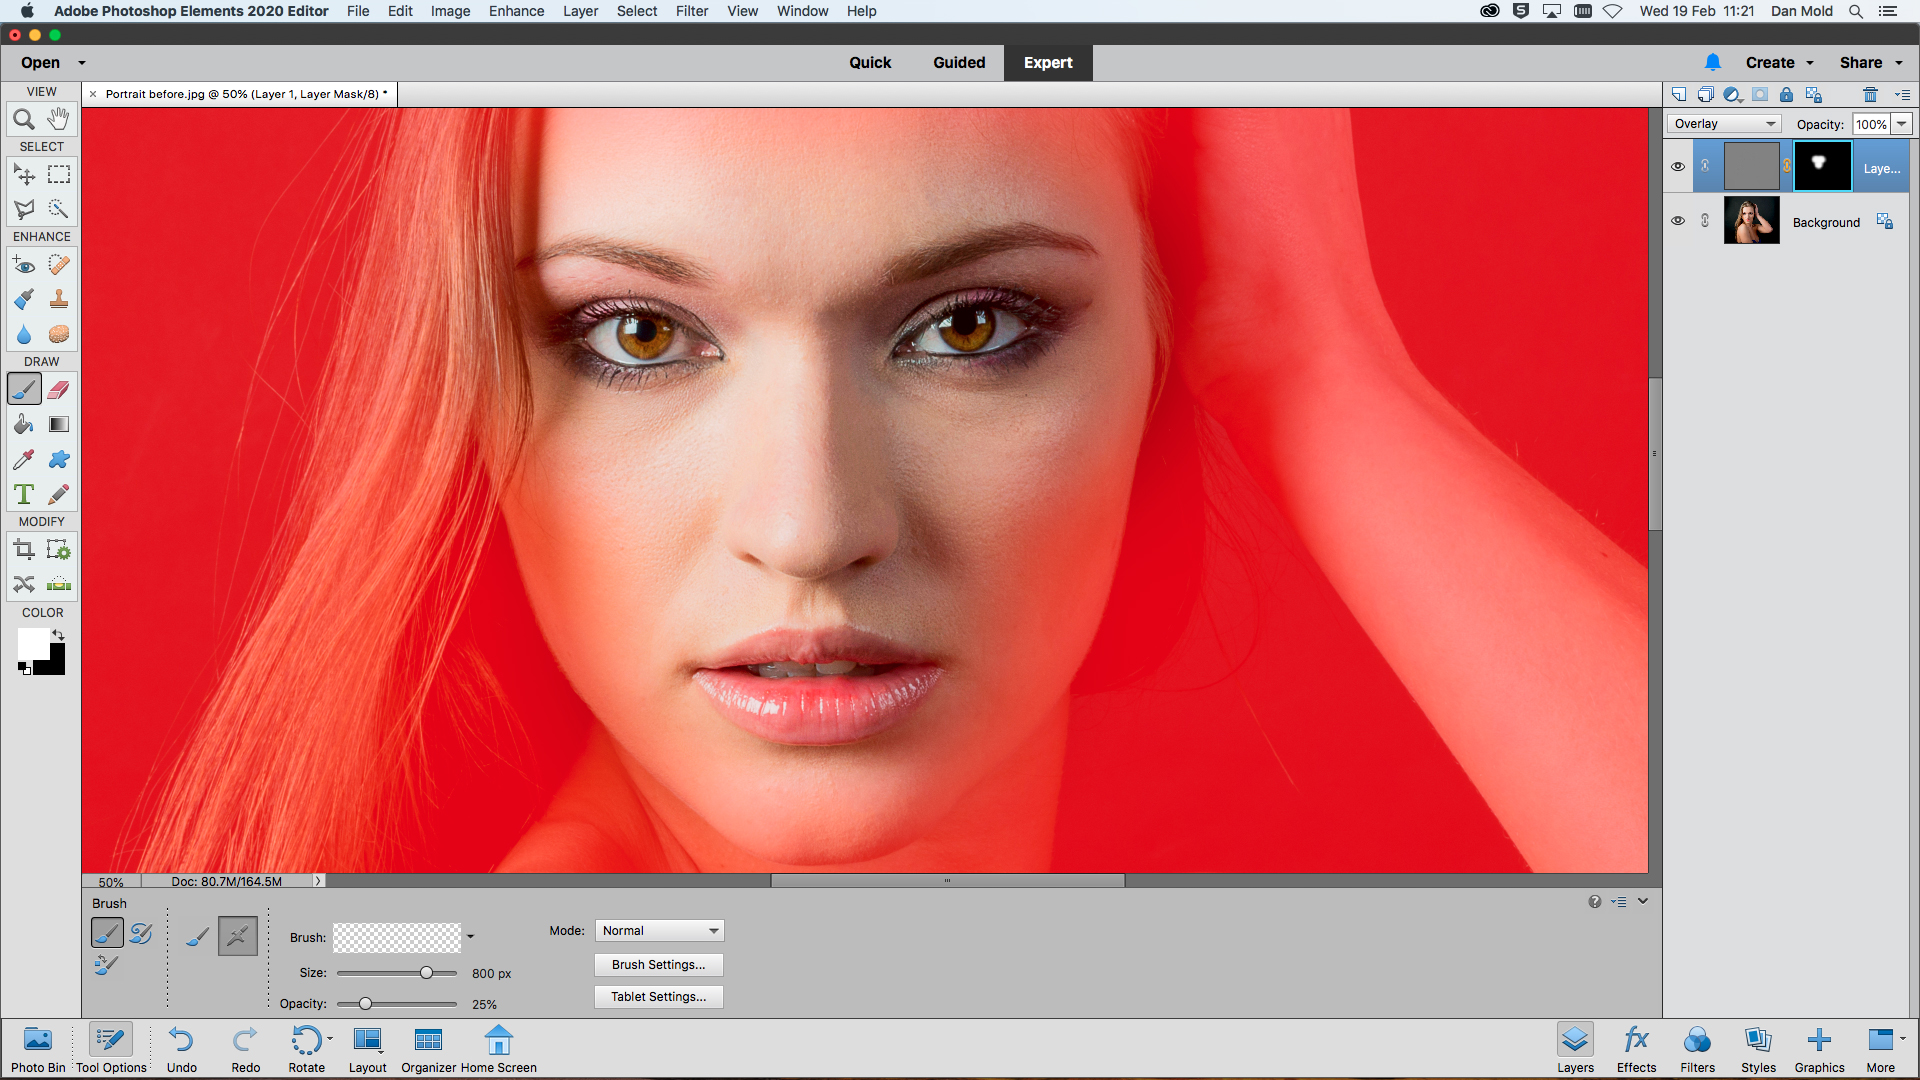
Click on the Add Layer Mask icon and hit Ctrl / Cmd + I to totally mask off the layer. Then use a soft-edged white Brush Tool to paint over the parts of your shots you want to sharpen like the features of the face.
PhotoPlus: The Canon Magazine is the world's only monthly newsstand title that's 100% devoted to Canon, so you can be sure the magazine is completely relevant to your system.
Read more:
The best photo editing software: image editors for novices through to pros
The best photo-editing laptops in 2020: top laptops for photographers
10 best online photography courses – from beginner guides to masterclasses

In addition to being a freelance photographer and filmmaker, Dan is a bona fide expert on all things Canon and Adobe. Not only is he an Adobe-certified Photoshop guru, he's spent over 10 years writing for specialist magazines including stints as the Deputy Editor for PhotoPlus: The Canon Magazine, Technical Editor for Practical Photography and Photoshop Editor on Digital Photo.
