The best camera deals, reviews, product advice, and unmissable photography news, direct to your inbox!
You are now subscribed
Your newsletter sign-up was successful
To get great shots of hot air balloons
Time needed: A few hours
Skill level: Beginner
Kit needed: DSLR, wide-angle zoom or travel zoom (if going up in a balloon)
Hot air balloons have a beauty that’s very different from other modes of flight. Shooting helicopters and planes can be exhilarating, but hot air balloons are much slower moving, as their movement is dictated largely by the wind.
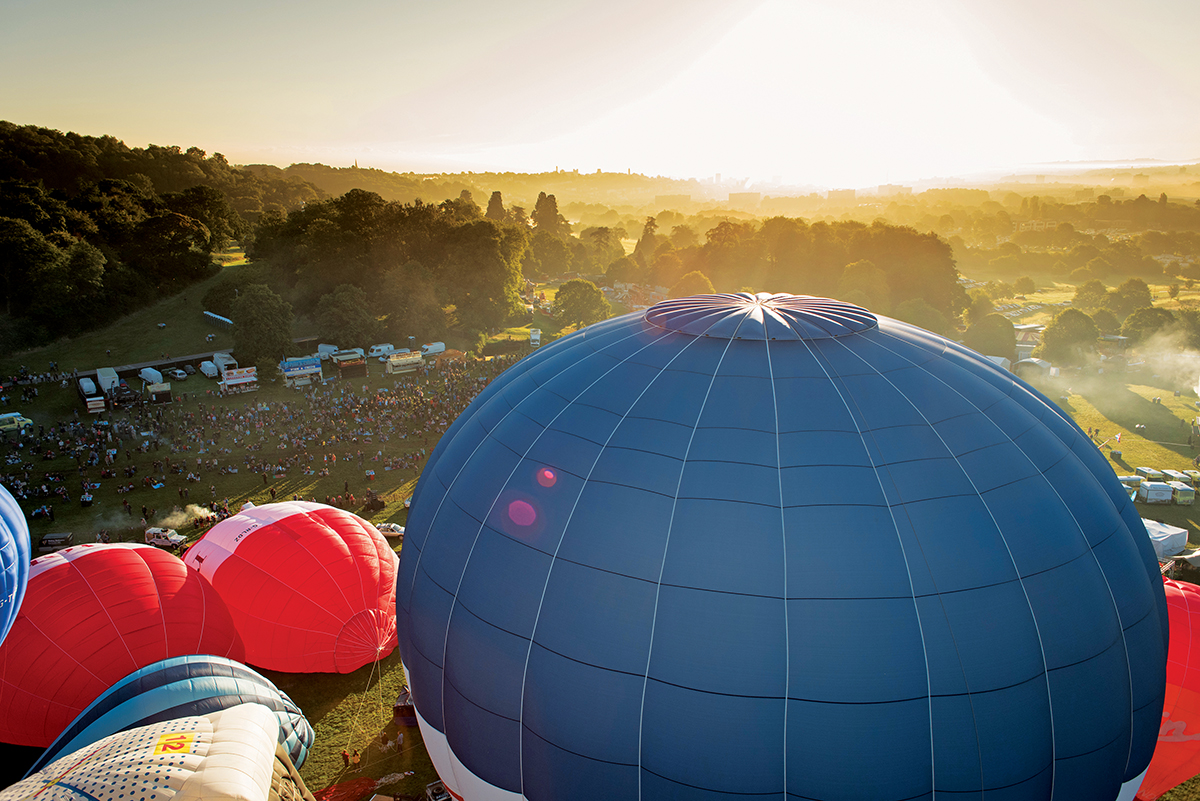
We visited the Bristol Balloon Fiesta to get our images, but there are many balloon festivals worldwide. At the Bristol Balloon Fiesta over 100 hot air balloons take to the skies during the mass ascent, and with more than half a million people attending, getting a good vantage point is crucial.
Check the weather before you go, as often, if the wind is over 10 miles per hour, the balloons won’t take off. The wind will also affect the direction in which the balloons fly. Sometimes pilots can aim for certain directions using the burners in combination with thermals, but nothing is certain. Investigate the area around the take-off site, too, paying attention to the direction of the sun to see what will be lit up when you’re there.
Most flights are in the early mornings and late evenings, when the air is still. On a fine day, cumulus clouds can start to form, and they look striking when they’re side-lit by the low sun. Depending on your luck and location it may be possible to capture valley fog, a type of low-lying cloud. Tall buildings often breach this ‘cloud’, making for a cinematic atmosphere.
Get to your location early so that you an shoot the whole process from inflation to flight. The appearance of the balloon changes rapidly during inflation, so you’ll get a wide variety of images in minutes. Try standing behind the inflater and at the other end of the balloon, and shoot inside if you can; looking for abstracts is an easy way to vary your images.
If you’re taking flight, wear warm clothing. The air gets colder as you ascend and wind speed can pick up the higher you go. You’ll probably land in a field and have to walk to a road to get picked up, so solid footwear can help. You might be able to squeeze a small camera bag into the basket, but there won’t be room for a tripod – not that you’ll need one if you’re using a high ISO and fast shutter speed. Read on for more on settings, and what else you need to consider, to get balloon shots that soar.
On location: Best settings for hot air balloon photography
Versatility is key here, as you want to be creative without needing to change lenses too often.
The best camera deals, reviews, product advice, and unmissable photography news, direct to your inbox!
Fast shutter speed
Although balloons move at a slow pace, you’ll want to use a relatively fast shutter relative to your focal length. Even if you have steady hands it will help to beat blur.
Mid-range ISO
Unless it’s a bright day, a medium-to-high ISO setting can help you achieve a fast shutter speed. Depending on how bright it is, try between ISO 400 and ISO 800 as a starting point.
Creative aperture
Use aperture creatively – to blur the background, stop down to f/2.8 and focus on something nearby, or increase to f/8, f/11 or f/16 if you want to keep everything in focus.
Wide and long
Changing lenses mid-flight means you can lose out on shots – or even drop a precious lens out of the basket! – so a superzoom is probably your best option.
Step-by-step guide: One fantastic subject, six ways to shoot it
Here are six ideas for taking creative images at a balloon festival.
You don’t have to find a fully-fledged balloon festival to get great balloon shots. Local ballooning clubs run ascents throughout the summer, typically in the evenings, so you won’t have to take any time off work to shoot them.
1. Static
Shoot the balloon on its side or from the top to get that melting look. Move quickly and keep shooting – you will probably only have two opportunities to get these images, at the beginning and end of your flight. Be safe at all times, and avoid tripping over the balloon ropes.
2. Inflating
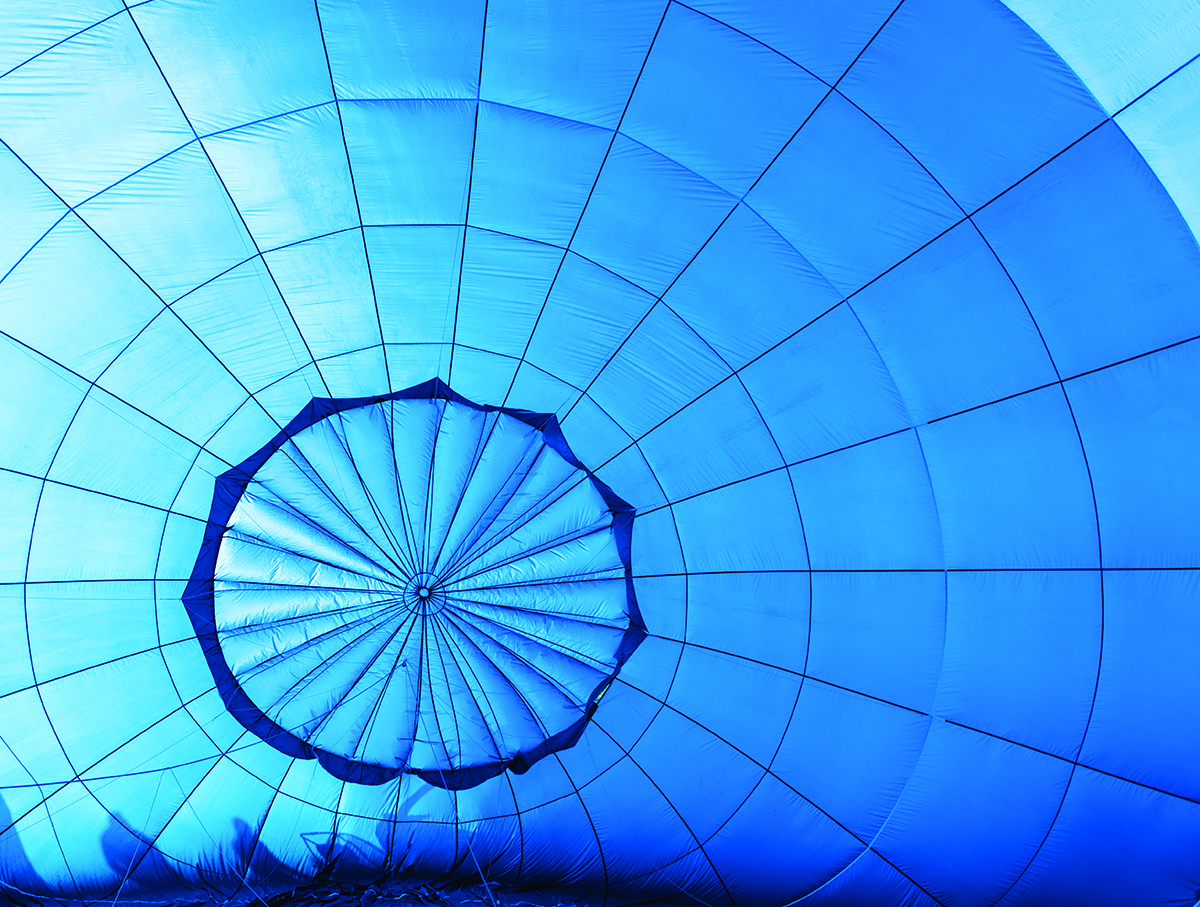
Get inside the balloon or shoot through the fabric (symmetry can be suitable here, or the rule of thirds). If you’re lucky the balloon will be positioned into the sun and the fabric will be bright and colourful. Get a variety of landscape and portrait-oriented photos in this situation.
3. Inflated
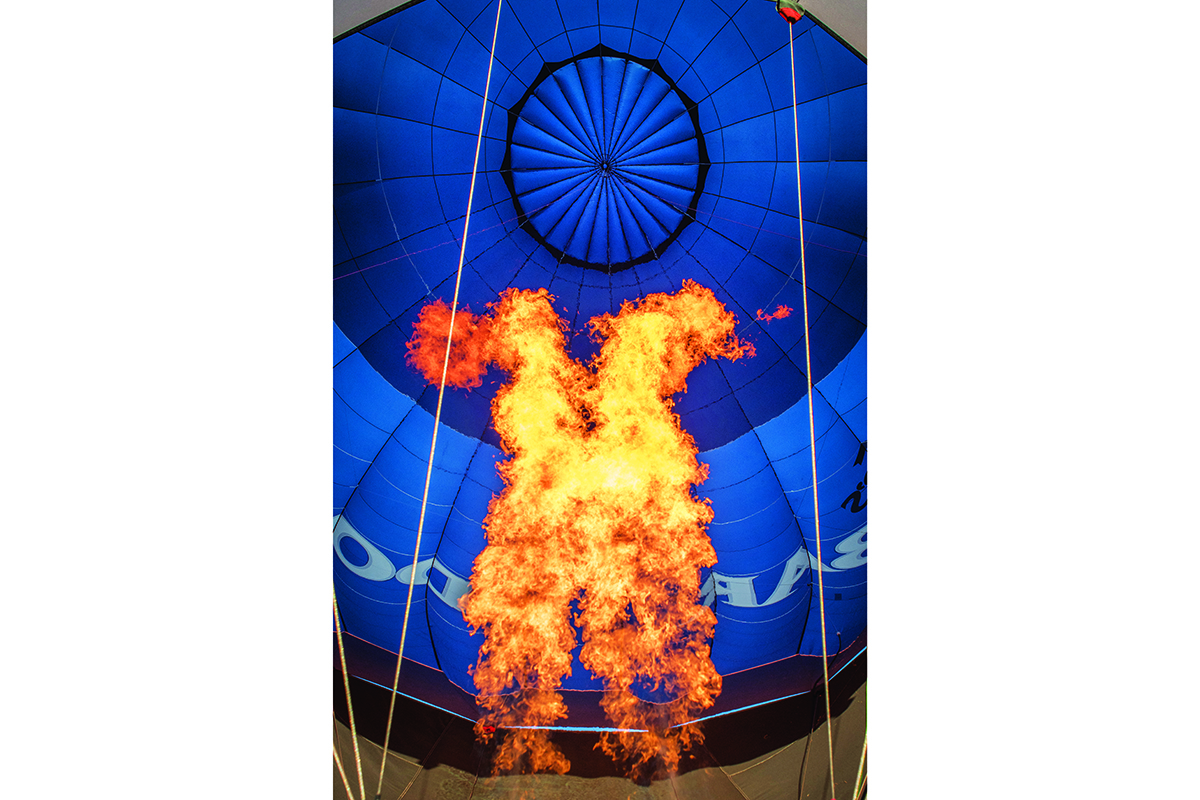
Capture the fire roaring up into the balloon, but be careful not to over-expose. Use the Manual exposure mode here, as Aperture-priority or Shutter-priority modes will struggle to expose correctly as the flames flicker and burn different colours during the inflation.
4. Going up
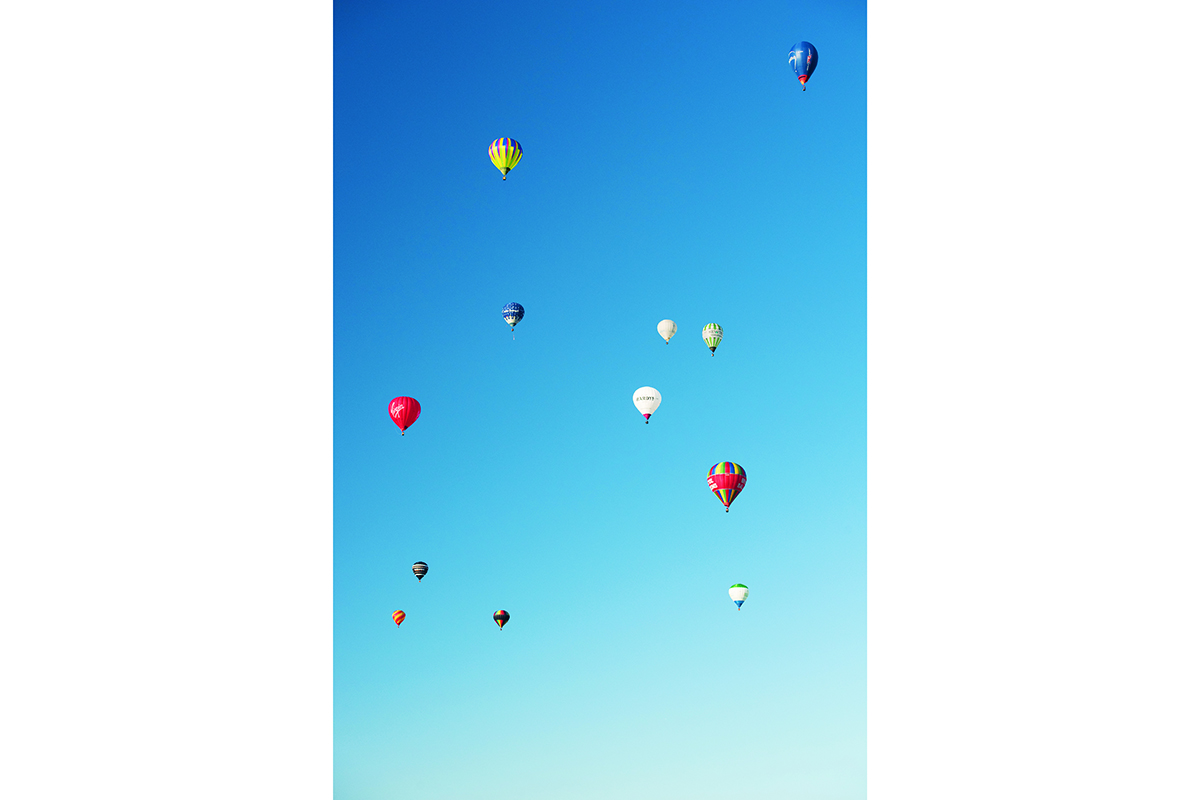
If you’re taking pictures at a festival, try to capture the mass ascent – there’s something poetic about the repeated pattern of fiery globes soaring in the sky. Try zooming in on a tight cluster, or zoom out to include the landscape and reveal the bigger picture.
5. Bird's-eye view
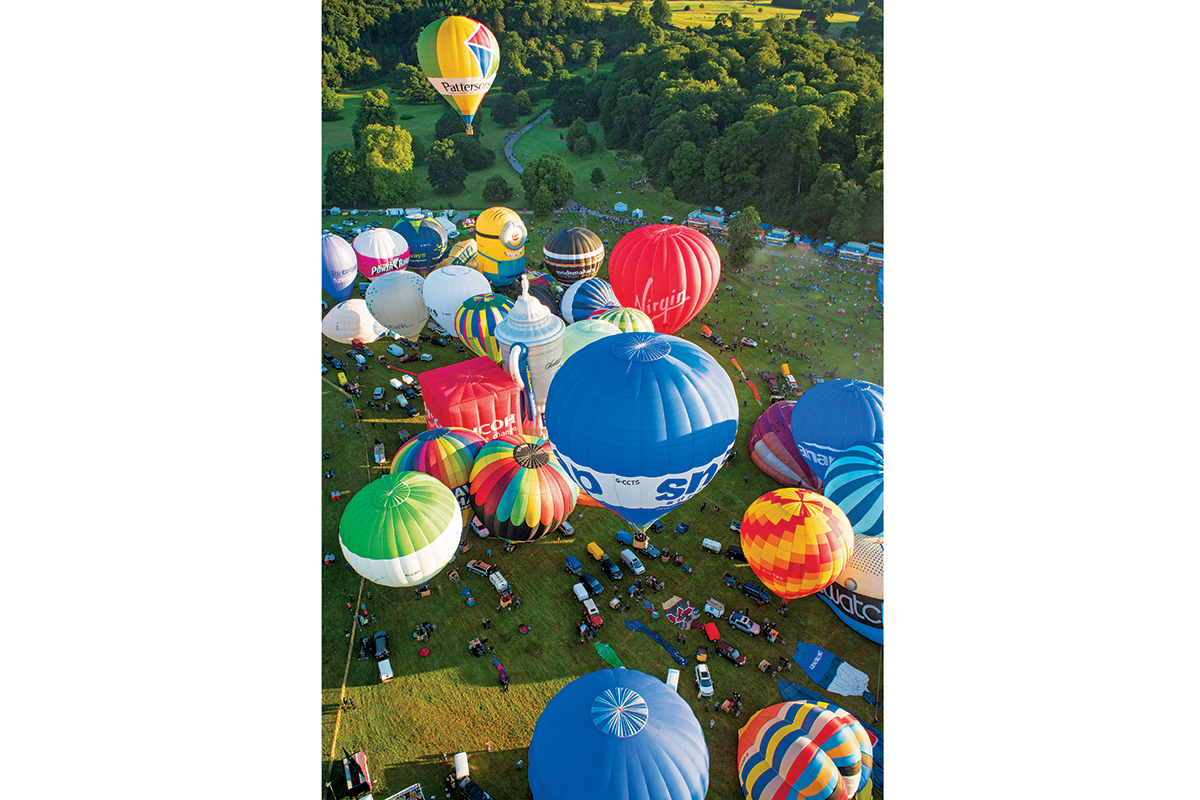
Shoot up (or down) at higher (or lower) flying balloons. Most people never see balloons from this angle, so it offers a fresh perspective. Work with the sun as you rotate into the sky; side lighting looks beautiful on balloons.
6. Clouds and landmarks
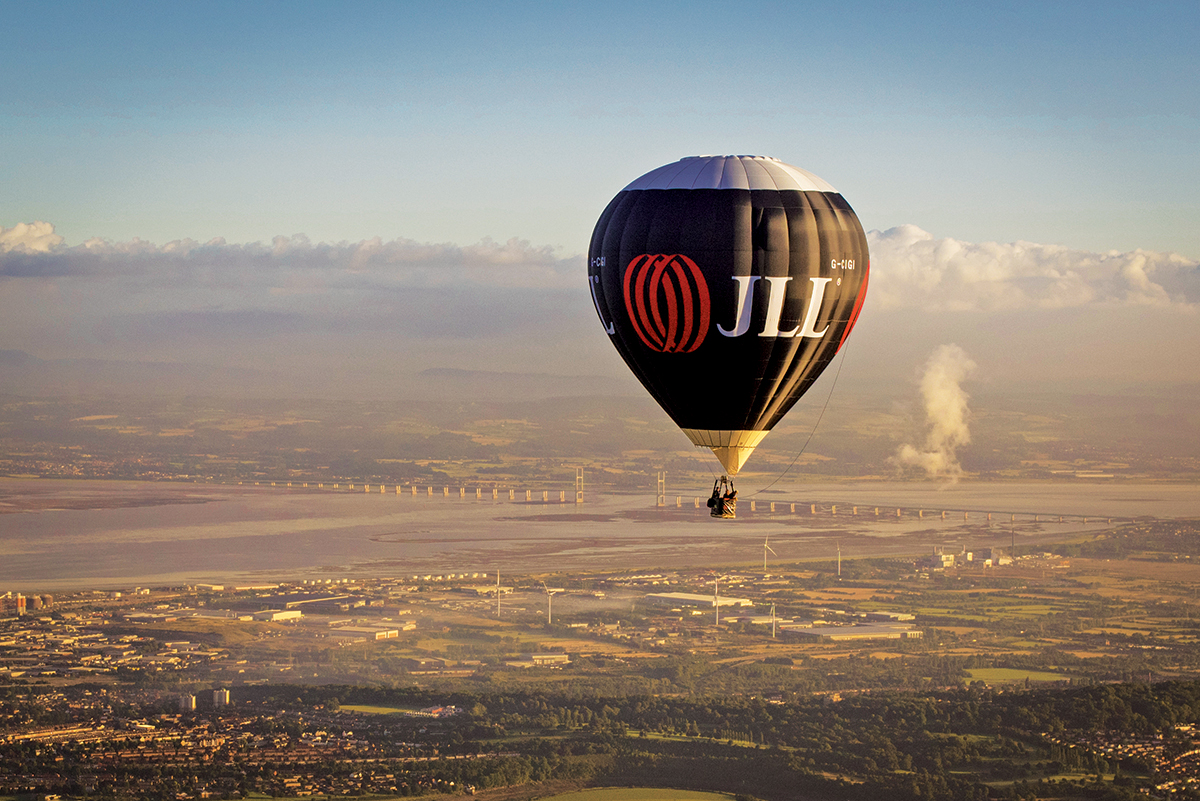
If you’re fortunate enough to see them as you ascend, capture some striking clouds. You’re a slave to the weather, but think texture and complementing shapes. If you can combine the clouds with landmarks in the background (or even a factory producing a billow of steam), all the better.
Lay of the land
Research landmarks in the area before setting off. You could take a map – or map on your smartphone – to locate them if you’re not good at spotting them from the air. And remember, balloons fly in the direction the wind takes them, so you’ll need to check the map in all directions from your starting point; you can’t assume you’ll fly over the landmarks you’re keenest to photograph!
Read more: How to photograph during the golden hour
N-Photo: The Nikon Magazine is a monthly publication that's entirely dedicated to Nikon users. As a 100% independent magazine, you can be assured of unbiased opinion from a trustworthy team of devoted photography experts including editor Adam Waring and Deputy Editor Mike Harris.
Aimed at all users, from camera newcomers to working pros, every issue is packed with practical, Nikon-specific advice for taking better photos, in-depth reviews of Nikon-compatible gear, and inspiring projects and exciting video lessons for mastering camera, lens and Photoshop techniques.
Written by Nikon users for Nikon users, N-Photo is your one-stop shop for everything to do with cameras, lenses, tripods, bags, tips, tricks and techniques to get the most out of your photography.

