The best camera deals, reviews, product advice, and unmissable photography news, direct to your inbox!
You are now subscribed
Your newsletter sign-up was successful
Watch video: How to edit Raw files in Photoshop Elements 2020
Modern digital cameras have many advantages over film, but arguably the most useful is the ability to shoot Raw files that contain masses of exposure information. This creates a safety net if your exposure or white balance isn’t quite right, and also enables you to tweak the images to exactly how you want them.
Raw isn’t an acronym, but instead literally refers to the raw data coming straight from the camera’s sensor. Each camera manufacturer has its own raw file format, such as .CR2 files on most Canon cameras or .NEF on Nikons. They are usually five to ten times larger in size than JPEGs, varying from body to body, so they will fill memory cards much more quickly.
However, it's well worth paying the extra price of admission to get that raw data – which makes it possible to correct white balance, change the exposure and a whole raft of other handy adjustments that are far more difficult on a compressed JPEG file. JPEG colors, contrast and other parameters are 'baked in' when you take them, and most of the additional data is thrown away, but Raw files grant you the ability to work them up exactly how you want.
All you need to do is open a Raw file that you want to edit and bring it into Photoshop Elements 2020. It will then be taken automatically into a simplified version of Adobe Camera Raw, which is where we can make some key edits to improve the picture and take full advantage of that extra raw data. Here’s all that you need to know…
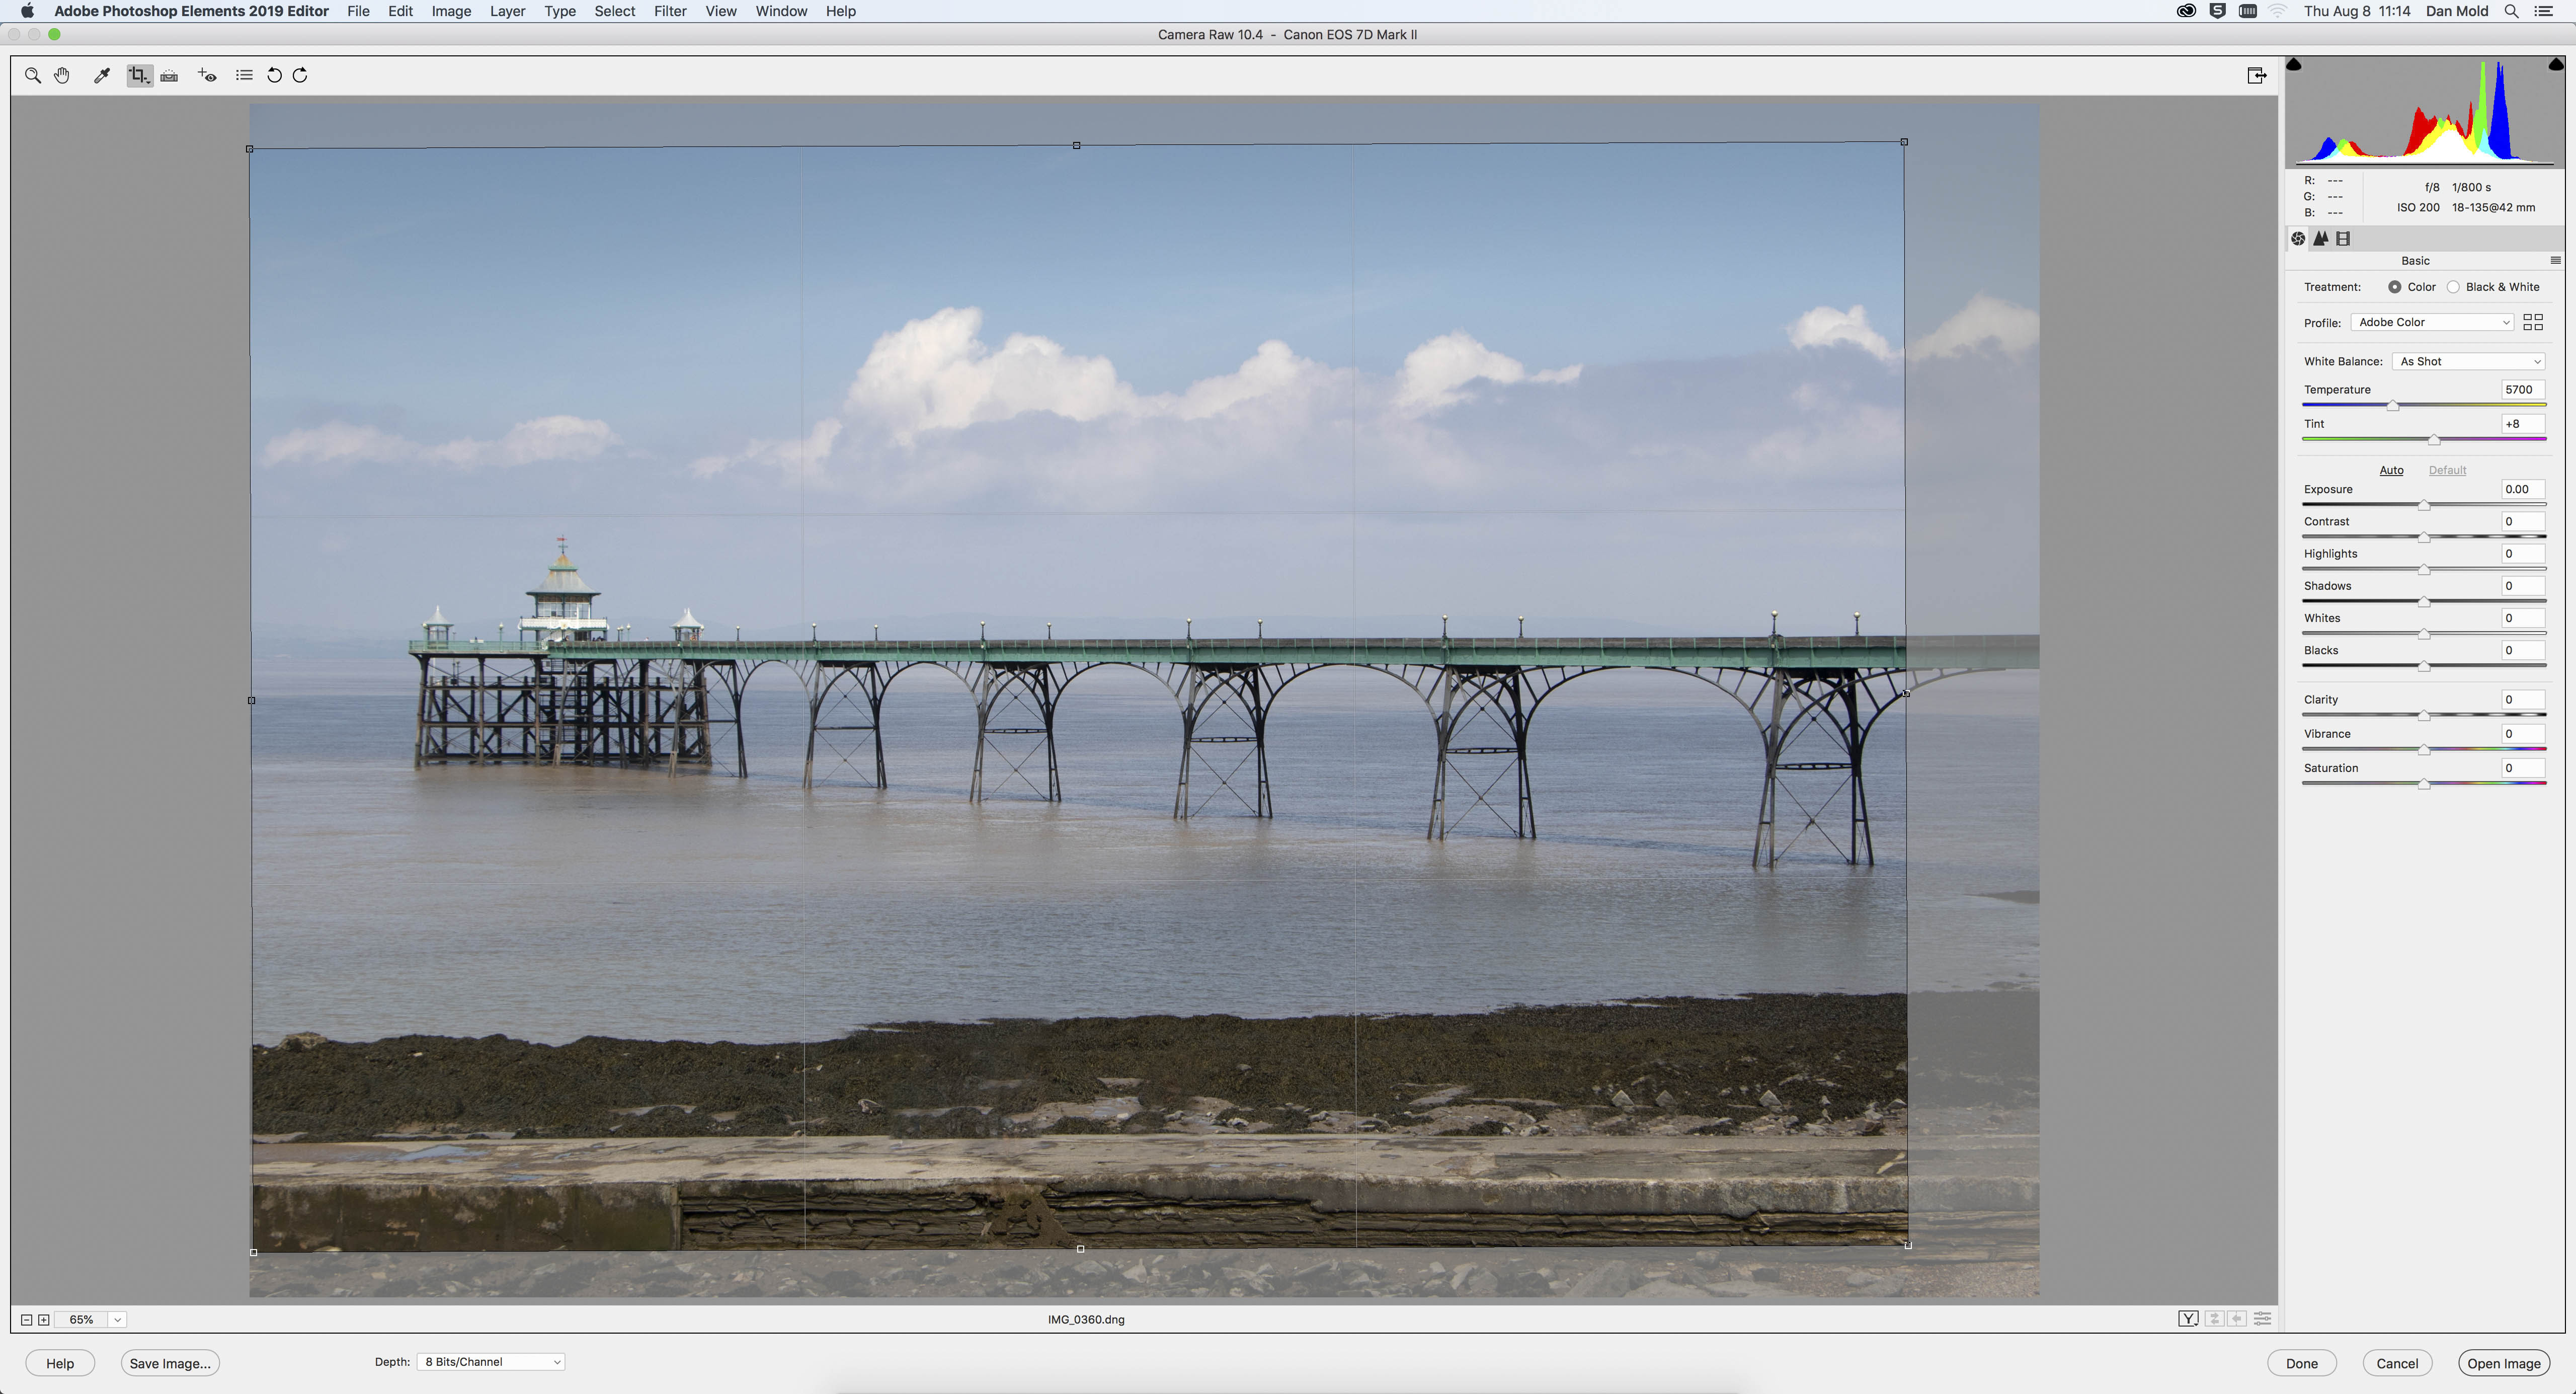
01 Crop and straighten up
Before you start making any major edits, it’s best to get the composition you want with the Crop Tool. This means that you’re not spending time editing pixels that won’t actually be in your end result, and you can straighten up the horizon while you’re at it too.
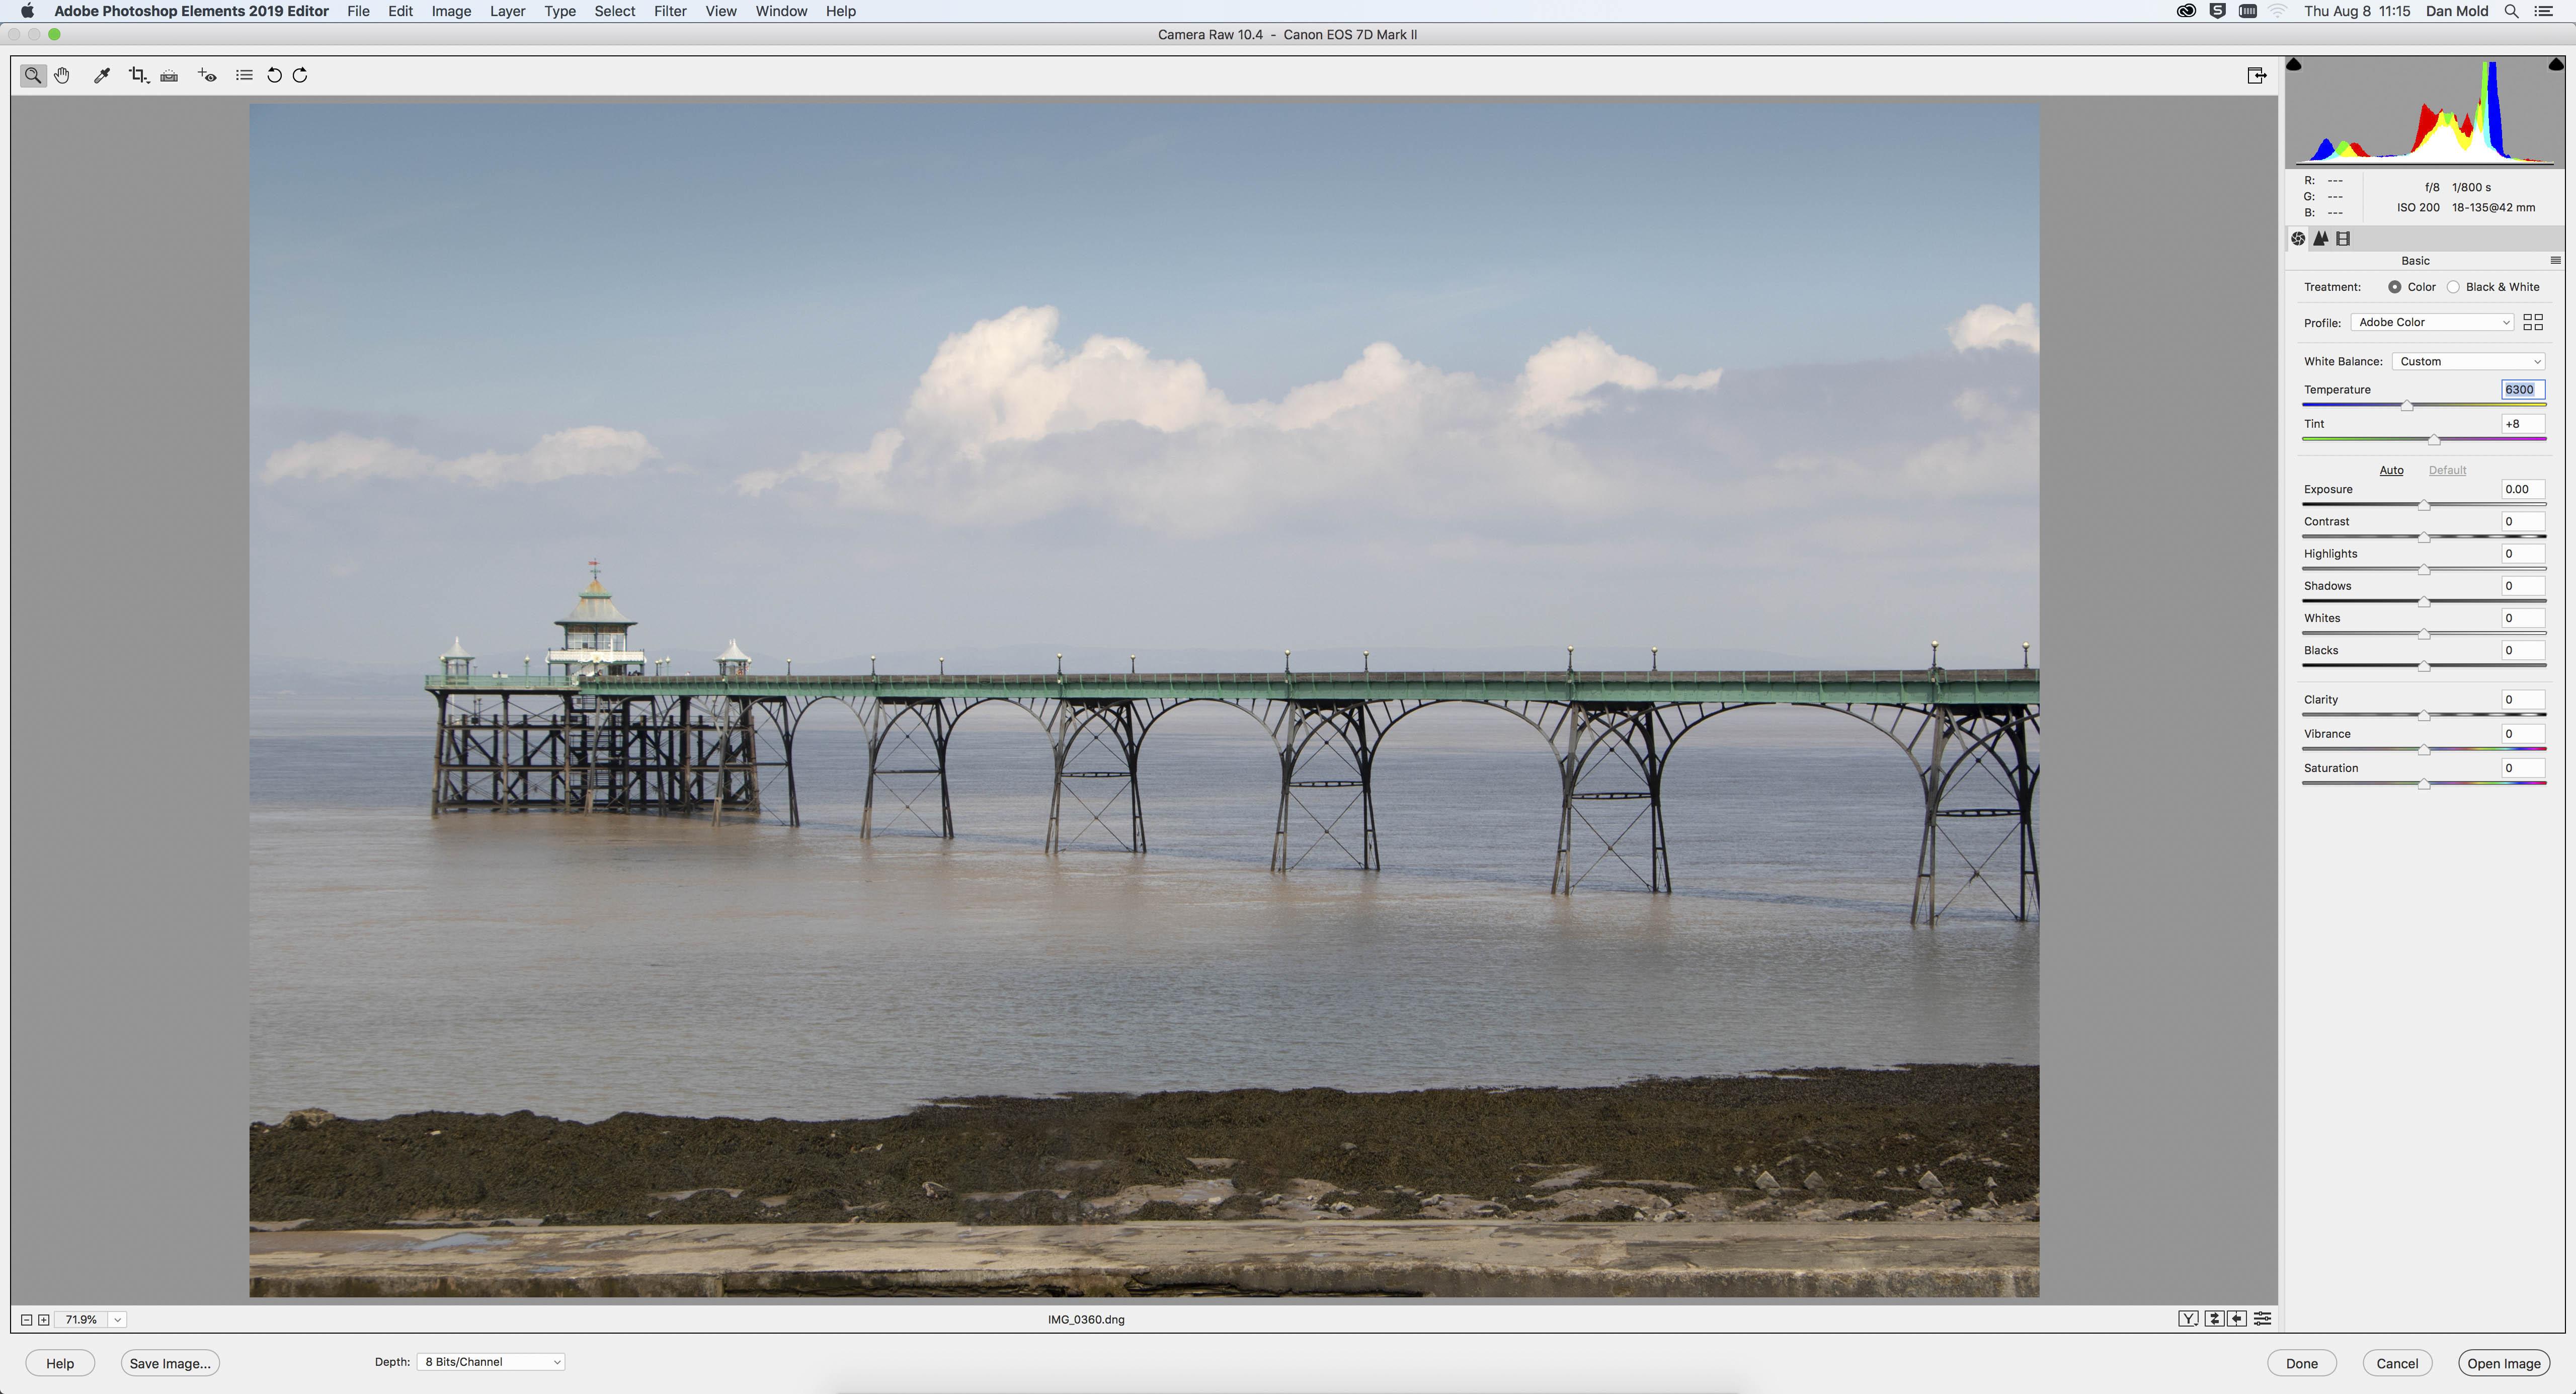
02 Shift the white balance
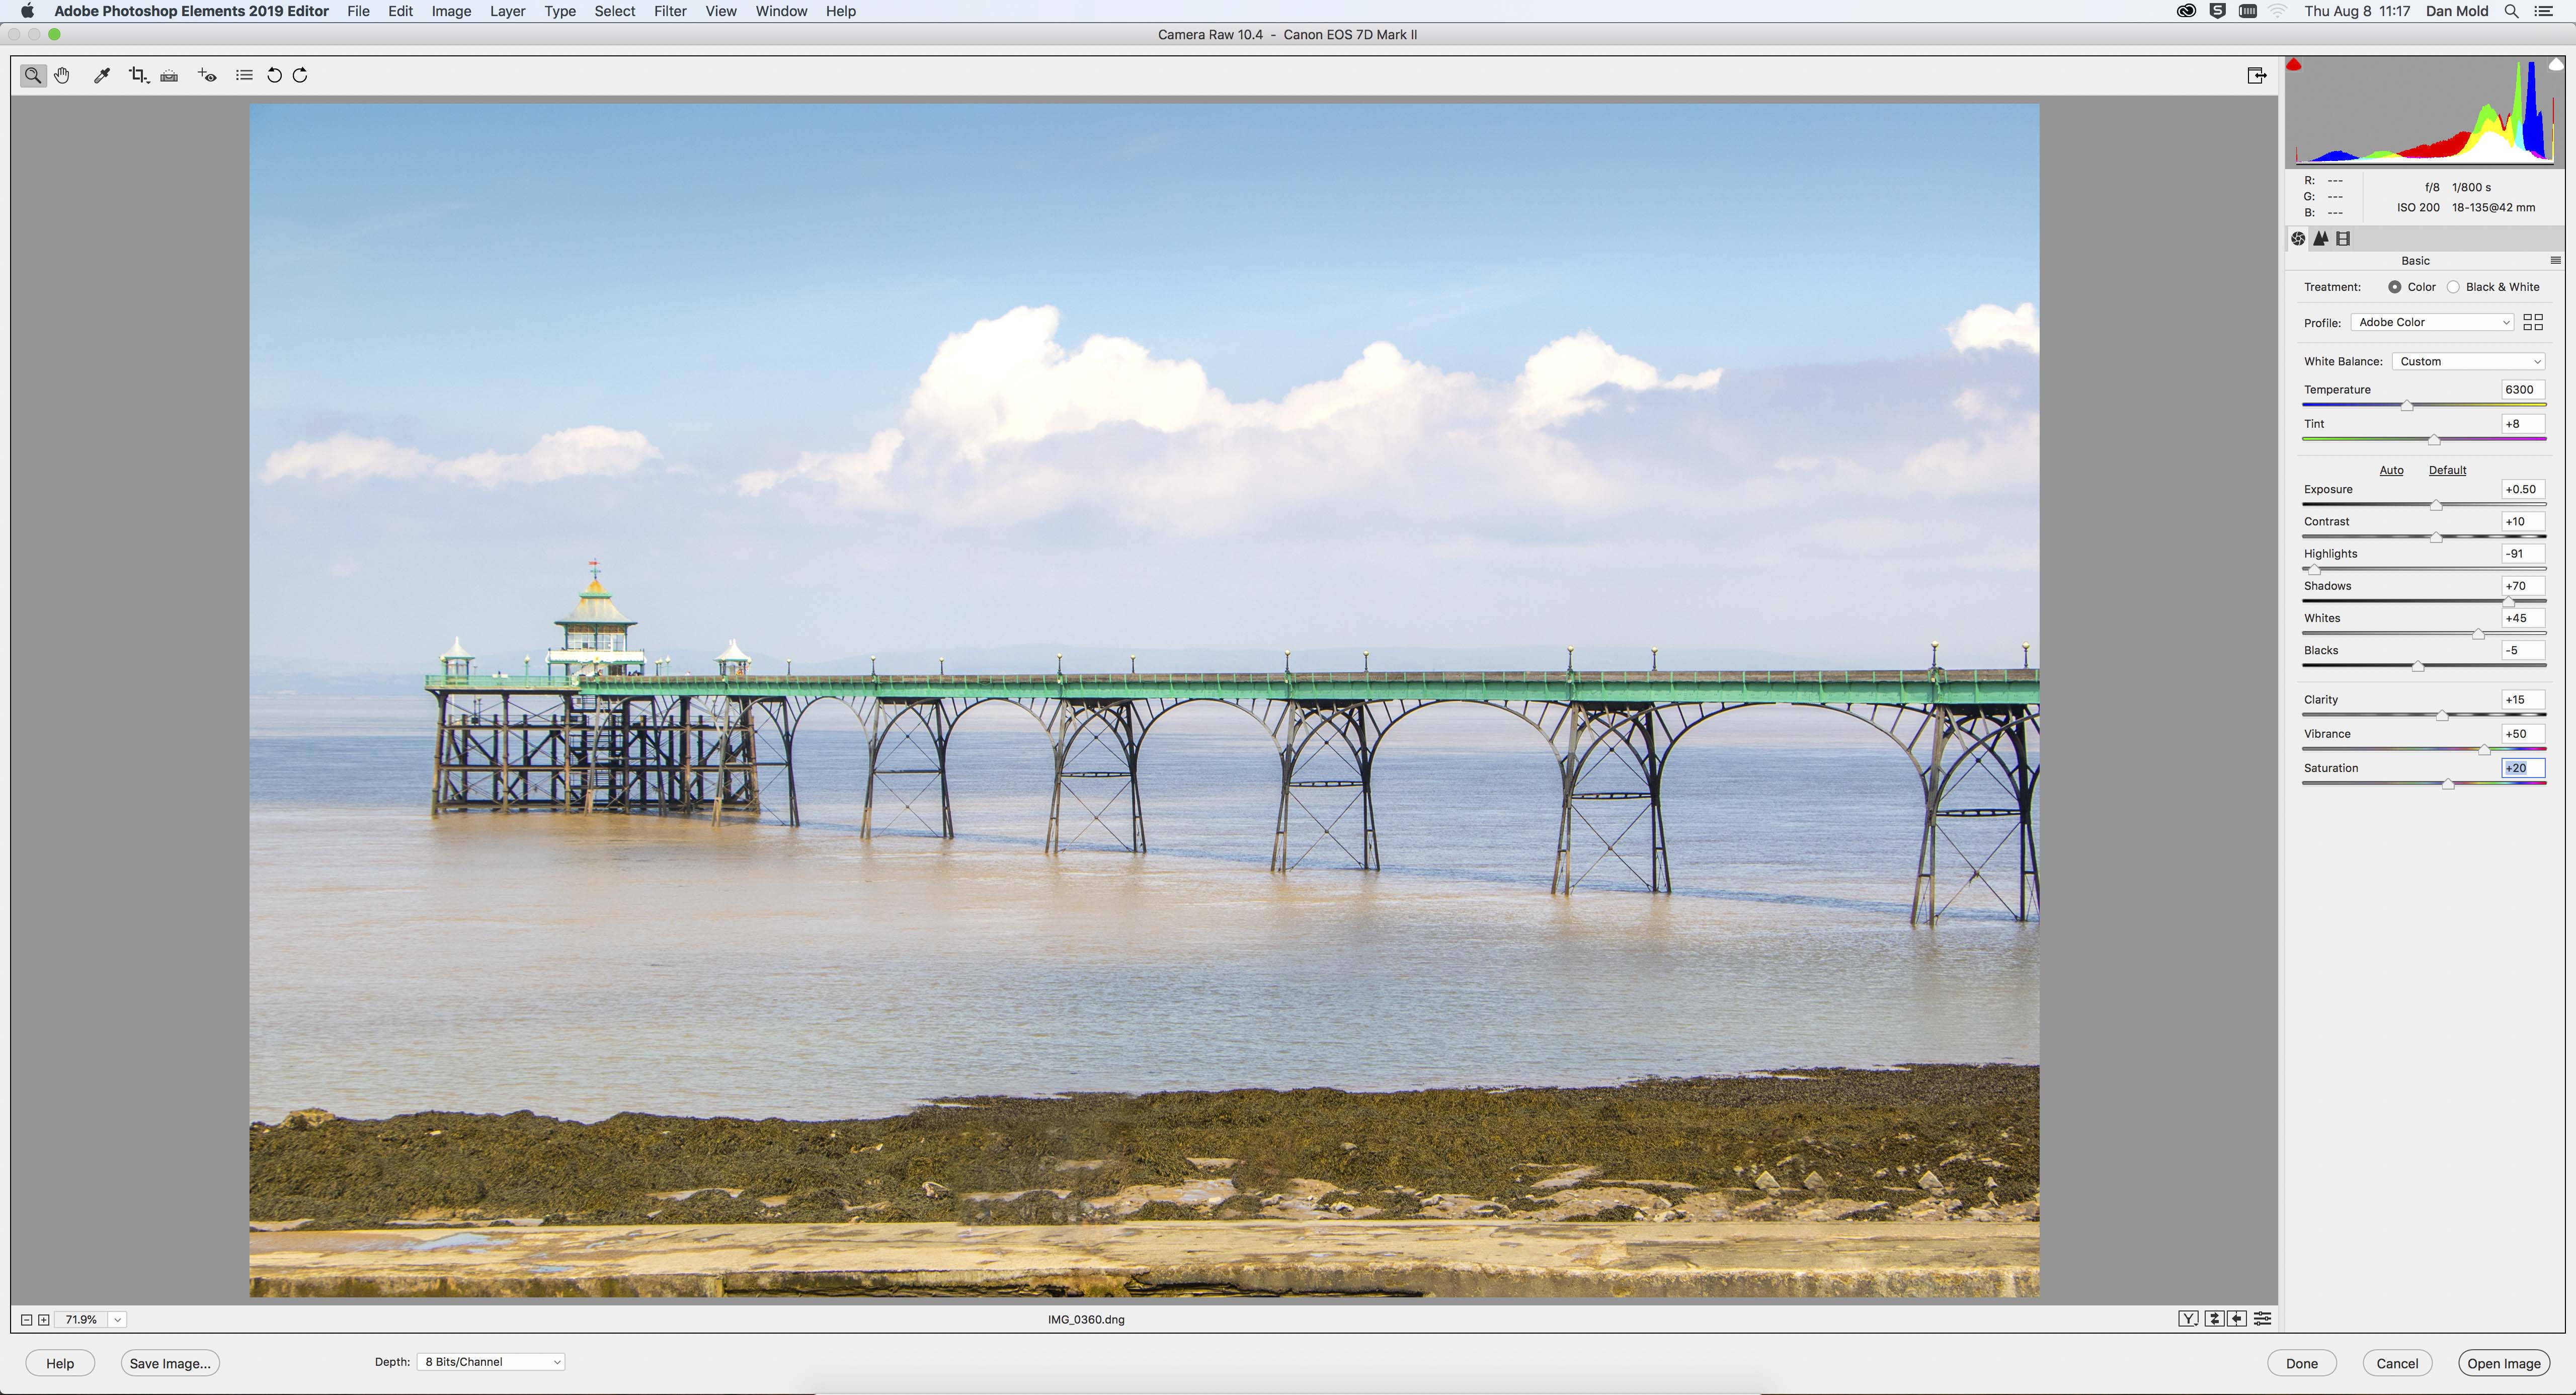
White balance is tricky to adjust when working with a JPEG, but because Raws contain so much more exposure info this is easy to tweak using the Temperature slider to make the picture cooler or warmer. Alternatively, you can use one of the presets in the drop-down box.
The best camera deals, reviews, product advice, and unmissable photography news, direct to your inbox!
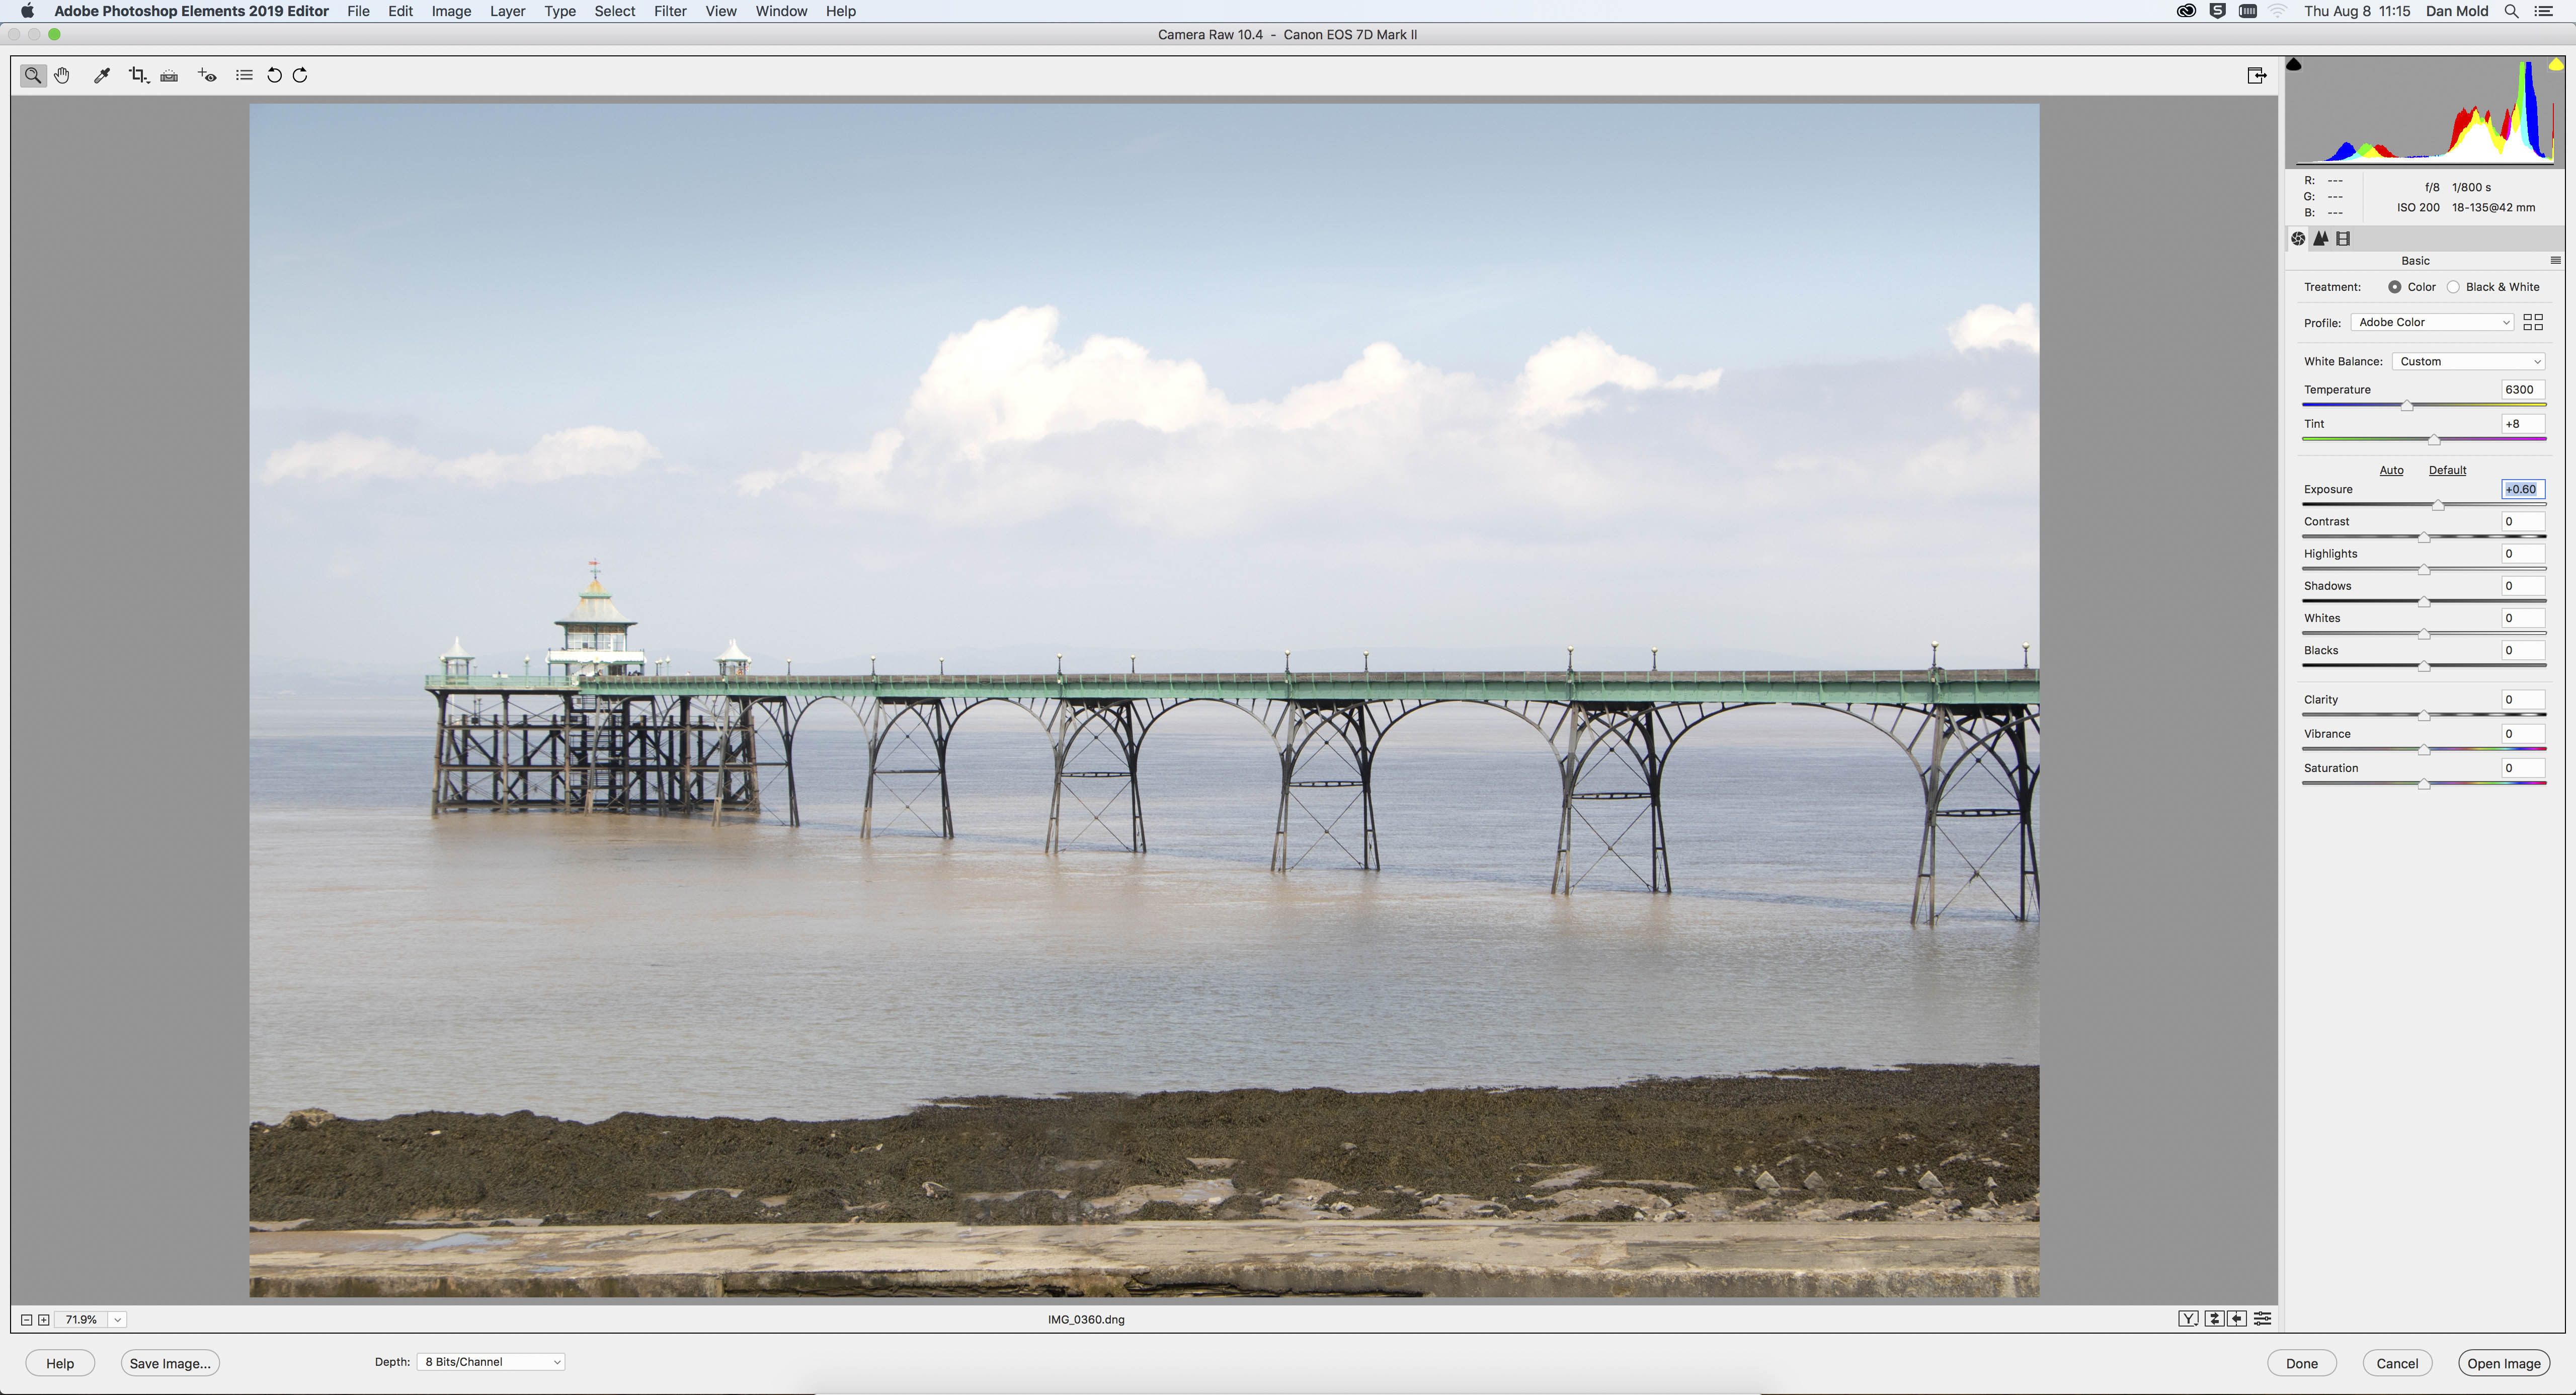
03 Fine-tune the exposure
Another feat, trickier to do with JPEGs, is adjusting the exposure. Again not a problem for Raw files, though – and with all that extra data and you can usually make your pictures at least two stops brighter or darker with minimal impact on the image quality.
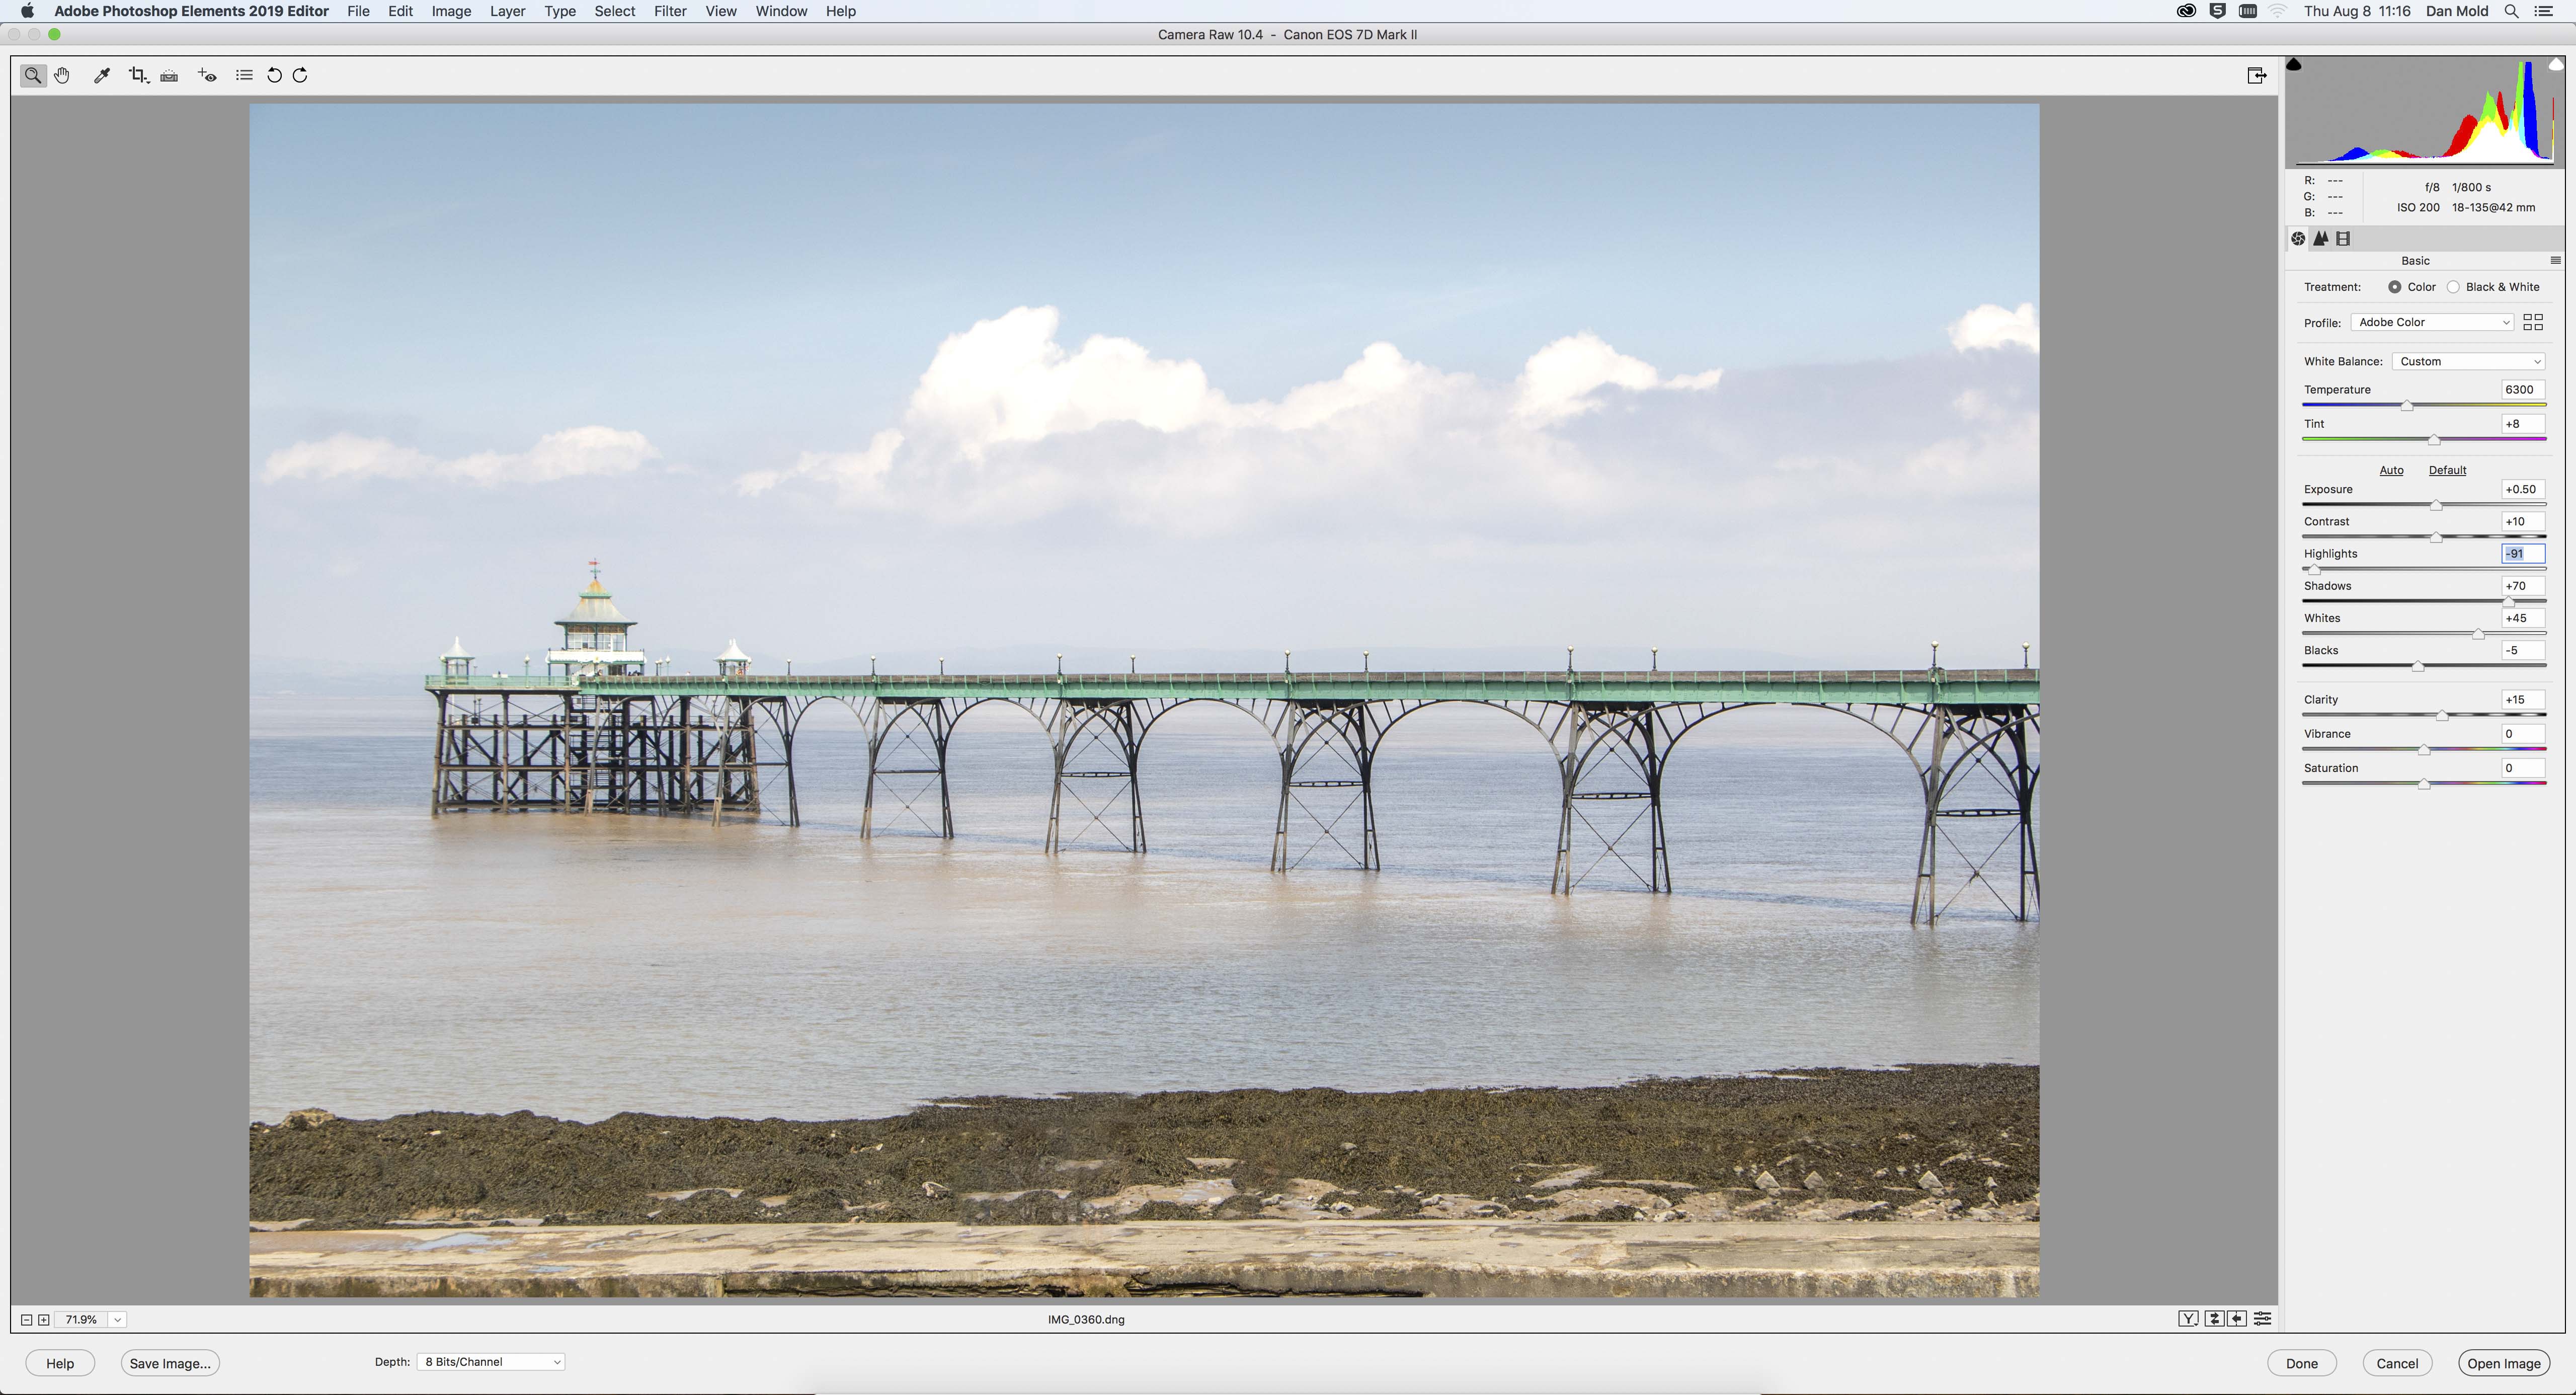
04 Boost the contrast
We can now get the exact contrast we want in the scene using the Highlights, Shadows, Whites and Blacks sliders. A good tip is to drag Shadows and Whites to the right and Highlights and Blacks to the left to expand the dynamic range of the scene.
05 Give the colors a kick
To make the colors in your shot a bit more zingy you can drag the Vibrance and Saturation sliders to the right, or take color away by dragging them to the left. Vibrance will boost the least saturated colors first, so it's a bit more subtle than the Saturation slider.
06 Sharpen your shots
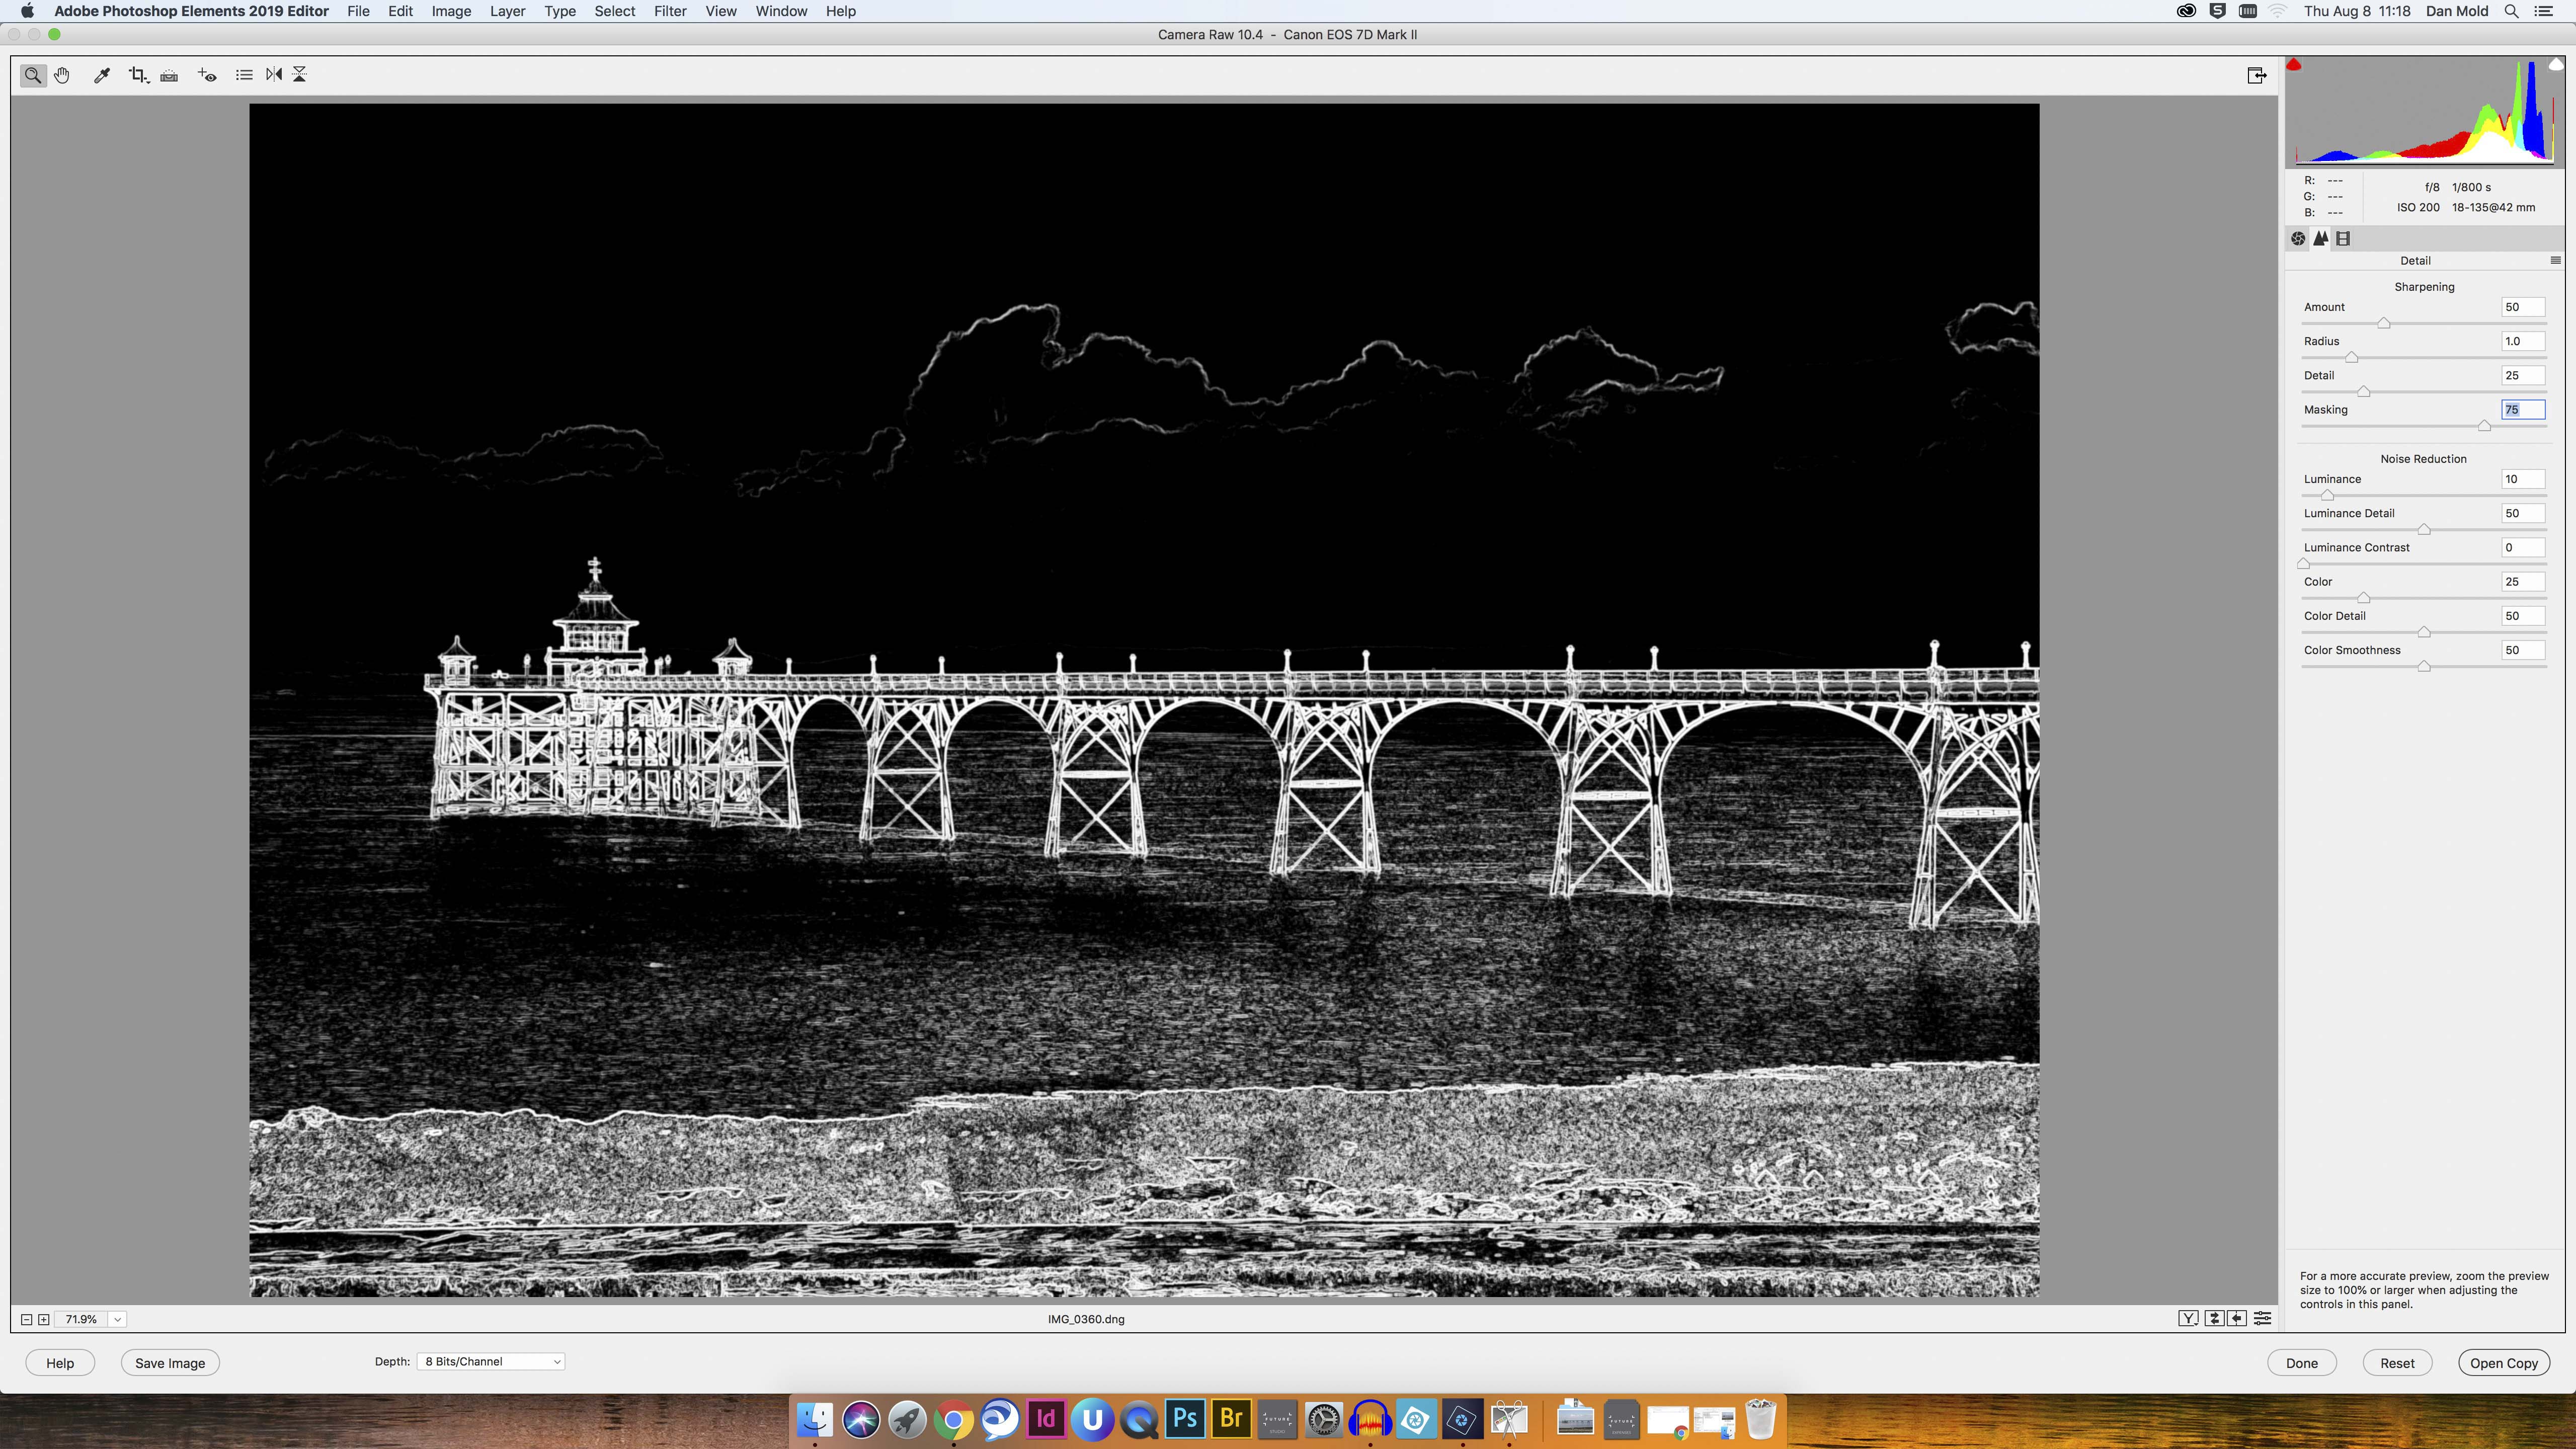
Go to the Detail panel and set the Sharpening Amount to 50. Now hold the Alt key and drag the Masking slider until only the parts that you want to be sharpened are shown in white (a value of 80 or 90 on our shot) and add Noise Reduction as needed, then hit Open Image.
Read more:
The best photo editing software: image editors for novices through to pros
The best photo-editing laptops in 2020: top laptops for photographers
The best ultrawide monitor for photo editing in 2020

In addition to being a freelance photographer and filmmaker, Dan is a bona fide expert on all things Canon and Adobe. Not only is he an Adobe-certified Photoshop guru, he's spent over 10 years writing for specialist magazines including stints as the Deputy Editor for PhotoPlus: The Canon Magazine, Technical Editor for Practical Photography and Photoshop Editor on Digital Photo.
