Create beautiful monochrome photos in Photoshop CC
Discover how you can utilise the best monochrome tools and settings for your portraits in Lightroom and Photoshop CC
Watch video: How to go mono in Photoshop CC
Black and white treatments and portraiture go hand in hand. But what’s the best way to strip out the color, and what other edits can we make to enhance the monochrome image? In this Photoshop CC tutorial, we’ll explore a few techniques you can use to create stunning black and white portraits, from the best conversion tools to essential enhancements like dodging and burning.
Converting a photo to black and white shouldn’t just be an ‘effect’, there should be a reason behind the change. Perhaps the monochrome tones enhance the subject, or emphasize the composition, or draw attention to textures and form. Or perhaps the color is a distraction, and removing it ensures the viewer focuses on the main aspects of the photo. With portraits in particular, color is sometimes an unnecessary addition. By stripping it away, we can draw the focus to things like the expression and shape. Besides, we’re all very accustomed to seeing people in color. We know what color skin tones and hair are without needing to be shown, so we don’t necessarily need them to be present in an image.
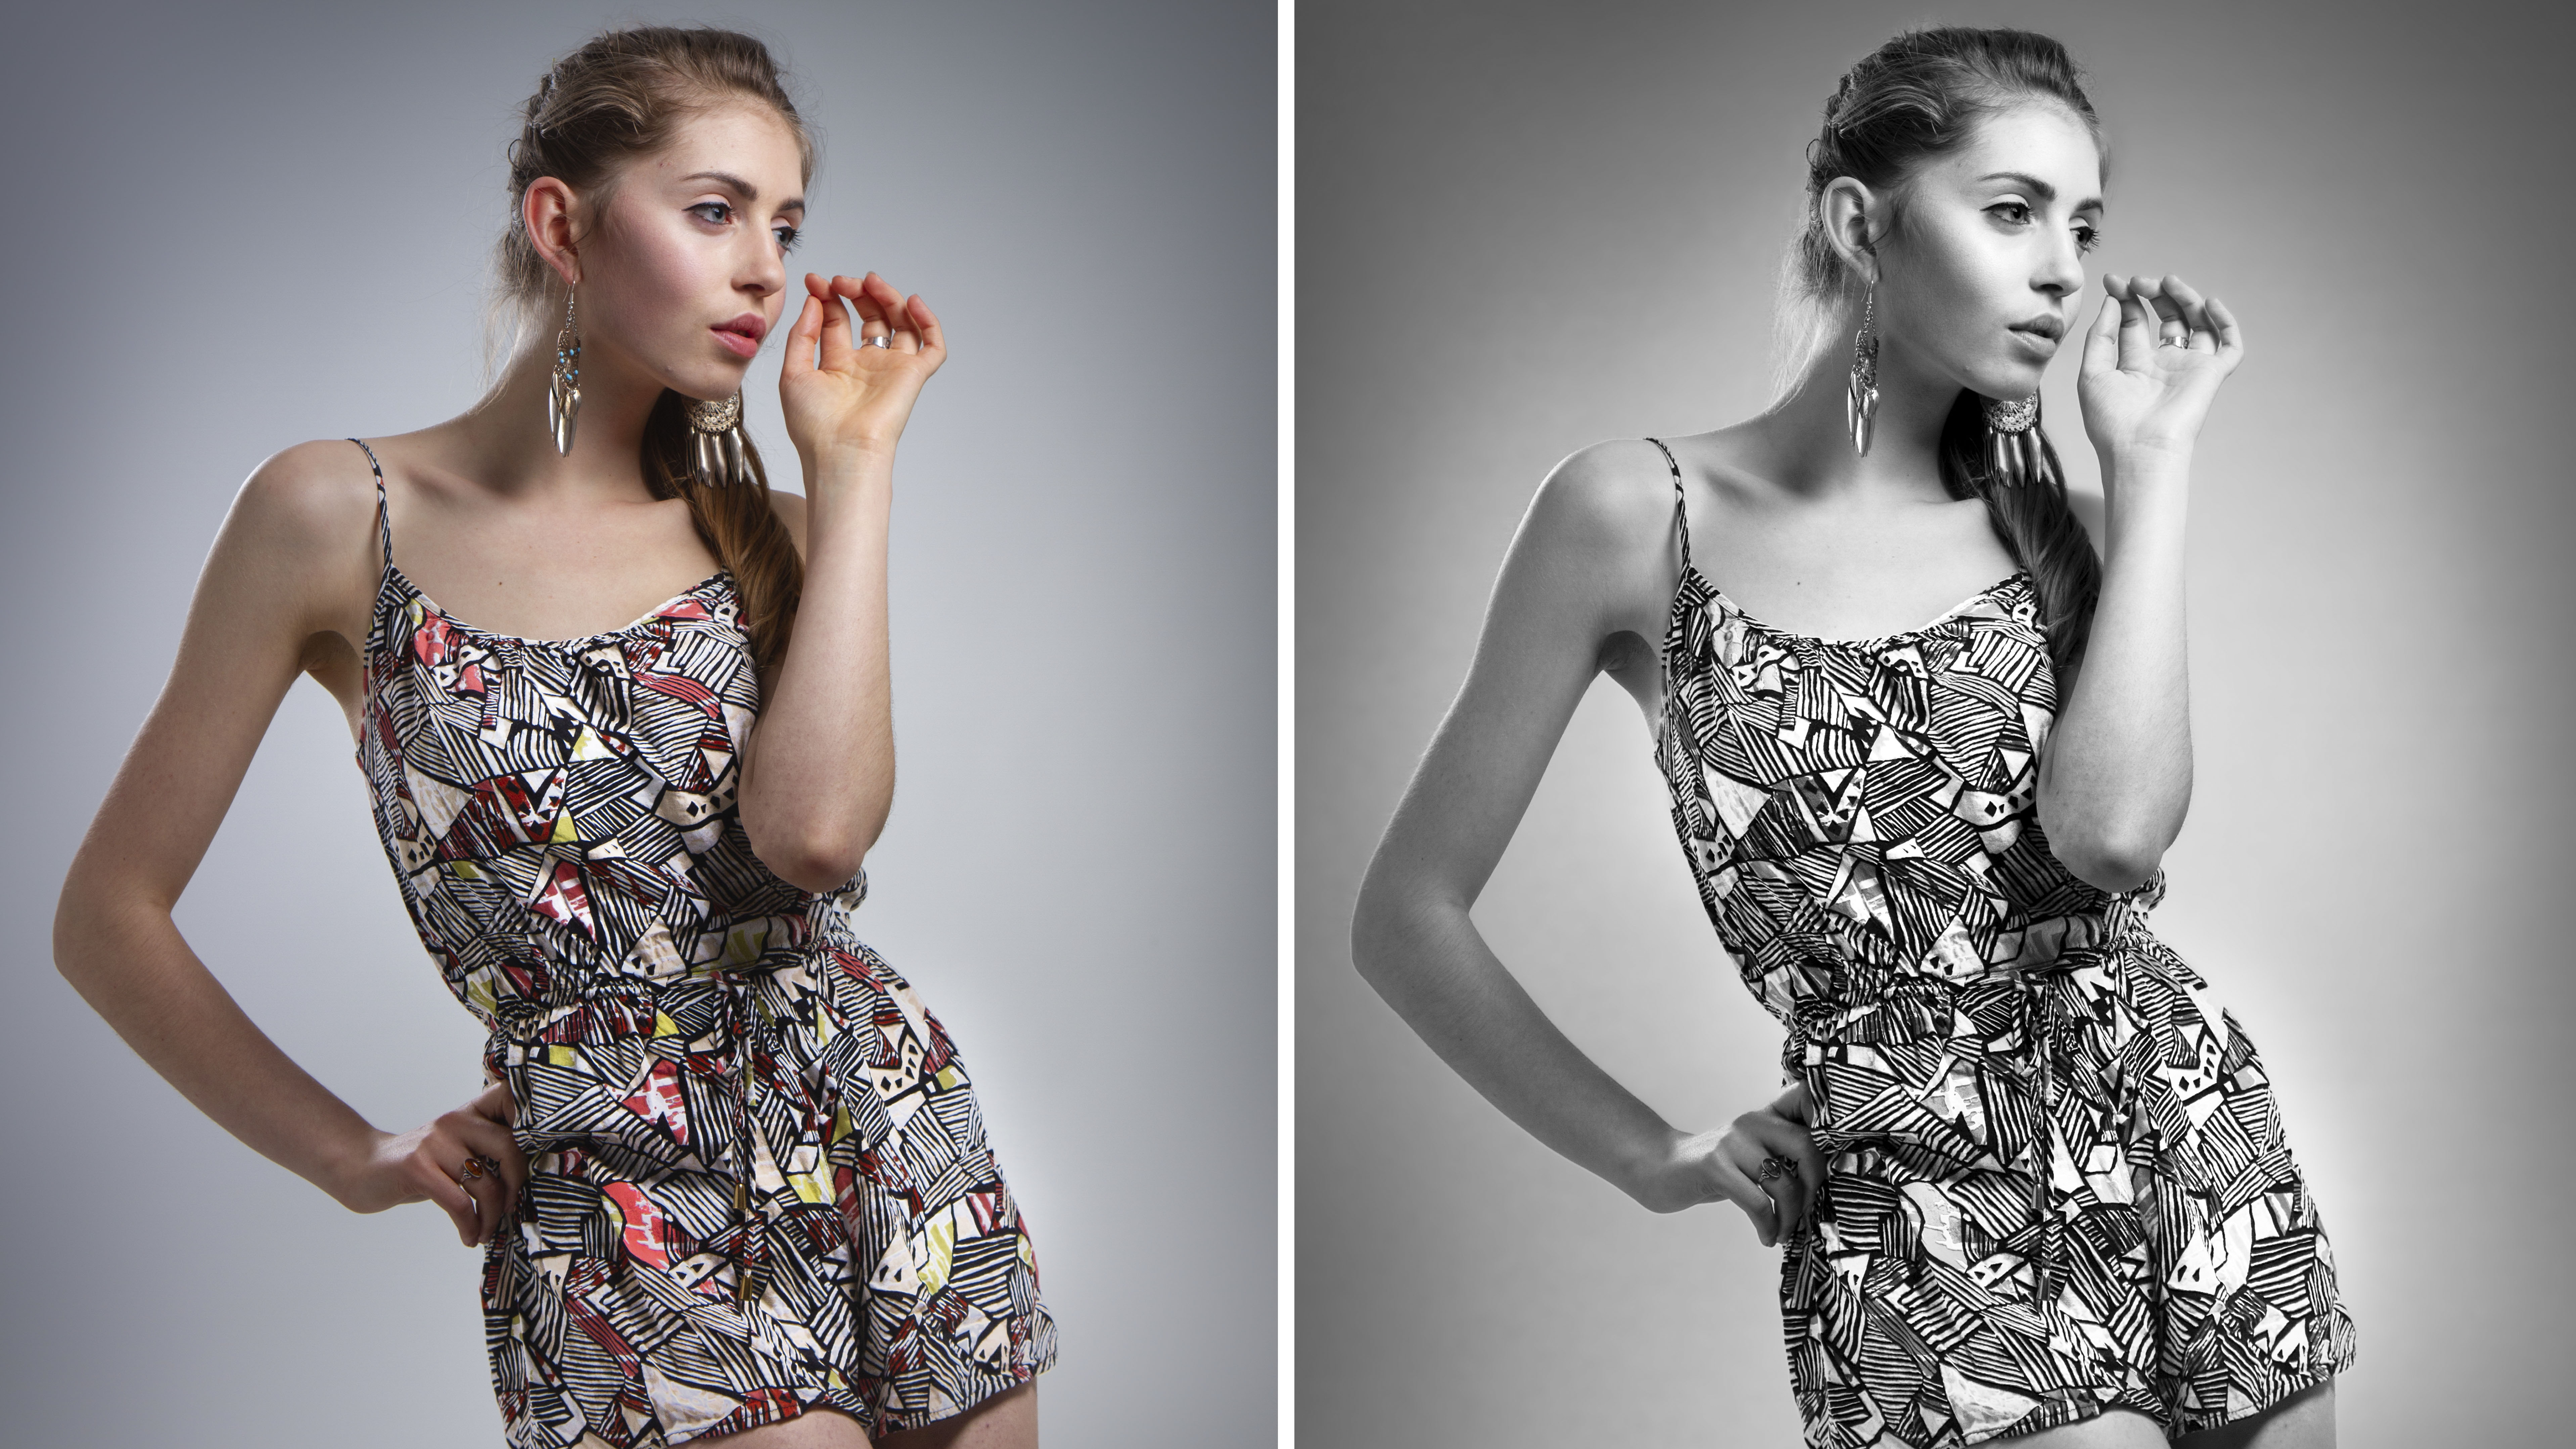
As such, a bold monochrome effect can really elevate a portrait. Here, for example, it emphasizes the strong pose, brings out the contrast in the patterned clothing, and strengthens the play of light and shade across the face. We’ll begin with our workflow in Lightroom, then eventually head into Photoshop to finish off the portrait...
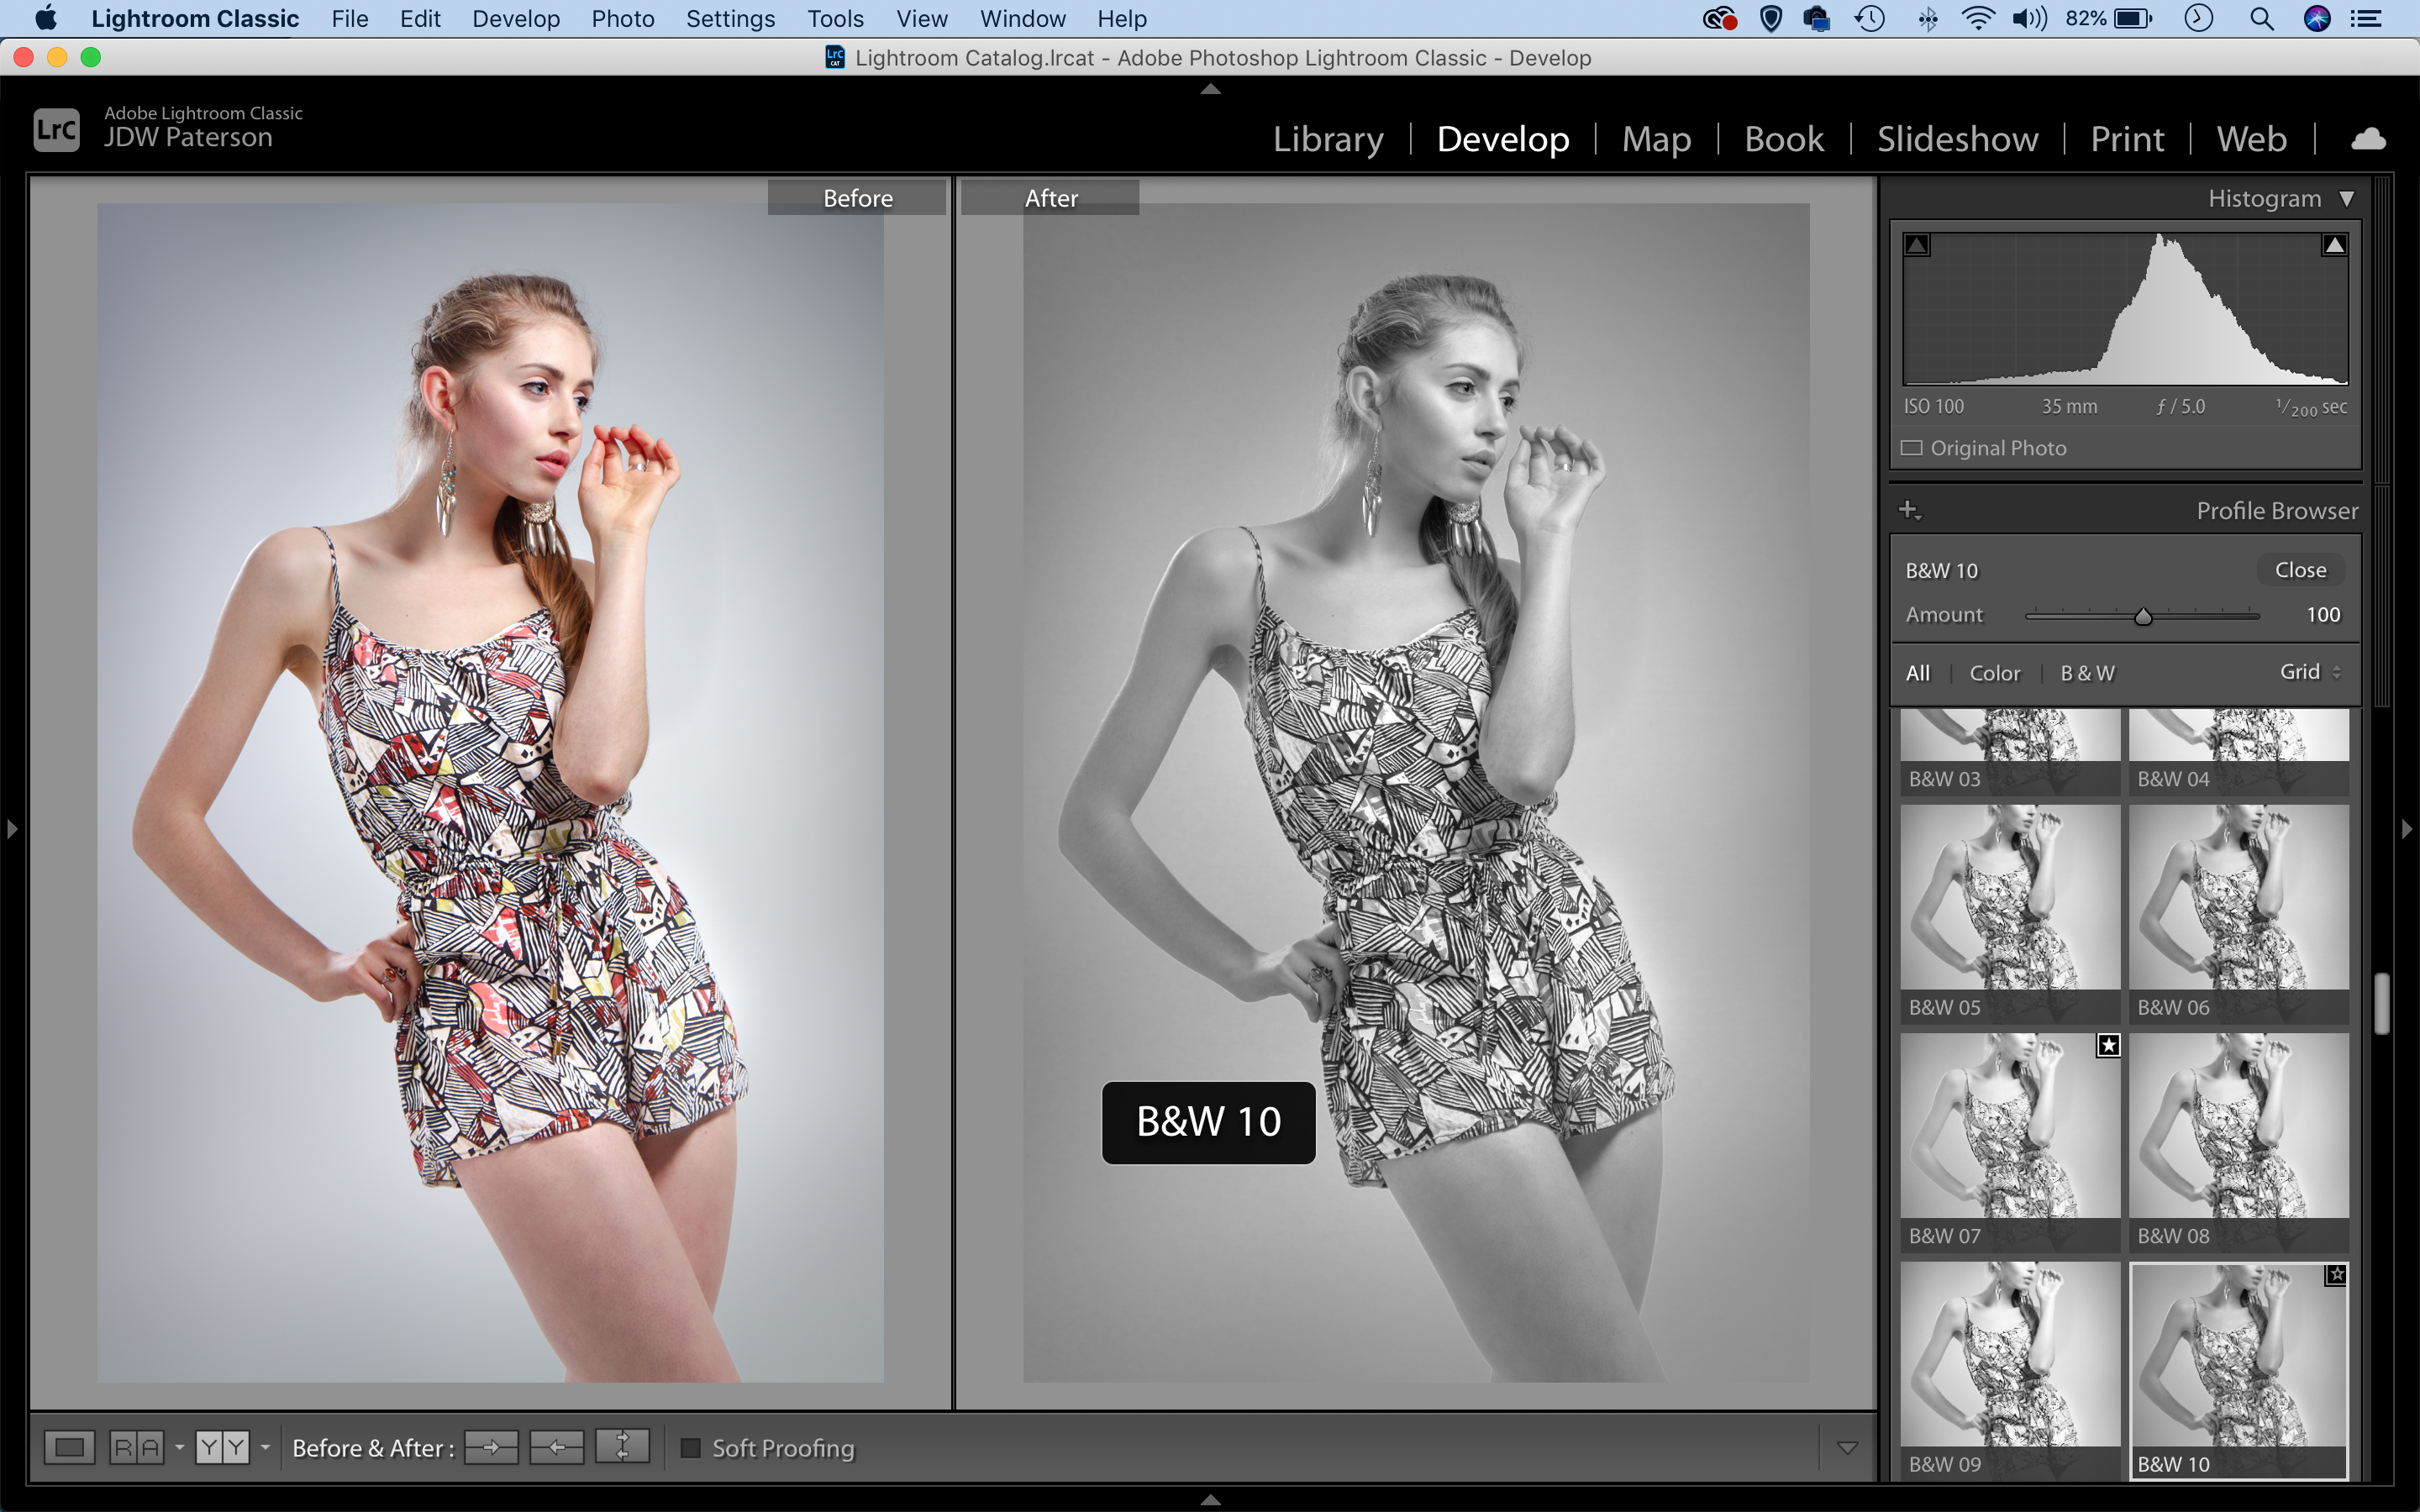
01 Choose a B&W profile
Import your image into Lightroom (download our start file here), then go to the Develop Module. Go to the Profile Browser at the top of the panels on the right, click the grid icon and choose a black and white profile – use the Adobe B&W or experiment with the BW profile set. We used BW10.
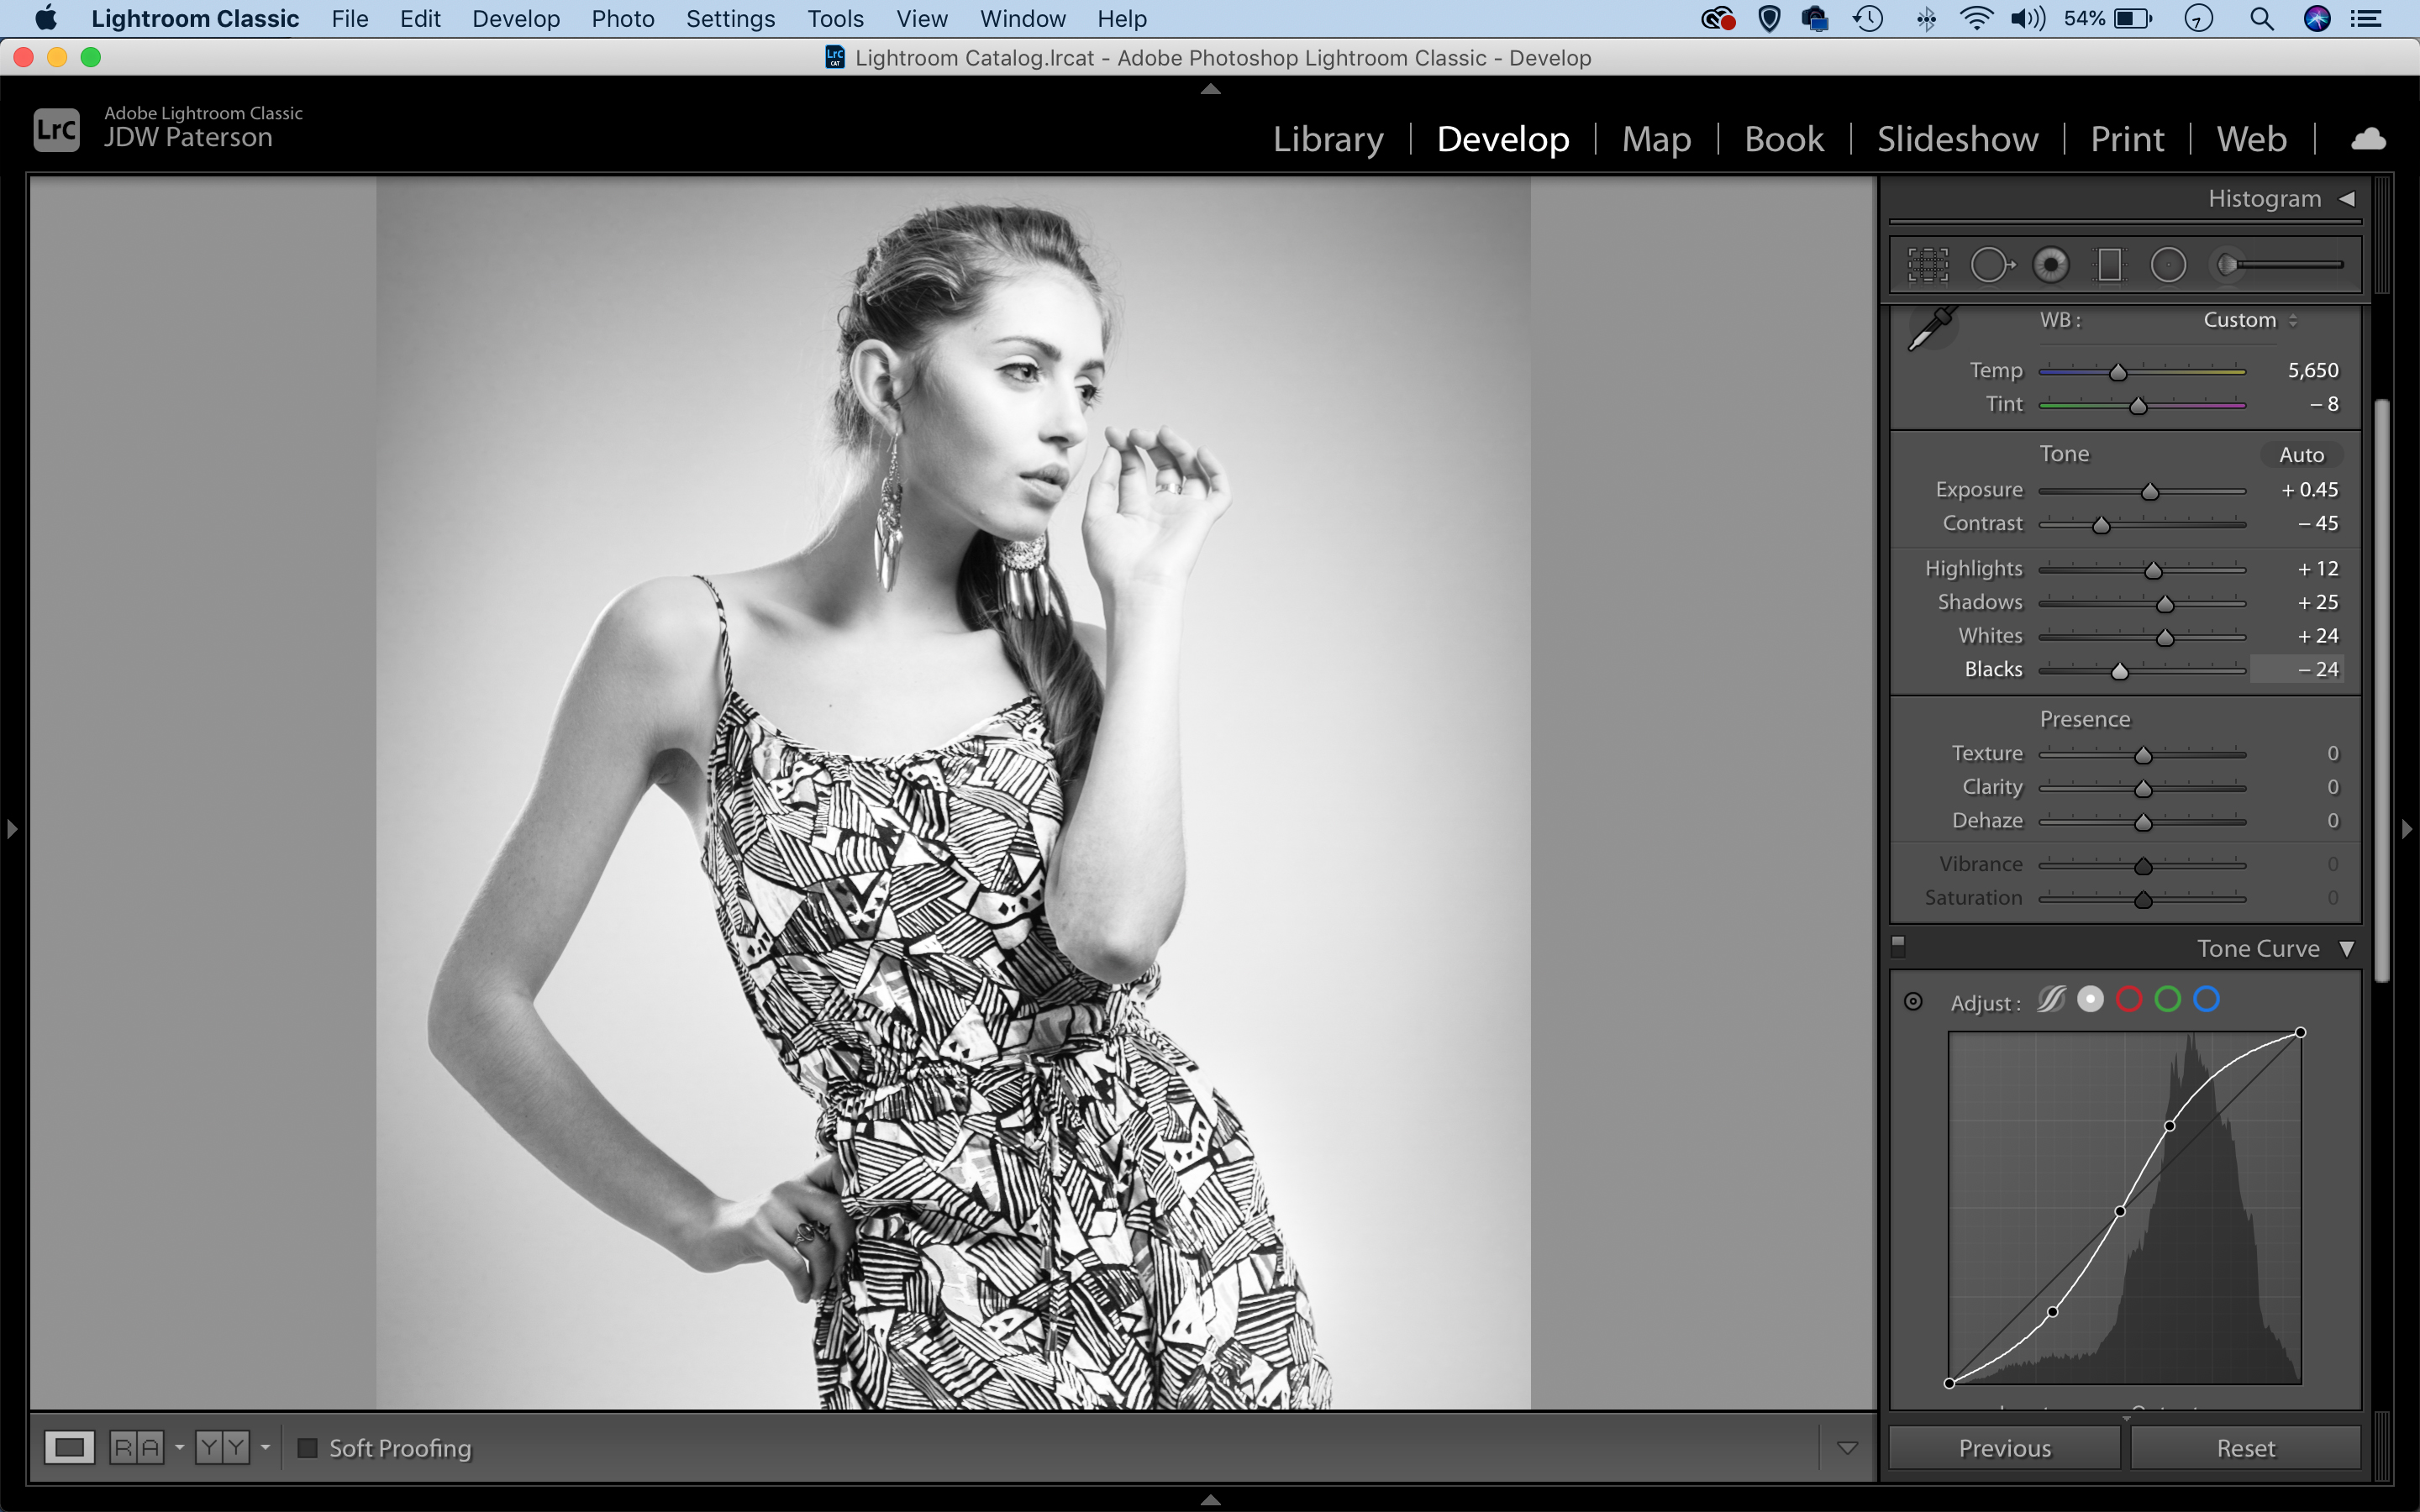
02 Boost the contrast
Use the Basic panel sliders to tweak the exposure. Hold Alt while dragging the blacks and whites sliders, this shows clipped pixels. Drag to a point just before they start to show. Next, go to the Tone Curve panel. Plot an S-shaped curve line like this to boost contrast.
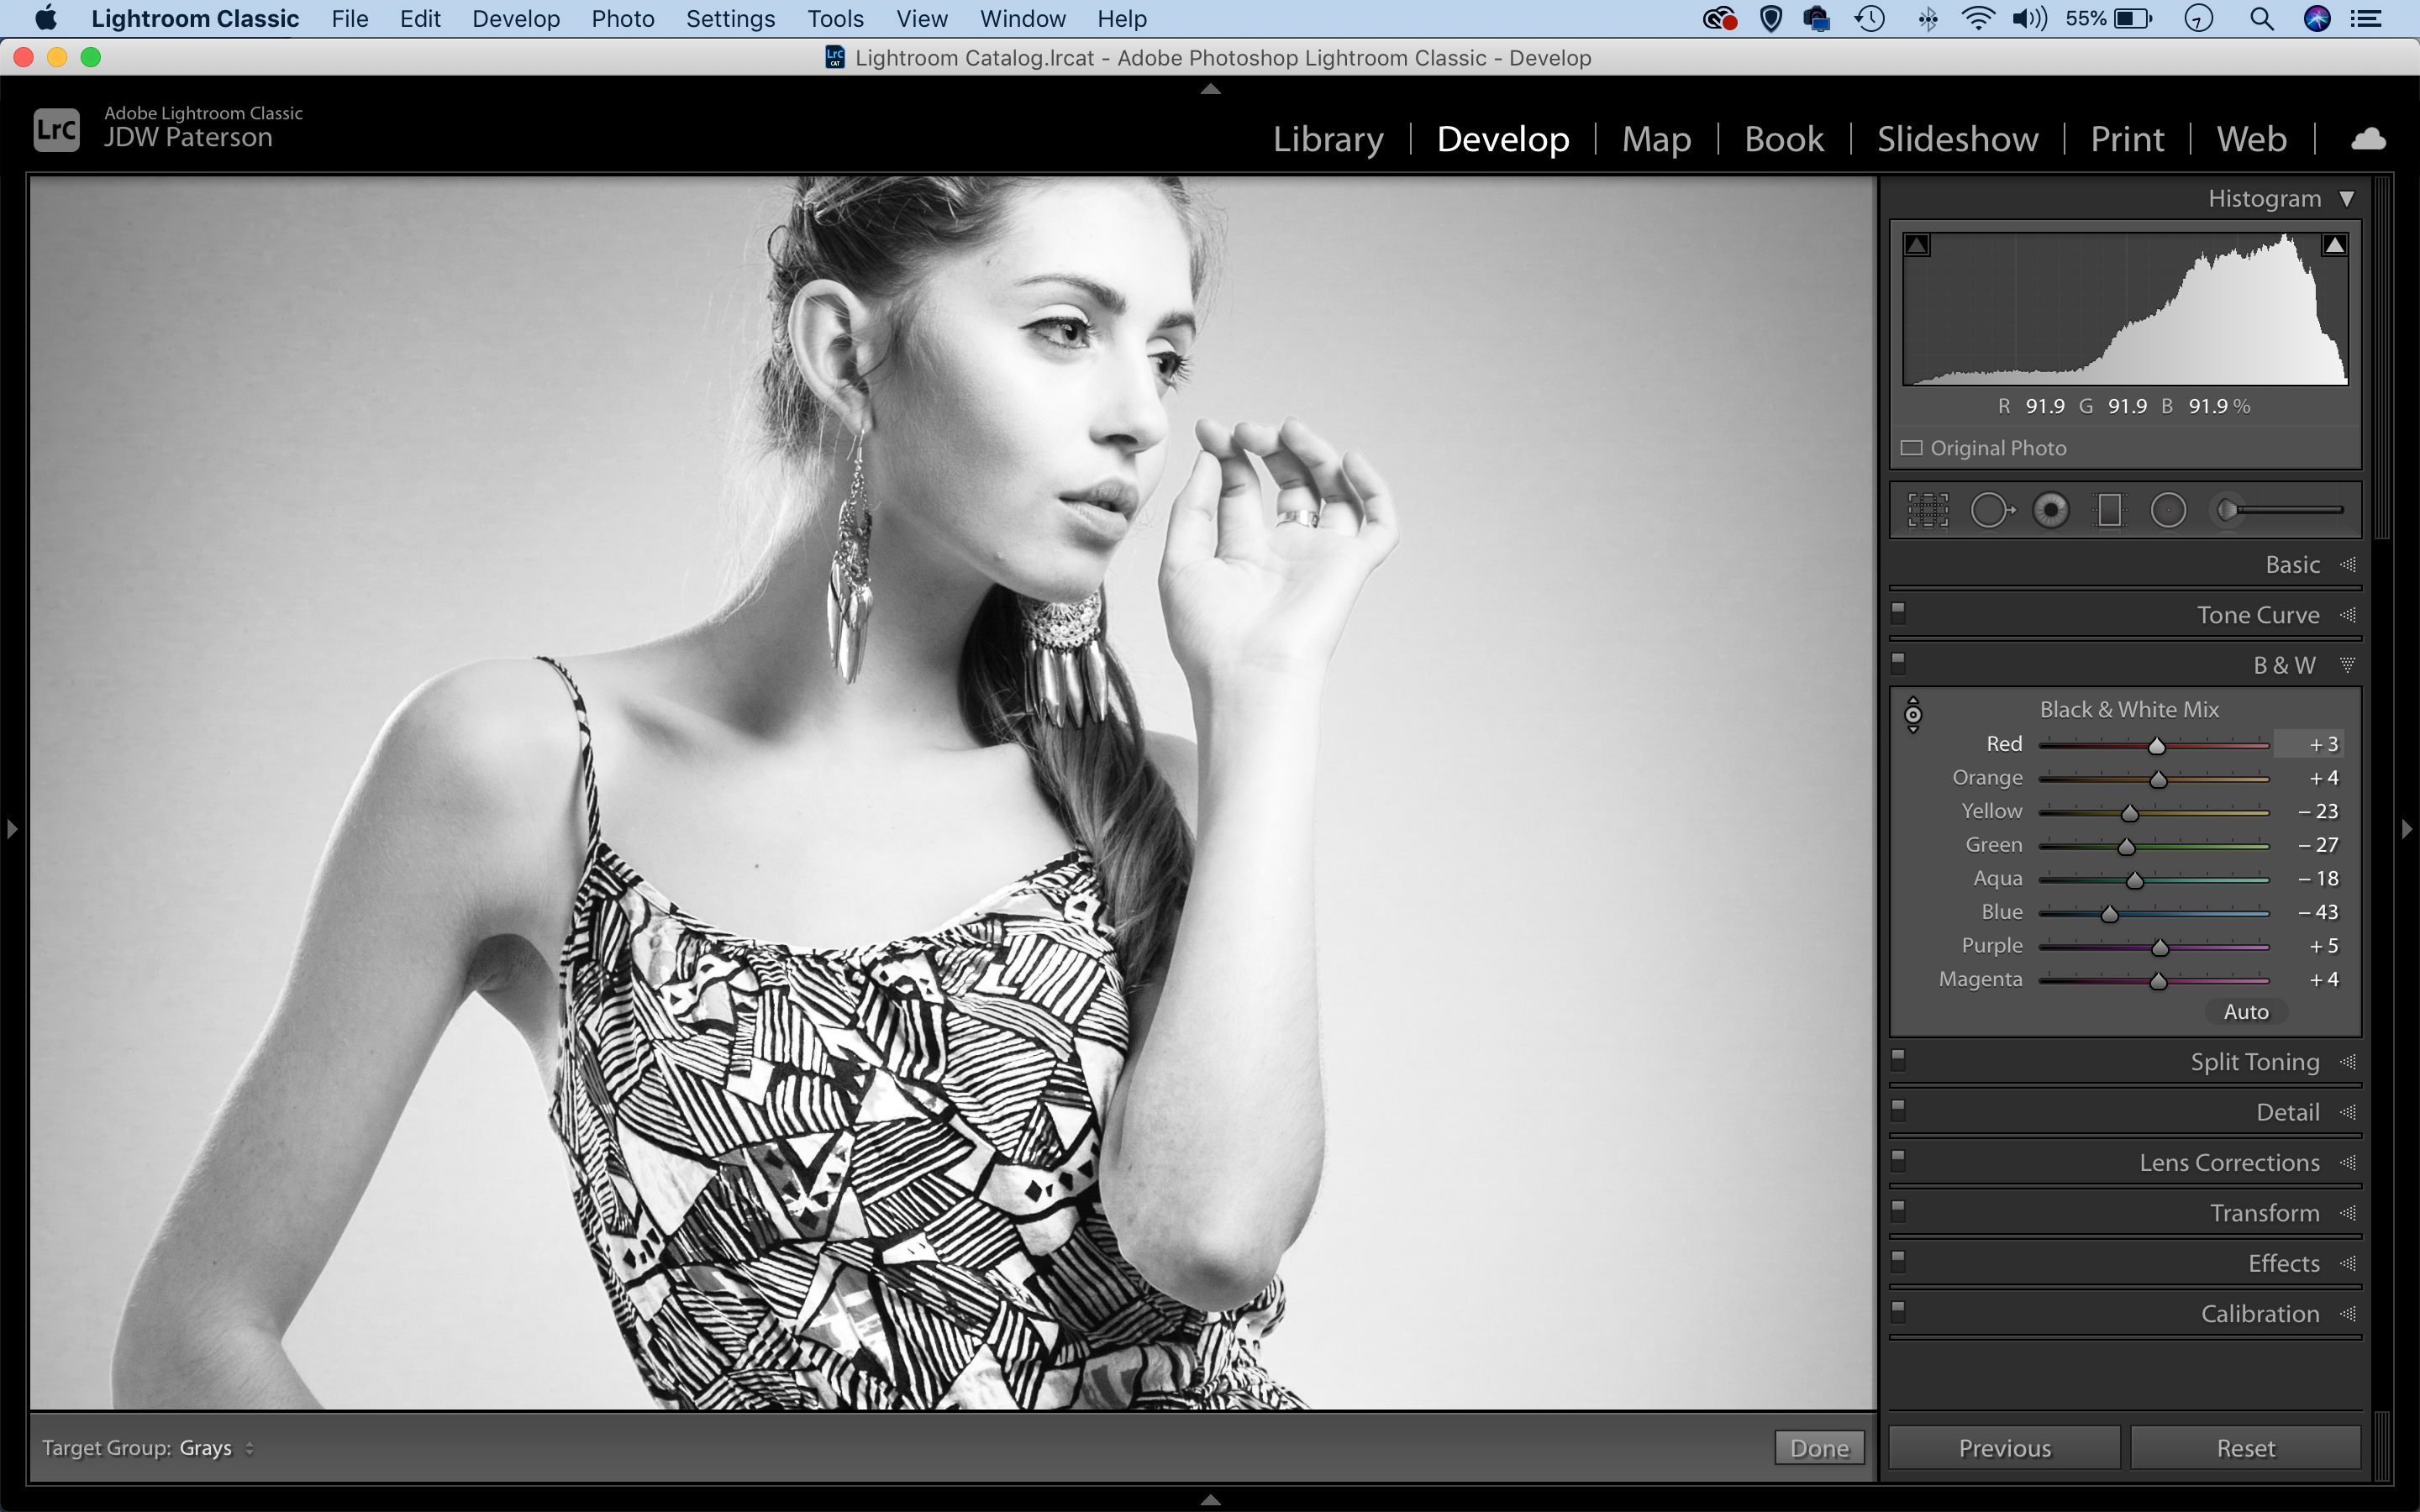
03 Fine-tune the conversion
Go to the B&W panel on the right. We can use the color sliders to tune the conversion by altering the brightness of these color ranges. We can also click the target icon and drag over the image. Drag up over the skin a bit to lift it, and down over the backdrop.
The best camera deals, reviews, product advice, and unmissable photography news, direct to your inbox!
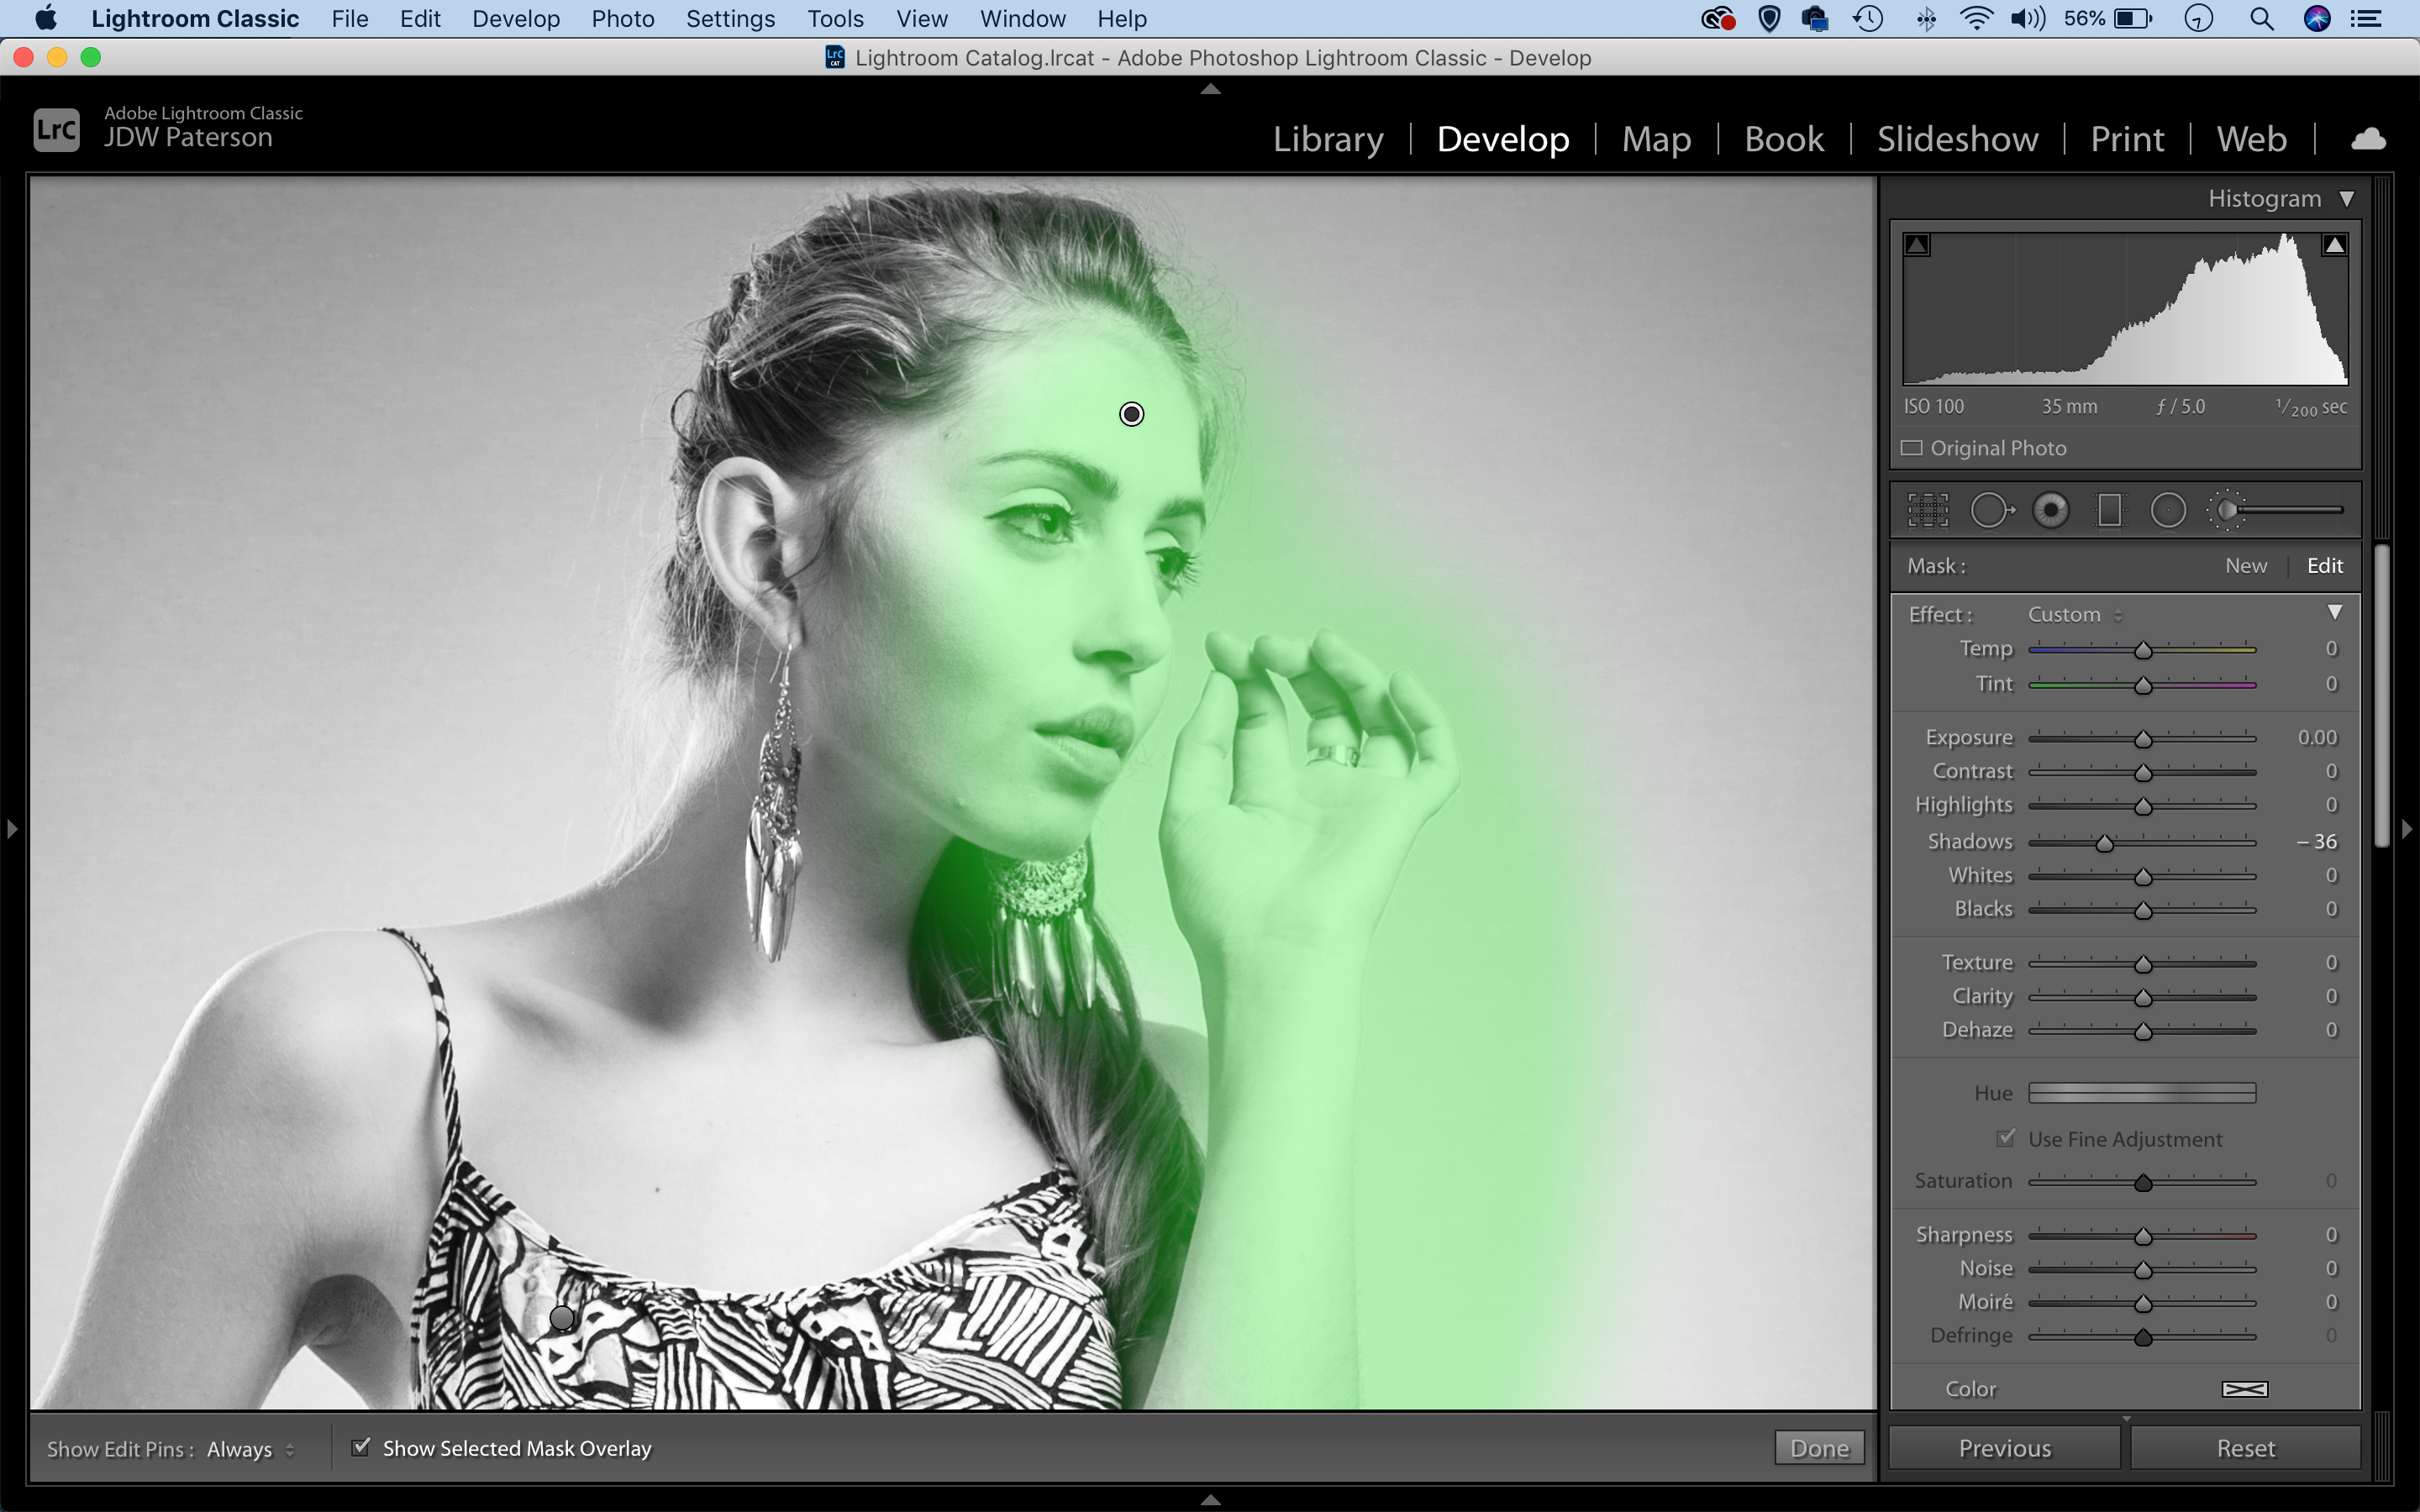
04 Darken the face
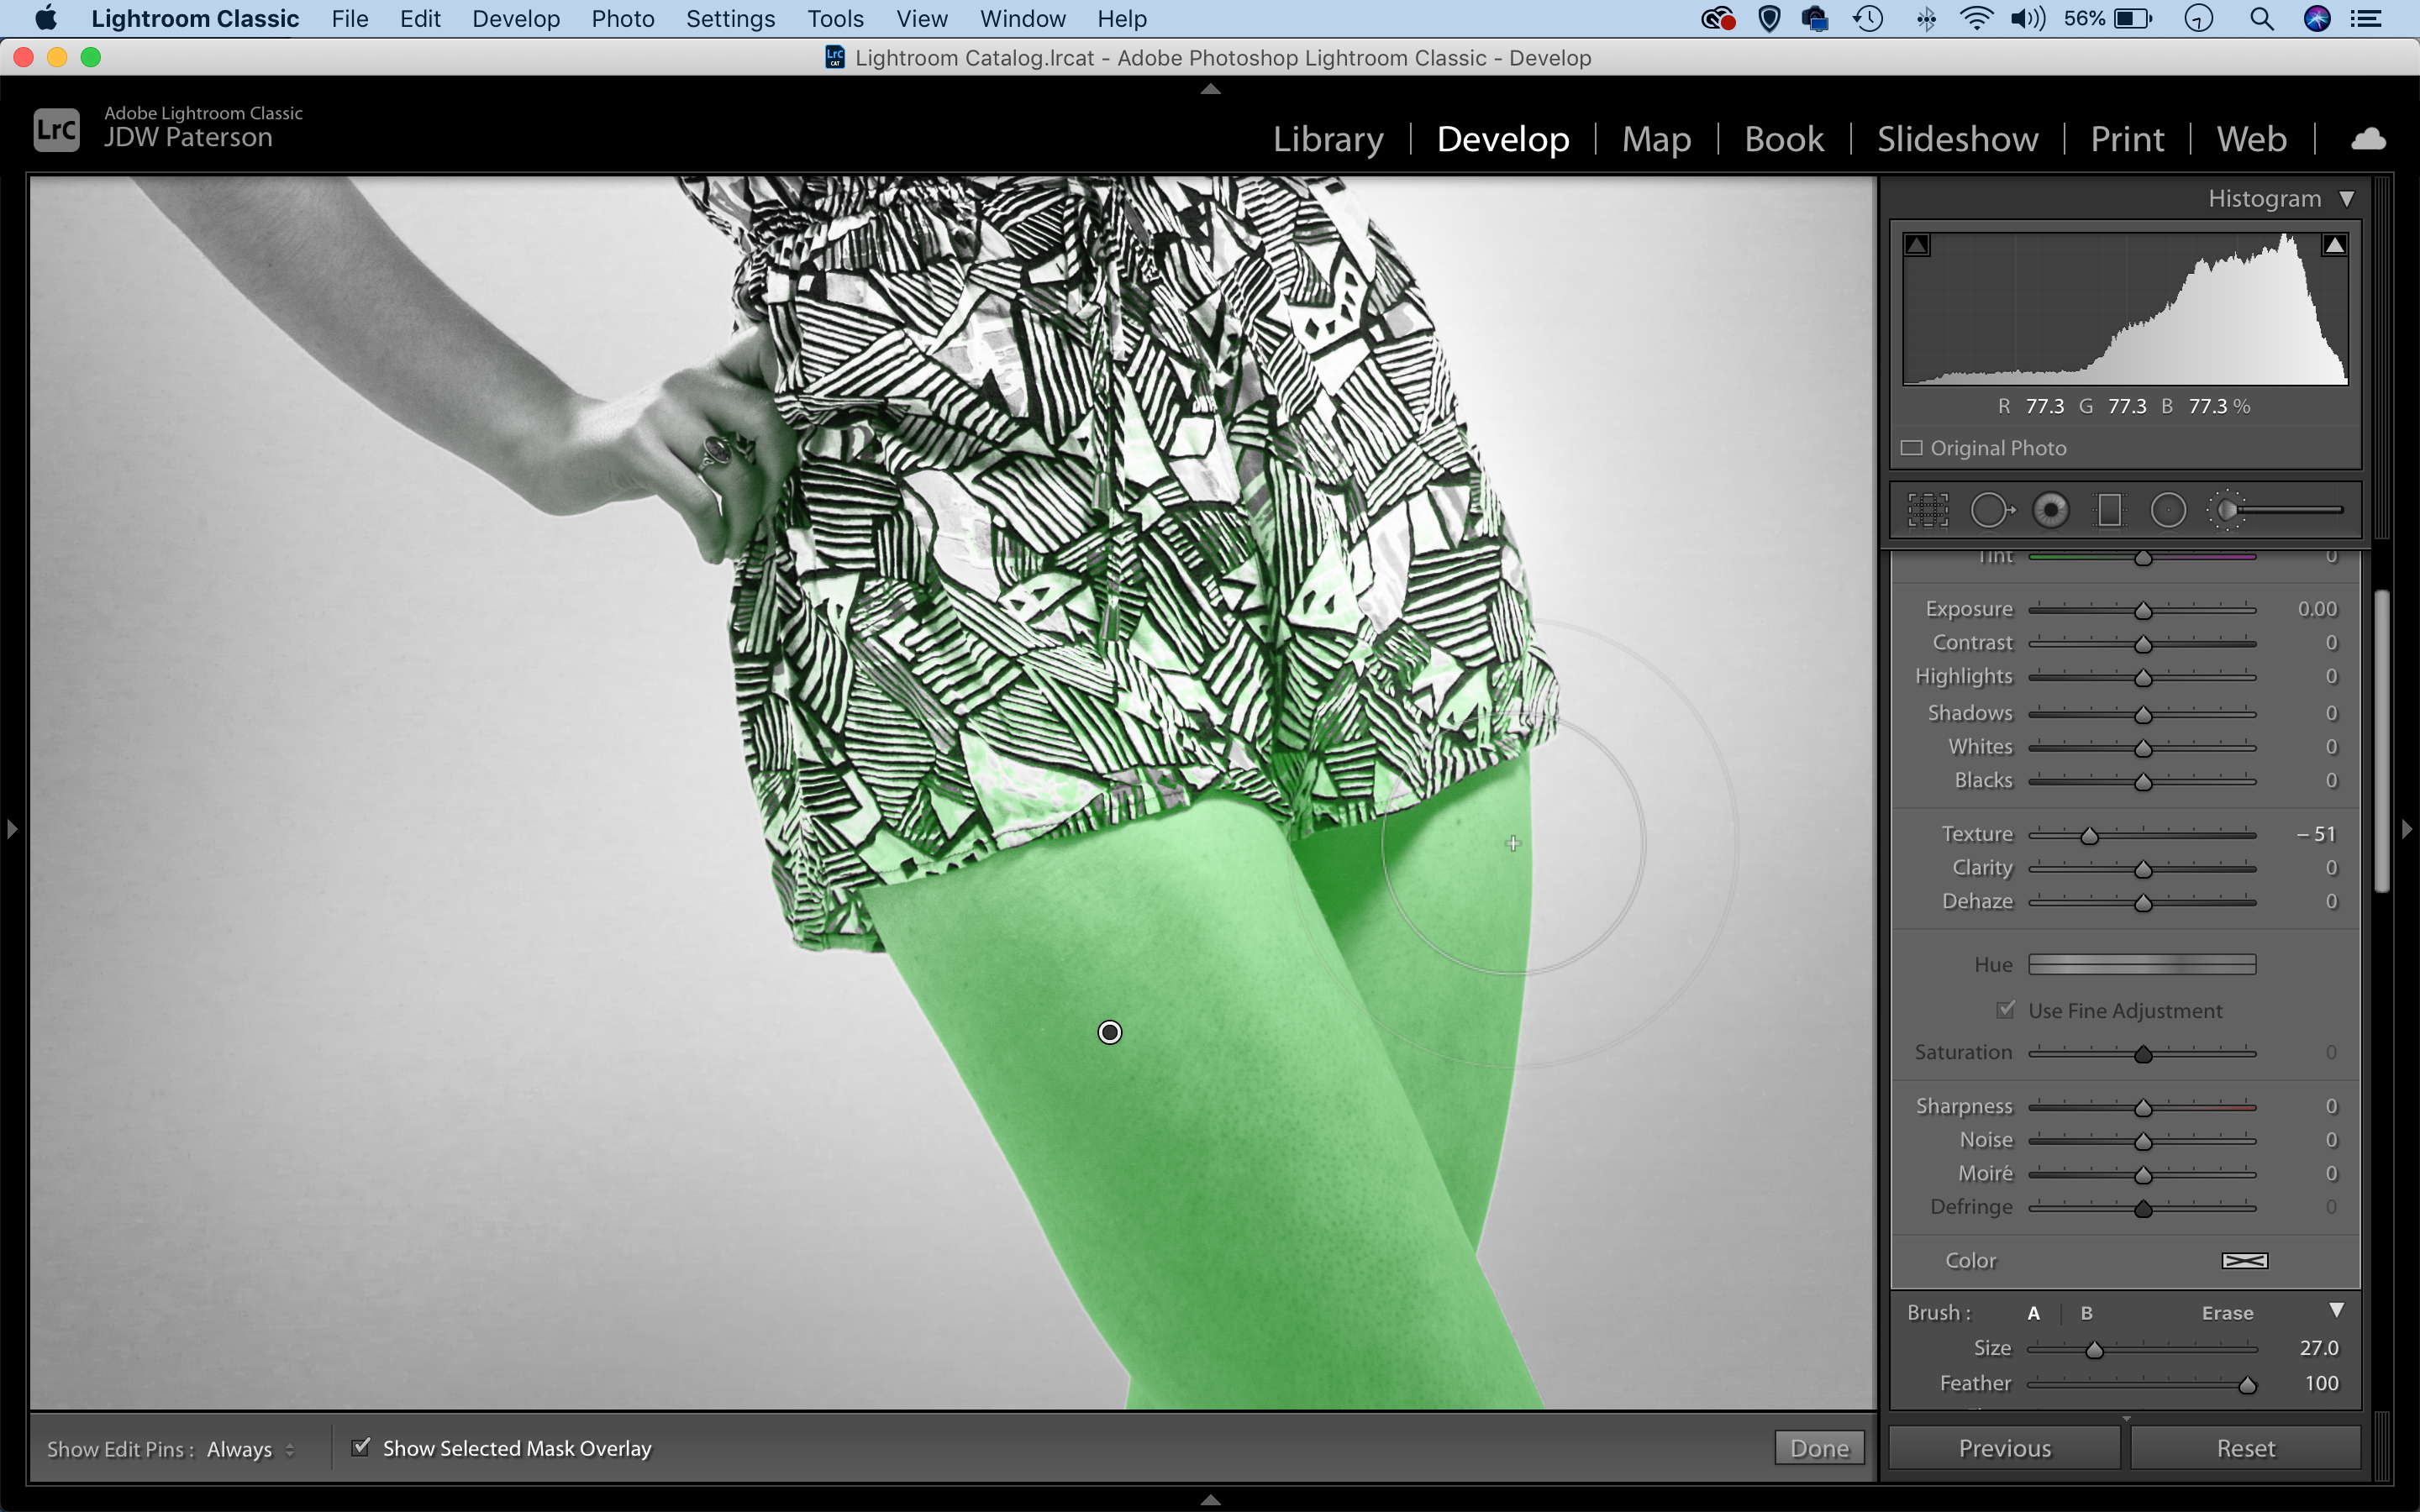
To make selective adjustments with the Adjustment Brush, get it from the toolbar and paint over the face. Reduce the Shadows slider to darken the face. Click New to make another adjustment. Paint over the clothes and increase Contrast to boost the patterns.
05 Soften skin
Black and white can emphasise blotchiness in skin. To soften it, paint over the area with the Adjustment Brush (press O to toggle a mask overlay to see where you’ve painted). After, reduce the Texture slider to -50. This reduces blotchiness while retaining fine texture.
06 Dodge and burn
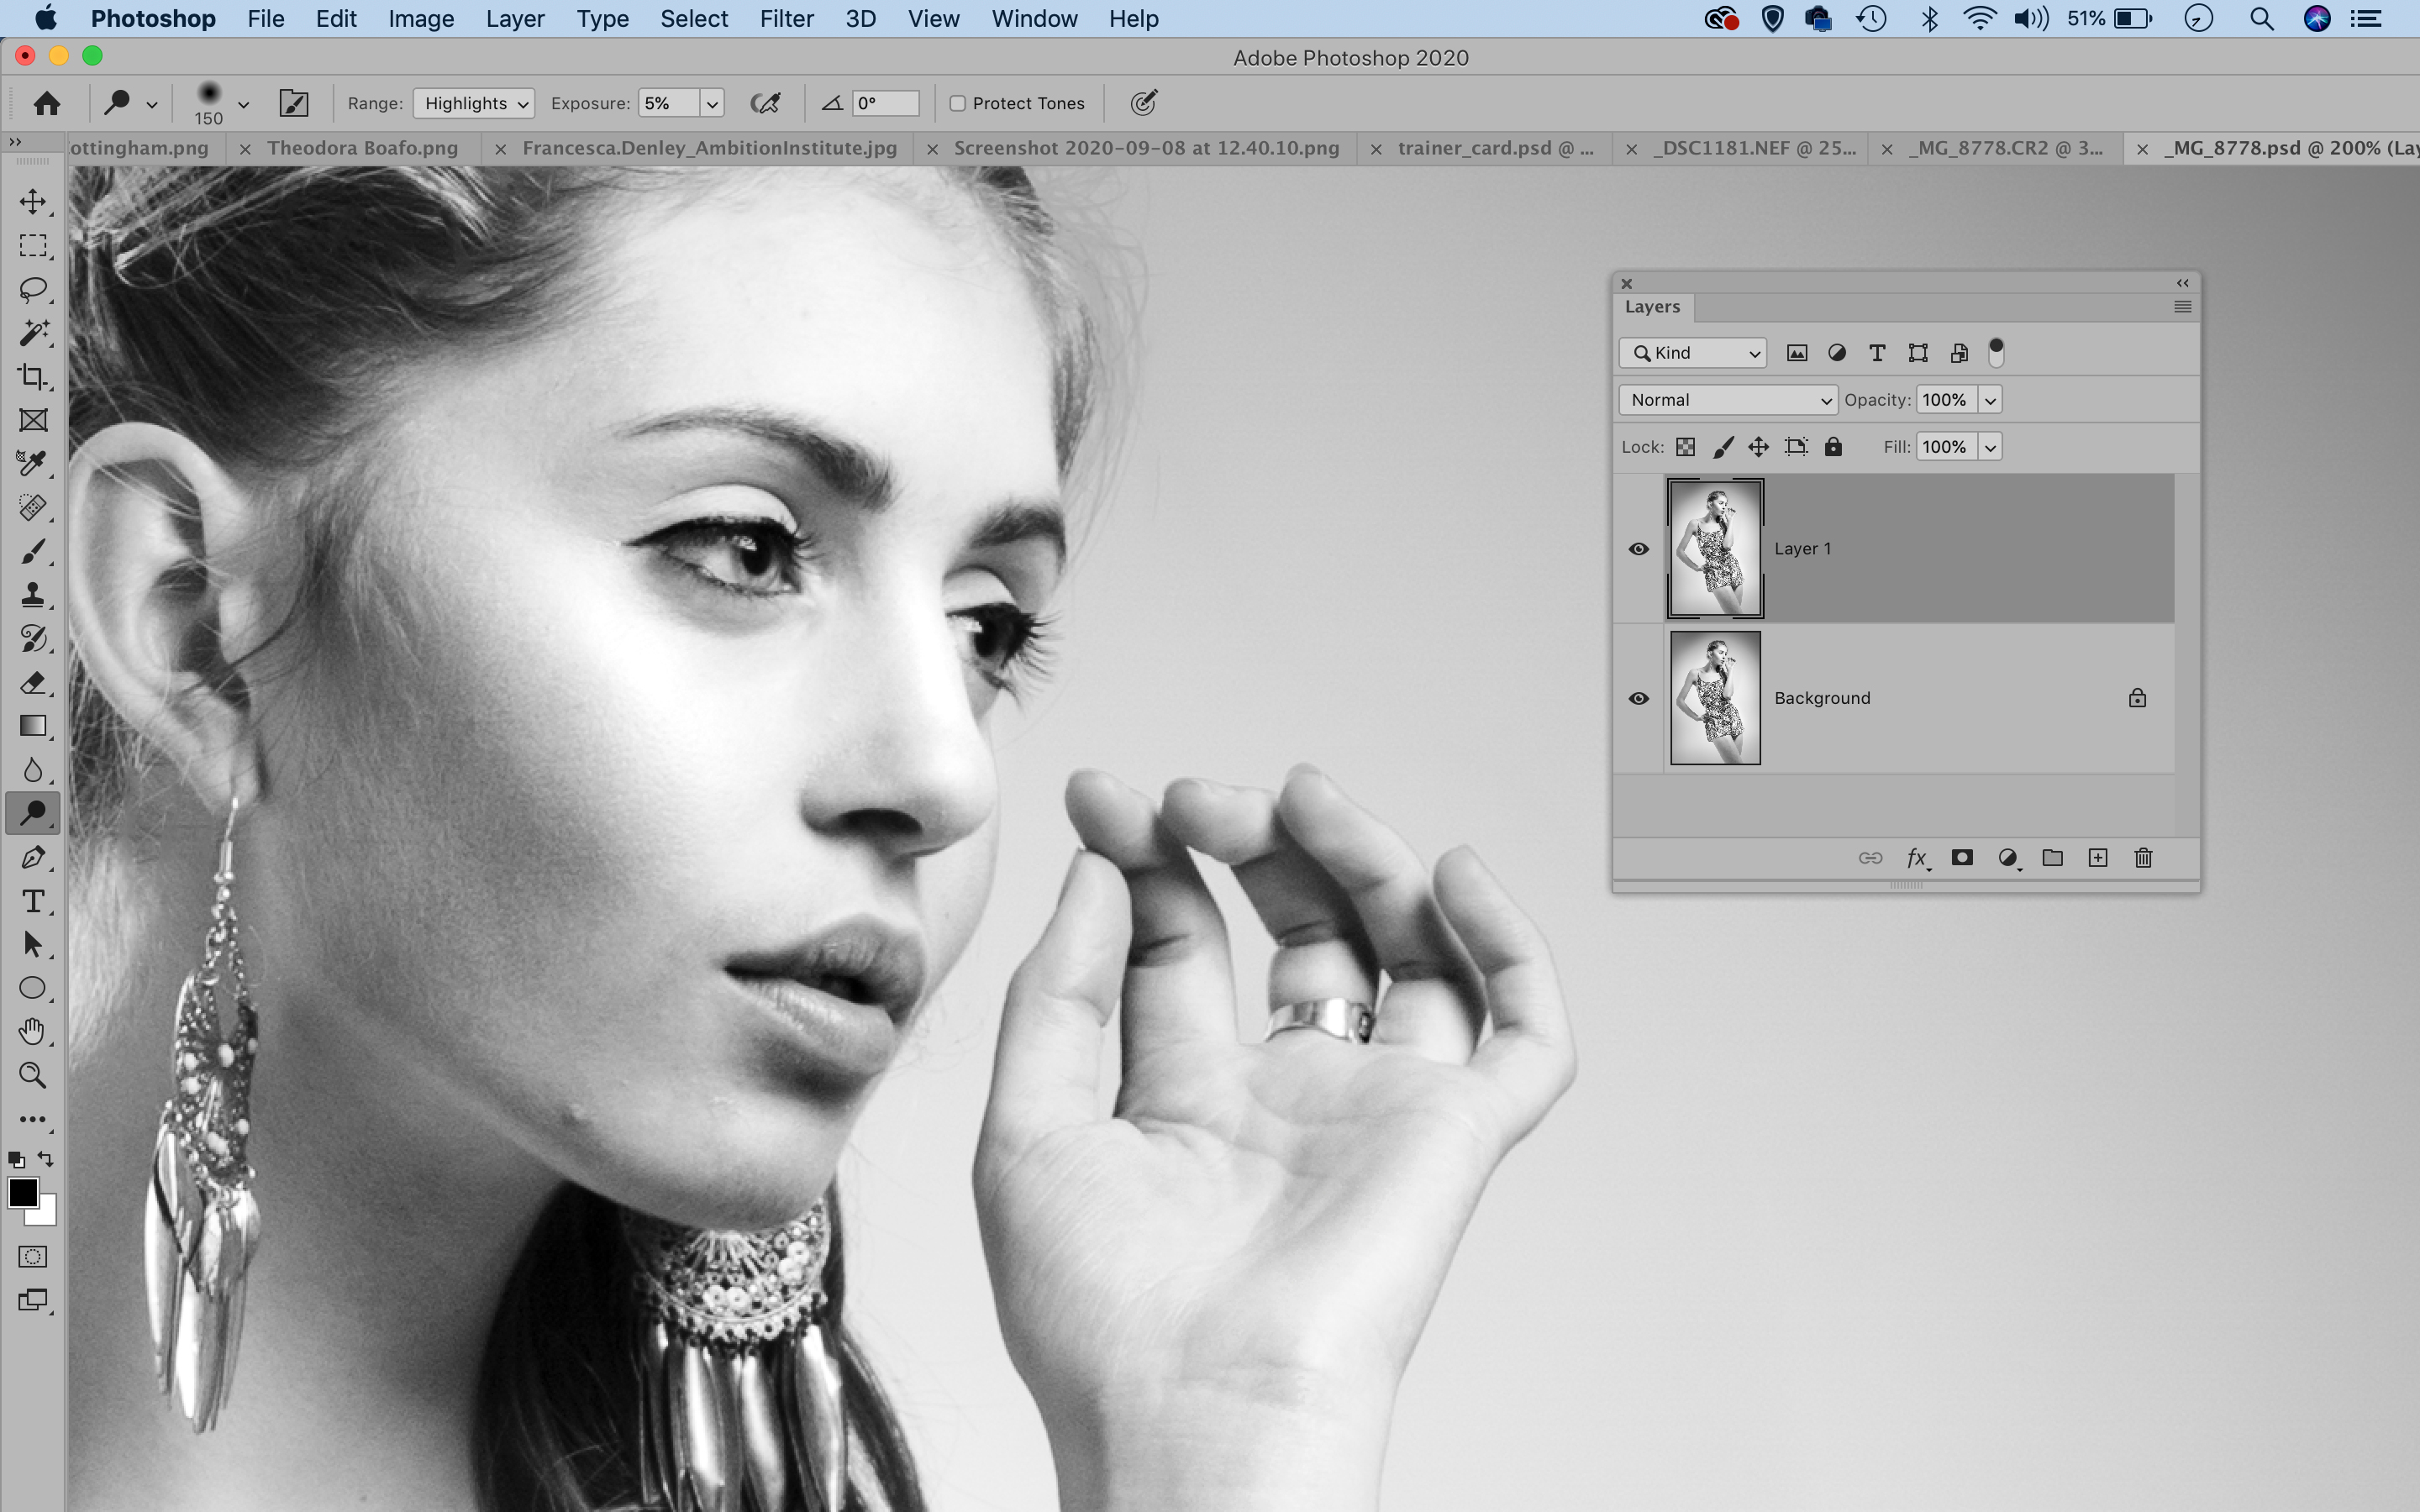
Right-click the image and Edit in>Photoshop. Once open, duplicate the background layer with Cmd/Ctrl+J, then grab the Burn tool from the toolbar. Set it to Shadows, then paint to darken any areas you like. Use the Dodge tool to lift areas.
PhotoPlus: The Canon Magazine is the world's only monthly newsstand title that's 100% devoted to Canon, so you can be sure the magazine is completely relevant to your system.
Read more:
The best photo editing software: image editors for novices through to pros
The best photo-editing laptops: top laptops for photographers
10 best online photography courses – from beginner guides to masterclasses
The lead technique writer on Digital Camera Magazine, PhotoPlus: The Canon Magazine and N-Photo: The Nikon Magazine, James is a fantastic general practice photographer with an enviable array of skills across every genre of photography.
Whether it's flash photography techniques like stroboscopic portraits, astrophotography projects like photographing the Northern Lights, or turning sound into art by making paint dance on a set of speakers, James' tutorials and projects are as creative as they are enjoyable.
He's also a wizard at the dark arts of Photoshop, Lightroom and Affinity Photo, and is capable of some genuine black magic in the digital darkroom, making him one of the leading authorities on photo editing software and techniques.
