Change colors in Photoshop to create a brand-new look the easy way
Use Photoshop CC to take full control of the color palette in your pictures using the LAB mode
The best camera deals, reviews, product advice, and unmissable photography news, direct to your inbox!
You are now subscribed
Your newsletter sign-up was successful
Watch video: Use LAB mode in Photoshop CC
It might sound like something that requires a white coat and a clipboard, but LAB Color mode isn’t just for digital imaging boffins, it’s for anyone who wants to shift, boost and take control of color in their photos. Here, we’ll explain how it works.
First, a little about color modes in Photoshop CC. Most of the time we view and work on images in the RGB color mode. This stands for Red, Green and Blue, and from combinations of these three colors any other color can be made. When in RGB mode each pixel has a specific R, G and B value between 0 and 255. This determines not just the color intensity but also the brightness of the pixel. For example, if a pixel has R 255, G 255, B 255 then it is fully white. So in RGB mode the color and brightness of any given pixel are binded, making it difficult to change one independently of the other.
Article continues below• Read more: Best photo editing software
LAB Color works differently. When we switch to LAB each pixel is again designated three values, just like RGB. But instead of three color values, there are two – the A and B channels. The third channel – L – is dedicated to luminance. Put them all together and we get L-A-B. Unlike RGB the LAB values are based on how the eye sees color rather than how a device calculates it, and it brings several important benefits.
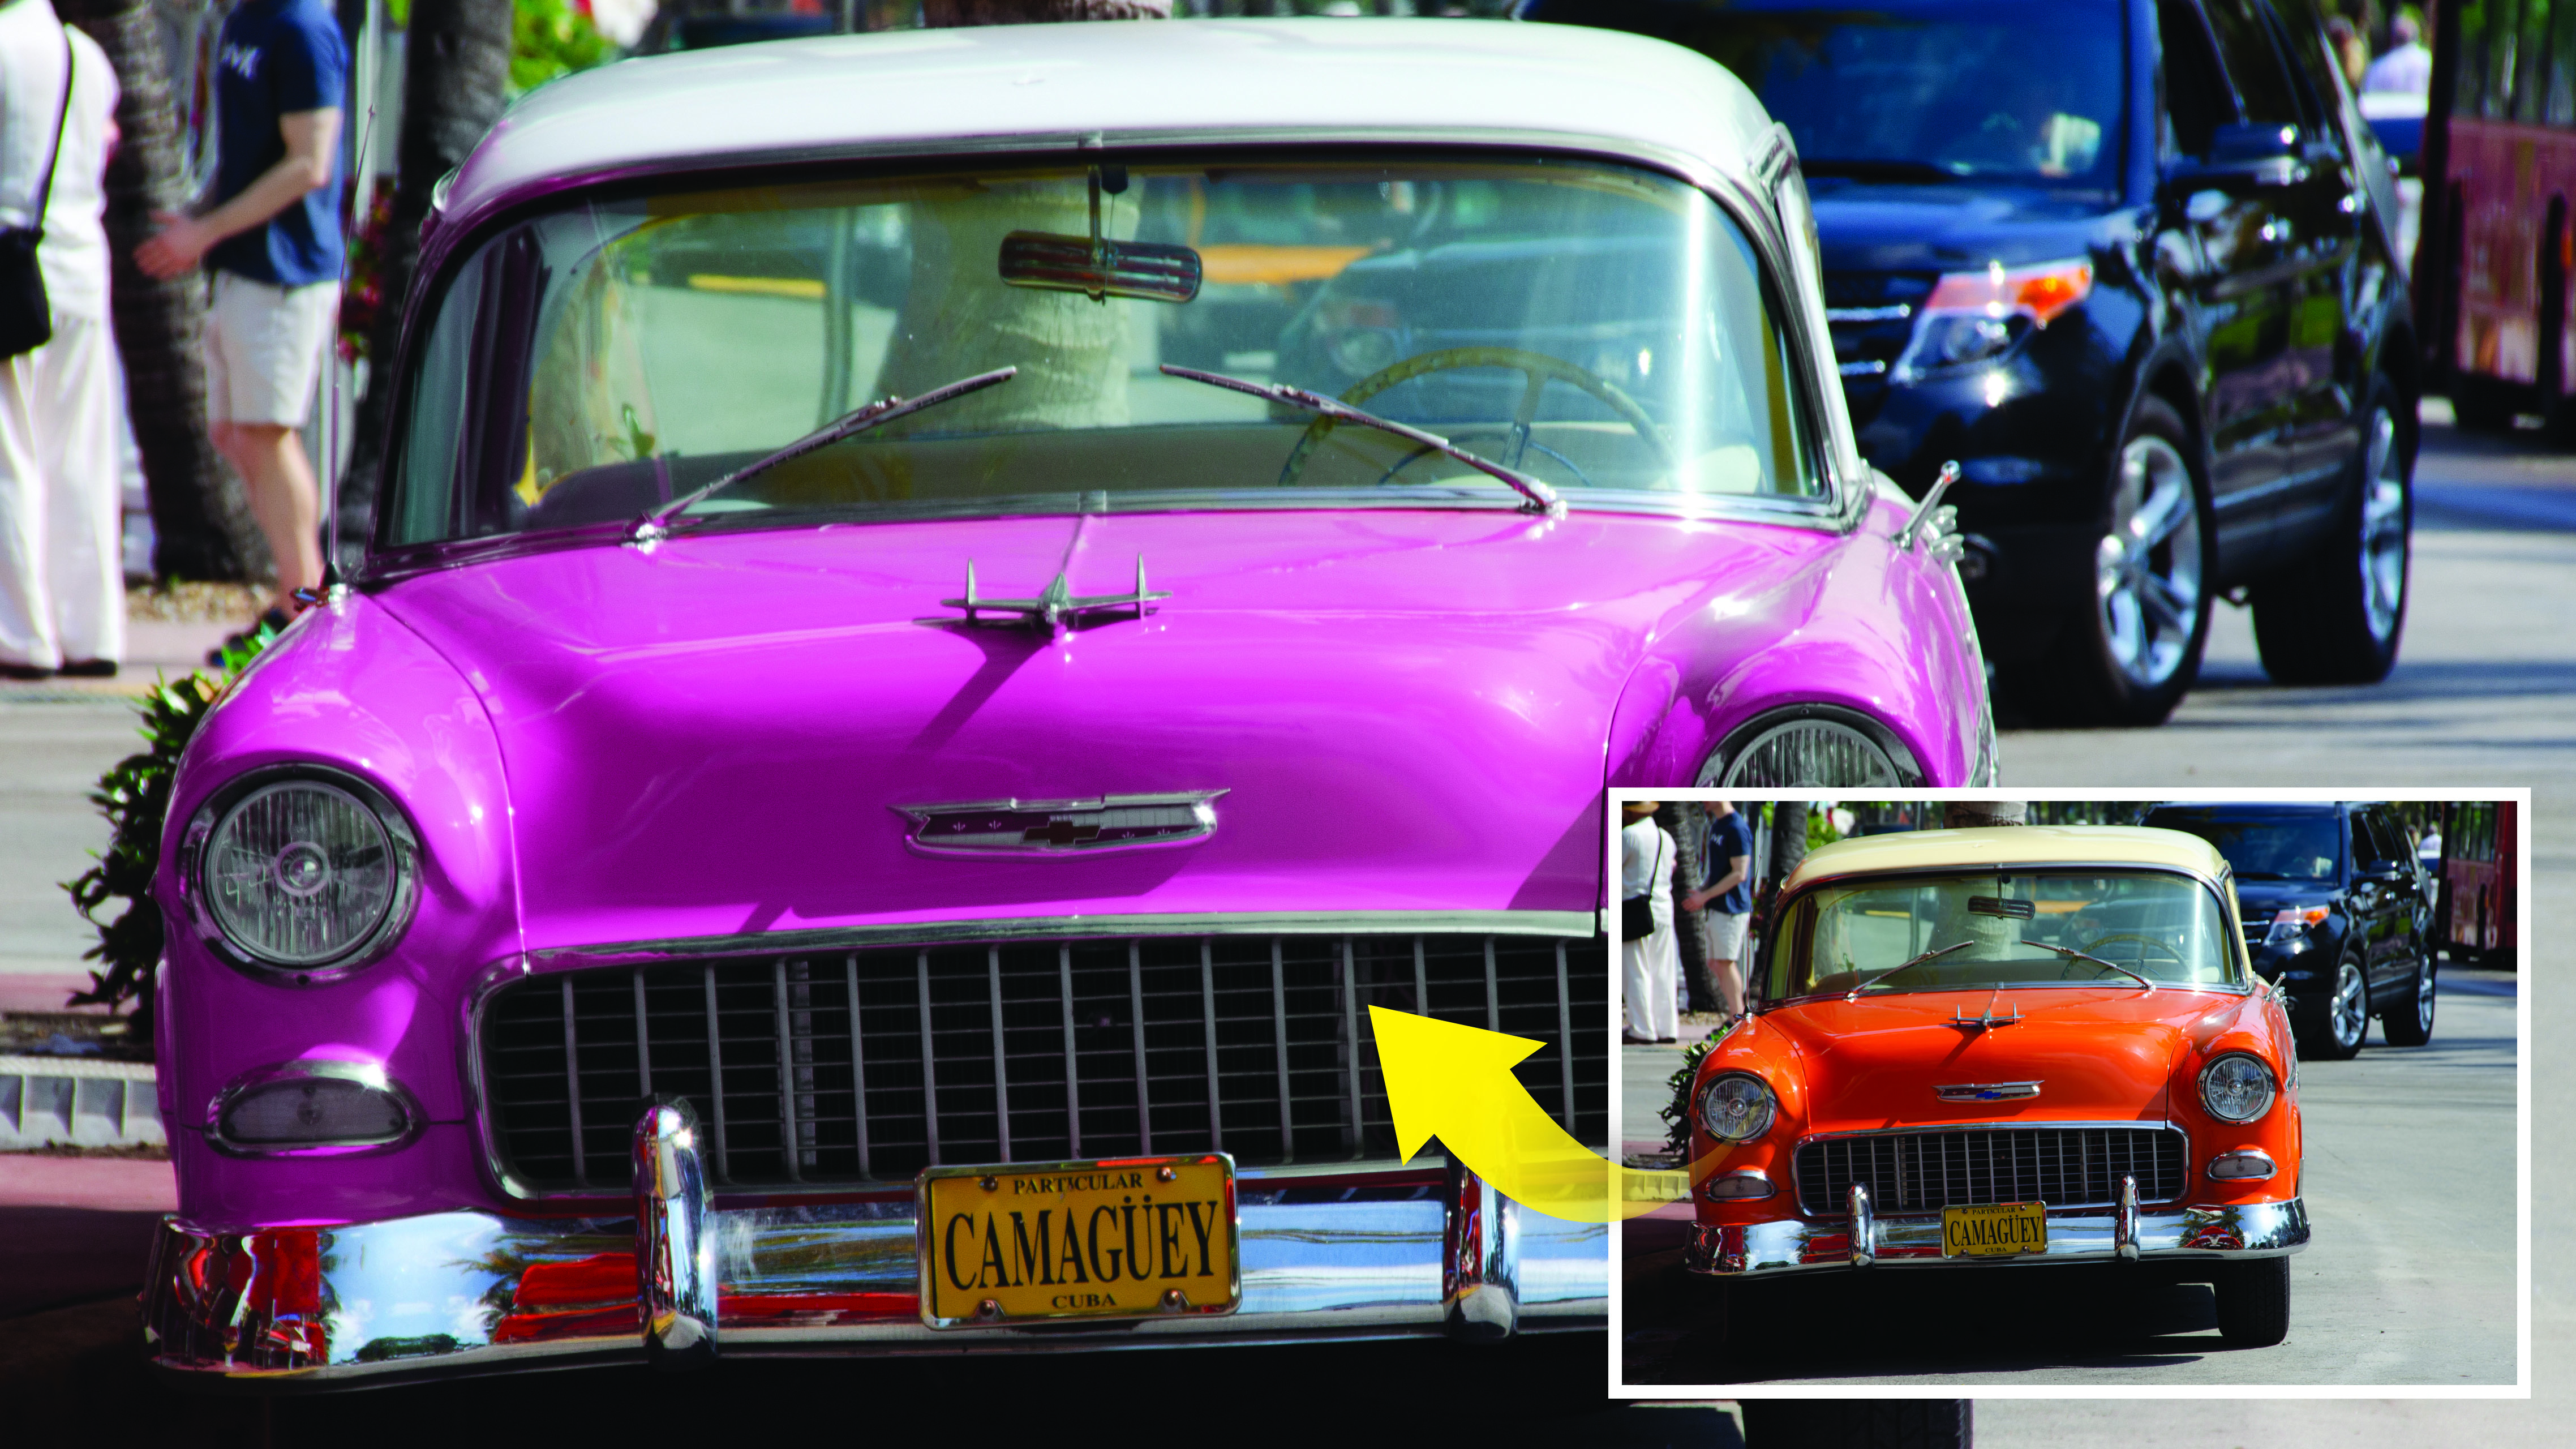
Chiefly, it means we can actually alter colors independently of brightness, like with the car here. We can also boost color saturation and convert to monochrome.
01 Convert to LAB
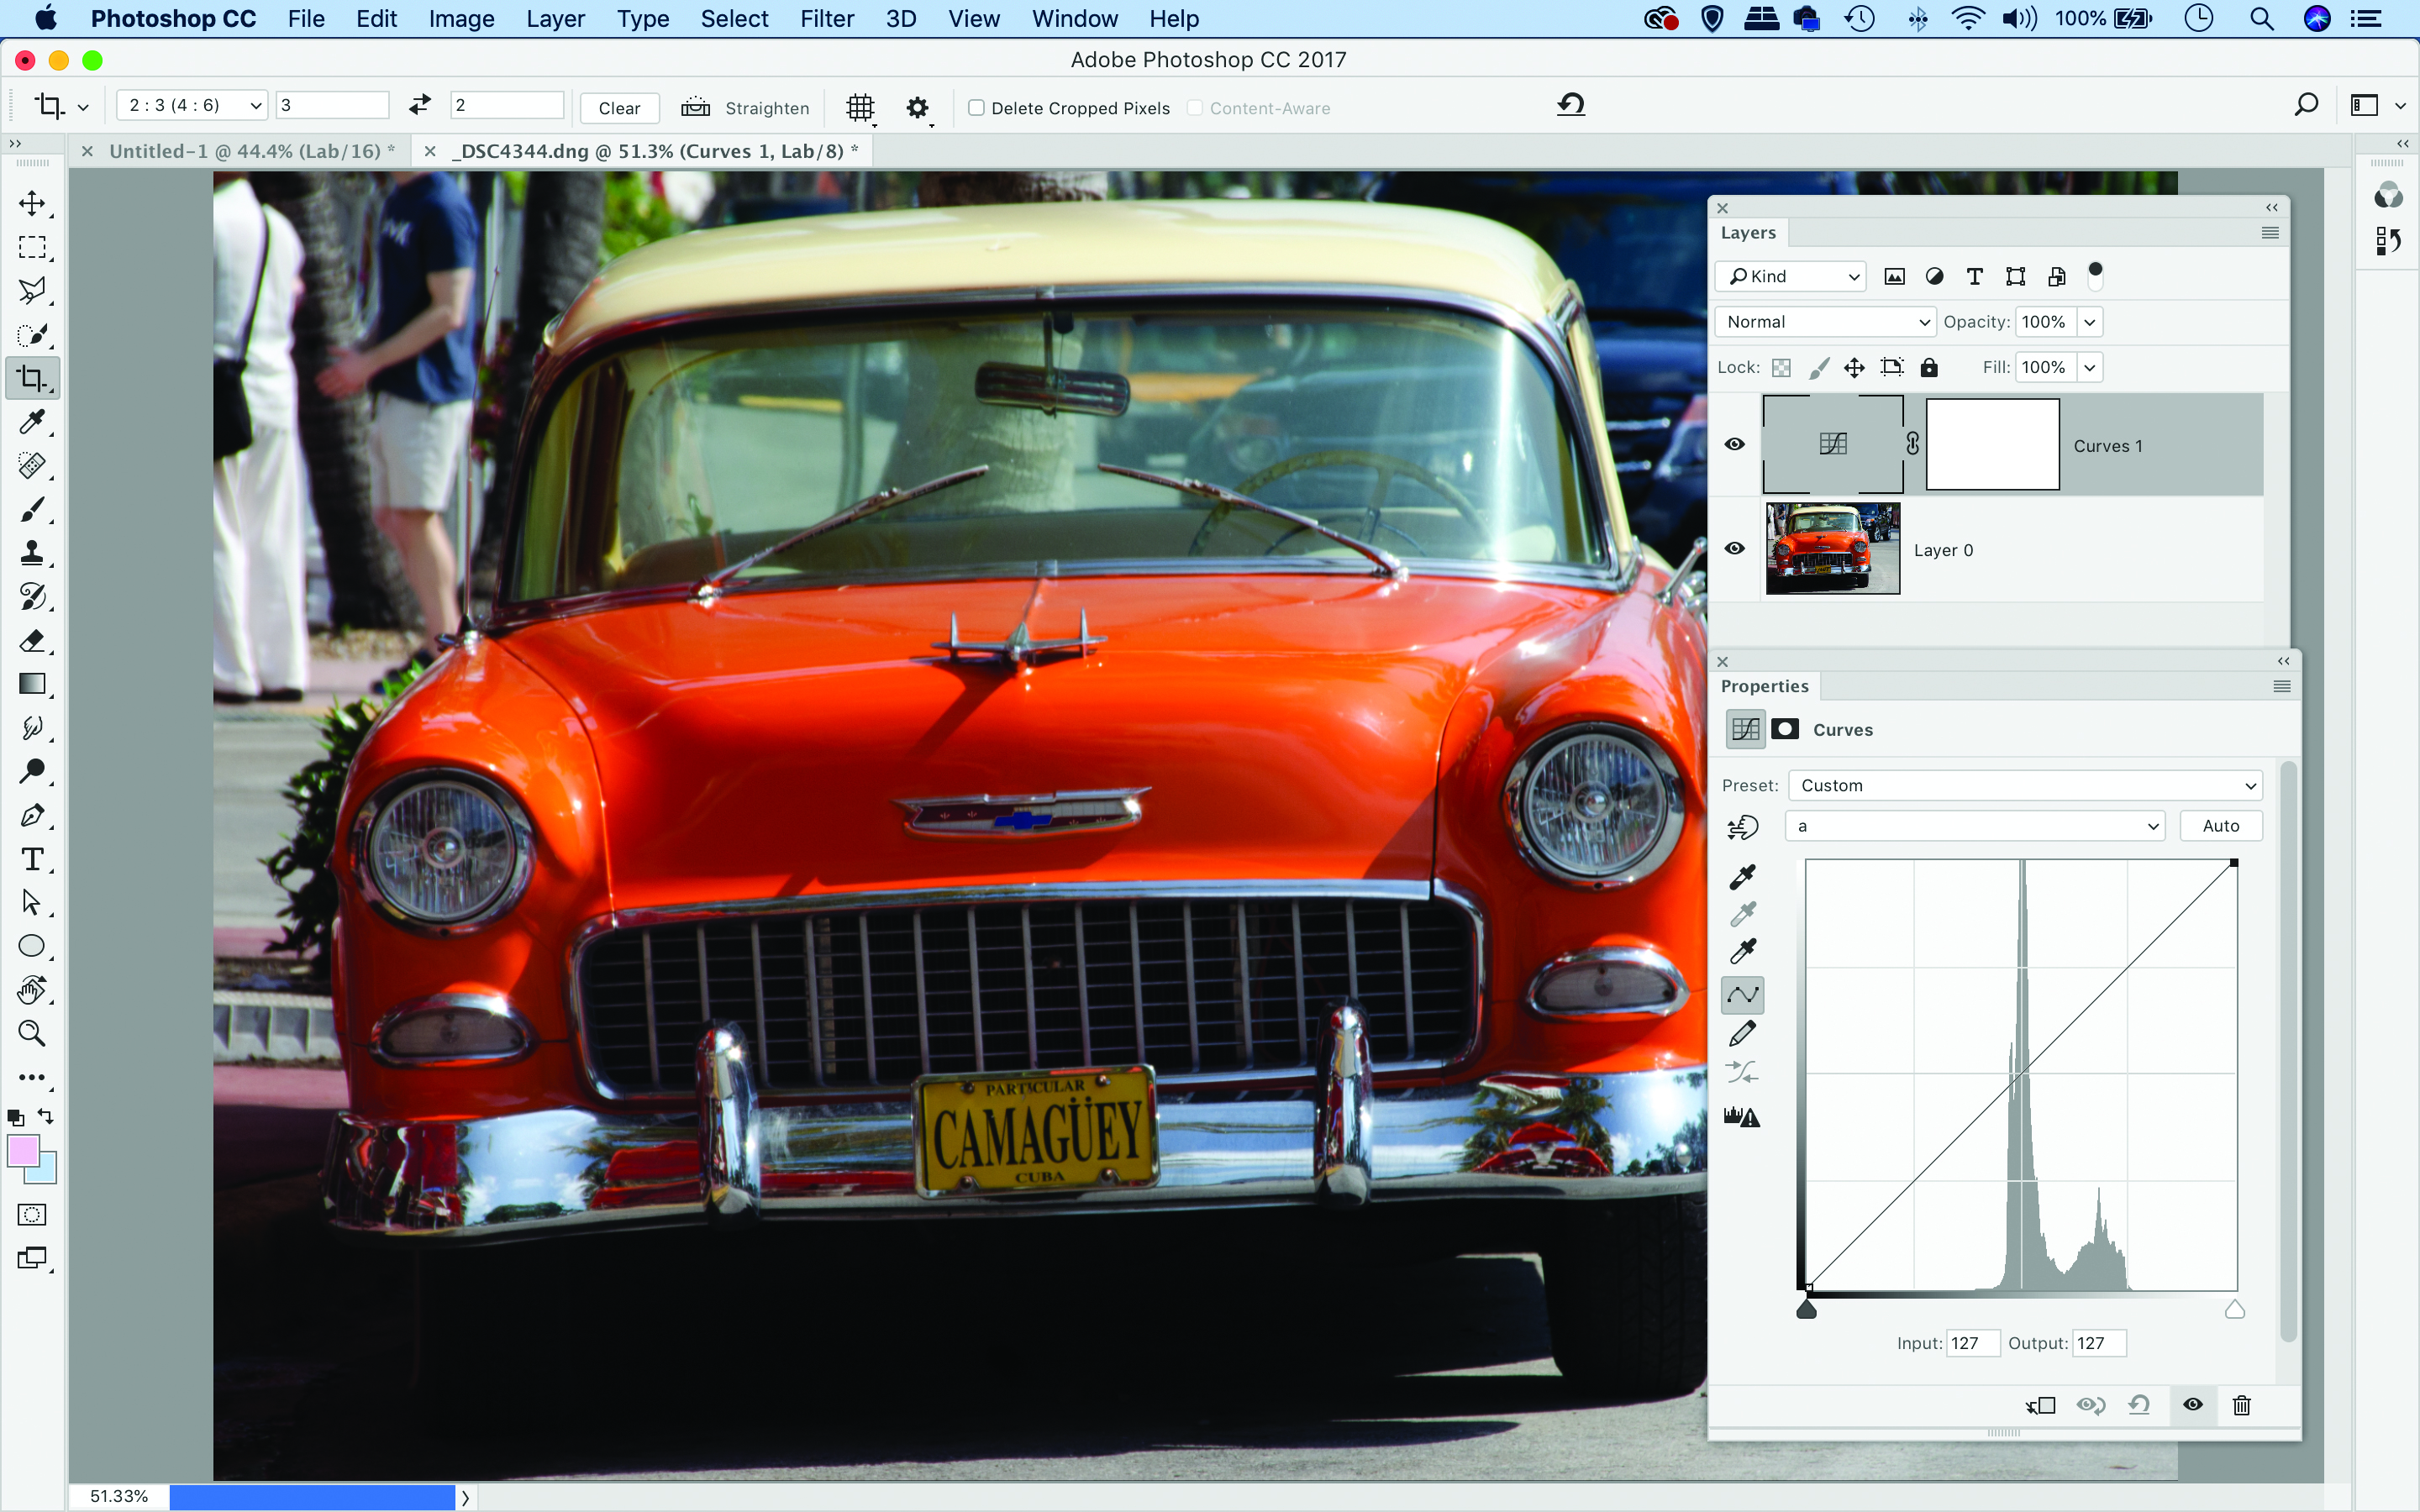
Open a photo in Photoshop CC and go Image > Mode > LAB Color. Next go to the Layers panel (Window > Layers) and click the Create Adjustment Layer icon. Choose Curves. The channel dropdown at the top of the settings shows Lightness. Go to it and choose A.
The best camera deals, reviews, product advice, and unmissable photography news, direct to your inbox!
02 Shift the color
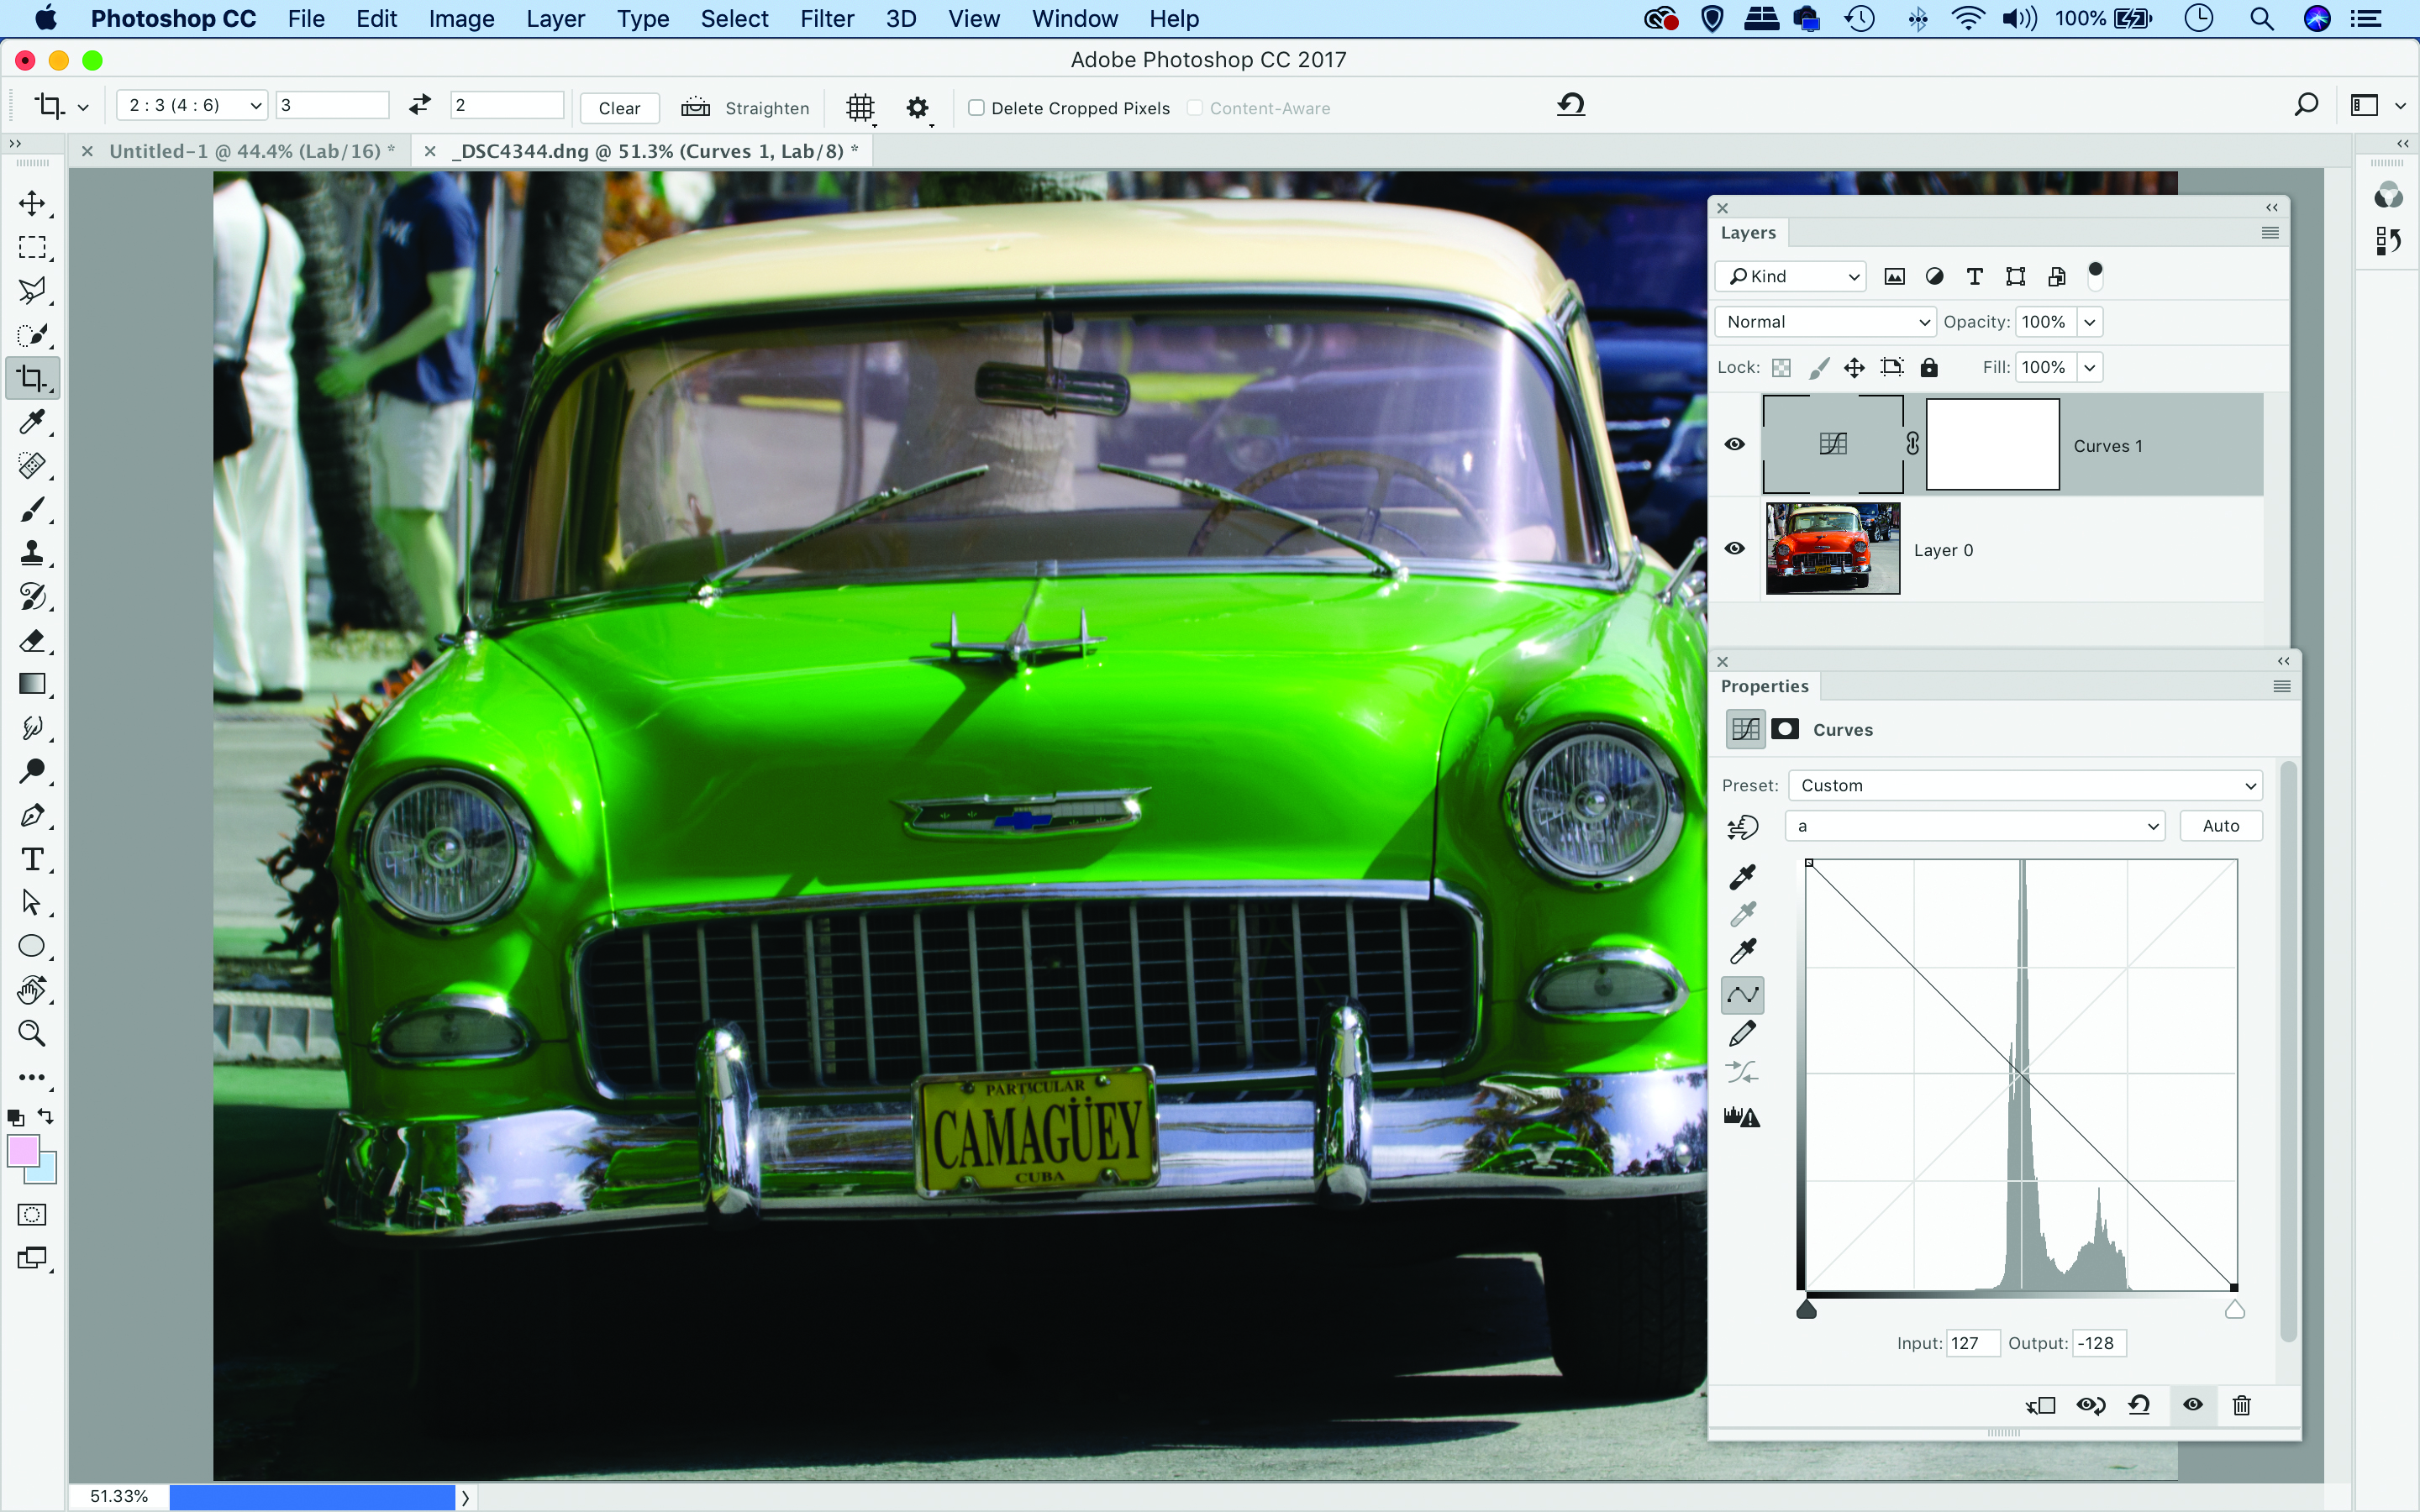
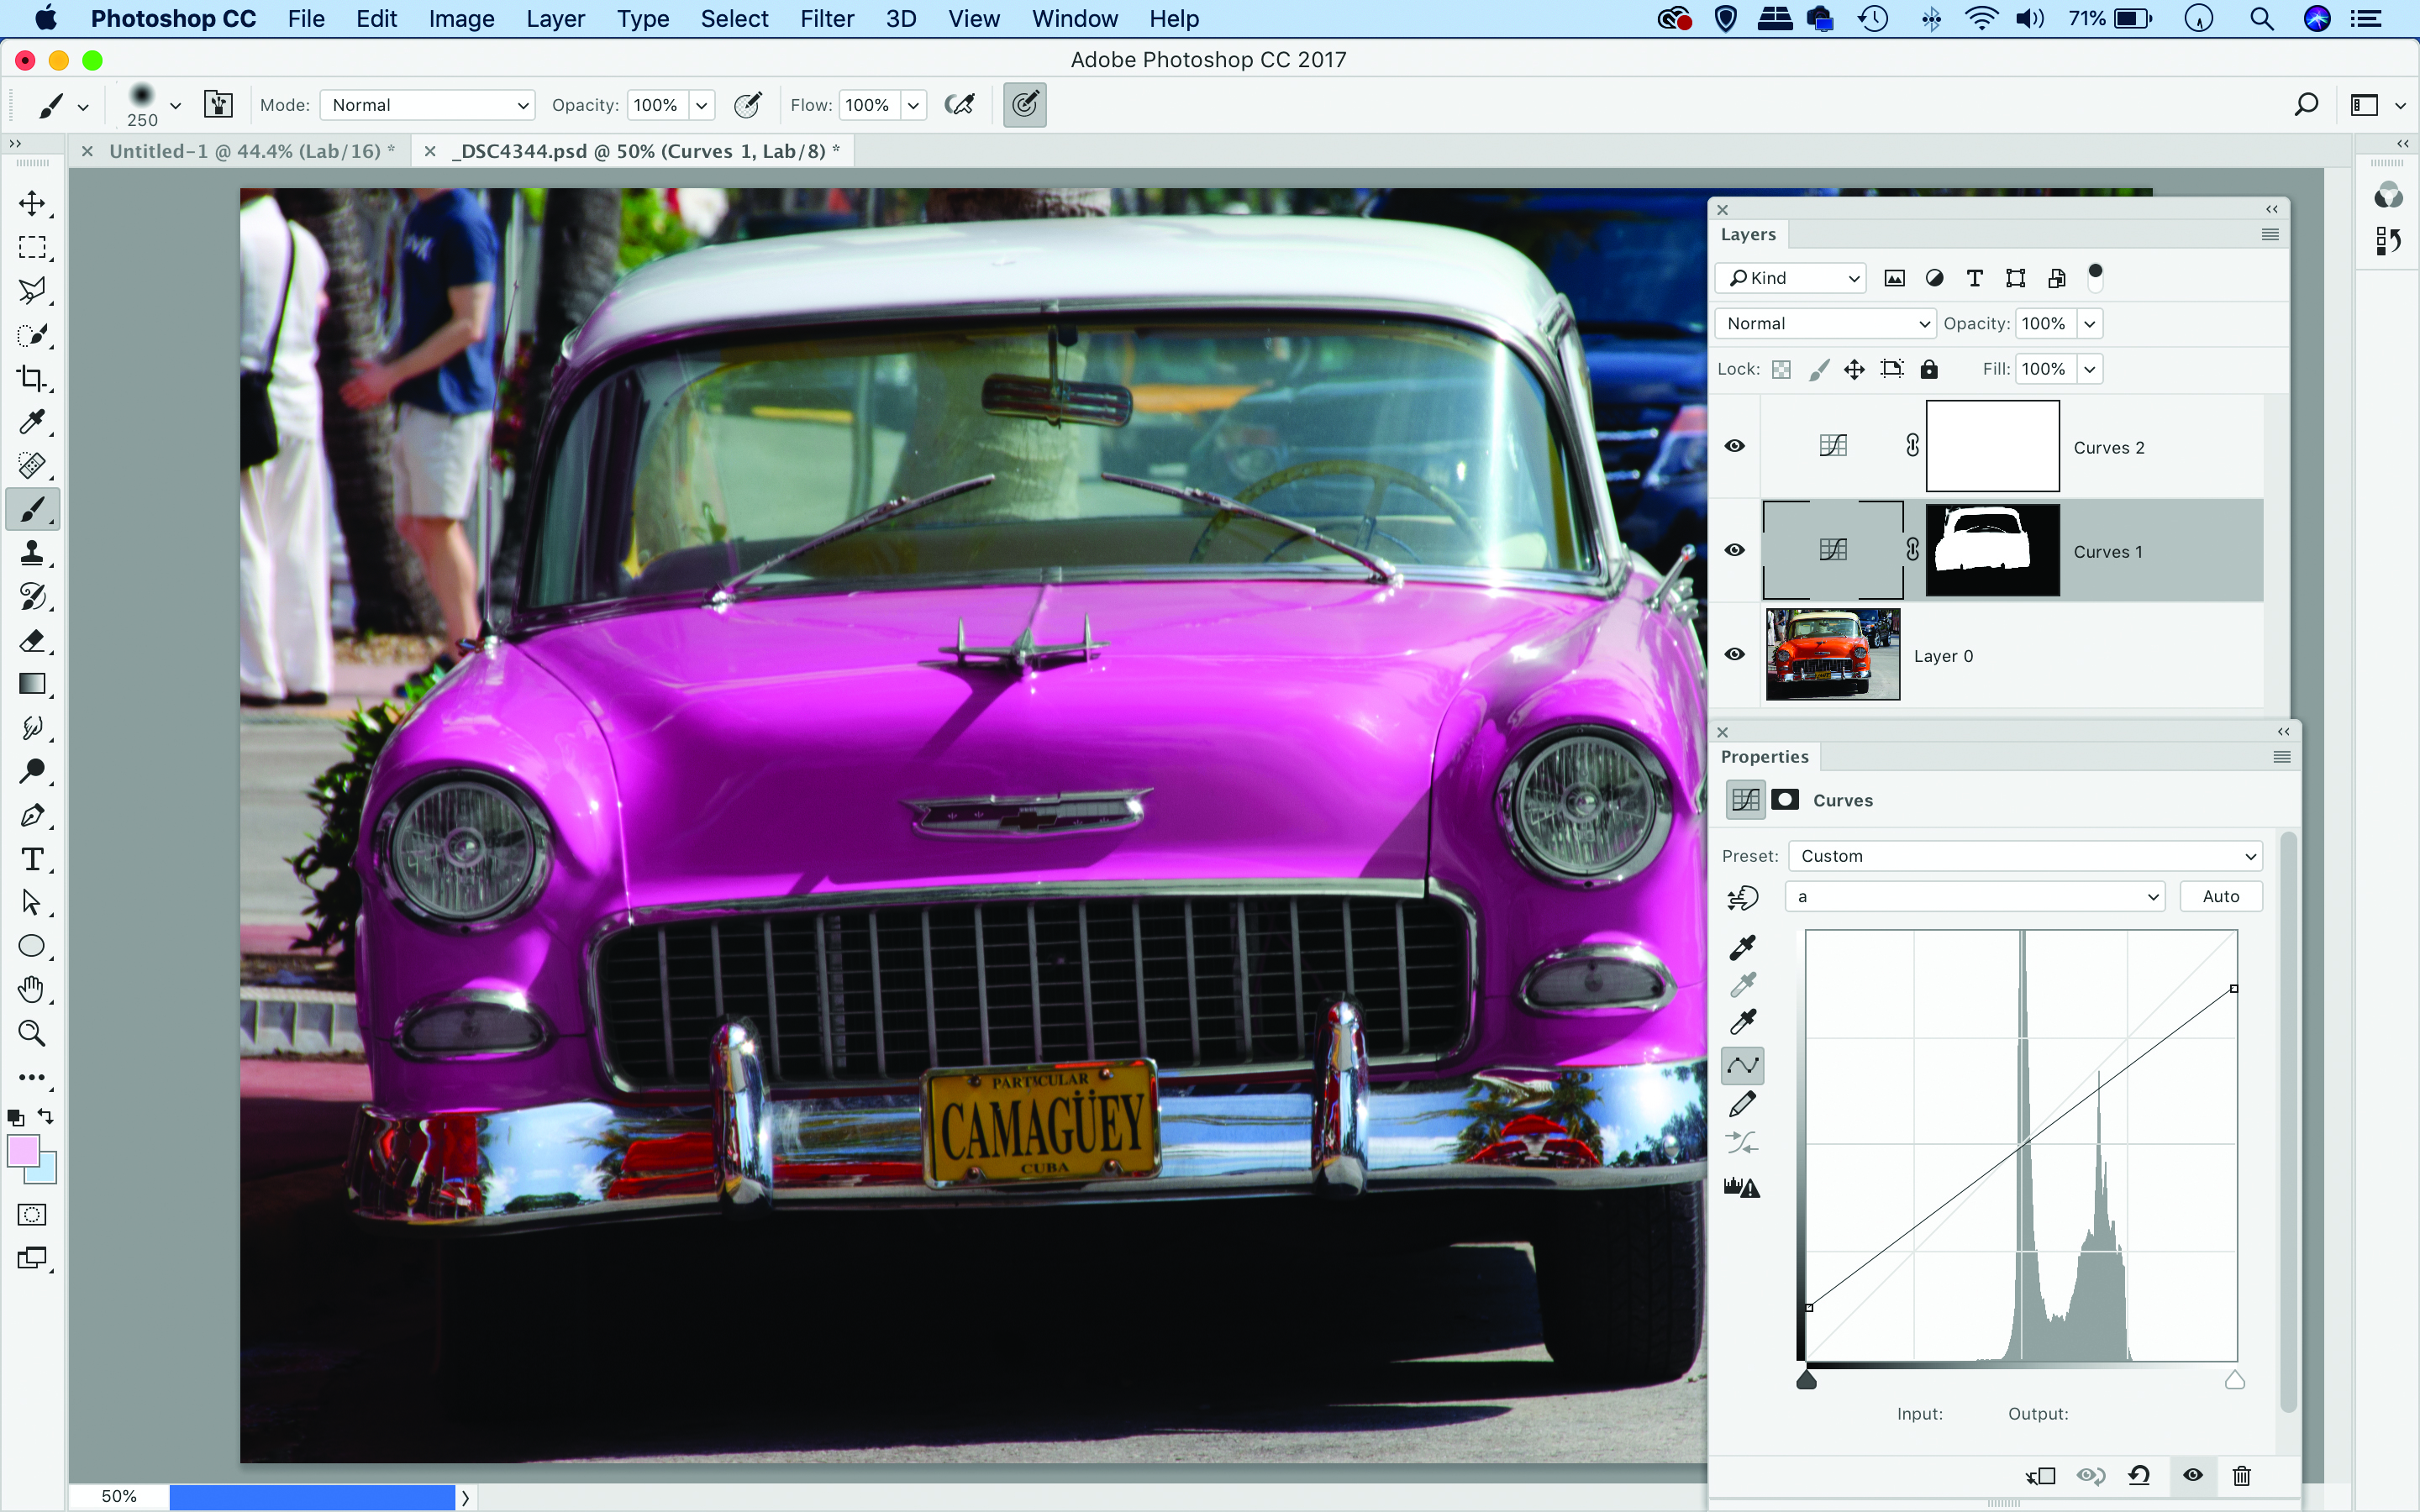
The A channel gives us control over a green / magenta spectrum of color. Drag the top right point on the line down and the bottom left point up. You can drag the points as far you as like, but ensure the line passes over the centre of the grid, or the neutrals will shift.
03 Experiment with tones
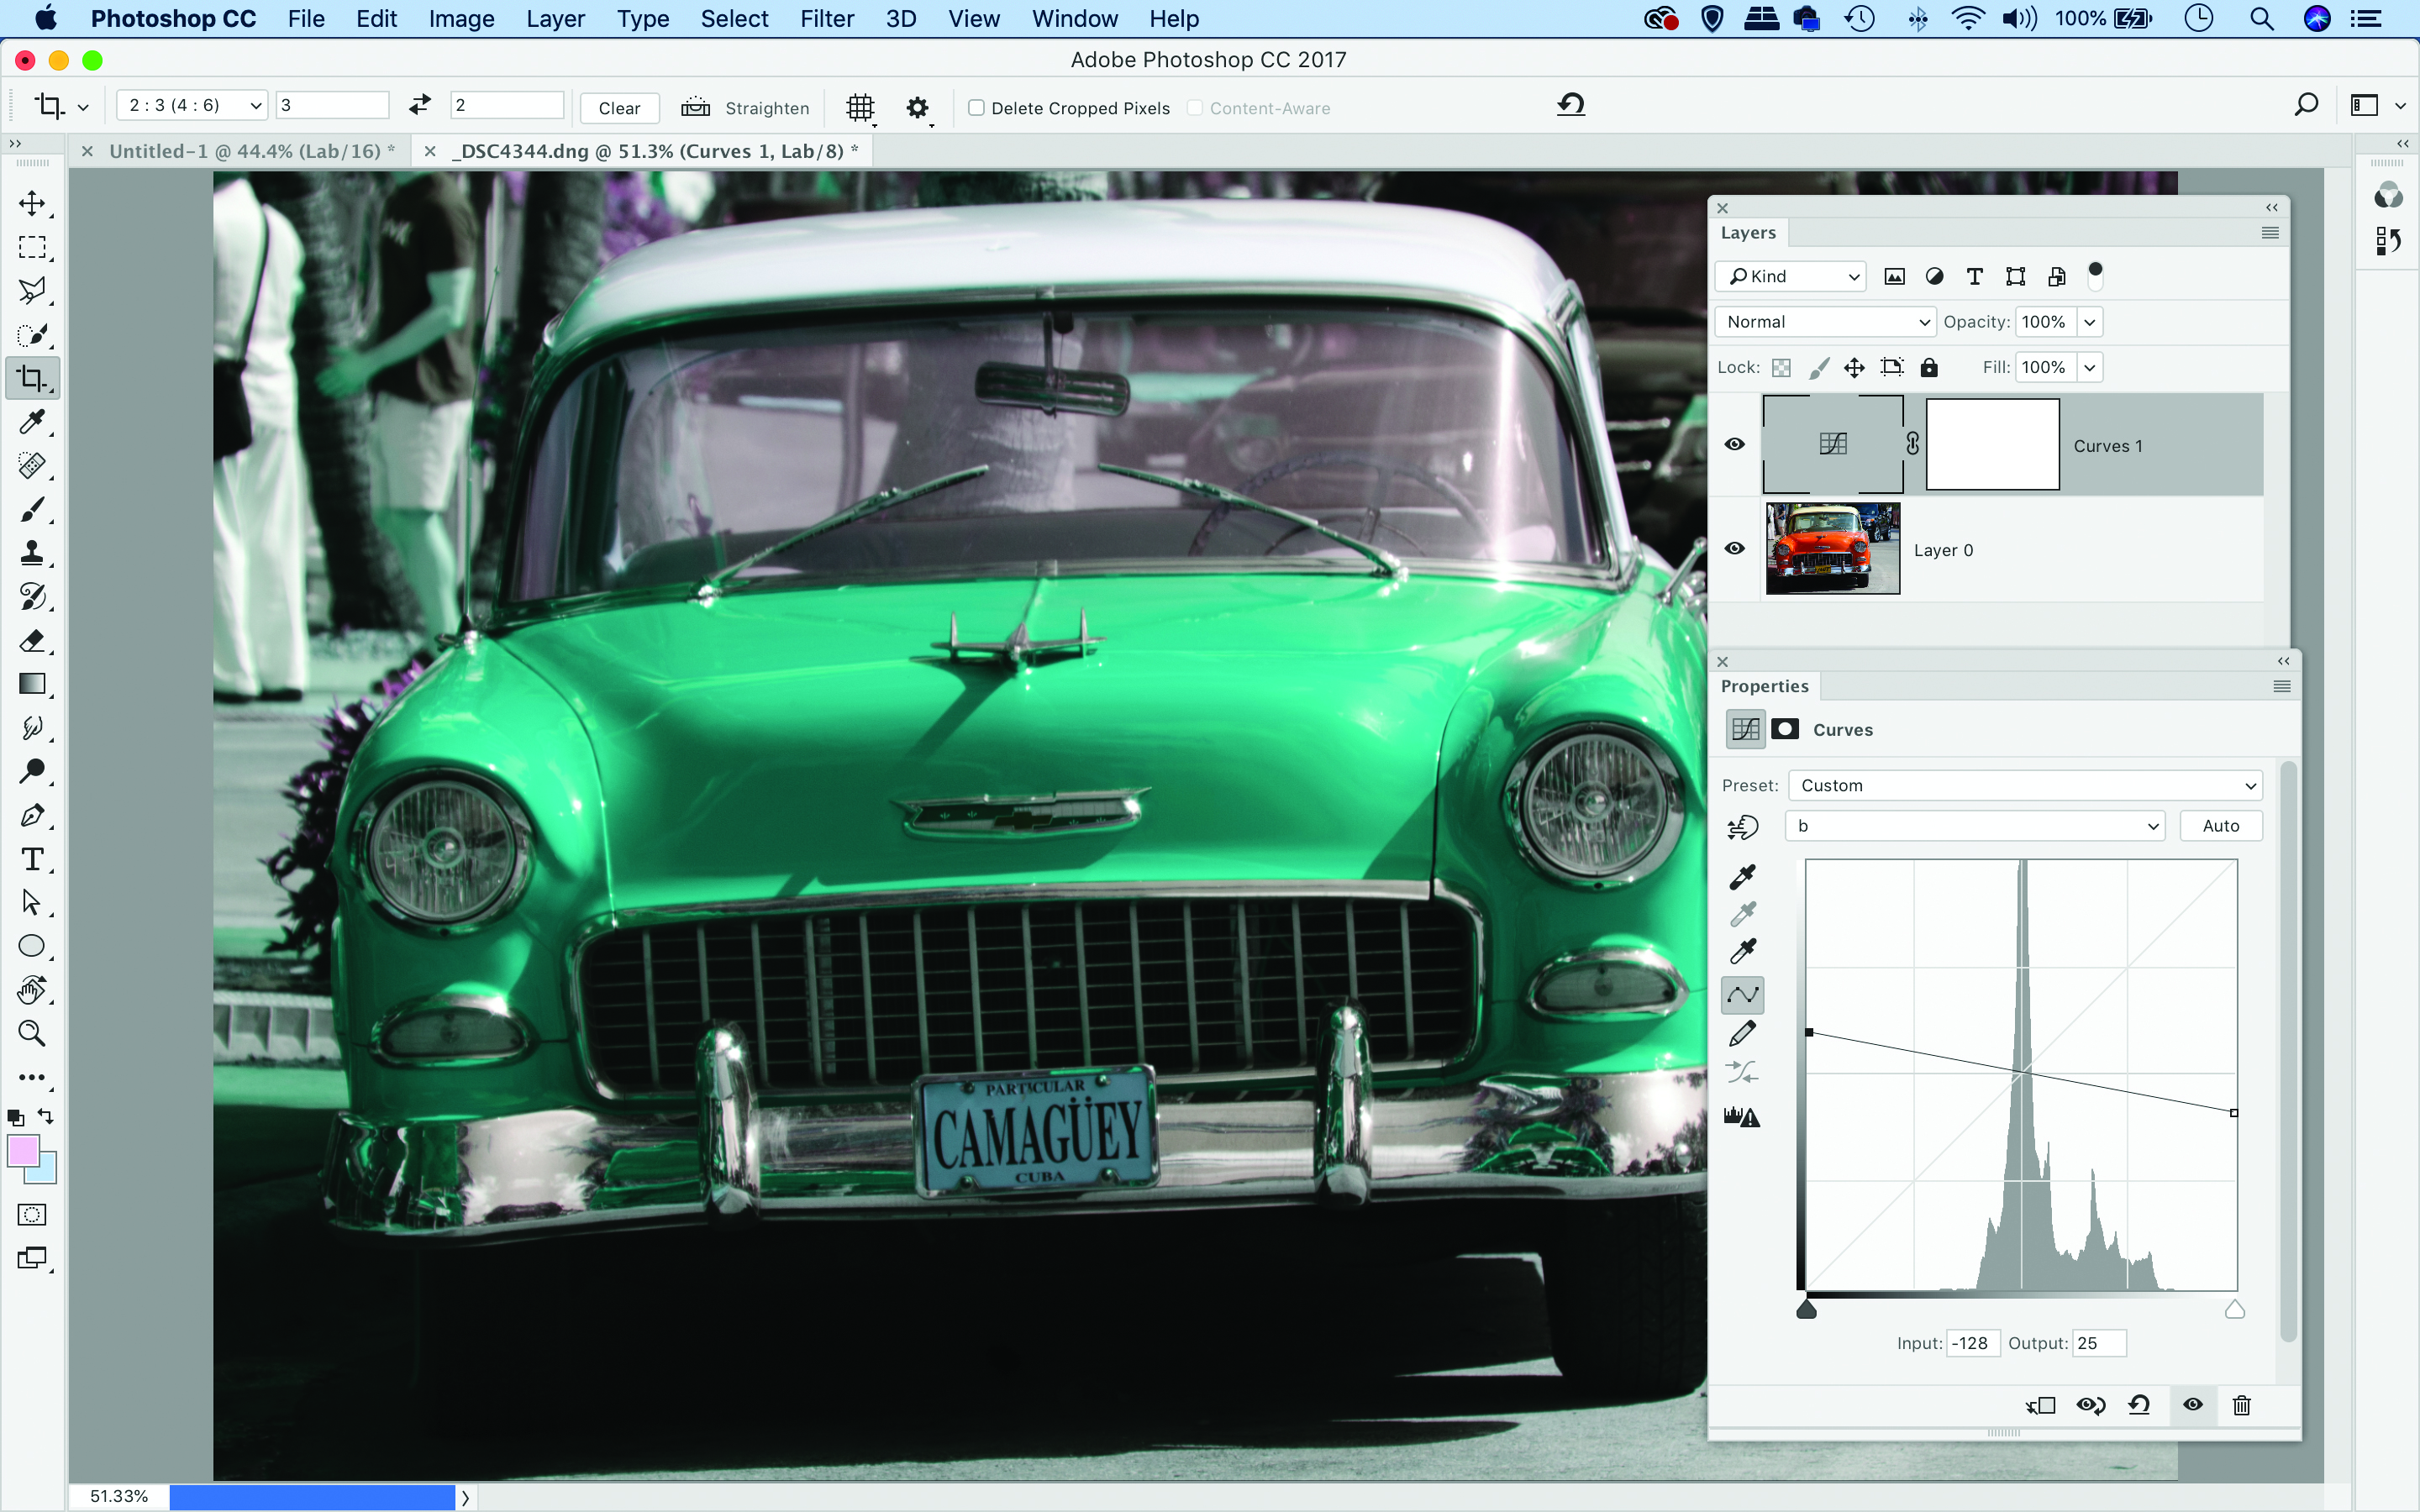
Next choose the B channel. This lets us control the blue / yellow color spectrum. Experiment with the top and bottom points on the curve line, ensuring the line intersects the centre. If you like, go back to the A channel and tweak it to come up with a color you like.
04 Make it selective with layer masks
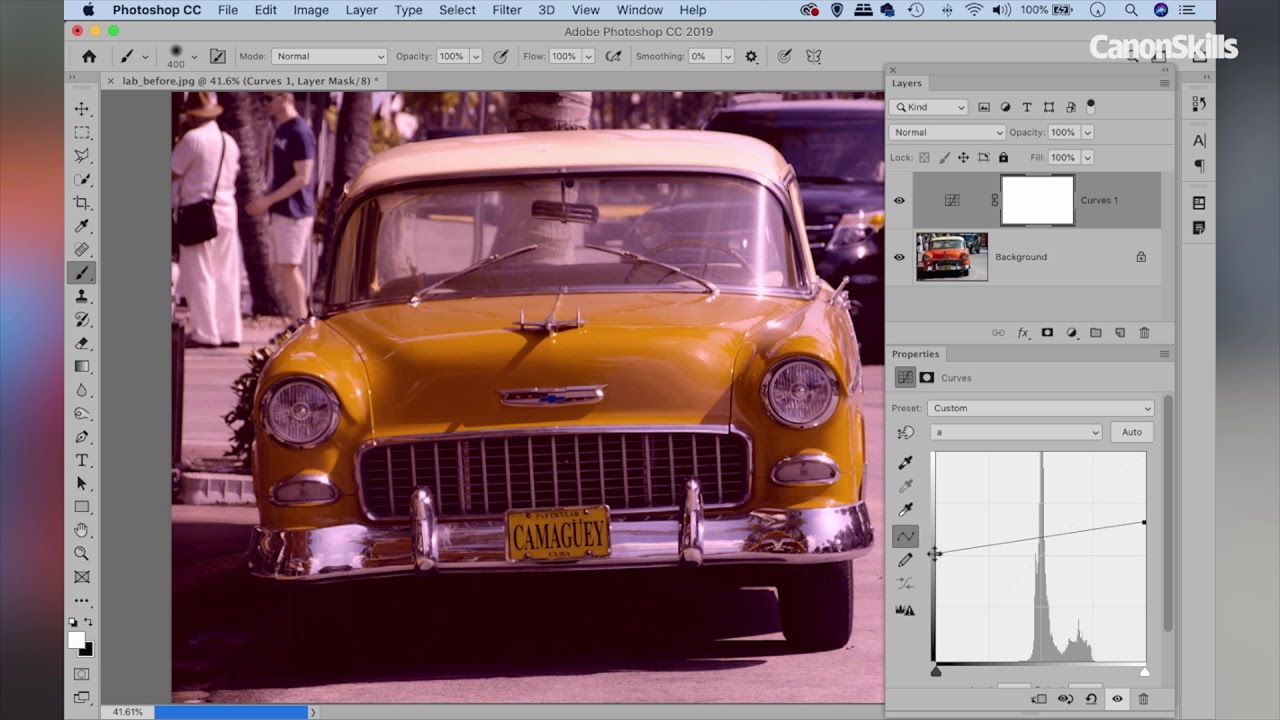
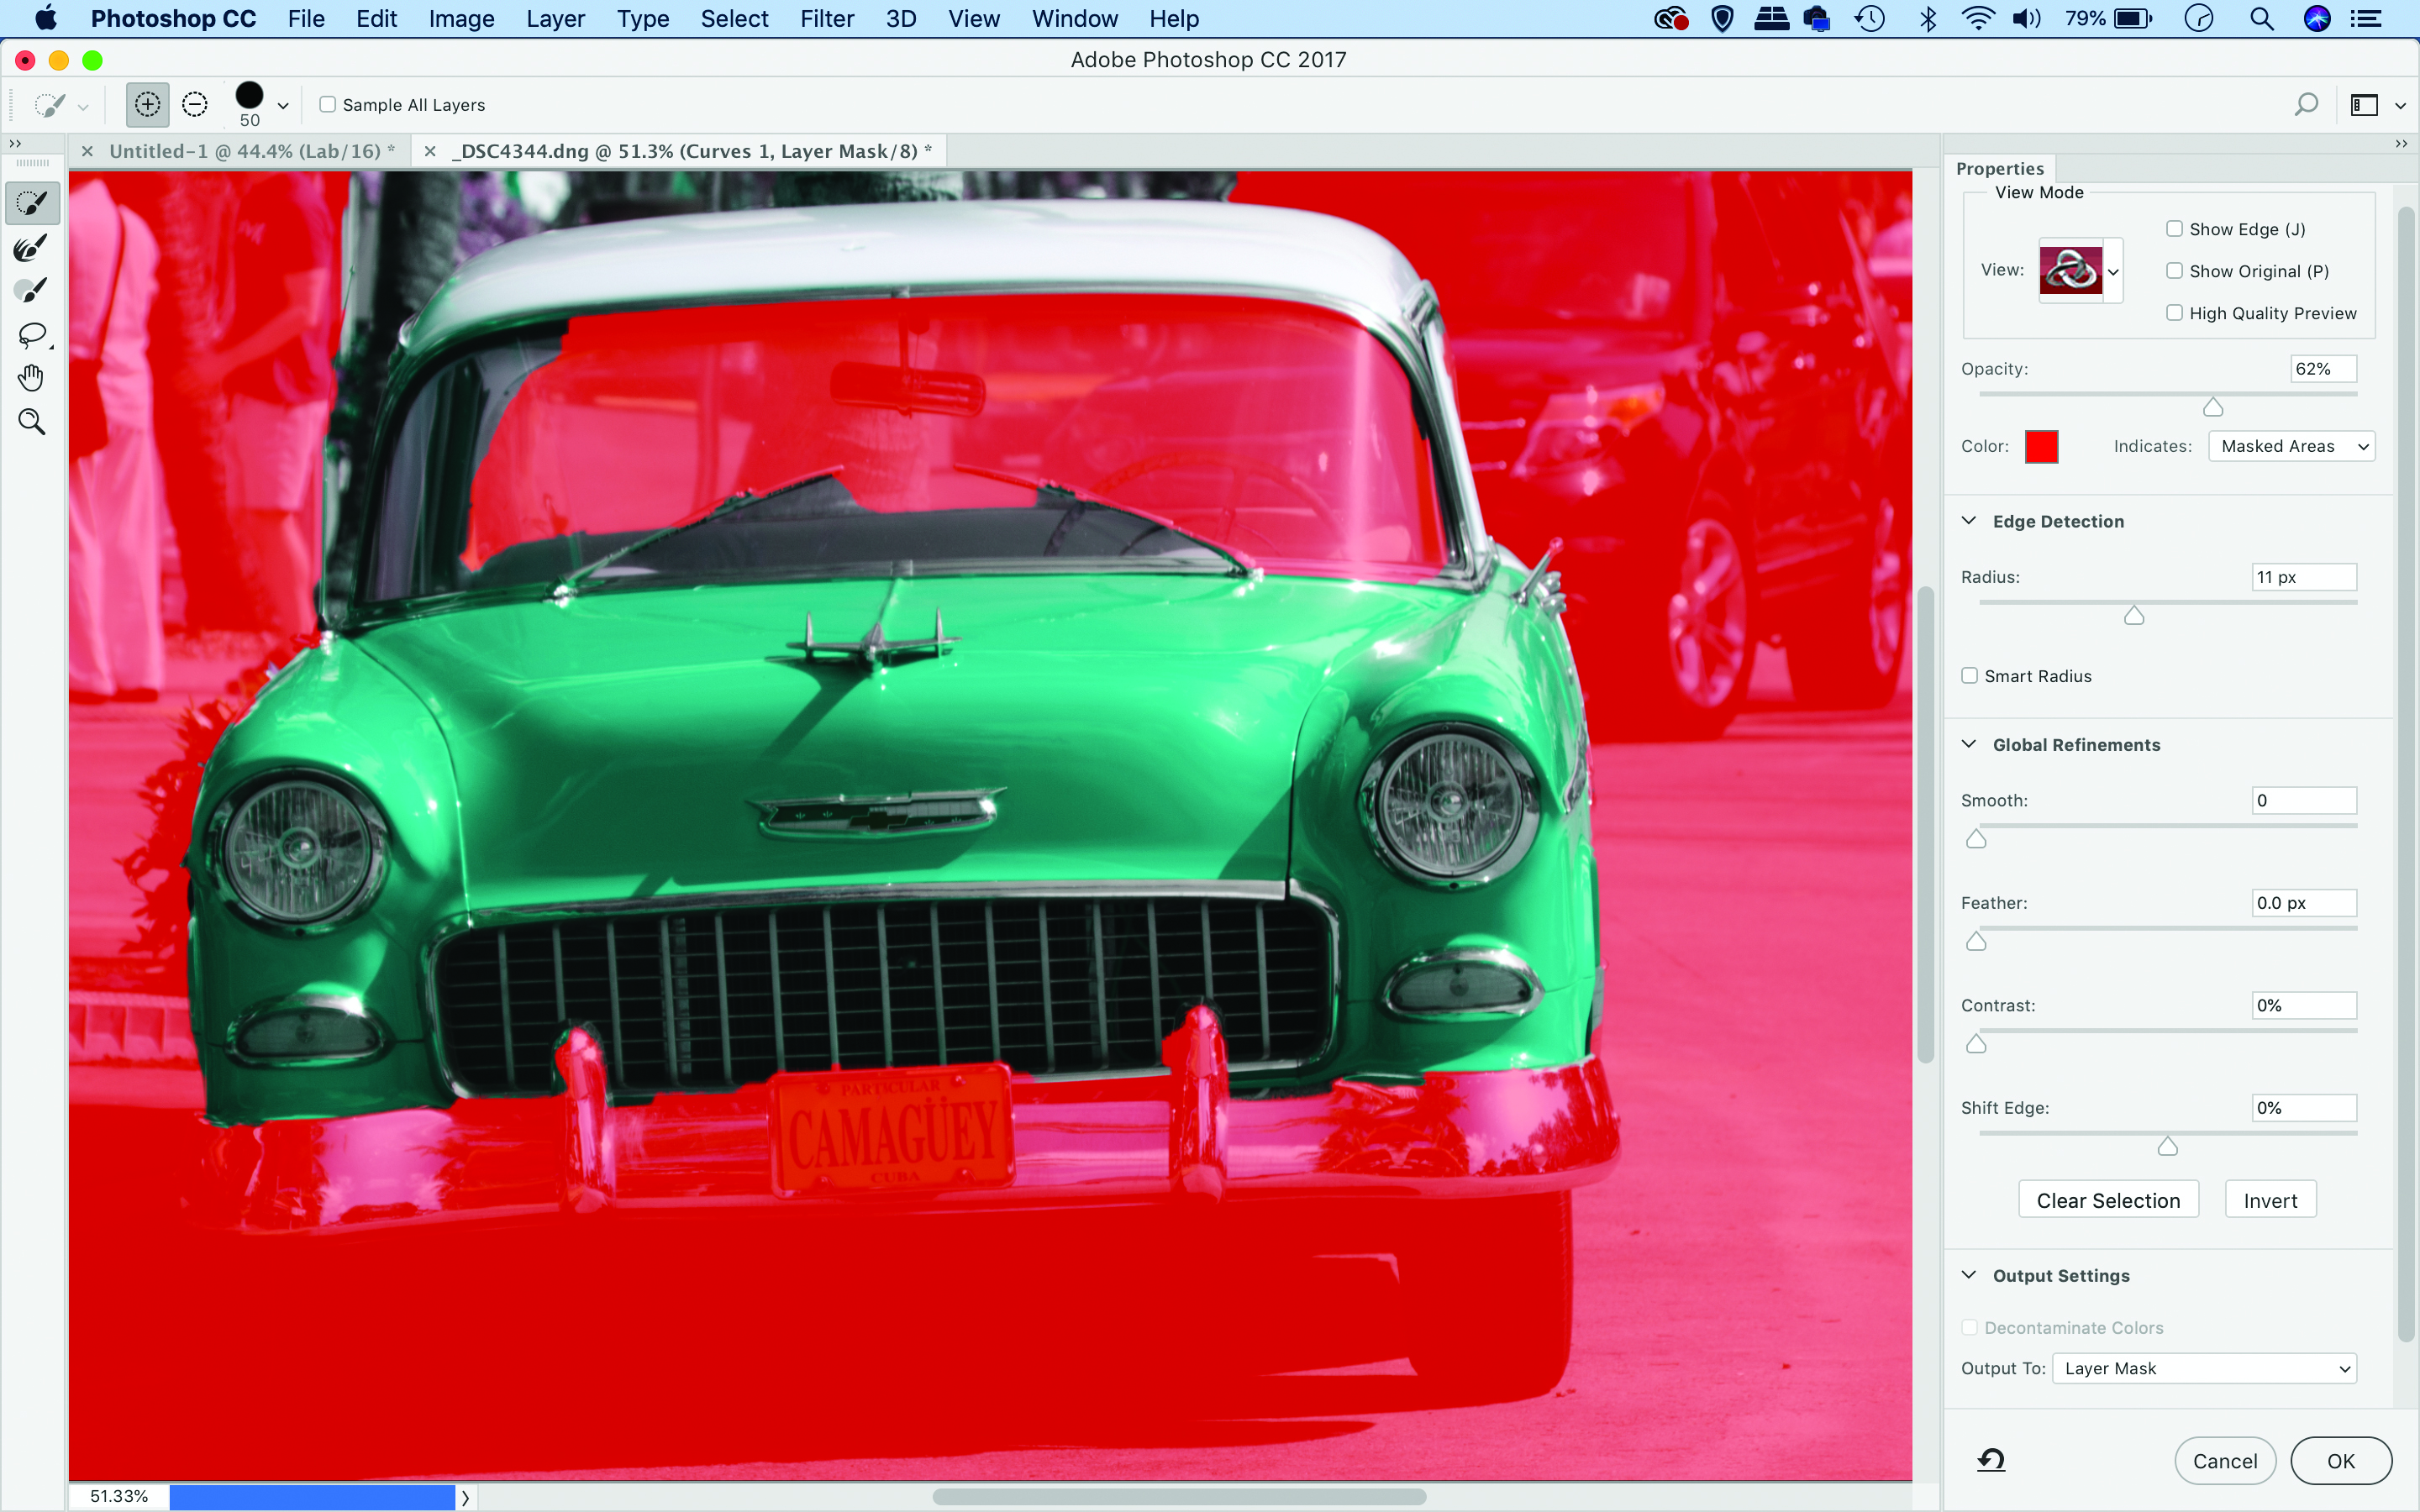
Next restrict the color change to the car. Go to the Layers panel, right-click the white mask thumbnail and choose ‘Select and Mask’. Click the Invert button on the right then grab the Quick Selection brush to the left of the box and paint over the car. Hit OK.
05 Boost colour intensity
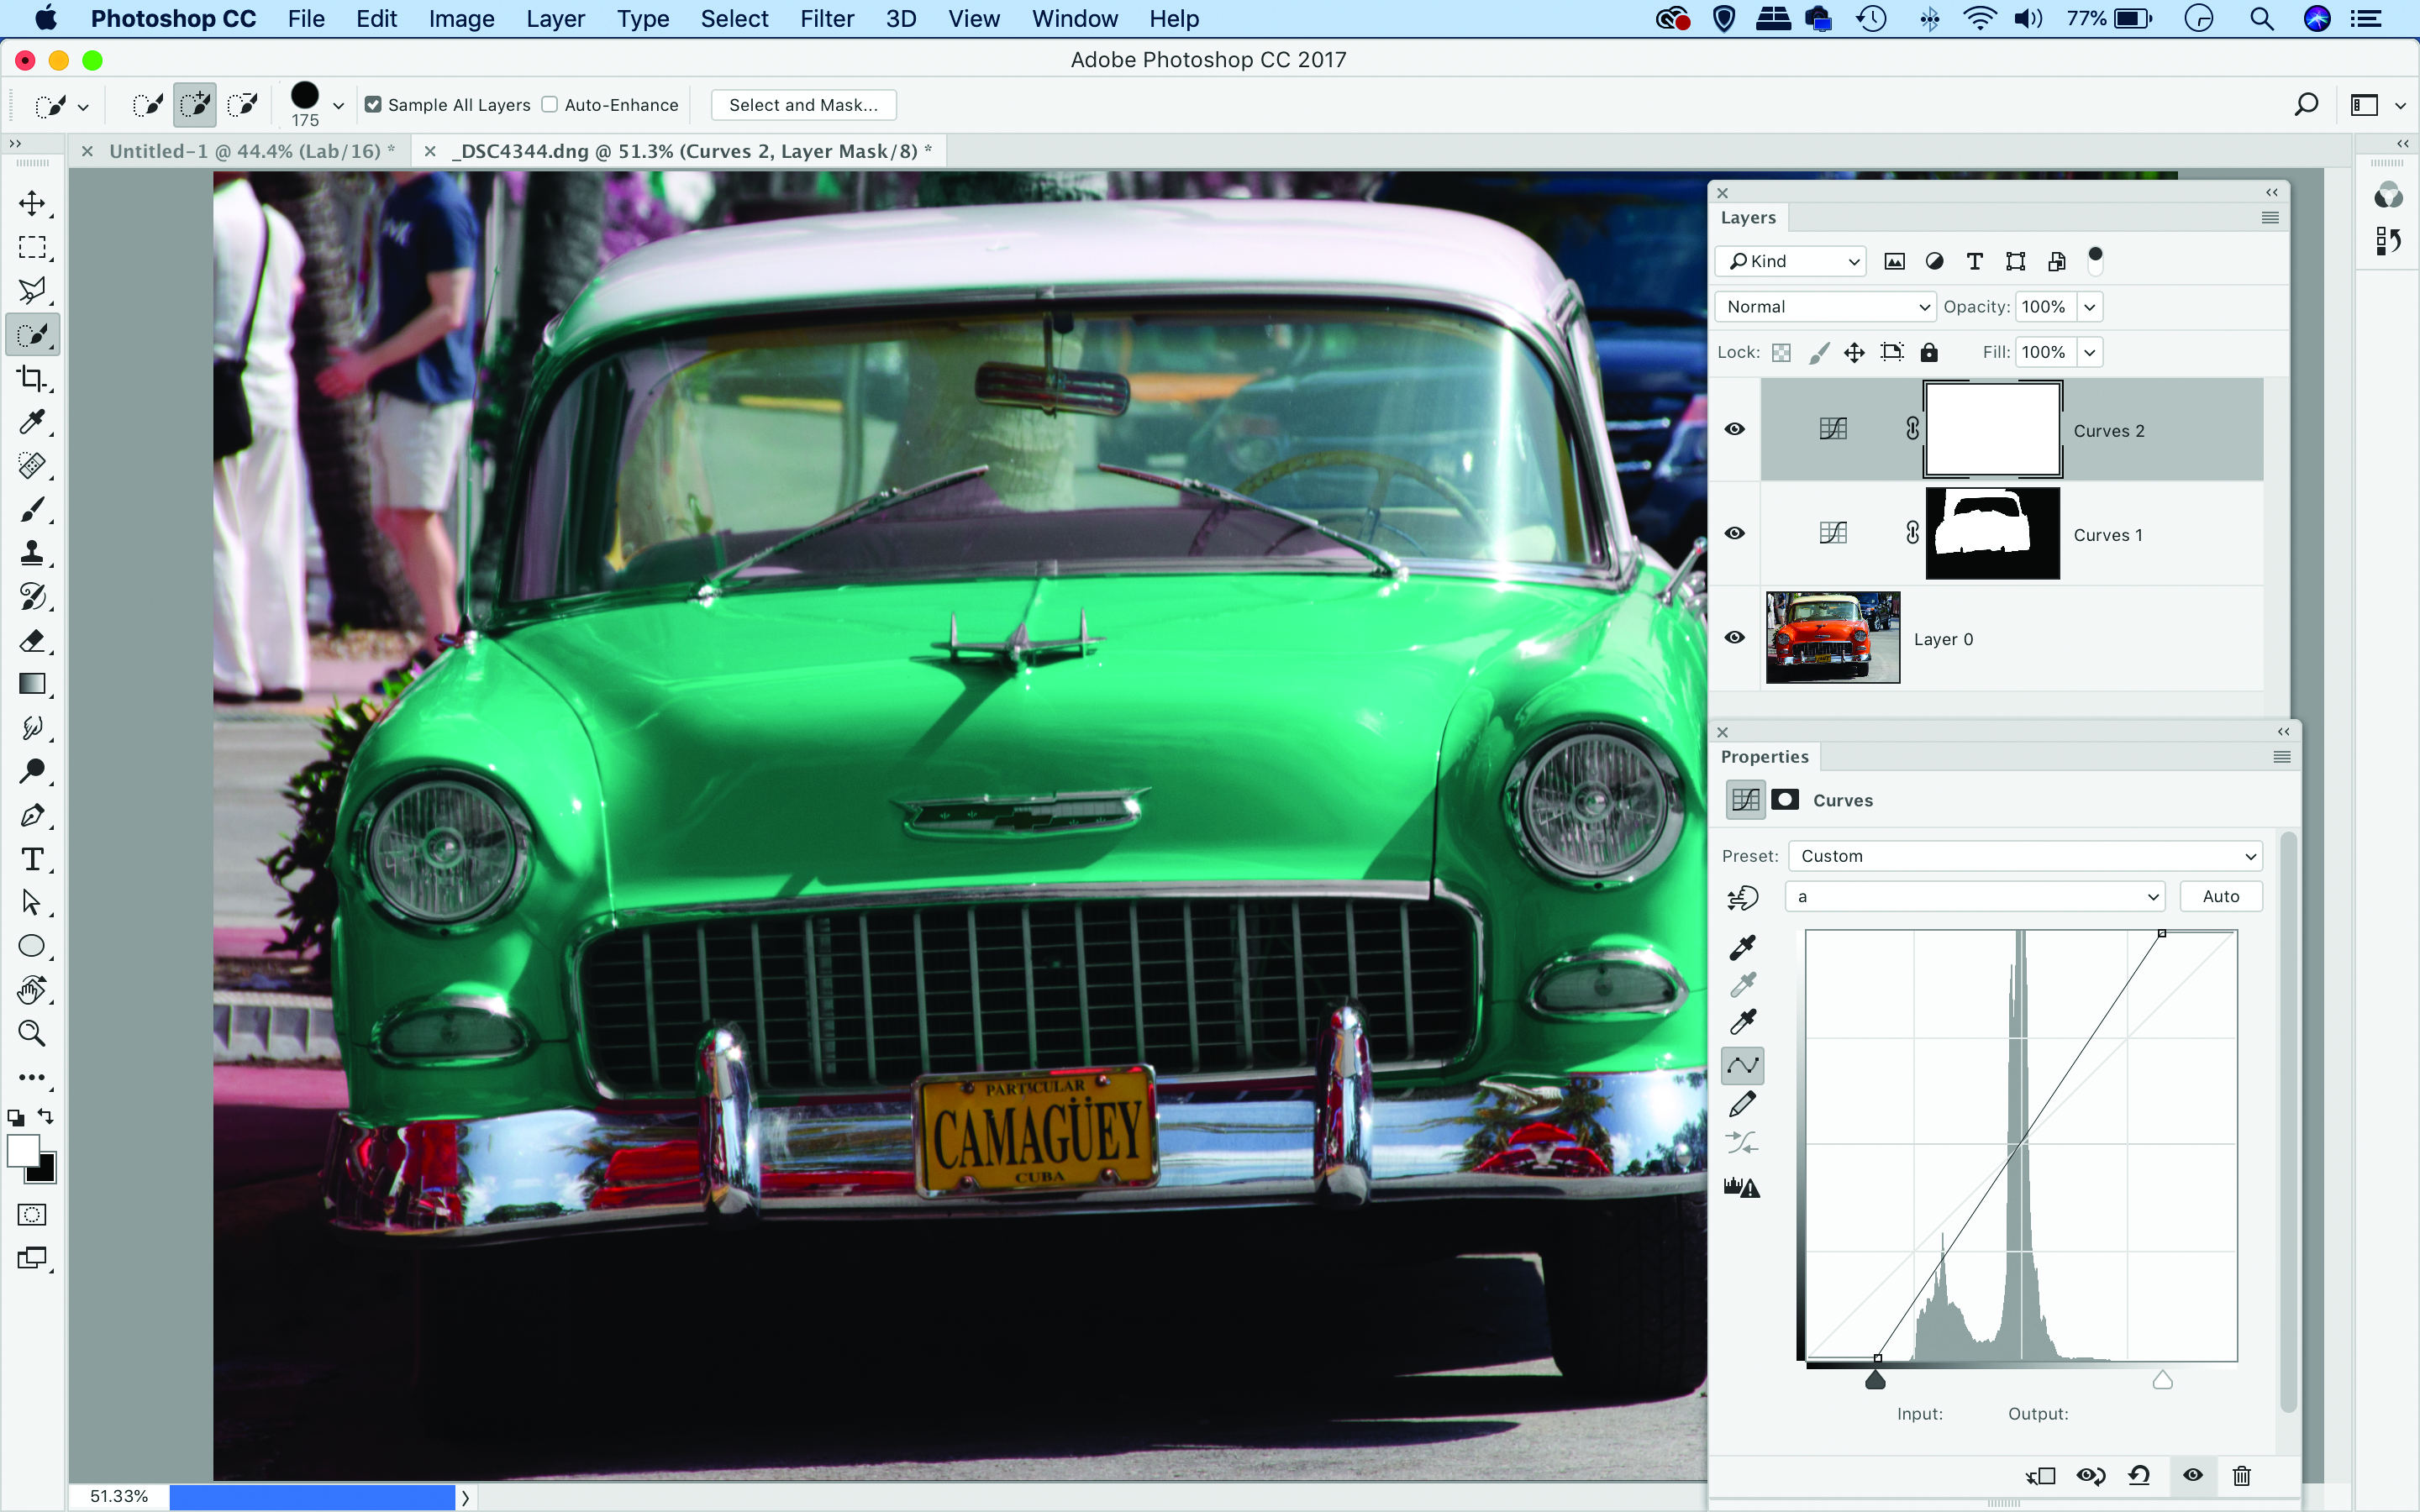
We can also use the A and B channels to boost the saturation. Add another Curves Adjustment Layer and select the A channel. Rather than dragging the points up/down instead drag both inwards to make the line steeper – ensure the line intersects the centre.
06 Tweak and merge
Select the B channel and drag the points inwards. The steeper the line, the greater the saturation boost. You can continue to experiment with different color shifts by tweaking the Curves layers as shown. Once happy, go to Image > Mode > RGB and hit Merge.
PhotoPlus: The Canon Magazine is the world's only monthly newsstand title that's 100% devoted to Canon, so you can be sure the magazine is completely relevant to your system.
Read more
The best photo editing software: image editors for novices through to pros
The best photo-editing laptops: top laptops for photographers
10 best online photography courses – from beginner guides to masterclasses
The lead technique writer on Digital Camera Magazine, PhotoPlus: The Canon Magazine and N-Photo: The Nikon Magazine, James is a fantastic general practice photographer with an enviable array of skills across every genre of photography.
Whether it's flash photography techniques like stroboscopic portraits, astrophotography projects like photographing the Northern Lights, or turning sound into art by making paint dance on a set of speakers, James' tutorials and projects are as creative as they are enjoyable.
He's also a wizard at the dark arts of Photoshop, Lightroom and Affinity Photo, and is capable of some genuine black magic in the digital darkroom, making him one of the leading authorities on photo editing software and techniques.
