Capture One keystone correction: how to fix perspective issues in architectural shots
Pro photographer Paul Reiffer explains keystone correction in Capture One: why you need it and how to do it!
The best camera deals, reviews, product advice, and unmissable photography news, direct to your inbox!
You are now subscribed
Your newsletter sign-up was successful
Very often it's the subtle touches that separate professional photography from amateur snaps, and one of the key examples is perspective correction – or 'keystone' correction in Capture One. The human eye is very sensitive and even a small degree of skew, tilt or convergence can spoil shots of buildings and landmarks.
This series on Capture One has been specially commissioned from globetrotting pro photographer and editing expert Paul Reiffer.
• See the full Capture One series
• Capture One 21 review
• Best photo editing software
Whenever we shoot off-plane from an object, with standard lenses, we introduce perspective distortion. This is the effect where the part of the subject that is further away from us becomes smaller in the scene.
While this can sometimes be useful to give a feeling of distance or height, when we want a cleaner head-on shot, we only really have two options: Either making use of a dedicated tilt/shift lens, or correcting it in post-processing.
For those without such a specific lens, Capture One’s keystone tool can fix things in a few clicks.
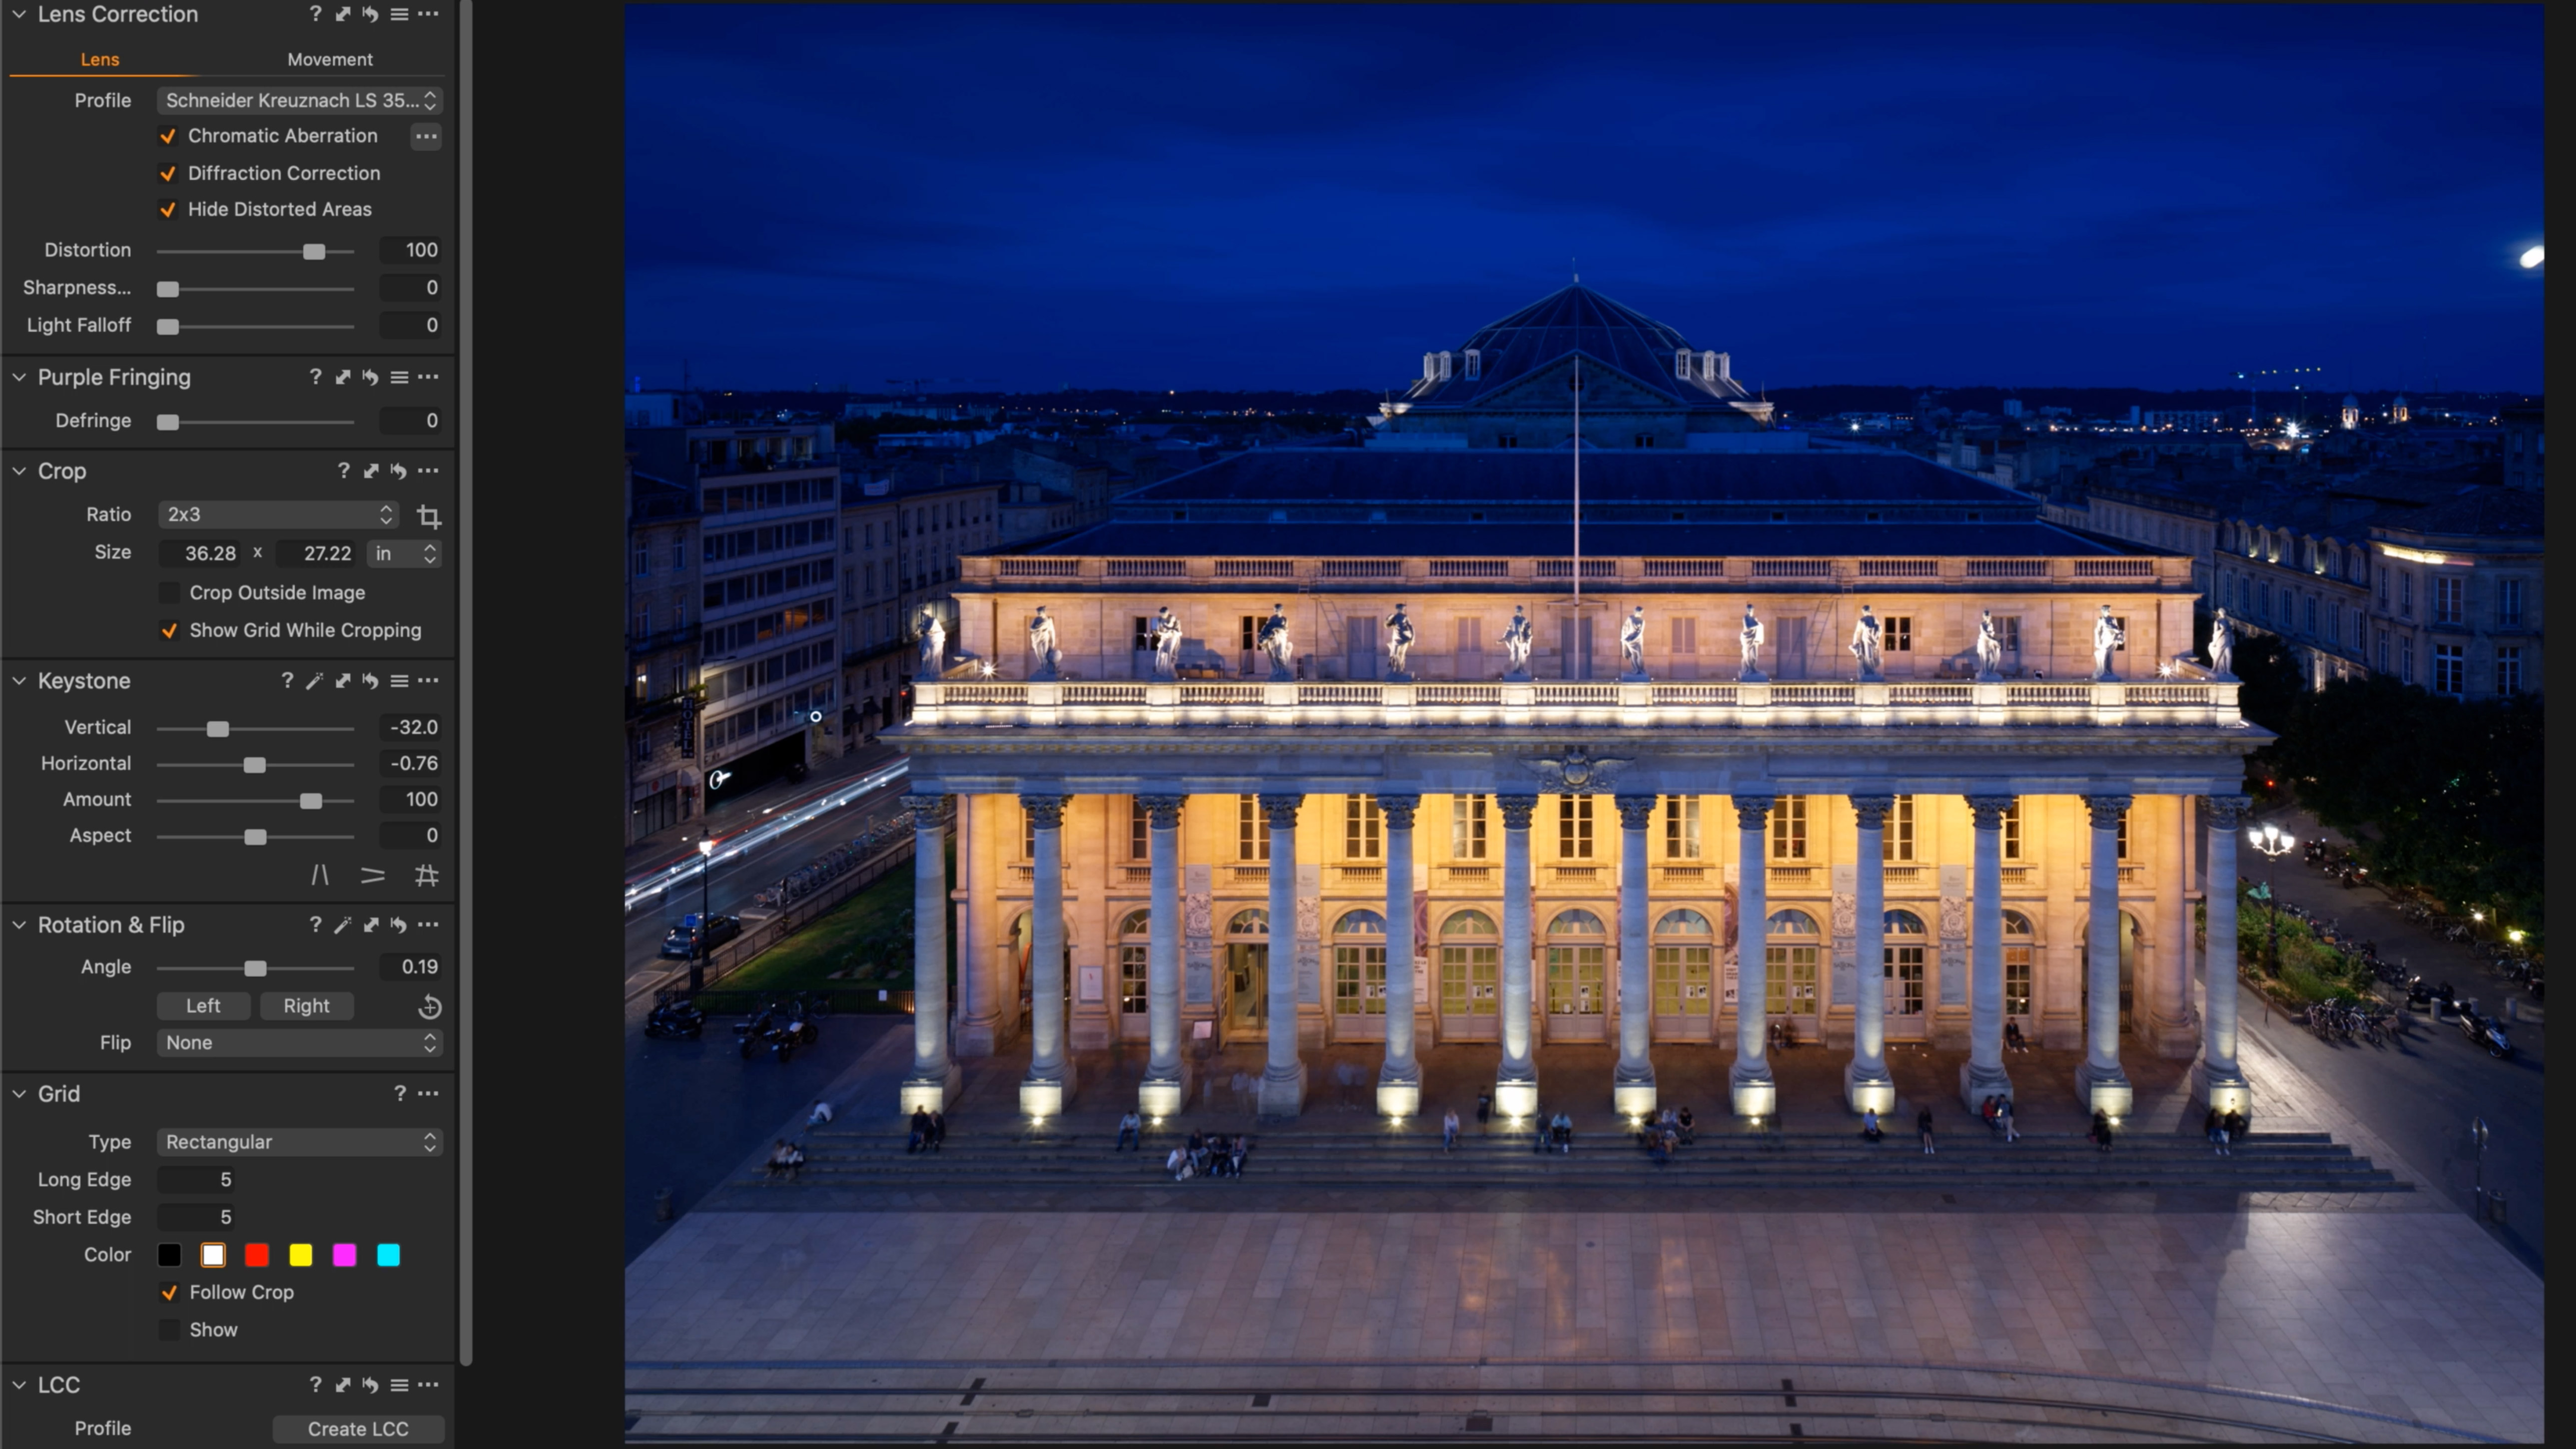
Capture One Keystone tool
1. Where to find the keystone tool
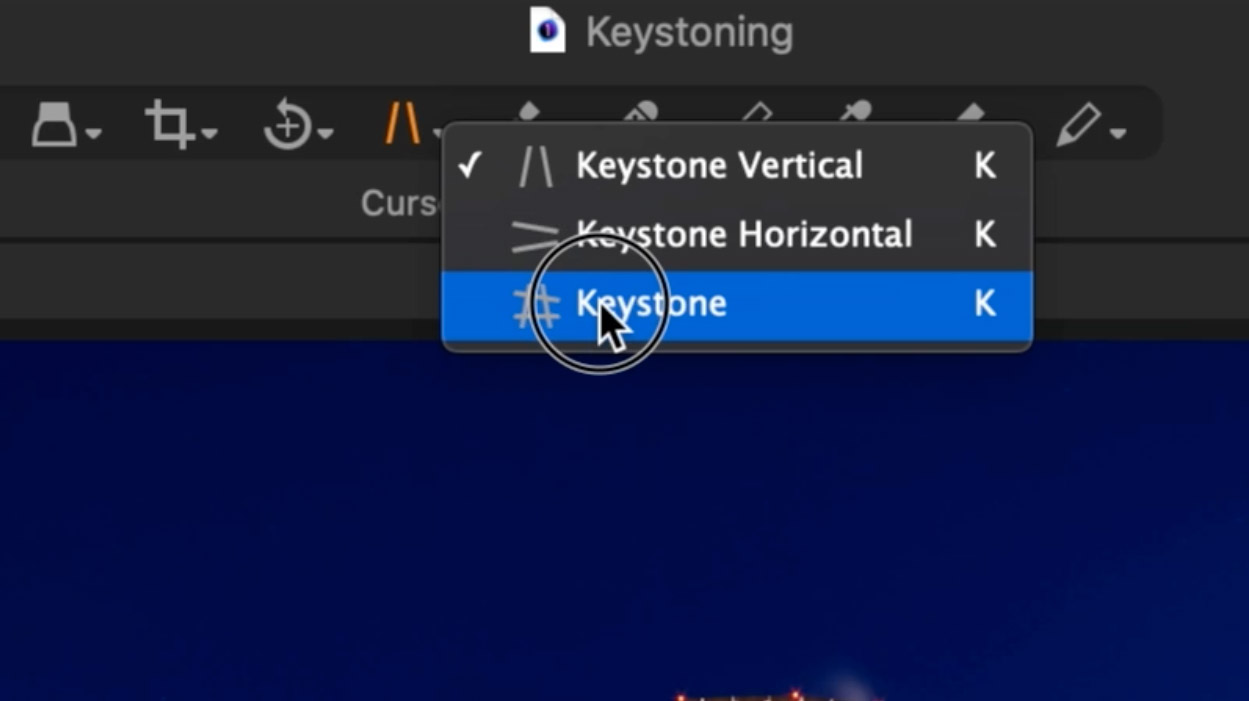
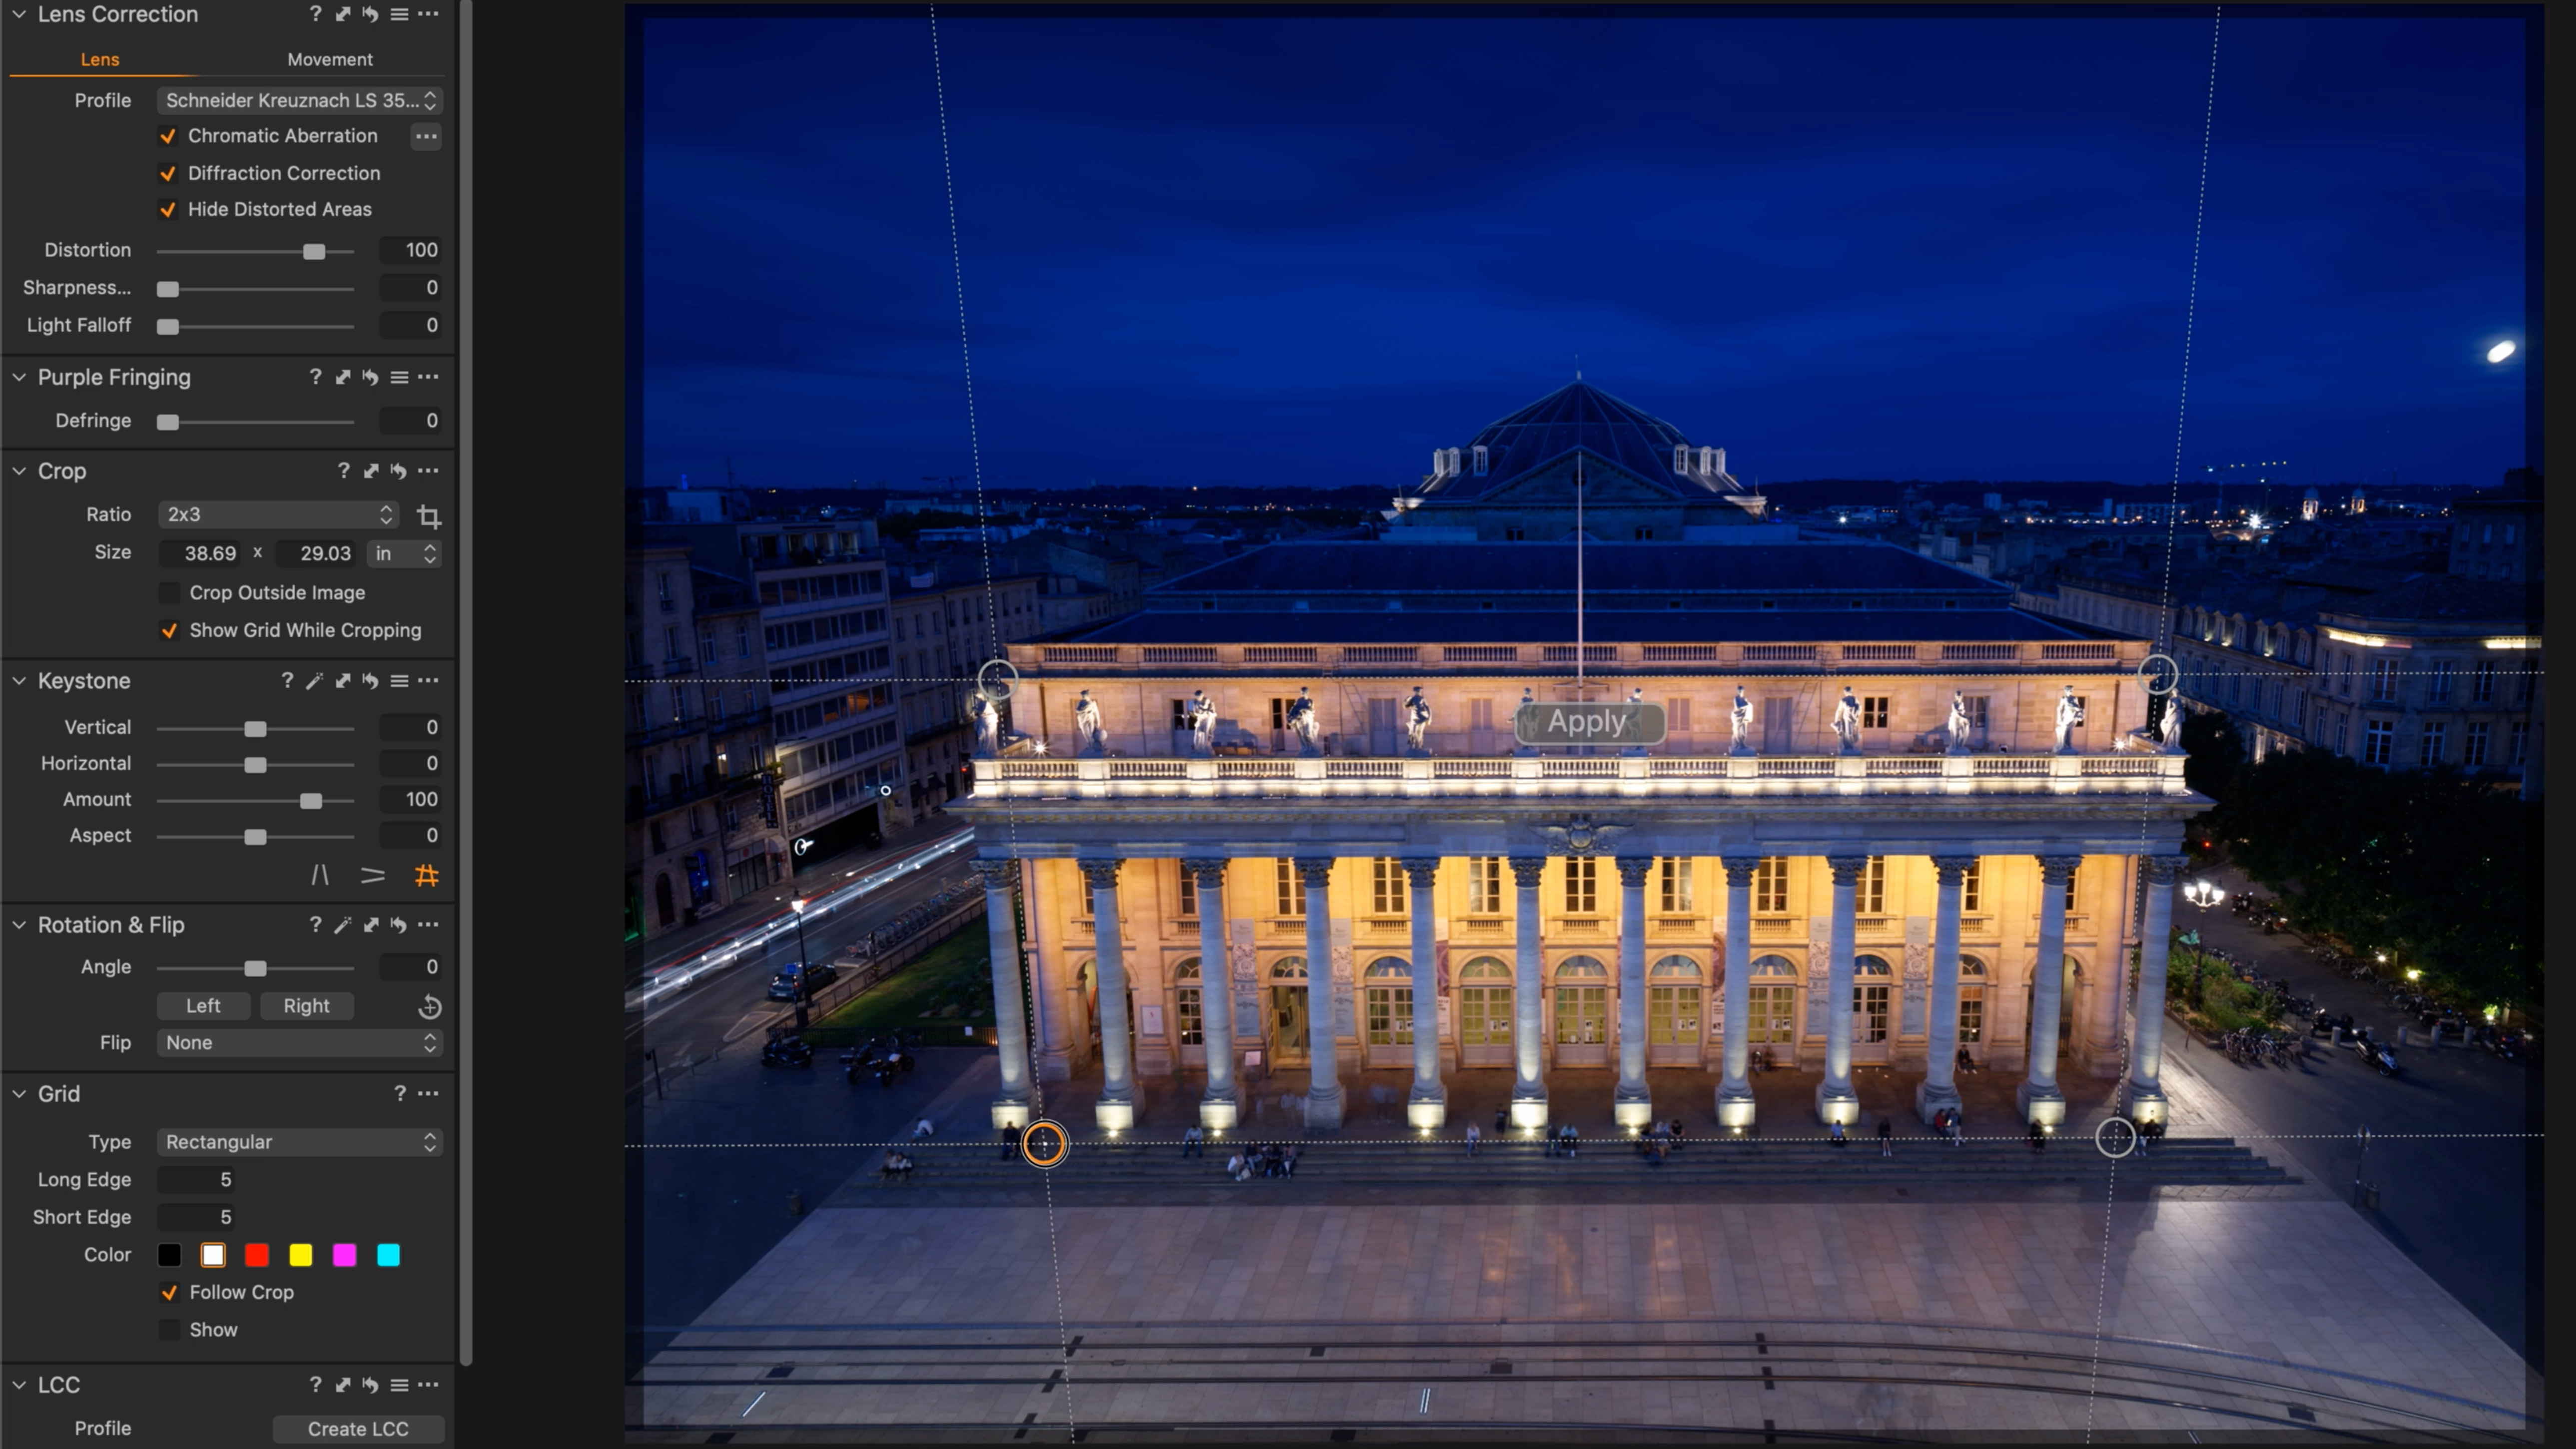
The keystone tool can be found in the top menu bar, but bear in mind there are three versions of the tool (vertical lines only, horizontal lines only or 4-way keystone correction) which can be found by holding the mouse button down on the tool itself.
2. Numerical values
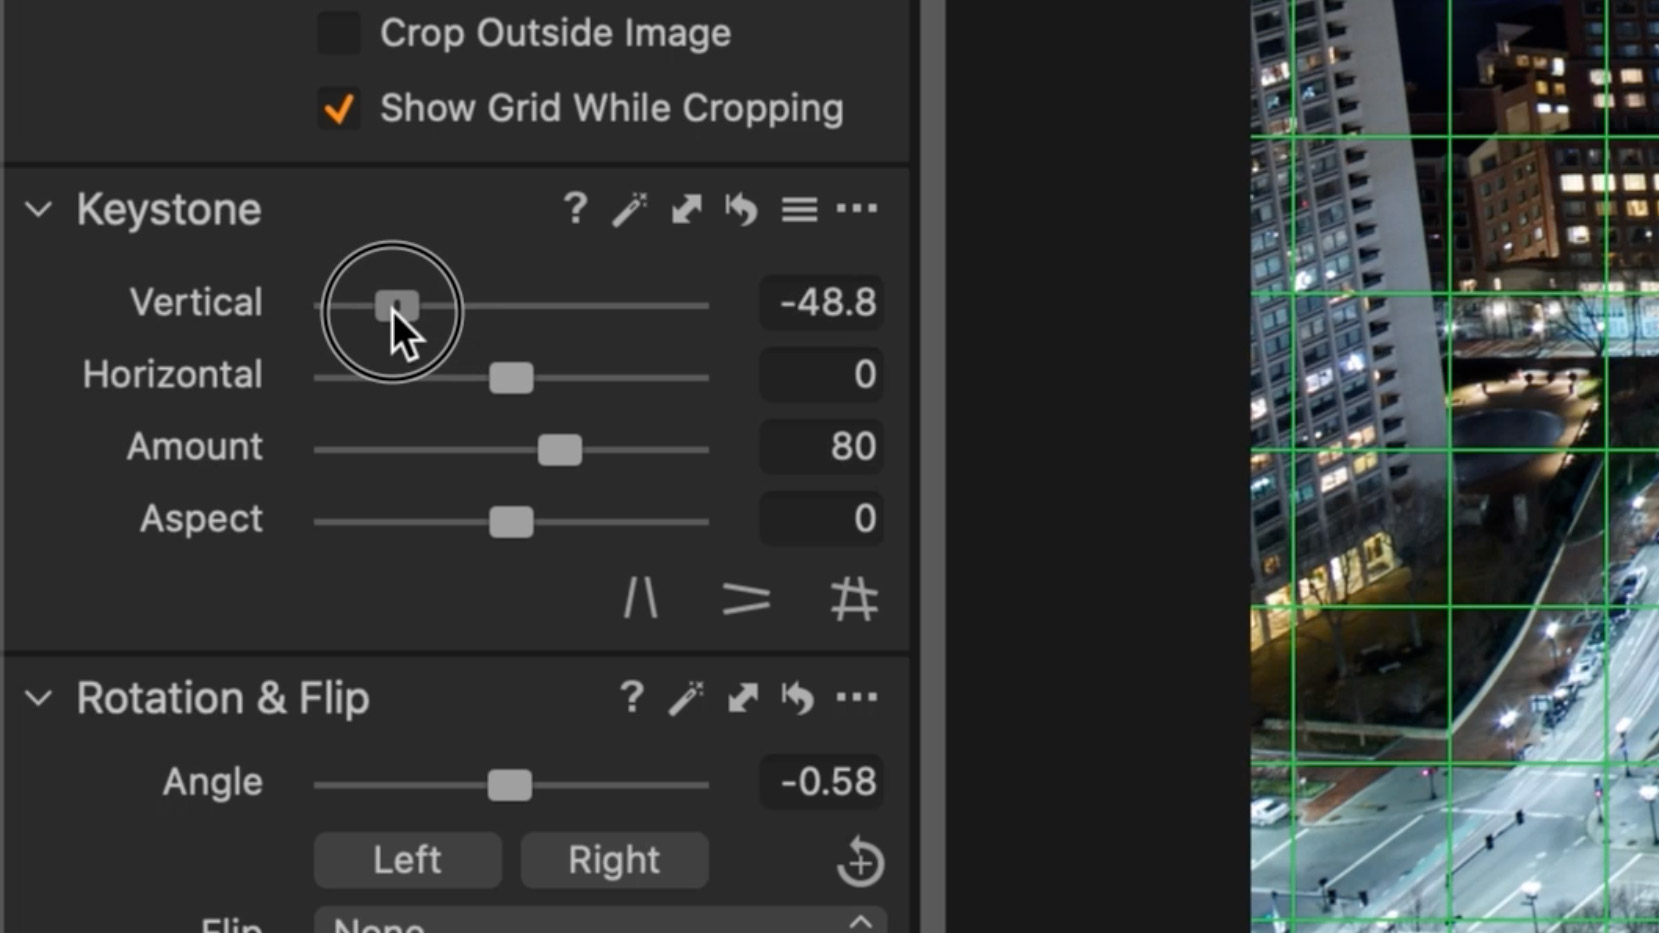
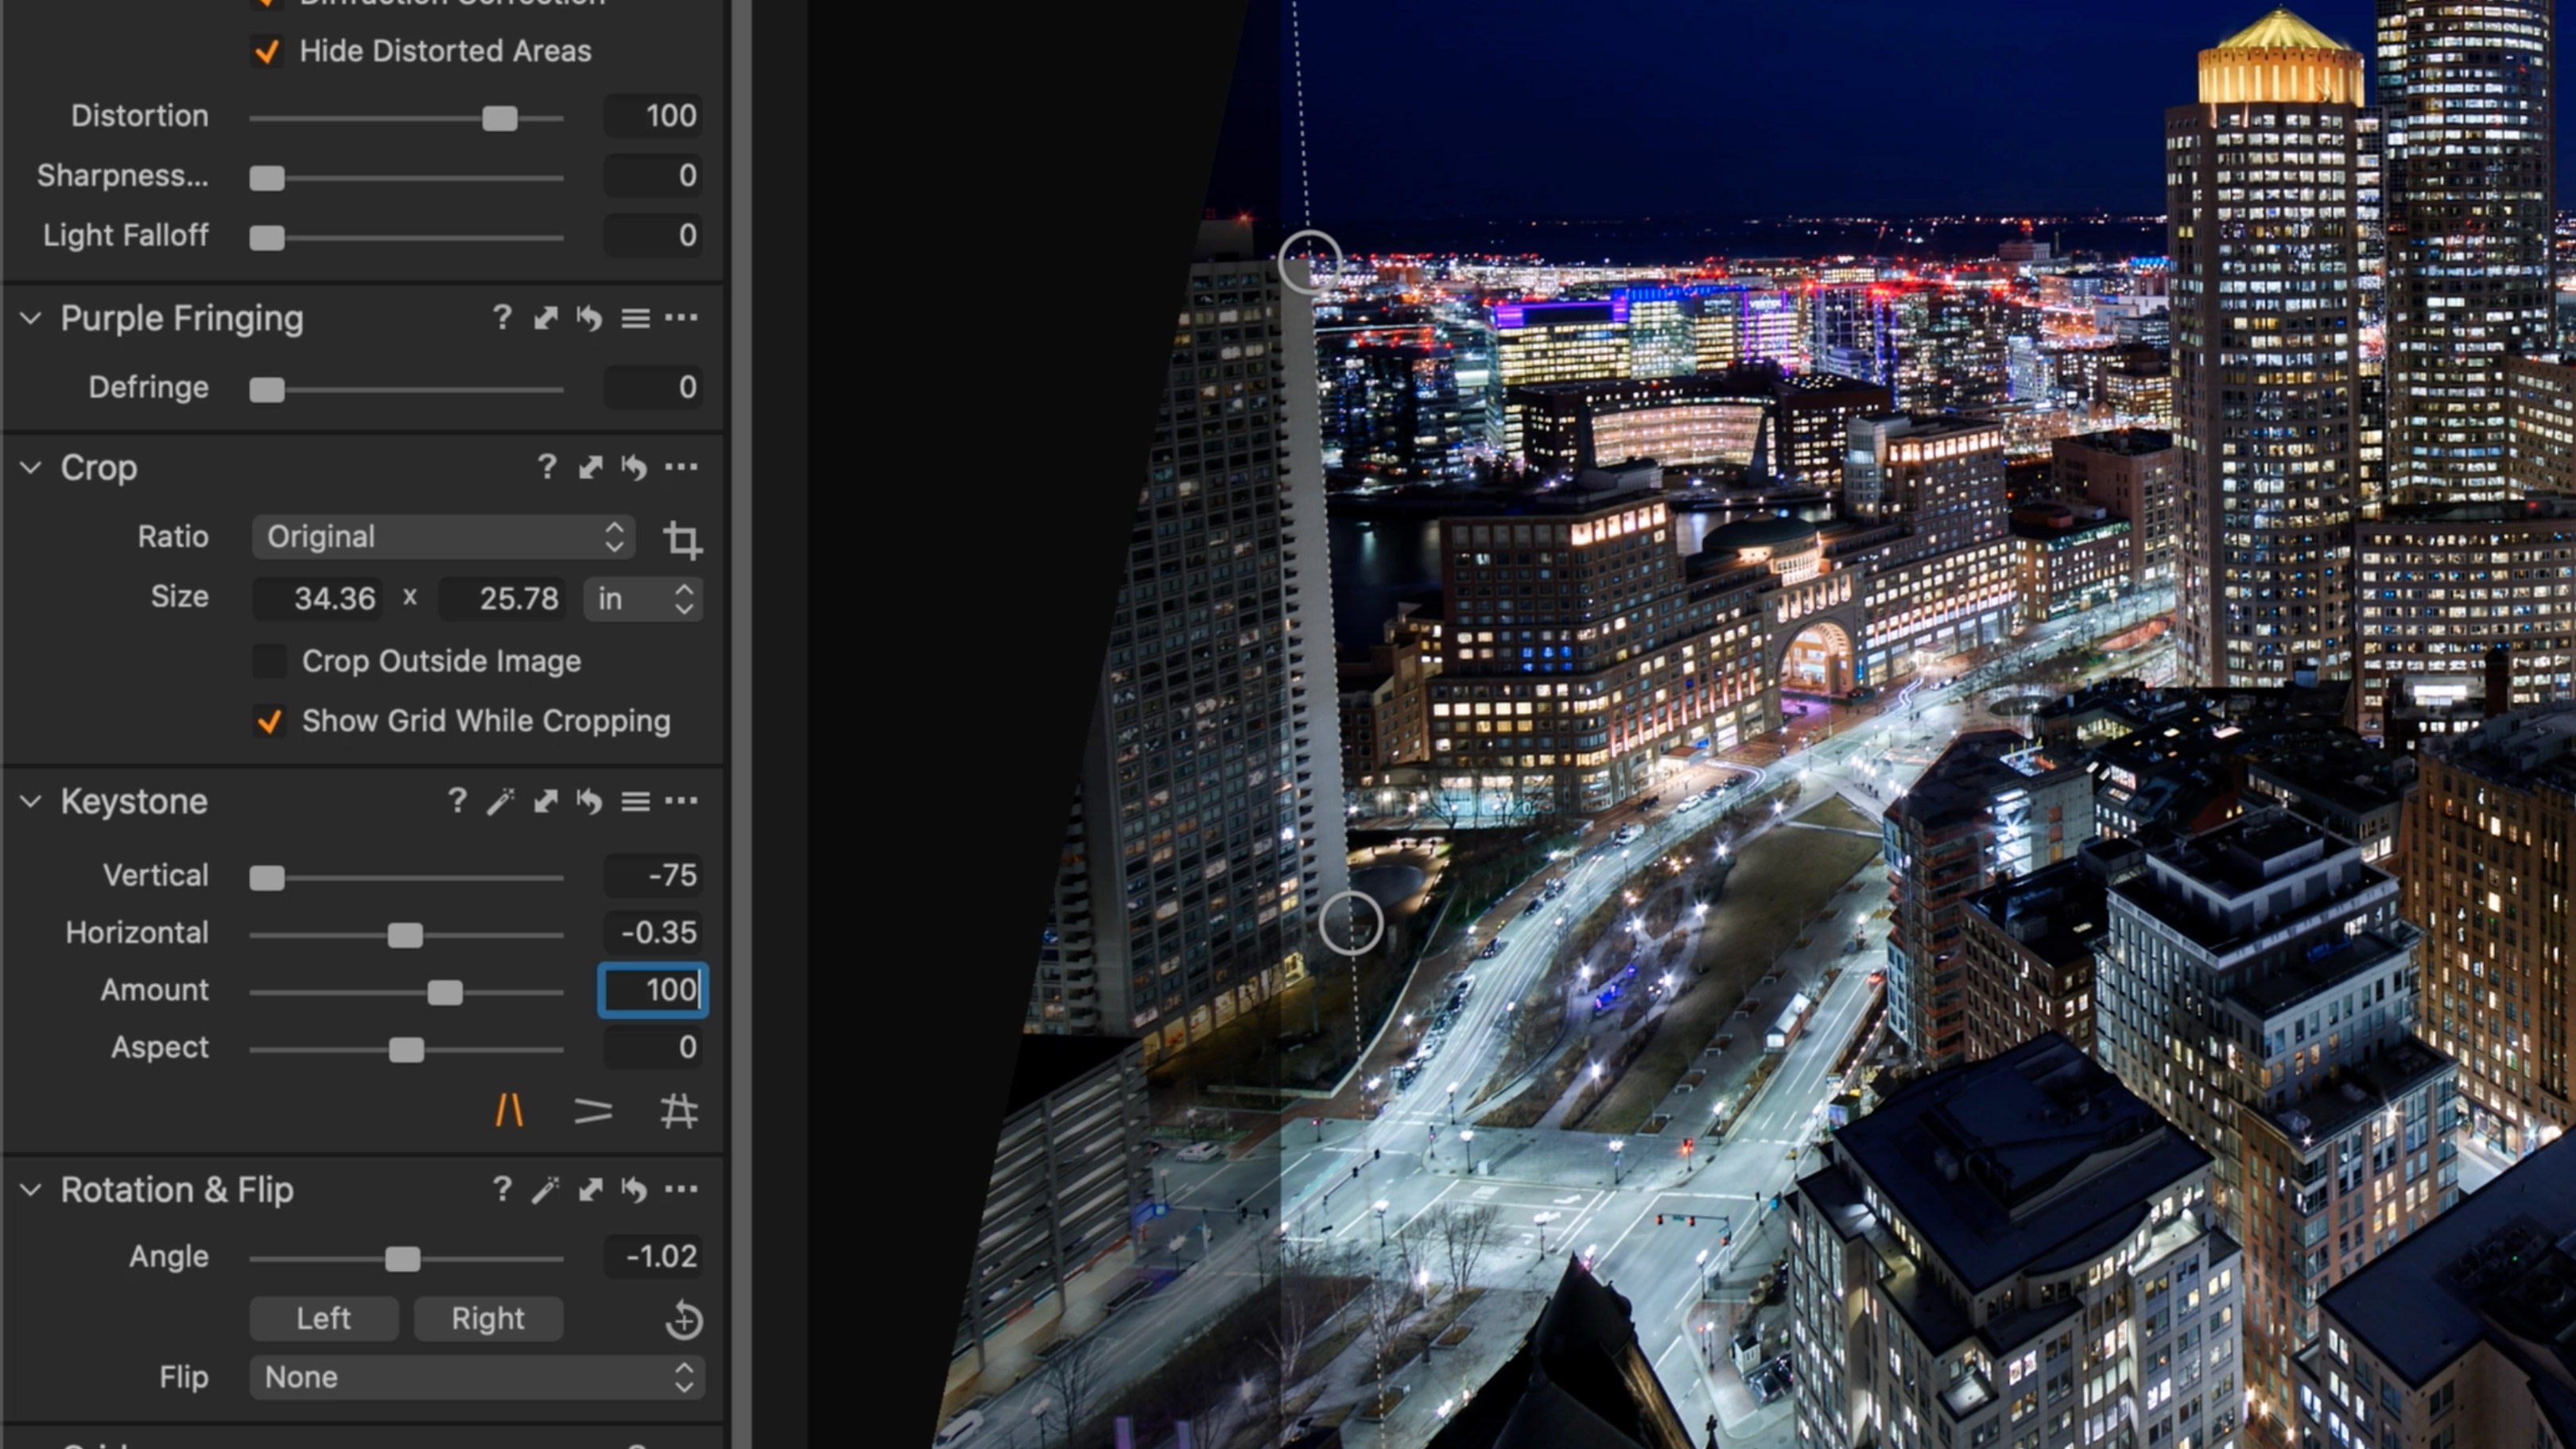
It’s also worth remembering that the tool is actually just a graphical interpretation of the numbers in the Keystone tab on your tool panel to the side. As you move the anchor points, the tool interprets these into numerical values that are delivered to that panel.
3. Visual adjustment
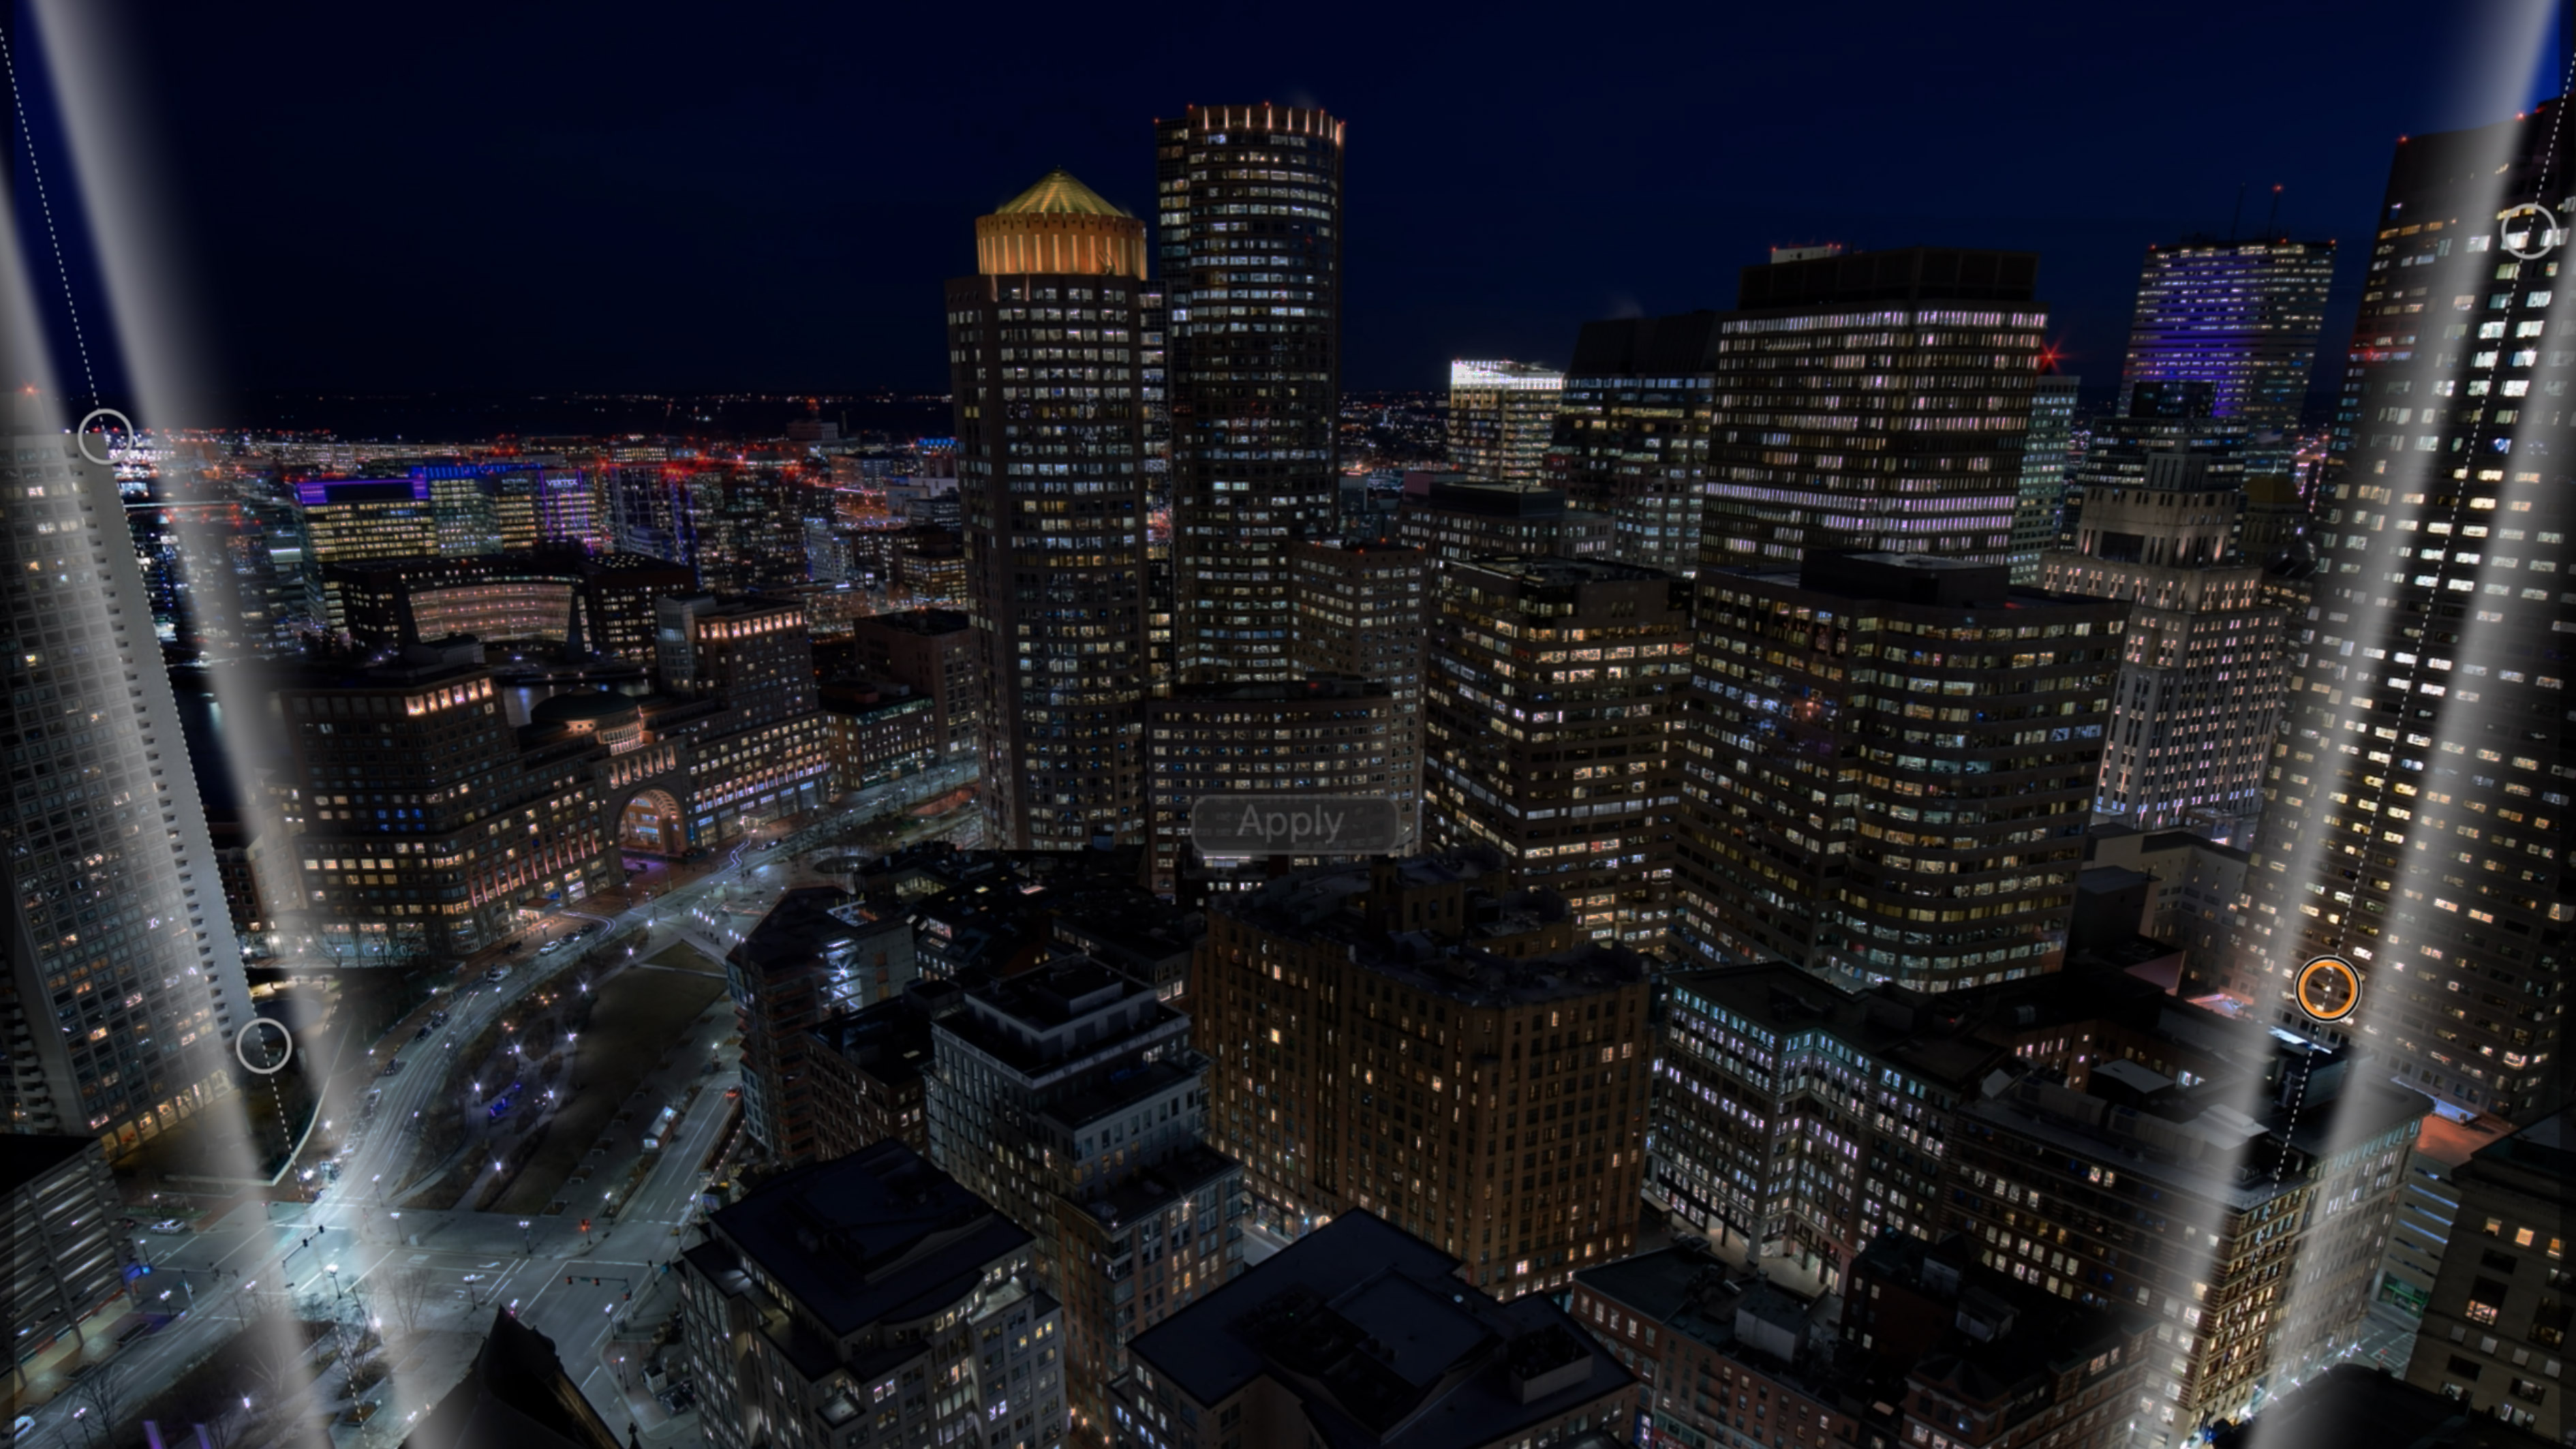
While you can use the sliders in the tool panel to make adjustments, it’s often easier to use the anchor points and their guidelines in between to let Capture One do the calculations for you.
The best camera deals, reviews, product advice, and unmissable photography news, direct to your inbox!
4. Aspect ratios
The goal is to put the anchor points on a line that SHOULD be straight but isn't (not that’s already correct). In the case of vertical only, that means a line that should be straight up-down. In the case of a horizontal keystone adjustment, that’s lines that should be perfectly flat and level.
Dragging those points to their respective areas will show you (with the joining lines) what else between those points will be levelled up, and once happy, click apply.
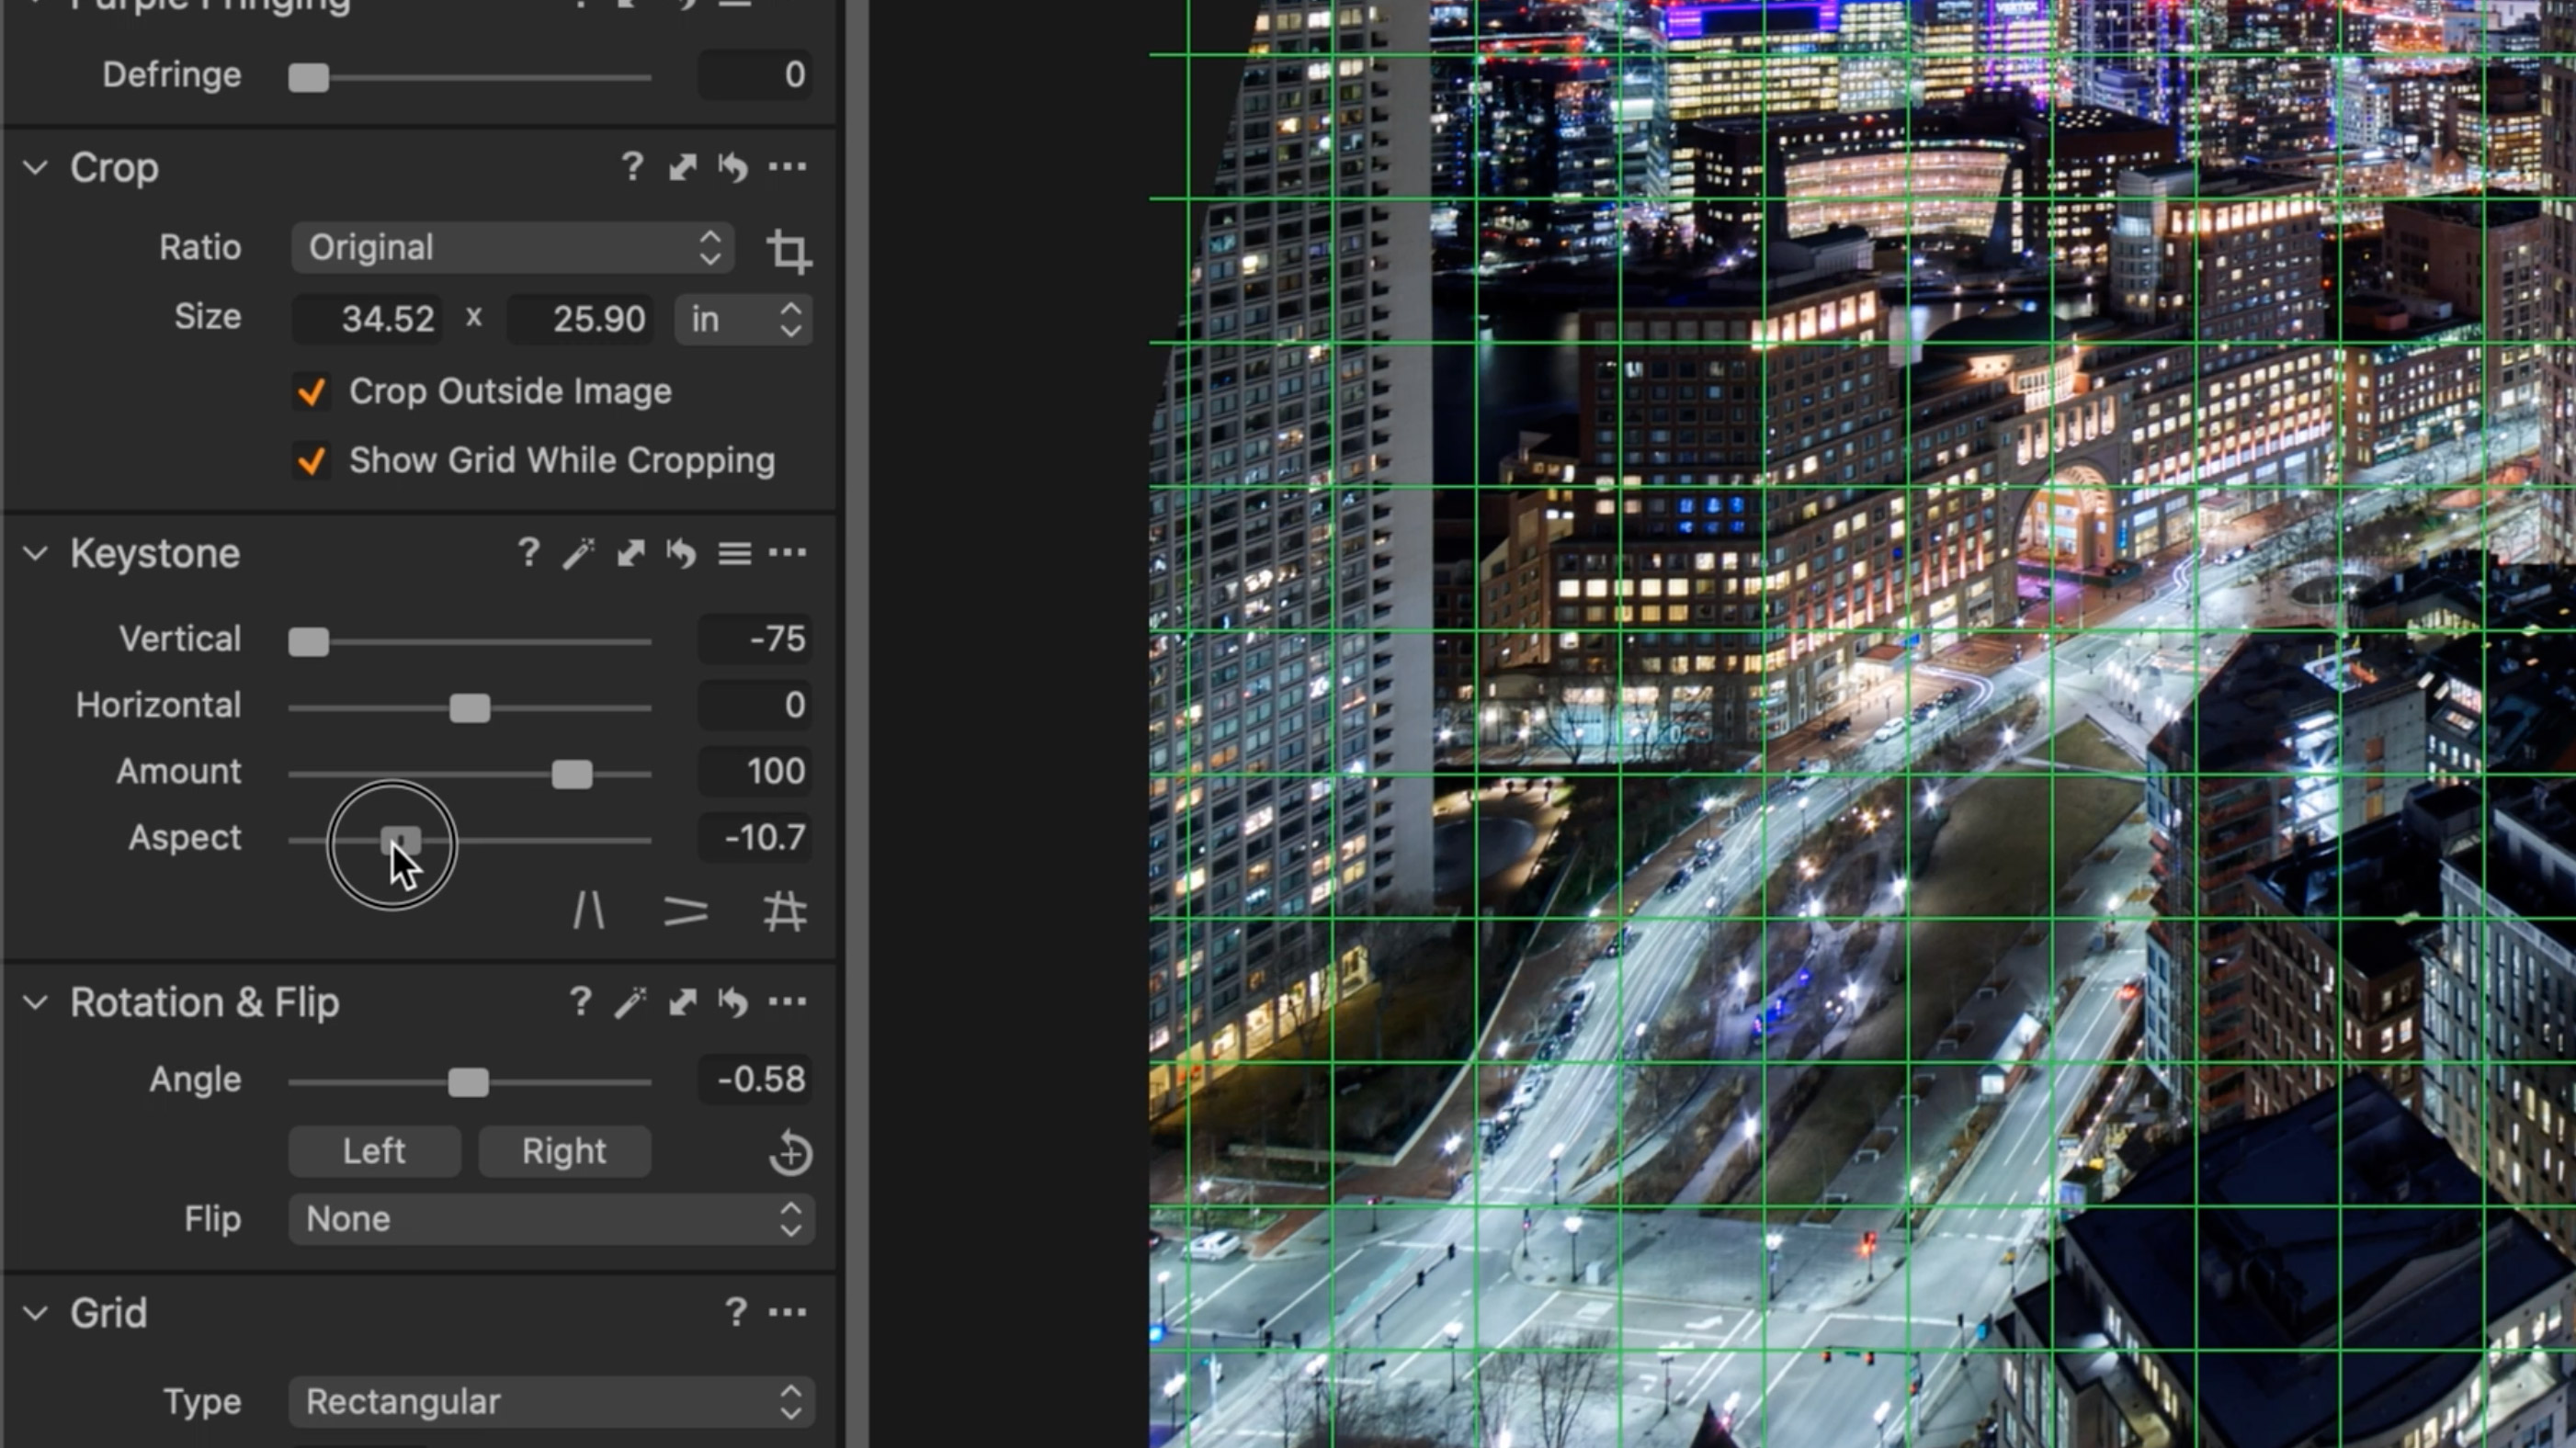
If the result now appears too “squashed”, consider using the “Aspect” slider to stretch or flatten the image to suit.
5. Check the crop
You will lose some of your wider image to the crop, as a result of the correction – so it’s worth checking the uncropped version to see what’s been pulled out of the frame. Also bear in mind the default “amount” of correction is 80 – not entirely handy for architecture that you need to be 100% straight, so it’s worth setting that back to 100 once you’ve set your anchor points.
6. Four-way adjustment
The four-way tool works in exactly the same way as the horizontal or vertical version, only it allows for a complete transformation of an object in one go.
Just like before, simply select 4 points that should all be linked in a straight rectangle and hit apply.
There will always be a need for getting things exactly right in-camera when it comes to architectural photography – and for those moments, a tilt/shift lens can be the winning tool.
But for those who find themselves having to make minor adjustments, infrequently, or if you don’t shoot enough of these images to warrant the investment in a dedicated lens, the keystone correction tool is there to help in a few clicks.
About Capture One
Capture One is an all-in-one non-destructive image cataloguing, raw processing and editing tool, and its closest rival is Adobe Lightroom Classic. Capture One regularly features in our guide to the best photo editing software, thanks to its high-quality raw processing, in-depth color controls and layer and mask based editing.
Get Capture One Pro 22: $299 or $179/year
Capture One Pro is available either for a single one-off license fee on a paid-monthly subscription or an annual subscription which offers a big saving over the monthly option.
Read more:
• Best tilt-shift lenses
• Best tripods
• Best photo editing laptops
• Best monitors for photo editing
• Best portable hard drives
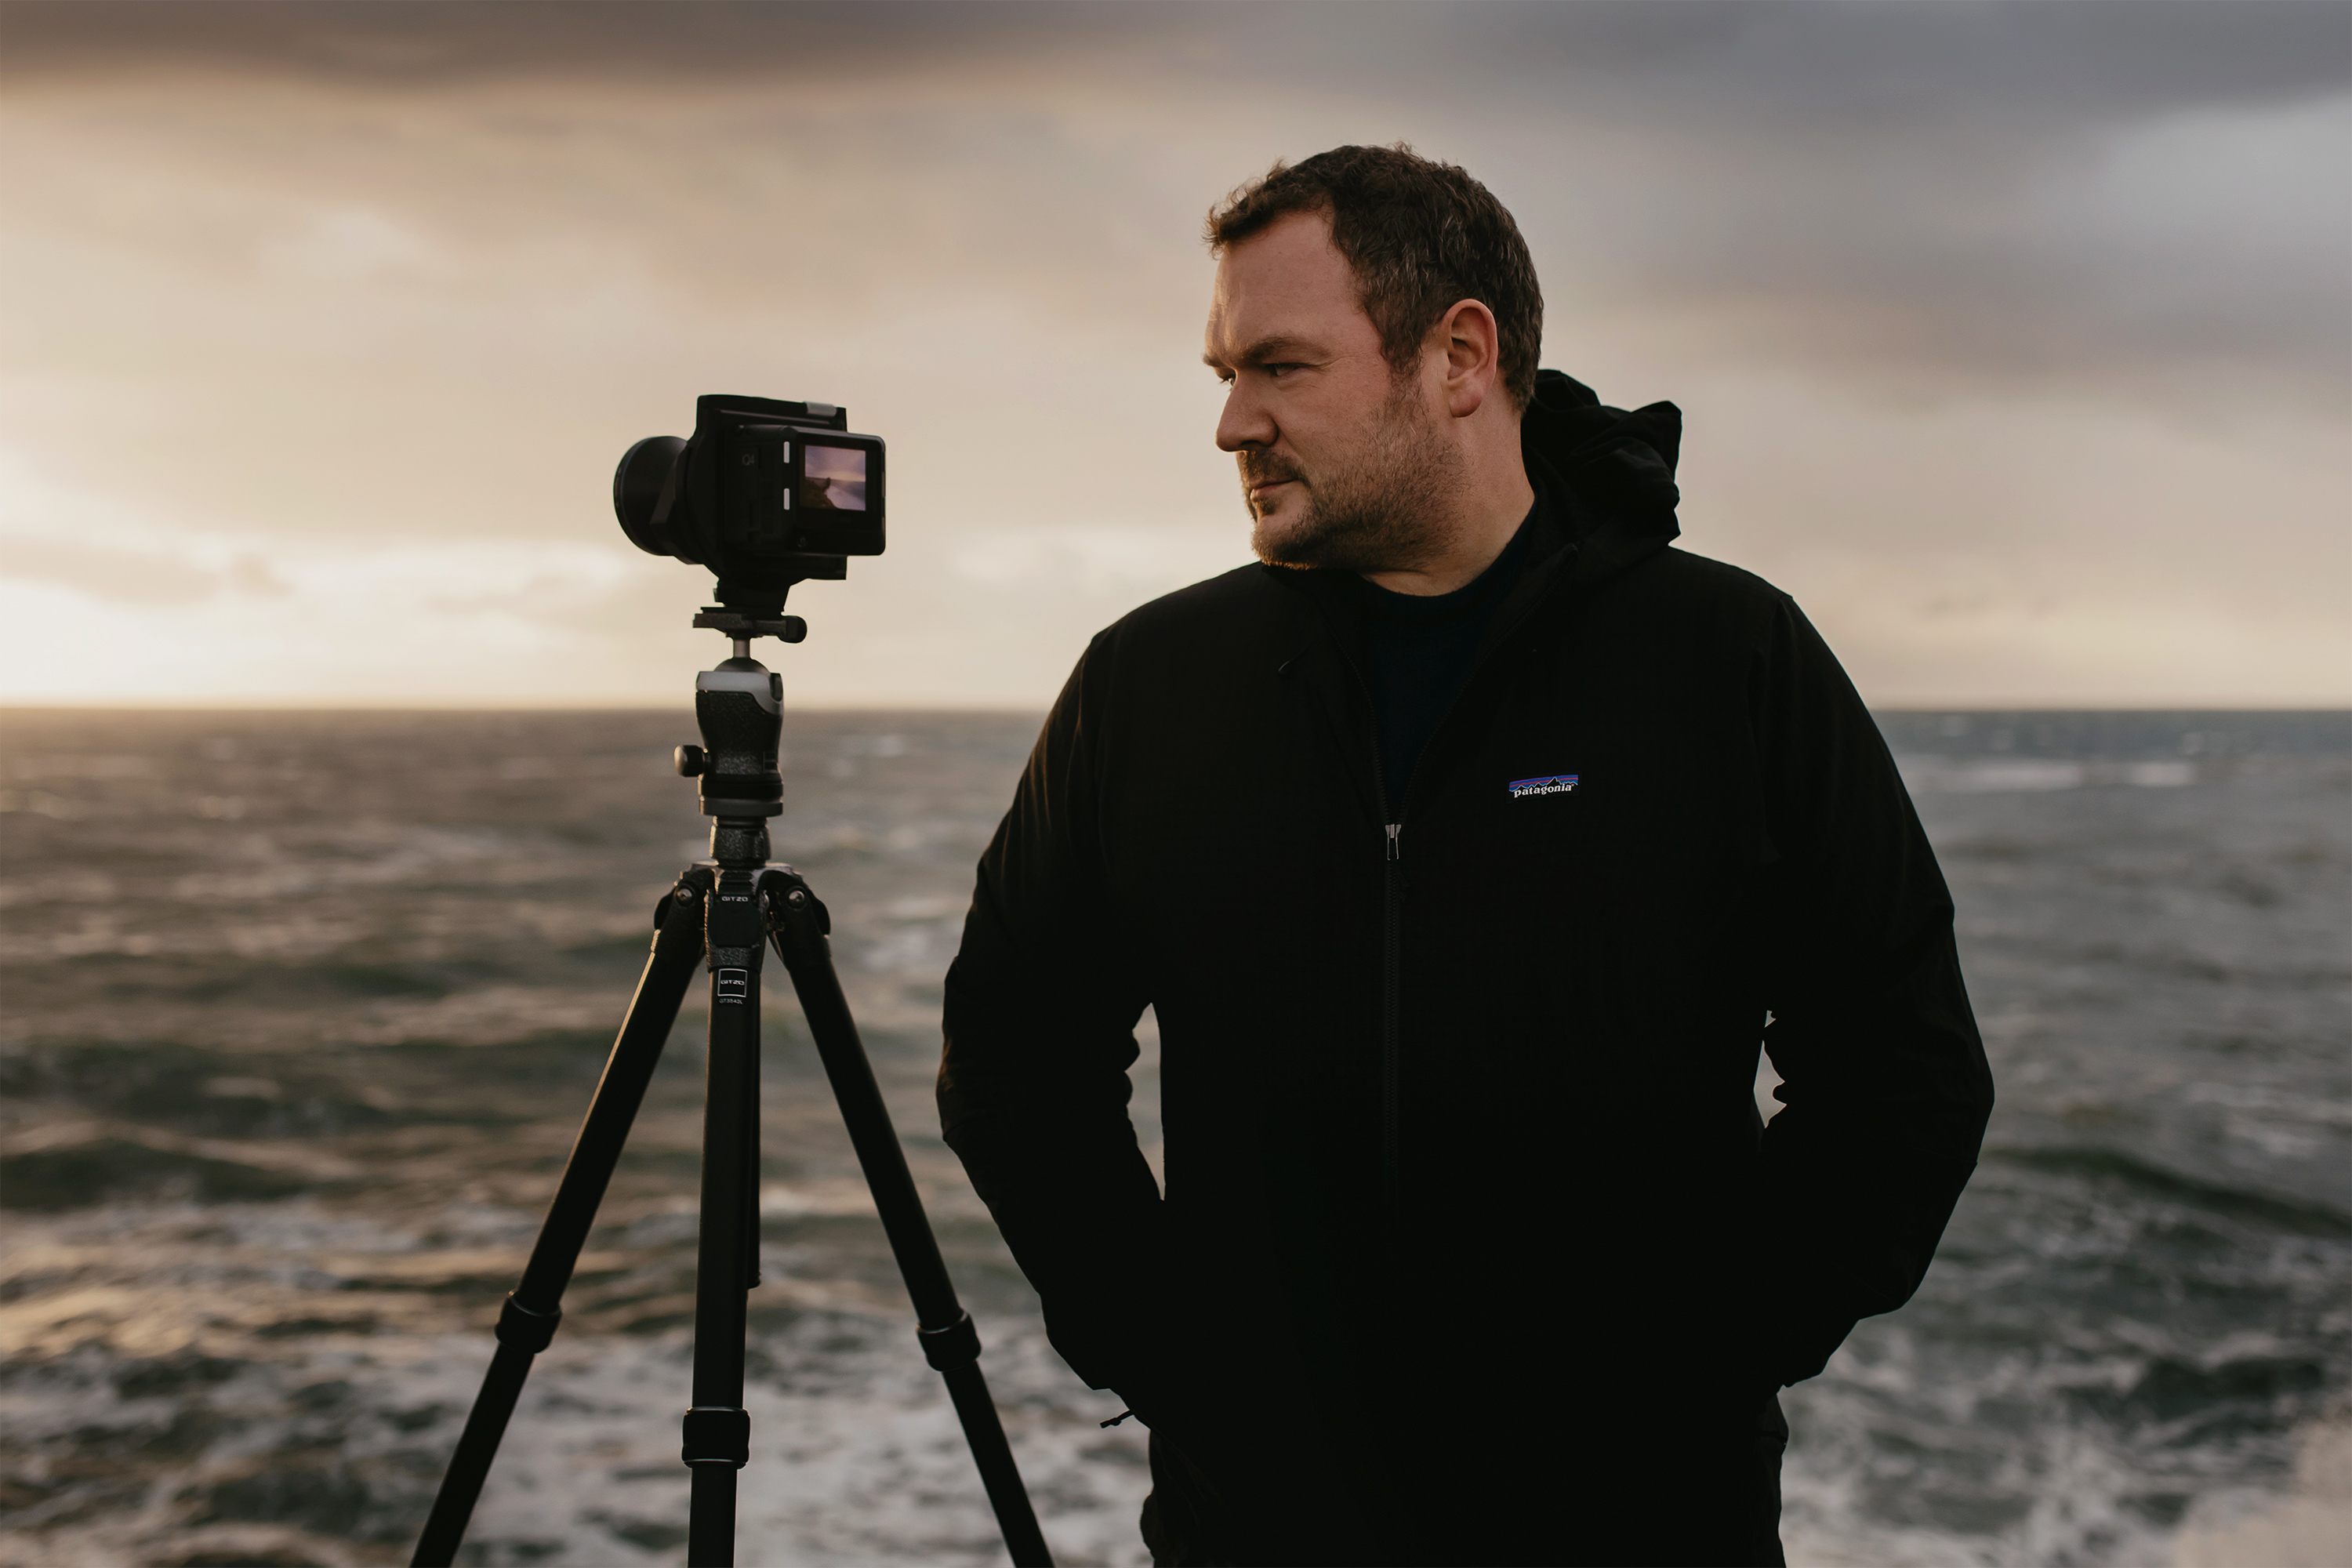
Paul Reiffer is an award-winning photographer and landscape artist. As a global ambassador for both Phase One and Capture One, he specialises in grand vistas, electrifying cityscapes and iconic views. His images have been published all around the world in well-known books, newspapers and magazines as well as supporting global travel and hospitality brands to reach and excite their audiences. His technical expertise is regularly called upon for industry insights, and through his luxury workshop programme as well as online channels, he’s carved out a unique style of teaching that is now appreciated by thousands worldwide. Shooting with ultra-high-resolution Phase One cameras, his work is used commercially by interior designers and clients ranging from National Geographic to British Airways, Marriott, Land Rover and many more.
