Capture One 22 introduces in-built panorama stitching: here's how it works
Capture One expert Paul Reiffer demonstrates the new pano stitching feature and how it produces an editable DNG file
The best camera deals, reviews, product advice, and unmissable photography news, direct to your inbox!
You are now subscribed
Your newsletter sign-up was successful
Panorama stitching is a favorite technique that's been made massively easier by photo-editing software. In the early days you needed dedicated stitching applications alongside your regular photo editor, but programs like Capture One are now including panorama stitching as standard.
This series on Capture One has been specially commissioned from globetrotting pro photographer and editing expert Paul Reiffer.
• See the full Capture One series
• Capture One 21 review
• Best photo editing software
A frequent request over the years has been for the ability to “stitch” multiple images into one file, within Capture One. This is a particularly popular technique with landscape photographers
Why within the raw processor? While only having to use one tool instead of external plugins has its benefits, the bigger reason was that people wanted to be able to edit the output as a fully functioning raw file, not as a flat TIFF or JPEG. And with Capture One 22, that feature has now been added.
Article continues belowWhile a successful panoramic stitch is as much down to the way the individual frames are captured as it is the software that joins them together, Capture One’s new feature has been designed to work on the full range of input shots – from a row of handheld snaps, to automated drone sequences, through to calibrated multi-row captures using a nodal rail.
So here’s how to get started:
1. Lens corrections
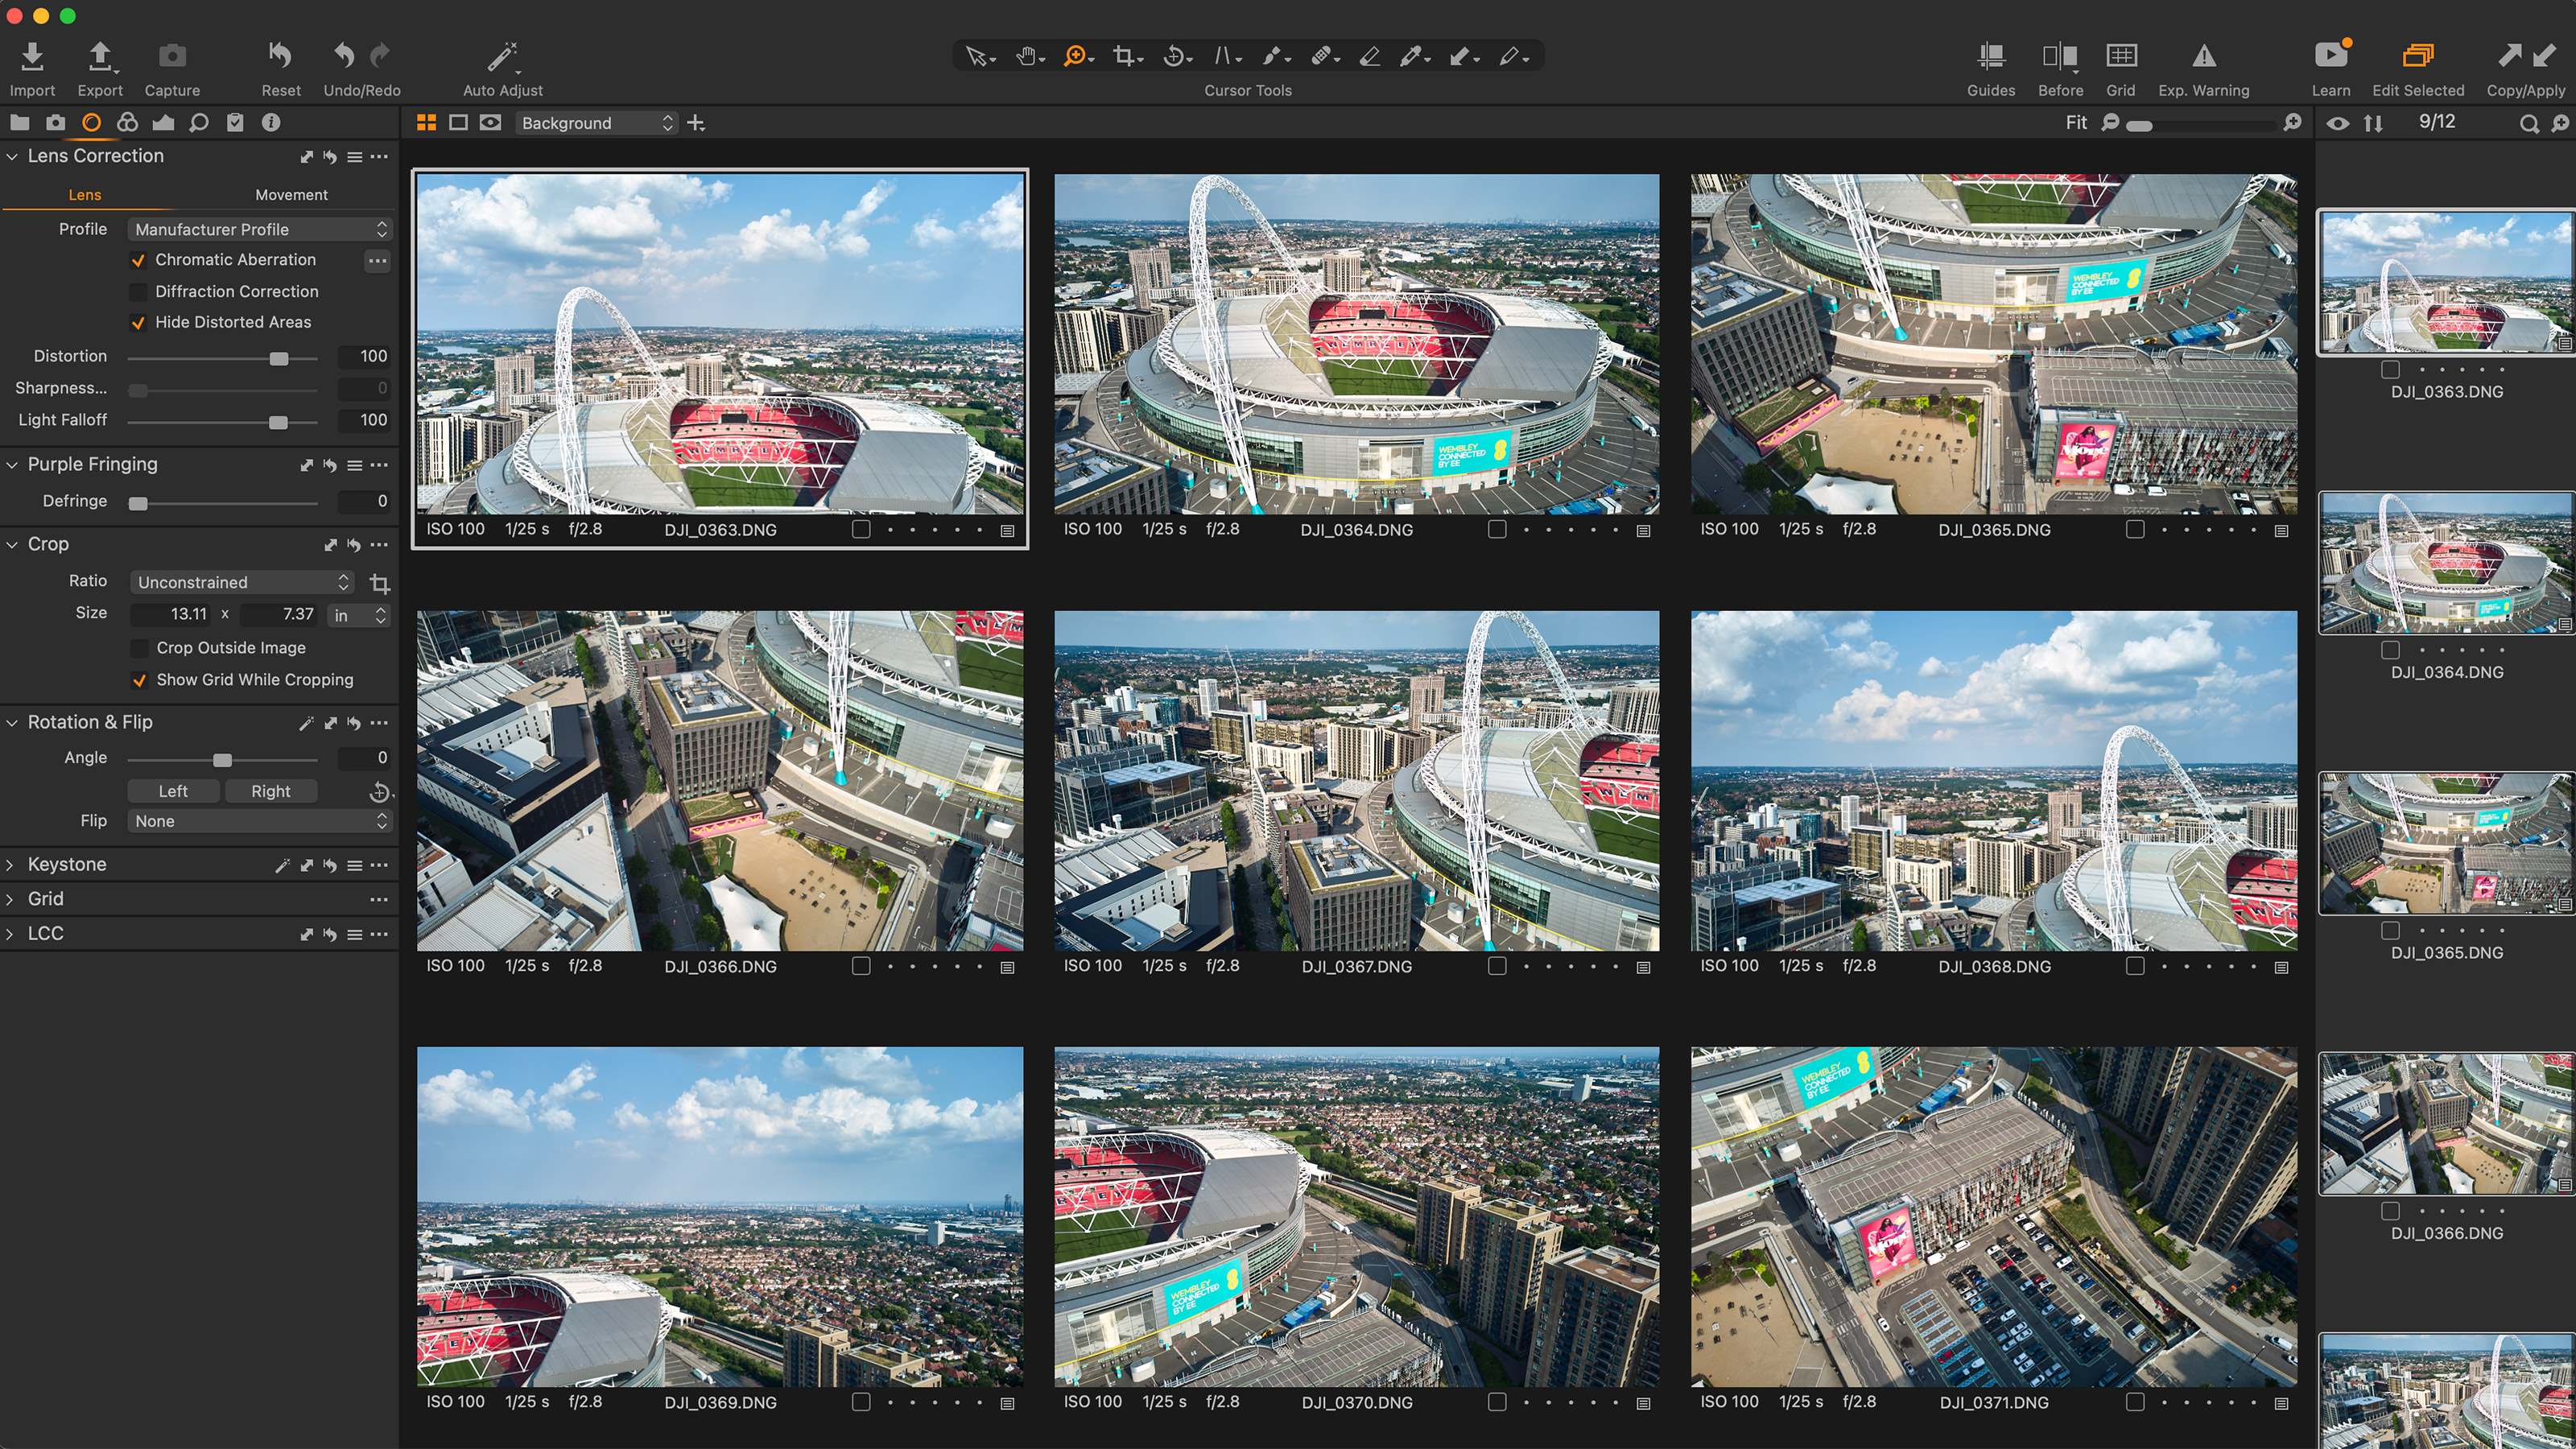
Having shot a series of images, ideally with a 30-40% overlap between each one, you’ll import your sequence of shots just like any other.
From there, in order to get the best out of Capture One’s Panoramic Stitching you’ll need to adjust the “Lens Corrections” to load in the correct profile (or “manufacturer profile”) and set “Light Falloff” to 100% (where available). This is critical to avoid the “bumpiness” in any sky as the lens vignettes from frame to frame.
The best camera deals, reviews, product advice, and unmissable photography news, direct to your inbox!
2. Basic adjustments
Make any basic adjustments – white balance, sharpening, noise reduction, any dynamic range recovery – to the “middle” shot, and apply the exact same changes (through copy/apply) to every other shot in the sequence you want to join together. If there are variations between the images, it will be apparent when you see the output.
3. Stitch the panorama
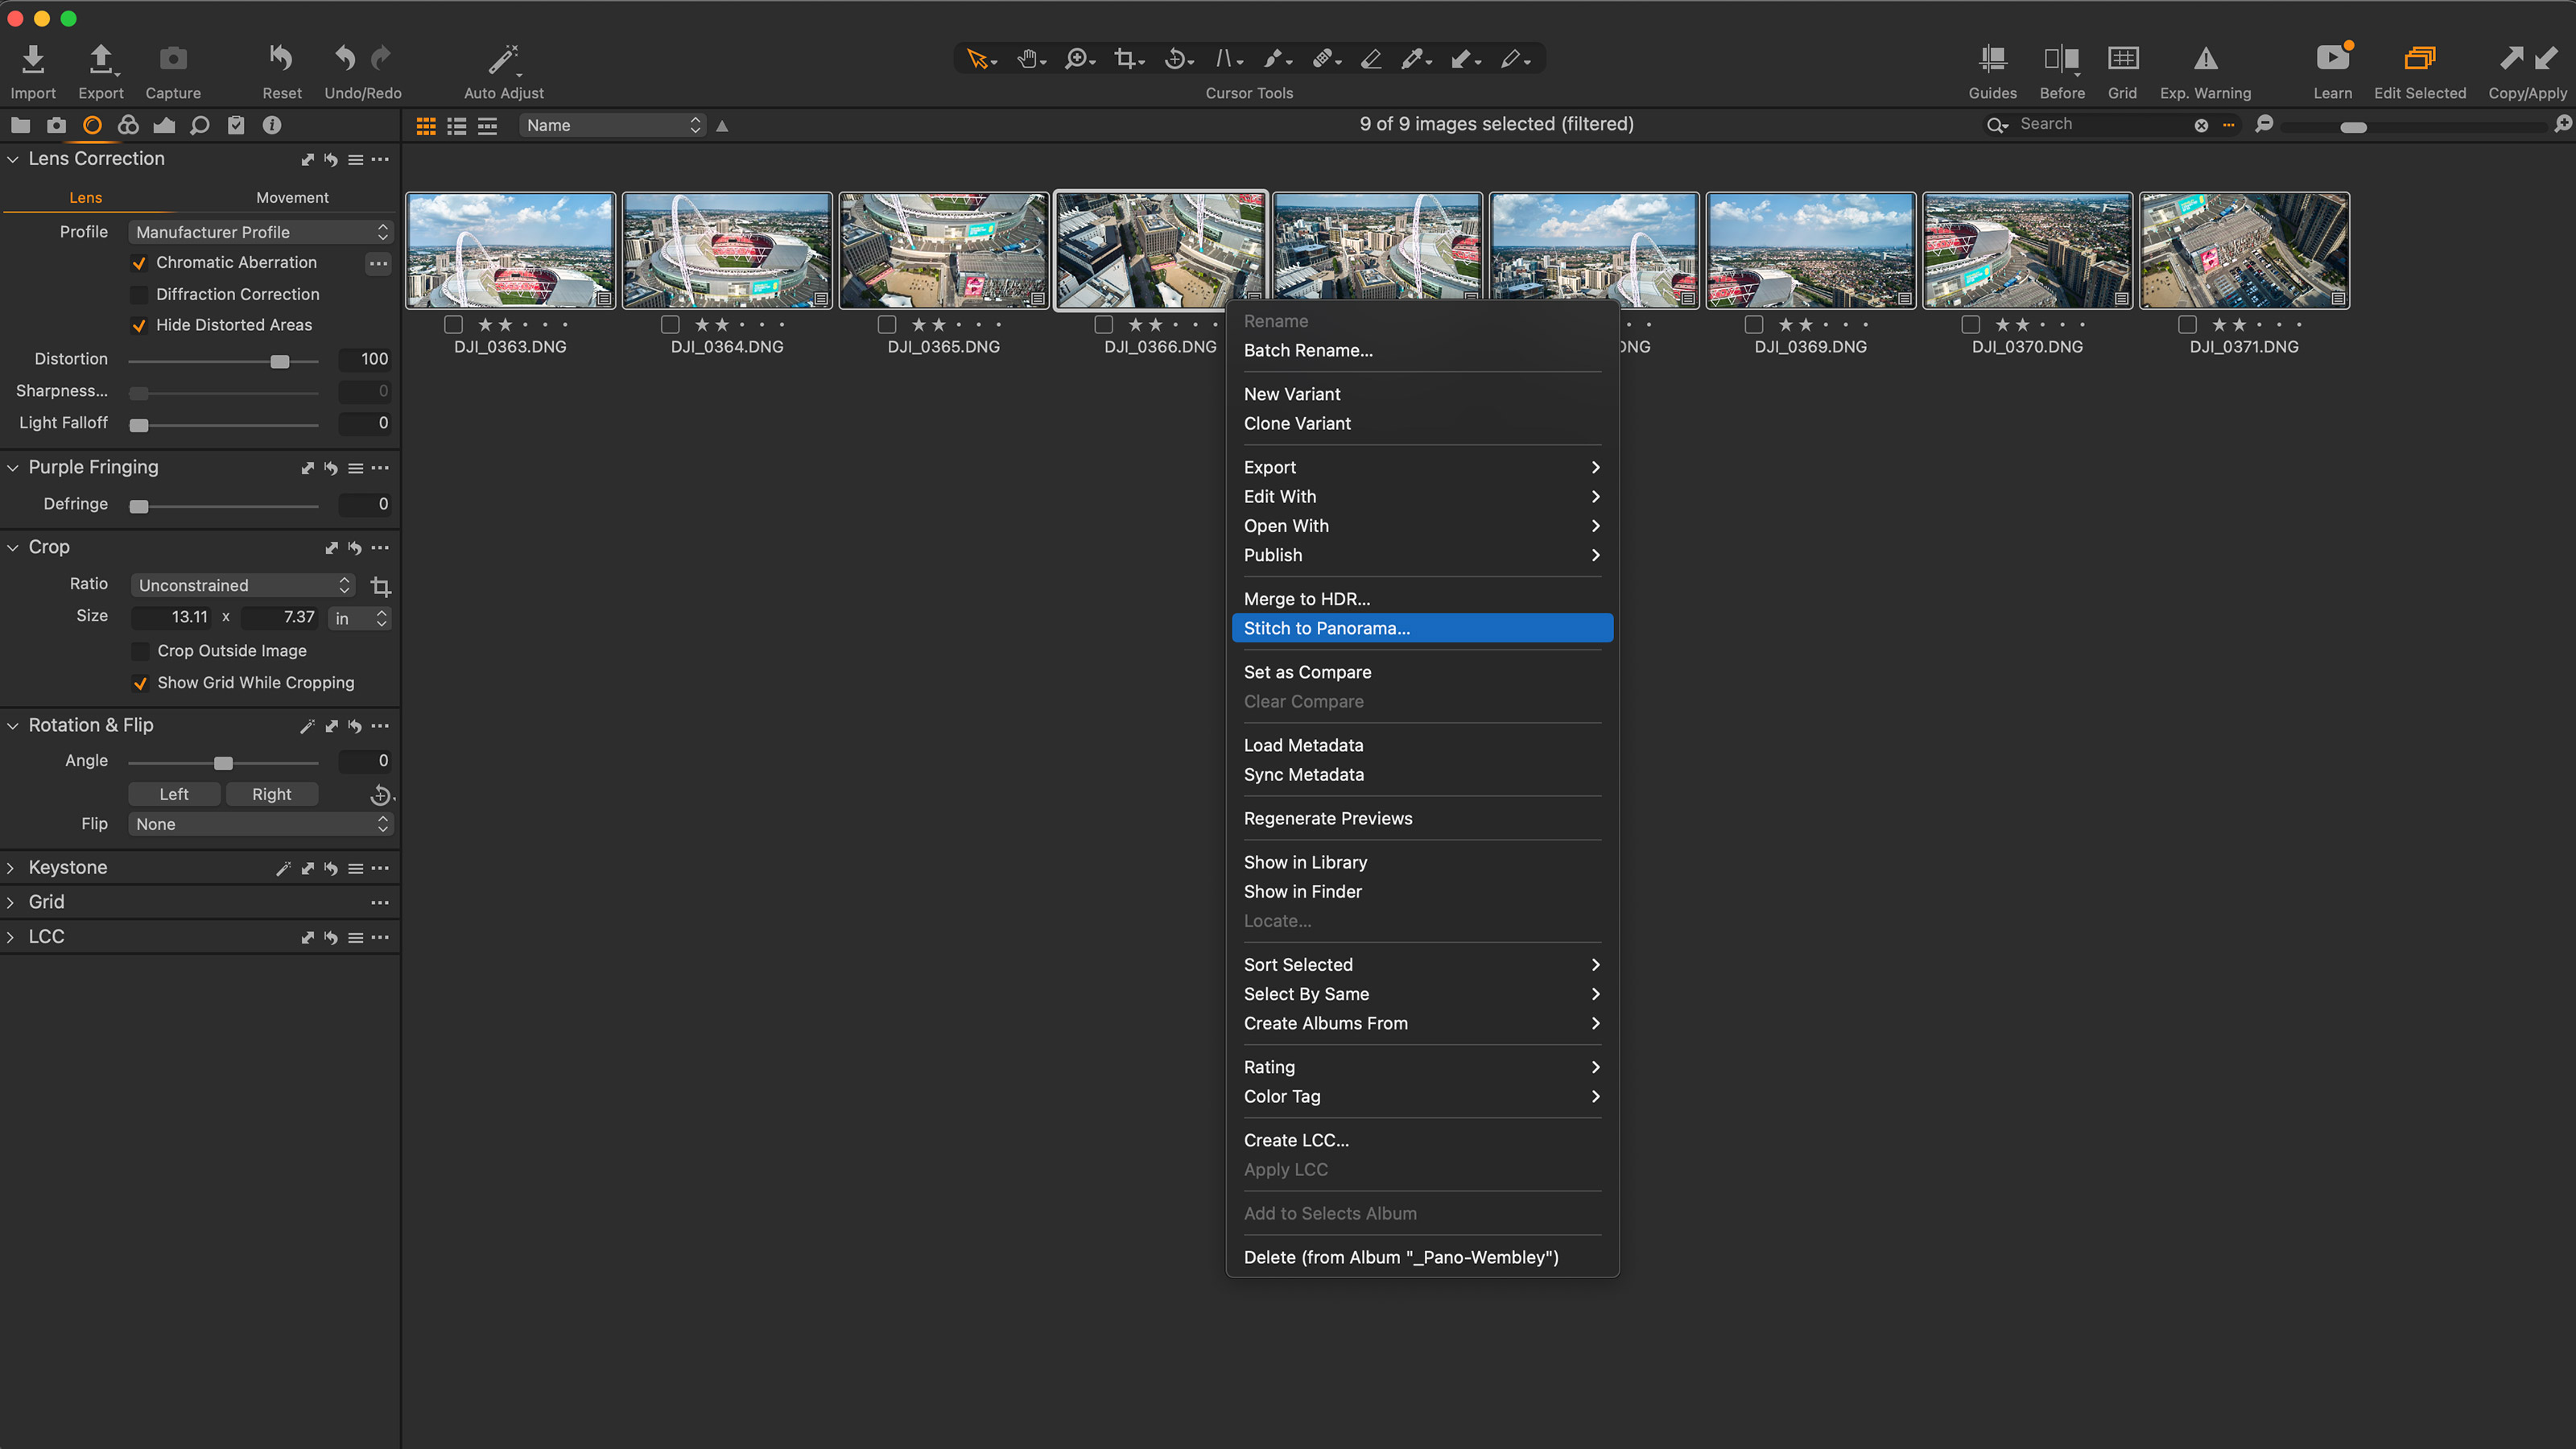
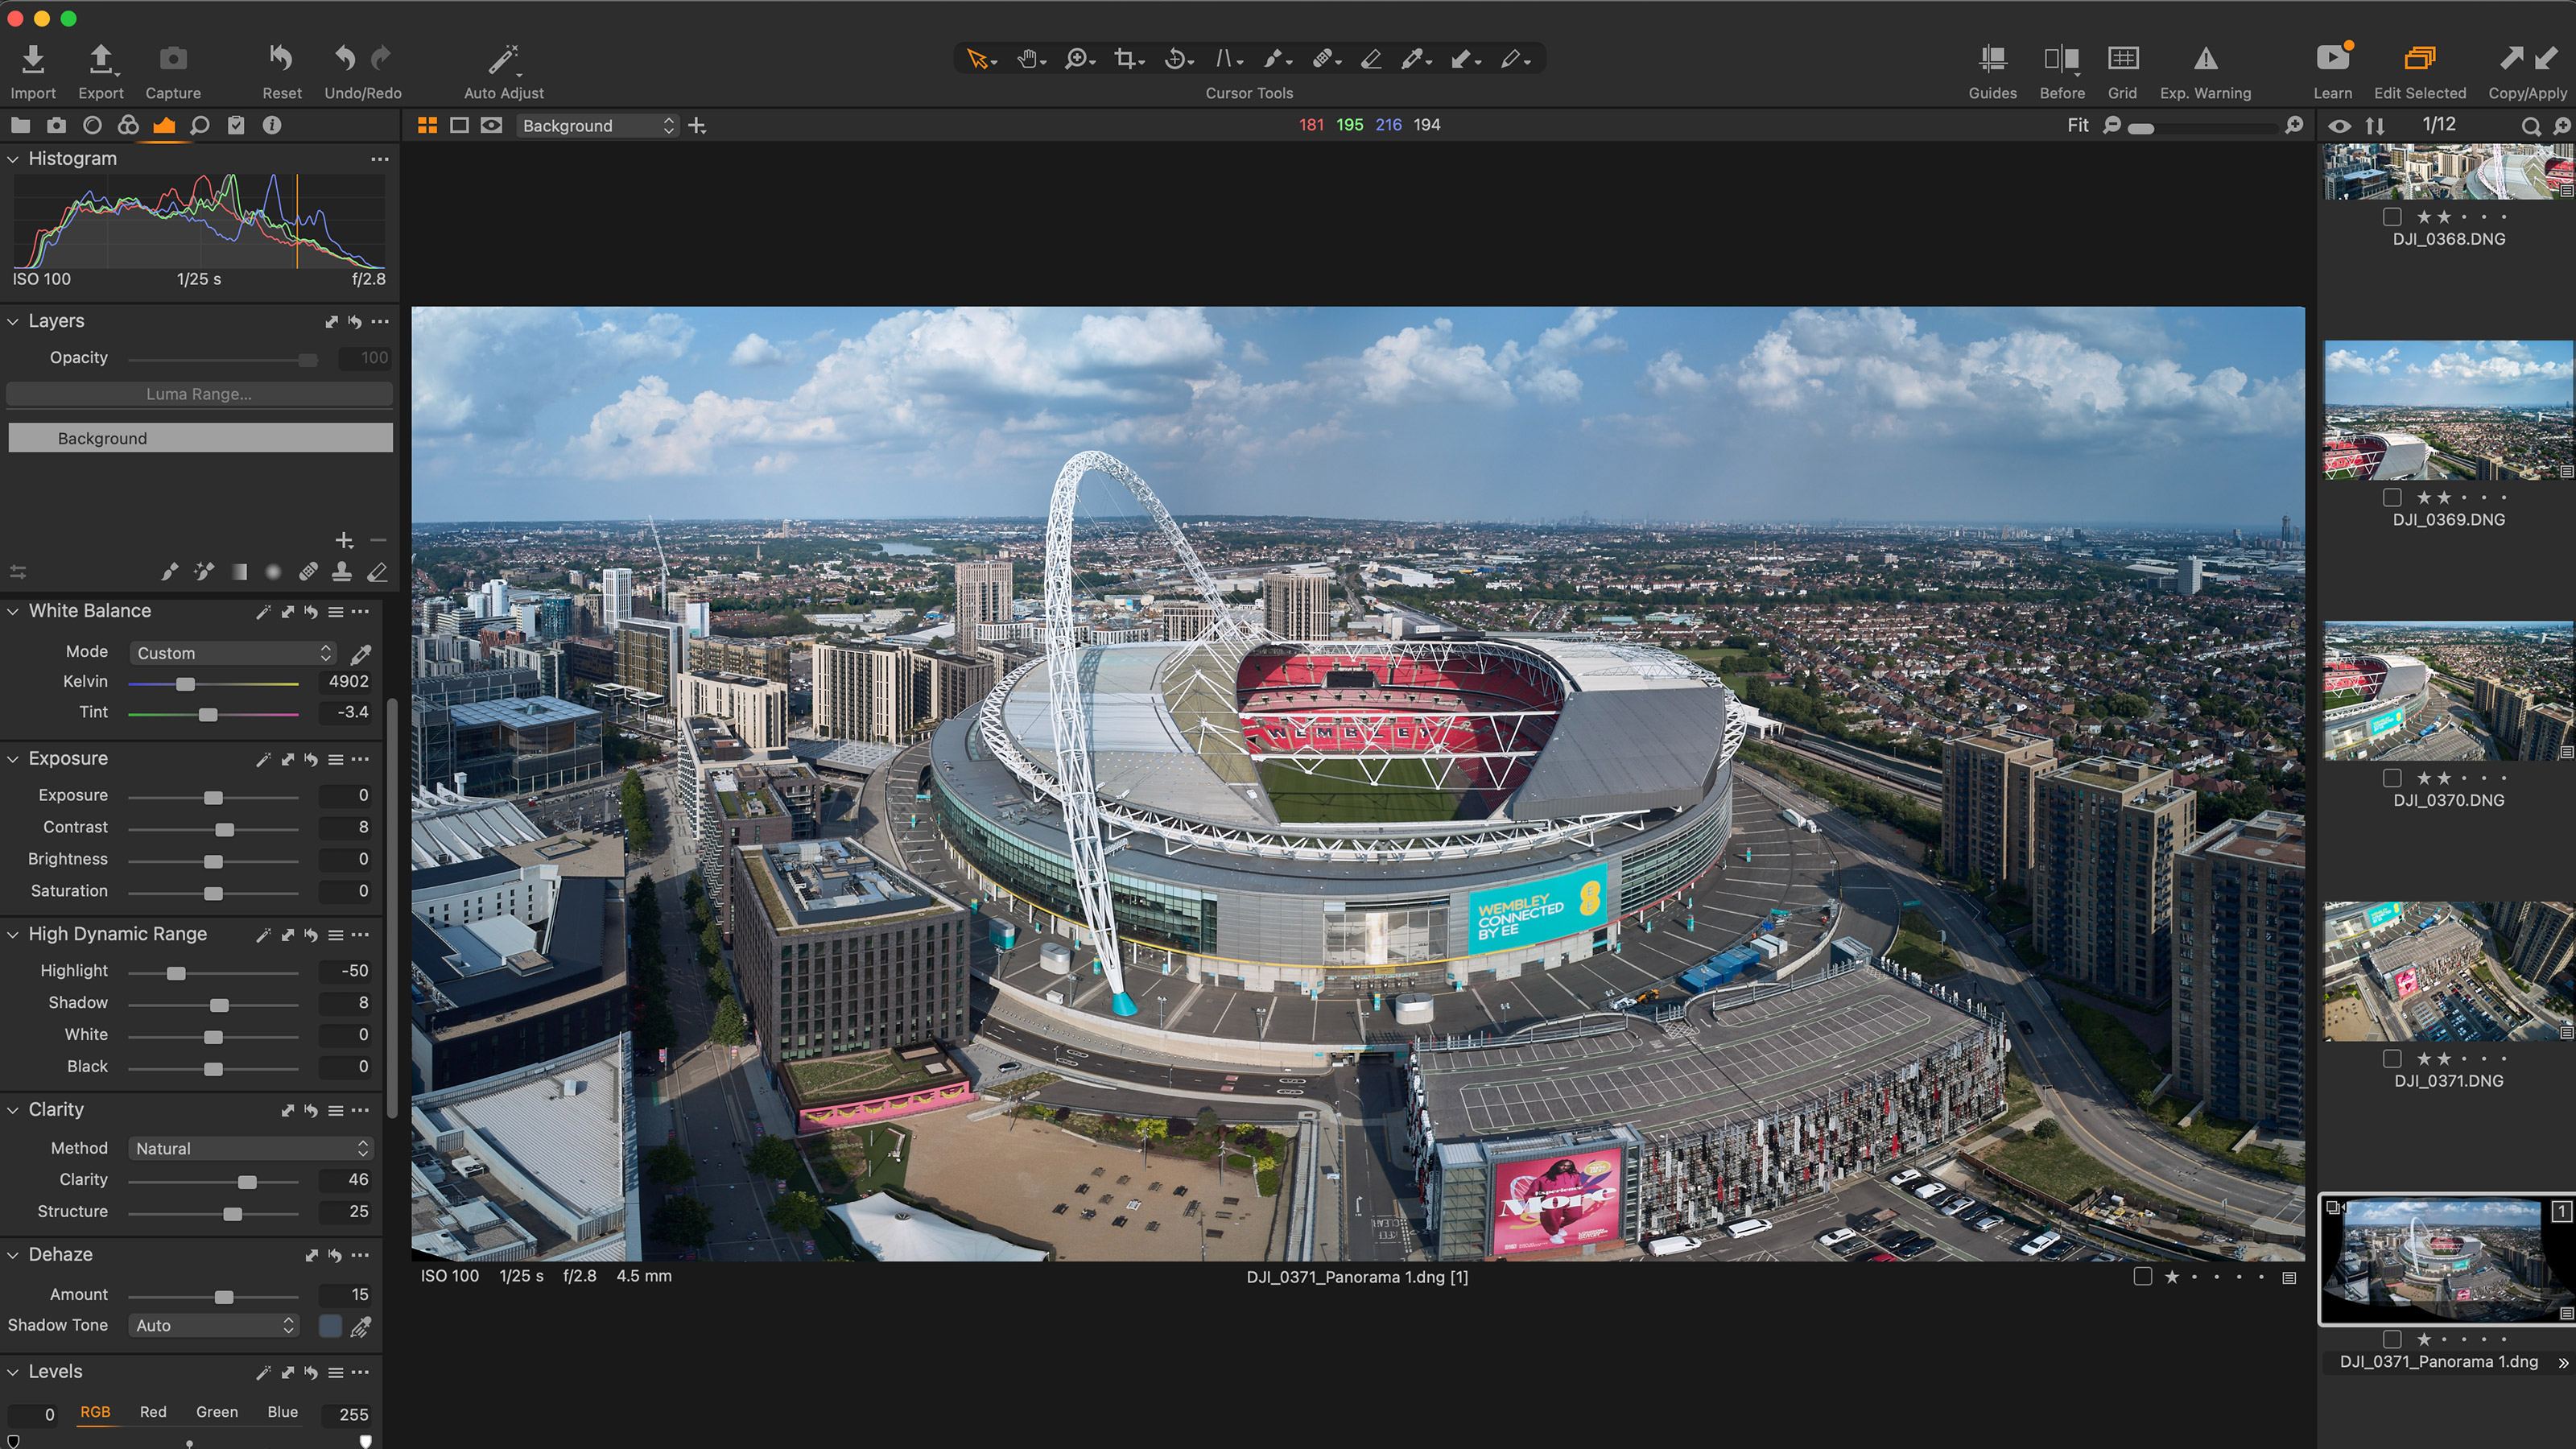
Select the images you want to stitch in the browser, and right-click, choosing Stitch to Panorama…
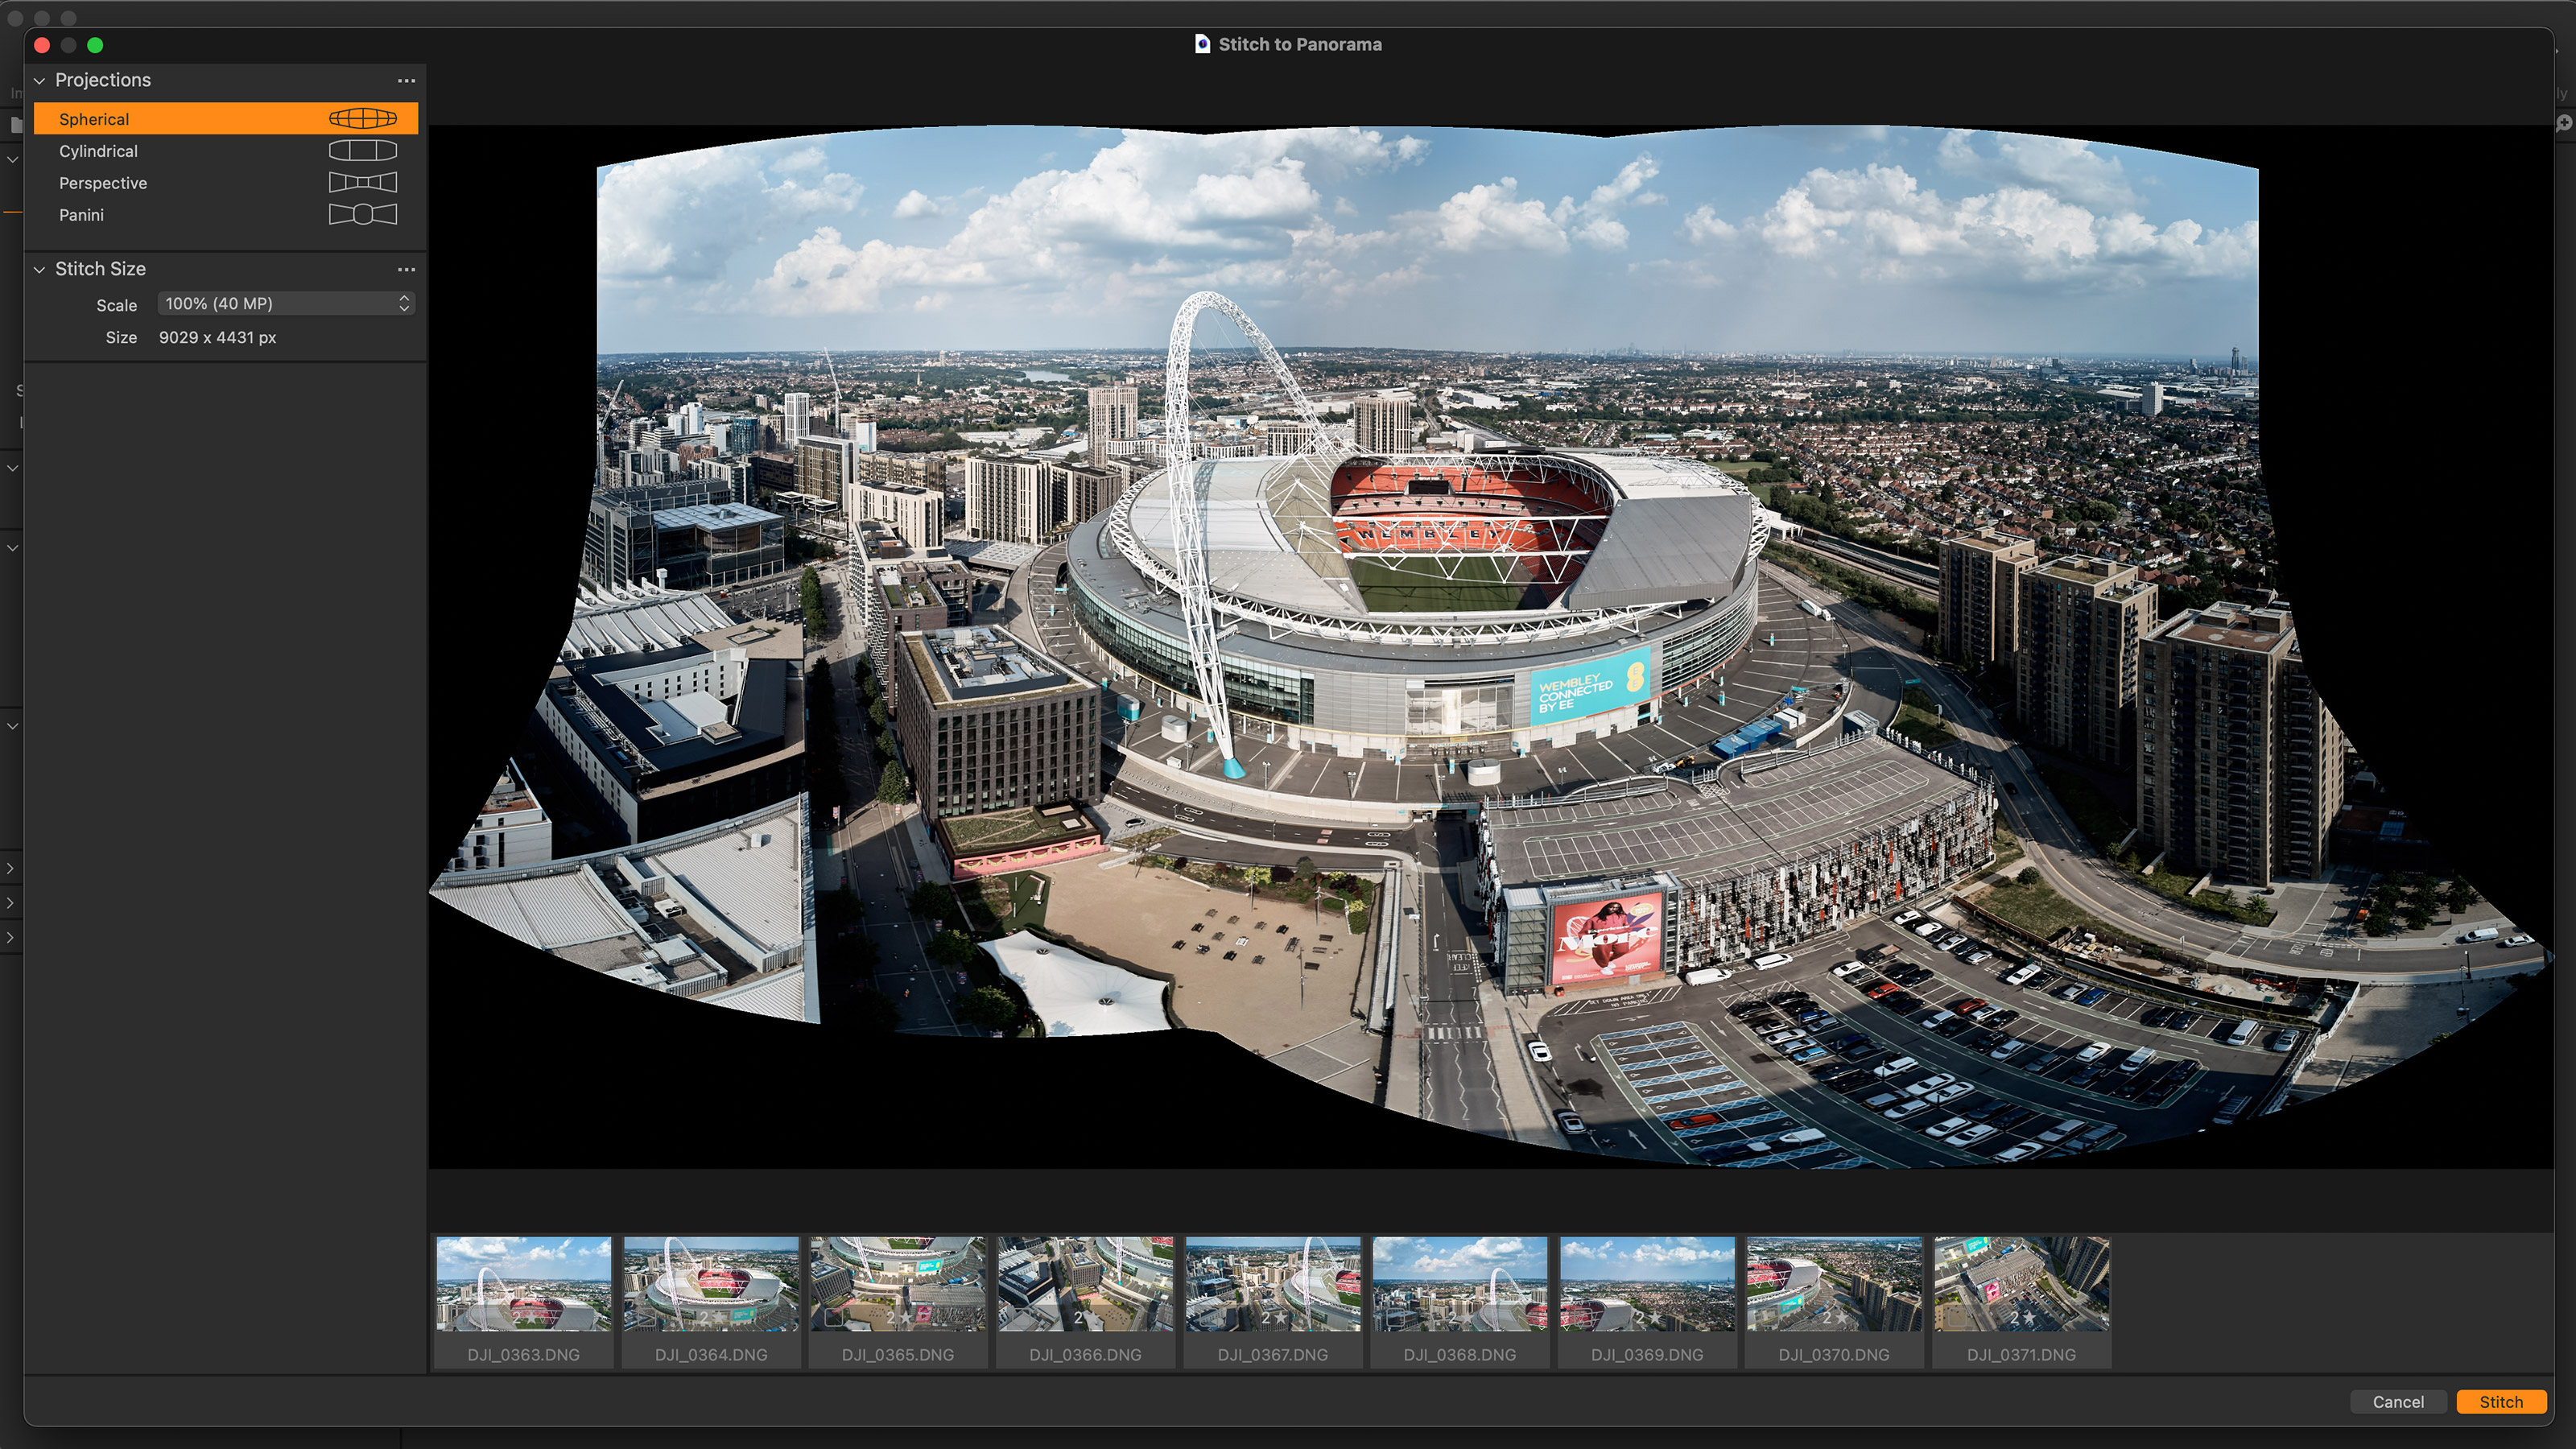
The new interface has been slimmed down to the essentials, with four 'projection' methods and a simple output size drop-down.
Each projection method is worth experimenting with:
• Spherical: Ideal for “multi-row” sequences, or aerial drone shots, but can “bend” straight lines.
• Cylindrical: Ideal for a single row of images to produce an ultra-wide field of view.
• Perspective: Creates an image where lines are straight and true, as-if you’d shot the sequence with a single ultra-wide lens.
• Panini: If shooting into the distance with converging lines, this is a great combination of cylindrical and perspective methods to deliver a realistic appearance.
You’ll also see a Stitch Size option. You can use this to reduce your output file size for faster processing, or to keep it within the DNG limit of 65,000px wide on any edge or 715 megapixels overall.
Once stitching is complete, you have a raw file ready to be further edited to your choice of look – it behaves just as your original raw files, but as one big stitch of multiple images, blended together by Capture One.
When to use pano stitching
Panoramic stitching allows for more creativity, in terms of both shooting style as well as giving the viewer an “impossibly wide” view of the world around us.
By bringing us the ability to stitch that content together, while still able to edit the output as a raw file in itself, Capture One gives us a valuable new tool to produce such views.
About Capture One
Capture One is an all-in-one non-destructive image cataloguing, raw processing and editing tool, and its closest rival is Adobe Lightroom Classic. Capture One regularly features in our guide to the best photo editing software, thanks to its high-quality raw processing, in-depth color controls and layer and mask based editing.
Get Capture One Pro 22: $299 or $179/year
Capture One Pro is available either for a single one-off license fee on a paid-monthly subscription or an annual subscription which offers a big saving over the monthly option.
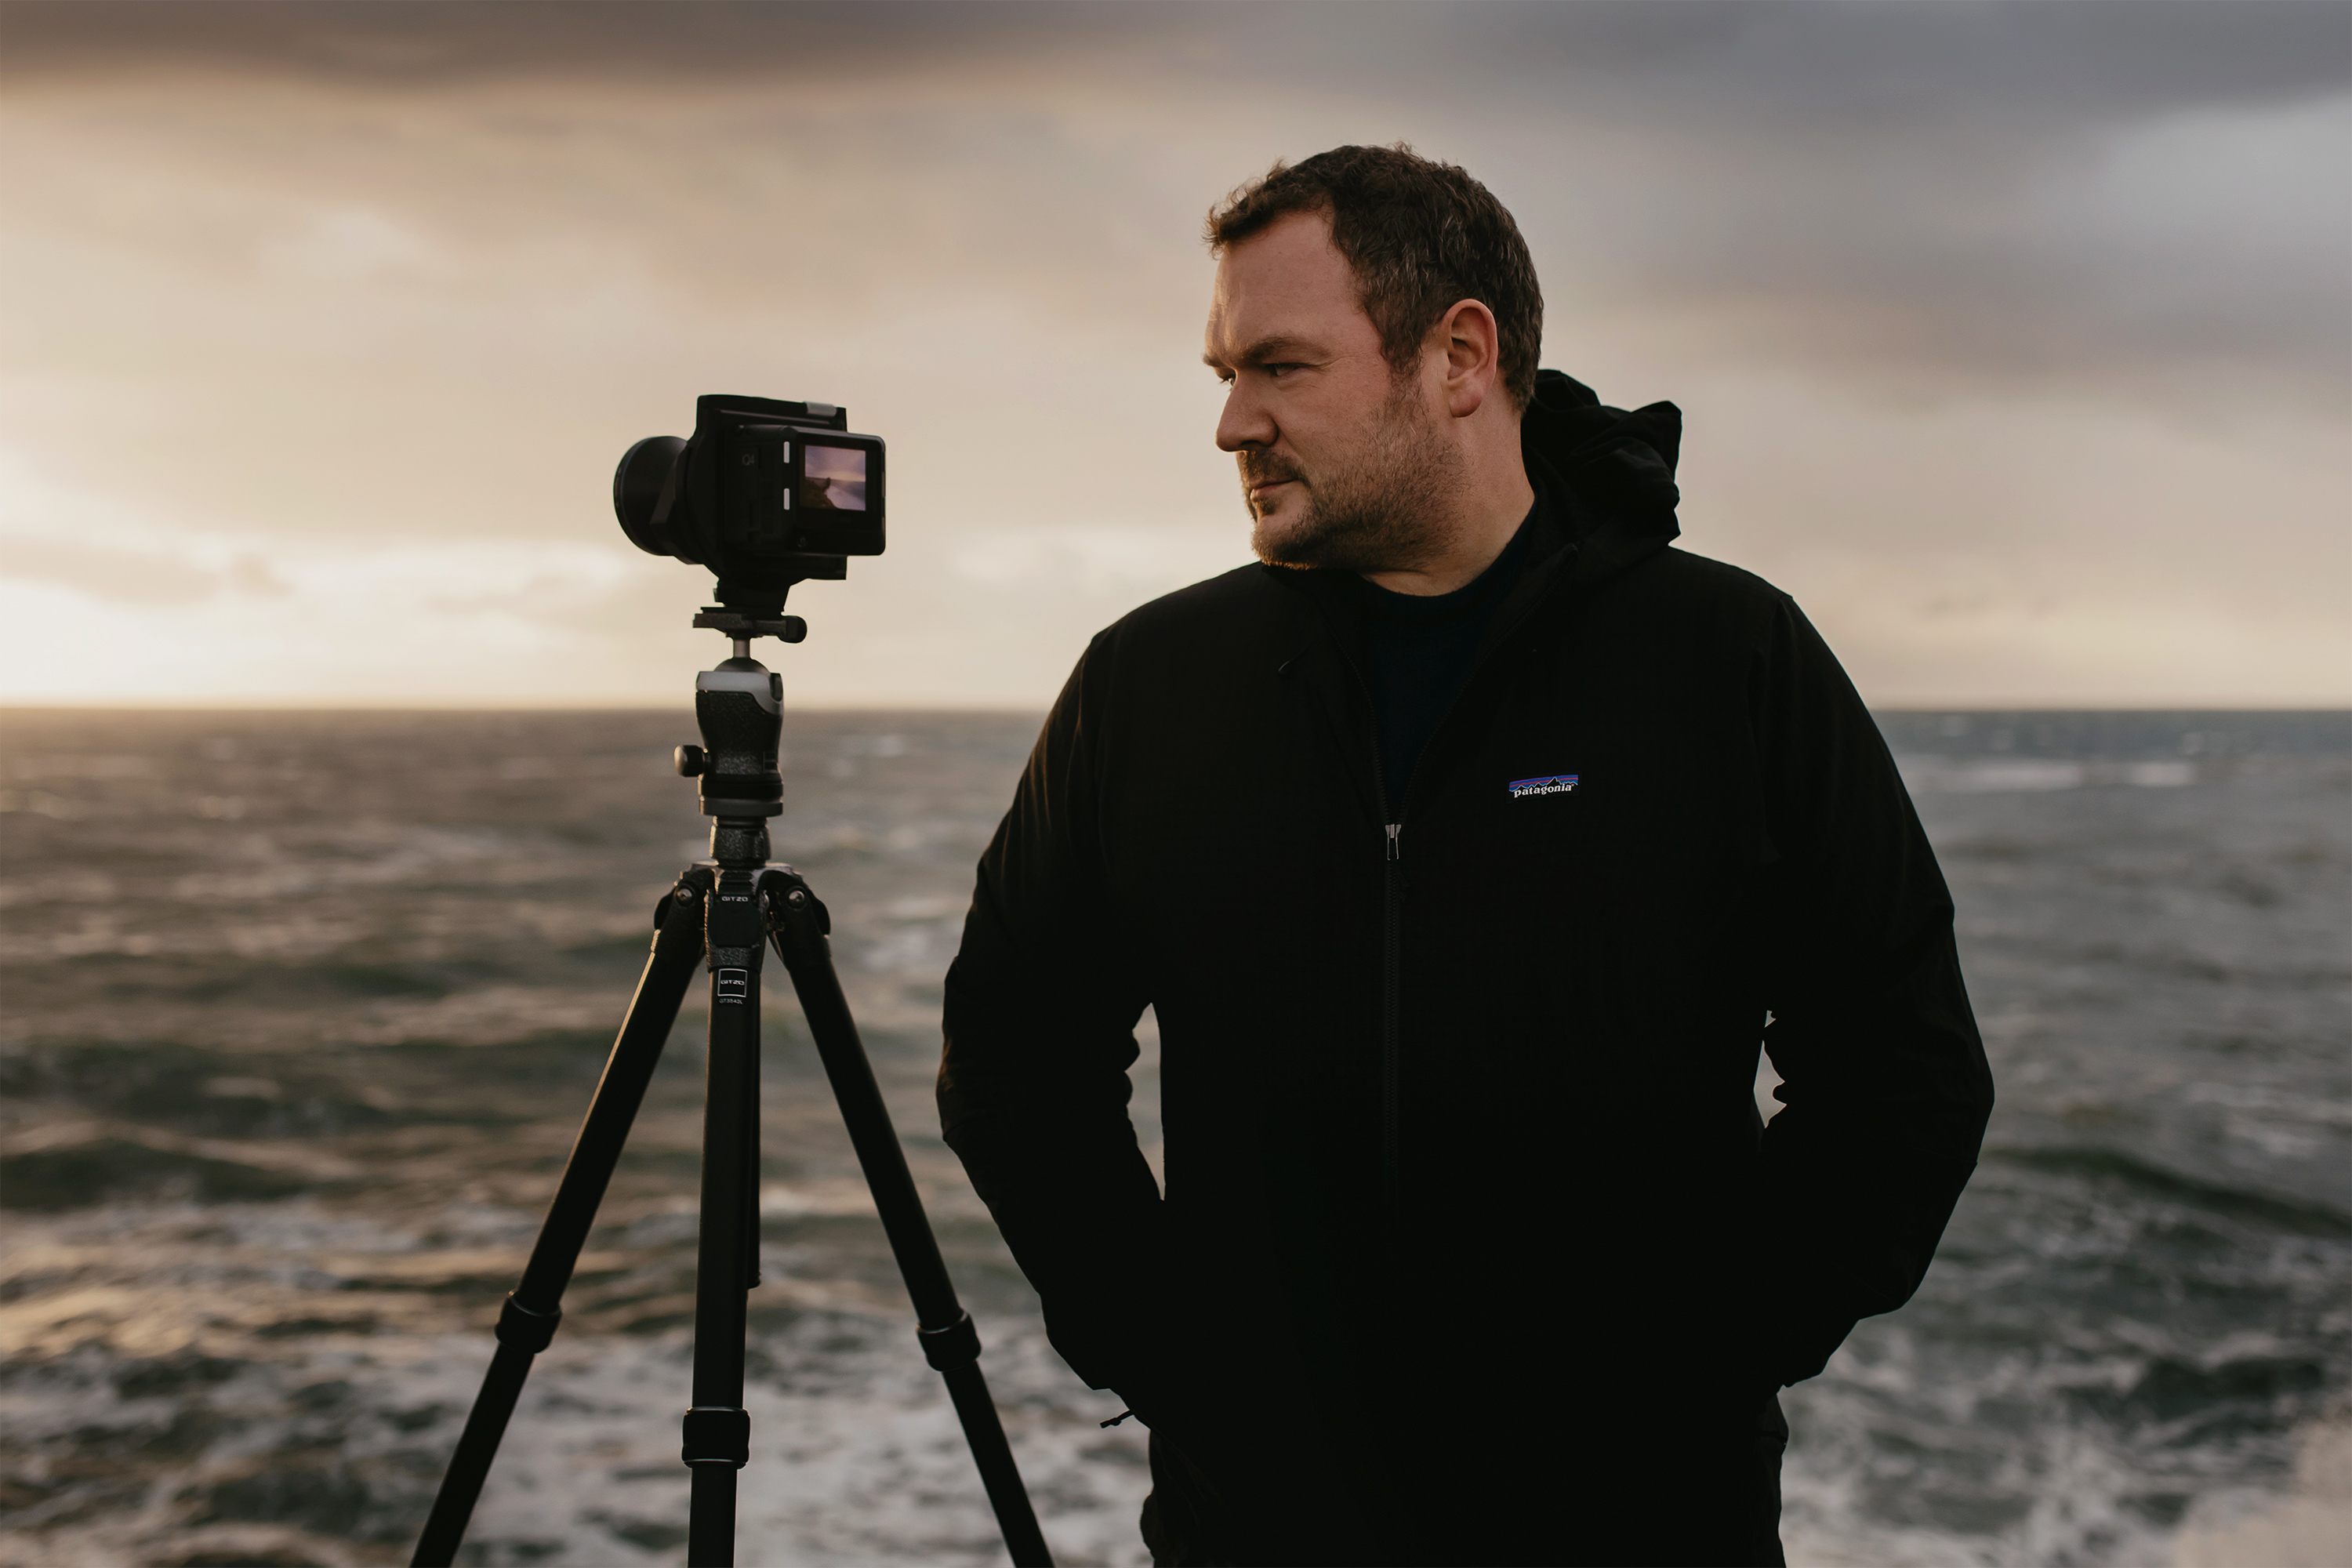
Paul Reiffer is an award-winning photographer and landscape artist. As a global ambassador for both Phase One and Capture One, he specialises in grand vistas, electrifying cityscapes and iconic views. His images have been published all around the world in well-known books, newspapers and magazines as well as supporting global travel and hospitality brands to reach and excite their audiences. His technical expertise is regularly called upon for industry insights, and through his luxury workshop programme as well as online channels, he’s carved out a unique style of teaching that is now appreciated by thousands worldwide. Shooting with ultra-high-resolution Phase One cameras, his work is used commercially by interior designers and clients ranging from National Geographic to British Airways, Marriott, Land Rover and many more.
