Create colorful paint splash portraits easily in Photoshop CC
Discover how to create this fun painterly effect in Photoshop CC, and learn a whole raft of key editing skills along the way
Watch video: Create colorful paint splash portraits in Photoshop
You can have lots of fun with filters, blend modes and brushes in Photoshop – and the great thing is, they’re very easy to use. A vibrant portrait effect like this might look complicated, but it’s quite simple. In this project we’ll explain how. We’ve supplied a starting image you can download here but you can also use your own – any portrait will do, but it helps if the subject is against a clear, bright backdrop.
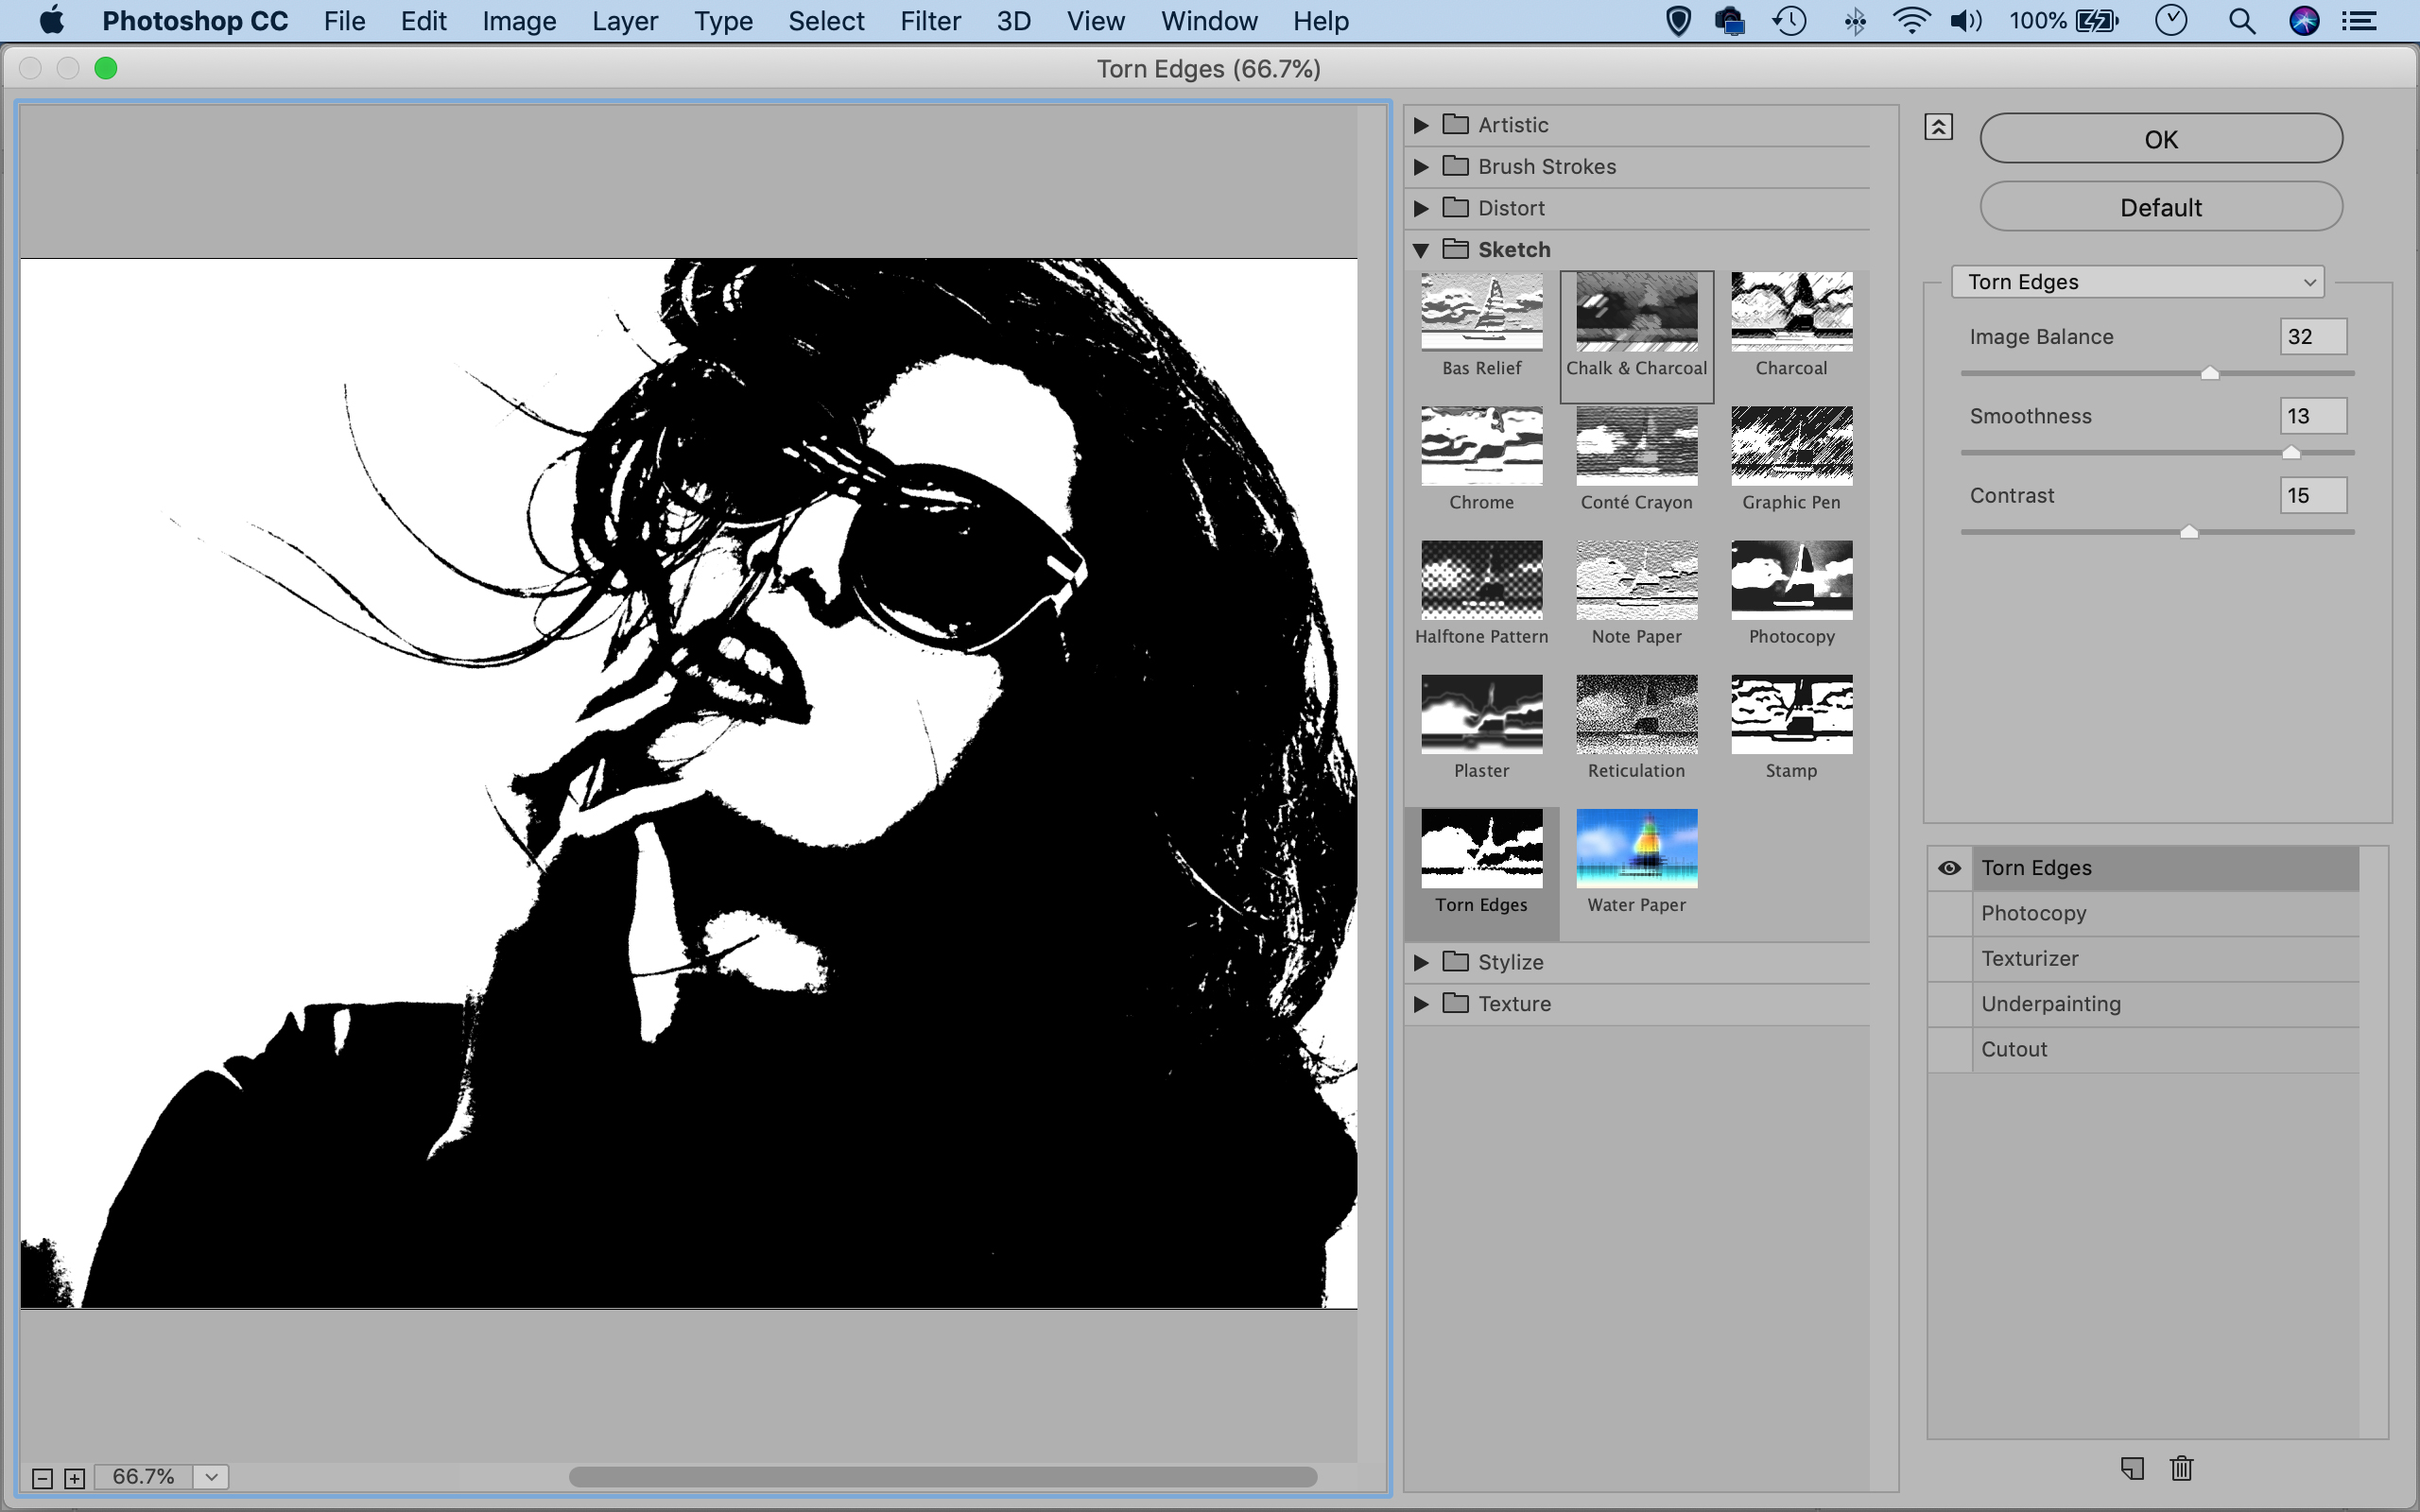
Aside from learning how to make a fun portrait effect, we’ll also encounter useful Photoshop features like Smart Objects. These are key to a non-destructive workflow, as they allow you to keep filter effects editable. So you can go back and tweak settings or try a new effect at any stage in your workflow. We’ve used the Torn Edges filter here to transform our photo into blocky black and white tones. Once done, we can add our vibrant paint effects.
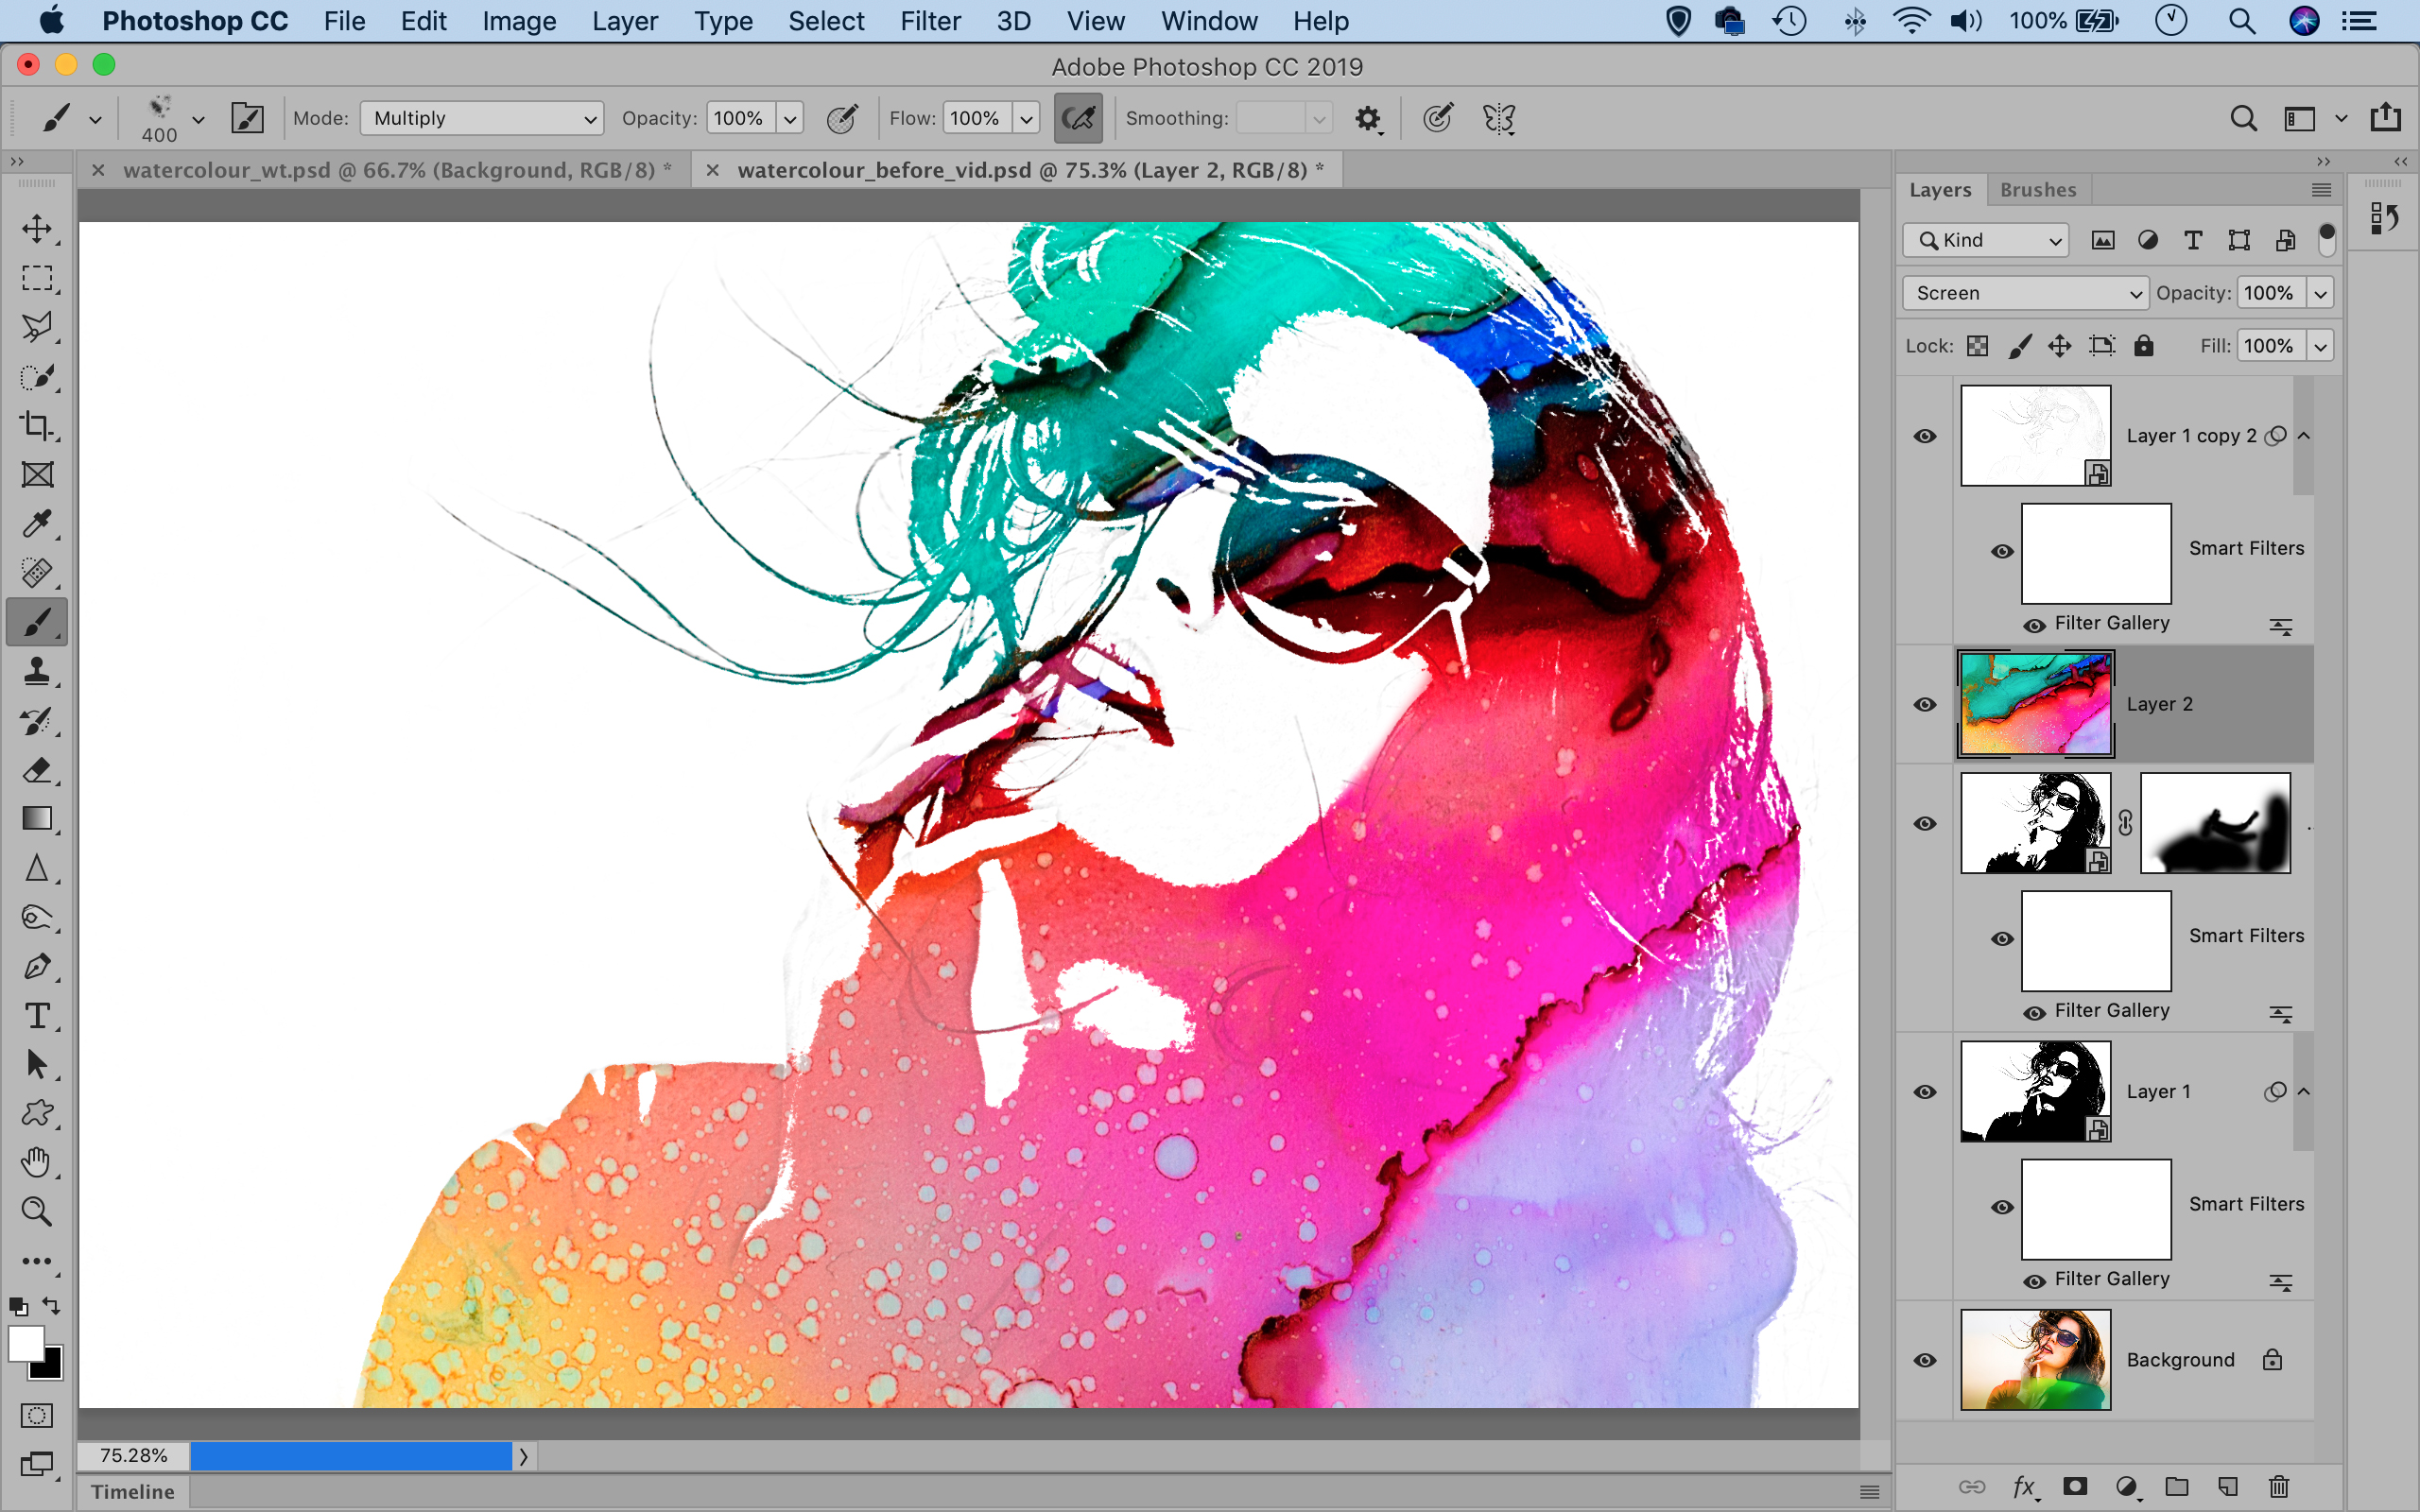
To add splashes of color to our portrait we’ve used a separate image of paints (downloadable for free from www.pixabay.com, search for 2681039). This is blended using the Screen Blend mode, which creates a double exposure effect by combining the lightest parts of the two photographs.
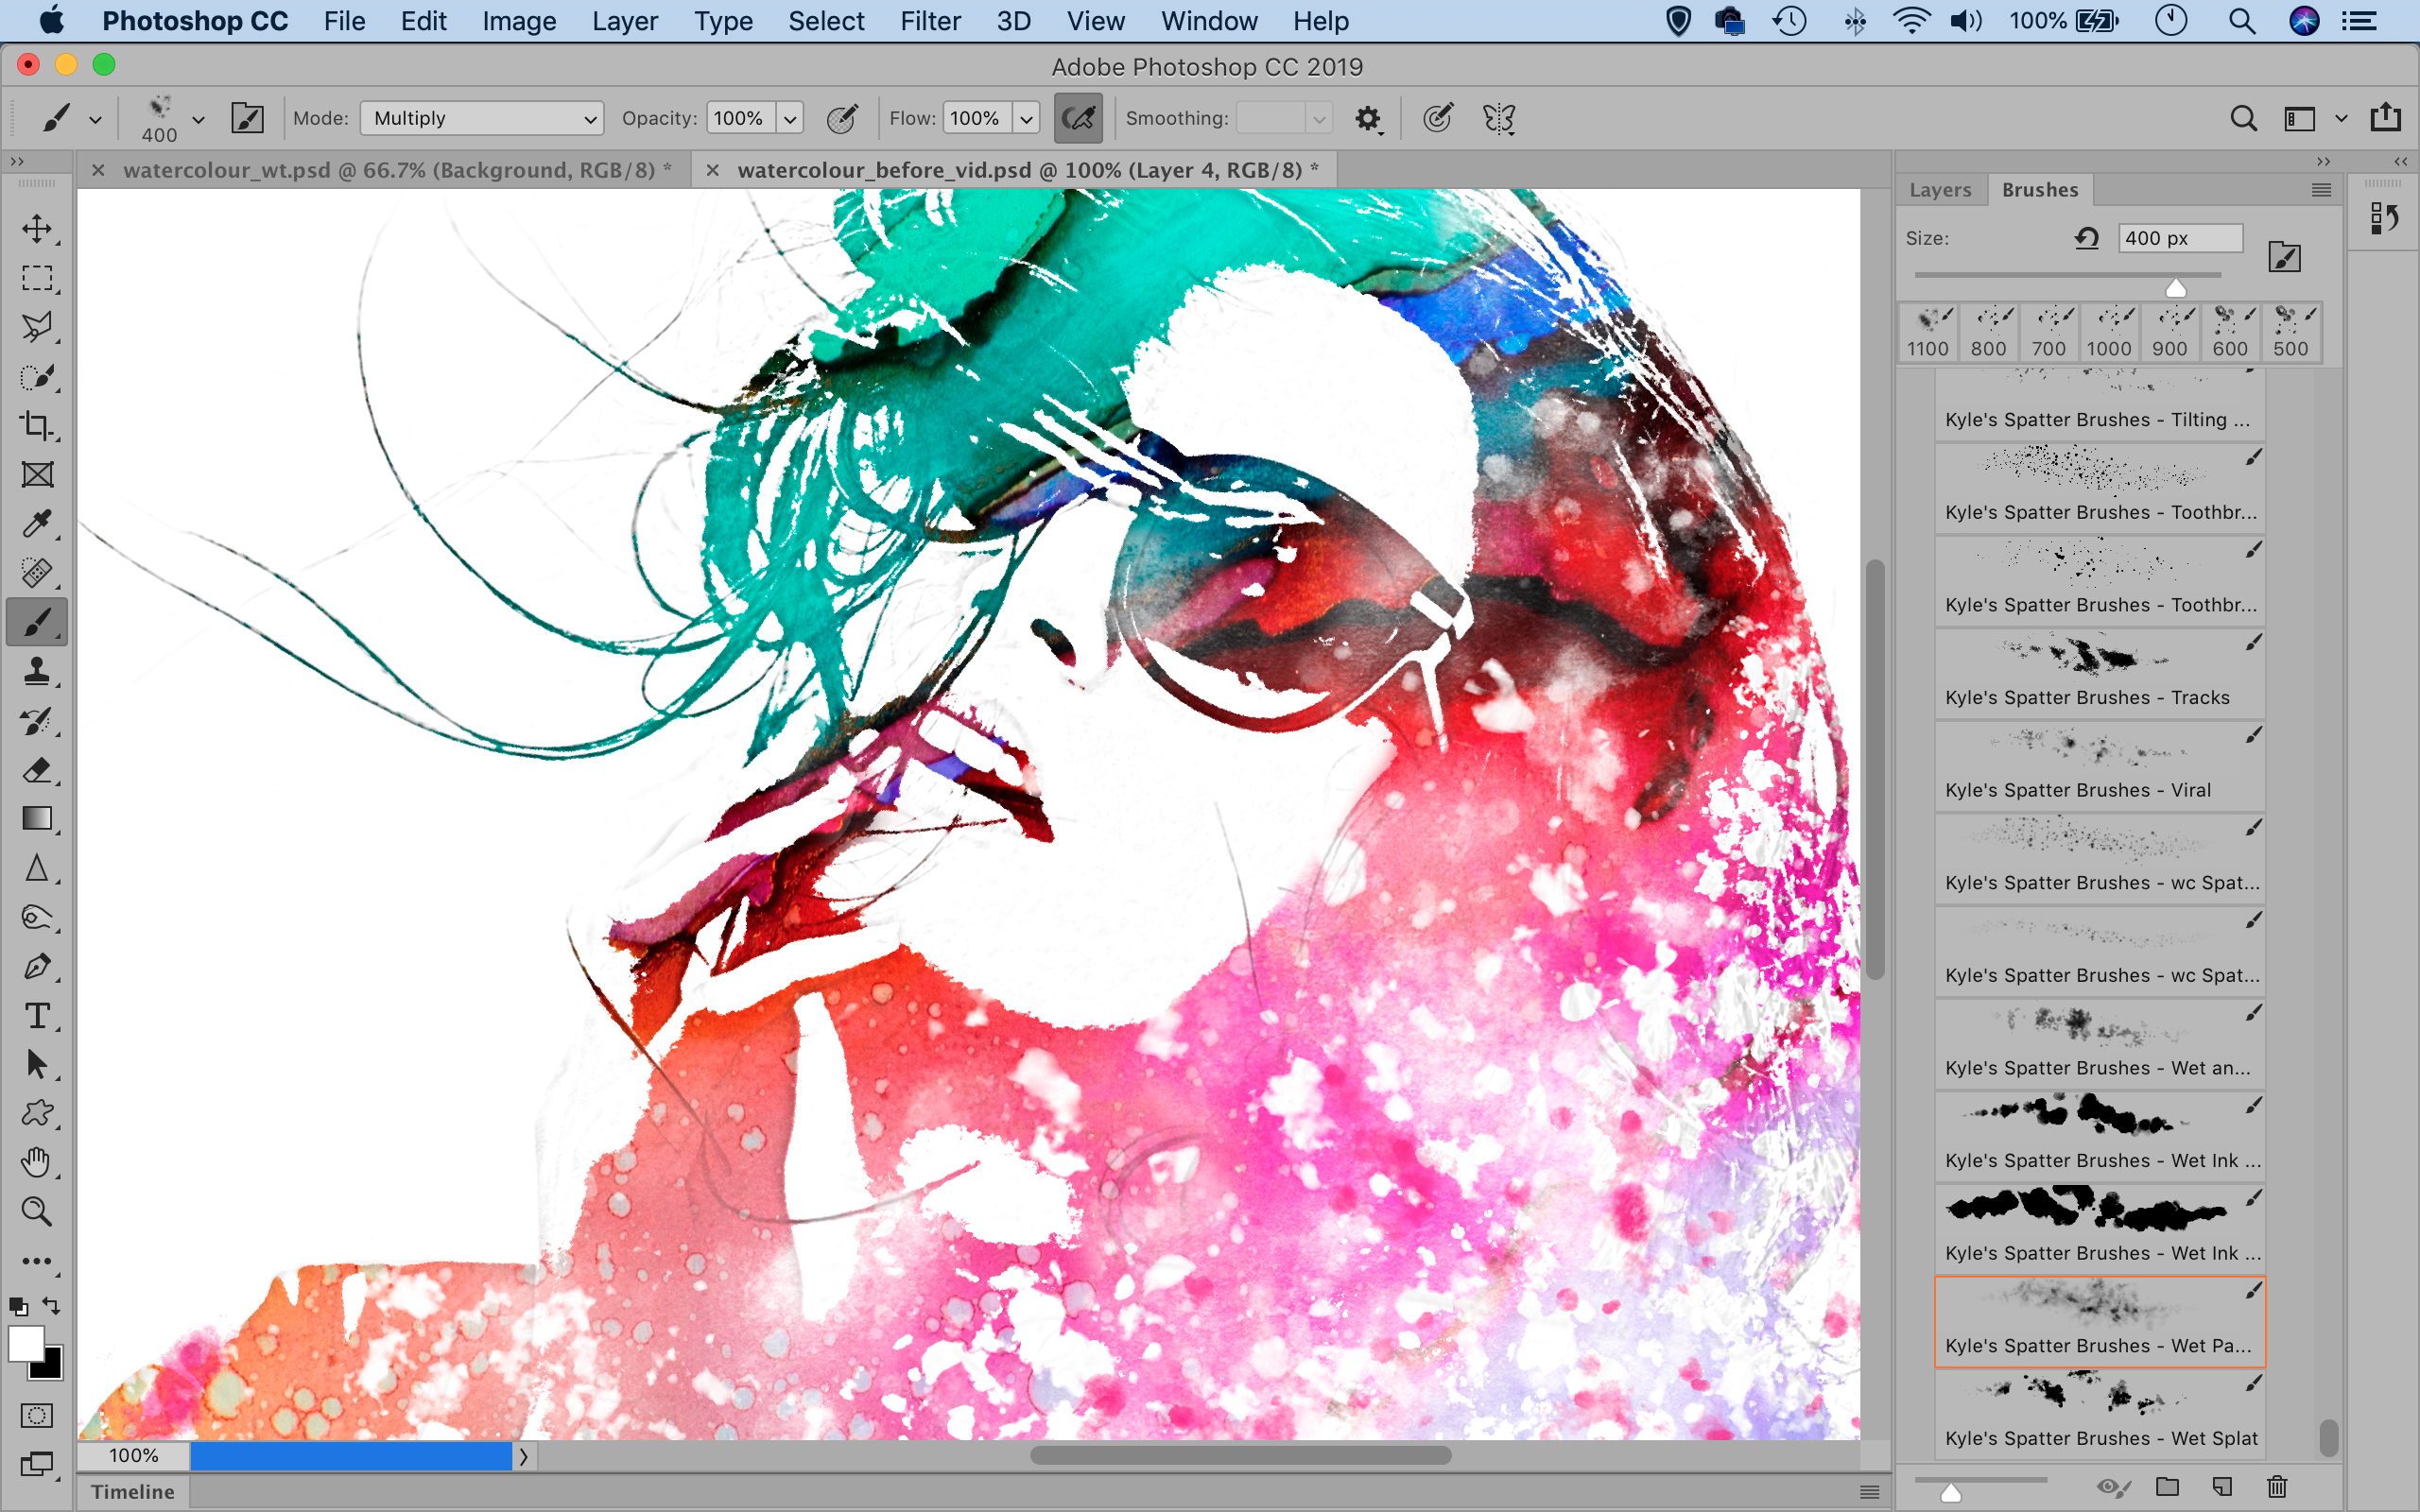
Once done, we can make use of a set of brushes to add splashes and spatters across the image. These brushes are downloadable for free from the Adobe site – there’s even a link within Photoshop to them, found in the Brushes panel. They’re great fun to use, not just in this project but for all sorts of brush-based artwork in Photoshop. Here's how to do it…
01 Apply a filter
Open the image in Photoshop CC and copy the background with Cmd/Ctrl + J. Right-click the copy in the Layers panel and ‘Convert to Smart Object’. Hit D to reset colors, then go Filter > Filter Gallery. Go to Sketch > Torn Edges and set Balance 32, Smoothness 13, Contrast 15, hit OK.
02 Copy and mask
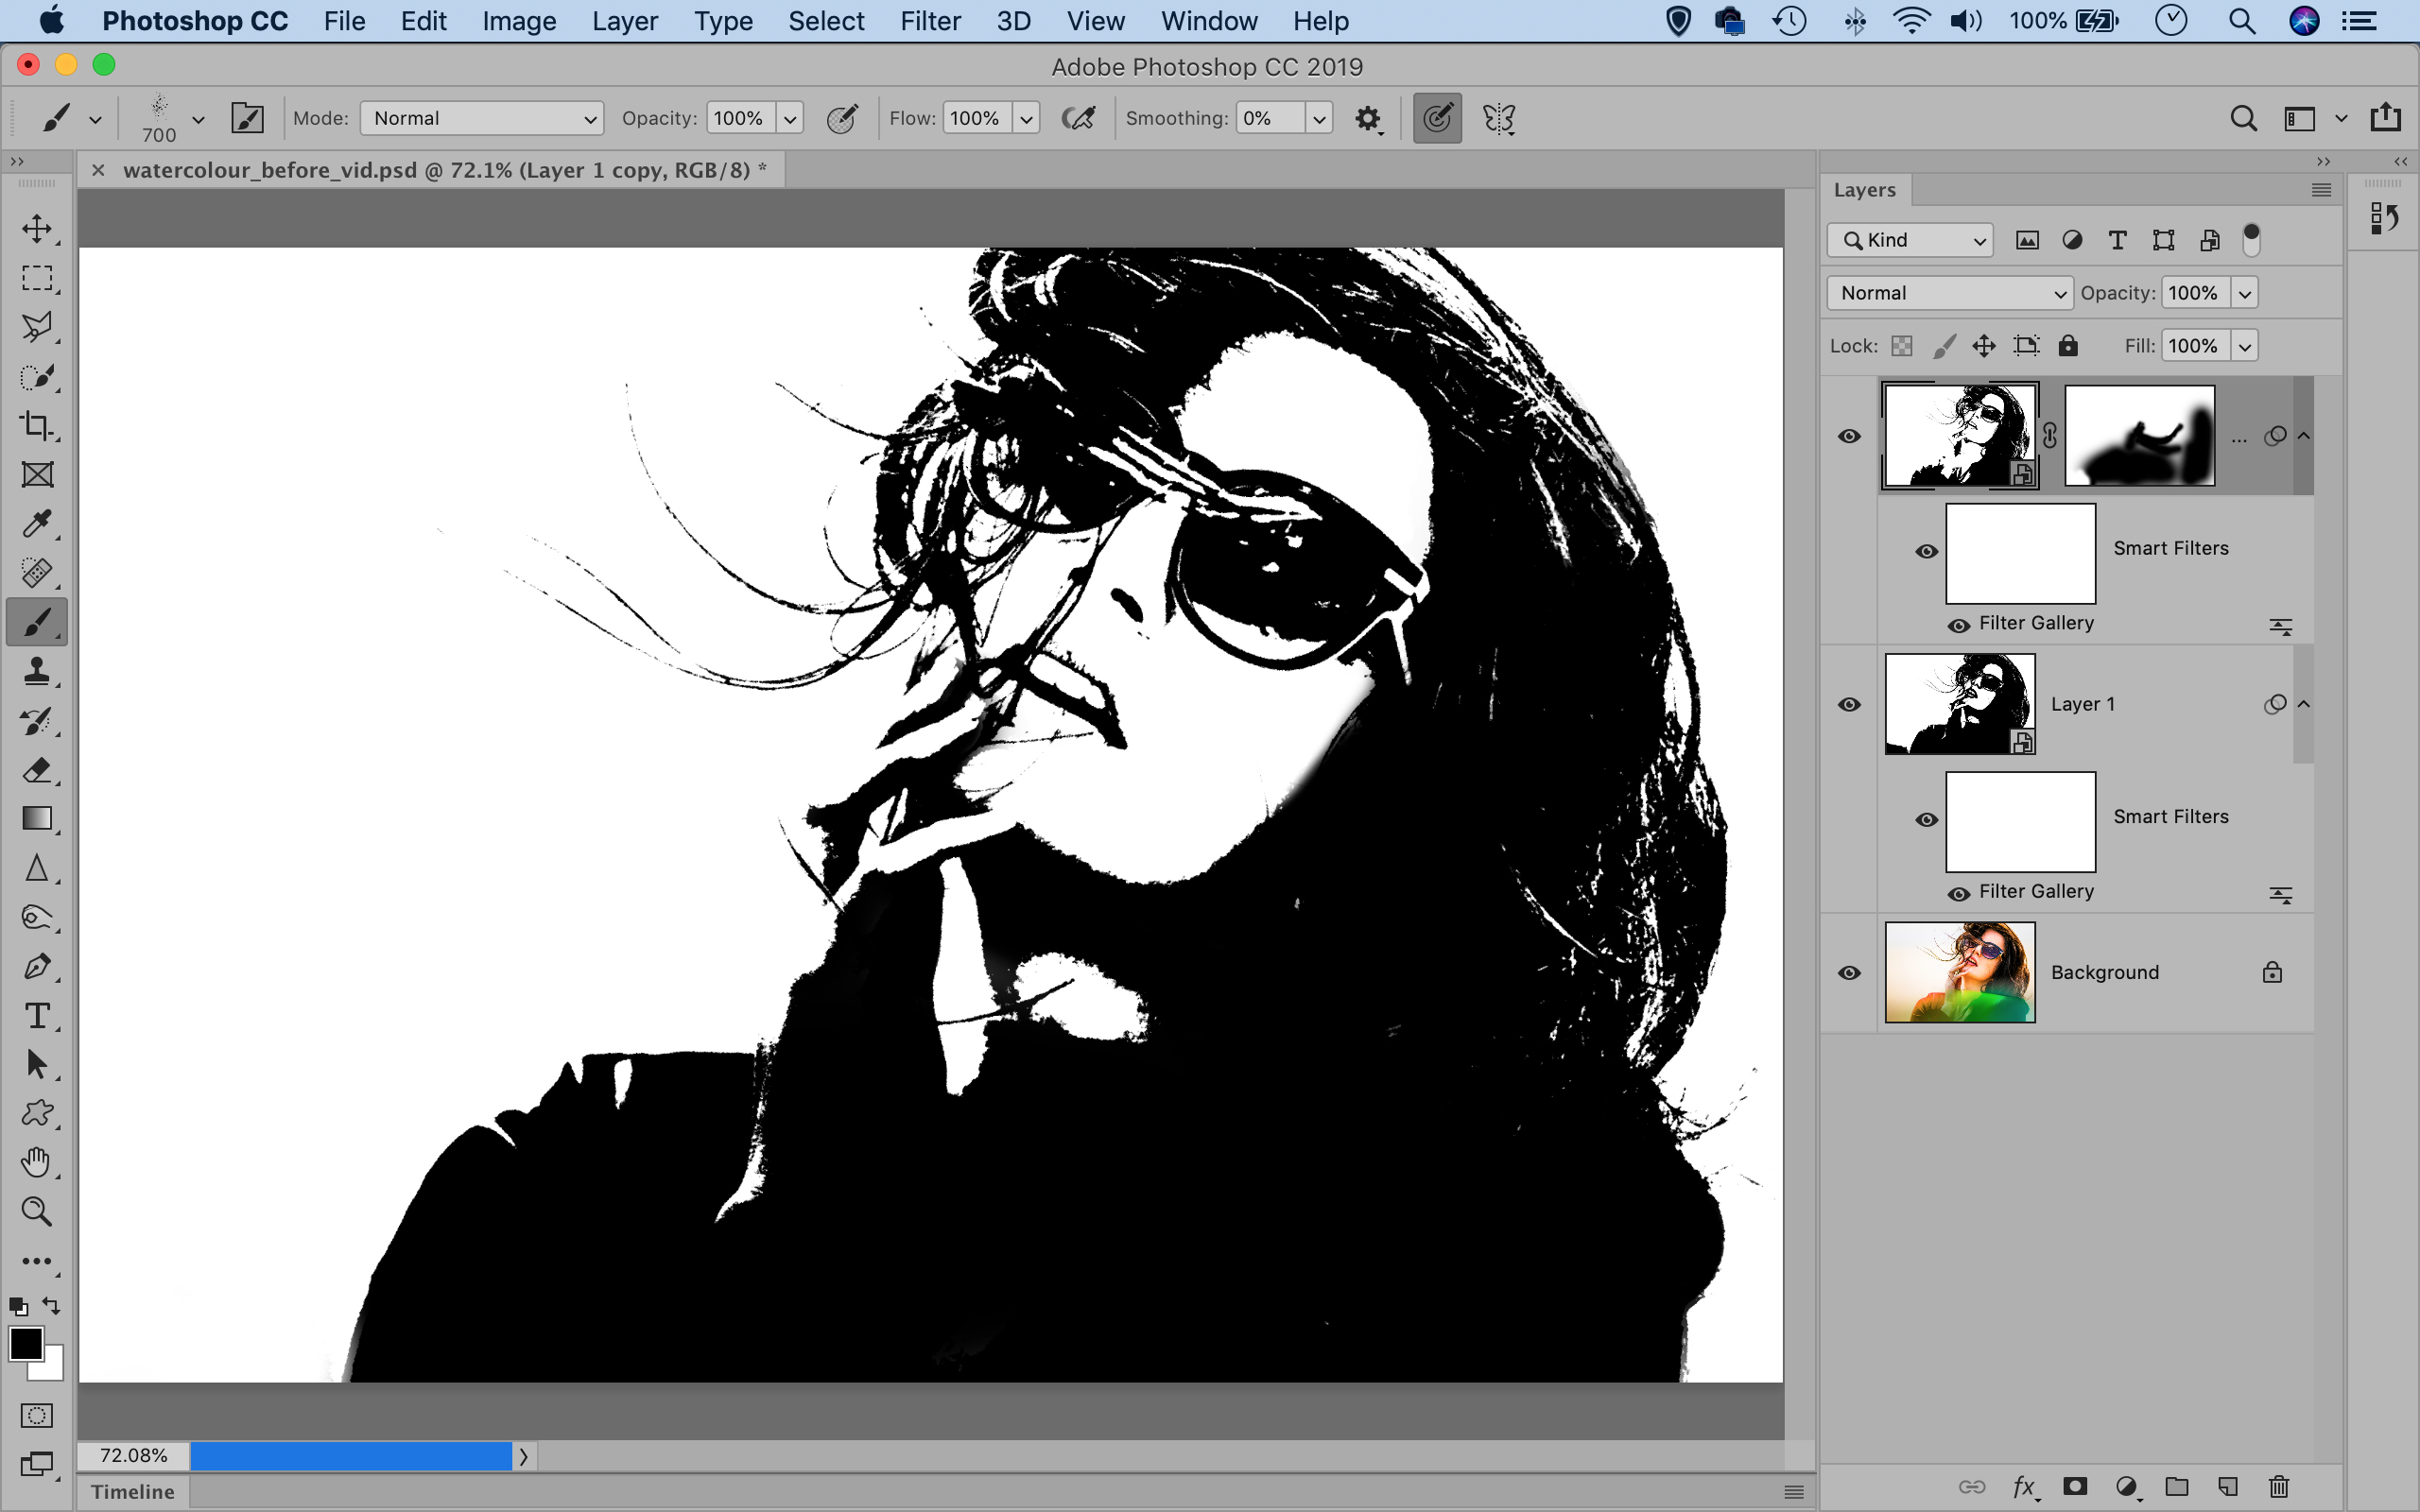
Copy the layer again. We’ll apply weaker settings, then blend them. Double-click the ‘Filter Gallery’ Smart Filter, set Balance 21, hit OK. Click the Add Layer Mask icon, then get the Brush tool. Paint black to hide the bright area at the bottom, revealing the darker layer.
The best camera deals, reviews, product advice, and unmissable photography news, direct to your inbox!
03 Make a sketch
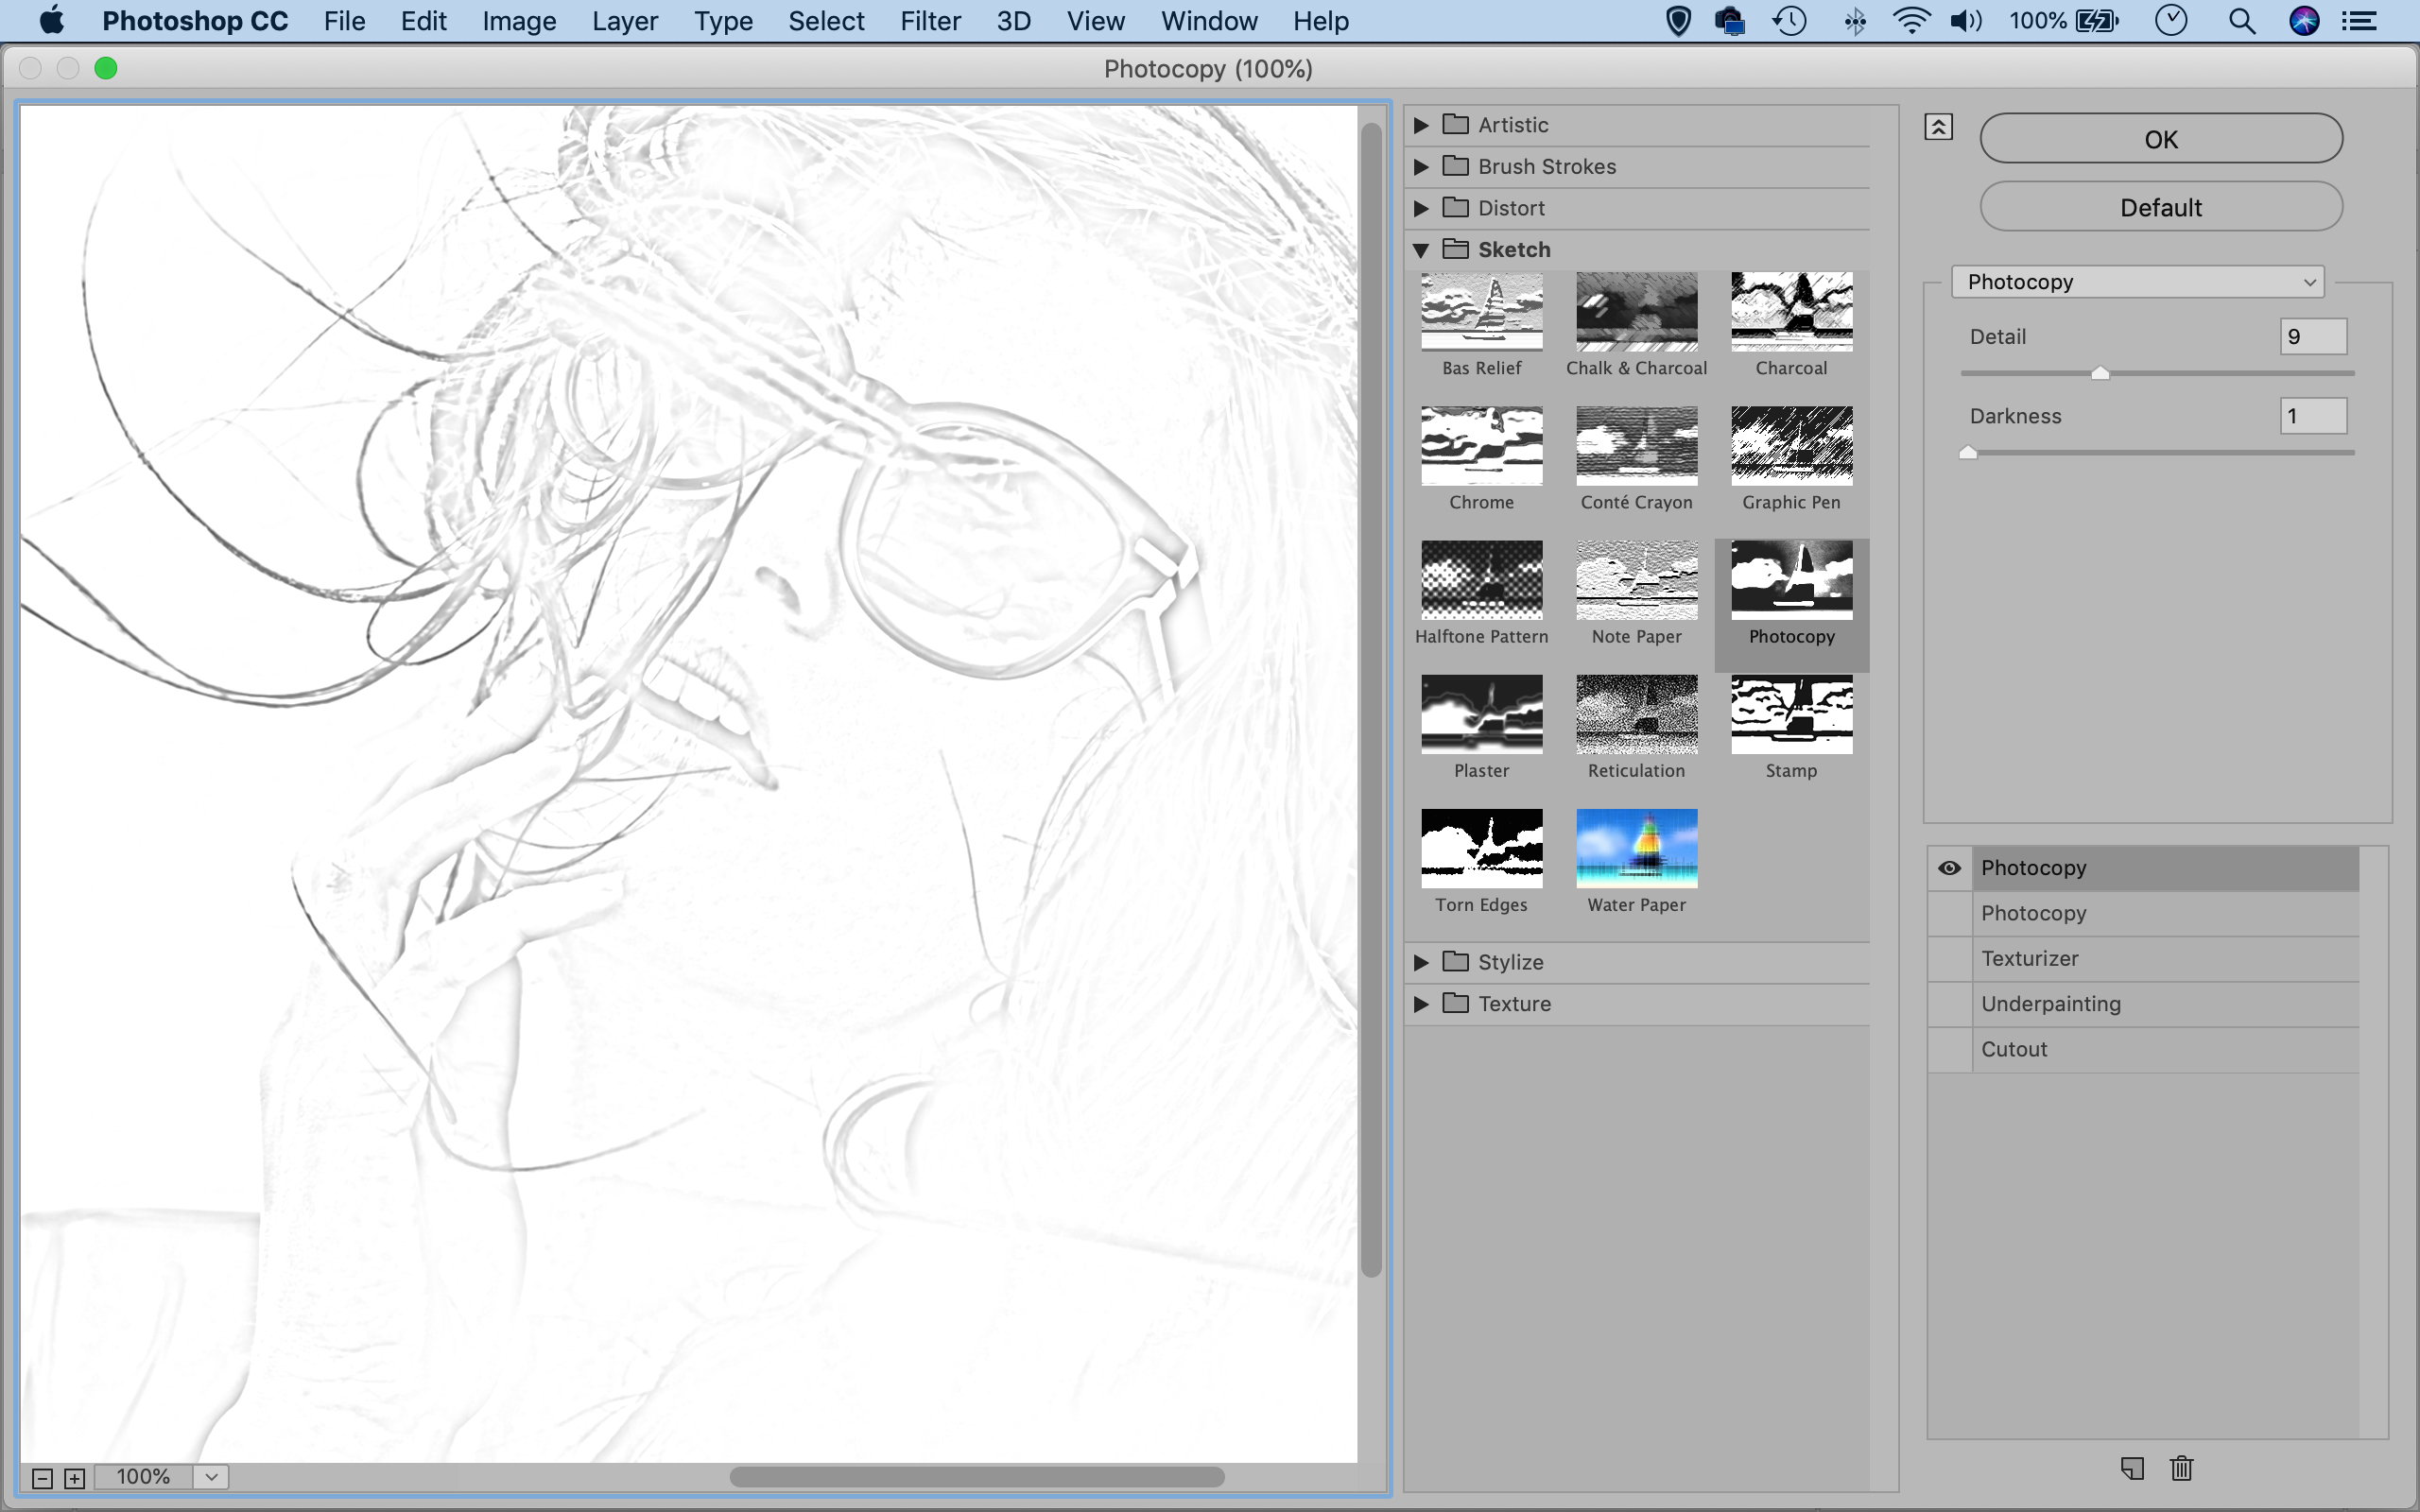
Duplicate the layer, right-click the mask and ‘Delete Layer Mask’ then double-click Filter Gallery. Now go to Sketch > Photocopy and set Detail 9, Darkness 1. Hit OK then go to the Layers panel and change the Blend Mode to Multiply. Next select the layer below.
04 Blend the paint
Open a watercolor photo (we downloaded image 2681039 from Pixabay). Grab the Move tool and drag the paint image into the portrait. Change the Blend Mode to Screen, hit Cmd/Ctrl + T and use the bounding box to resize or rotate the image to fit over the portrait.
05 Load the paint brushes
Go to the Brush panel (Window > Brushes), click the menu icon and choose ‘Get More Brushes’. This takes you to an Adobe site. Download the Scatter and Watercolor sets. Once done right-click the abr file and ‘Open with Photoshop CC’ to load the set.
06 Add splashes
Click the New Layer icon in the Layers panel, then get the Brush, set color to white and choose a scatter brush. Dab over the shot to rough up the edges of the subject. Keep painting, using other brushes and colors to build up the colors and scattered paint.
PhotoPlus: The Canon Magazine is the world's only monthly newsstand title that's 100% devoted to Canon, so you can be sure the magazine is completely relevant to your system.
Read more:
100 Photoshop tips
Lightroom tutorials
The best photo editing software: image editors for novices through to pros
The best photo-editing laptops: top laptops for photographers
10 best online photography courses – from beginner guides to masterclasses
The lead technique writer on Digital Camera Magazine, PhotoPlus: The Canon Magazine and N-Photo: The Nikon Magazine, James is a fantastic general practice photographer with an enviable array of skills across every genre of photography.
Whether it's flash photography techniques like stroboscopic portraits, astrophotography projects like photographing the Northern Lights, or turning sound into art by making paint dance on a set of speakers, James' tutorials and projects are as creative as they are enjoyable.
He's also a wizard at the dark arts of Photoshop, Lightroom and Affinity Photo, and is capable of some genuine black magic in the digital darkroom, making him one of the leading authorities on photo editing software and techniques.


