
Photography can get very complicated. You can easily get lost in a maze of shutter speeds, aperture and ISO settings, metering modes and EV compensation – an it gets even more complicated after dark, when you’ve got ultra-low light levels and high contrast to deal with.
But there is a simple way to swap all the complications for a simple bit of trial and error – with your camera’s B setting.
This both the simplest and most powerful tool for long exposure night photography. If you’re shooting a bright scene where the exposure is just a few seconds or less, you can use the camera’s regular shutter speeds – many go up to 30 seconds, even. But for darker scenes the exposure will be a lot longer, and B mode really comes into its own.
What you need for B mode
The one thing you will definitely need is a tripod. You’ll be using long exposures so the camera must be kept perfectly still.
The B setting is the last option on your camera’s shutter speed settings, just past the longest exposure. In B mode, the shutter stays open for as long as you keep the button pressed, and closes again when you let go.


A few cameras still have threaded shutter buttons for old-fashioned cable releases which you can lock open for long exposures.
If your camera doesn’t have this, you can’t just hold down the shutter button because that will move the camera and blur the picture. Instead, you can do one of two things:
1) Check to see if your camera has a T setting. Many more advanced models do. This works just like the B setting, but you press the shutter button once to open the shutter and a second time to close it – you don’t have to keep it pressed down.
2) Check the smartphone app for your camera. It may have a B setting that keeps the shutter open – you will probably have to switch the camera to Manual or B mode first.
3) If these don’t work then you will need to invest in a remote release for your camera. Simpler remotes plug in via a cable; more advanced remotes work wirelessly. You can get remote releases from the camera maker or third-party remote releases – but do check then are compatible with your camera.
B mode exposures: how to work them out

The brilliant thing about digital cameras is that you can take a shot, see if it works, then adjust the settings and try again if it doesn’t!
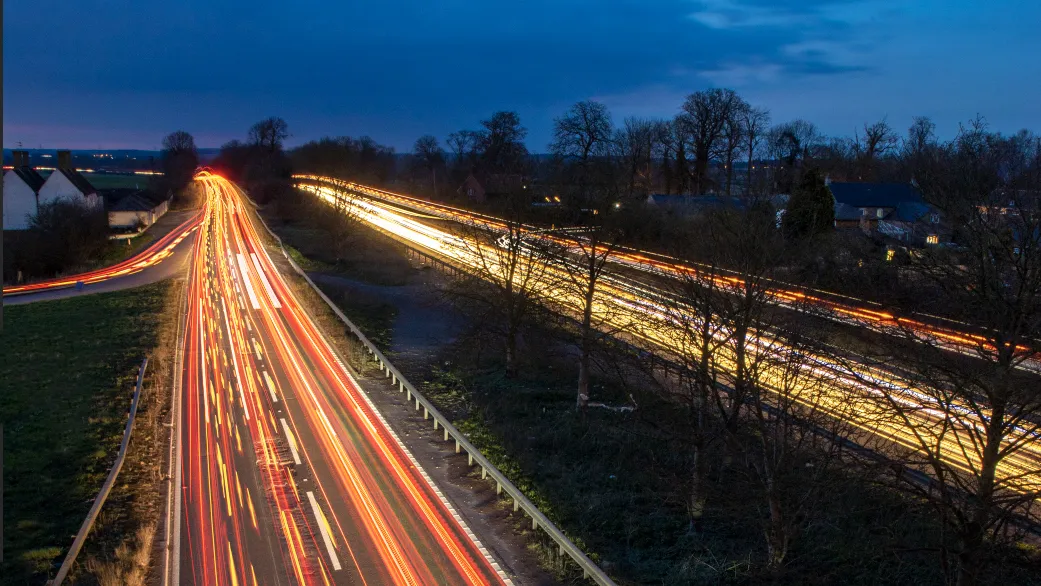
1) Set the ISO to minimum: this will give long exposures, but if the camera is on a tripod, that’s fine. Long exposures will blur traffic trails t produce ‘rivers of light’ at night.
2) Choose a medium aperture, say f/8. You can change this later if you need to, but f/8 will give you good depth of field and exposures long enough for B mode to be useful.
3) See if your camera can give an exposure reading – if you’ve already set the ISO and aperture, this will give you the exposure reading. Now, if there are lots of bright lights, double the exposure! So if the camera says 15 seconds, give it 30. If it says 30 seconds, give it 60.

• As a starting point, for suburban street lighting, try 15 seconds at f/8 at your camera's lowest ISO. Exposures will be much shorter in brightly lit city streets but much longer in dark alleyways (yeah, go with a friend), and if you are shooting under moonlight, it could be minutes not seconds.
• Note: After you’ve finished an exposure, the camera may be ‘busy’ for many seconds. That’s because it’s recording a second ‘dark’ frame to measure the camera’s background digital noise. It will then use this to reduce noise in the picture. This is a standard step for many cameras when capturing long exposures, where heat build up in the sensor creates random noise that you don't get during regular, short exposures.

4) Now wait to see how the image looks when you play it back. Your camera’s LCD can trick you at night, making pictures look brighter than they actually are, so use the camera’s histogram display to double-check. If there are bright lights in the scene they will be ‘clipped’, but that’s to be expected with naked light sources. The key thing to check is that the rest of the histogram isn’t clumped right up and the left-hand (shadow) end of the scale. You’re looking for a relatively even distribution of tones – and if you don’t get it, change the exposure and try again!
The beauty of B mode
It’s tempting to imagine that photography is governed by exact numbers and precise calculations, but really it’s not. And shooting after dark with B mode is a reminder that photography can be a much simpler try-it-and-see process.
All light meters struggle to make sense of night scenes, especially in cities, and it’s almost always simpler to shoot, judge and shoot again. You can see in a moment whether a scene needs more or less exposure.
And you don’t have to be exact. If you decide a 15-second exposure looks too dark, a 30 second exposure is only one f-stop longer, and 60 seconds just two f-stops. You don’t need a split-second stopwatch, just a watch with a second hand – or you could just count!
The other advantage of B mode is that you can interrupt and continue exposures if things happen in front of the camera. If you keep a black card with you, you can hold it over the lens for a few seconds while a car with bright headlights passes right in front of the camera, or some annoying bystander wanders into the scene. When they’re gone, you can remove the card and pick up where you left off.
One key motto with photography is that if you can see it, you can photograph it. And with a tripod and your camera’s B setting, you can photograph a lot of things you CAN’T see too, often discovering textures, colors and shadow details too dim for the naked eye.

Read more:
• Best tripods
• Best remote releases
• Night photography A-Z
• Astrophotography how to

