The best camera deals, reviews, product advice, and unmissable photography news, direct to your inbox!
You are now subscribed
Your newsletter sign-up was successful
During the summer of 2018, I got into photography 'seriously' when a broken hip left me confined to the house and garden for six weeks. I bought a macro lens, practiced shooting bugs every day, and devoured all I could about photographic technique.
Now my main camera passion is landscape astrophotography. While I don’t get to do this as often as I like – I’m a father of two young ones – when I do it’s a true experience. I love every stage of the operation: the planning, waiting and hoping for the right conditions, the night itself alone under the stars, and even the post-processing – a key aspect of astro.
• Read more: Best cameras for astrophotography
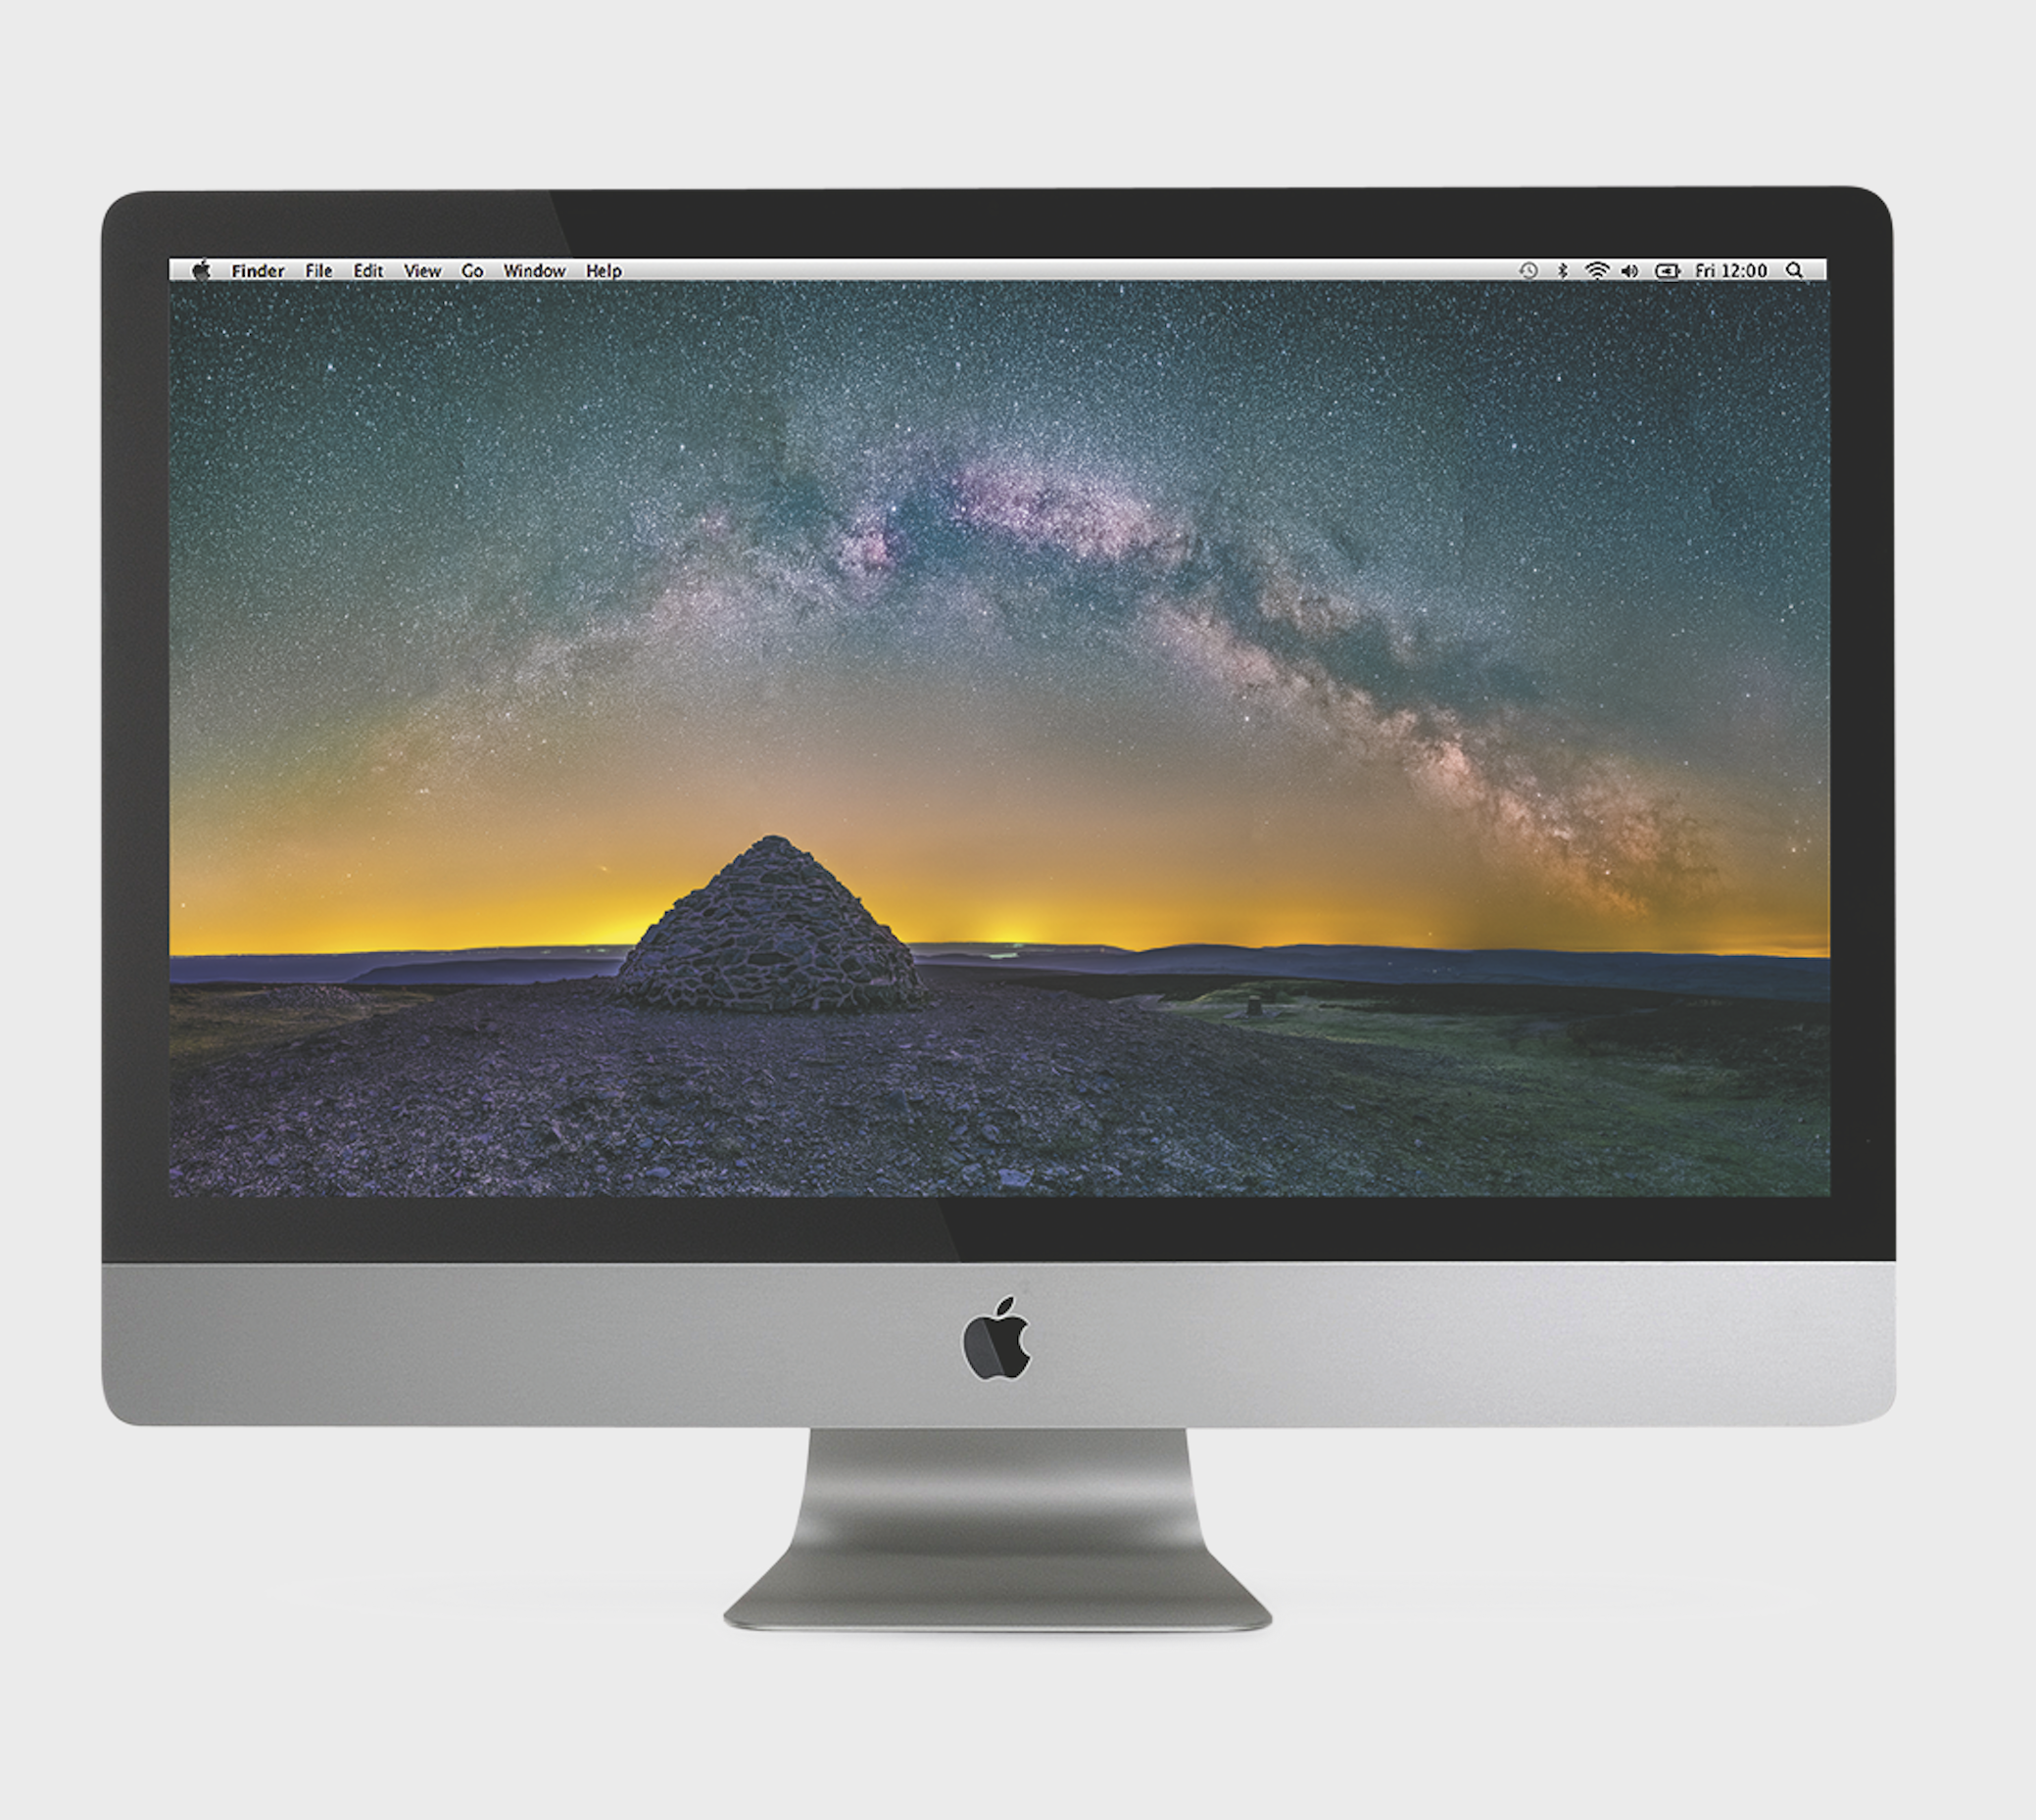
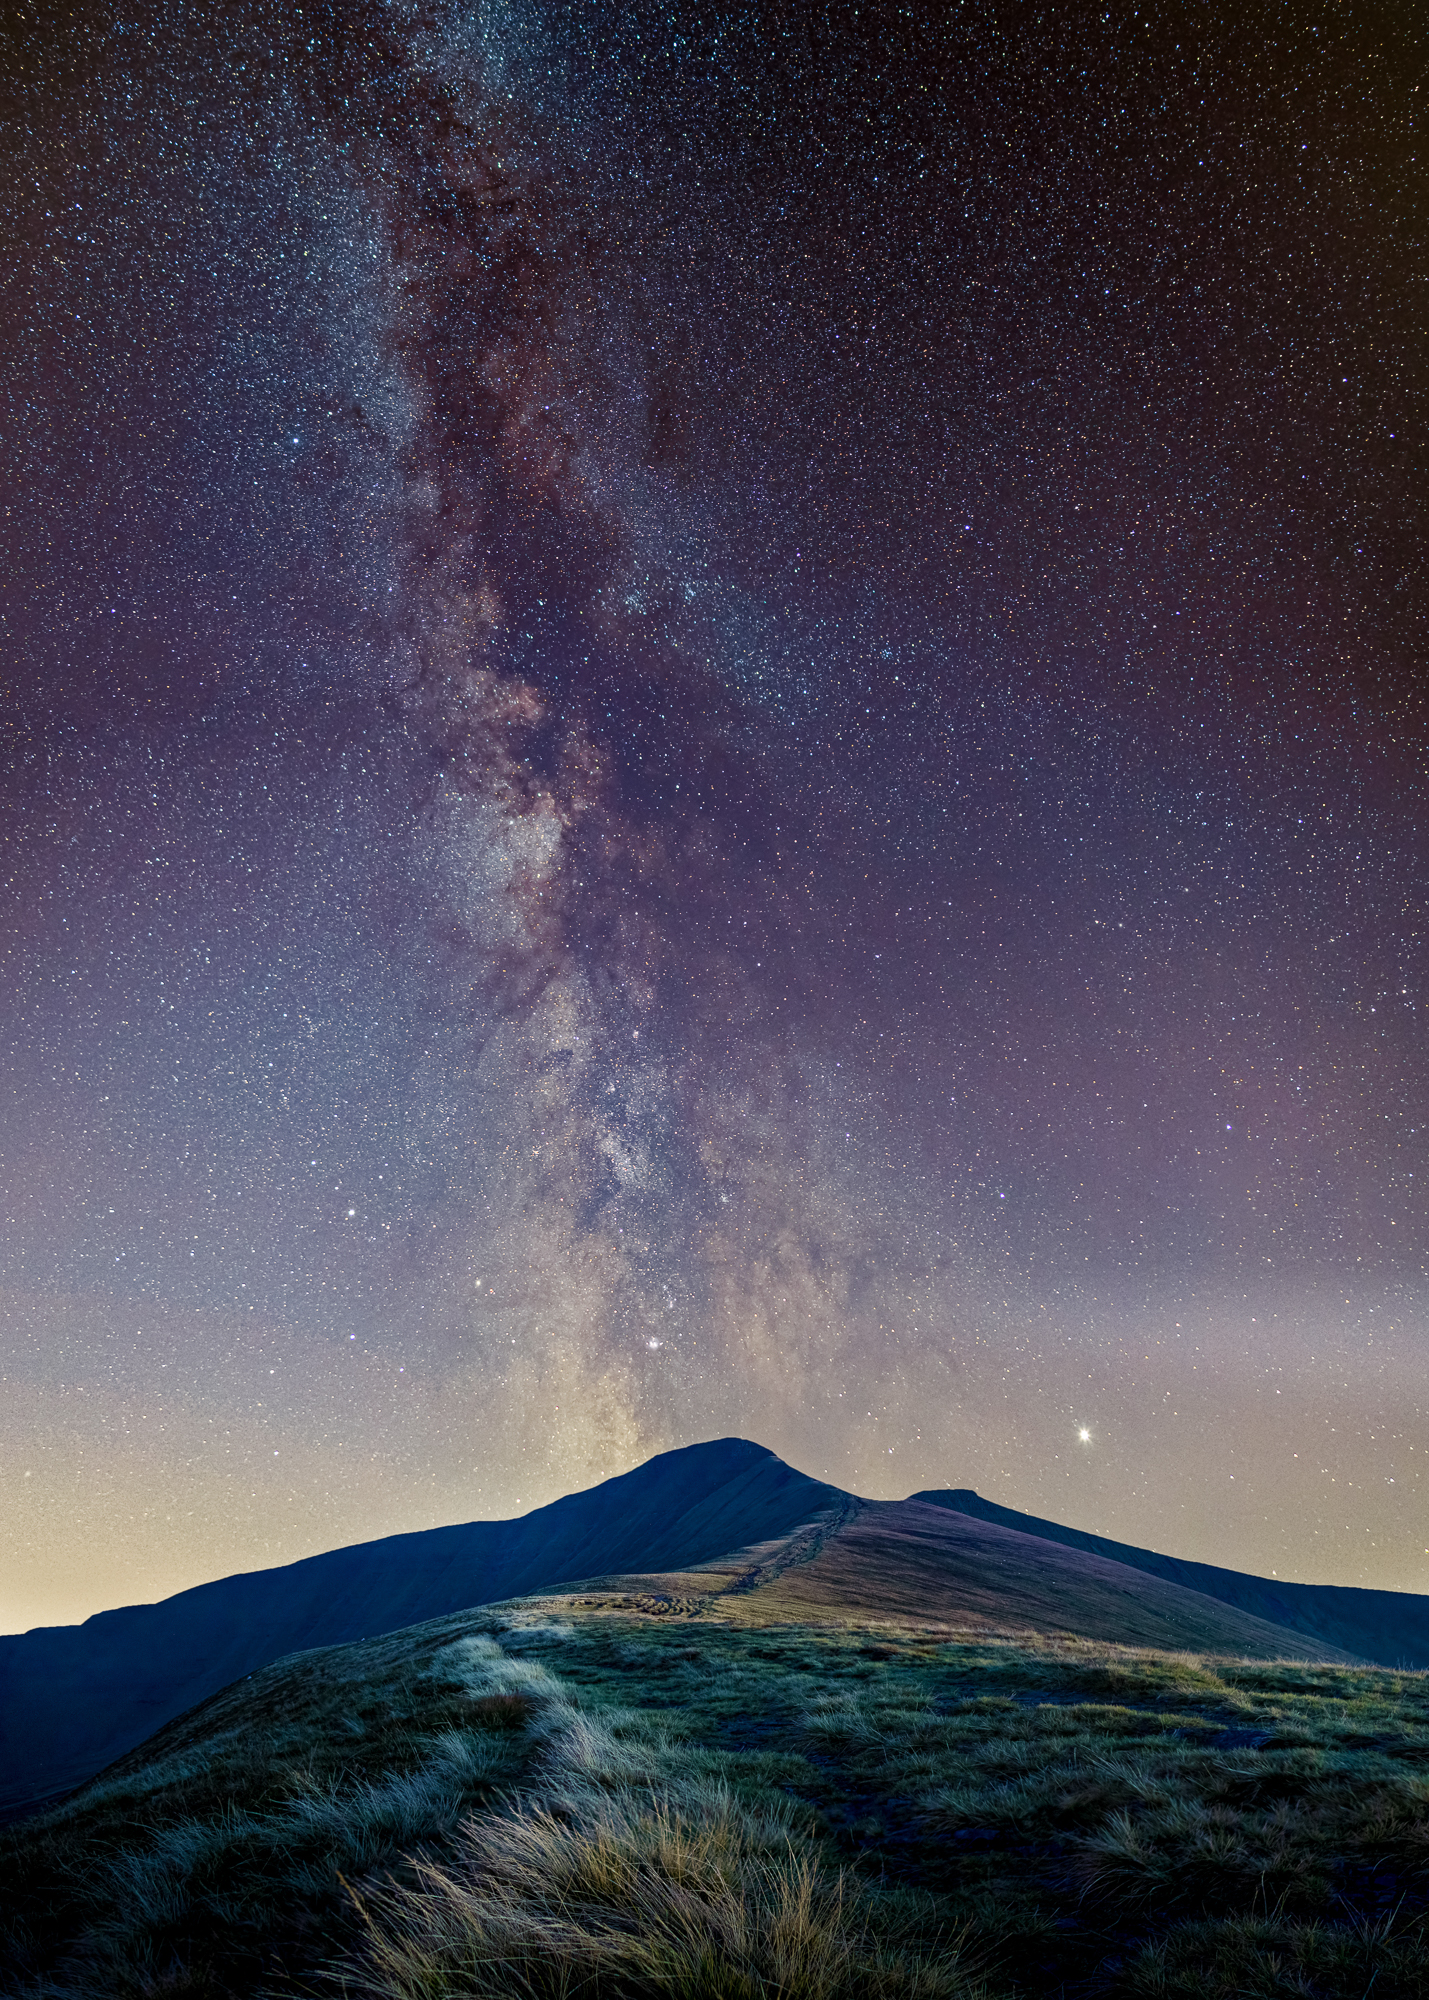
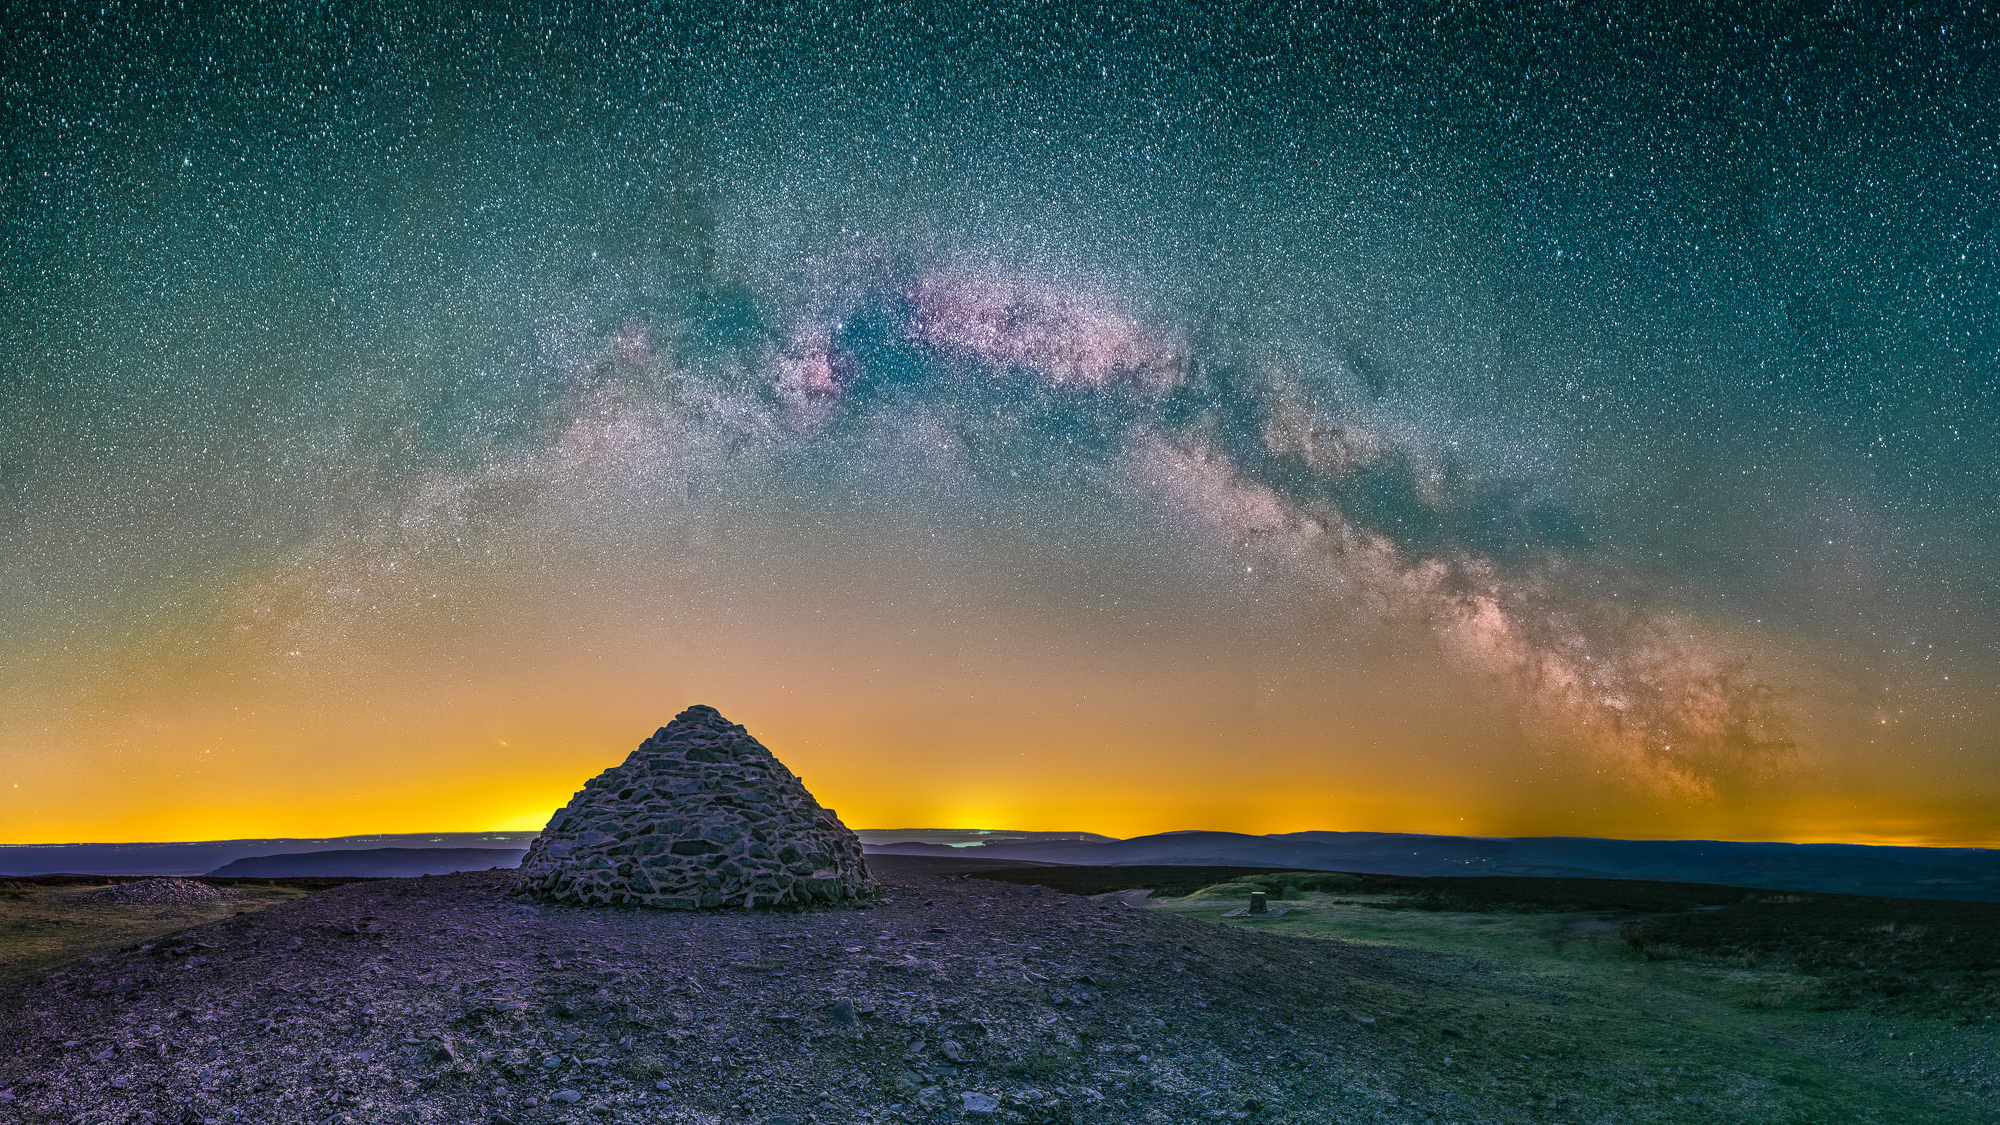
All my favorite images have strong memories associated with them; clearly that’s a personal thing, which can never be fully conveyed, but I can only hope that my passion comes through in the final result. The image here was taken at Dunkery Beacon and was a tracked panorama, which is complex to execute. The shot at Pen Y Fan (later in the article) uses a different method – non-tracked, but with stacking.
Here's a breakdown of the image (click the top-right to see it full size)…
01. The Stone Cairn
I’d recommend getting to your chosen site to set up before darkness. In the case of this image I’d envisioned the composition with the Milky Way arching over the cairn, but I didn’t realize a trig point over to the right would also be visible – if I’d arrived in the dark, I would have missed this.
02. Glow on the horizon
I knew this was going to be a reasonably dark site, but I was initially disappointed that it wasn’t quite so dark near the horizon. In the end, though, I like how it looks as it adds an extra dimension and depth to the sky, as well as providing contrast against the horizon. I’m delighted the Andromeda galaxy is visible despite the glow – see the smudge to the left of the cairn?
The best camera deals, reviews, product advice, and unmissable photography news, direct to your inbox!
03. The Milky Way
A general rule is that if you can see the Milky Way with the naked eye, even faintly, then the camera will pick it up; then you can boost it enough in processing to show good detail. Here I chose to track the sky (and so enable long exposures) to maximize the detail, as I'll explain later. I also wanted to try to capture a full Milky Way arch, which meant a 180-degree panorama – 14 exposures were used to make this image!
Below I'll run through some of my gear and shooting tips.
Helpful tools
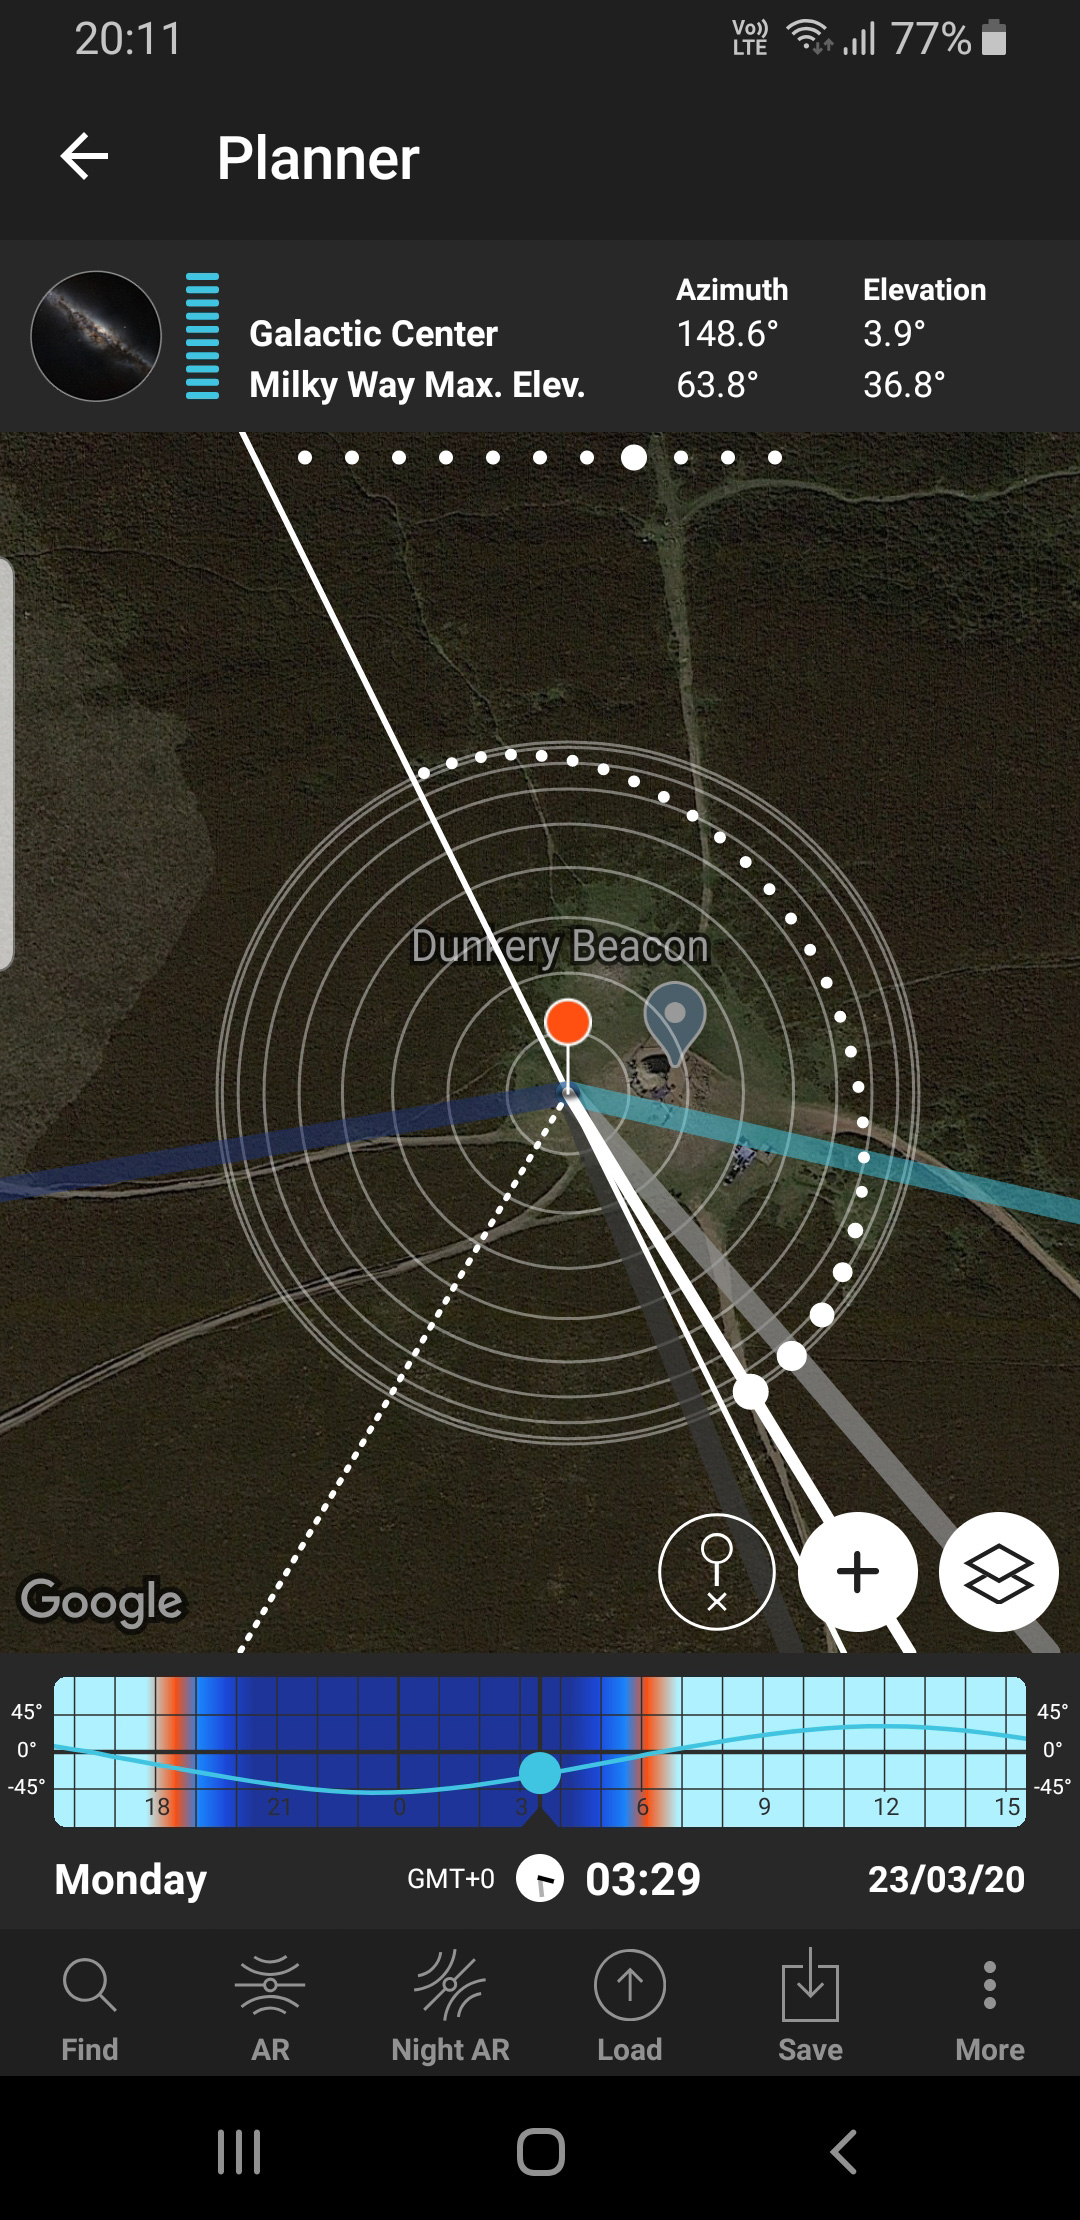
I tend to use Google Maps for scouting new locations, as many areas have photos tagged to them. The PhotoPills app (above) helps me ascertain which direction the Milky Way will look its best. For weather forecasting I use Clear Outside, which also gives the light pollution value for the location: in skies with light pollution levels above Bortle 4, it’s hard to capture the Milky Way well.
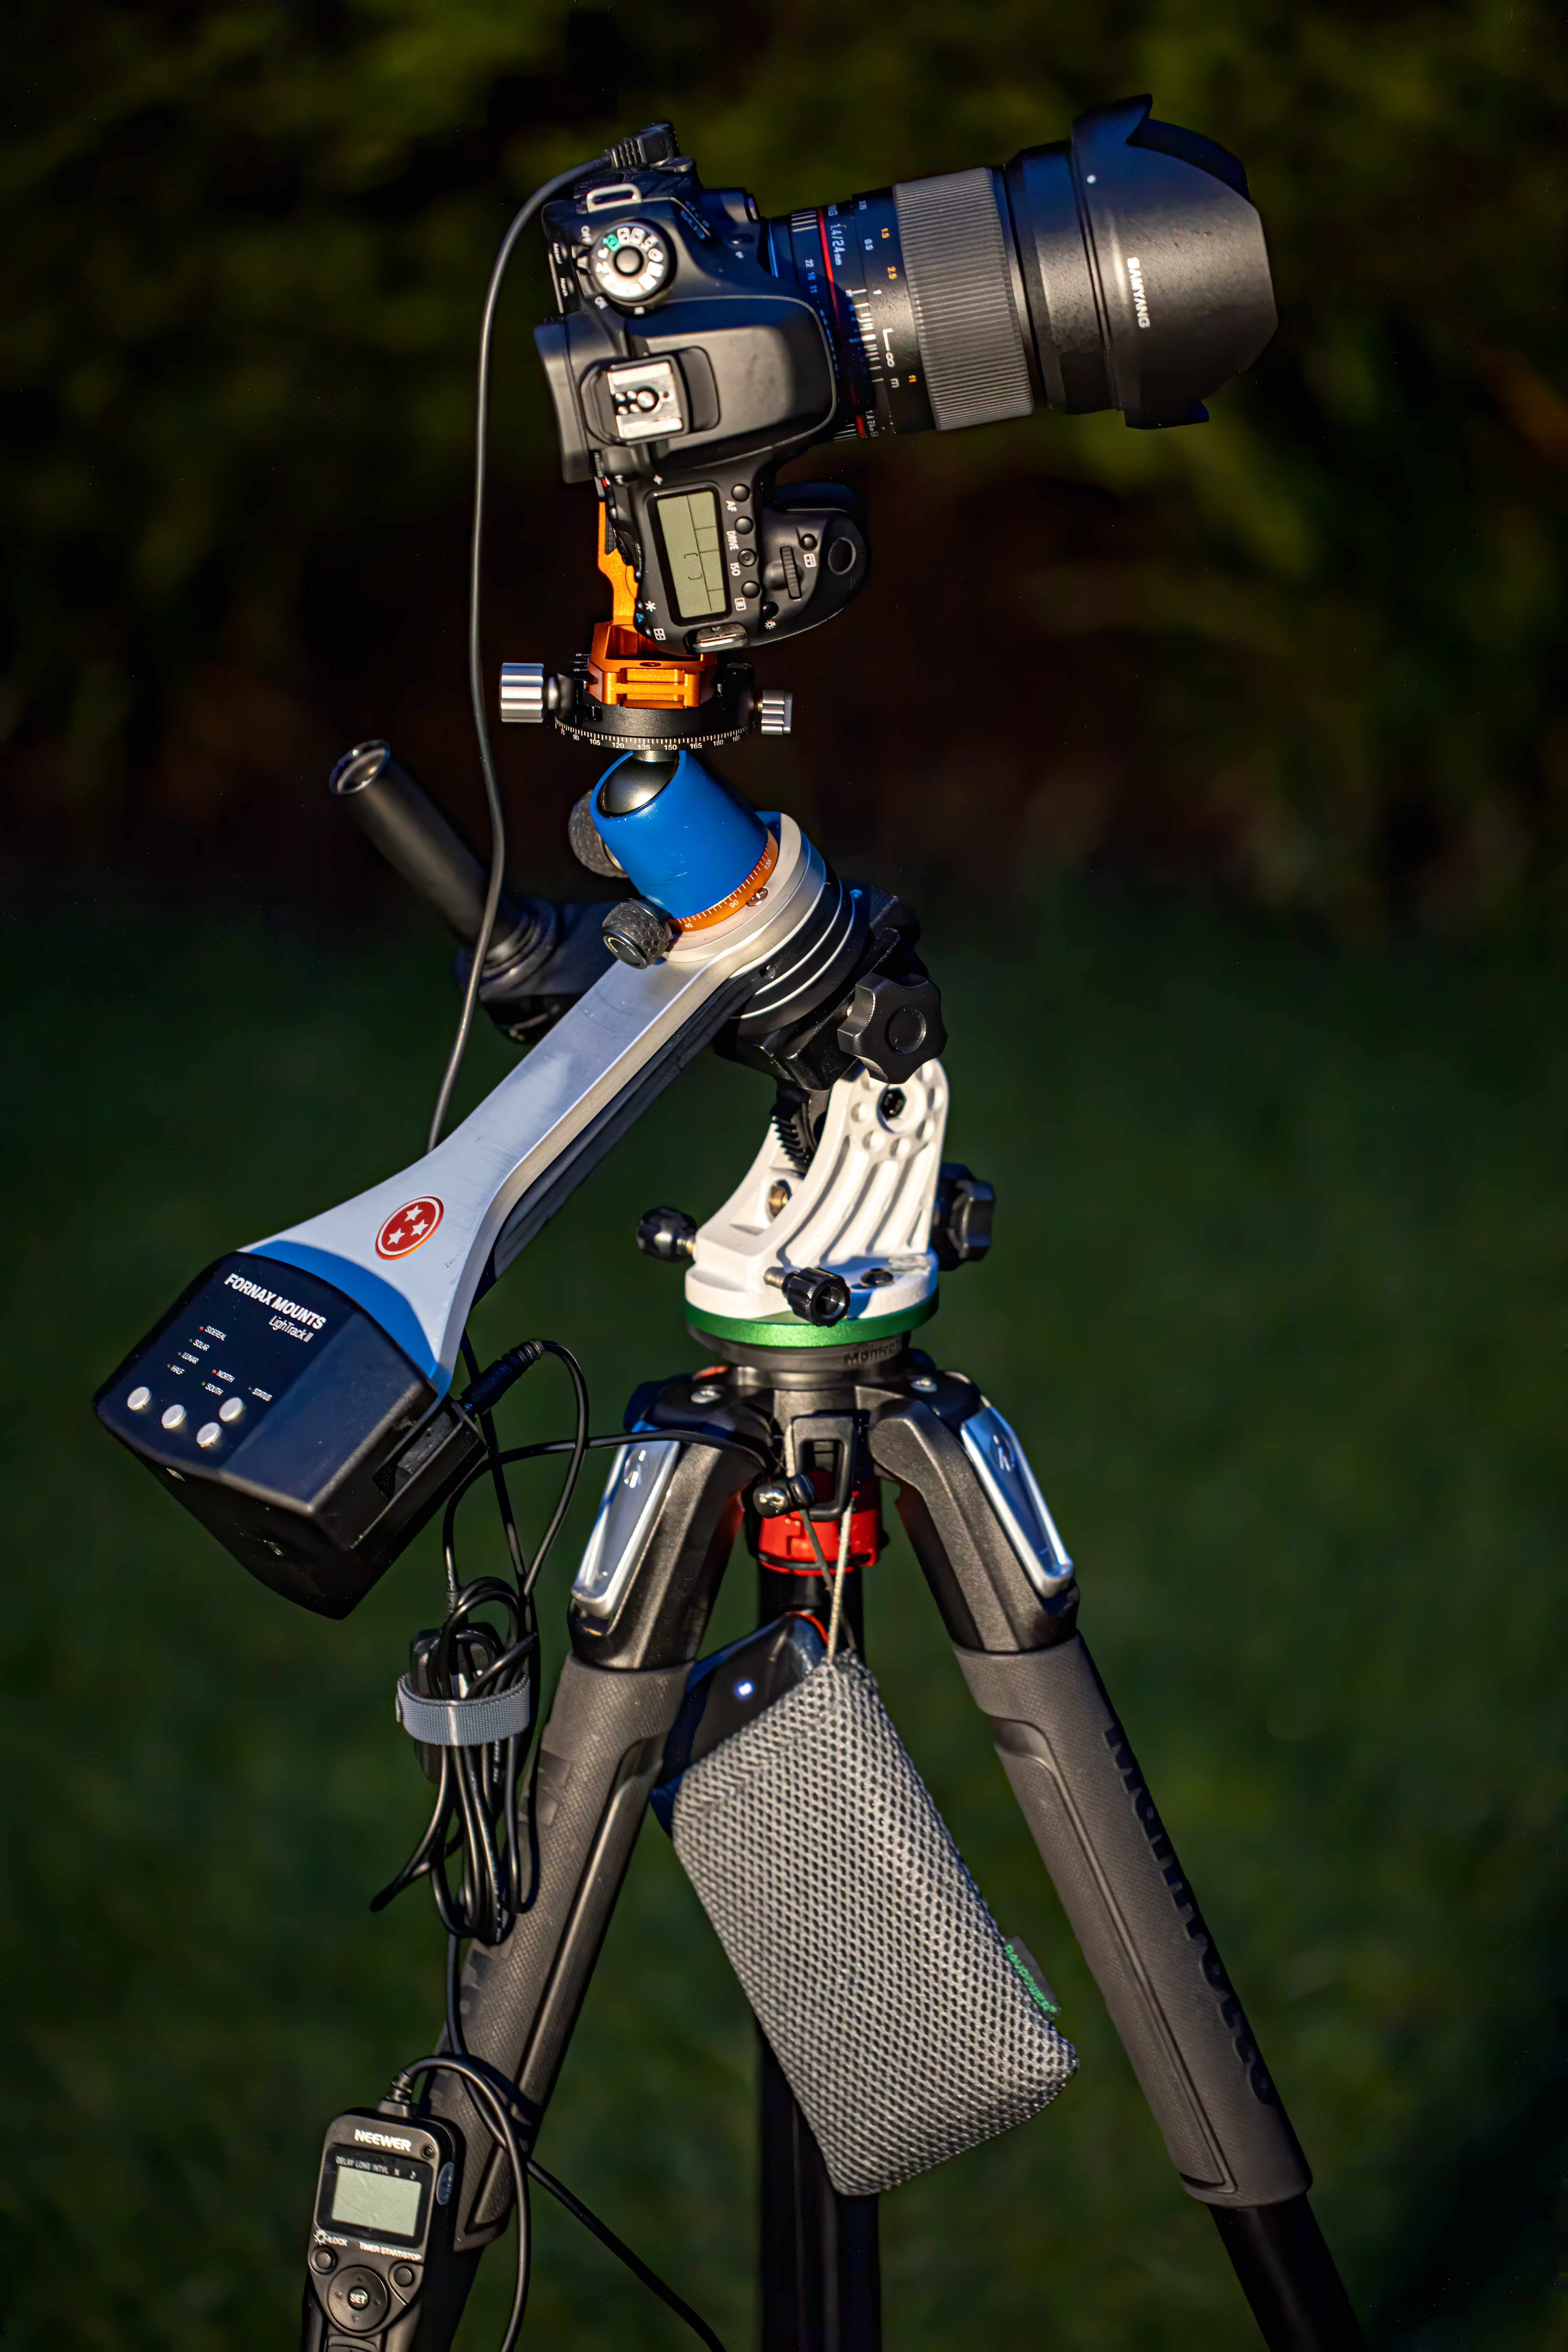
The rig shown below is what I use for tracking the night sky, as seen in the main Dunkery Beacon image. The tracking mount allows exposures of several minutes, which can really maximise detail and colour. If I have to travel light, I’ll just use a camera, tripod and fast lens, as in my Pen y Fan image below, and stack the exposures in software to manage the high-ISO noise.
L-bracket: This enables the camera to be tilted up at the Milky Way while keeping the panorama plate level.
Tracking mount: This enables long exposures, to really soak up those photons.
Intervalometer: To take timed exposures in Bulb mode, when longer than 30 seconds is needed.
Fast wide-angle lens: For tracked shots f/2.8 or f/4 is fine, but for untracked f/2 or faster is a must. The lens needs to produce a good star shape. Find out more about the best lenses for astrophotography.
Panorama plate: This allows level panning when fixed to the top of the ball head. Angular increments make correct pano overlap much easier than guessing in the dark.
Equatorial wedge: To align the tracking mount to Polaris.
Power bank: I run my tracking mount off this, along with a dew-heater band if it’s cold, to stop the lens misting up.
Settings and processing
Landscape astrophotography images tend to come out best (in terms of detail and minimizing noise) if the sky and ground are shot separately, then blended together in post-processing. That’s not to say you can’t take stunning Milky Way images as single exposures – it really depends on what you want to achieve with the end result. All my shooting is done in manual mode, with manual focusing – you can’t rely on your camera’s AF or metering here.
Remeber:
• Consider the foreground
• Use manual focus
• Set manual exposures
• Have a sturdy tripod
At the processing stage, I use Sequator for stacking, Photoshop for panorama stitching, blending the sky and ground together (using Layer Masks), and general editing. I then use Lightroom for final tonal tweaks and cropping the frame. I’ve also just discovered Topaz Labs DeNoise AI; I’m very impressed – it does a great job!
Capturing the final image
Shooting the sky
If I’m tracking the sky, I use a low-ish ISO (say 800) and stop down my lens to f/2.8, with exposure times of up to 4 minutes. Find a bright star to focus on, then using your camera’s magnify function, get the smallest possible star using manual-focus mode. For a non- tracked sky, I’ll tend to shoot at up to ISO 6,400 at f/1.4 or f/2, with 13-sec exposures for a 24mm lens.
Using long flowing clothing and shooting fairly wide to maximize movement works really well for this technique. But you can also try something with a little less movement and clothing that’s more casual. By filling the frame, zooming in for a closer portrait will completely change your composition. If you’re able to balance your exposures, experiment with longer shutter speeds.
Capture the ground, too!
I’ll tend to shoot at f/4 and ISO 800, with exposure times as appropriate, ideally shooting in twilight, or at night if I decide to light the ground. For this Pen y Fan shot (right), I had to focus-stack several exposures due to the proximity of the foreground grasses to the camera. Shooting at a narrow aperture at f/16 would have resulted in an excessive exposure time, which can introduce thermal sensor noise into the image.
You can see more of Simon's astro work on Instagram @si_newman.
Read more:
The best light pollution filters for astrophotography and star gazing
Best CCD cameras for astrophotography
Best telescopes for astrophotography
Best star tracker camera mounts for astrophotography
Digital Camera World is one of the leading authorities on camera and photography news, reviews, techniques, tutorials, comparisons, deals and industry analysis. The site doesn't just specialize in cameras, but all aspects of photography, videography and imaging – including camera phones, gimbals, lenses, lighting, editing software, filters, tripods, laptops, printers, photo books, desks, binoculars and more.
Whether you're using, looking to buy or trying to get the most out of a compact camera, action camera, camera drone, cinema camera, beginner camera or professional camera, Digital Camera World has a roster of experts with combined experience of over 100 years when it comes to cameras, photography and imaging.
