
A is for Astrophotography
If there’s one thing that makes us humans feel small, it’s the stellar display arcing above our heads on a dark, clear night. Atmospheric conditions and proximity to towns and cities affect how many stars we can see, but if you can see them with the naked eye, you can capture them on your camera’s sensor.
Shooting the night sky takes you into the realm of astro-photography. Although you can make a sizeable investment in highly specialised kit, capturing constellations and broad star fields requires nothing more than a SLR and a tripod.
Set a high ISO of 1,600, use a wide-angle lens set to its largest aperture, and set the exposure mode to Manual. Focus manually using Live View: to do this, zoom right in on the screen, scroll around to find a star close to the centre, and gently rotate the focusing ring until it appears at its sharpest. With the shutter speed dialled to 30 sec, take a shot. Check the sharpness on screen: if all looks good, welcome to the amazing world of astro-photography!

B is for Bulb mode
Night shooting requires long exposures to ensure that the faint light levels are recorded on the sensor. SLRs will take you to 30 seconds in Manual exposure mode, but there may be times when you require longer shutter speeds to record really dark scenes such as moonlit landscapes.
Using Bulb mode allows you to hold the shutter open for as long as you want, giving the light more time to register on the imaging chip. Holding down the shutter button for minutes at a time is uncomfortable and can lead to unwanted movement of the camera, so Bulb exposures are best carried out with a remote release. This allows you to press the button once to start the exposure, and once to end it, while you count off the seconds on a stopwatch.
• See also Best light-light cameras
C is for Composition

Framing up a night scene is easy in well-lit towns and cities – but try it with a starry sky or a rural landscape, and you’ll find you can’t see a thing through the viewfinder. Live View mode can often reveal more, but you may still have to shoot test shots and check the screen to get the composition you want. This can take a while when exposures are 30 seconds or more, so it pays to have a bright torch to illuminate areas in the foreground to establish the edges of the frame. This is also useful for accurate focusing, as your AF will struggle to lock on to anything in very dark conditions.
D is for Dynamic range
The difference between the smallest and largest quantity of the light a camera can record is the dynamic range. In night shots, the darkest tones are abundant, so getting detail in the shadows can result in the brightest tones burning out to pure white. To get detail at both ends of the spectrum, try shooting the same scene with different exposure settings, then blend the pictures together in software. For scenes that aren’t so extreme, your camera’s raw format records more detail across the tonal range.
E is for Equatorial mount

Take an exposure longer than 30 seconds with a wide-angle lens, and you’ll see that the stars cease to be points of light, and start to become streaks. Use a shorter focal length, and the magnification will make this effect even more apparent.
The earth’s rotation is to blame for this. While it’s a blessing to those who want to shoot star trails, it’s bad news for anyone trying to capture longer exposures of the stars to reveal more detail.
To counteract this, serious telescopes use motor-driven equatorial mounts that slowly turn to keep the stars in the same place – and cameras can use the same kind of device. With prices starting at just under £300 / $350, equatorial mounts aren’t cheap, but you can make a hand-driven DIY ‘barn door’ mount from two sheets of plywood and a few nuts, bolts and hinges. These work well for wide and standard lenses, and can track the sky for exposures up to 10 minutes.
F is for Firespin

Place some fine gauge steel wool in the cage of an egg-beater, attach it to a metre of wire, and set fire to it with a turbo lighter, before spinning it round. It’s a health and safety nightmare – but a popular technique for those daft enough to try it.
Before even thinking about it, make sure you’re in a remote outdoor location with nothing vaguely combustible anywhere near. Wear safety goggles, a hat and cotton clothing that won’t melt, and cover all exposed skin to reduce the risk of burns.
Set your camera on a tripod well away from the spin, and use Manual mode with an aperture of f/8, an ISO of 100 and a shutter speed of around 30 seconds. The results are spectacular as the molten strands fl y off, but it can be dangerous – so be very careful!
G is for Galaxy

The Milky Way is our home in the universe. On a dark, clear night, you can see the arm of this spiral galaxy as a faint glow. The brightest part – the galactic centre – is in the constellations of Sagittarius and Scorpius, and can be seen from the northern hemisphere between late March and early October. It’s never too far above the horizon, so a wide-angle lens can include earthbound detail in the frame. During the winter, the dimmer part of our galaxy runs through the distinctive ‘W’ shape of Cassiopeia.
To get a shot of the Milky Way, use your widest lens and Manual (M) mode. Set ISO to 3200 and use your largest aperture (the smallest f/number available). Set a shutter speed of 30 seconds, and use raw format for more fl exibility when you process the shot.
H is for Head torch
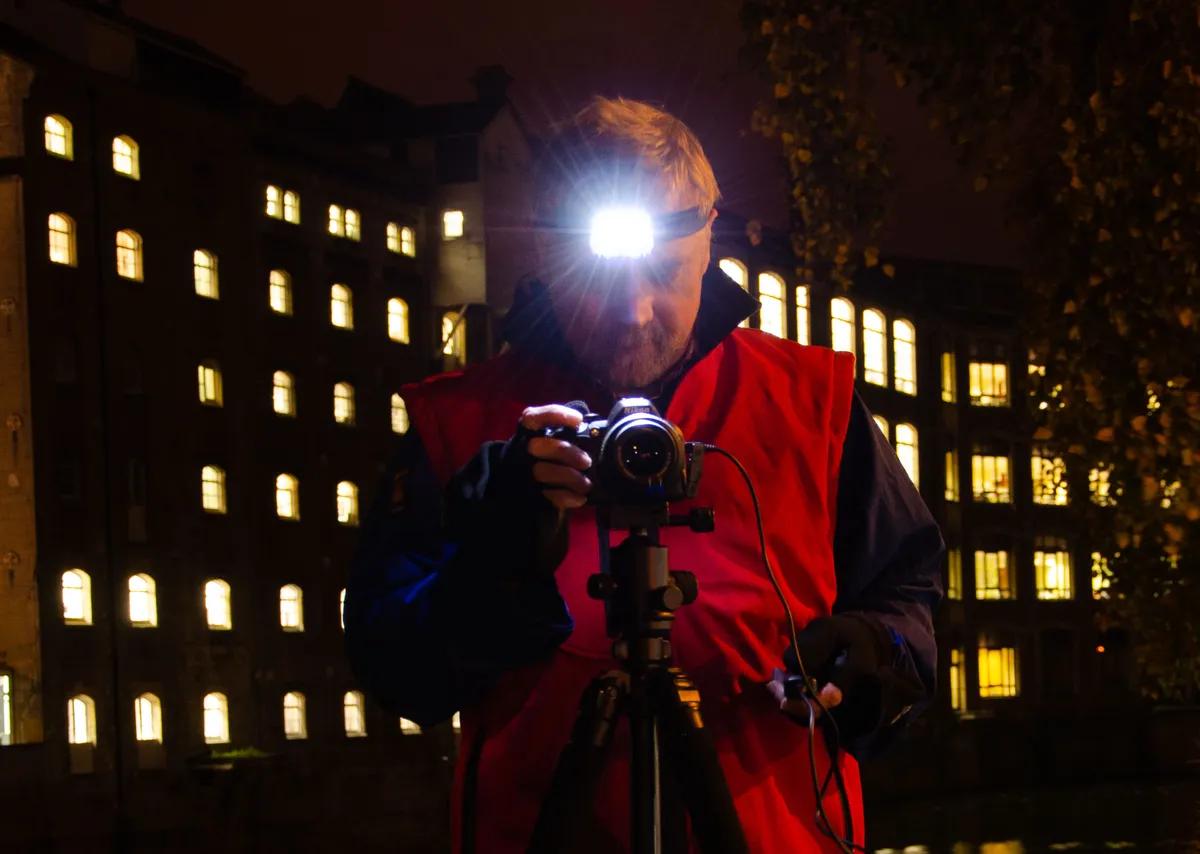
One indispensable accessory for night shooting is a torch that leaves you hands-free to set up your gear and operate your camera. A small head torch does this brilliantly; if you shop wisely, you can even get one with a variable- power main beam and a red LED light built in. The latter is great for tweaking camera settings, because if you use a bright white beam at close range, you’ll effectively dazzle yourself and ruin the night vision your eyes have spent half an hour accommodating to.
• Buying guide to the best head torch
I is for image stabilizer
Many modern lenses have sophisticated image stabilization systems: these give a real advantage in counteracting the blurry effects of camera shake when you shoot hand-held at slower shutter speeds. The optical stabilizers used in lenses can be effective down to 1/15 or even 1/8 sec, depending on the focal length used, but they start to work against you once you mount your camera on a tripod. The IS system is expecting movement, and if the camera is rock- solid, it’ll feed back on itself and create blur. Always switch IS off whenever you place your camera on any support.
J is for JPEG
JPEG is an image file format devised by the Joint Photographic Experts Group. It’s fantastic at compressing big image files to make them more convenient to store on a memory card or send over email. But when you’re shooting at night, you need all the quality and control your camera can muster, and this makes JPEG a poor choice for taking pictures in the dark. If you’re shooting at night, use raw format instead. (See R for Raw).
K is for Kit essentials

Batteries drain faster in cold weather and when you shoot longer exposures, so take a fully charged spare or two to see you through your shoot. Raw files take up more space on memory cards than JPEGs, so make sure you have a freshly formatted card in the camera, and a spare in case you fill it.
Clean your lenses before you set off, but take a lens cloth or clean microfibre towel with you in case you smudge your filters or lenses in the dark. A powerful hand torch assists with focusing, light-painting and finding your way home, but even more vital is a head torch. (See H for Head torch).
If you need help finding the right star, a smartphone app will make life easy. Planets is a free app for iOS and Android that gives a 3D view of the sky – just hold up your phone and look through the screen.
L is for Long exposures

To record a good exposure on your SLR, you need just the right amount of light to reach the sensor. This is controlled by three variables: aperture, ISO and shutter speed. The aperture is an adjustable hole in the lens that lets more or less light through; the ISO controls the light sensitivity of the chip; and the shutter speed governs how long the light is allowed to strike the sensor.
In very dim conditions, the only real option is to extend the time the sensor is exposed to light, so shutter speeds can extend to several seconds or even minutes. With such long exposure times, it’s impossible to keep a hand-held camera still; so to record sharp shots, some kind of support is needed to lock the camera in place. Anything moving in the scene will become blurred, but in low-light and night photography, this can be used to creative effect.
M is for Moon photography

As the largest object in the night sky, the Moon is a must-shoot subject for any night photographer – but rather than revealing lunar craters and seas, most attempts result in a blank white disc devoid of any detail. The Moon is much brighter and much faster-moving than you’d think, so you need to set up carefully to get a well-exposed shot.
You’ll need at least a 300mm lens, but even longer is better if you can get your hands on a focal length that is equivalent to 500mm or a 600mm.
Cameras with APS-C sensors have an advantage over full-frame models, as the sensor crop effectively magnifies the focal length by 1.5x (so a 400mm gives you an effective focal length of 600mm). Micro Four Thirds lenses have a 2x focal length crop factor.... so that a 300mm lens setting would give you an equivalent of a 600mm. Compact cameras have even higher crop factors as have smaller sensors – making some zoom and bridge models perfect for really close-ups of the moon.
With the camera on a sturdy tripod, set the main mode to Manual (M). For a full moon, dial in an aperture of f/11 and a shutter speed of 1/125 sec, with the ISO set to 100. Focus using AF, but switch to MF to lock the focusing distance. If you have a mirror lock-up mode, engage it, as this will minimise any vibrations when the shot is taken.
Use a remote release if possible; if you don’t have one to hand, set the self- timer to 5 sec so you’re not touching the camera when the shot is captured.
Take your shot and check the screen. If it’s too bright, set the shutter speed to 1/250 sec and reshoot. If it’s too dark, set the aperture to f/8. The important thing is to use a shutter speed of at least 1/125 sec. Frame up with Live View enabled and zoom in on the edge, and you’ll see the Moon positively belting across the screen!
N is for Noise
Noise is a grainy degradation in image quality that impairs fine detail and reduces colour saturation. It’s controlled much better on modern cameras than on models that are a few years old, but as you increase ISO value to make the chip more sensitive to light, you also increase the noise in the image. To avoid noise in static scenes, use your lowest ISO value (normally 100), a tripod and a longer shutter speed to compensate. For moving subjects in dim conditions, you’ll normally have to use a higher ISO setting to get a sharp shot, but the effects of noise can be reduced with noise reduction processing in raw software like Lightroom or Camera Raw.
O is for Optics
There’s no ‘right’ lens for night shooting, but photographers specialising in low-light work often bias their choices towards ‘faster’ optics. These are prime lenses with a fixed focal length, and they have larger maximum apertures than equivalent zooms. They’re less flexible when you frame up a shot, as you have to physically move the camera to change your composition, but they gather more light – a big factor in dim conditions. A 50mm f/1.8 prime lens is a popular first choice for many photographers is, as it’s fast and the lenses can be very affordable. A Canon 50mm f/1.8 costs just over £100, and Nikon 50mm f/1.8D model is a similar price.
P is for Painting with light
By shooting a long exposure while shining a torch, you can manually light a static subject. The longer the exposure is, the more time you have to move your torch around – but to avoid lighting the whole subject in one go, it’s easier to lock off the camera on a tripod, and make several shorter exposures, lighting the subject in sections at a time. After you’ve framed up and focused, switch to MF to ensure the focus doesn’t change, and use Manual mode with a shutter speed of 8 sec and an aperture of f/11. Set a self-timer delay of 5 or 10 sec to allow you to get into position with your torch, and play the light over the subject, using a different angle for each shot.
Provided you don’t move the camera or alter any settings while you take your shots, it should be easy to combine them. Load all the pictures into a single Photoshop document as separate layers. Set them all to the Lighten Blend Mode in the Layers panel, and all your lighting effects will be switched on.
When you paint with light, keep your torch beam moving all the time during the long exposure. This avoids creating hotspots and hard-edged shadows.
Q is for Quality, not Quantity
With night photography, it’s best to concentrate fully on nailing a specific shot, rather than taking a bagful of gear and trying to shoot a barrage of different pictures. If conditions are right for star trails, for example, it’ll take at least a few hours to capture the shots – and that’s before you start processing. With traffic trails or industrial scenes, you only have a short window of about 40 minutes to get your shot if you want to record some colour in the sky. And if you take on a painting-with-light project, it’s easy to spend half a night finessing your light trails and processing the results.
The approach is very different to more reactive photography disciplines, where you respond quickly to what’s happening. So take your time, and look to do one shot well, rather than getting a brace of average images.
R is for Raw
You’ll be surprised at the amount of detail that lurks in the shadows of shots you take at night – and the best way to release this is to shoot in raw format. This special format takes the data straight from the sensor and allows you to process it in your own way, using software such as Adobe Camera Raw (built into Photoshop) or Lightroom.
As well as restoring shadow detail, you can also compress the highlights to effectively expand the dynamic range of the image, and can adjust the colour temperature too. Unlike with a regular image file format like JPEG, the colour data isn’t fixed in a raw file, so the white balance of your scene can be changed by simply moving a slider. You can even adjust the overall exposure, so if you’ve undercooked your shot, you can increase exposure to rectify it.
Raw offers many other benefits, and for low-light and night images, its immense fl exibility lets you get the maximum possible quality out of a picture. If you’re more comfortable with JPEGs, then start shooting in raw+JPEG format. This will use up more memory card space, but you’ll still have the familiarity of a JPEG.
Raw You’ll be surprised at the amount of detail that lurks in the shadows of shots you take at night – and the best way, using software such as Adobe Camera Raw (built into
As well as restoring shadow detail, you can also compress the highlights to effectively expand the dynamic range of the image, and can adjust the colour temperature too. Unlike with a regular image file format like JPEG, the color data isn’t fixed in a raw file, so the white balance of your scene can be changed by simply moving a slider. You can even adjust the overall exposure, so if you’ve undercooked your shot, you can increase exposure to rectify it.
Raw offers many other benefits, and for low-light and night images, its immense fl exibility lets you get the maximum possible quality out of a picture. If you’re more
DSLRs, CSCs and even some high-end compacts all have the ability to shoot raw files. While they provide the same benefits, each manufacturer has its own type.
S is for Star trails

As the earth rotates on its axis, all the stars appear to revolve around a particular point. Draw a line from the south pole through the north pole and extend it into space, and this rotation point is occupied by a particular star – Polaris. With Polaris in the frame and a sufficiently long exposure, you can record the movement, because the stars will slowly arc round, and become streaks of light rather than points.
Really long exposures of several hours make this an amazing spectacle, but regular SLR sensors aren’t designed to be exposed for such long periods. For better results, a ‘burst’ of shorter, 30-second exposures is more suited; the results are blended together as layers in Photoshop. With all the separate pictures stacked one on top of the other, the Lighten Blend Mode is applied to all layers except the one at the very bottom of the stack. This adds all the brighter pixels together, turning the short streaks into arcs of light.
To avoid pressing the shutter every 30 seconds for an hour or more, an intervalometer is normally used. This automatically fires the camera at a preset time interval, so you can leave it to get on with the picture-taking.
T is for tripod
When it comes to night shooting, there is no substitute for a good-quality set of sticks. Whether you’re shooting the night sky, a street scene or a light-painted still-life, a tripod jumps the queue on every other accessory: nothing else affords you more creative options. If the weight, bulk or general faff of tripod usage bothers you, consider it as an integral part of your camera, rather than a separate piece of kit.
If you don’t yet have a tripod, put it at the top of your wish list and buy the best full-size model you can afford. Pro-quality aluminium tripods with heads start at around £130 – a relatively small price to pay for the creative potential on offer.
U is for Underexposure
Most night shots are underexposed by a stop or even two, because we judge the exposure captured using the image on the LCD screen for reference. As your eyes adjust to the dark, the screen appears much brighter than it really is, so it’s common to undercook everything.
To get better night-time exposures, look at the histogram display in conjunction with the image. If the graph stops about two thirds of the way along, open the aperture or extend the shutter speed until it’s close to the right-hand side. It may look too bright on location, but it won’t be on your computer later.
V is for Vehicles

An attractive flow of head and tail lights is a must for every photographer: captured using a long shutter speed, vehicle lights snake into a river of colour. Shooting from a vantage point like a footbridge is an easy way to capture traffic trails; but for the best results, get there just after sunset, when you can still capture some detail and colour in the sky.
Use a tripod to keep your camera still, and set your camera to Manual mode. Start with an aperture of f/11 and a shutter speed of 10 sec with your ISO set to 200, but be prepared to adjust the settings for the sky’s brightness and the fl ow of traffic.
W is for Wrap up warm!

You won’t believe how cold you can get shooting in remote locations. When you’re walking from location to location, you’ll generate some body heat, but once you start on long exposures, you’ll be almost stationary.
Wear lots of layers, topped off with a windproof jacket. A down jacket is even better: it’s effectively a sleeping bag with sleeves. Wear a thin pair of gloves for dexterity when adjusting your camera settings, plus a thick pair to go over the top when waiting for exposures to end. Wear a hat to keep your head warm, and throw on thick socks: there’s nothing worse than getting numb toes!
X is for X-sync
Flashguns can add an extra dimension to night shots, but there’s a ceiling on the shutter speed you can use. In an SLR, the shutter is like a roller blind: if it moves too quickly across the sensor when the fl ashgun is triggered, there won’t be enough time for it to expose the whole frame to the light. The X-sync is the maximum shutter speed your camera can use with fl ash, and is normally 1/200 sec or 1/250 sec, depending on your camera model. Anything up to this speed will be fine, but exceed your X-sync and you’ll see a black bar obscuring part of the picture. Check your manual to find out the X-Sync speed for your camera.
Y is for You!

If you want to get sci-fi style selfies, after dark is the time to do it! There’s no end of projects involving you, a tripod-mounted camera and a powerful torch, but a simple set-up that gives spectacular results is a backlit shot. With huge shadows acting as lead-in lines to your silhouette, plus a halo of rim-lighting to cut your figure out of the darkness, it’s a must for any photographer.
Find a good, dark location, such as a piece of woodland. After you’ve composed your shot, decide where you’re going to stand. To focus on this distance, tape your torch about waist-high to a light-stand or tripod; after you’ve focused on it using AF, switch to MF to lock off the focus. Mark the spot, then place your torch further away, so it’s in the middle of the frame and shining directly at the camera.
Use Manual mode, select an ISO of 100 and set a shutter speed of 15 sec and an aperture of f/5.6. Use your self-timer with a delay of 10 sec; after pressing the shutter, go to your mark and assume your chosen position. Stay as still as you can until the exposure has ended, and check the results. If it’s too dark, increase the ISO to 200 or 400, and try again. After a few attempts, you’ll have a spectacular selfie, straight out of a blockbuster movie!
Z is for Zoom burst

The longer exposure times involved in night shooting allow you to get creative by moving the camera or changing the focal length while the shutter is open. If you rotate the zoom ring while the exposure is being made, light sources will become smears and streaks; you can vary the effect with the amount of zoom used or with camera movements.
For smooth results, start the zoom movement before pressing the shutter button, and continue zooming after the exposure has ended. With longer exposures of several seconds, you can also ‘stagger’ the effect by repeatedly zooming and stopping while the shutter is open. Results are abstracted and unpredictable, but give a very different way of seeing the world.
Read more:
• Astrophotography: How-to guides, tips and videos on getting your best shots
• Astrophotography tools: the best camera, lenses and gear for shooting the night sky

