Sunset photography: tips and settings for perfect pictures
As the sun goes down, the light changes to create fantastic colors – here's how to get great photos of sunsets
The best camera deals, reviews, product advice, and unmissable photography news, direct to your inbox!
You are now subscribed
Your newsletter sign-up was successful
Watch the video: tips and settings for sunset photography
Sunsets make spectacular subjects. The rich colors, dramatic lighting and strong shapes they offer can produce stunning shots with little need for much effort from you. However, you might find that your camera often captures pale imitations of the sunsets you see with your naked eye.
• More photography tips: how to take pictures of anything
The intensity of the colors may have been lost, or the composition might not work. To replicate a spectacular sunset, you need to compose your shots properly and adjust the camera settings to make the most of the hues.
The temptation to shoot a sunset when you first see it is overwhelming. However, while there’s something to be said for getting a shot in the bag quickly in case the conditions change, it can be worth spending longer over it to make sure that you get everything right. Your first attempts might look okay, but you can almost certainly do better.
Your focal length and choice of viewpoint will make a big difference to the picture. A quick wide-angle shot might capture the broadest area of sky, but won’t necessarily give you the best composition; a longer focal length and carefully chosen viewpoint can produce a much more effective result. The sun will be bigger in the frame and you’ll have more control over shapes and silhouettes.
The key with camera settings is to make sure that you capture the sunset’s colors as they are, not how the camera ‘thinks’ they should be. You might need to adjust the exposure settings to suit the conditions, too, because in extreme lighting situations the camera might not interpret the scene in the way you expect.
The best camera deals, reviews, product advice, and unmissable photography news, direct to your inbox!
Camera settings are important with sunsets, as you don’t want your camera to correct things that don’t need fixing. We mention White Balance and Picture Controls in this tutorial, but you need to think about ISO settings too.
Don’t use Auto ISO if you’re using a tripod, because you won’t need higher ISOs and the image quality will suffer. If you’re shooting handheld, though, Auto ISO can be a good safeguard, because light levels (and shutter speeds) can change much more quickly than you might expect.
1. Make a first attempt
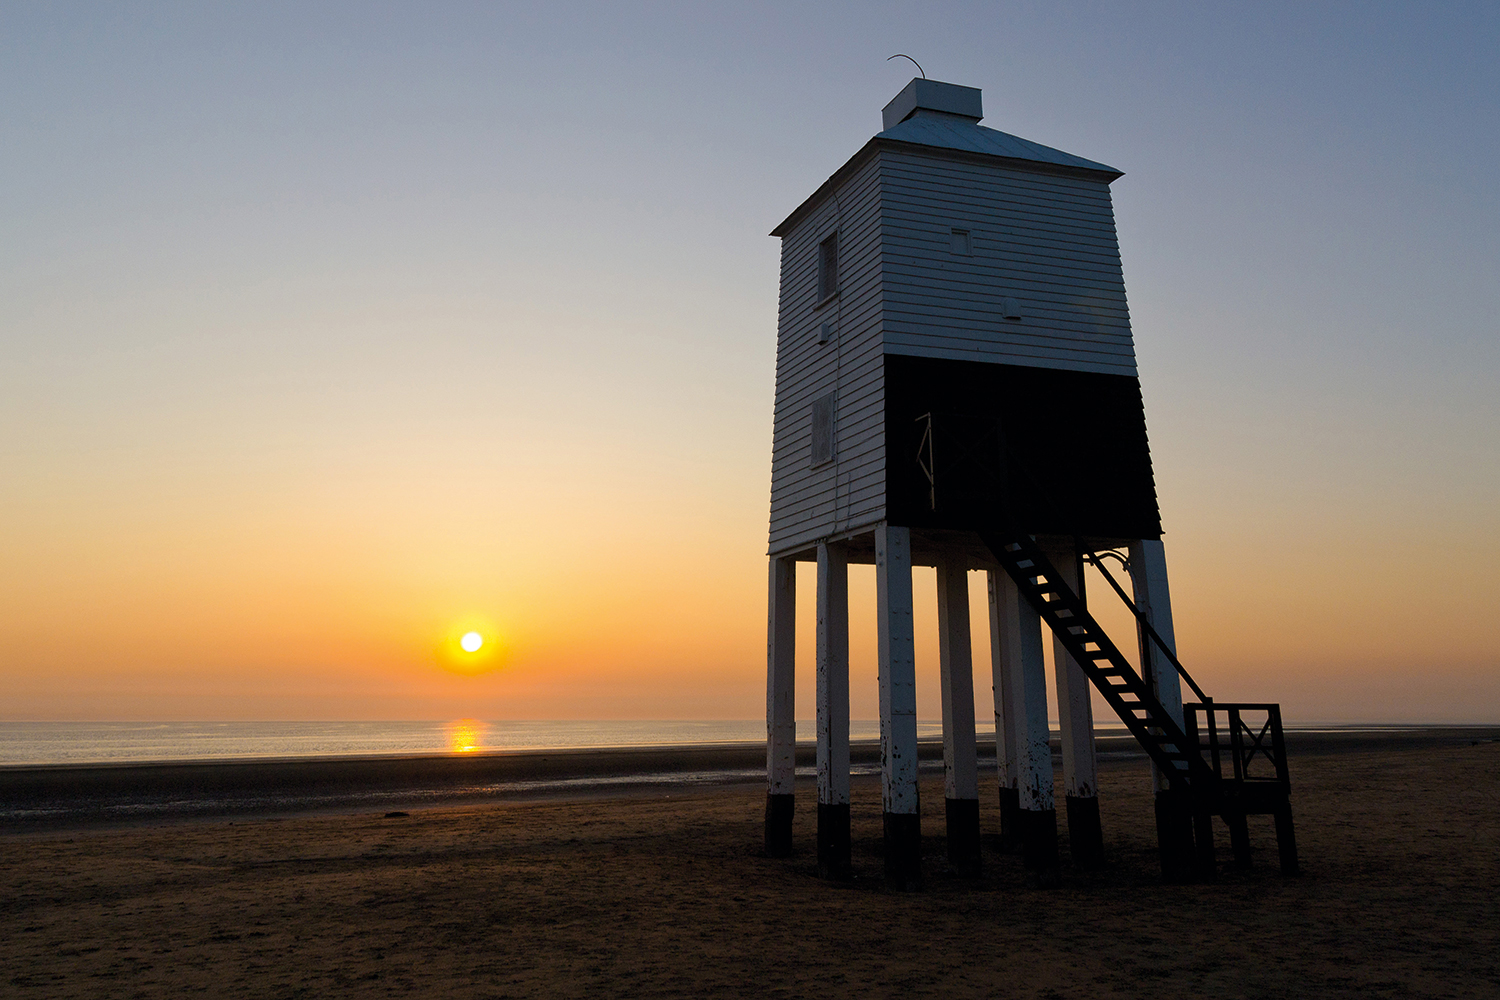
Conditions will change rapidly, so it’s a good idea to get a few shots done quickly first. Here, we’ve used our zoom lens at its widest focal length and got right up close to the old wooden lighthouse. This has resulted in a dramatic perspective, from tilting the camera upwards, but the sun is quite small in the background.
2. Move back and zoom in
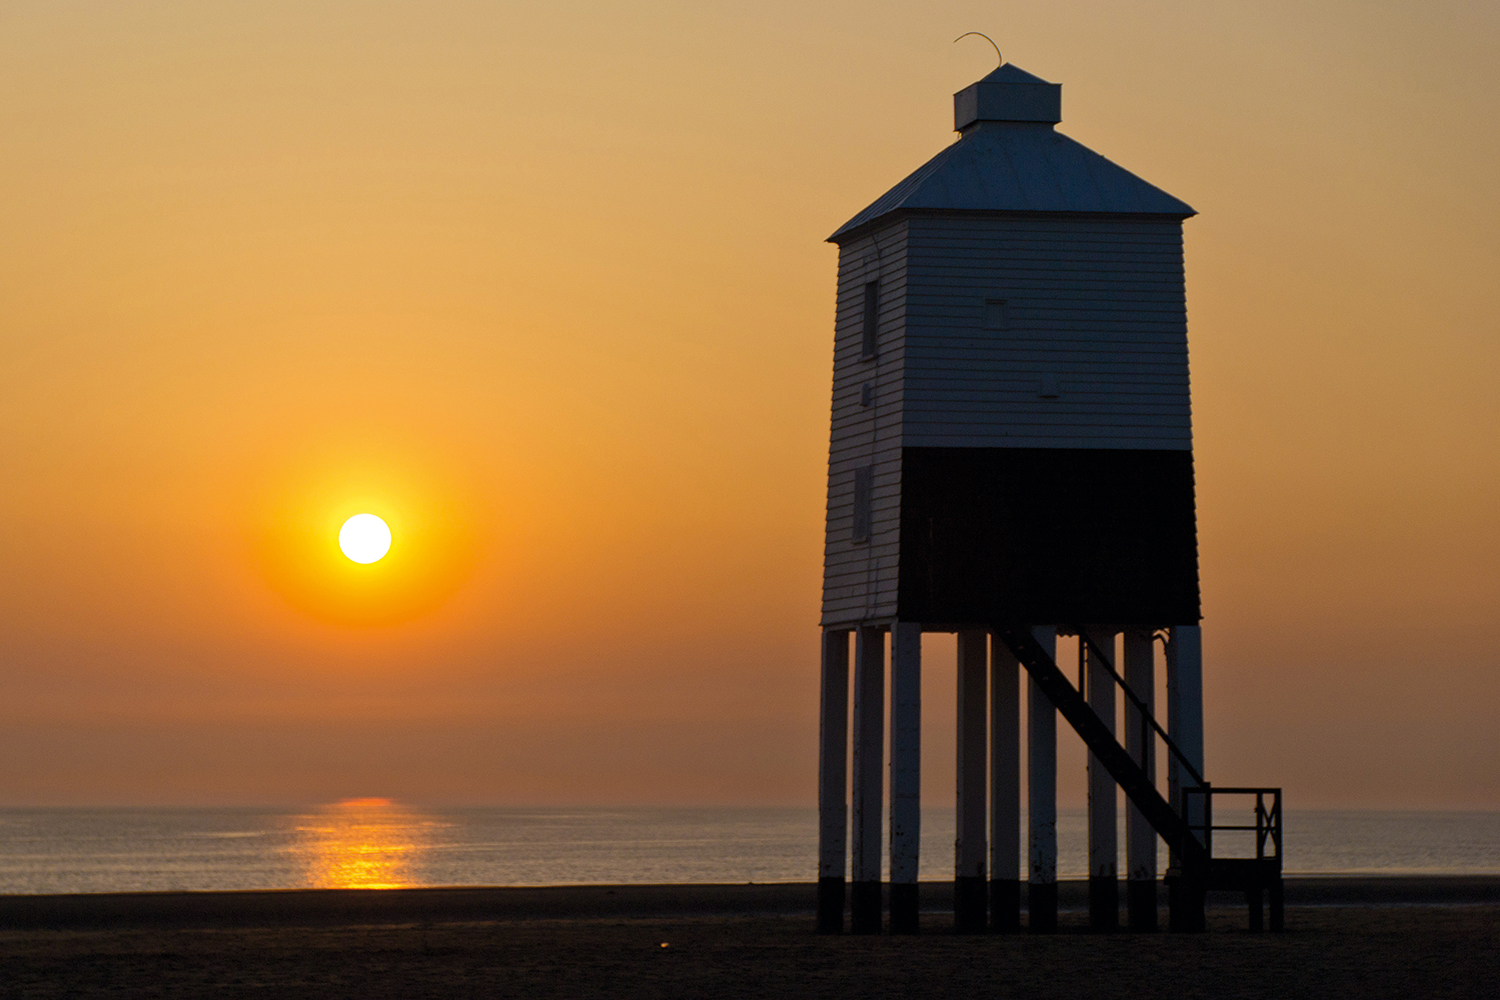
Here, we’ve got a better shot by moving further away and using a longer focal length. The lighthouse is the same size as in our first shot, and is much straighter because we haven’t had to tilt the camera. There’s a smaller area of sky in the background now, so the sun is larger and we’ve filled the frame with a rich, orange glow.
3. Play with White Balance
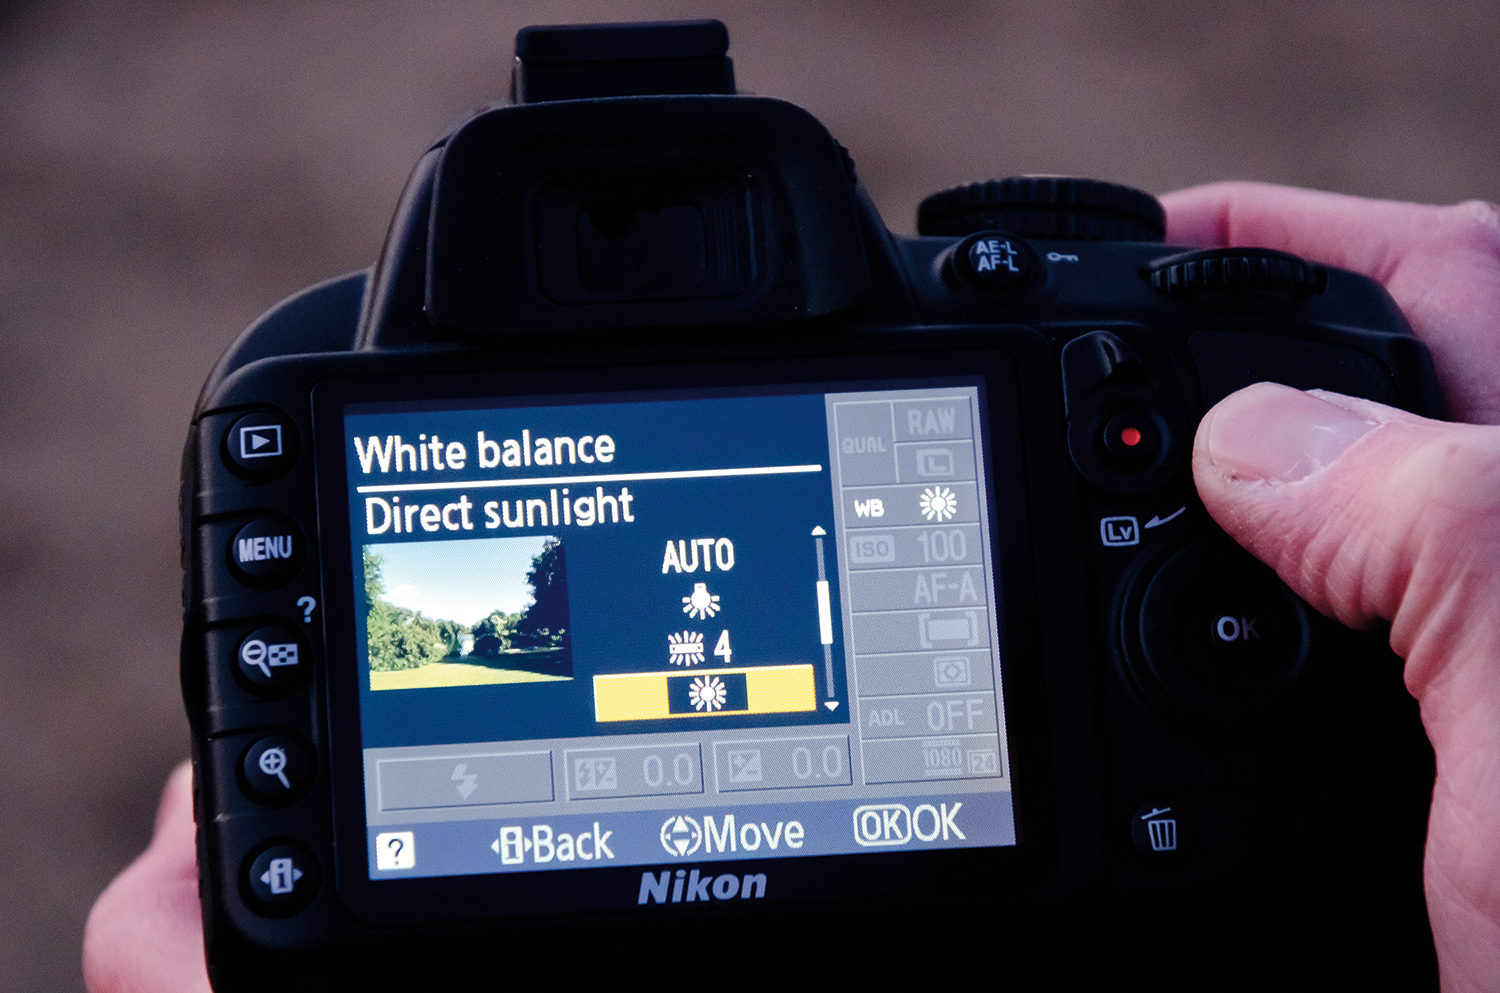
If you leave the White Balance set to Auto, your camera might attempt to correct what it sees as a color cast, producing weak or distorted tones. To capture sunset hues as they really are, use the Sunlight White Balance preset. Or, for even deeper, warmer colors, try the Cloudy setting instead.
4. Use Picture Controls
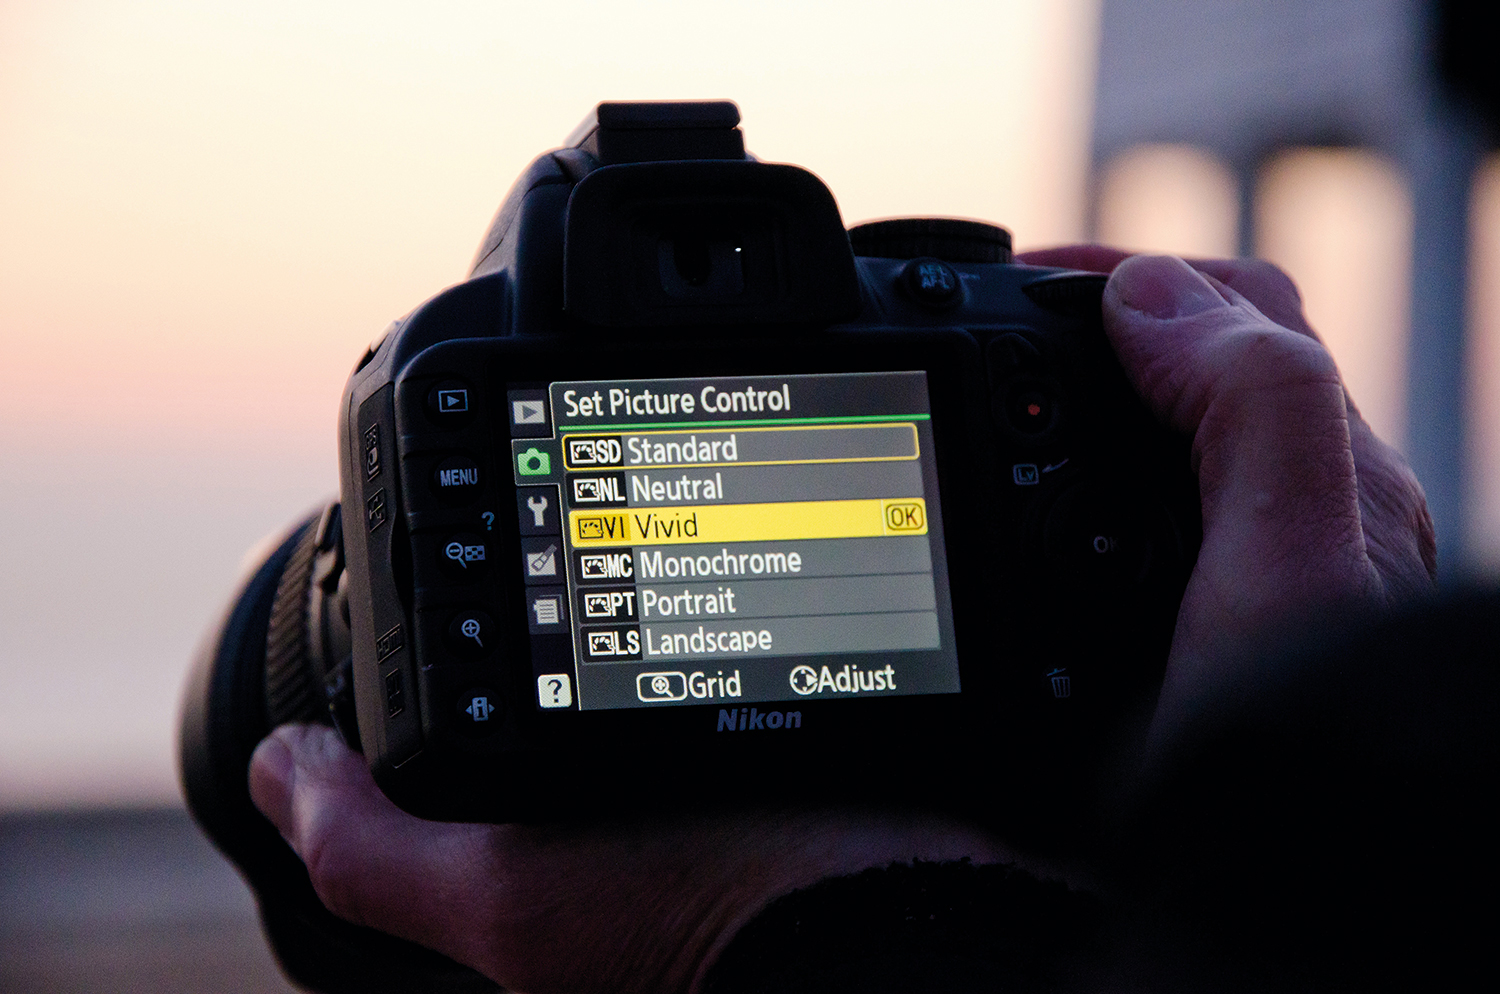
Take a look at your camera's picture controls/modes. The Standard setting reproduces colors accurately, but switching to something like Vivid will boost saturation and give extra intensity. Better still, shoot RAW files rather than JPGs – this will give you more scope for changing the White Balance and color saturation later on.
5. Hide the sun
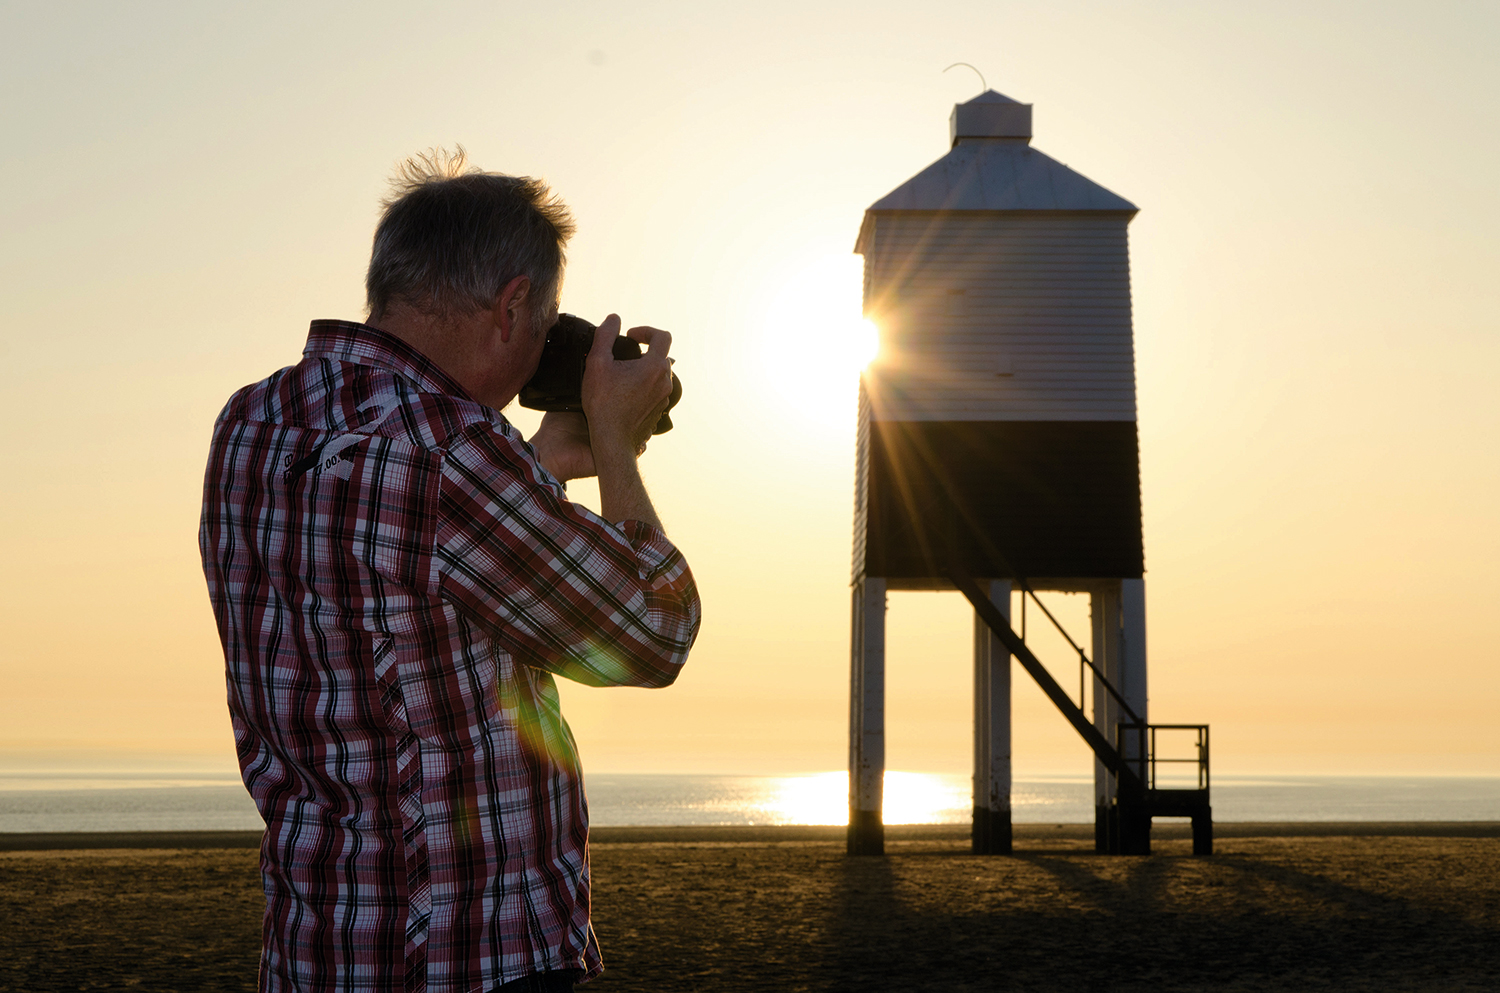
Exposure can be a problem with sunsets, so make sure you check images on the LCD as you take them. If the sun is high in the sky then it might be too intense in the shot, so try hiding it behind another object, such as this lighthouse. You still get rich sunset colors, but without the glare.
6. Shoot the sun
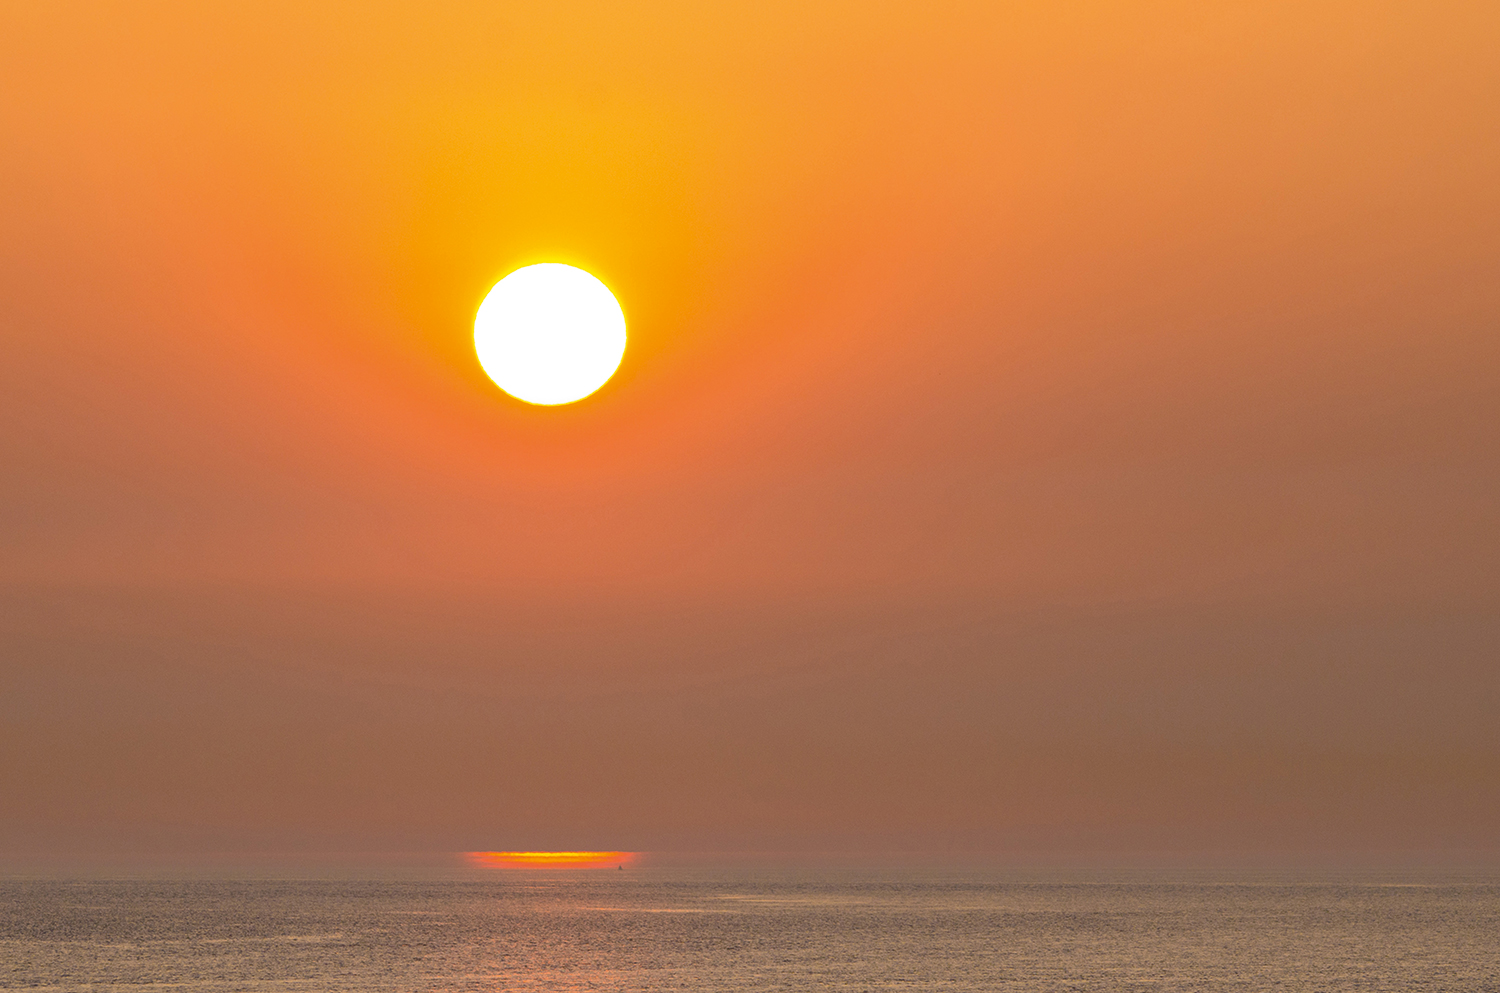
If you want to include the sun, wait until it’s much nearer the horizon, when it will be less intense. You’ll still need to keep a close eye on the exposure; in extreme conditions like this, your evaluative/matrix metering system might not react how you expect, so be prepared to adjust the exposure.
7. Metering modes
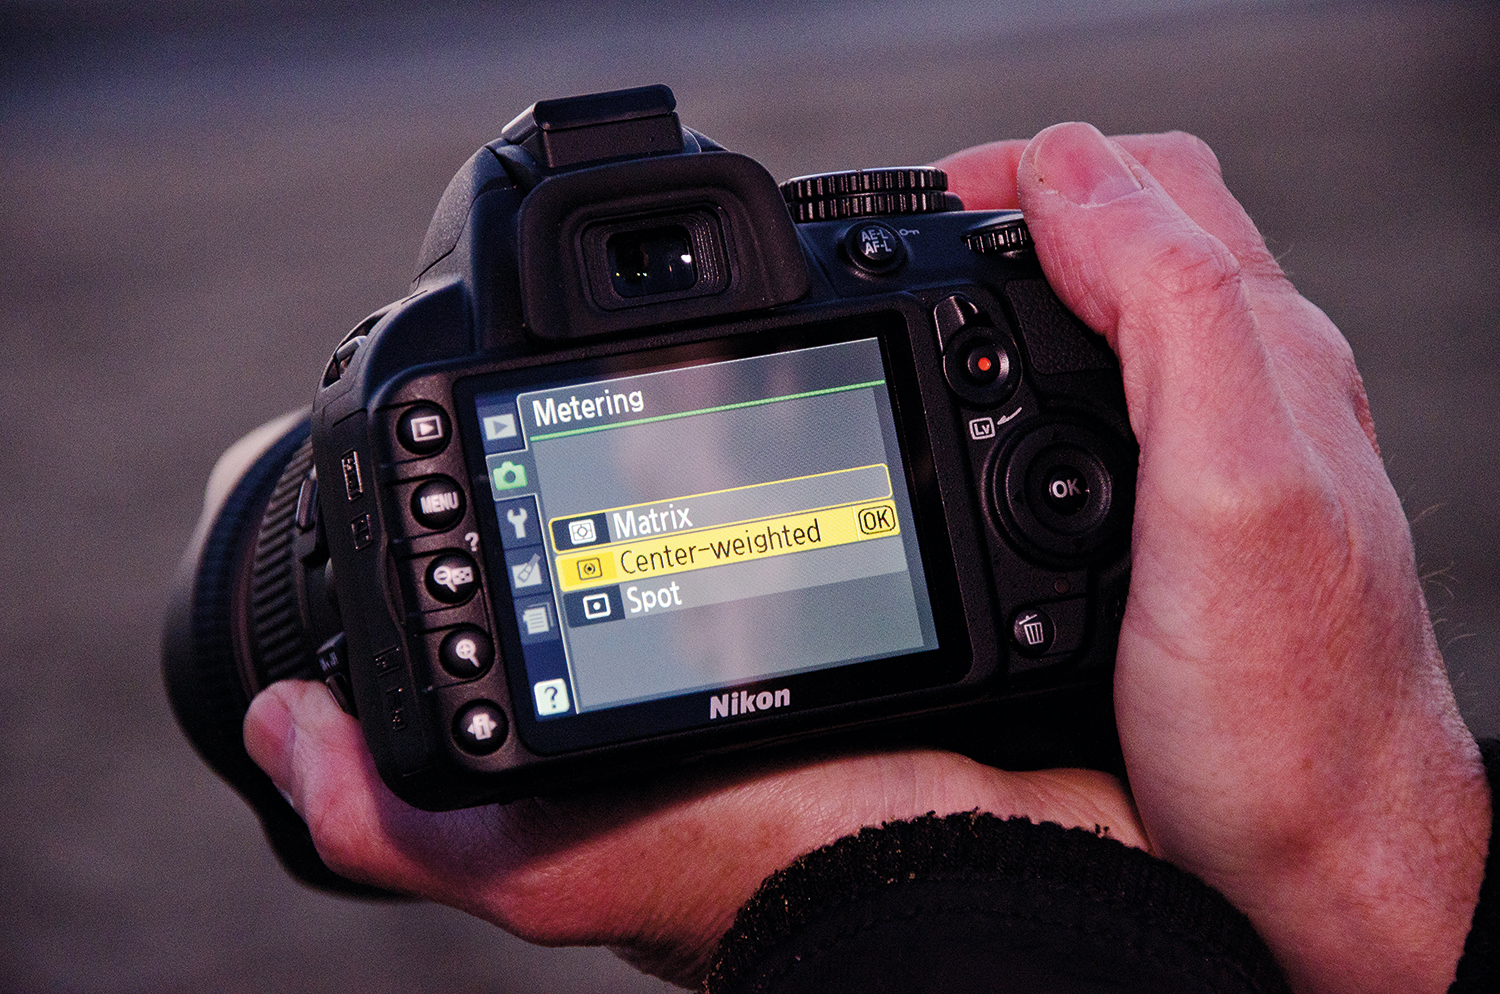
Try centre-weighted metering. It’s less sophisticated than matrix metering, and more easily influenced by very bright areas, but that’s what we want. It’s the color in the sky that’s key – foreground objects should be silhouettes. Try spot metering to take a reading from an area of sky.
8. Sunset calculators
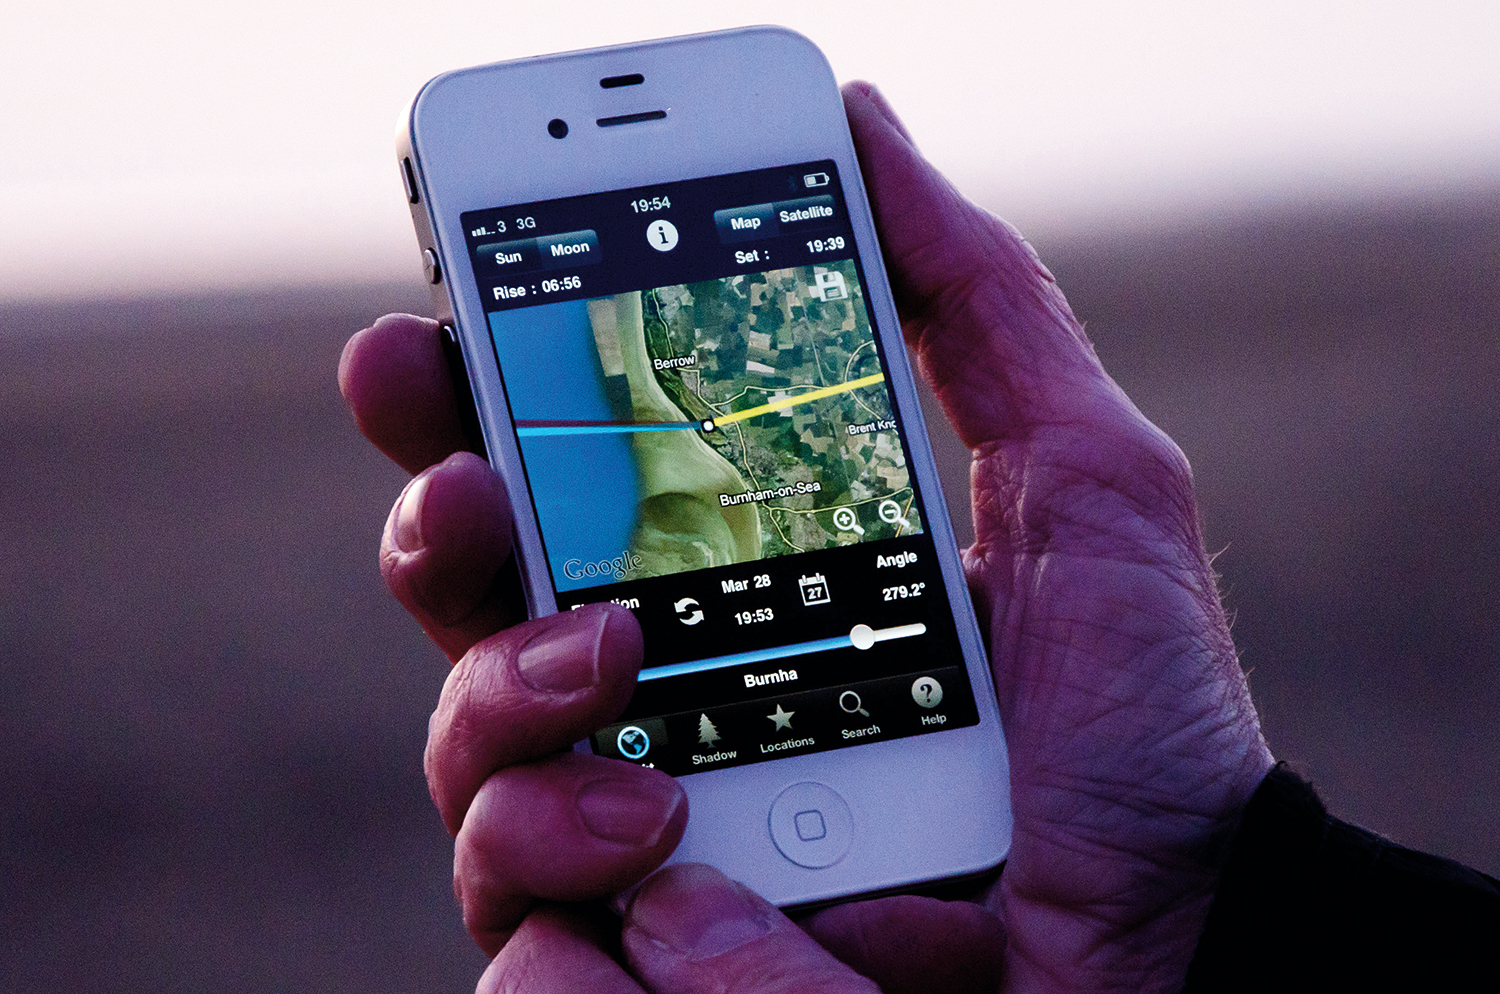
The secret with sunsets is to be in the right place at the right time. If you have a smartphone you can use a ‘sunset calculator’, which will tell you what time the sun will set, and at what angle, for any date and location. LightTrac – £8.99 / $8.99 for iOS and £3.99 / $4.99 for Android – is good. You’ll still need to arrive early, though, to prepare.
More videos:
147 photography techniques, tips and tricks for taking pictures of anything
How to use an ND graduated filter for stunning landscape photography
Depth of field and hyperfocal distance in landscape photography explained
Infrared photography using a filter: tips and techniques

Rod is an independent photography journalist and editor, and a long-standing Digital Camera World contributor, having previously worked as DCW's Group Reviews editor. Before that he has been technique editor on N-Photo, Head of Testing for the photography division and Camera Channel editor on TechRadar, as well as contributing to many other publications. He has been writing about photography technique, photo editing and digital cameras since they first appeared, and before that began his career writing about film photography. He has used and reviewed practically every interchangeable lens camera launched in the past 20 years, from entry-level DSLRs to medium format cameras, together with lenses, tripods, gimbals, light meters, camera bags and more. Rod has his own camera gear blog at fotovolo.com but also writes about photo-editing applications and techniques at lifeafterphotoshop.com
