To shoot striking portraits after sunset
Time: One hour
Skill level: Intermediate
Kit needed: DSLR, flashgun, light stand, light diffuser, CTO gel
Here, we’ll be following the process from part two of the How to use flash for your photography series, and add a few nifty tricks to make your portraits striking after sunset.
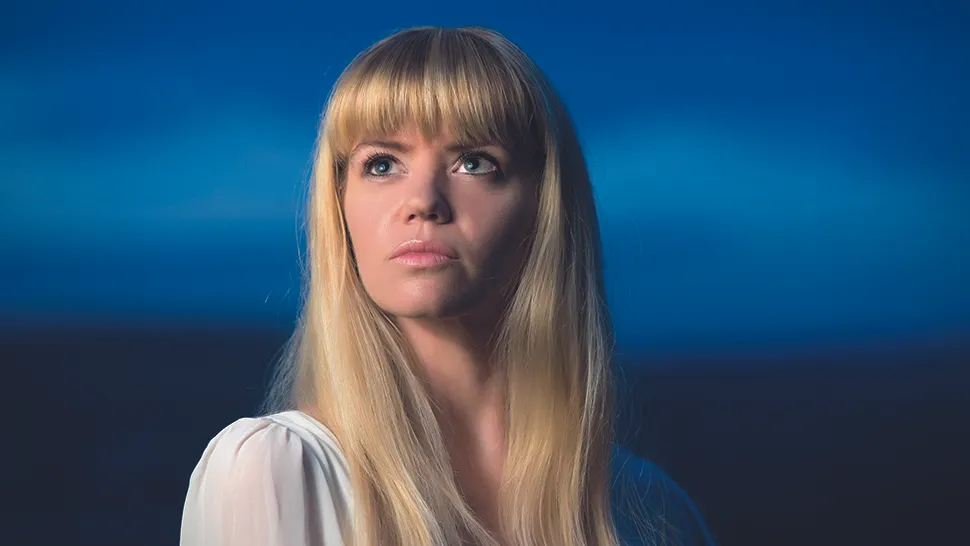
Everyone shoots during the golden hour, but stay out a little longer and you’ll see everything turn a deep blue. This is known as the ‘blue moment’.
If you turn your camera’s white balance to Tungsten, the effect becomes even more pronounced, but unfortunately it turns your model blue, too.
Lift their spirits (and their skin tone) with a colour temperature orange (CTO) gel over the flash. This will make their skin tone look natural while using Tungsten white balance.
• Get more photoshoot ideas
Let’s look at the specifics…
Step by step: The twilight zone

1. Shallow and late
Around 20 minutes after sunset, the sky will turn deep blue. Set your camera to its Aperture Priority mode and select a wide aperture. Now, take a shot of your model and look at the shutter speed, before switching to the manual mode and keying in the same settings. Reduce the shutter speed by one stop to underexpose the image.

Put the diffuser on the flashgun before you start. If you begin with a bare flash, take test shots and then attach the diffuser. The way the diffuser spreads the light will affect the flash power, and therefore, your exposure.
2. Colour Temperature Awesome
Put the colour temperature orange (CTO) gel on the flashgun and fix it to a light stand. Fix on a diffuser of some sort – we opted for a beauty dish. Trigger the flash with wireless flash triggers, which sit on both your camera’s hot shoe and underneath the flashgun.

3. Give it some height
Position the flash about a foot above the model’s head. Use the broad lighting technique: whichever side of the model’s face you can see most of through the viewfinder, place the flash to that side of the camera. So, if you can see more of the left-hand-side, for example, place it to the left of the camera. If they’re straight on, it doesn’t matter which side you pick.

We used an aperture of f/2.8 to maximise light input and reduce the possibility of camera shake at slower shutter speeds.
4. Bright eyes
With the flashgun in manual mode, set it to around 1/16th power to expose the model’s face. By underexposing the background, and correctly exposing the model with a flash stronger than the ambient light, the model becomes the brightest part of the scene.

5. Balance those whites
Put the CTO gel over the flash head and set your camera’s white balance to Tungsten. This change in white balance will make the backdrop even bluer, while the warm-coloured CTO gel will ensure the model has natural skin tone, relative to the white balance.

6. Check for clipping
Take another shot. Check the exposure of the face and look at the histogram to ensure nothing is clipped (bunched up at one end or the other of the histogram). If your model is too bright, as in our first shot, decrease the flash power. Increase it if they’re too dark.
Read more: How to use flash for your photography - Part 1
Missed the earlier parts of this feature?

