How to cheat at photography: create realistic lens flares in Photoshop
Love the lens flare look? Cheat at photography and create the effect in Photoshop with filters and gradient tricks
Watch video: Cheat at photography – add lens flare in Photoshop
Natural lens flare occurs when sunlight – or another source of strong, hard light – directly shines on the front element of a camera lens. We photographers are often at pains to prevent flare, either by using a lens hood, or shielding the front of the lens with a hand.
However, the slight softness, specular highlights and color shifts that are characteristic of lens flare can be great for enhancing the atmosphere of a scene. You don’t necessarily need to wait until the sun is in the perfect position in order to create flares, though; with a few simple skills in Photoshop CC, we can make our own gorgeous, realistic, flare effects.
Our starting point is the Lens Flare filter in Photoshop. It’s not bad for a simple effect, but the flare it creates tends to look too clean and sharp and it gives a generic result. That being said, it can still be useful as a starting point for further edits, as we can go on to augment the filter to make it look more natural.
The lens flare filter creates some interesting highlights and spots of flare, but it’s not good at shifting the color and mood of our scene. For this we can use a Gradient Fill layer. This enables us to tint large swathes of our image with a circular blend of colors, which is something that often occurs with natural lens flare. Once done, we can enhance the sunset feel with a Profile change in the Camera Raw filter.
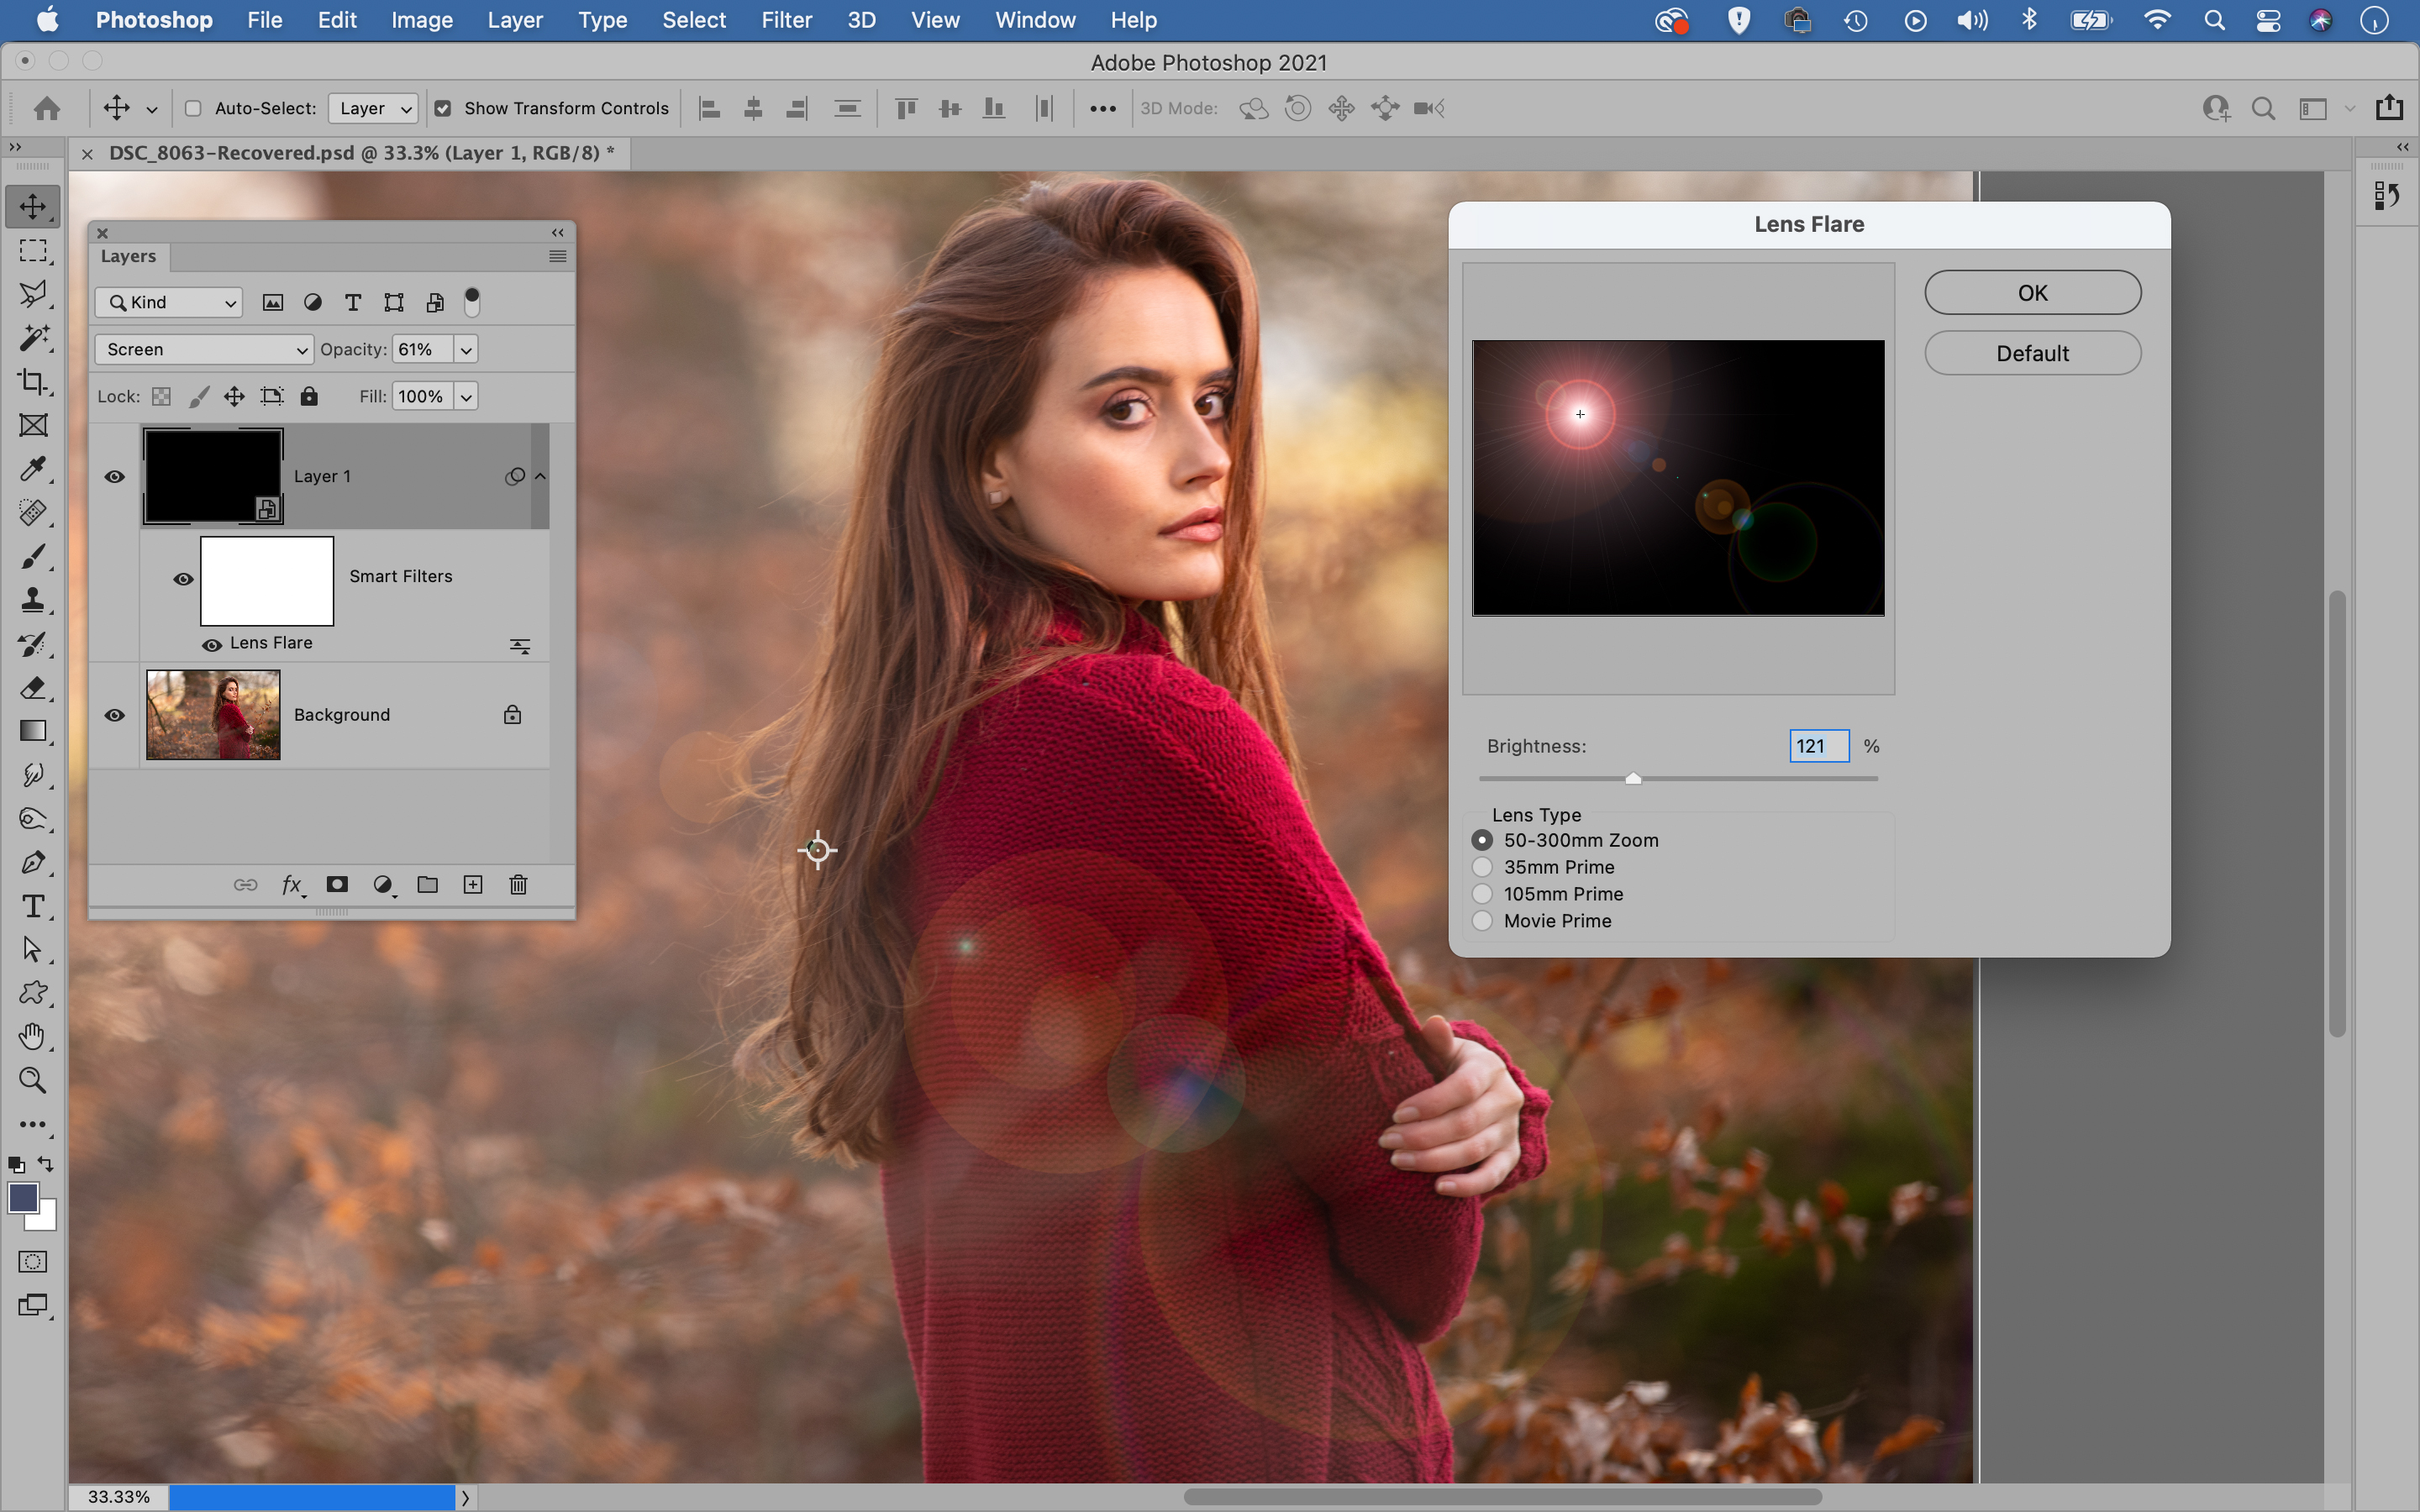
01 Use the Lens Flare Filter
Open an image into Photoshop CC and click the New Layer icon in the Layers panel. Go to Edit > Fill, set Contents: Black and hit OK. Right-click the layer and choose ‘Convert to Smart Object’, then go to Filter > Render > Lens Flare. Click the preview box to choose a position for the flare, hit OK.
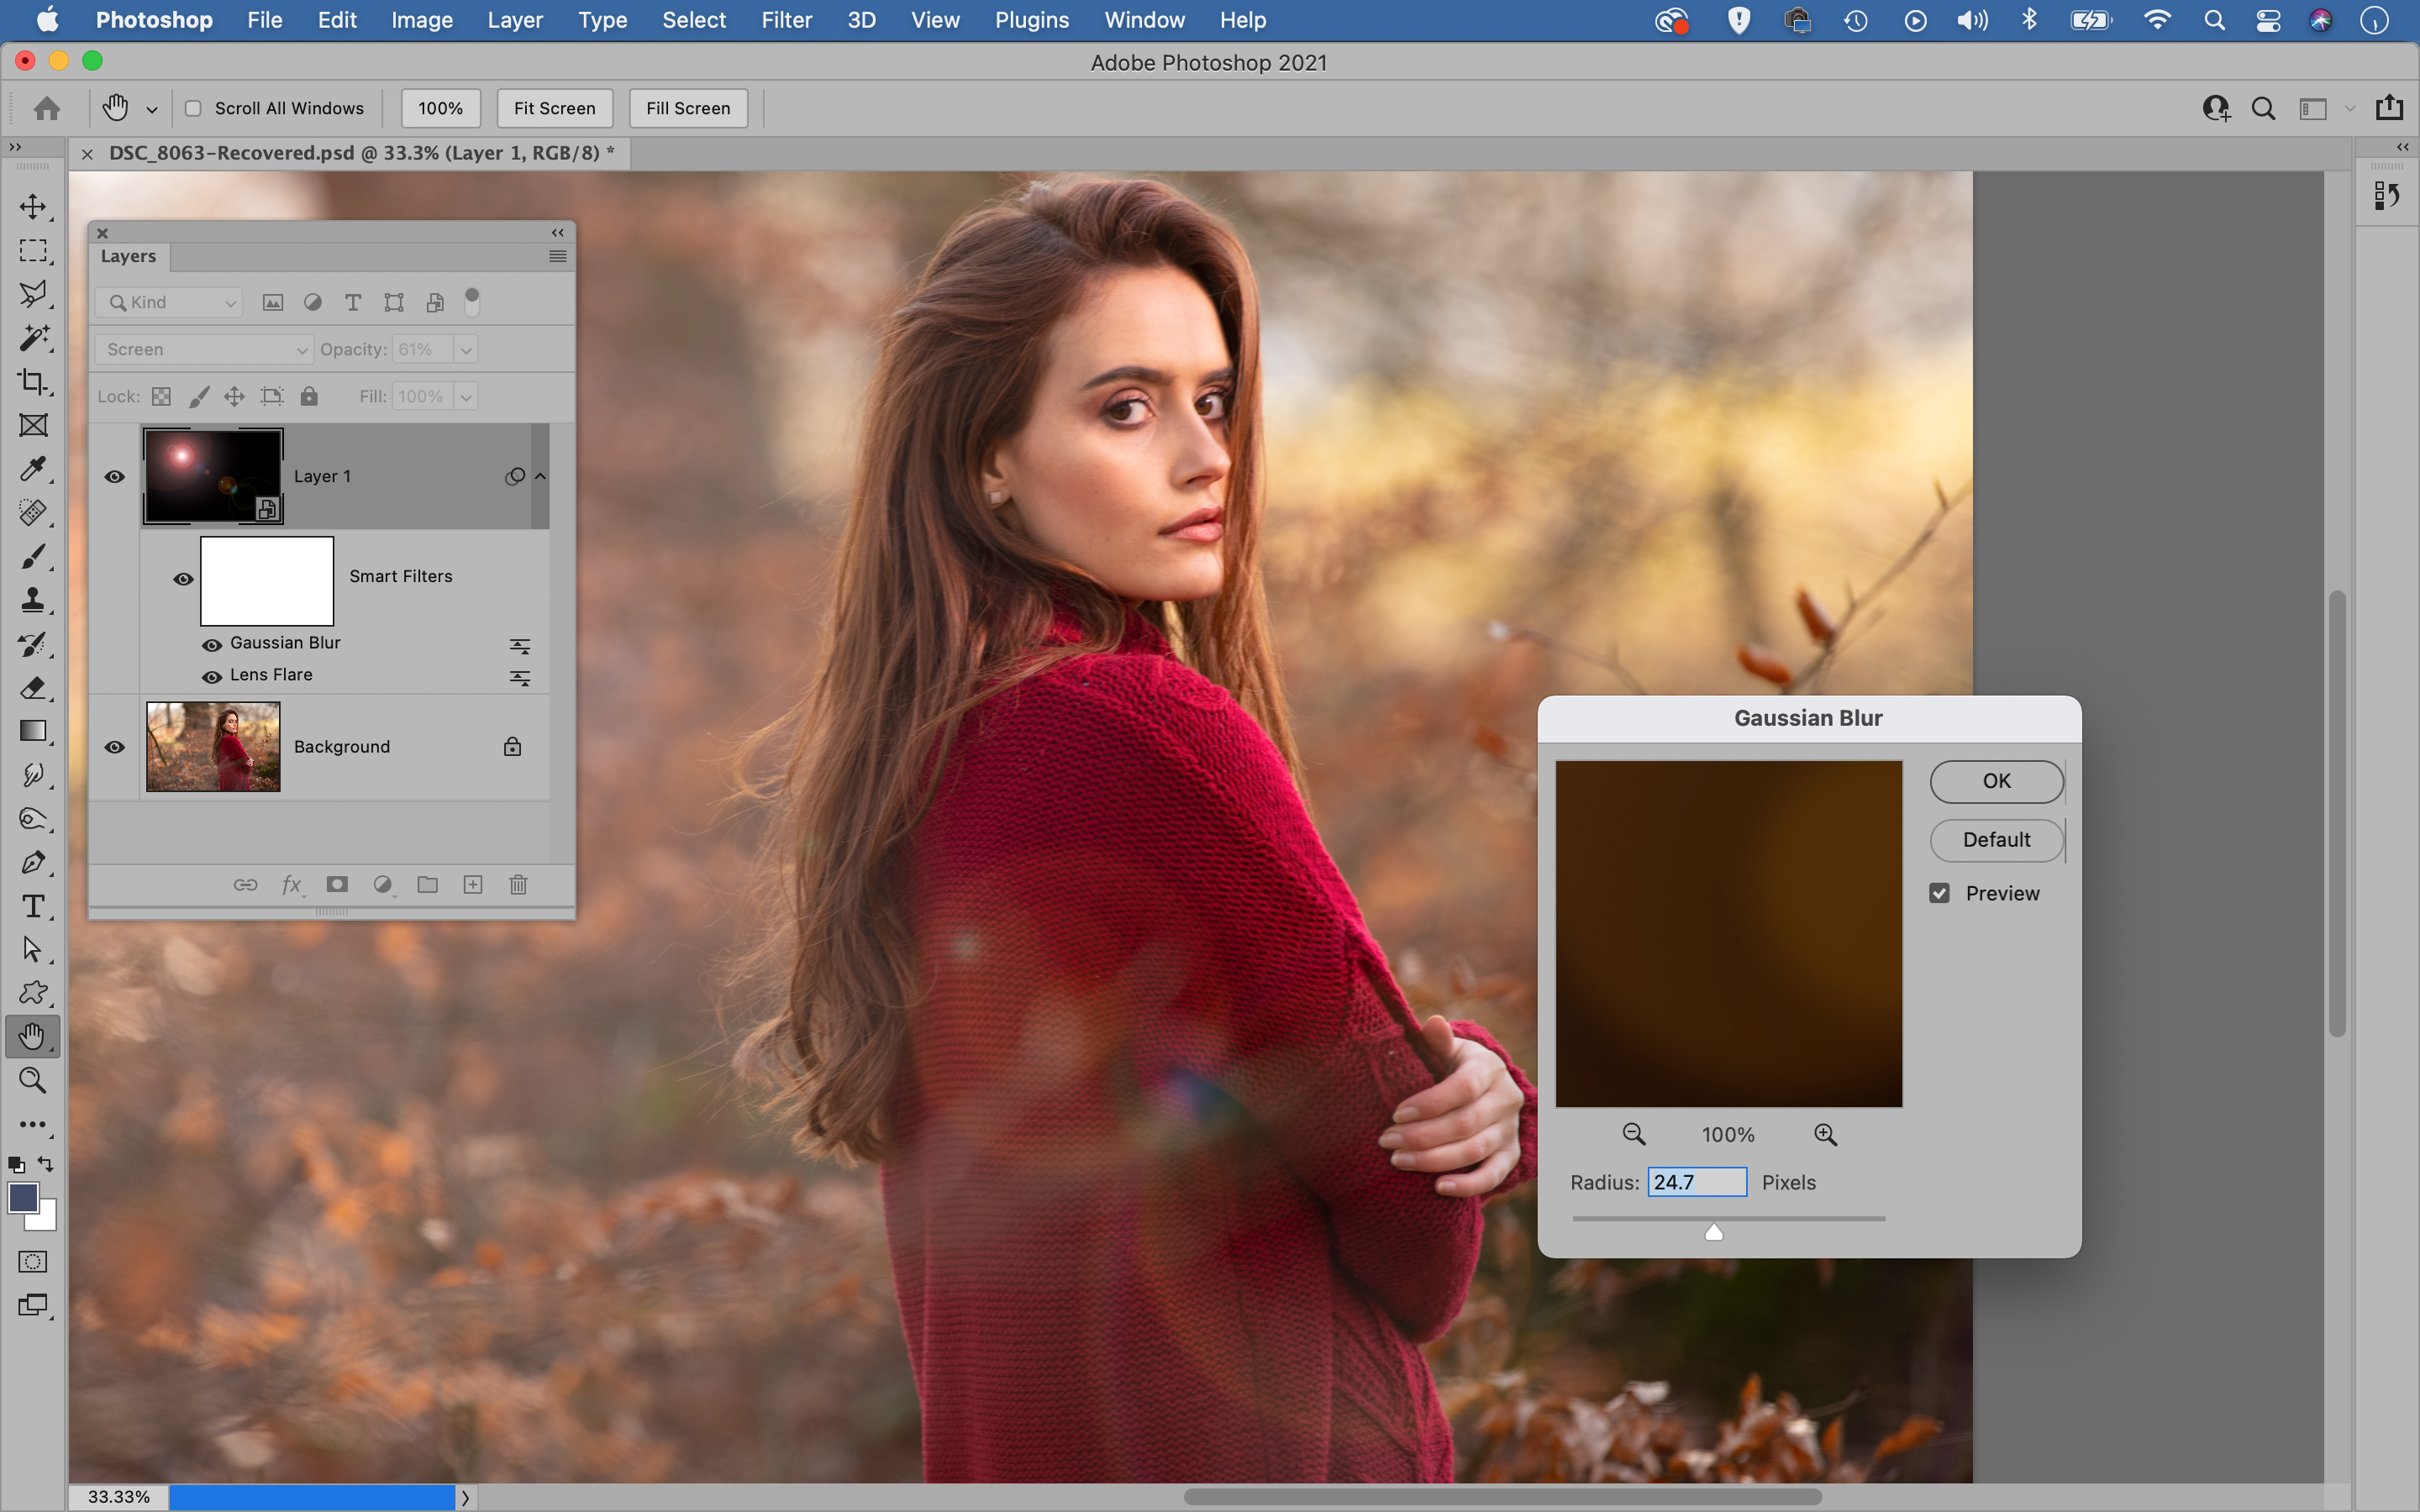
02 Blur the effect
Click the Blending Mode option in the Layers panel and set it to Screen. If you want to adjust the position, type or strength of the flare, double-click the smart filter and try again. Go to Filter > Blur > Gaussian Blur. Blur by a few pixels to soften the edges of the flare.
The best camera deals, reviews, product advice, and unmissable photography news, direct to your inbox!
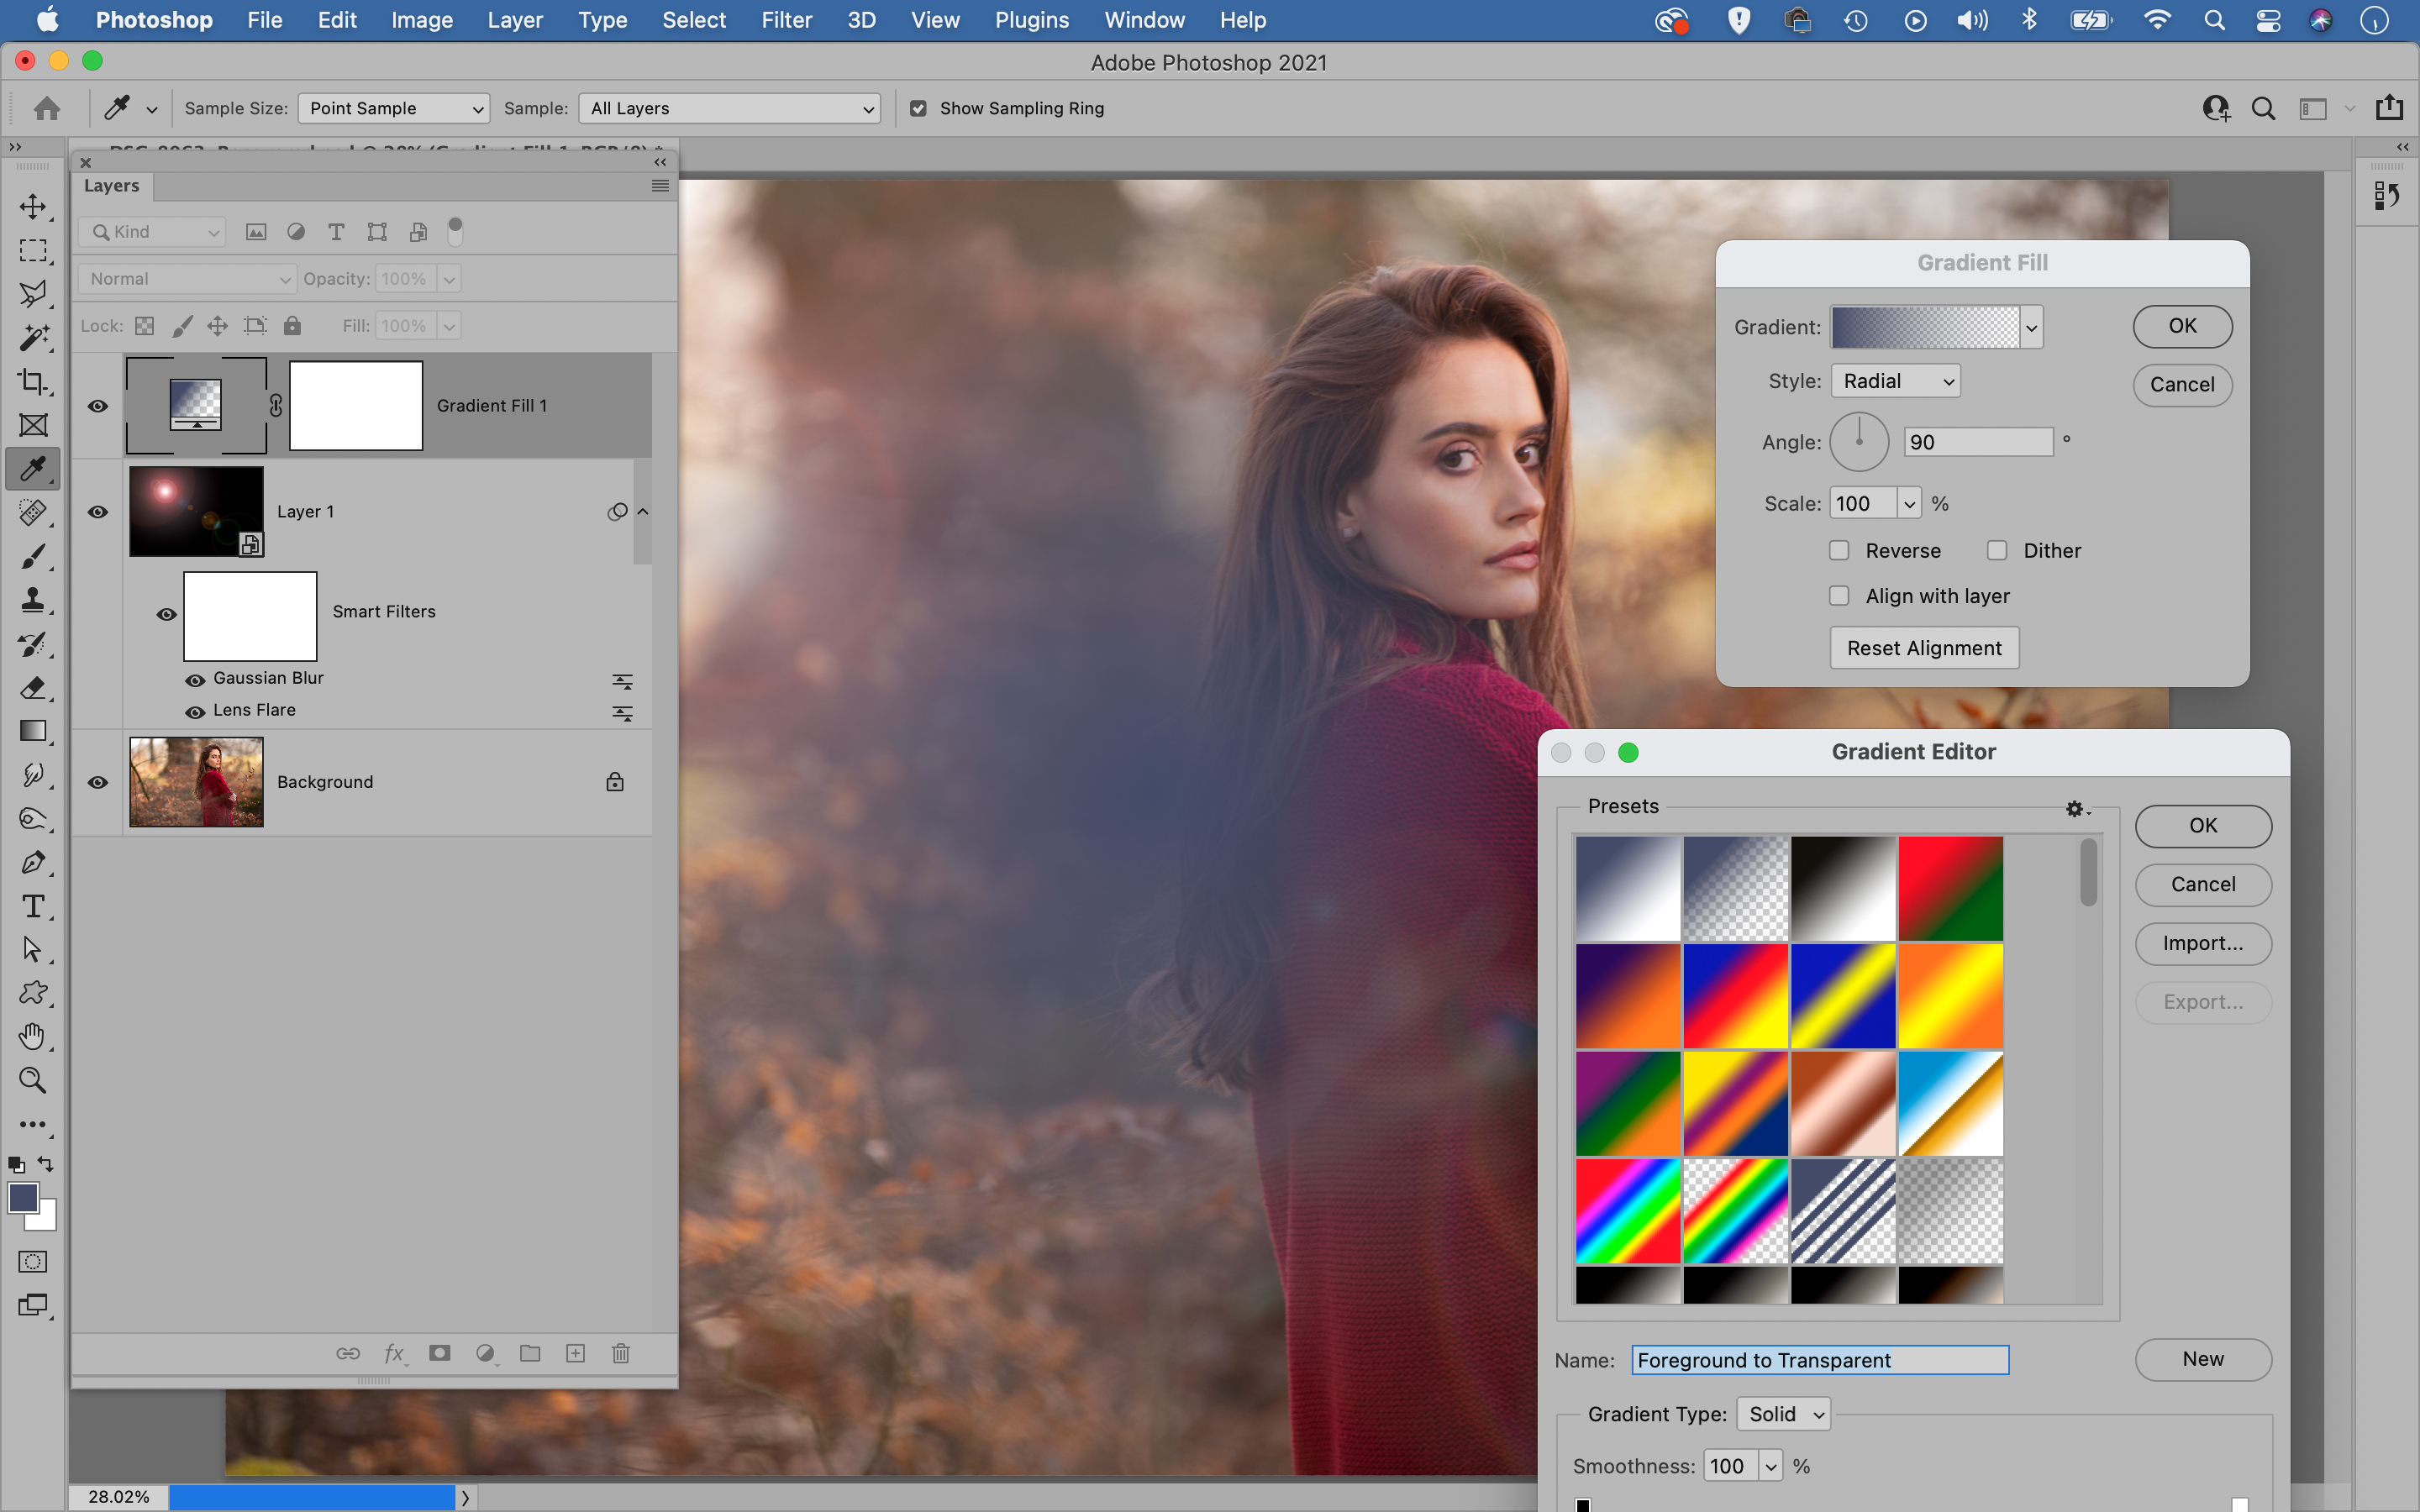
03 Add a gradient layer
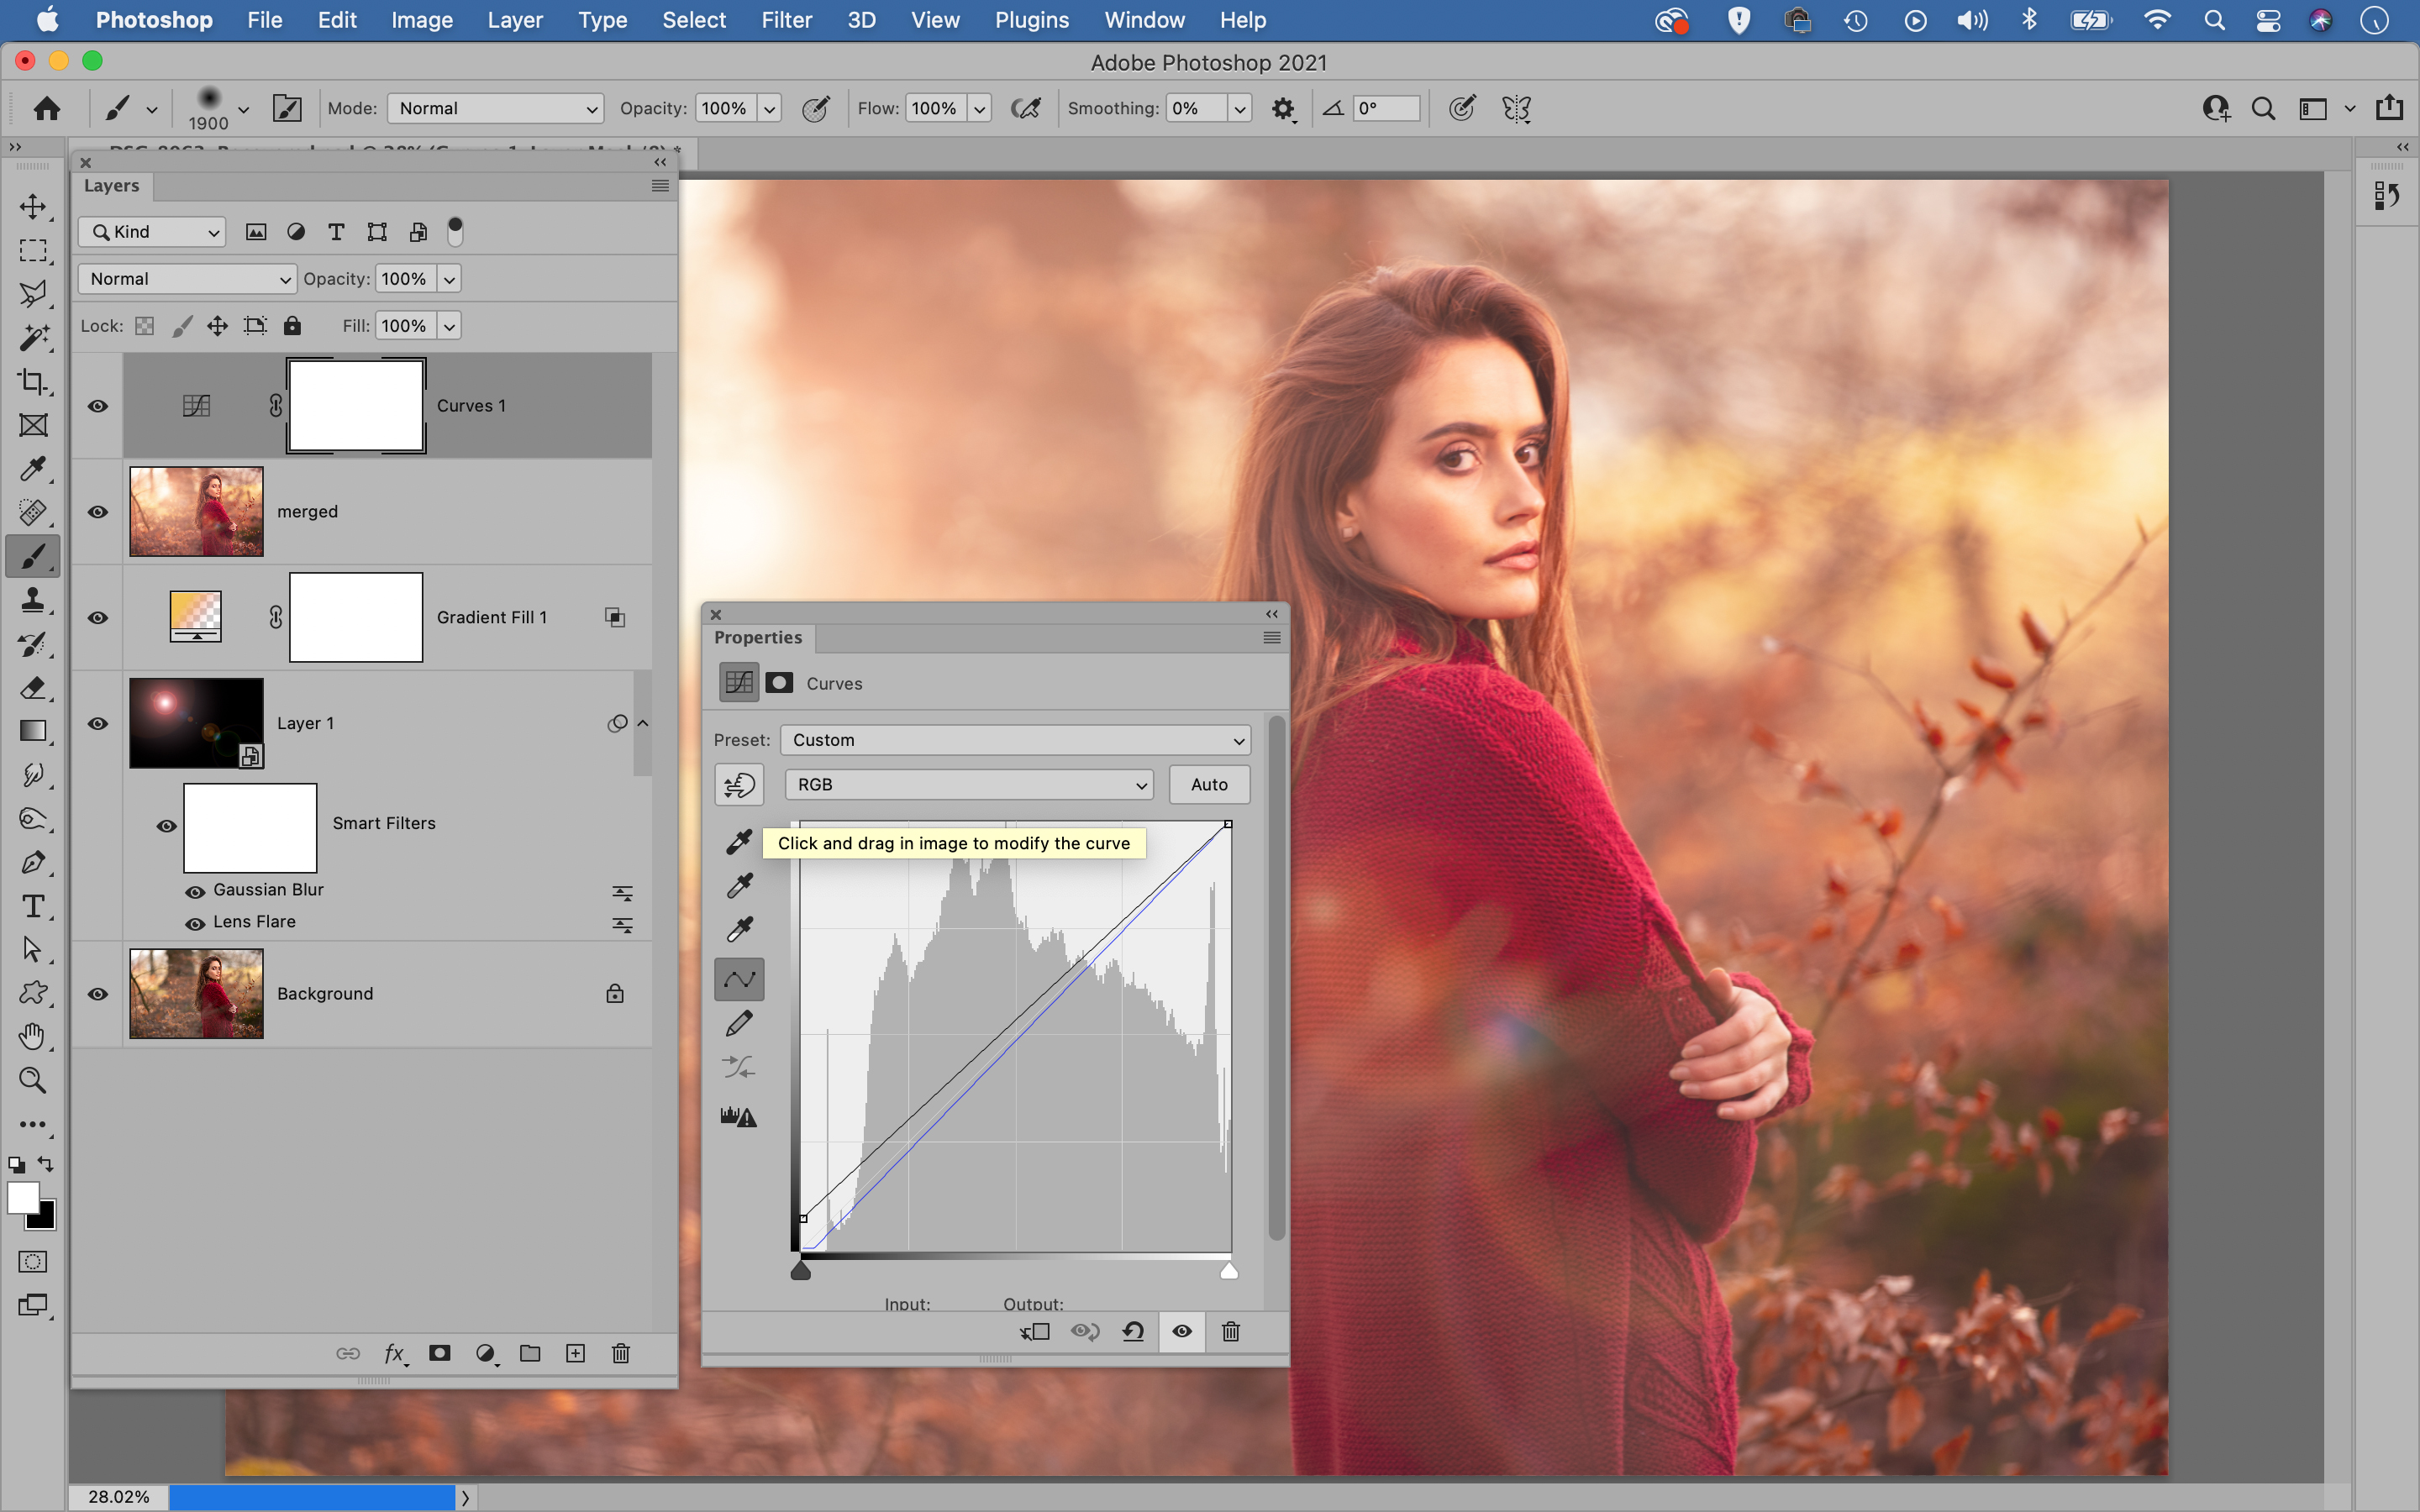
Click the Adjustment Layer icon in the Layers panel and choose Gradient. Set the Style to Radial and uncheck the ‘Align with Layer’ box. Click the little color preview box to open the Gradient Editor and choose the ‘Foreground to Transparent’ preset.
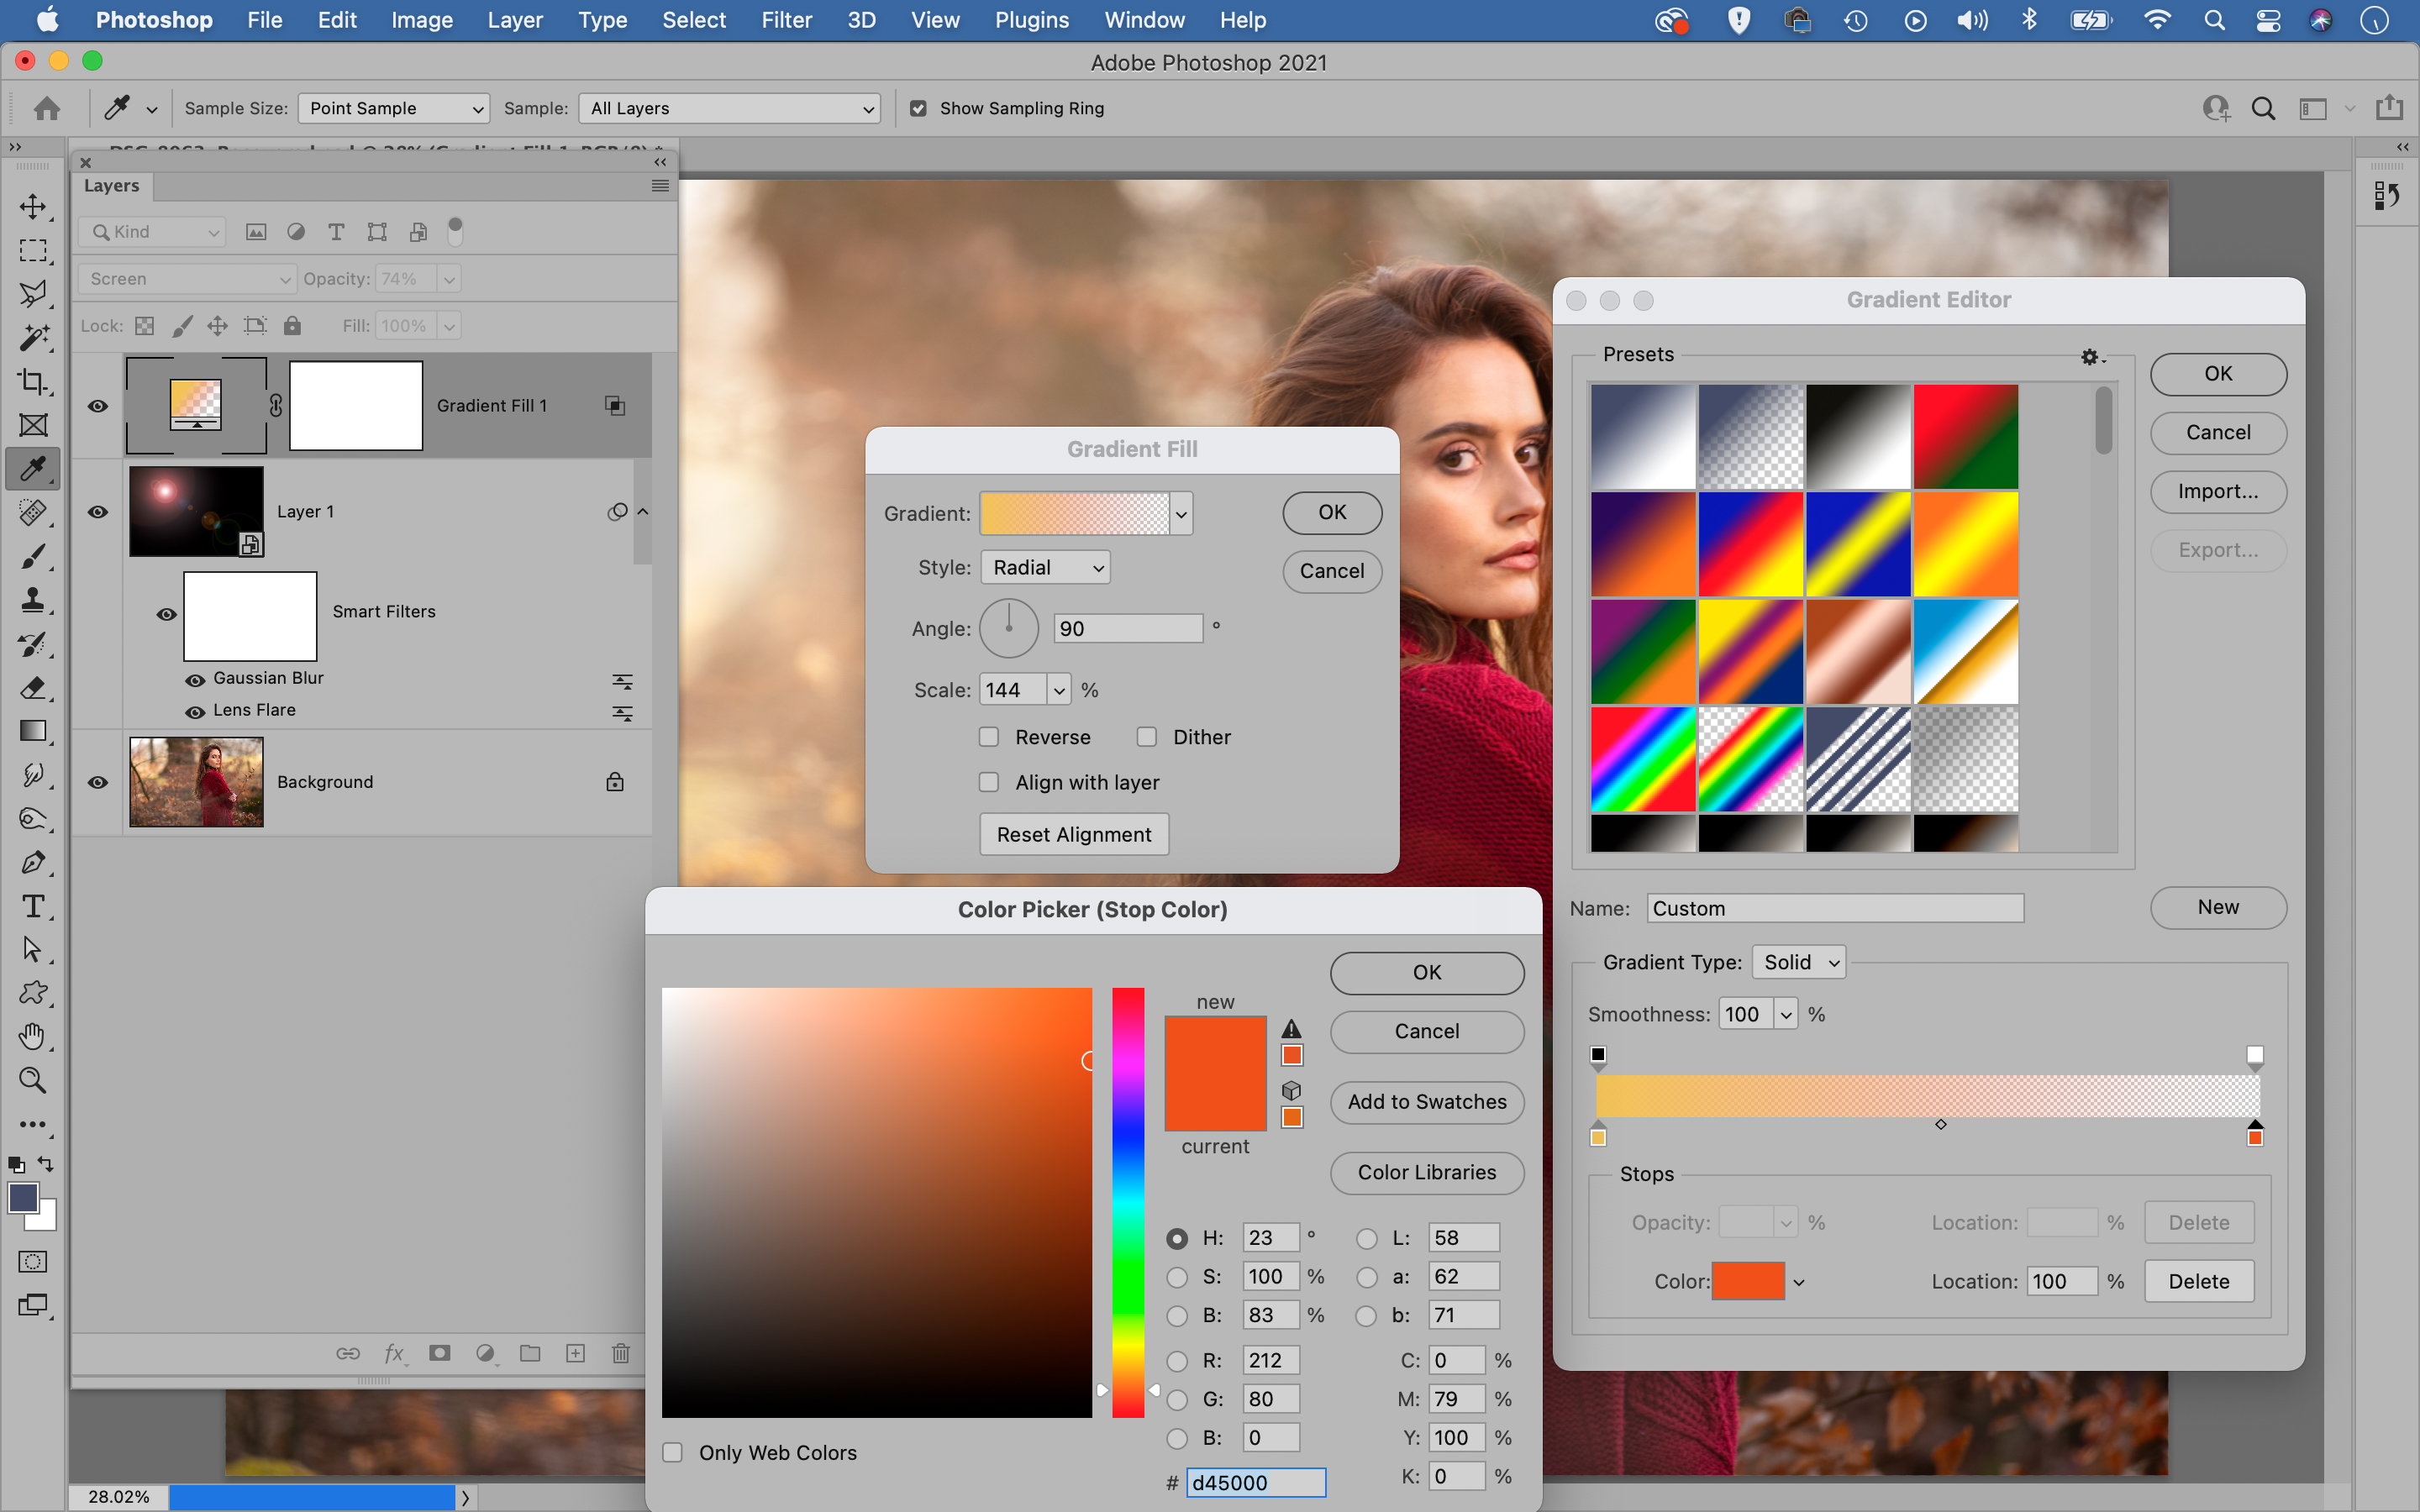
04 Change the blend
Double-click the bottom left color box below the gradient to choose a color. We’ve used a mustard yellow. Next, double-click the box on the right side and choose an orange color for the highlights. Drag the center of the circle to match the lens flare filter.
05 Apply a profile
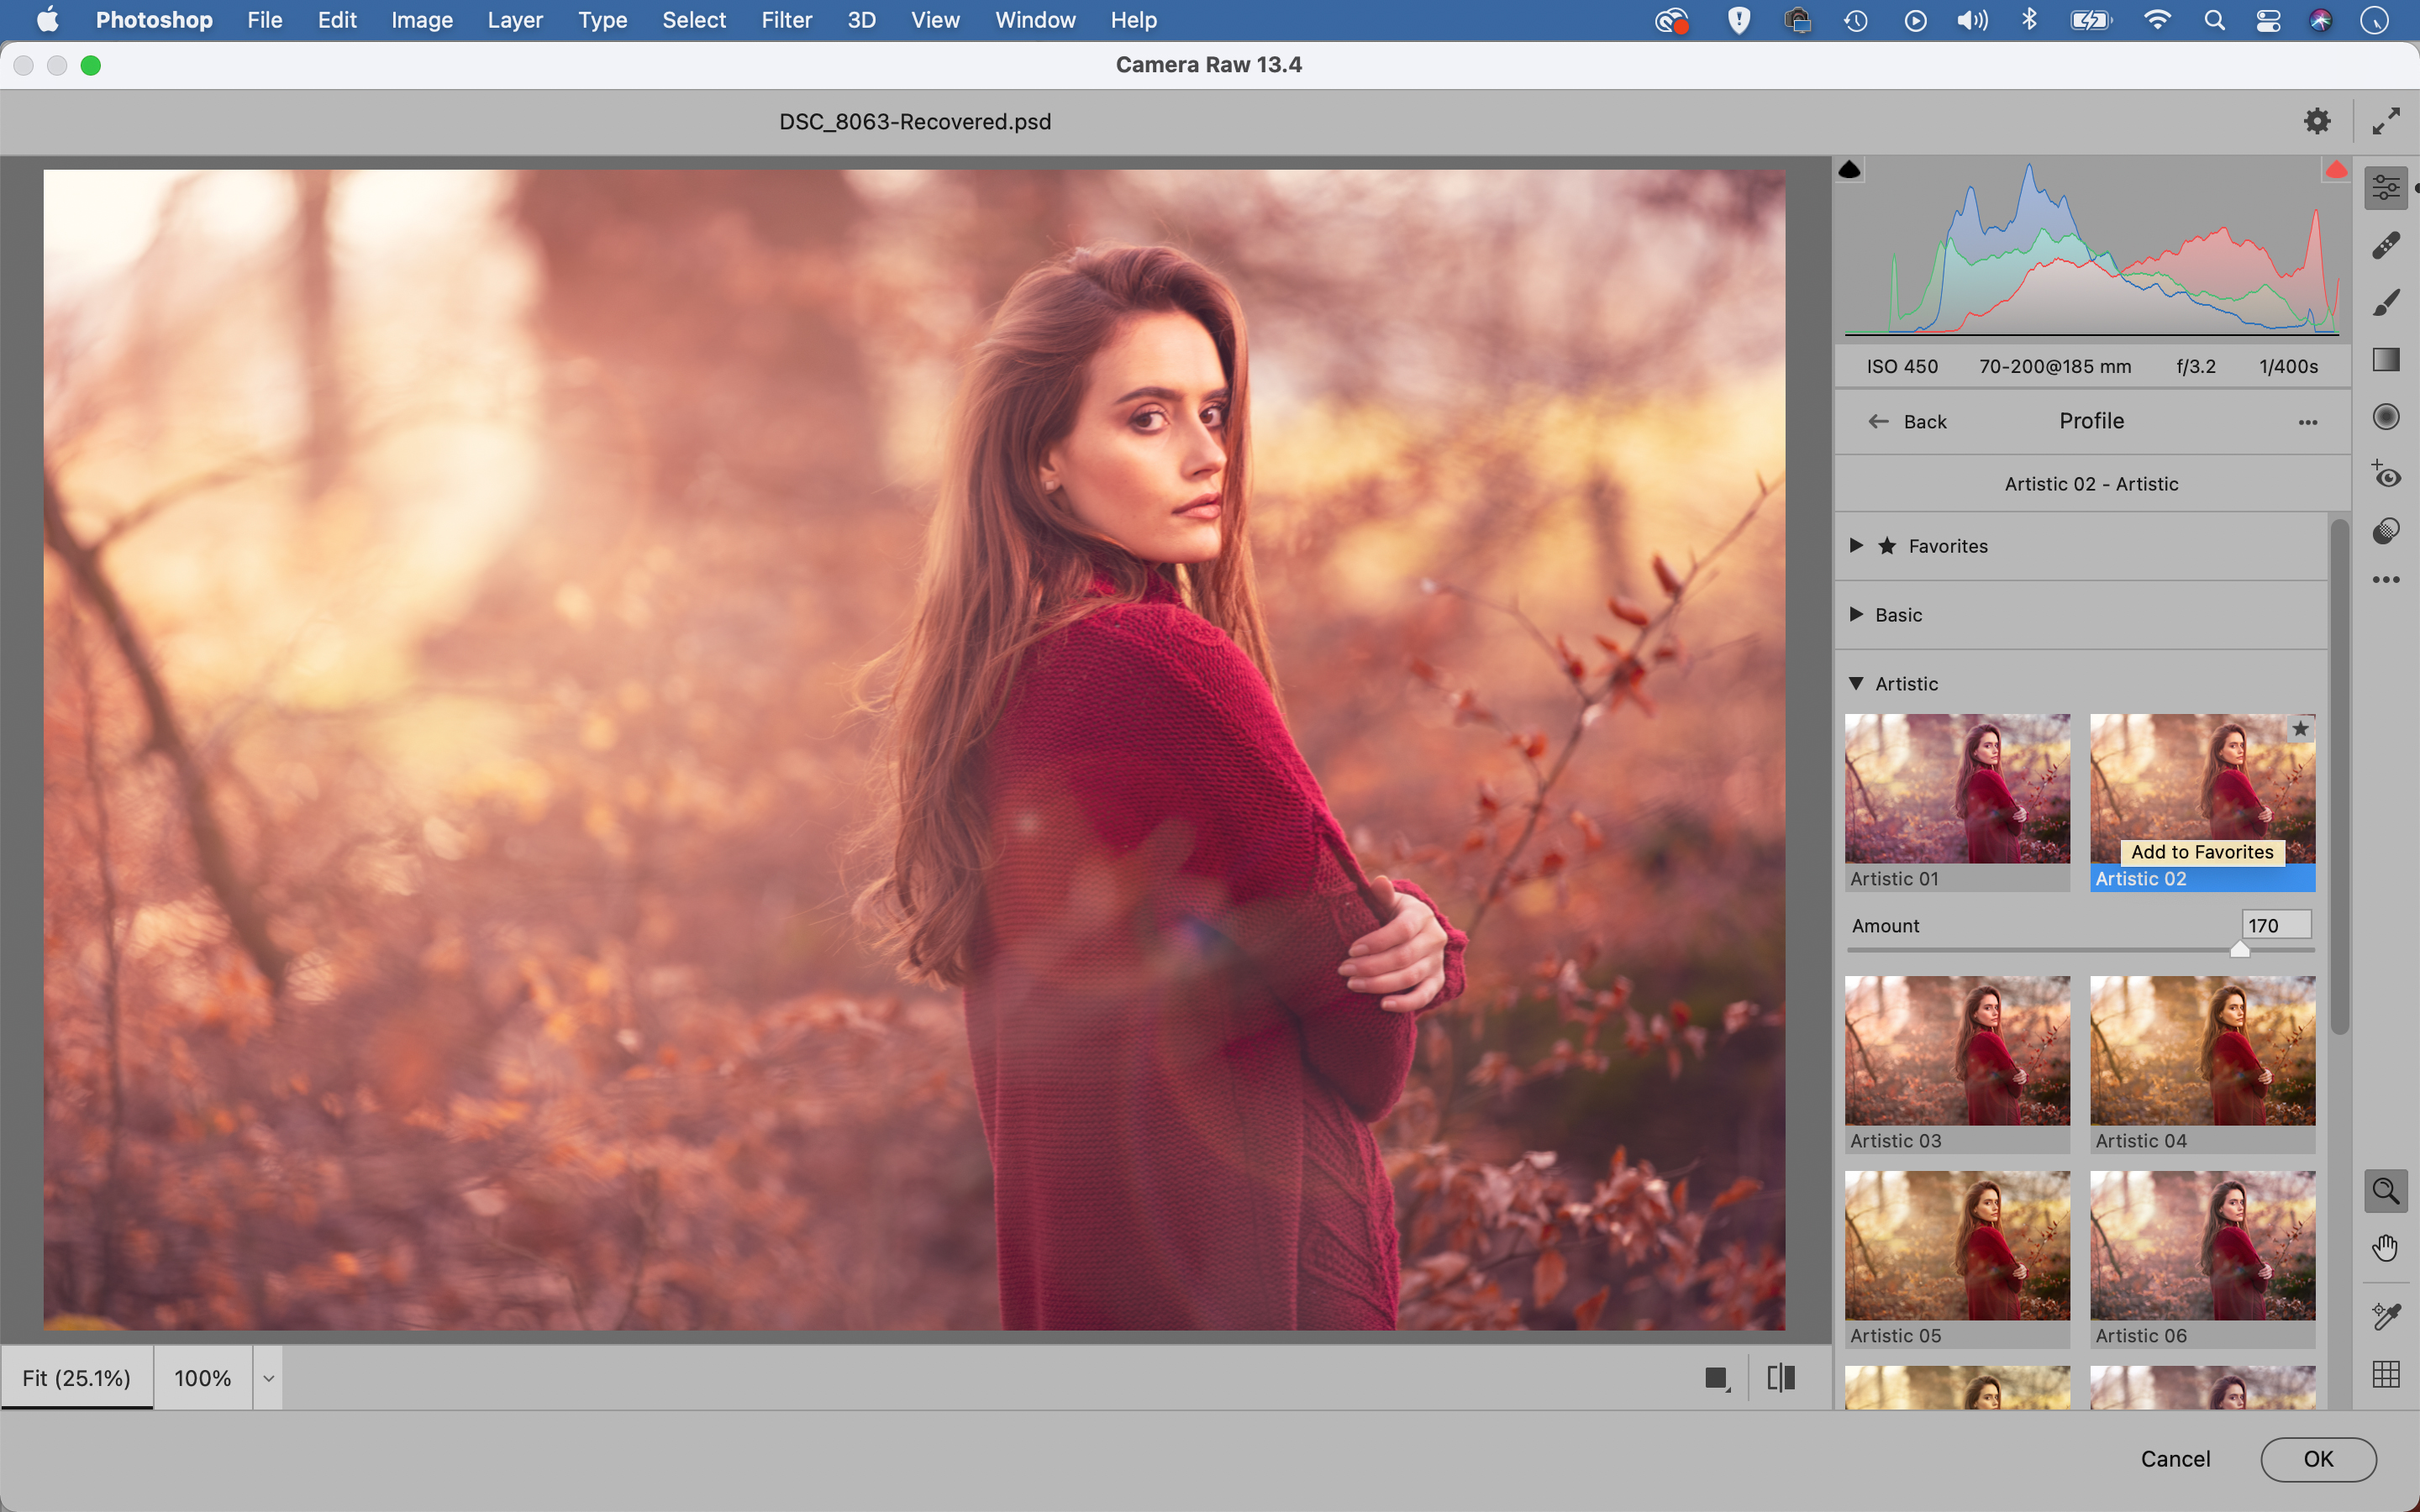
Set the blend mode of the gradient layer to Screen and adjust the opacity if needed. Next, press Cmd/Ctrl + Shift + Alt + E to merge a copy of all the layers, then go to Filter>Camera Raw Filter. Click the Profile Browser icon at top right and choose a color effect. Hit OK.
06 Fade the blacks
Real lens flare tends to leave shots looking washed out, and we can achieve a similar faded effect with Curves. Click the ‘Create Adjustment Layer’ icon at the bottom of the Layers panel and pick Curves. Drag the bottom left point of the line upwards to fade the blacks.
PhotoPlus: The Canon Magazine is the world's only monthly newsstand title that's 100% devoted to Canon, so you can be sure the magazine is completely relevant to your system.
Read more:
The best photo editing software: image editors for novices through to pros
The best photo-editing laptops: top laptops for photographers
10 best online photography courses – from beginner guides to masterclasses
The lead technique writer on Digital Camera Magazine, PhotoPlus: The Canon Magazine and N-Photo: The Nikon Magazine, James is a fantastic general practice photographer with an enviable array of skills across every genre of photography.
Whether it's flash photography techniques like stroboscopic portraits, astrophotography projects like photographing the Northern Lights, or turning sound into art by making paint dance on a set of speakers, James' tutorials and projects are as creative as they are enjoyable.
He's also a wizard at the dark arts of Photoshop, Lightroom and Affinity Photo, and is capable of some genuine black magic in the digital darkroom, making him one of the leading authorities on photo editing software and techniques.
