Take incredible insect photos with cheap extension tubes
Learn how to take incredibly detailed close up insect photos cheaply, using extension tubes and focus stacking skills
Watch video: Shoot super close-ups
There are all kinds of objects and details that look incredible in close-up, but insects are perhaps the most beguiling. Ultra-macro photography enables us to blow their tiny features up to a tremendous scale, revealing alien-like appendages, vibrant colors and incredible details.
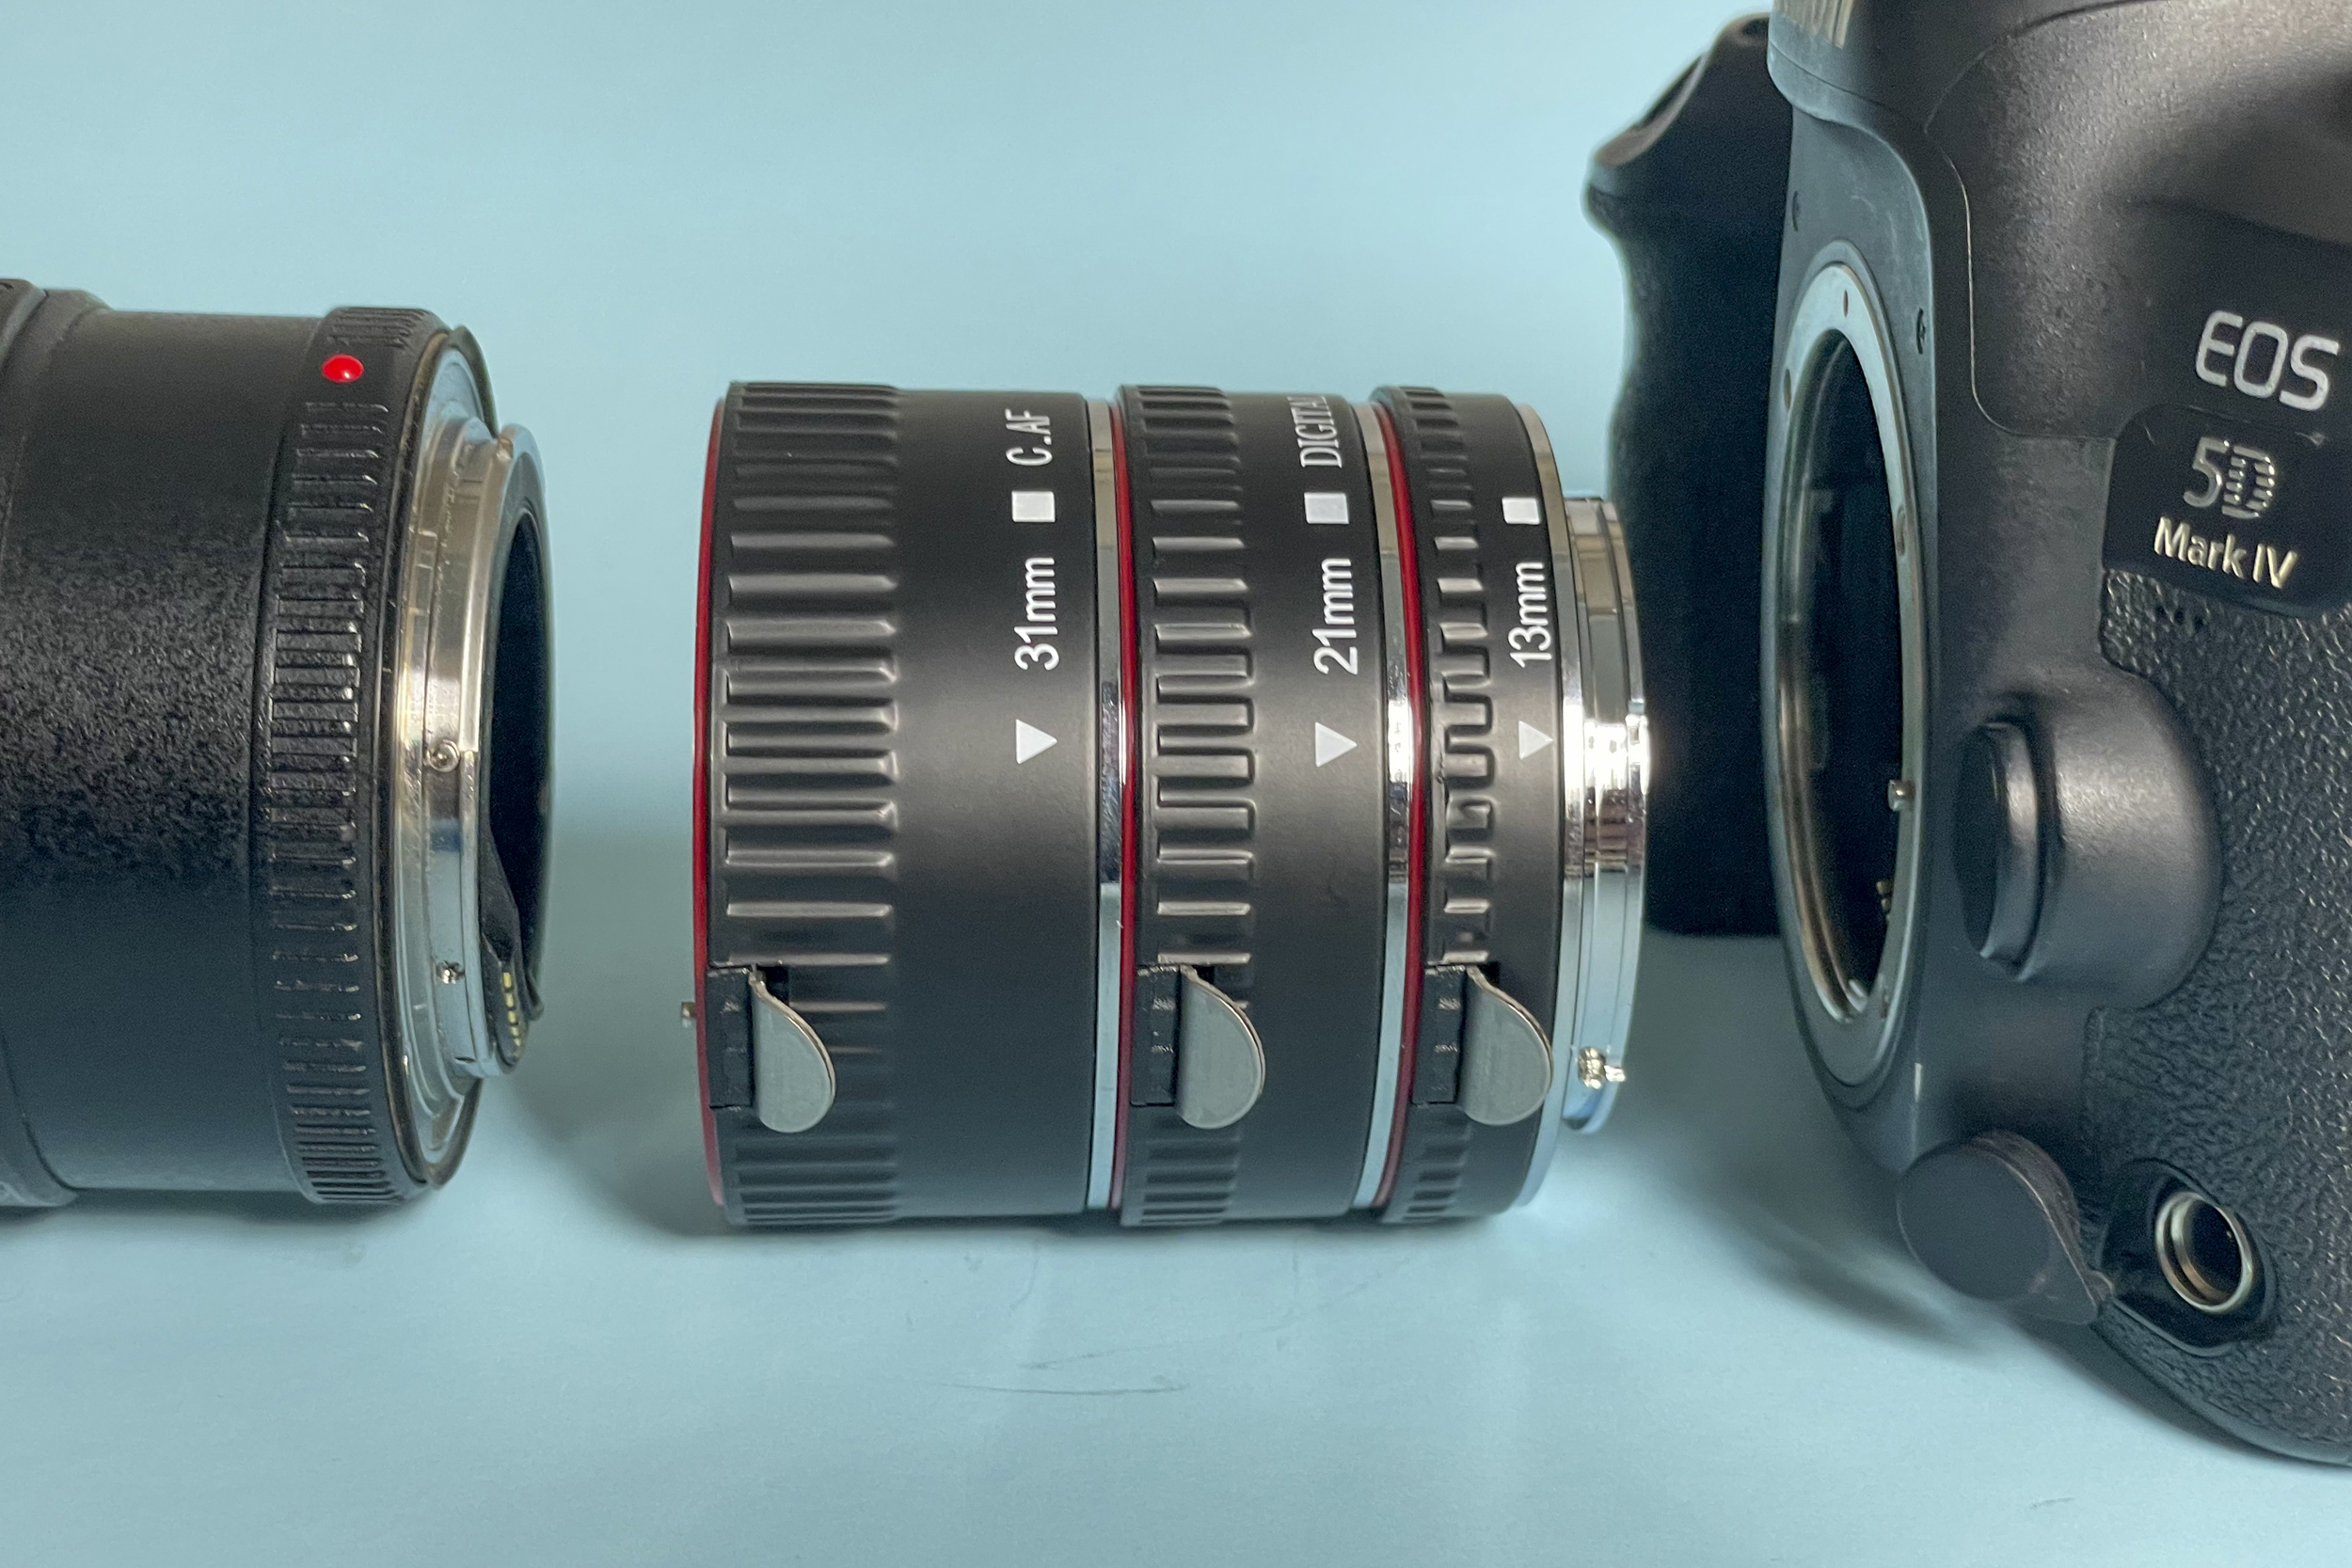
How do we get close enough to see these details, though? You can easily spend a lot of money on macro photography. From the best macro lenses to bellows and motorized focus rails, close-up photography can get expensive very quickly. However, for those looking to dip their toes in the wonderful world of ultra-macro photography, there is a cheaper option: extension tubes.
• These are the best extension tubes
These enable you to convert any lens for macro use by allowing for closer minimum focusing distances – and if you already own a macro lens then extension tubes can take you beyond a life-size 1:1 view of your tiny subjects.
However, macro photography throws up a particular set of photographic challenges, and the trickiest of all is depth of field; the smaller and closer the subject, the more limited (shallower) the depth of field becomes.
With macro lenses we are often left with just a tiny sliver of focus that may not even stretch to a millimeter, and this is amplified even more when using extension tubes. So if we want to capture the fine detail across the insect, we need to shoot for a focus stack.
The best camera deals, reviews, product advice, and unmissable photography news, direct to your inbox!
In this project we’ll show you how it’s done, and explore other key technical challenges of macro like lighting, camera settings and focusing.
01 Sourcing bugs
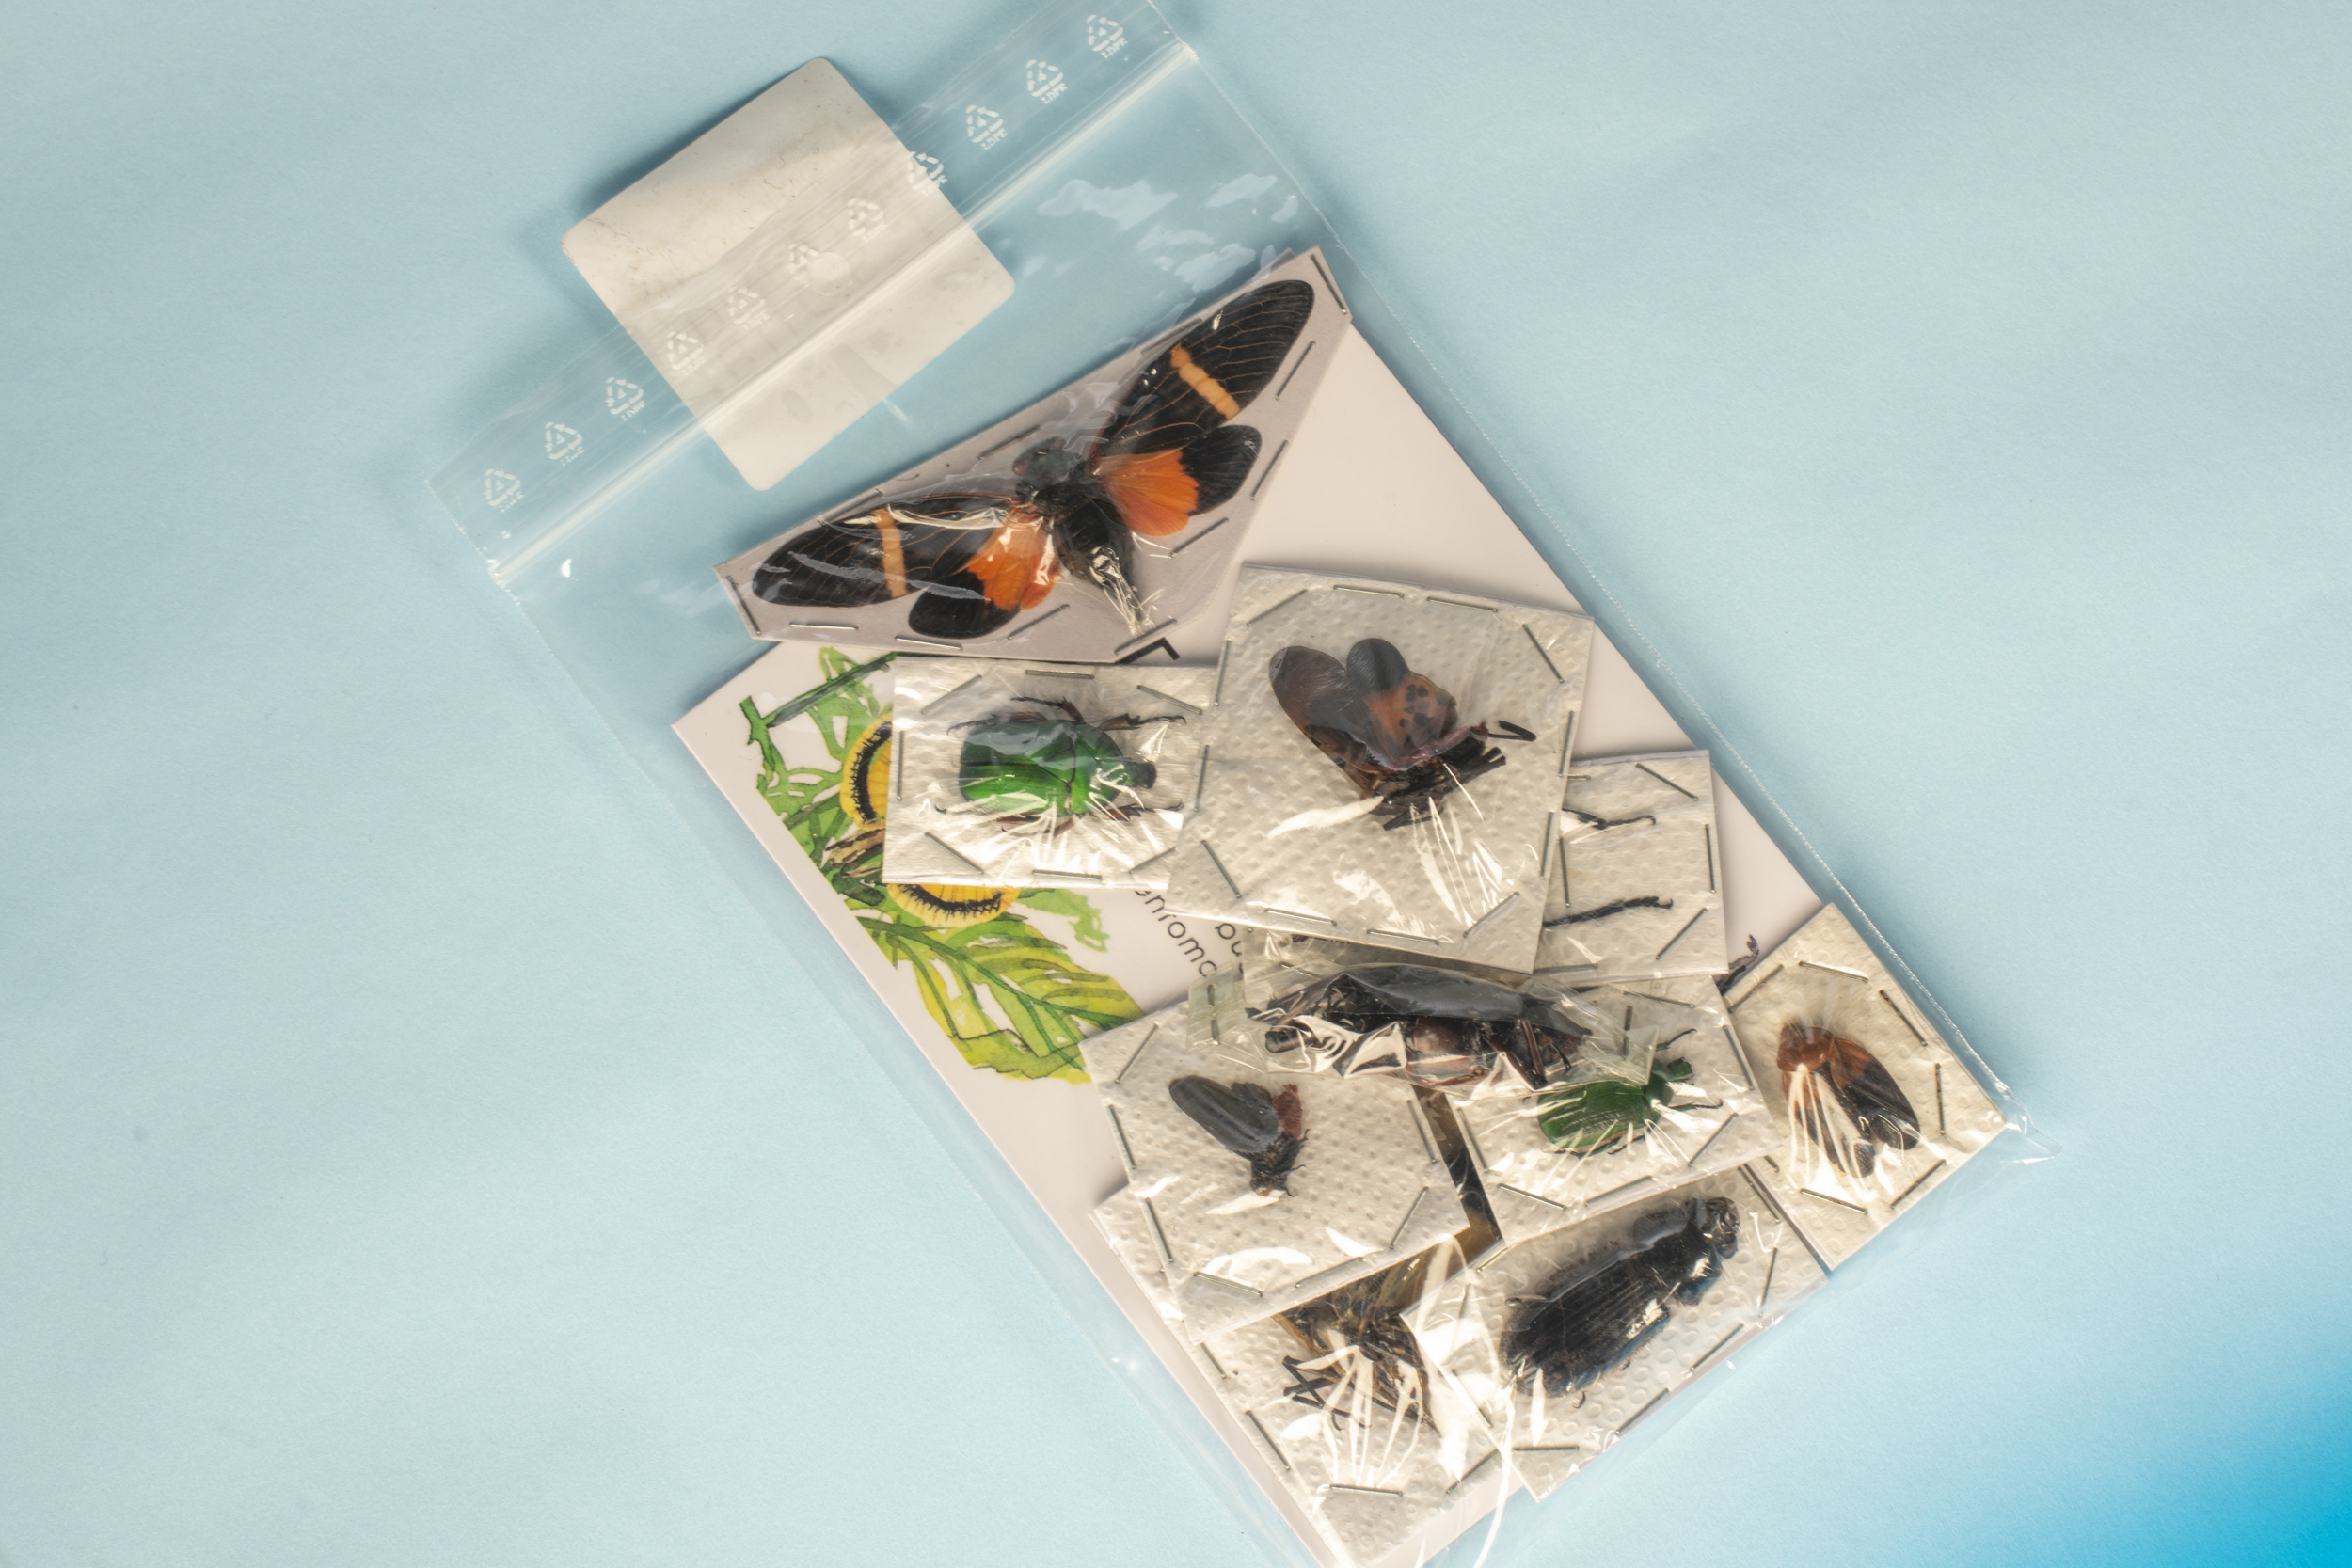
You can find bugs everywhere. Turn over stones in the garden, go for a walk or search windows for dead flies. However, for more exotic species you can also buy bugs. Look for ethical sources that specialize in insects. We purchased a set from art-butterflies.com.
02 Clean the insect
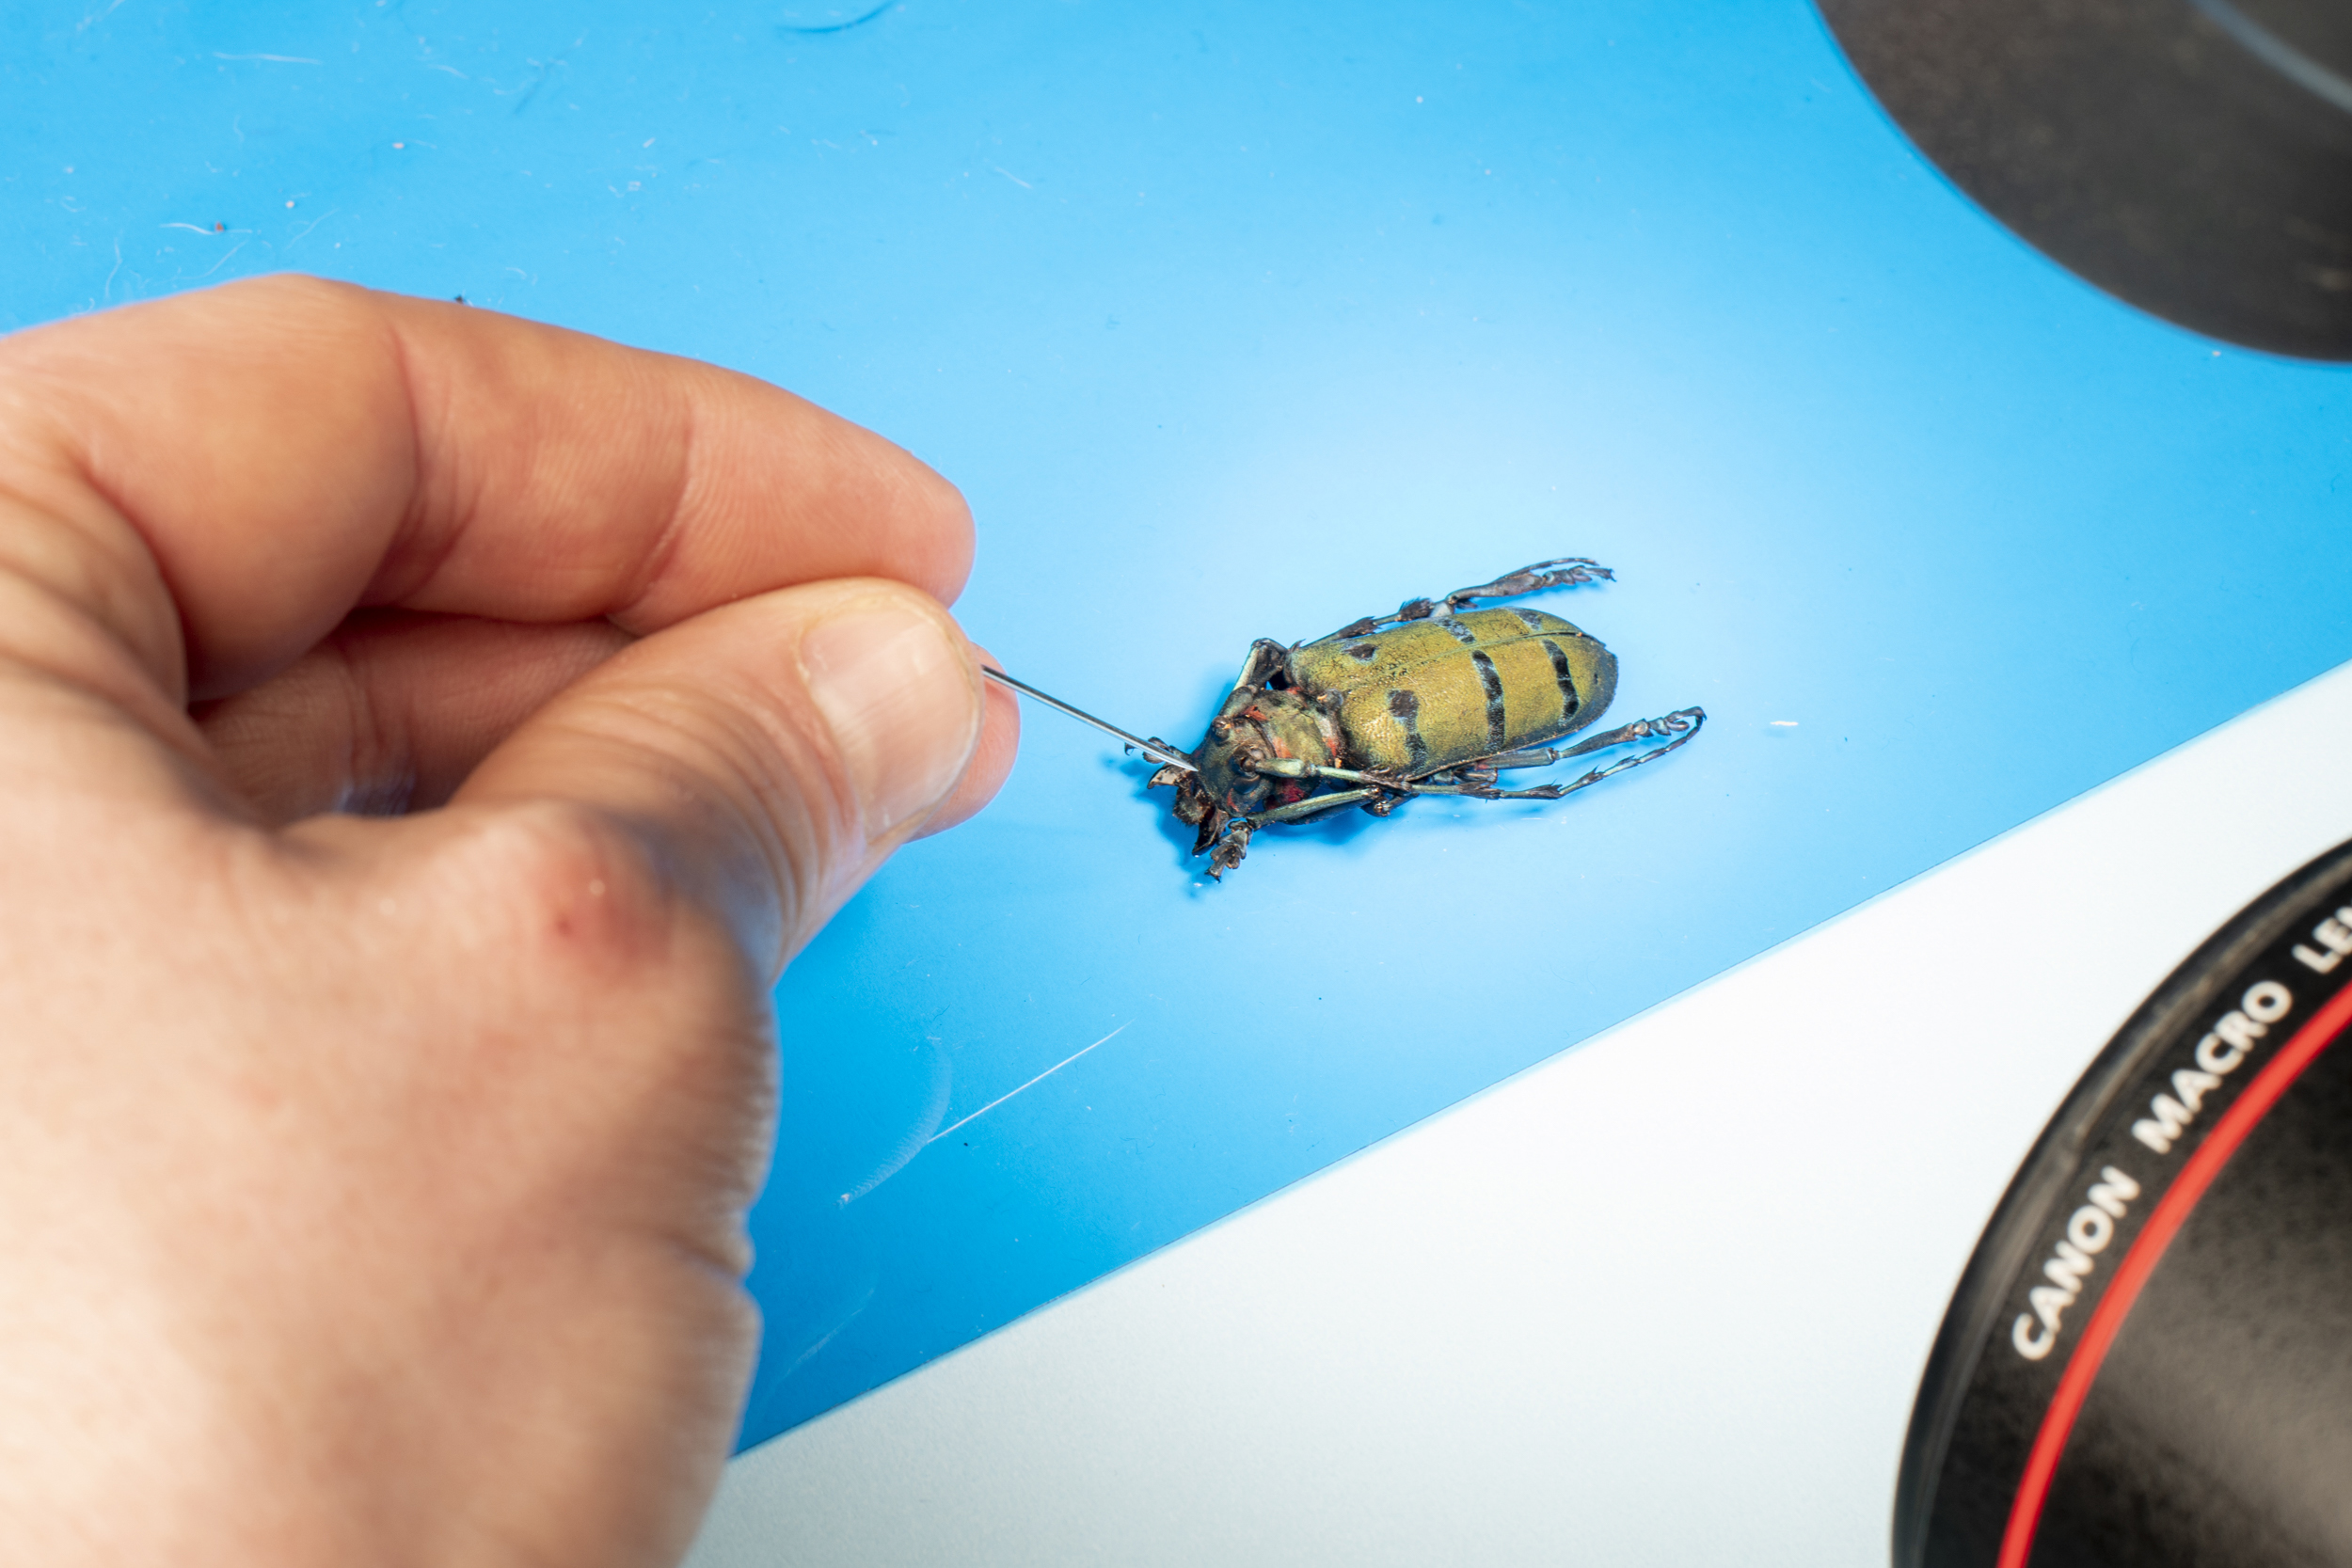
A bug might look pristine, but it can be covered in dust and fibers when seen in close-up, so before you start shooting spend time cleaning and preparing the insect. Use a needle for removing hairs, and an air blower can help to gently blow away particles.
03 Align the images
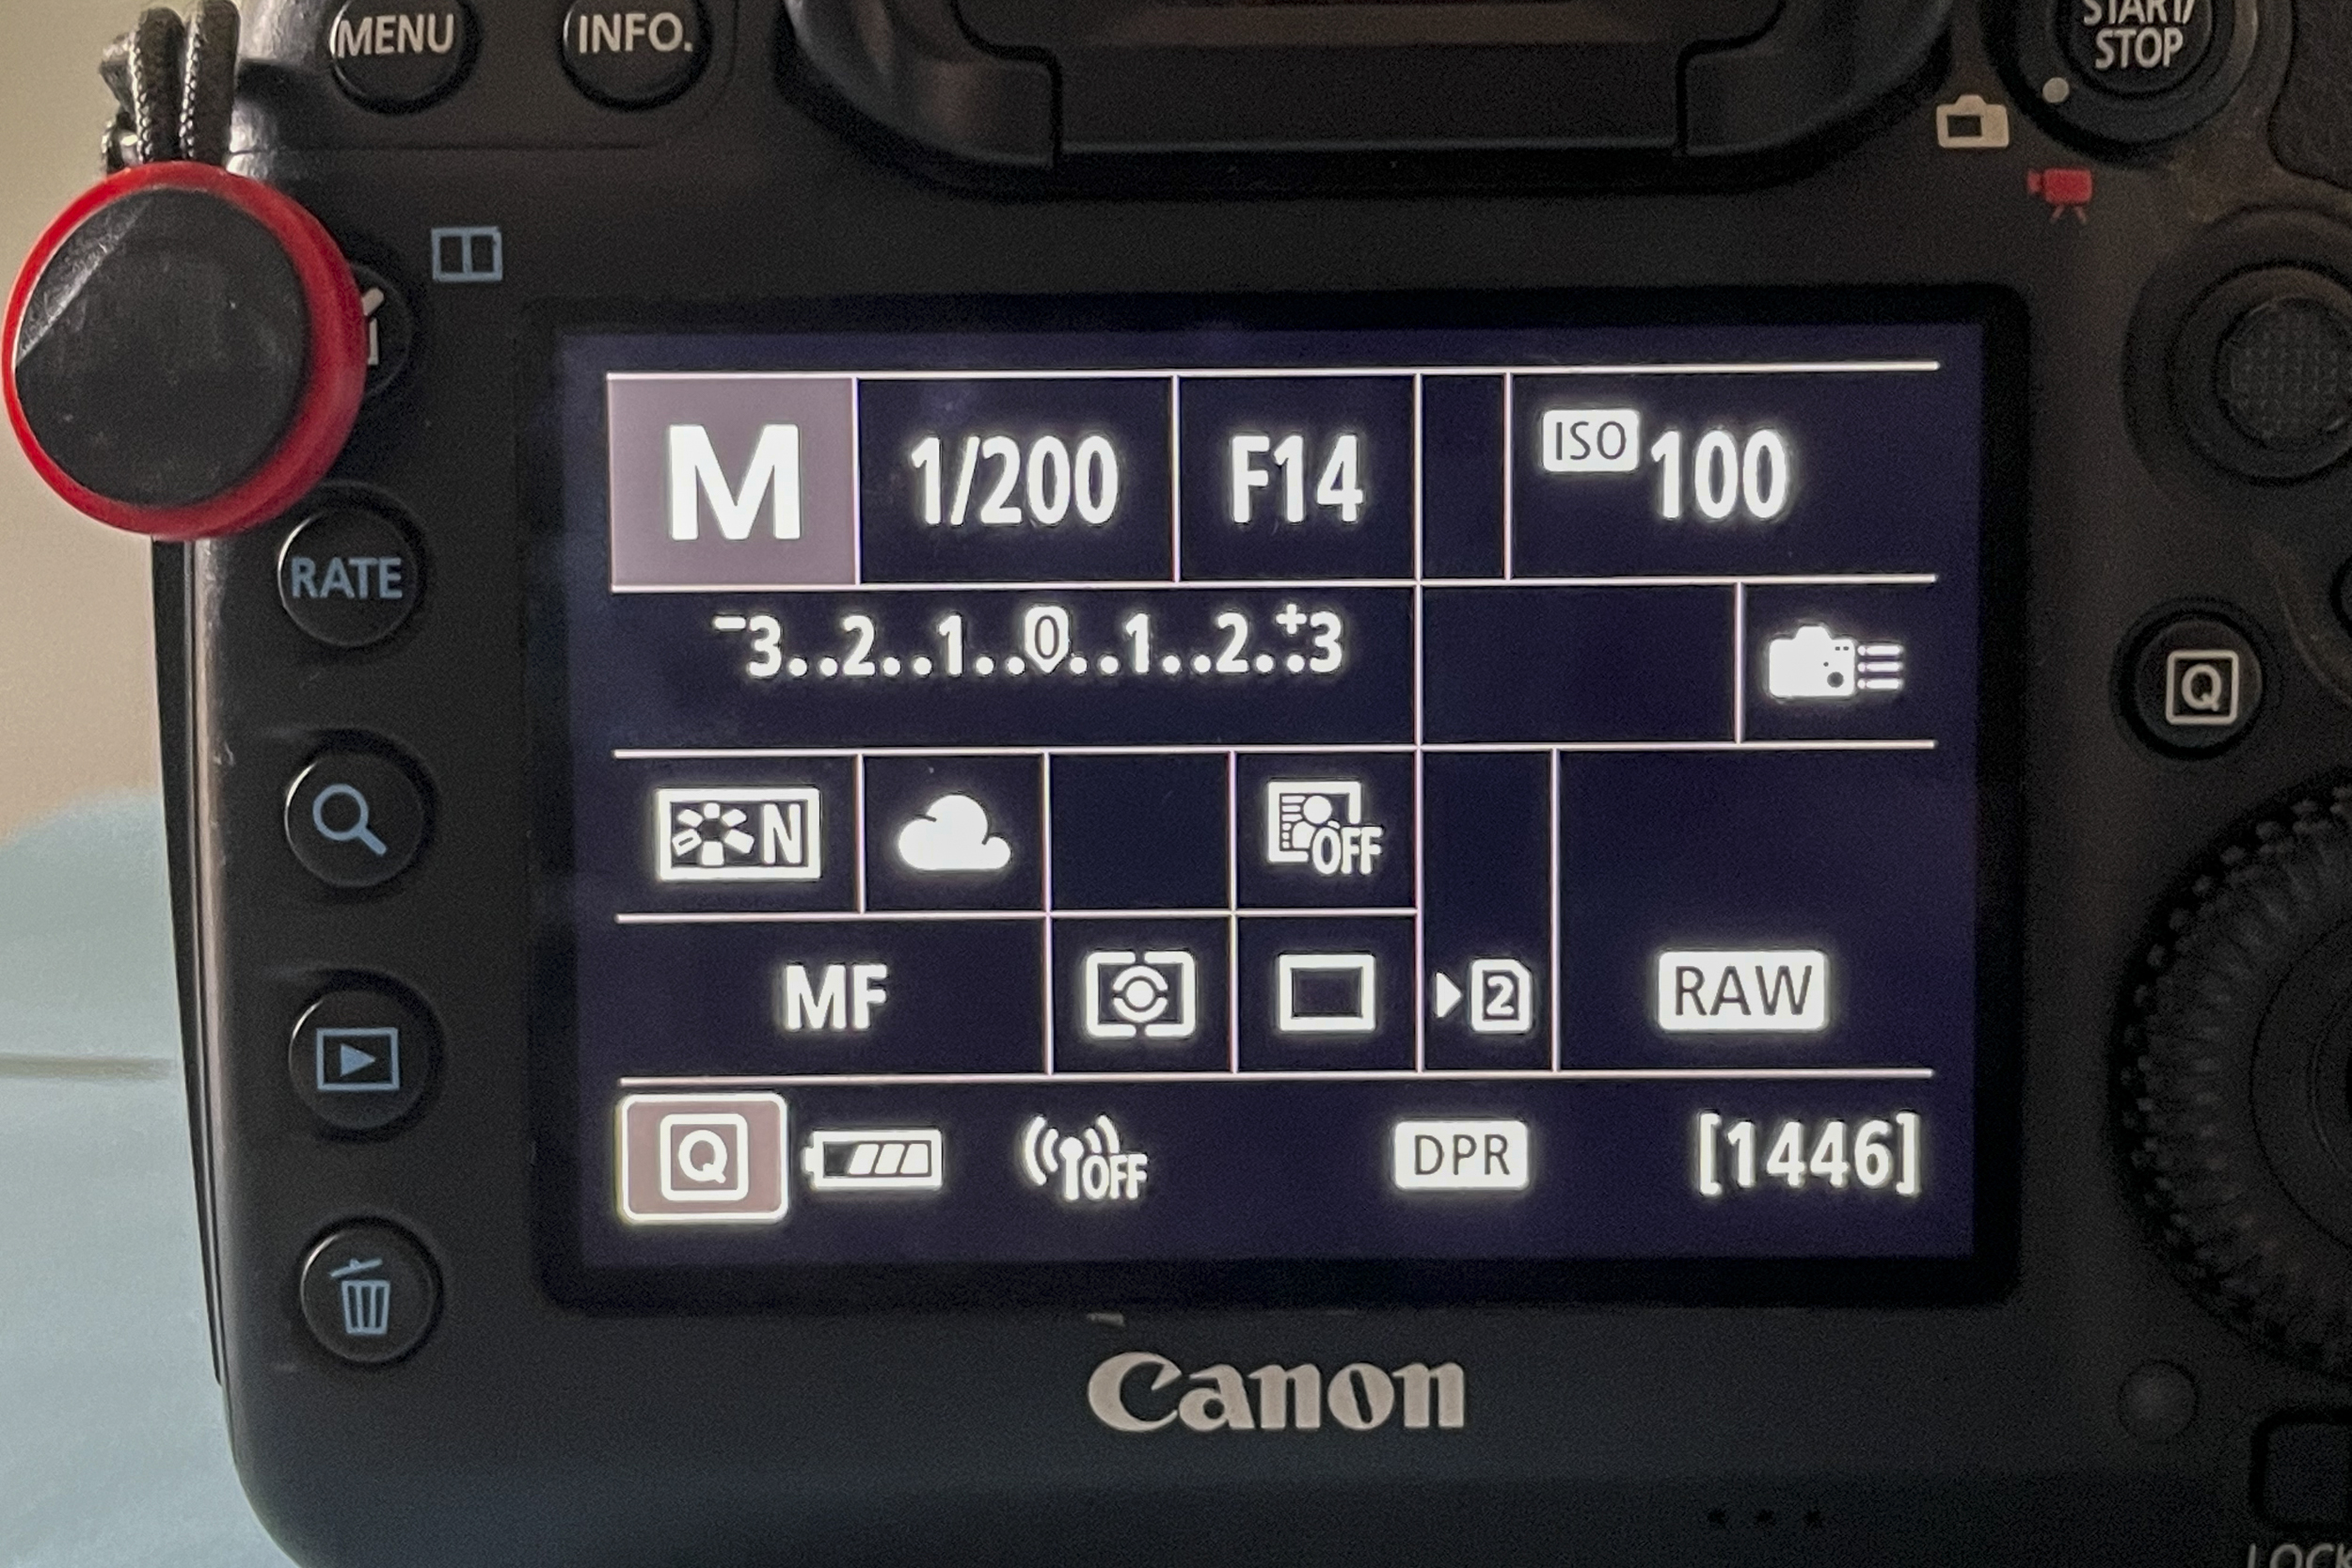
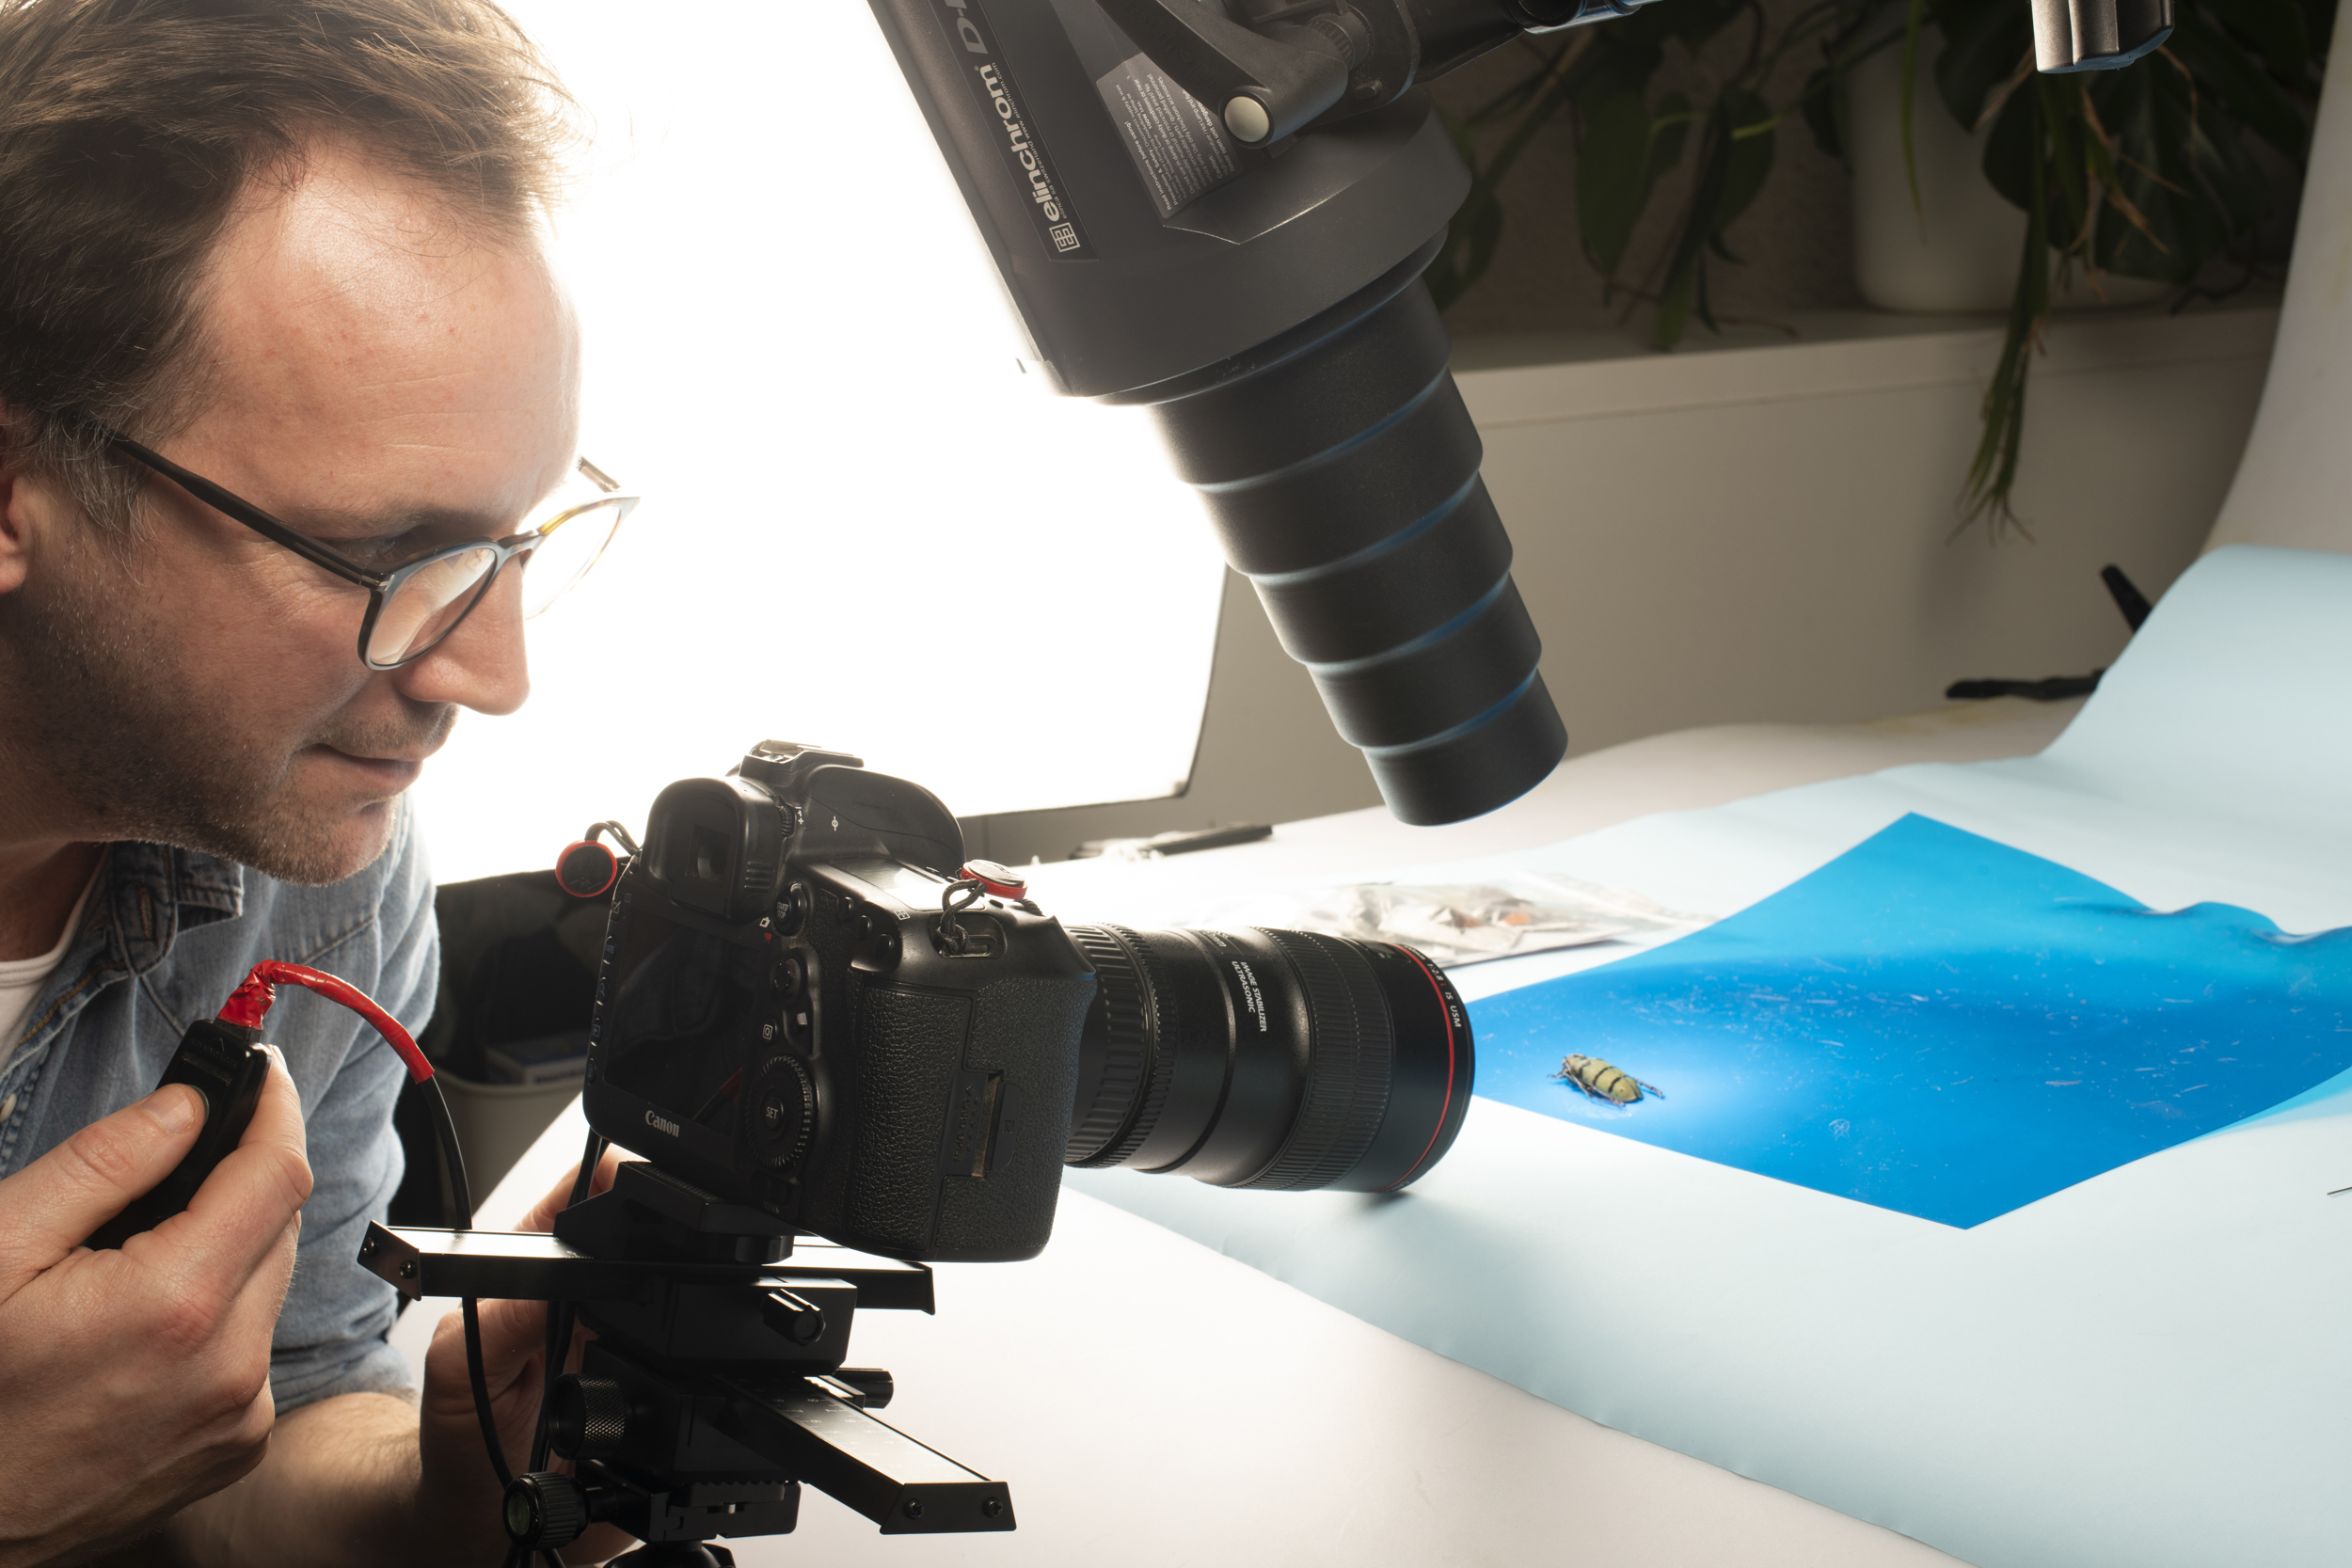
If you’re using studio strobes then try setting the camera to manual mode, shutter speed 1/200 sec, ISO100 and aperture around f/14. If you’re using natural light then you can use aperture priority at f/14 ISO100 and let the camera work out the shutter speed for you.
04 Shoot for a stack
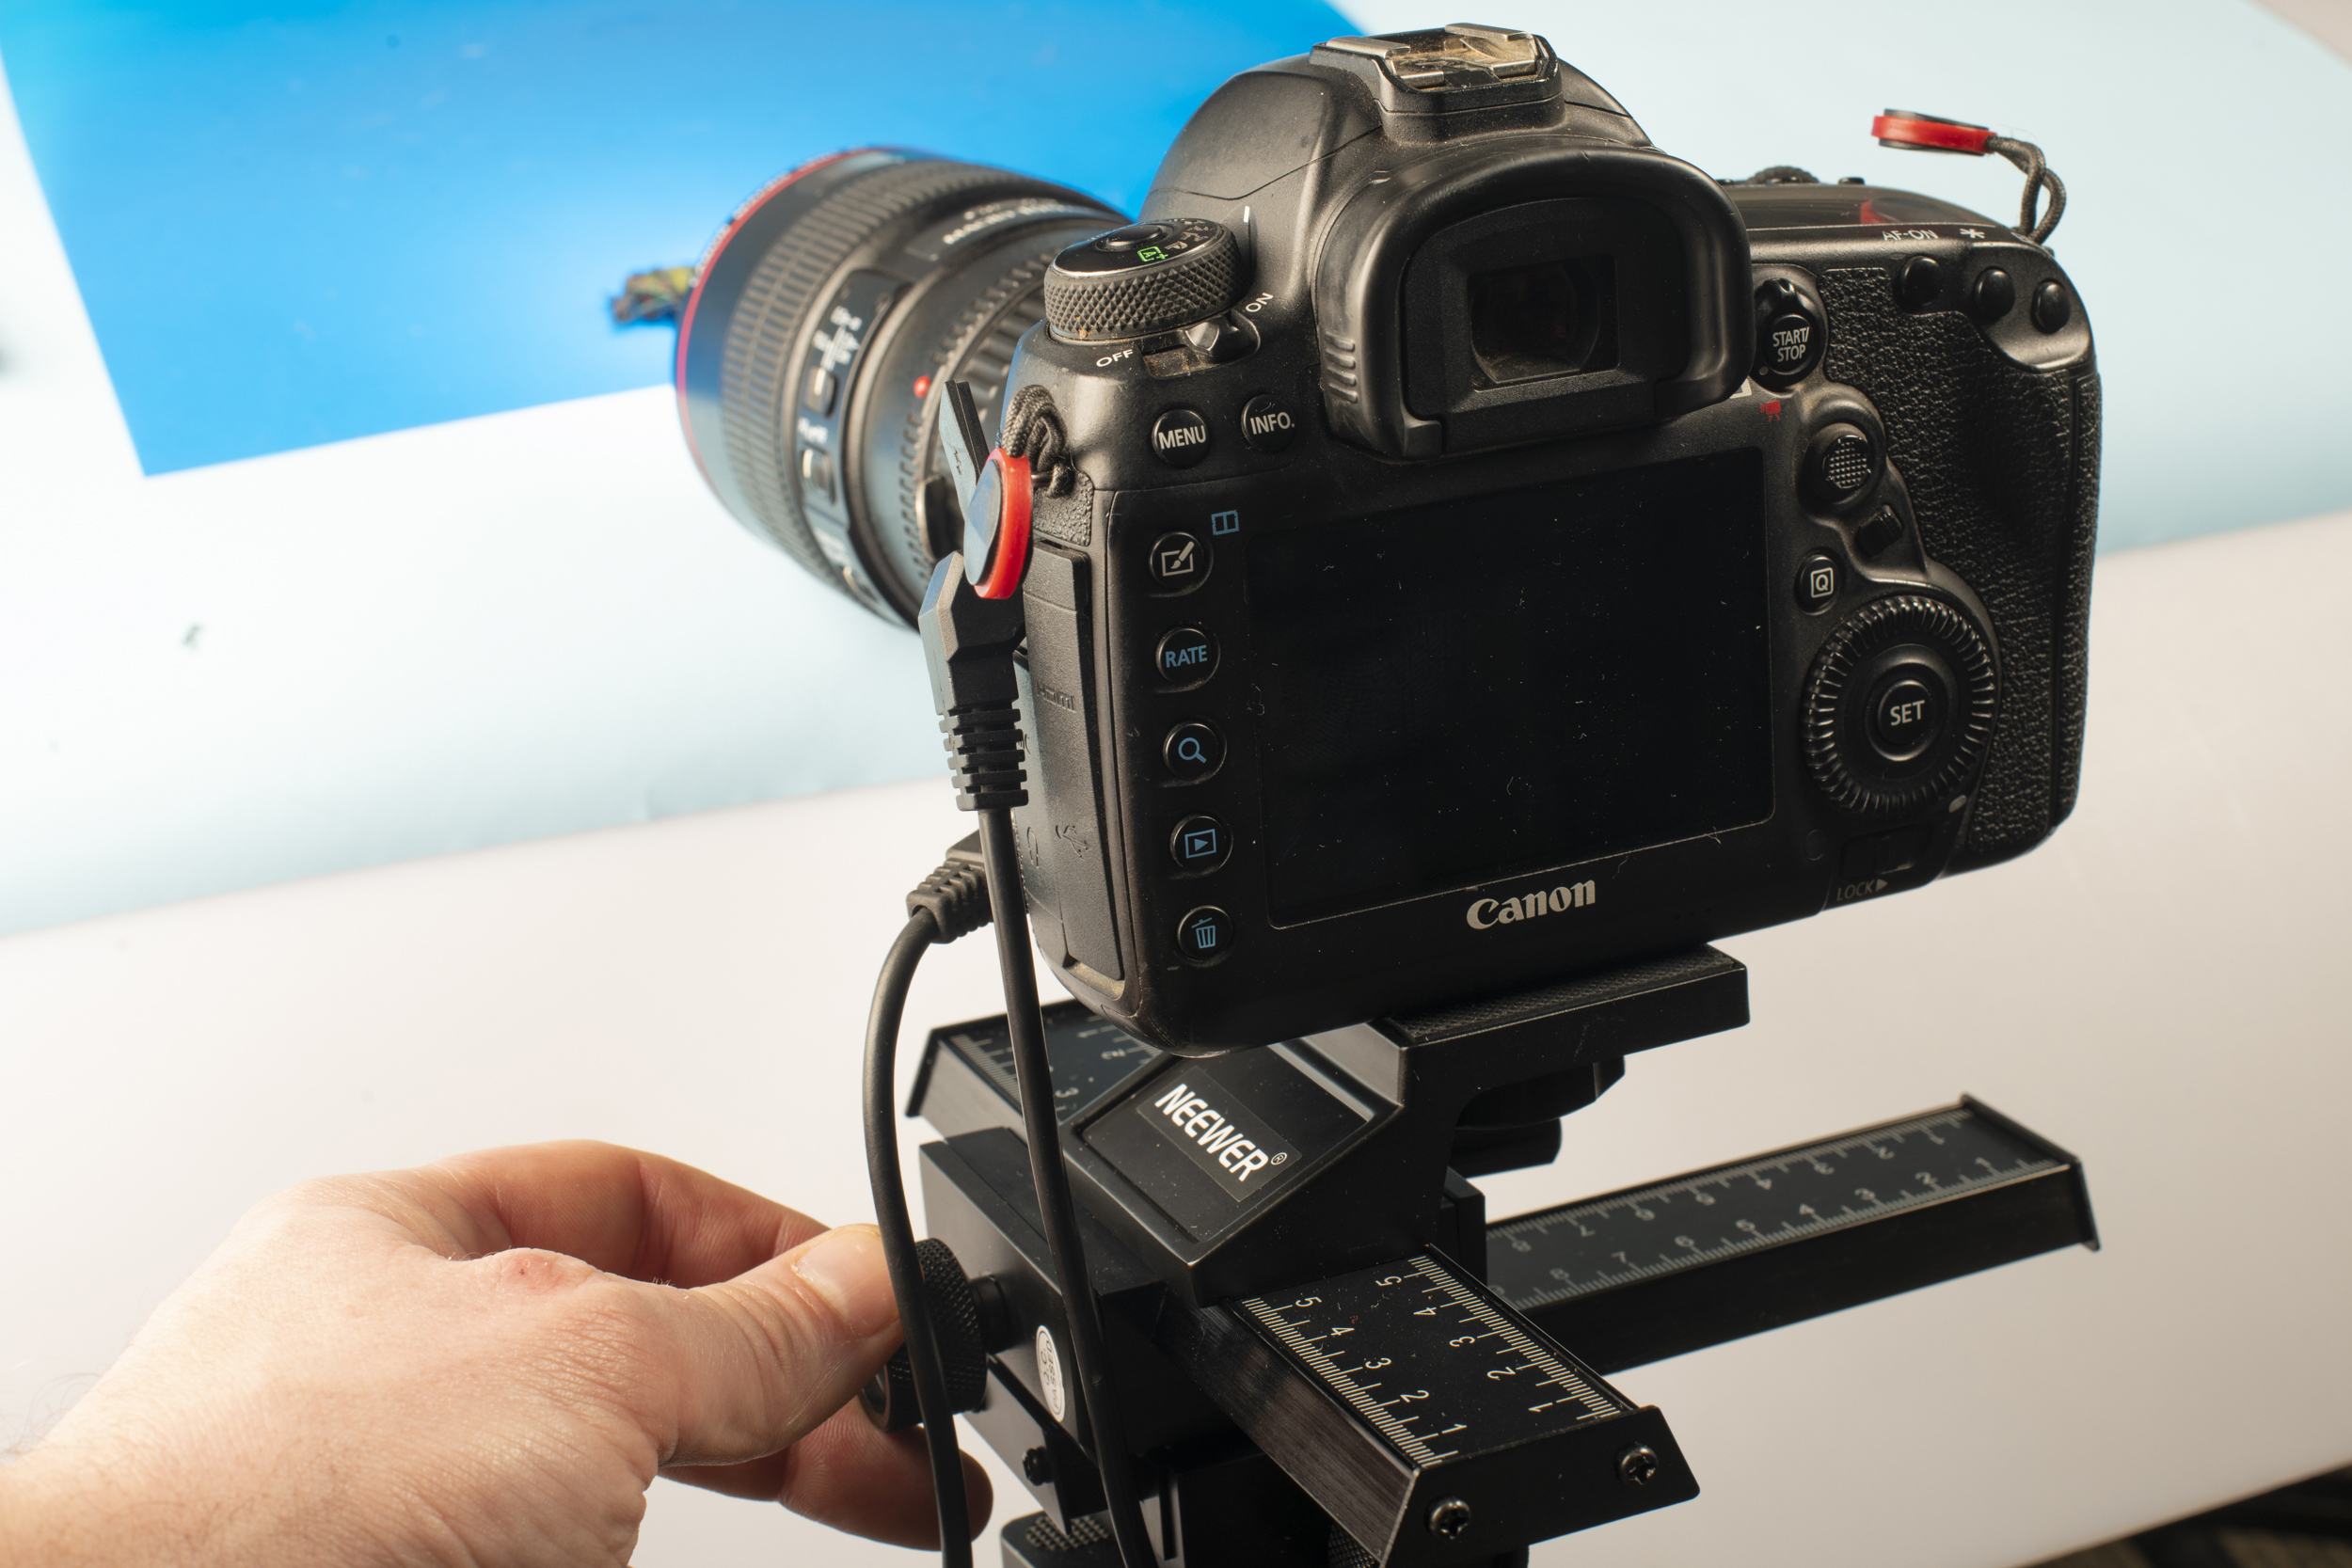
We begin by focusing on the part of the bug closest to the camera, take a shot, then adjust the focus rail slightly to shift our focus point backwards and take another, continuing in this way until we’ve captured segments of sharpness across our entire subject.
05 Lighting and aperture
When moving the lens further from the sensor using extension tubes, we increase the focal length. You’ll also notice that the shot in the viewfinder is much darker. So we need to increase the strength of the lighting, or use a slower shutter speed for a good exposure.
06 Extra reach with tubes
Most macro lenses give us 1:1 scale magnification, which means we can render objects at the same size on the camera’s sensor as they are in real life. But the extra 58mm extension given by the tubes changes the ratio to about 1.6:1 by enabling us to focus closer.
07 Stack the sequence
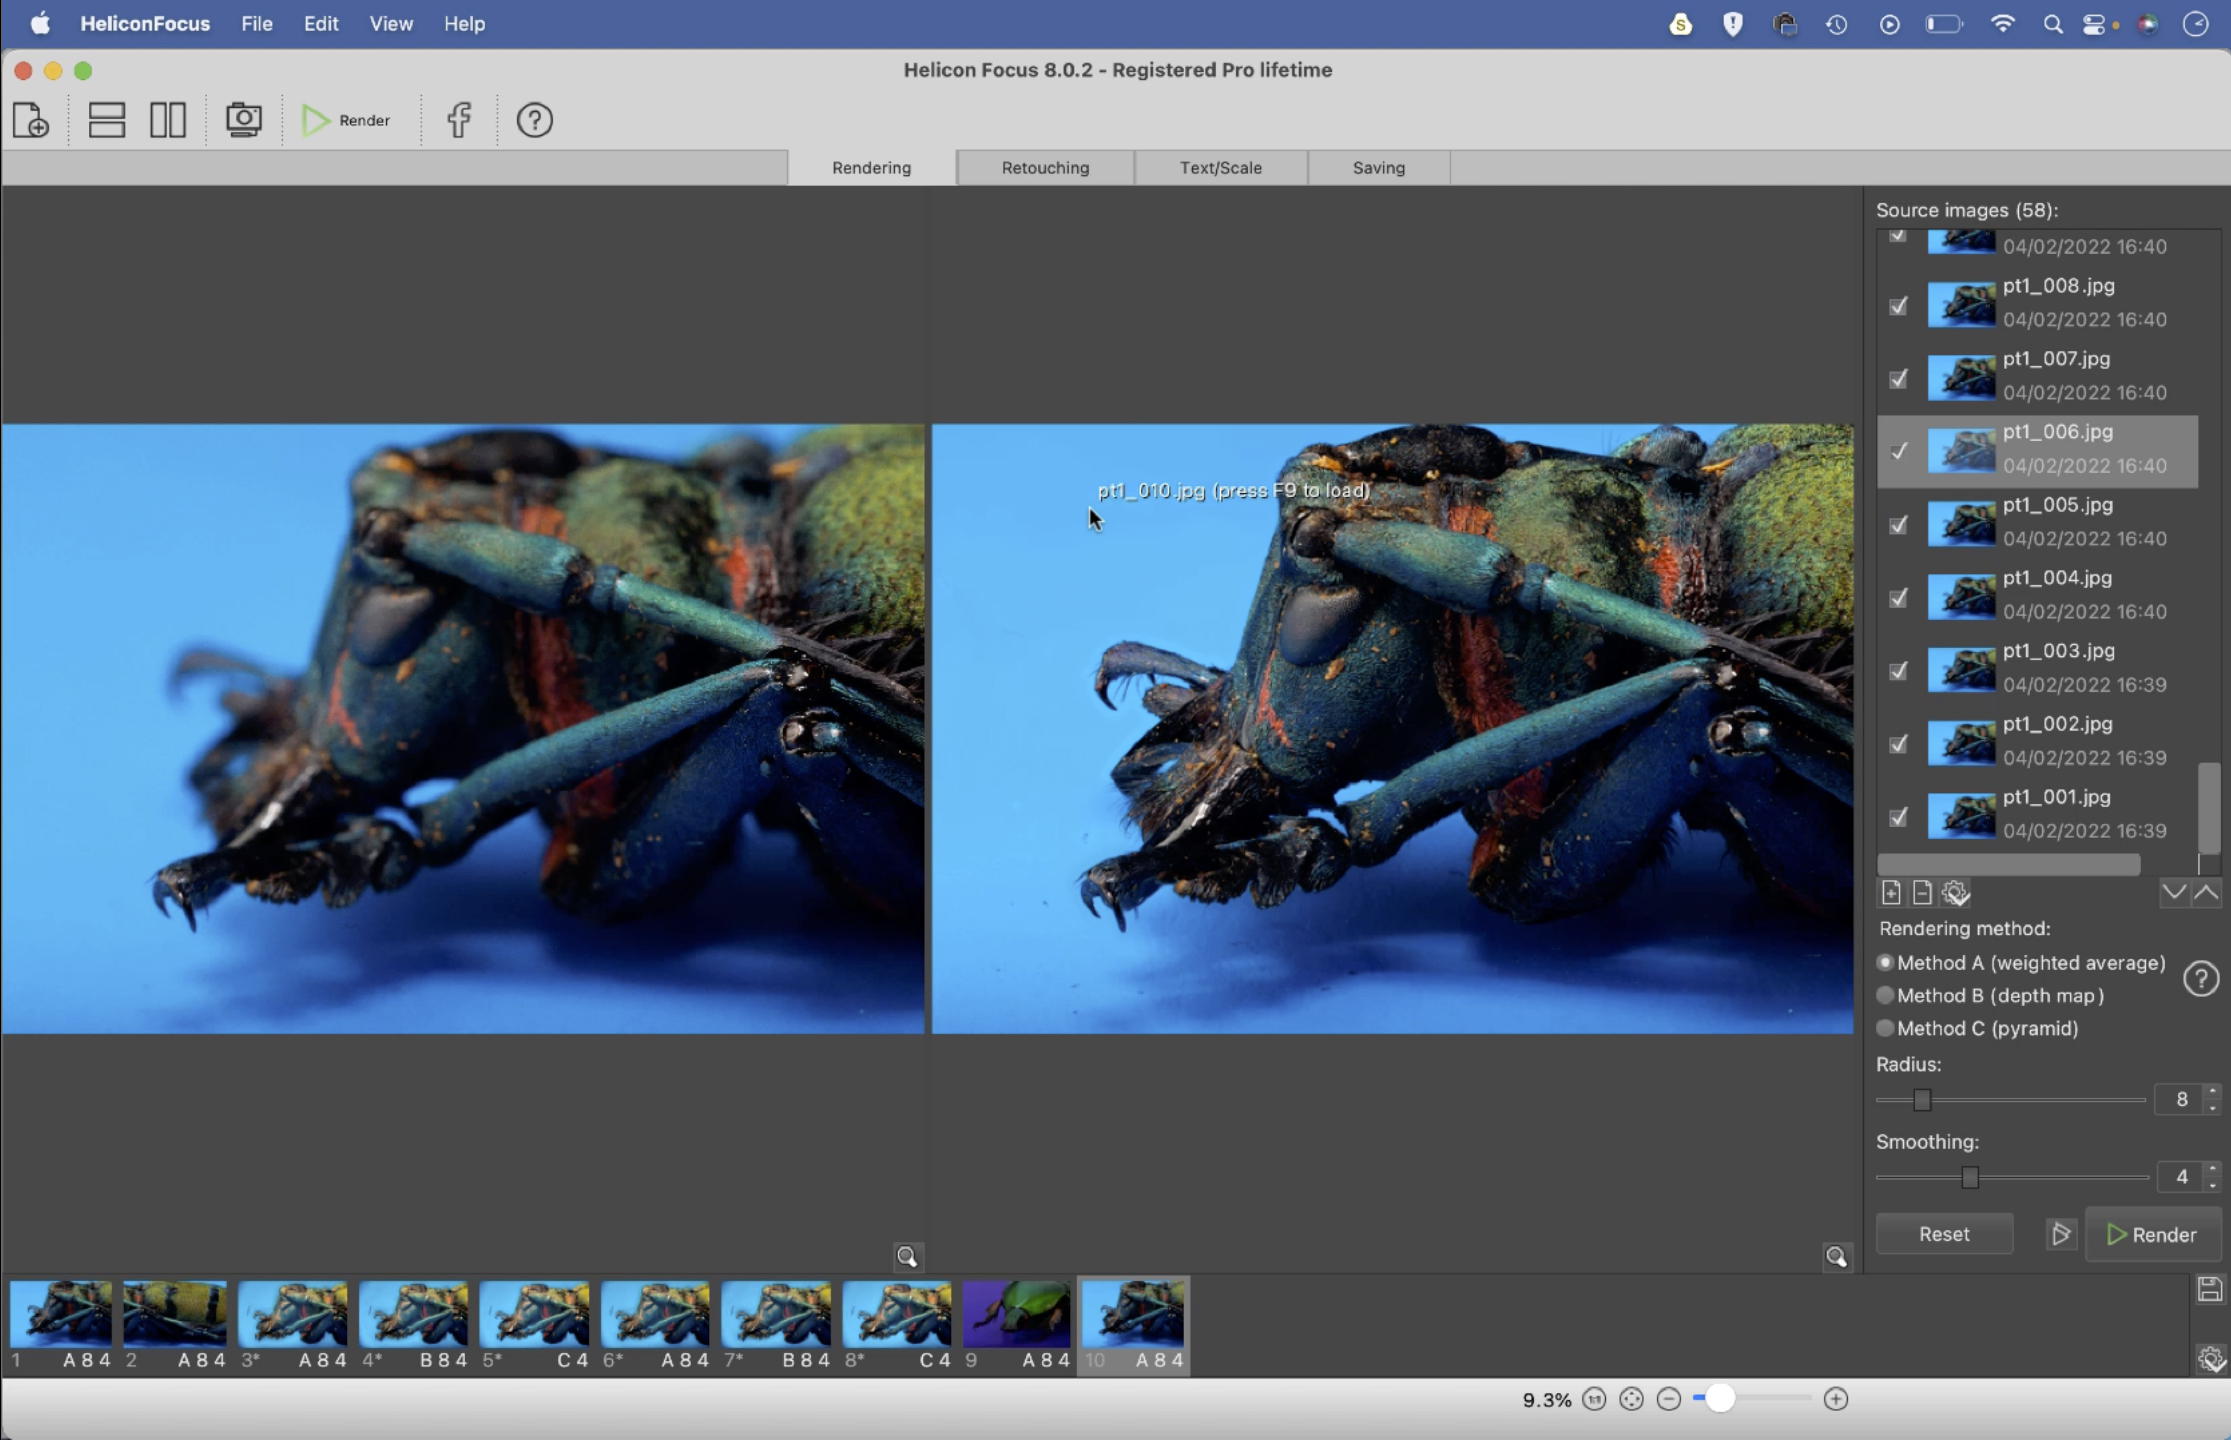
We used Helicon Focus to combine our focus stack sequence (there’s a free 30-day trial). We simply drag our sequence in then choose one of the three stacking methods and hit render, then save the image. We created one stack for the head, and a second for the abdomen.
08 Merge to a panorama
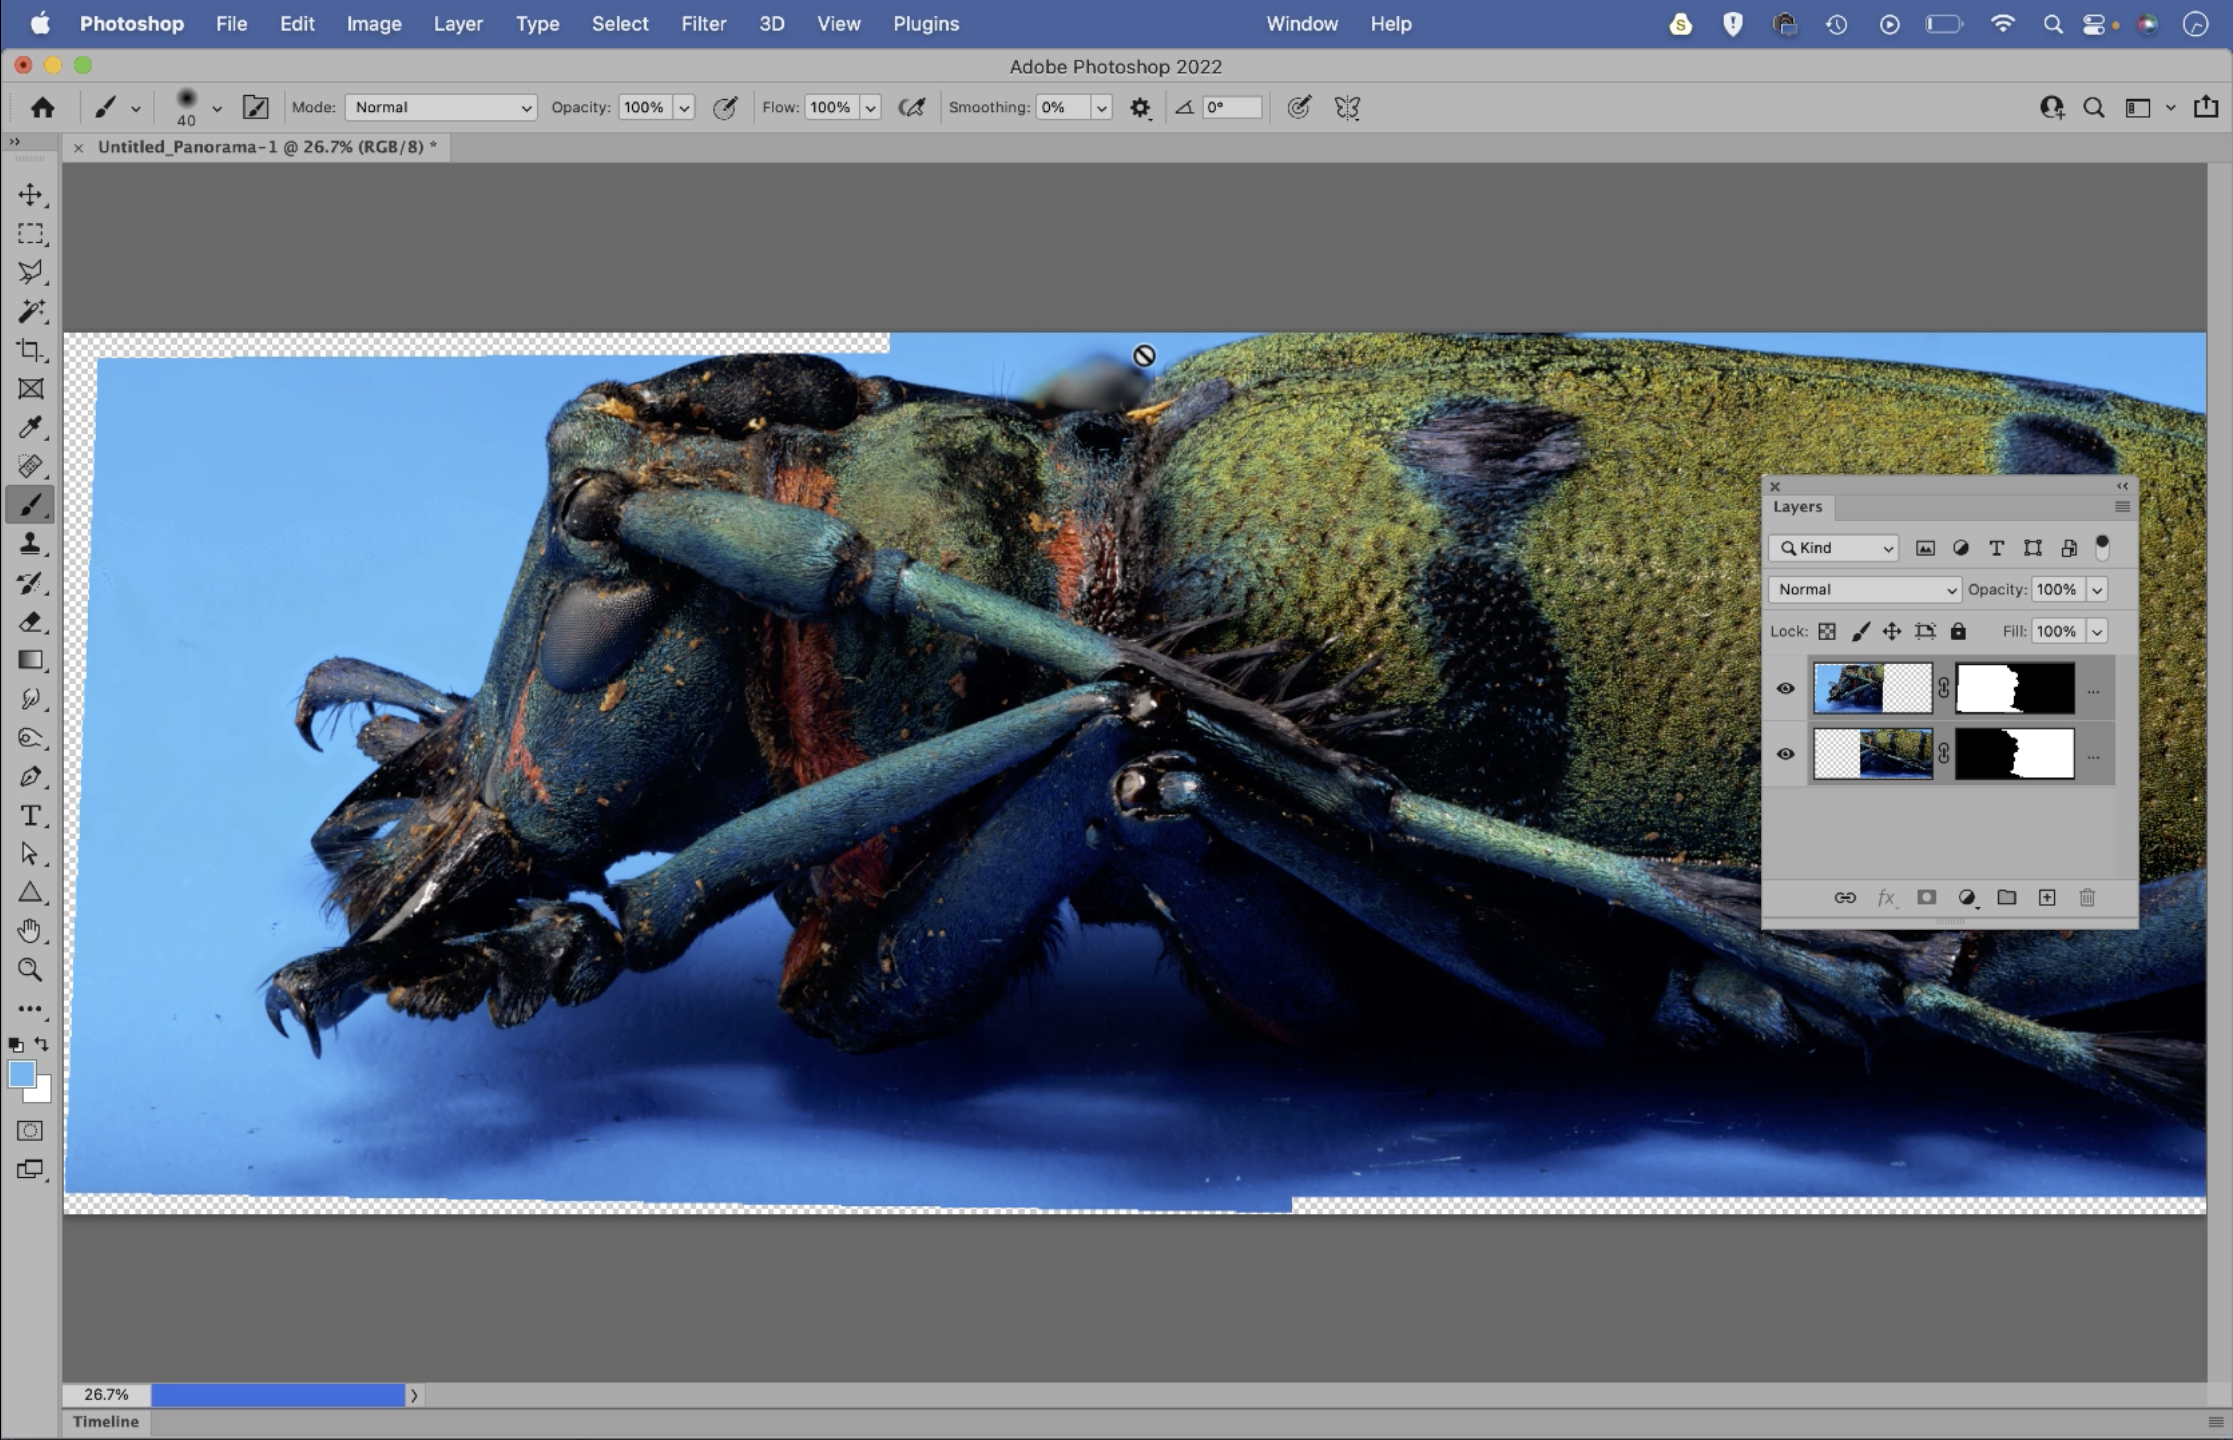
If we treat the insect like a panorama by shooting in segments then we can use Photoshop’s panorama stitching features to combine our stacked images. Open Photoshop and go to File > Automate > Photomerge and load in the stacked images to stitch them together.
09 Retouch any distractions
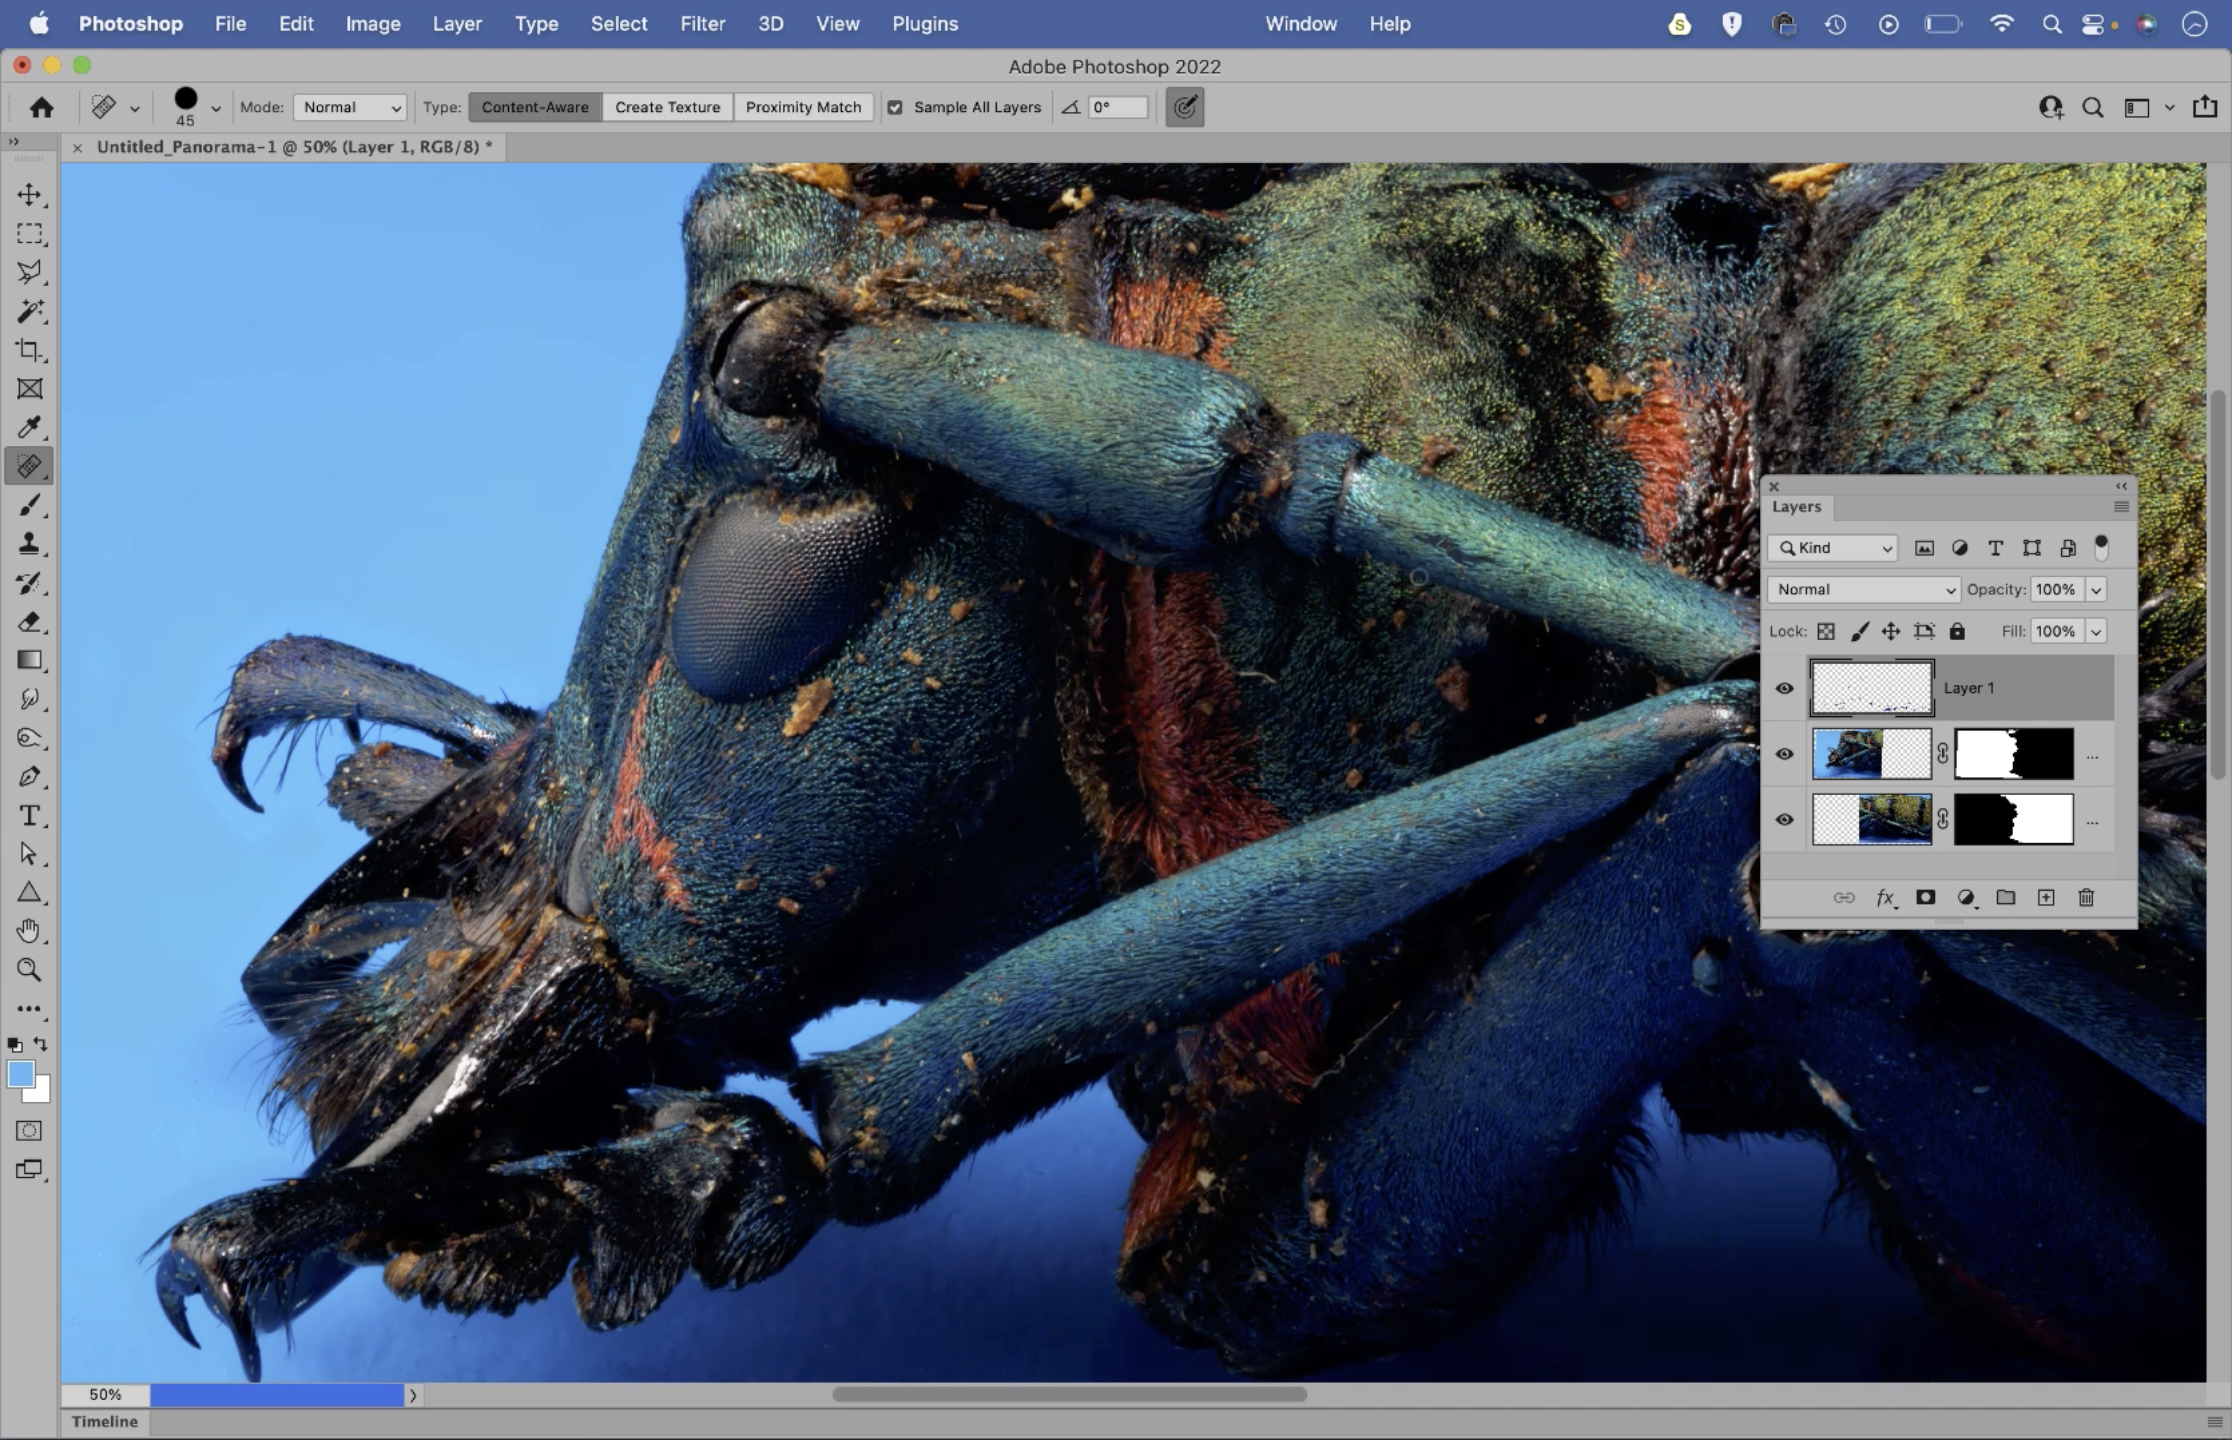
No matter how diligently you clean them, insects are likely to be covered in dust and other distractions, so we need to spend time retouching these unwanted details. Open the image into Photoshop then use the Spot Healing Brush tool to remove small spots and marks.
PhotoPlus: The Canon Magazine is the world's only monthly newsstand title that's 100% devoted to Canon, so you can be sure the magazine is completely relevant to your system.
Read more:
Best cameras for portraits
Best portrait photography tips
The best photo editing software: image editors for novices through to pros
The best photo-editing laptops: top laptops for photographers
10 best online photography courses – from beginner guides to masterclasses
The lead technique writer on Digital Camera Magazine, PhotoPlus: The Canon Magazine and N-Photo: The Nikon Magazine, James is a fantastic general practice photographer with an enviable array of skills across every genre of photography.
Whether it's flash photography techniques like stroboscopic portraits, astrophotography projects like photographing the Northern Lights, or turning sound into art by making paint dance on a set of speakers, James' tutorials and projects are as creative as they are enjoyable.
He's also a wizard at the dark arts of Photoshop, Lightroom and Affinity Photo, and is capable of some genuine black magic in the digital darkroom, making him one of the leading authorities on photo editing software and techniques.
