Whether we're pro or amateur photographers, right now we're all looking for fresh subjects that we can shoot at home. If your family members have had enough of sitting for portraits, why not turn next to your furry friends?
The greatest challenge in any environment outside the studio is controlling the ambient light, but here, you only need one flashgun to get great results.
• Get more Home photography ideas
• 10 best online photography courses
A home environment can be filled with visual distractions and unphotogenic elements (we're not saying you're messy), so we'll also explain how to work these out of the frame for cleaner compositions.
With a combination of shutter speed, off-camera flash and careful framing it's possible to produce images that appear to have been taken in a controlled studio setting, allowing you to work under any conditions – from your living room in lockdown.
Step 1: Position your pet

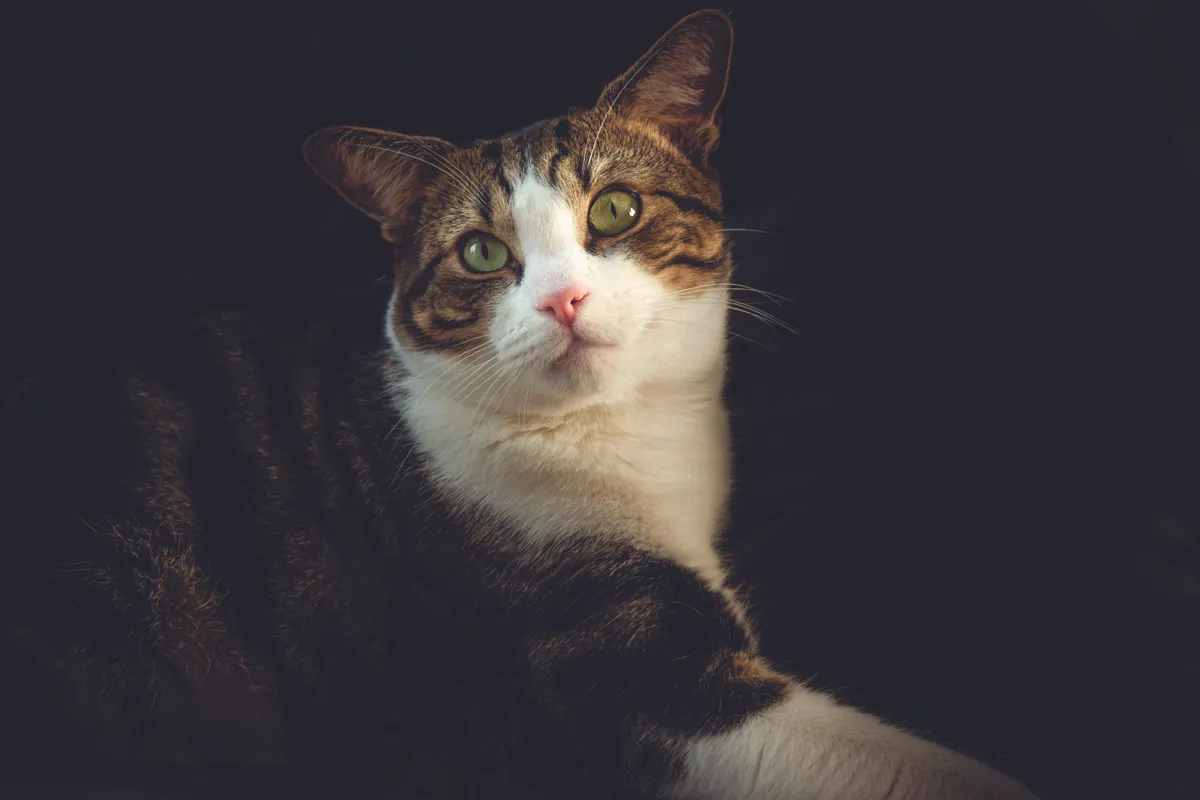
We didn't have a seamless background at home, but having the cat sit on a black cushion made it easier to control background brightness, as more light was absorbed by the dark material. Look for items around the home you can use.
Step 2: Make the flash directional

Attach a wireless trigger to your speed light and place this off to one side, at a 90° to 45° angle, elevated slightly above the subject and facing down, approximately where you'd place a strobe.
Step 3: Set the flashgun zoom

Use the controls on the rear of your flash to increase the head zoom position. Select the longest zoom setting (in our case this was 105mm) to narrow the beam for a focussed effect.
Step 4: Cut ambient light

Next, increase your shutter speed or stop down the aperture to reduce visible background detail. Start by lowering the ISO, choosing the base sensitivity if possible, then the speed or f-stop if this is insufficient.
Step 5: Increase flash power

To further darken the environment, increase the flash output and adjust camera settings to match. This will overpower ambient illumination even more, to help with the seamless background effect.
Step 6: Focus the light

To reduce light spill further, consider adding a small flash snoot or honeycomb grid to your speedlight (if you've got one). This 9mm model fitted directly to the flash head to create an even more focussed light.
Step 7: Adjust the white balance

Many home settings feature light bulbs with a low Kelvin setting, which creates a warm colour cast. Use a Tungsten White Balance preset or make a custom setting for a more neutral, studio-like colour palette.
Step 8: Adjust your frame

Zoom in on the composition to exclude edge detail and fill the frame with your background (and furry pal). Limiting context will minimise the need for removing objects when you edit the images. Shoot multiple frames at a fast continuous burst rate to capture the perfect pet pose.
Read more:
Stuck at home: 11 photo projects to try indoors during the COVID-19 crisis
DIY photography hack: add camera stabilization to ANY camera body!
Photography tips and techniques videos

