Lightroom hack #05: How to create a matte effect
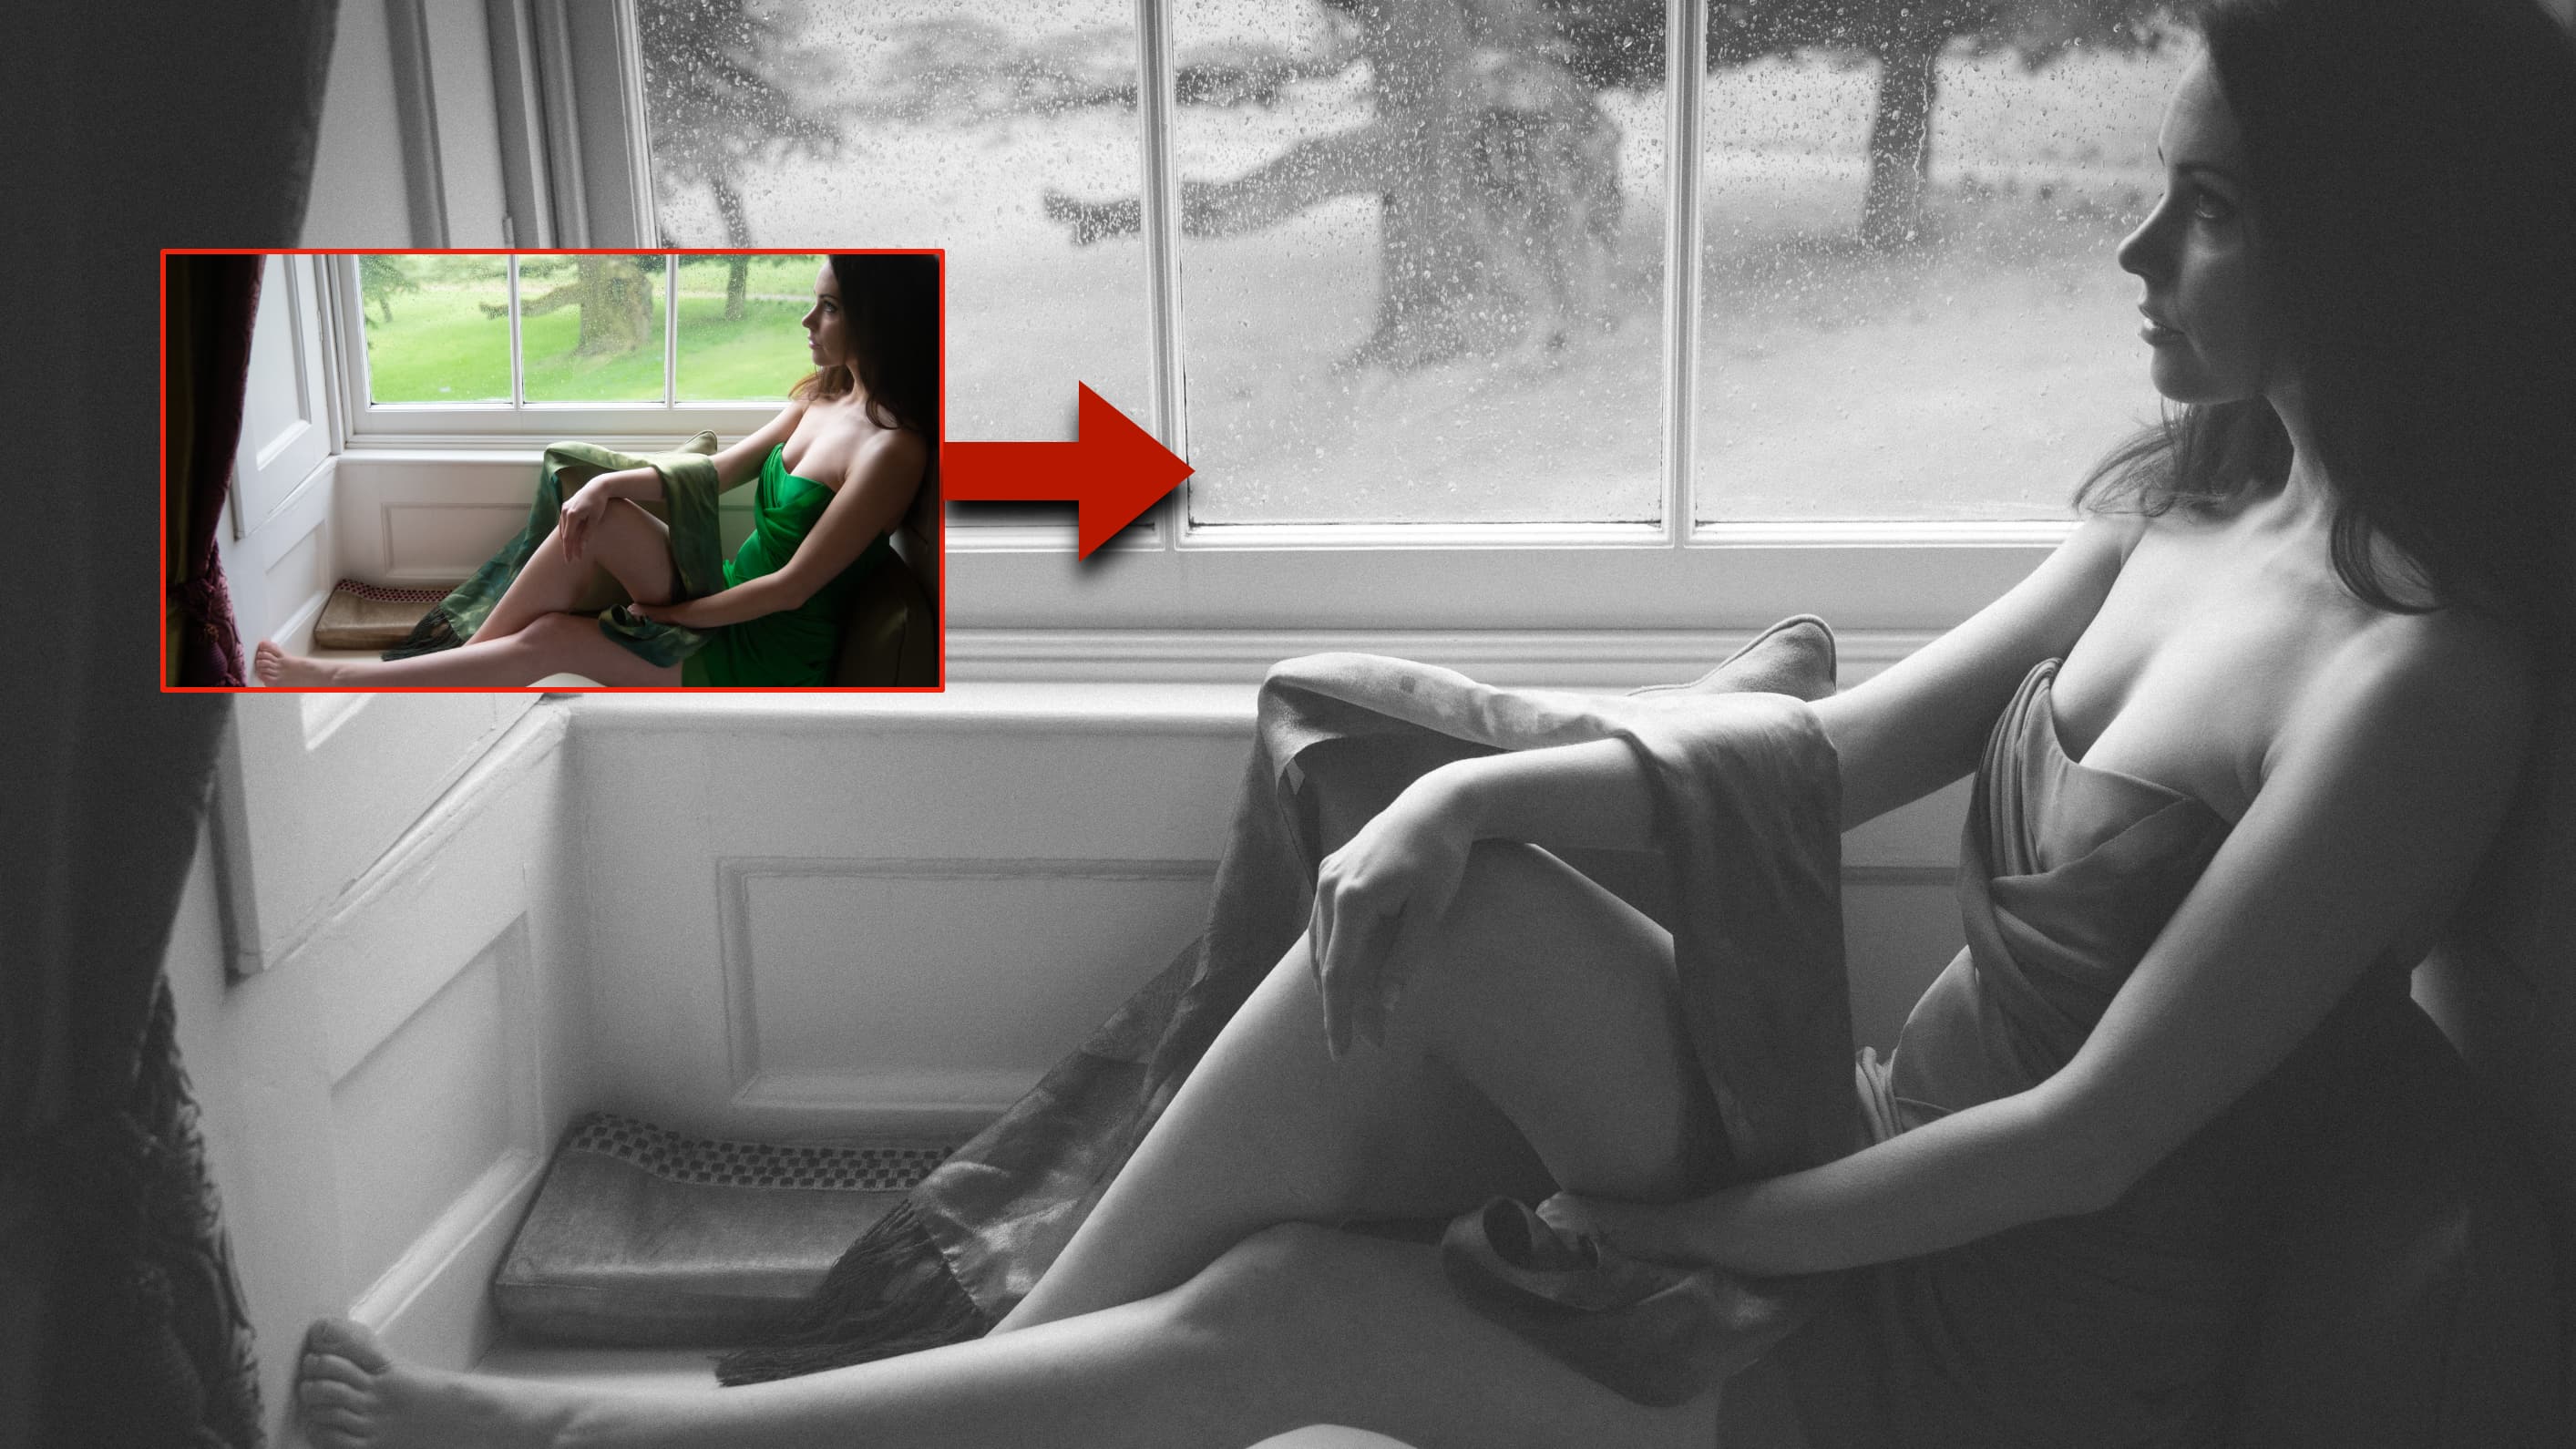
A matte effect is where the shadow tones in an image are lifted but not in the usual way, and it can be very effective

If there was such an organization as the Histogram Police, they would be knocking on your door for this. It does things to the tones in the image that go against all the rules for tonal rendition – or at least all the rules invented by darkroom technicians.
We are publishing one hack a day this Christmas holiday period, see our other Lightroom Hacks
A ‘matte’ effect is where the darkest tones in the image don’t descend to a solid black but a mid-dark gray tone. It doesn’t have to be gray, it can be a color, but for this example let’s stick to gray.
It’s easy to do with Lightroom’s Tone Curve panel and the results it produces can have a beautiful vintage ethereal look. What’s great about it is that it’s super quick, uses just one tool (though this example dresses it up a bit with grain and a vignette), and that there’s no mystery about it.
I started with a regular color portrait which is nice already. The first step was to switch to Black and White mode in the Basic panel, the second was to open the Tone Curve panel and do just two things.
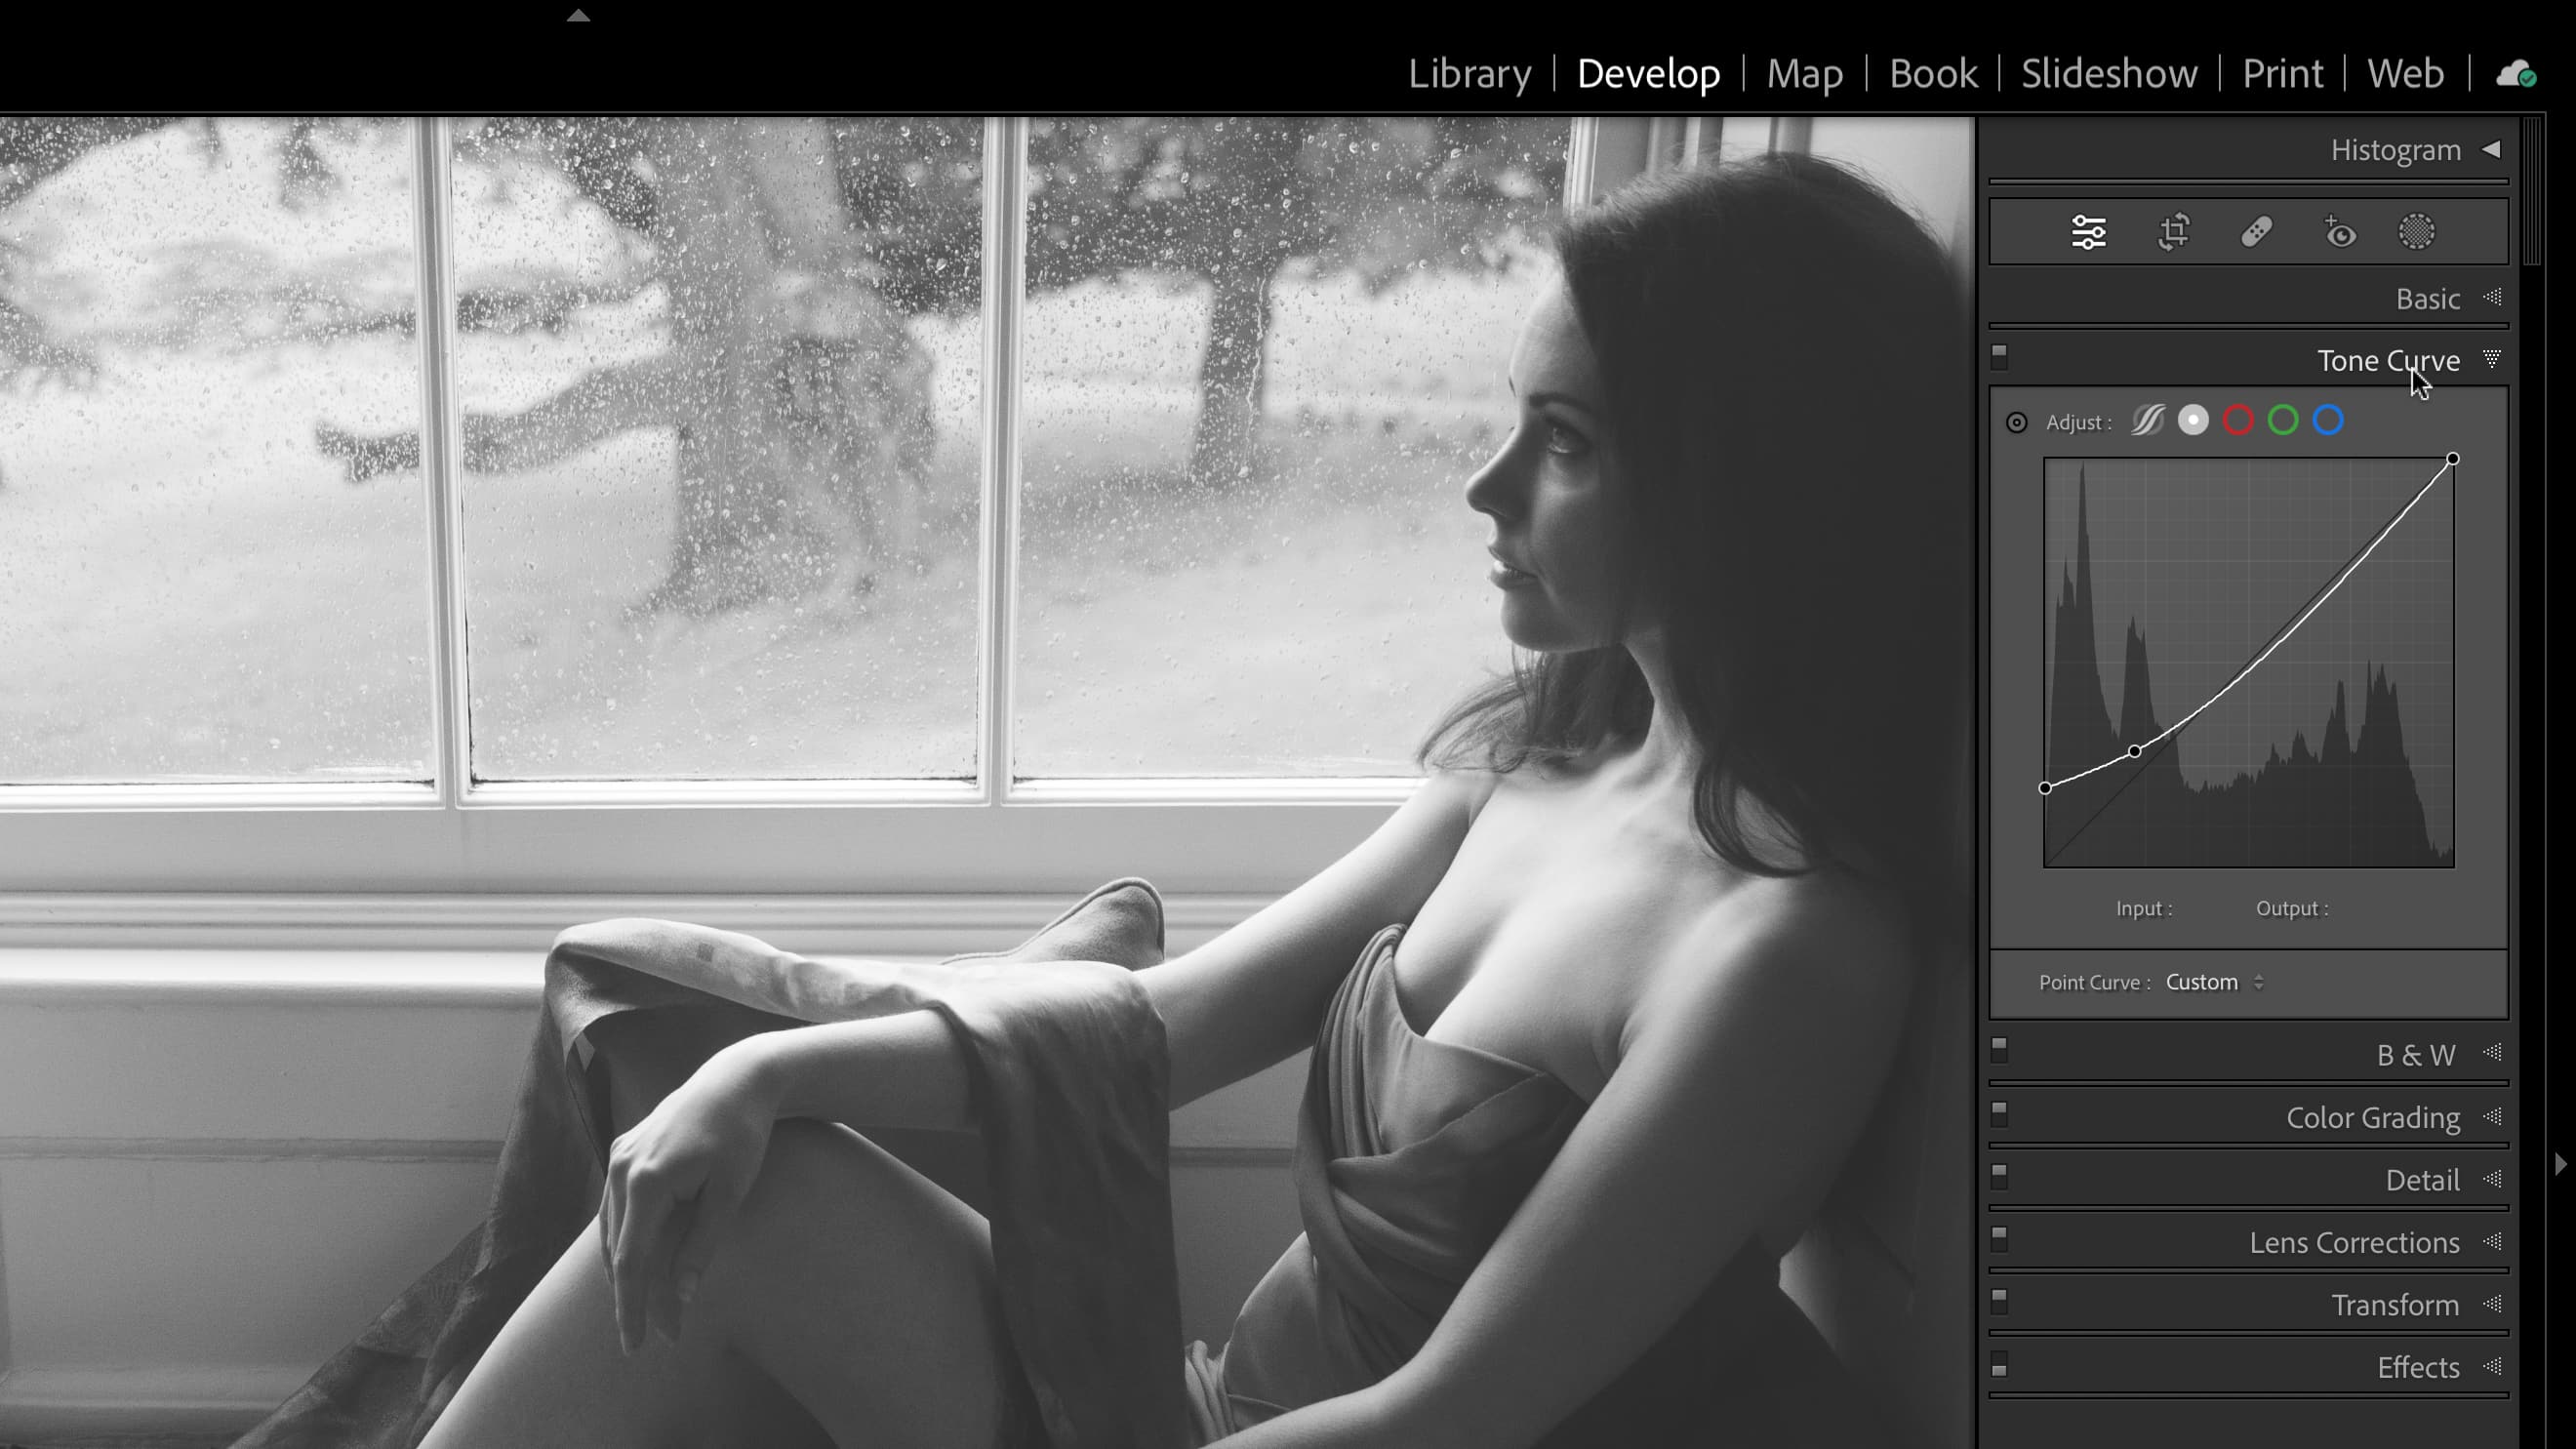
1. I dragged the black point not horizontally but vertically. This set the darkest tone in the image to a gray value, not solid white. That made the image a bit too pale.
2. So then I added a control point a little way up the curve and dragged it roughly in line with the 45-degree reference line indicating the original tone curve. That restored the contrast and brightness but kept the matte effect.
That’s all there is to creating a matte effect in Lightroom. If you work in color you can start getting clever with the individual RGB curves and that can be very effective too, but it’s a bit of a rabbit hole.
The best camera deals, reviews, product advice, and unmissable photography news, direct to your inbox!
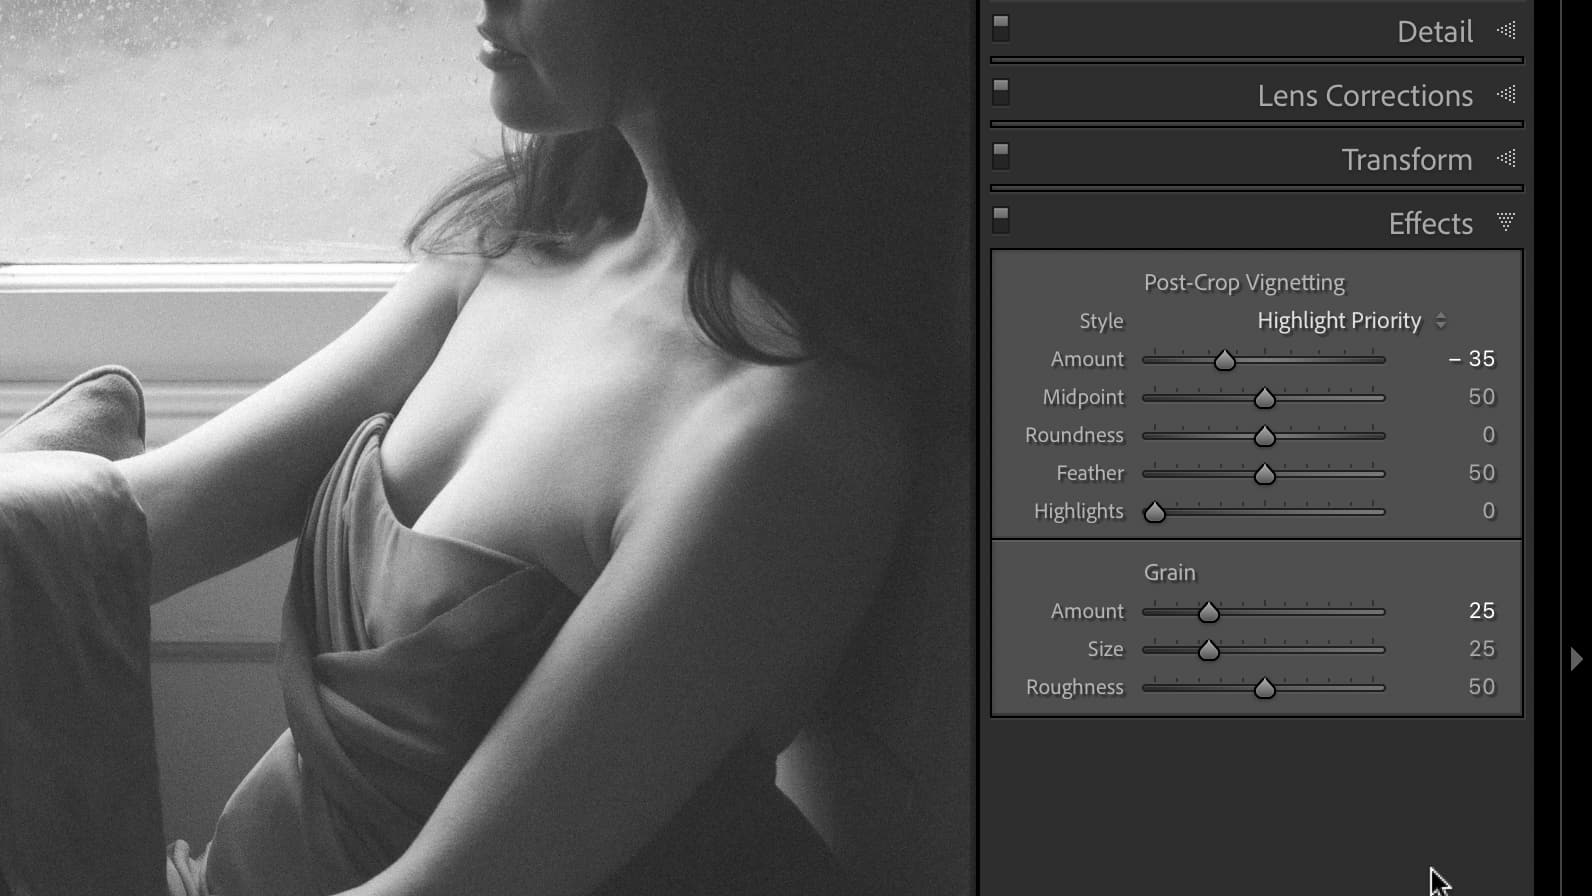
For this shot I thought a bit of grain would go well with the soft vintage look, and a bit of post crop vignetting too.
Read more:
• Best photo editing software
• Lightroom review
• Lightroom Classic review

Rod is an independent photography journalist and editor, and a long-standing Digital Camera World contributor, having previously worked as Group Reviews Editor, Head of Testing for the photography division, Technique Editor on N-Photo, and Camera Channel editor on TechRadar, as well as contributing to many other publications.
He has been writing about digital cameras since they first appeared, and before that began his career writing about film photography. He has used and reviewed practically every interchangeable lens camera launched in the past 20 years, from entry-level DSLRs to medium format cameras.
Rod has his own camera gear blog at fotovolo.com but also writes about photo-editing applications and techniques at lifeafterphotoshop.com.


